Preventing Gear Up Landings

baron
Image credit: Aviation Consumer

On the evening of November 3rd, 2015, I was returning to my home airport of Lancaster from Pittsburgh in my company’s Aerostar, after being out on charter all day. It was dark out as I entered the traffic pattern at Lancaster. After an uneventful approach, I was cleared to land behind a Mooney. The spacing looked good as I turned final, but, as I was nearing the threshold, I started to become concerned that the Mooney wouldn’t be clear of the runway in time for me to land. At that moment, over the radio I heard an uncomfortable transmission from the Mooney pilot: “Tower, Mooney ABC has landed gear up.”

It took the tower controller a minute to grasp what was going on, and I was on about a 1-2 mile final when I was instructed to go around. Thankfully, the Mooney came to a stop in such a position that I was able to use the other intersecting runway, and was on the ground only a few minutes later. I can assure you, however, that I’ve never checked my “3 green” so many times in one traffic pattern as after that incident. Thankfully, no one was hurt, but there sure was an impressive amount of emergency equipment on the runway as I taxied back to my hangar.

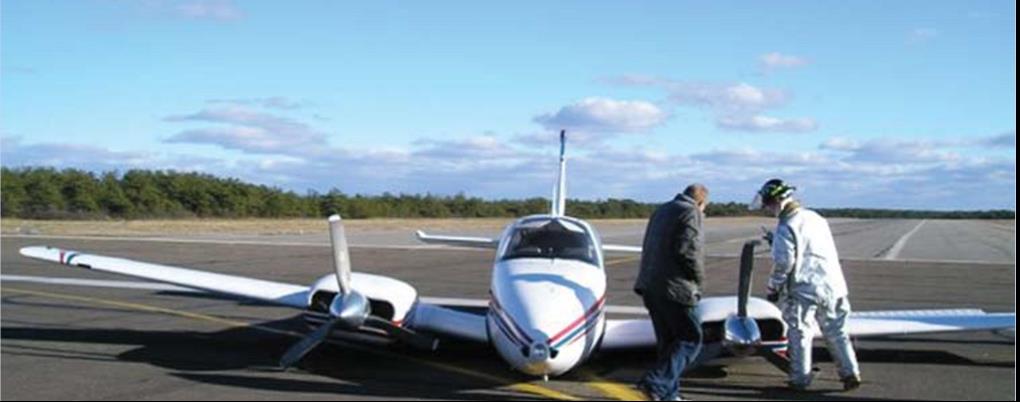
In aviation, there’s a saying that goes: “There are two types of pilots. Those who have landed with their gear up, and those that will.” I don’t like that saying. The potential of a gear up landing (as a result of pilot error) is something that has always been a risk that I have worked hard to avoid. Not only is a gear up landing embarrassing; but it’s also an extremely expensive black mark on any pilot’s career.
image
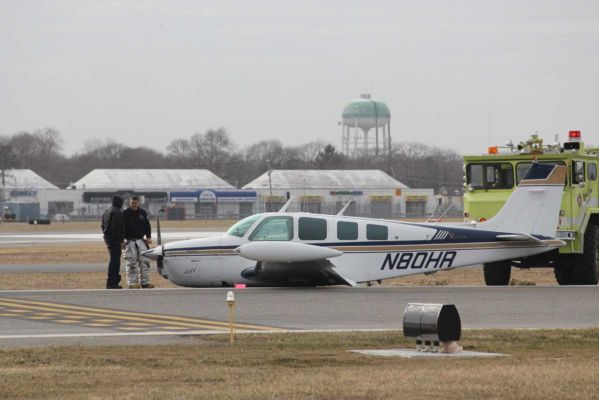
Not a good day. (Photo credit: http://www.newsday.com/long-island/suffolk/plane-lands-at-republic-with-no-wheels-1.2735131)

According to a July 2006, article in Aviation Consumer, the estimated cost of repairs following a gear up landing for an A-36 Bonanza would be about $27,000 and about 3 weeks of down time. 25 years ago, even my beloved E33 Bonanza was the victim of a gear up landing. While it was neither me nor my dad flying our airplane that day, the event stays in its history and reduces its value should the time ever come to sell it.

That incident in 1990 resulted in approximately $25,000-30,000 in repairs. The cause of the incident was classic: the pilot put the gear down at the normal time, but then had his downwind extended by tower. He brought the gear back up to fly the longer downwind, but forgot to put it back down later when he was cleared to land. Like many pilots, he had a set routine time when he normally put the gear down, and when his routine was changed, he didn’t remember to lower the gear once more.

Unfortunately, no matter what experience level one may be at, no pilot is immune to the possibility of such a mistake. The following are 5 tips that I have learned in my time flying that have helped myself and others minimize the chance of a gear-up landing occurring:

  1. Know your aircraft systems: What are the operating perimeters on your airplane’s gear warning system? Most airplanes have a designated speed or power setting at which the gear warning horn will sound in the event that the gear isn’t down and locked. In the Aerostar that I was flying, the gear horn was supposed to come on at 15” of manifold pressure with the gear up, but in practice, it didn’t come on until much lower than that. It has since been adjusted, but at the time it was important for me to know that if I had left the gear up, the horn wouldn’t have sounded in a timely enough manner for me to go around, much less lower it prior to touchdown. Most likely it would have just added to the noise of metal on concrete as I pulled the power all the way back in the landing flare.
  2. Don’t override gear-up warning systems: They were put there for a reason! Even if you’re out doing maneuvers and the horn is blasting in your ear for half an hour, resist the temptation to simply pull the circuit breaker or push the warning silencer to make it shut up. If a pilot disables the gear-up warning horn and then later forgets to put the gear down on landing, he or she will have a much worse headache on their hands than the one that the horn would have given them.
  3. Use your checklists and memory items: It doesn’t matter how much a pilot knows about his or her airplane, or the procedures for it. Distractions happen. Mistakes Happen. Always consult the checklist for confirmation that you’ve accomplished all the essential tasks before landing. Additionally, if you haven’t already, work on developing call outs which you perform out loud regardless of whether you are alone in the airplane or not. Whenever I’m landing an airplane, I start with my flows, go through my GUMPS (Gas-Under carriage- mixture- props- seat belt) checks, then do the printed checklist, and finally when on short final I call out “short final, cleared to land, three green.” I’ve had several passengers tease me about doing the “three green” call out while I was flying aircraft that didn’t have retractable landing gear. But, I’d much rather be in the habit of checking every time regardless of what I’m flying than forgetting to check when it is necessary.
  4. Use your available resources and develop healthy habits: If I have someone riding with me, I generally ask them to confirm that there are 3 green lights glowing on the instrument panel. Even if that person isn’t a pilot, they will probably enjoy the opportunity to be involved, and it’s a good way for me to stay in the habit of checking the gear lights to ensure that everything is properly down and locked. I’ve also found that intentionally leaving your hand on the gear lever until you have gear safe lights is a good idea. Forcing yourself to keep your hand on the handle until you have the all important lights obligates you to actually observe the indications instead of simply throwing the lever and moving onto something else. This way, if you only get an indication of 2 greens you’ll be aware of it right away and have more time to respond appropriately. It also helps you to learn the normal length of time it takes for the gear to extend or retract, which will be helpful to you to be aware of any abnormalities in the gear system.
  5. Upgrade your aircraft’s gear-up warnings: There’s a variety of ways you can improve your aircraft’s ability to warn you of a potential gear-up landing. For student pilots or pilots new to complex aircraft, it could be something as simple as a red post-it note on the panel to remind you to verify the gear position prior to landing. Or, if you own an aircraft that doesn’t have an effective way to warn the pilot of a gear-up landing, consider investing in an aftermarket gear-up warning system – surely the extra price of such an upgrade is a small amount next to the cost of repairing the damage from a gear-up landing!
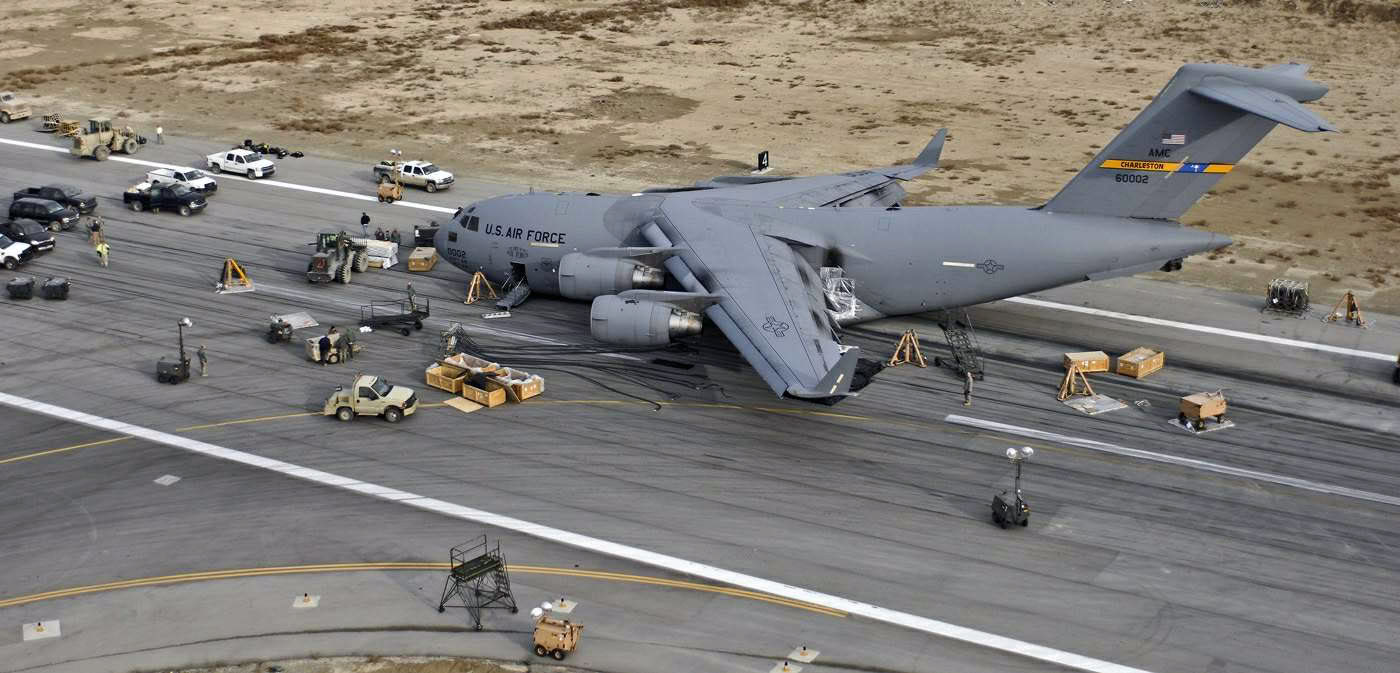
Crash recovery and emergency management crews survey a C-17 Globemaster as it rests on Bagram Air Field's active runway Jan. 31 after landing with its landing gear still up. More than 120 Airmen, Defense Department civilians and contractors successfully removed the crippled aircraft from the runway Feb. 2 and restored full air operations shortly thereafter. The "belly up," or no landing gear, recovery effort that began here Jan. 30 was the first time in the airframe's 16-year Air Force history. (U.S. Air Force photo)
It can happen to anyone! The gear handle in this C-17 was in the “UP” position. (Photo Credit:https://theaviationist.com/2009/02/09/c-17-gear-up-landing-in-bagram-images/)

Always remember, regardless of experience, no pilot is immune to the possibility of a gear up landing. The best way to safeguard yourself is to discipline yourself in the use of flows, checklists, and call outs. Things like gear warning horns, visual reminders, and other systems are a useful back up, but they shouldn’t be relied upon to save your bacon if you don’t get the gear down at the proper time. Fortunately, in most gear up landings, the pilot and passengers are able to walk away uninjured – but that doesn’t lessen the embarrassment or financial burden of the event. So, keep your chin up, your gear down, and remember….THREE GREEN

Similar Posts

  • Fly Away Destination: Sedona, AZ (KSEZ)

    Looking for somewhere to take a trip this fall?  Sedona, Arizona should warrant strong consideration.  Just shy of 100 miles north of Phoenix, Sedona is one of the most beautiful areas in the southwest United States.  From Texas, depending on how fast your airplane travels, you could make it to Sedona in a day, with a couple of stops in between.  You’d definitely want to spend a few days to enjoy the scenery and maybe jump over to the Grand Canyon while you’re in the area.

    The Airport

    As you approach the Sedona Airport (KSEZ), you become somewhat distracted by the scenery around you.  Don’t be too distracted as the approach is a little tricky.  If you are landing north, on Runway 3, the calm wind runway, don’t let the surroundings fool you.  Stay on that PAPI and don’t be short, as the runway is on a 500 foot mesa.  In instrument conditions, the MDA for the RNAV approach to Runway 3 dumps you out about 1,300 feet above the airport elevation, giving you plenty of time to set up to land.

    When using runway 21, don’t make your pattern too wide as there are some pretty tall rocks (around 7,000 feet) north of the field.  The Airport/Facilities Directory gives a warning to pilots in strong southwesterly wind conditions.  Be aware of strong downdrafts coming in on final for runway 21.

    The runway itself is in excellent condition, and plenty long at just over 5,000 feet.  The FBO is a little dated, but the folks there are great.  They were redoing the ramp this summer, so beware of that.  Airplane parking is no problem, but actually getting to the FBO is a little tricky.  The Mesa Grill is a very nice good restaurant just a short walk from the FBO.  When I was there, I chowed down on a buffalo burger.  It definitely hit the spot.

    What To Do

    Sedona is the outdoorsman’s paradise.  Starting off, to get a great overview of the area, hop on the Red Rock Scenic Byway (SR 179) about an hour before dusk.  You’ll get to see some spectacular views while it’s still light, then you can’t beat the sunsets in Sedona.

    For hiking, you have a myriad of options, from the Cathedral Rock, to the Oak Creek Canyon, to the Devil’s Bridge Trail, all are beautiful, though most are not for the faint of heart (especially the Devil’s Bridge).  Even though the fall is cooler, make sure you pack plenty of water for the hikes.

    Sedona

    Want something to do in the evening?  Go up to the Chapel of the Holy Cross to watch the sunset.  After the sun goes down, go do some stargazing.  You’ll get to take a tour of the stars at the Sedona Star Gazing location in Oak Creek.  You are shown all the constellations and stars by professional astronomers, and blankets and chairs are provided.

    Art connoisseur?  You’ll find plenty of art galleries around town with a ton of beautiful, original artwork.  There are also several theaters and golf courses around Sedona, giving everyone a little bit of everything.

    If you’re up for it, the Grand Canyon is about a 2 hour drive north of Sedona, or a quick flight up to the Grand Canyon Airport (KGCN).

    In search of a good getaway?  Try Sedona.  You’ll be sore from lots of hiking and sight seeing, but it will definitely have been worth it.

  • Using the ICARUS Device to Simulate IFR Conditions

    Most of us who have been through instrument training are familiar with the traditional view limiting devices. There is the original hood, which does a decent job of blocking a pilot’s view of outside, but there are still gaps that allow “peeking”, though that peeking doesn’t really help a pilot fly an approach. It does help them figure out which way is up, so it’s not a true simulation.

    The other problem with a hood is the process of putting it on to begin simulating IFR conditions, then taking it off when it’s time to land. This process takes time and the instructor has to take the controls (or the autopilot flies), losing some of the realism of the simulation.

    Overall, an IFR hood is relatively comfortable. The elastic band sits under your headset, doesn’t squeeze your heard, and doesn’t press underneath your ear cups of the headset, giving you a headache. Hoods are large and somewhat unwieldy.

    Foggles are another way to simulate IFR conditions for training. Most of the time, these are safety glasses that have most of the lens blacked out or fogged out, leaving little slits at the bottom for the pilot’s eyes to see the instruments.

    Foggles aren’t quite as good as an IFR hood at blocking the outside. Due to their shape, there are often cracks that allow more “peeking” then a hood. The process of beginning to simulate IFR conditions and ending the simulated IFR conditions is easier though, since all the pilot has to do is put the foggles on or slip them off, which can often be done one handed (putting them on can be more difficult one handed since they have to fit underneath your headset). Wearing them for a long period of time can get painful as your headset is probably going to start crushing them against the side of your head.

    The best comfort and view limiting combination I have found, so far, is called the ViBAN. It’s very comfortable and does a really good job of simulating IFR by blocking a view of the outside.

    What’s the whole goal behind a view limiting device? When a pilot starts instrument training, ideally, all the training would take place in the clouds, since that is why someone get’s an instrument rating. As we all know, this isn’t possible, hence the need to simulate IFR conditions. The problem with simulating IFR is, it’s not true IFR. True IFR conditions are different then what a hood or a set of foggles can simulate. This can lead to spatial disorientation if a fresh instrument pilot enters the clouds for the first time, having done all his training in simulated conditions.

    I’ve even heard a story of a pilot who did all his IFR training with a hood, passed his check ride, went into the clouds the first time, and put the hood on because he was getting disoriented since he hadn’t ever experienced true IFR.

    What about full motion simulators? How I wish every airport had a full motion simulator for instrument training. Full motion sims are truly the best way to simulate IFR conditions. A pilot can easily get spatially disoriented in a sim if he or she isn’t careful. It’s a great way to simulate IFR conditions, but, alas, this just isn’t possible.

    Are we doomed to just do an okay job of training instrument pilots in simulated IFR conditions with a hood or foggles?

    Nope, at least not anymore.

    Enter the ICARUS Device. The ICARUS Device, which stands for Instrument Conditions Awareness Recognition and Understanding System, is an amazing piece of equipment which truly simulates IFR conditions in the training environment. The ICARUS is a plastic shield that uses a Polymer Dispersed Liquid Crystal film that allows the degradation of a pilot’s visibility. It clips on to a baseball cap and is attached to a battery. That battery is then bluetoothed to an iPad or iPhone App that allows the instructor to put the pilot into and take him out of simulated IFR conditions.

    Originally designed for helicopter training, it’s an excellent tool for fixed wing IFR training too. I’ve been using it for the last month and a half and I am hooked. The customer’s that I have used it with truly say that they cannot see a thing outside. Because the plastic shield turns white, it really does give the view that the pilot is in the clouds. The inner ear certainly believes it. The curve of it fits the glare shield in most planes nicely (there is some custom cutting that would have to take place for specifically rounded glare shields, but it fits Cirrus and Piper Saratogas nicely, the two planes I have used it in), and it sits away from the pilot’s face, blocking out all windows, which is what clouds do.

    The greatest thing from an instructor’s standpoint is the ICARUS Device app. The pilot puts the device on before taxi and I set the app to VMC. This completely clears the ICARUS Device so the pilot can see just fine for taxi and takeoff. Then, at about 400 AGL, I tap the <1/2 VIS button on the app, and boom, the pilot is in the clouds. I even have a time delay to slowly make the ICARUS Device opaque to simulate slowly entering the clouds. I do the same thing on an approach, except in the reverse order, simulating we are slowly exiting the clouds.

    The ICARUS Device is a game changer for IFR training. It’s comfortable, easy to use, the battery lasts for a long time (though bring a standard USB charging cord with you in the plane because the battery failure mode makes the ICARUS Device opaque instead of transparent. You don’t want that to happen at 200 AGL!), and, most important, it truly simulates IFR conditions.

    After using it, I believe all flight schools and CFII should get one of these, both in the fixed wing and helicopter world. It’s the best option for simulating IFR conditions.

    Checkout the ICARUS Device website for more information and to hear the story of the company.


    Texas Top Aviation, LLC was given an ICARUS Device by the ICARUS Device company to test. Texas Top Aviation, LLC was not paid for our above opinion on the ICARUS Device (trust me, if it was terrible, I would have told you!).

  • A Takeoff Briefing

    Takeoff briefings are one of those things that most pilots are taught when they first learn how to fly, but once they get into flying themselves around, quickly fall by the wayside.  There is a reason student pilots are instructed to perform a takeoff briefing before departure.  It gets them thinking about what the plan is after they get off the ground and what to do if something goes wrong.

    Takeoff Briefing

    Takeoff briefings are a good habit to get into.  Airline crews do a takeoff briefing before every departure, even though they have performed a takeoff in that particular airplane thousands of times.  It enhances safety and provides repetition, keeping that knowledge at the forefront of the crew’s minds.

    In general aviation, a takeoff briefing should cover what the takeoff procedure is, what the abort plan is, and what the plan after takeoff is.

    Takeoff Procedure

    Most pilots fly the same airplane all the time, so the familiarity with what goes into a takeoff is there.  But, habits should be formed to brief the takeoff procedure as part of the takeoff briefing.  It doesn’t need to be extensive, just covering the basics of how the airplane is getting off the ground.  Something like this:

    • Throttle setting (if turbo charged, will full throttle cause an overboost?)
    • Rotate speed
    • Expected takeoff roll

    That’s it.  Nothing fancy for the takeoff procedure.

    Abort Plan

    What is the plan if something goes wrong?  It doesn’t have to be an engine failure, maybe the engine coughs when full power is added or maybe the engine doesn’t produce peak RPM.  Maybe the takeoff roll is longer than anticipated and something doesn’t seem right.  Maybe on climb out a door pops open.  Maybe the engine fails at 1,000 feet.  It’s good to keep the plan in the foreground for what to do if an abnormal or emergency situation takes place.

    • Brief the aborted takeoff procedure
      • Pick an abort point on the runway based on the expected ground roll
      • What is the procedure if the airplane isn’t off the ground by then?
      • What is the procedure if the engine quits on the runway?
    • Brief the engine failure procedure at low altitude
      • If the engine fails over the runway, will you try to land on the runway?
      • What altitude would you elect to turn back as opposed to landing straight ahead?
      • If the plane is too low to turn back, would you land straight ahead or aim left or right?
      • What airspeed will you aim to hold if the engine fails?
    • In a Cirrus, what is your minimum parachute deployment altitude?

    After Takeoff Plan

    After the airplane is off the ground, what’s the plan then?  Are you staying in the pattern or departing the area?  Do you need to adjust your power at a certain altitude?  What altitude are you climbing to?  What heading are you going to fly?  Is your flight plan in your GPS?  This is an excellent time to set up altitude and heading bugs if your airplane is so equipped.

    Get in the habit of doing a takeoff briefing before you call the tower or announce your departure.  It get’s your mind focused on the task at hand and then what is going to be happening next.

  • Beechcraft Bonanza Ownership

    If you walk up to any Beechcraft Bonanza sitting on the ramp at an airport and ask the owner, “How do you like your Bonanza?” be prepared to stand there and listen for 15-20 minutes while he brags about his airplane.

    V35 Bonanza

    The thing about Beechcraft Bonanza owners is that they are almost a part of a cult. They will tell you up and down why the Bonanza is the best airplane out there. They’ll tell you why all the others don’t even come close. They’ll tell you about the payload, the six seats, the variety of configurations you can select from, the ability to land pretty much anywhere. By the time you walk away, you will probably be convinced to buy one yourself.

    Bonanza’s are great airplanes. For those of you new to the single engine piston market, a good comparison for a Beechcraft Bonanza would be a Suburban. Not the flashiest ride out there, but extremely capable, comfortable, and family conscious. If you’re hauling a load, you’ll take a Bonanza over a Cirrus or Mooney any day. Have six people? No problem!

    One of the best things about a Beechcraft Bonanza is the variety of designs. Four seats, six seats, long range tanks, tip tanks, turbo charged, normally aspirated, steam gauge, G1000, Aspen or G500 retrofitted, dual yoke, single yoke, leather, cloth, and a variety of different colors out there on the market make finding a Bonanza that fits your need pretty easy.

    When it comes to picking out an airplane, the first question is always the mission. If you’re thinking about a Beechcraft Bonanza, you’ve already determined you need something with a good useful load. Do you need four seats or six? Depends on how often you’ll be carrying someone or how new of an airplane you want. Older Bonanzas have four seats, but a lot have had significant updating. Newer A36 and B36 Bonanzas have six seats, but are going to cost you more.

    Beech Bonanza

    Do you need a turbo charged Bonanza? If you’re in a high elevation area or expect to visit the mountains a lot, then absolutely. If you want a better cruise speed and don’t mind a little less useful load, then go for it. If you’re more concerned about being able to load it up and you aren’t going to cross the Rockies often, then normally aspirated is what you want. You’re probably looking at about 160-170 KTAS with the normally aspirated whereas you get between 180-190 KTAS at altitude with the turbo.

    Do you need tip tanks? Tip tanks have two advantages. One is the most obvious: you get to carry more fuel, therefore you get to go farther without having to stop (or when you stop for the bathroom, you don’t have to fill up with gas). The other advantage is you get a bump up in useful load. I talked to a Beechcraft Bonanza owner a few weeks ago who had tip tanks on his. He told me max gross on his Bonanza was 3,800 pounds and was eligible for an upgrade of up to 4,000 pounds and all it took was paper work for the STC. That’s quite a bit of load!

    G36 Bonanza

    Are Bonanzas hard to fly? When moving up from a typical 172 or Cherokee that most people learn to fly in, it does take some adjustment. But, with good Bonanza training from a qualified Bonanza training instructor, then the transition is no problem. There are tons of resources out there to aid all future and present Bonanza owners in their foray into the Bonanza nation. With the American Bonanza Society and Bonanza Pilot Training, there is no lack of training, thoughts and opinions.

    In need of an airplane that can pretty much do whatever you need? Then a Bonanza may be right for you.


  • AOPA Rusty Pilot Seminar in San Marcos

    “AOPA Rusty Pilot presented by AOPA Ambassador Pat Brown at Tempus Training Solutions”
    Topic: A Rusty Pilots Seminar
    On Saturday, July 16, 2016 at 09:00 Central Daylight Time
    Location:
    Tempus Training Solutions
    2080 Airport Dr.

    San Marcos, TX 78666

    Select Number:
    EA2769634

    Description:

    Life may have gotten in the way, but the dream of flight can be yours again. Returning to the skies is not as difficult as most rusty pilot think. We’re inviting you back in the cockpit and will help you get there. Come and participate in a FREE Rusty Pilot program with fellow lapsed pilots. We will help you understand what’s changed in aviation since you’ve last took the controls and brush up on your aviation knowledge. The Rusty Pilot program is developed by AOPA in partnership with local flight training providers in order to create the best environment for getting you back in the air and a part of the general aviation community.

    It is easier than most people think:

    • No FAA checkride or test
    • Medical may not be required

    As a Bonus, by attending, you get two to three hours of free ground instruction towards your flight review!

    Register Now!

    https://ww2.eventrebels.com/er/Registration/StepRegInfo.jsp?ActivityID=16910&StepNumber=1

    To view further details and registration information for this seminar, click here.

  • Cirrus Simulator Training

    Let’s face it: airplanes are not the best classrooms. The propeller is running, the engine is making lots of noise, the pilot is attempting to multi-task and the instructor is barking orders. That’s almost as much overstimulation as being a parent to 4 kids under 10 (I have experience in that arena!). That’s even before takeoff!

    At Texas Top Aviation, we have observed many situations where a simulator would be an excellent way to introduce different concepts and supplement training. Now, in our Austin Executive (KEDC) office, we finally have a really good simulator.

    Meet the Noble Flight Simulator, the next best thing to a Cirrus cockpit. With the Noble Flight Simulator, we can duplicate 6 different types of Cirrus aircraft (G3 SR22, G3 SR22T, G5 SR22, G5 SR22T, G6 SR22, and G6 SR22T). The Garmin Perspective panel easily swaps between the G3 and G5 configuration to the G6 configuration, so the buttons are all in the proper places.

    Having button pushing problems? The simulator is the place to practice.

    Want to experience actual emergencies? An engine failure is a lot less stressful in a simulator.

    Want to pull CAPS (Cirrus Airframe Parachute System)? The Noble Flight Simulator has a realistic CAPS handle with the same amount of pull pressure that the CAPS handle in the airplane has.

    Need an IPC or want to practice approaches? All approaches done on a Noble Flight Simulator are luggable, plus a full IPC can be accomplished.

    Want to save fuel? The Noble Flight Simulator is for you!

    To top it all off, the Noble Flight Simulator that Texas Top Aviation has is classified as an Advanced Aircraft Training Device. It is certified to the highest standards of non-motion simulators, allowing pilots working toward their private and instrument ratings to log a significant amount of time toward that certificate or rating. Up to 20 hours of IFR training is allowed to be logged in an AATD toward an instrument rating. That’s huge!

    Texas Top Aviation is also developing a CAPS specific course to expose Cirrus pilots to the many different scenarios where pulling CAPS would be necessary. This teaches Aeronautical Decision Making to Cirrus pilots who struggle with the decision of whether or not to pull CAPS. Look for CAPS course information under our Aircraft Training page later this summer.

    Interested in checking the simulator out? Contact us today!

Leave a Reply

Your email address will not be published. Required fields are marked *