In instrument flying, I am all about keeping things simple. There is a ton of detail that an instrument pilot can get bogged down in. When an instrument pilot gets bogged down, he gets distracted from flying the airplane. When he gets distracted from flying the airplane, dangerous circumstances can happen.
I like to keep things simple. When I first started instructing, I developed a very simple instrument approach briefing that captures everything that is necessary on an approach plate, but prevents getting bogged down in the details.
I call it the BBC instrument approach briefing. Here it is:
Brief
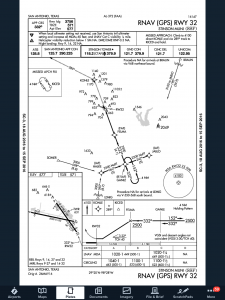
First things first. The first step of an instrument approach briefing is to brief the approach plate. There are a bunch of acronyms out there that instructors tell their students to memorize that only cause confusion instead of helping get the plate briefed. To keep it simple, just work your way across the plate and you’ll get all the information you need.
Start in the top left hand corner of the plate, with the approach course, then work your way right and down, as follows:
Approach Course (or Nav frequency if flying a VOR/ILS/LOC)
Runway information
Notes (these are good to brief the night before as a lot are irrelevant to GA pilots
Missed approach
Frequencies
Planview and MSA
Profile View and Minimums
Simple enough, right?
Build
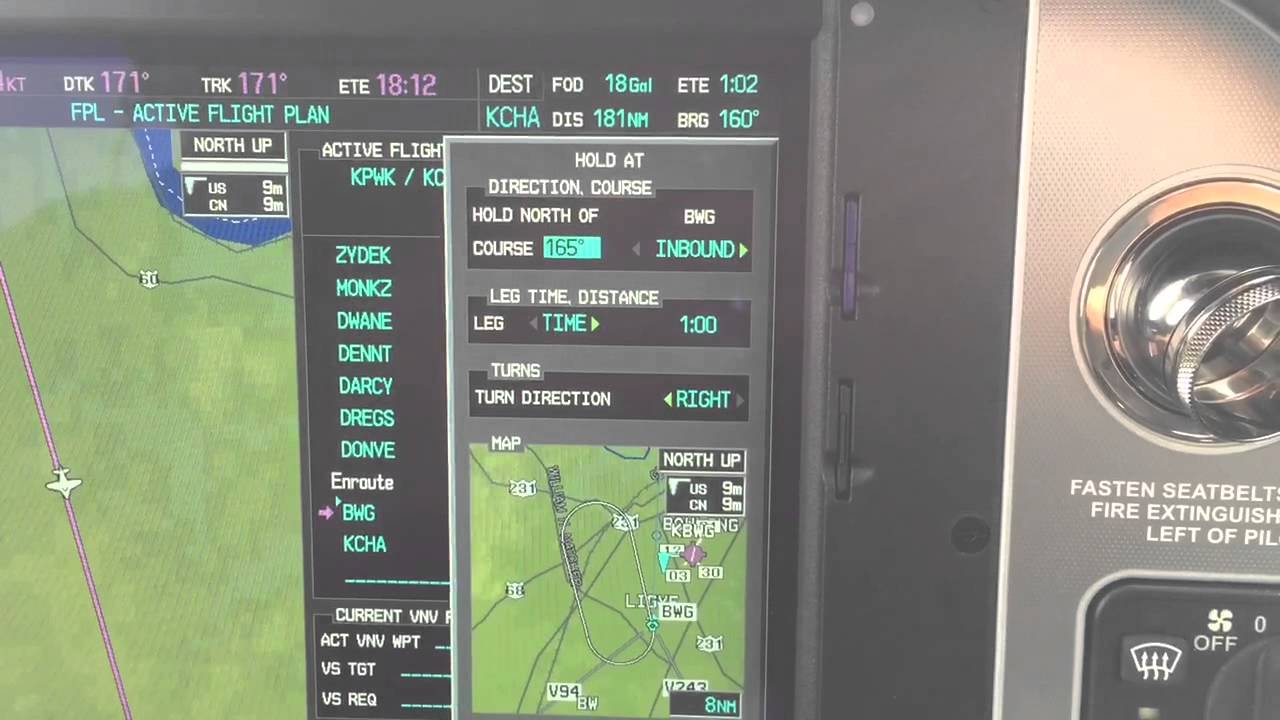
Now that you know what you are planning on doing, you can now take the second step in the instrument approach briefing and build the approach in your GPS. You know your approach type, you know your transition, and you know what your minimums are. Taking all that information, you can now build it in to your system.
Checklists
Once everything else is done, don’t forget the checklists. The descent and before landing checklists still need to be done as part of an approach. The best time to do these is before joining the approach so that you don’t have to worry about flying the approach and looking at a checklist at the same time. Even better, memorize the checklist and you don’t have to look at anything!
Most importantly, you want to be configured properly for the approach by the final approach fix. Gear, flaps set, power set, so all you have to worry about at that point is following the needles and trusting your instruments.
When is the last time you talked to the Flight Service Station?
Believe it or not, FSS is still in existence. Over the past 10 years, they went from FAA run, the being bought by Lockheed Martin, to now being privately run by a company called Leidos. 1-800-WX Brief will get you connected with a weather briefer, but you’ll hear “Leidos Flight Service Station” now when the briefer picks up.
Since the advent of Foreflight, most pilots these days get their weather briefings digitally on the iPad. Foreflight has come a long way since it’s inception. The briefing part of their Flights page is quite comprehensive, with lots of information, and counts as a legal weather briefing (which pilots are still required to get before a flight).
Why does a pilot even need to call Flight Service? Well, when’s the last time you tried to interpret everything the Briefing on Foreflight told you? As I said before, it’s a lot of information and a lot of it can be confusing. Pilots are not fully trained on interpreting Prog Charts and getting an overall weather picture for a flight. A weather briefer is.
I have over 5,000 hours and I still call a weather briefer before almost every flight. On the way to the airport is a great opportunity to get a weather briefing. I get a great picture of what’s going on in my area or over my route, frontal movement, bad weather areas, and whether or not it’s a good idea to even take off. Calling in the car alleviates the main complaint I hear about calling the Flight Service Station, which is it’s inconvenient and causes a delay since you have to call them on the phone.
I don’t do much private pilot training anymore, but when I do, I always teach my students how to get a weather briefing from the Flight Service Station. I’ll show them how to get the briefing on Foreflight too, but usually their eyes bug out of their heads when they start trying to read everything. A breathe of relief is released when I tell them there is a trained professional just a phone call away who can clear everything up.
The other thing that the Flight Service Station provides that is important to a lot of folks are PIREPs. It’s vital in sketchy weather areas for the FSS to get a report of what’s actually going on in the air. This helps other pilots out greatly as they are getting information about icing, cloud bases and tops, turbulence and a myriad of other things from airplanes who are actually in the conditions.
Finally, the most used portion of the Flight Service Station is the Clearance Delivery line (888-766-8267). At airports without a tower or a clearance delivery frequency, with IFR conditions present, the only way to get your IFR clearance is to call Clearance Delivery. Yes, it can take a little time sometimes, but you will get a clearance every time, unlike taking off and trying to dodge the clouds without hitting anything, while trying to call Center on the radio (which isn’t safe or legal).
Been a while since you’ve talked to the Flight Service Station? Give them a call, either on the phone or on the radio. Odds are, they are bored and just wanting someone to talk to, just like you are on that long cross country flight!
Checkout 1800WXBrief.com to see all the cool stuff the Flight Service Station does.
Last fall, the Malibu & M-Class Owner’s and Pilot’s Association (MMOPA) announced a new program to encourage and enhance safety, the Master Aviator Program.
The MMOPA Master Aviator Program was designed as a system to recognize those in the Piper PA46 community who strive to become the best pilots they can be. Each year, those who have achieved each of the levels in the program will be honored at the MMOPA Convention (the 2020 MMOPA Convention will be in Tucson in the spring of 2020) by getting Wings pinned on.
What is the heart behind the MMOPA Master Aviator Program, you ask? Here’s a quote from the MMOPA Website:
This program is the result of MMOPA having identified areas of flight operation that need improvement to increase safety. It provides a path forward for training for the PA46 pilot, honors those pilots that elect to participate in the MMOPA Master Aviator Program, and rewards those pilots that progress upwards to ultimately reach the highest level (MMOPA Master Aviator).
The main focus areas of the MMOPA Master Aviator Program are pilot flight experience (flying more during a year increases skills), stall/spin awareness, and operations in the runway environment (improper aircraft handling during takeoff, landing, and go around, with a particular emphasis on rudder control).
The MMOPA Master Aviator Program tackles these three areas in each of the different levels of achievement: Aviator, Senior Aviator, and Master Aviator.
To achieve the Aviator Wings, a PA46 pilot must do the following:
Complete Initial Training with an Approved Training Provider
Fly 100 total hours in a PA46
Attend an Approved Mid-Year Training Event (M-Class, MMSTF, MMOPA Safety Standown, MMOPA Maintenance Standown, to name a few)
Attend the MMOPA Convention once in the last 3 years
No accidents/incidents in a PA46 in the last 3 years
To achieve the Senior Aviator Wings, a PA46 pilot must have received their Aviator Wings and do the following:
Completed at least one yearly Recurrent Training Event
Attend the MMOPA convention once in the last 3 years
No accidents/incidents in a PA46 in the last 3 years
To achieve the Master Aviator Wings, a PA46 pilot must have received their Senior Aviator Wings and do the following:
Completed at least two yearly Recurrent Training Events
Fly 300 total hours in a PA46
Receive a tailwheel endorsement
Attended the MMOPA convention once in the last 3 years
No accidents/incidents in a PA46 in the last 3 years
To incentive PA46 pilots, MMOPA offers a $400 voucher to program participants to accomplish the Aviator Mid Year Training, the Senior Aviator Upset/Recovery Training, and the Master Aviator Tailwheel Training. A PA46 pilot is only eligible for one voucher per year.
I received the Master Aviator Award at the MMOPA Convention this year. All told, there were close to 40 participants who received one of the three levels of achievement at the MMOPA Convention in Amelia Island, FL this year.
Interested in applying to be a part of the MMOPA Master Aviator Program? You can find out more information on MMOPA’s website.
In January, Cirrus announced the Generation 2 SF50 Vision Jet. After getting the Generation 1 Vision Jet certified in late 2016, Cirrus didn’t waste any time in starting in on improvements.
The improvements are pretty sweet, making the G2 Vision Jet even easier to fly and step into for Cirrus’ target market, SR22 owners.
Here are the improvements on the G2 Vision Jet.
RVSM Approval
The G2 Vision Jet has received RVSM approval, allowing the airplane to fly at 31,000 feet. RVSM stands for Reduced Vertical Separation Minimums (read more about RVSM here). RVSM airspace starts at 28,000 feet, the G1 Vision Jet’s ceiling. Now that the G2 Vision Jet is RVSM certified, it can fly at 31,000 feet.
For piston pilots, you are left scratching your head as to the advantage of this. In a jet, the higher you go, the thinner the air, so the faster you go, and the less fuel you burn since the thin air needs less fuel to mix with. This caps out at a certain altitude and the speed begins dropping and you start losing efficiency (even though the fuel burn is quite low).
According to Cirrus, at 31,000 feet, the G2 Vision Jet cruises over 300 KTAS and gets a range boost to almost 1,200 nm.
Garmin Perspective Touch+
Cirrus & Garmin have taken the new NXi interface and paired it with the Garmin Perspective Touch to create the Touch+. You can read about the improvements on the NXi here, all of which are included in the Touch+ in the G2 Vision Jet.
The big improvement that is included in the Touch+ is Autothrottle capability. An Autothrottle is integrated with the autopilot. It automatically adjusts power settings and speeds based on the phase of flight without the pilot having to touch the throttle. Pretty cool.
New Cabin
The G2 Vision Jet has a redesigned cabin as well, making it an extremely passenger friendly airplane. The second row has been redesigned and equipped with a center console. There is also a drop down TV screen that allows passengers to connect their mobile devices to it to watch movies or videos while traveling (no internet on board, yet. That’ll probably be the G3 Vision Jet!).
Cirrus also put in more noise reduction in the cabin, creating a quieter ride for passengers. Cirrus also allows for multiple different seating configurations, depending on the needs of the owner.
As always, Cirrus is on the leading edge of airplane technology, creating airplanes that are easy as well as fun to fly. I’m excited to see how they continue to improve the design to both the SR22 and the Vision Jet.
Most of us who have been through instrument training are familiar with the traditional view limiting devices. There is the original hood, which does a decent job of blocking a pilot’s view of outside, but there are still gaps that allow “peeking”, though that peeking doesn’t really help a pilot fly an approach. It does help them figure out which way is up, so it’s not a true simulation.
The other problem with a hood is the process of putting it on to begin simulating IFR conditions, then taking it off when it’s time to land. This process takes time and the instructor has to take the controls (or the autopilot flies), losing some of the realism of the simulation.
Overall, an IFR hood is relatively comfortable. The elastic band sits under your headset, doesn’t squeeze your heard, and doesn’t press underneath your ear cups of the headset, giving you a headache. Hoods are large and somewhat unwieldy.
Foggles are another way to simulate IFR conditions for training. Most of the time, these are safety glasses that have most of the lens blacked out or fogged out, leaving little slits at the bottom for the pilot’s eyes to see the instruments.
Foggles aren’t quite as good as an IFR hood at blocking the outside. Due to their shape, there are often cracks that allow more “peeking” then a hood. The process of beginning to simulate IFR conditions and ending the simulated IFR conditions is easier though, since all the pilot has to do is put the foggles on or slip them off, which can often be done one handed (putting them on can be more difficult one handed since they have to fit underneath your headset). Wearing them for a long period of time can get painful as your headset is probably going to start crushing them against the side of your head.
The best comfort and view limiting combination I have found, so far, is called the ViBAN. It’s very comfortable and does a really good job of simulating IFR by blocking a view of the outside.
What’s the whole goal behind a view limiting device? When a pilot starts instrument training, ideally, all the training would take place in the clouds, since that is why someone get’s an instrument rating. As we all know, this isn’t possible, hence the need to simulate IFR conditions. The problem with simulating IFR is, it’s not true IFR. True IFR conditions are different then what a hood or a set of foggles can simulate. This can lead to spatial disorientation if a fresh instrument pilot enters the clouds for the first time, having done all his training in simulated conditions.
I’ve even heard a story of a pilot who did all his IFR training with a hood, passed his check ride, went into the clouds the first time, and put the hood on because he was getting disoriented since he hadn’t ever experienced true IFR.
What about full motion simulators? How I wish every airport had a full motion simulator for instrument training. Full motion sims are truly the best way to simulate IFR conditions. A pilot can easily get spatially disoriented in a sim if he or she isn’t careful. It’s a great way to simulate IFR conditions, but, alas, this just isn’t possible.
Are we doomed to just do an okay job of training instrument pilots in simulated IFR conditions with a hood or foggles?
Nope, at least not anymore.
Enter the ICARUS Device. The ICARUS Device, which stands for Instrument Conditions Awareness Recognition and Understanding System, is an amazing piece of equipment which truly simulates IFR conditions in the training environment. The ICARUS is a plastic shield that uses a Polymer Dispersed Liquid Crystal film that allows the degradation of a pilot’s visibility. It clips on to a baseball cap and is attached to a battery. That battery is then bluetoothed to an iPad or iPhone App that allows the instructor to put the pilot into and take him out of simulated IFR conditions.
Originally designed for helicopter training, it’s an excellent tool for fixed wing IFR training too. I’ve been using it for the last month and a half and I am hooked. The customer’s that I have used it with truly say that they cannot see a thing outside. Because the plastic shield turns white, it really does give the view that the pilot is in the clouds. The inner ear certainly believes it. The curve of it fits the glare shield in most planes nicely (there is some custom cutting that would have to take place for specifically rounded glare shields, but it fits Cirrus and Piper Saratogas nicely, the two planes I have used it in), and it sits away from the pilot’s face, blocking out all windows, which is what clouds do.
The greatest thing from an instructor’s standpoint is the ICARUS Device app. The pilot puts the device on before taxi and I set the app to VMC. This completely clears the ICARUS Device so the pilot can see just fine for taxi and takeoff. Then, at about 400 AGL, I tap the <1/2 VIS button on the app, and boom, the pilot is in the clouds. I even have a time delay to slowly make the ICARUS Device opaque to simulate slowly entering the clouds. I do the same thing on an approach, except in the reverse order, simulating we are slowly exiting the clouds.
The ICARUS Device is a game changer for IFR training. It’s comfortable, easy to use, the battery lasts for a long time (though bring a standard USB charging cord with you in the plane because the battery failure mode makes the ICARUS Device opaque instead of transparent. You don’t want that to happen at 200 AGL!), and, most important, it truly simulates IFR conditions.
After using it, I believe all flight schools and CFII should get one of these, both in the fixed wing and helicopter world. It’s the best option for simulating IFR conditions.
Texas Top Aviation, LLC was given an ICARUS Device by the ICARUS Device company to test. Texas Top Aviation, LLC was not paid for our above opinion on the ICARUS Device (trust me, if it was terrible, I would have told you!).
As all Cirrus pilots know, SR20s and SR22s have 2 batteries in the Cirrus electrical system (technically, they have 3, as Battery 2 is made up of 2 12 volt batteries in series with each other). Battery 1 provides power to the starter and is a backup for the entire Cirrus electrical system, while Battery 2 provides backup for the Essential Bus items.
If you look on the engine page of either an Avidyne or a Garmin Cirrus, there is a section showing the Cirrus electrical system health. With the engine running, you have voltmeters showing the voltage from Alternator 1 and Alternator 2, ammeters showing the amperage output from Alt 1 and Alt 2, and an ammeter showing the charging rate of Battery 1. There is no indication for Battery 2.
This brings up a question. How does the pilot know that Battery 2 has any kind of a charge? What happens if the whole Cirrus electrical system goes caput and all that’s left is Battery 2? Will Battery 2 have juice then?
The answer is actually rather simple. As part of the pre-flight inspection, the first step in the cabin inspection is to turn the Battery 2 switch on, then check the Essential bus volt meter. The checklist says the voltmeter should be reading between 23-25 volts. This tells you how much voltage Battery 2 currently has. The next step (after ensuring the flap lights are out) is the turn Battery 1 on. Battery 1 then powers the Main Bus and Essential Bus. The voltage showing on the Main Bus shows how much voltage Battery 1 currently has.
Easy enough right? Now you can impress friends and family alike with your Cirrus electrical knowledge!
Looking for somewhere to take a trip this fall? Sedona, Arizona should warrant strong consideration. Just shy of 100 miles north of Phoenix, Sedona is one of the most beautiful areas in the southwest United States. From Texas, depending on how fast your airplane travels, you could make it to Sedona in a day, with a couple of stops in between. You’d definitely want to spend a few days to enjoy the scenery and maybe jump over to the Grand Canyon while you’re in the area.
The Airport
As you approach the Sedona Airport (KSEZ), you become somewhat distracted by the scenery around you. Don’t be too distracted as the approach is a little tricky. If you are landing north, on Runway 3, the calm wind runway, don’t let the surroundings fool you. Stay on that PAPI and don’t be short, as the runway is on a 500 foot mesa. In instrument conditions, the MDA for the RNAV approach to Runway 3 dumps you out about 1,300 feet above the airport elevation, giving you plenty of time to set up to land.
When using runway 21, don’t make your pattern too wide as there are some pretty tall rocks (around 7,000 feet) north of the field. The Airport/Facilities Directory gives a warning to pilots in strong southwesterly wind conditions. Be aware of strong downdrafts coming in on final for runway 21.
The runway itself is in excellent condition, and plenty long at just over 5,000 feet. The FBO is a little dated, but the folks there are great. They were redoing the ramp this summer, so beware of that. Airplane parking is no problem, but actually getting to the FBO is a little tricky. The Mesa Grill is a very nice good restaurant just a short walk from the FBO. When I was there, I chowed down on a buffalo burger. It definitely hit the spot.
What To Do
Sedona is the outdoorsman’s paradise. Starting off, to get a great overview of the area, hop on the Red Rock Scenic Byway (SR 179) about an hour before dusk. You’ll get to see some spectacular views while it’s still light, then you can’t beat the sunsets in Sedona.
For hiking, you have a myriad of options, from the Cathedral Rock, to the Oak Creek Canyon, to the Devil’s Bridge Trail, all are beautiful, though most are not for the faint of heart (especially the Devil’s Bridge). Even though the fall is cooler, make sure you pack plenty of water for the hikes.
Want something to do in the evening? Go up to the Chapel of the Holy Cross to watch the sunset. After the sun goes down, go do some stargazing. You’ll get to take a tour of the stars at the Sedona Star Gazing location in Oak Creek. You are shown all the constellations and stars by professional astronomers, and blankets and chairs are provided.
Art connoisseur? You’ll find plenty of art galleries around town with a ton of beautiful, original artwork. There are also several theaters and golf courses around Sedona, giving everyone a little bit of everything.
If you’re up for it, the Grand Canyon is about a 2 hour drive north of Sedona, or a quick flight up to the Grand Canyon Airport (KGCN).
In search of a good getaway? Try Sedona. You’ll be sore from lots of hiking and sight seeing, but it will definitely have been worth it.