Avionics

The Avidyne Equipped Cirrus Upgrade

1 Comment

A History Lesson

11 years ago, in April of 2009, the Avidyne Corporation unveiled the much bally-hooed Release 9, or R9 as it is commonly known, as a hardware replacement for the Avidyne EX5000 Entegra system in Cirrus Aircraft. The Entegra system was way outdated by that point. Even though Avidyne was the first company to put together a glass PFD in a single engine piston airplane, the company had quickly fallen behind Garmin in keeping up with the ever changing technology landscape.

Rewind to 2008. Cirrus had been going strong with the Avidyne Entegra since the SR20 and SR22 went to full glass in 2003 (a PFD and an MFD; prior to that, Cirrus aircraft only had an MFD with steam gauges and a Sandel Electronic HSI). Cessna, on the other hand, vaulted past the Avidyne Entegra and went straight to the Garmin G1000 in it’s aircraft, starting in 2004 with the 182 G1000 and 2005 with the 172 G1000. Beechcraft and Columbia went to the G1000 (Columbia started with the Avidyne as well) in 2005.

Garmin’s technology in 2007 was so much better than Avidyne’s technology that Cirrus decided to switch. I’m sure there were many promises made by Avidyne to Cirrus about what Avidyne was working on (the R9), but the G1000 was out there, available, and being used in a lot of different airplanes with very good results.

So, in 2008, Cirrus made the switch from the Avidyne Entegra to the Garmin G1000, dubbing it the Cirrus Perspective by Garmin avionics package. Avidyne finally got the R9 to market in 2009, but by that time, Piper was the only airplane manufacturer left putting factory Avidyne panels in their airplanes, and they switched to G1000 later that year.

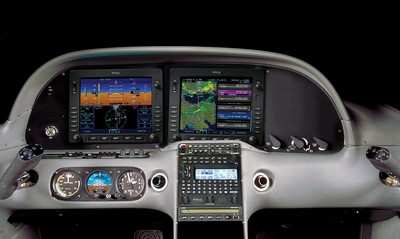
The R9 is a fabulous product. It’s fully integrated, has great graphics, has fully redundant displays, a QWERTY keypad (which, by the way, Garmin didn’t do for another 8 years), and a lot of other neat features. There’s a bit of a learning curve, but it’s a really good product for what it is.

Avidyne, though, was late to the game with their technology. By the time it debuted in 2009, all the GA aircraft manufacturers had long since switched to the Garmin G1000 and weren’t looking back. That left Avidyne with the retrofit market for the many different Avidyne Entegra Cirrus aircraft out there. The only problem was, the retrofit was $80,000 ($95,000 if you wanted to throw in the DFC 100 Autopilot, which is a must have) and not many owners were up for paying that much money, then or now.

To sum up our brief history lesson, Avidyne knew the Entegra needed to go, but couldn’t get the R9 out quickly enough to convince anyone to stick with Avidyne products. The retrofit market didn’t amount to many sales, so Avidyne doesn’t even make the R9 anymore.

As a side note, I really, really like the Avidyne R9 and am sad that it didn’t make it into more airplanes.

So, when the Avidyne Entegra starts to have issues, what’s an owner to do? Keep reading!

There is Hope

There are thousands of Cirrus aircraft out there flying with the Avidyne Entegra instrumentation, which is basically 20 year old technology (I’ve had a computer engineer tell me the programming in an Entegra is Windows 98 tech). These things are going to start having problems at some point (many already have), but what solution do owners have that is cost effective and get’s them new technology?

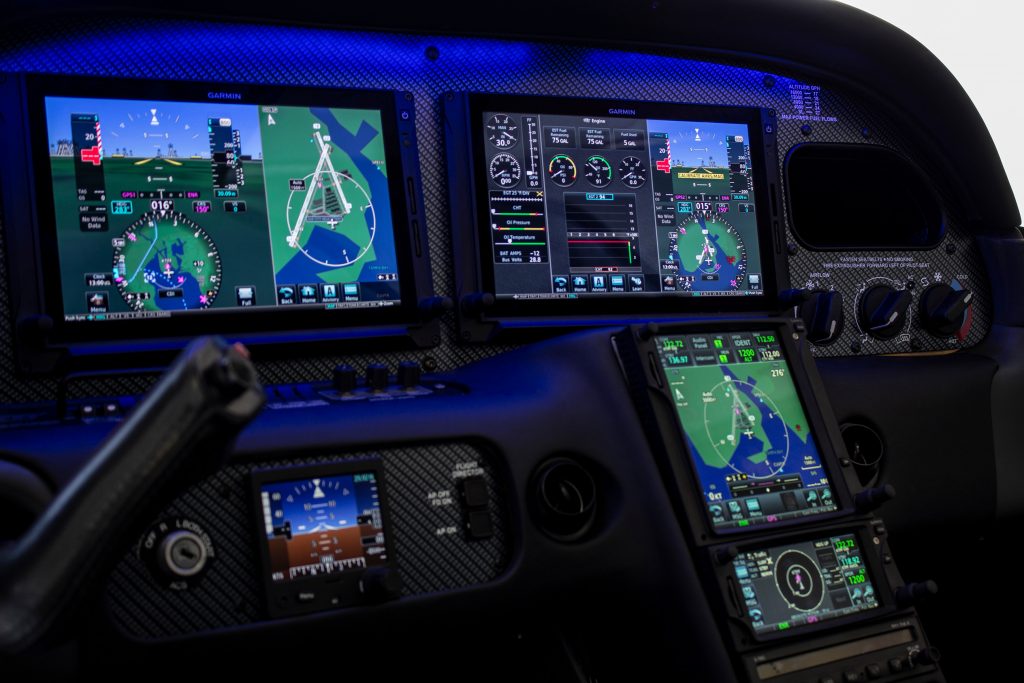
Remember that little company named Garmin? Well, they have come through again. Announced this summer, the Garmin G500 TXi is now certified as a replacement in the Cirrus Avidyne Entegra equipped aircraft. This means pulling out both the PFD and MFD and replacing them with the G500 TXi on both sides. Engine data is also displayed on the G500TXi MFD, including the percent power and TIT indications, if equipped.

Cirrus SR22 Equipped with Dual G500 TXi Screens and Dual Garmin GTN 650Xi GPS Units

The cost for the panel? Two 10.6″ G500 TXi’s run about $16,000 apiece for the units, not including labor. $32,000 for a brand new panel isn’t terrible. Plus, the G500 TXi’s work with the DFC90 autopilot if the Cirrus is already equipped with it. If not, the Garmin GFC 500 autopilot is now approved for the Cirrus at a relatively low price of $7,000, including the servos.

Still have the original Garmin 430s in your Cirrus? Upgraded to the Avidyne IFD 540/440 stack? Put in dual GTN 650Xi’s? Put in a GTN 750Xi? All are compatible with the G500 TXi panel.

Want to upgrade everything? It does get kind of pricey at that point, but for just equipment, the cost for a complete panel conversion is somewhere in the area of $65,000 plus labor, still below what the R9 cost, but not cheap either. That would include 2 G500 TXi’s, 2 GTN 650Xi’s, a GFC 500 Autopilot, and all the engine monitoring equipment that the G500 TXi would need.

Cirrus SR22 Equipped with Dual G500 TXi Screens, a GTN 750Xi, and a GTN 650Xi

Thankfully, some new technology has finally come to the Generation 1-3 Cirrus. Oh, and by the way, your steam gauge Cirrus is fully upgradable as well.

Want to read more? Check out Garmin’s website.

Garmin Perspective Tips & Tricks

0 Comments

The Garmin Perspective and Perspective + are awesome pieces of equipment.  There is so much a pilot can do with this system that it can sometimes get overwhelming. There are two very important features of the Garmin Perspective that all IFR pilots need to know, but are tricky to do if the correct buttons aren’t pushed.

The two features of the Garmin Perspective I want to focus on today are the “Load Airway” feature and the “Hold at Waypoint” feature.  The “Load Airway” feature is especially handy when flying IFR long distances with several airways as part of the clearance.  Here’s how to utilize both on the Garmin Perspective.

Load Airway

  • On your flight plan page, insert the waypoint where you will be joining the airway, or, if your clearance was radar vectors to join an airway, then insert the waypoint on the airway that begins the leg you will be joining on
  • Press the Menu key on the keypad
  • A menu will pop up. Scroll down to highlight Load Airway
  • Highlight the Airway you want from the next menu that pops up then press Enter
  • Then, a list of waypoints will display to exit the airway. Highlight the waypoint where you will be exiting the airway and Press Enter
  • The cursor will then move down to Load at the bottom of the menu. Press Enter to load the airway
  • The Airway and all the waypoints in between your entry and exit waypoints appear in your flight plan
  • If you are getting vectors to join the airway, you’ll need to use the Activate Leg function to activate the leg you will be joining the airway on
    • On the Flight Plan page, highlight the waypoint that ends the leg you want to activate
    • Look for the ACT LEG soft key on the lower right hand side of the MFD and press
    • This Activates the leg on the airway. Then, just simply fly the heading assigned by ATC until the CDI needle centers showing you are on the airway

Hold At Waypoint

The Garmin Perspective allows pilots to place a holding pattern at any waypoint that is in the Nav Database (or any user created waypoint).  Here’s how to do it.

  • On the Flight Plan page, highlight the Waypoint that you want to hold over and press Menu on the keypad
  • On the menu that pops up, highlight Hold At Waypoint and press Enter
  • On the next menu that pops up, input either the inbound or outbound course, right or left turns, leg time or distance, and the EFC time, then highlight Load and press Enter
  • You will see the hold now as a Waypoint in your flight plan

Garmin G1000 Updates

0 Comments

You have just received the keys of your shiny new (to you) airplane complete with a beautiful Garmin G1000 glass panel flight deck. Synthetic Vision, WAAS, and ADS-B are all installed. You are ready to cruise in high technology.

You turn on the PFD and MFD and notice one problem. All your databases are expired. No big deal, right? Your Garmin 530W was easy as pie to update with it’s single data card.

You start looking around and can’t find the data card. Then you notice that there are several SD cards in slots on the panels. SD cards won’t fit in your Blue Jepp Skybound card reader. Confusion sets in which quickly leads to full on panic.

What have you gotten yourself into?!

No need to fear, Texas Top Aviation is here to help with your Garmin G1000 database update confusion (and hopefully not panic).

Database Update Providers

First, you have to choose who to get your Garmin G1000 updates from. You have two options. One is Garmin (fly.garmin.com; always use either Firefox or Chrome to update, don’t use Safari). The other is Jeppesen.

Honestly, there is no difference between the data that each provides. If you had a 530 or 430 before, you used Jepp already. Just keep the Jepp account, call them, and have them get you set up for your Garmin G1000 updates.

If you didn’t have a Jepp account before, I would use Garmin, for a couple of reasons. You get multiple downloads in case you mess something up (Jepp NavData gives 1 download per month, while Safe Taxi, etc. you get 2-3). On Jepp, you have to call in and have them reset the account, which can be a pain if it’s after hours or a Saturday or Sunday.

The other problem with Jepp is since Boeing bought Jeppesen, I have found it extremely difficult to find online where to set up a new account and purchase databases. Yes, you can always call, but, again, problematic after hours or on a weekend.

The only problem with Fly Garmin for your Garmin G1000 updates is Garmin is constantly updating their program. You have to update their downloader quite often, which can be a bit frustrating.

I’m going to use Fly Garmin as my example.

What to Buy

Garmin gives you a couple of different bundle options for your Garmin G1000 updates, the OnePak and the PilotPak. The main difference between the two is the PilotPak includes approach charts that display on your PFD and the OnePak doesn’t. Therefore, the OnePak is about $200 cheaper.

Both include Navigation Data, SafeTaxi, Obstacles, Airport Directory, Terrain, and the BaseMap.

How to Update

Once you have followed all the instructions on Garmin’s website (or gotten Jeppesen set up), here is what to put on which SD card.

NOTE: YOU WILL NEED TO PURCHASE ONE OR TWO BLANK SD CARDS FOR THE NAVIGATION DATABASES. DO NOT PUT THE NAVIGATION DATA ON THE SD CARD THAT IS ALREADY IN THE TOP SLOT ON THE MFD. THAT IS FOR ENGINE DATA LOGGING ONLY. NO NAVIGATION DATA SHOULD EVER BE PUT THAT ON THAT CARD.

Bottom Card, PFD

  • SafeTaxi
  • Obstacles

Bottom Card, MFD

  • SafeTaxi
  • Obstacles
  • Airport Directory
  • Flite Charts

Top Card, PFD & MFD (This is the new blank SD card(s) you bought)

NOTE: REMOVE THE TOP SD CARD IN THE MFD THAT IS ALREADY IN THE SLOT AND DON’T PUT ANY DATABASE INFORMATION ON IT.

  • Navigation Data

Garmin G1000 NXi Users (or Cirrus Perspective + Users)

Ignore everything above and put all databases on the bottom card of the MFD. You have database sync, so you don’t have to mess with multiple cards. When you do an update though, go to the AUX chapter on the MFD and scroll down to the Databases page. Ensure that all dates match what you just put on the SD Card.


For you Jeppesen users, check out the new Bad Elf Wombat updater that works with the iPad JDM app for updates.