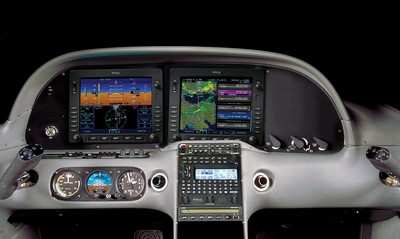
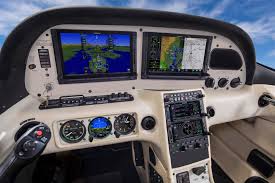
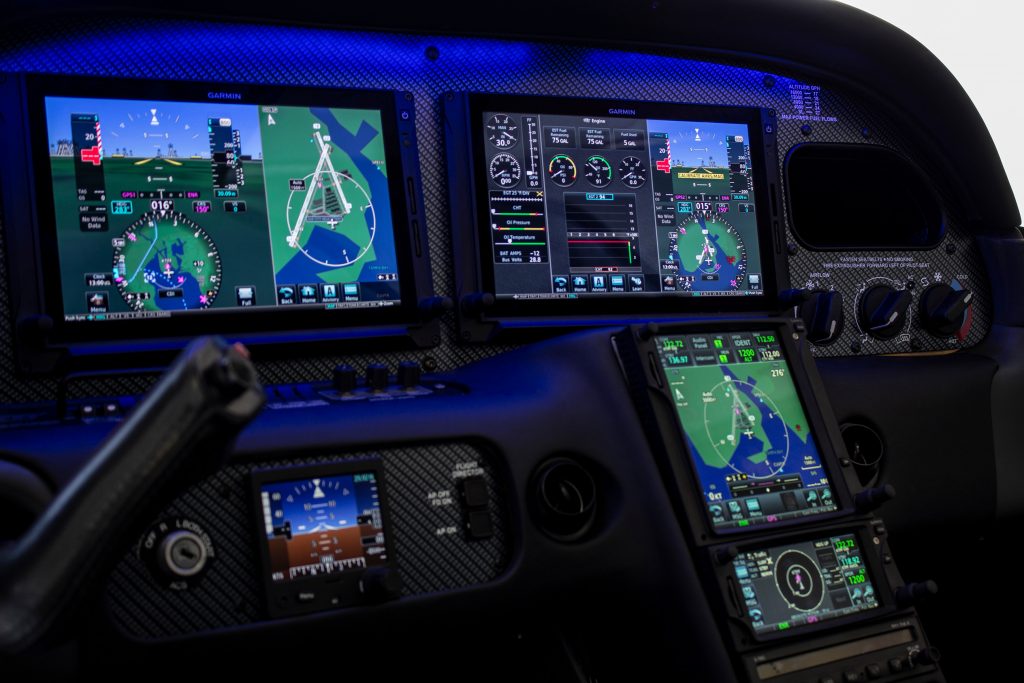
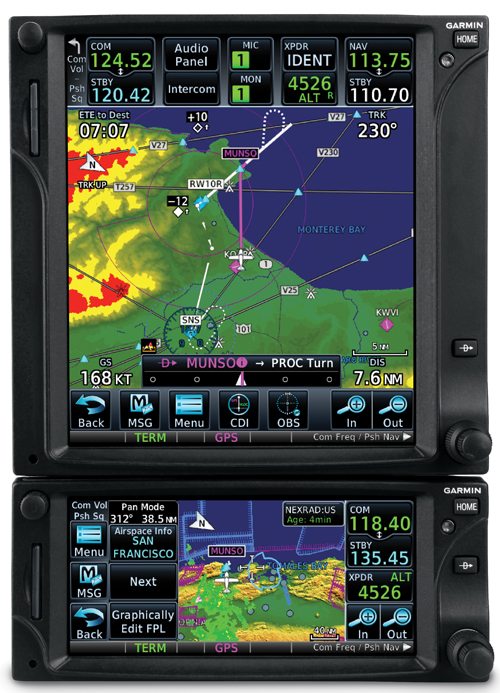
The Garmin Perspective and Perspective + are awesome pieces of equipment. There is so much a pilot can do with this system that it can sometimes get overwhelming. There are two very important features of the Garmin Perspective that all IFR pilots need to know, but are tricky to do if the correct buttons aren’t pushed.
The two features of the Garmin Perspective I want to focus on today are the “Load Airway” feature and the “Hold at Waypoint” feature. The “Load Airway” feature is especially handy when flying IFR long distances with several airways as part of the clearance. Here’s how to utilize both on the Garmin Perspective.
Load Airway
On your flight plan page, insert the waypoint where you will be joining the airway, or, if your clearance was radar vectors to join an airway, then insert the waypoint on the airway that begins the leg you will be joining on
Press the Menu key on the keypad
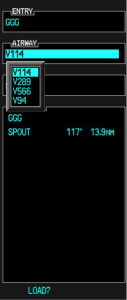
A menu will pop up. Scroll down to highlight Load Airway
Highlight the Airway you want from the next menu that pops up then press Enter
Then, a list of waypoints will display to exit the airway. Highlight the waypoint where you will be exiting the airway and Press Enter
The cursor will then move down to Load at the bottom of the menu. Press Enter to load the airway
The Airway and all the waypoints in between your entry and exit waypoints appear in your flight plan
If you are getting vectors to join the airway, you’ll need to use the Activate Leg function to activate the leg you will be joining the airway on
On the Flight Plan page, highlight the waypoint that ends the leg you want to activate
Look for the ACT LEG soft key on the lower right hand side of the MFD and press
This Activates the leg on the airway. Then, just simply fly the heading assigned by ATC until the CDI needle centers showing you are on the airway
Hold At Waypoint
The Garmin Perspective allows pilots to place a holding pattern at any waypoint that is in the Nav Database (or any user created waypoint). Here’s how to do it.
On the Flight Plan page, highlight the Waypoint that you want to hold over and press Menu on the keypad
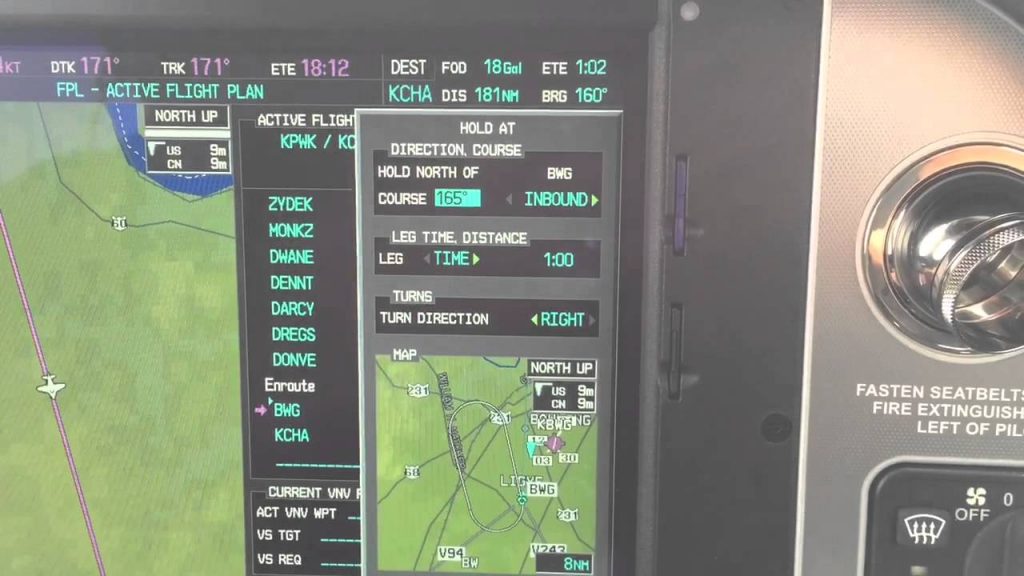
On the menu that pops up, highlight Hold At Waypoint and press Enter
On the next menu that pops up, input either the inbound or outbound course, right or left turns, leg time or distance, and the EFC time, then highlight Load and press Enter
You will see the hold now as a Waypoint in your flight plan
Yes, you heard correctly. Last fall, Cirrus released a program called Cirrus Embark. The Cirrus Embark program offers 3 Free Days of Training to new purchasers of used Cirrus aircraft. The 3 Days is equivalent to the Cirrus VFR Transition Training Course.
Previously, Cirrus offered free factory training to anyone who purchased a new Cirrus from the Cirrus factory. Now, anyone buying a used Cirrus gets the same offer through Cirrus Embark at their home airport with a local CSIP training provider.
IFR pilot? No problem. The Cirrus IFR Advanced Transition Training Course is 5 days in length, but the Cirrus Embark program covers the first 3, reducing the out of pocket pay to only 2 days.
11 years ago, in April of 2009, the Avidyne Corporation unveiled the much bally-hooed Release 9, or R9 as it is commonly known, as a hardware replacement for the Avidyne EX5000 Entegra system in Cirrus Aircraft. The Entegra system was way outdated by that point. Even though Avidyne was the first company to put together a glass PFD in a single engine piston airplane, the company had quickly fallen behind Garmin in keeping up with the ever changing technology landscape.
Rewind to 2008. Cirrus had been going strong with the Avidyne Entegra since the SR20 and SR22 went to full glass in 2003 (a PFD and an MFD; prior to that, Cirrus aircraft only had an MFD with steam gauges and a Sandel Electronic HSI). Cessna, on the other hand, vaulted past the Avidyne Entegra and went straight to the Garmin G1000 in it’s aircraft, starting in 2004 with the 182 G1000 and 2005 with the 172 G1000. Beechcraft and Columbia went to the G1000 (Columbia started with the Avidyne as well) in 2005.
Garmin’s technology in 2007 was so much better than Avidyne’s technology that Cirrus decided to switch. I’m sure there were many promises made by Avidyne to Cirrus about what Avidyne was working on (the R9), but the G1000 was out there, available, and being used in a lot of different airplanes with very good results.
So, in 2008, Cirrus made the switch from the Avidyne Entegra to the Garmin G1000, dubbing it the Cirrus Perspective by Garmin avionics package. Avidyne finally got the R9 to market in 2009, but by that time, Piper was the only airplane manufacturer left putting factory Avidyne panels in their airplanes, and they switched to G1000 later that year.
The R9 is a fabulous product. It’s fully integrated, has great graphics, has fully redundant displays, a QWERTY keypad (which, by the way, Garmin didn’t do for another 8 years), and a lot of other neat features. There’s a bit of a learning curve, but it’s a really good product for what it is.
Avidyne, though, was late to the game with their technology. By the time it debuted in 2009, all the GA aircraft manufacturers had long since switched to the Garmin G1000 and weren’t looking back. That left Avidyne with the retrofit market for the many different Avidyne Entegra Cirrus aircraft out there. The only problem was, the retrofit was $80,000 ($95,000 if you wanted to throw in the DFC 100 Autopilot, which is a must have) and not many owners were up for paying that much money, then or now.
To sum up our brief history lesson, Avidyne knew the Entegra needed to go, but couldn’t get the R9 out quickly enough to convince anyone to stick with Avidyne products. The retrofit market didn’t amount to many sales, so Avidyne doesn’t even make the R9 anymore.
As a side note, I really, really like the Avidyne R9 and am sad that it didn’t make it into more airplanes.
So, when the Avidyne Entegra starts to have issues, what’s an owner to do? Keep reading!
There is Hope
There are thousands of Cirrus aircraft out there flying with the Avidyne Entegra instrumentation, which is basically 20 year old technology (I’ve had a computer engineer tell me the programming in an Entegra is Windows 98 tech). These things are going to start having problems at some point (many already have), but what solution do owners have that is cost effective and get’s them new technology?
Remember that little company named Garmin? Well, they have come through again. Announced this summer, the Garmin G500 TXi is now certified as a replacement in the Cirrus Avidyne Entegra equipped aircraft. This means pulling out both the PFD and MFD and replacing them with the G500 TXi on both sides. Engine data is also displayed on the G500TXi MFD, including the percent power and TIT indications, if equipped.
Cirrus SR22 Equipped with Dual G500 TXi Screens and Dual Garmin GTN 650Xi GPS Units
The cost for the panel? Two 10.6″ G500 TXi’s run about $16,000 apiece for the units, not including labor. $32,000 for a brand new panel isn’t terrible. Plus, the G500 TXi’s work with the DFC90 autopilot if the Cirrus is already equipped with it. If not, the Garmin GFC 500 autopilot is now approved for the Cirrus at a relatively low price of $7,000, including the servos.
Still have the original Garmin 430s in your Cirrus? Upgraded to the Avidyne IFD 540/440 stack? Put in dual GTN 650Xi’s? Put in a GTN 750Xi? All are compatible with the G500 TXi panel.
Want to upgrade everything? It does get kind of pricey at that point, but for just equipment, the cost for a complete panel conversion is somewhere in the area of $65,000 plus labor, still below what the R9 cost, but not cheap either. That would include 2 G500 TXi’s, 2 GTN 650Xi’s, a GFC 500 Autopilot, and all the engine monitoring equipment that the G500 TXi would need.
Cirrus SR22 Equipped with Dual G500 TXi Screens, a GTN 750Xi, and a GTN 650Xi
Thankfully, some new technology has finally come to the Generation 1-3 Cirrus. Oh, and by the way, your steam gauge Cirrus is fully upgradable as well.
There are many different ways to upgrade an instrument panel. Putting in a 696 here, a JPI engine monitoring system there, even an Electronic HSI. But, if you want to swing for the fences and get a serious upgrade, you have to go for a complete glass instrument panel. For good measure, you might as well throw in a touch screen GPS while you are at it.
The Garmin G500
The Aspen EFD 2500
Which panel to go with? There are two mainstream options (Garmin and Aspen) and a handful of other companies that make glass panel replacements (Avidyne being one, King for a short period of time at the end of the last decade being another with the KFD 840). Around 2010, there were a lot of companies trying to get into the glass panel retrofit game, but many of the products didn’t gain a whole lot of popularity, leaving Garmin and Aspen at the top of the heap.
What about the touch screen GPS market? Garmin has this pretty much cornered as well, with Avidyne and King just getting into the game. The gap between Garmin’s GTN series and Avidyne and King is pretty wide.
The answer is pretty easy when it comes to the GPS (go with Garmin!), but not so easy when it comes to the panel. The G500 and the Aspen Evolution series are both excellent interfaces with strong reliability, so which one do you go with? Feature-wise, both have a lot of the same features: traffic, weather, terrain, synthetic vision, to name a few. The presentation for each feature is a little different between the two interfaces. It just depends on what you like better.
The nice thing about the Aspen system is you can go glass, but you have options on how much glass you want: 1 screen, 2 screens, or 3 screens? With the single screen PFD, you have all your instrumentation, traffic, weather, and optional synthetic vision. You don’t need the synthetic vision for the traffic and weather, as it shows up behind your HSI. It is an honest to goodness glass panel retrofit.
When you decide to upgrade to 2 screens, this is where Aspen has a leg up. The second screen is a completely redundant PFD and, if you get the 2 hour emergency backup battery installed, acts as the backup instrumentation to the main PFD. This means you can take out the old steam gauge standby instruments. This helps clean the panel up.
I personally don’t see the need for 3 screens, but maybe there is someone out there who needs it.
One selling point that Aspen has over Garmin is the wide variety of autopilots and GPS units that Aspen units are compatible with. The G500 is only compatible with King autopilots, it’s own GFC 700 autopilot (which would be a retrofit), some Collins autopilots, and the Century 21, 31, 41, and 2000. This does cover a wide array of autopilots, but it keeps some on the outside. Aspen, on the other hand, is compatible with most autopilots on the market.
Finally, let’s talk price. Going with an Aspen EFD 1000 PFD (this is the single screen Aspen) will run you somewhere in the area of $12,000. The price will vary based on the shop and the airplane. When you want to add a screen, it’s an additional $6,000. This is for the base, so if you want to add weather or synthetic vision, it’ll run you a little more.
The Garmin G500 comes in around $20,000, again depending on the shop and the airplane. The screens are bigger on the G500, which is kind of nice, and you are buying a Garmin product, which has a fabulous track record in the aviation industry.
Decisions, decisions. There really is no wrong answer here. Both are excellent products with very good track records. Both have really nice features and don’t hardly fail. Really, the choice comes down to what you want.
Need training on your upgraded GPS or glass panel retrofit? Contact Texas Top Aviation for thorough training on your new avionics today.
Looking for some good $100 Hamburger options in the state of Texas? Here are some other good fly-in eateries around Texas. These are ranked in no particular order because they are all just really good! Most of these are located on the airport property, but a few are in town and worth the drive!
Lockhart BBQ (50R): With 4 BBQ options in Lockhart (and City Market BBQ 10 minutes away in Luling), you can’t go wrong with a stop in Lockhart. Just grab the keys for the giant suburban, and away you go. Most folks who stop off in Lockhart will give it a legitimate claim over Hard 8 in Stephenville.
Angelina County Airport Restaurant (KLFK): This is pure East Texas eating here in Lufkin. With greasy, tasty burgers and sandwiches, breakfast, and ladies who call you “Sugar” when taking your order, this is down home if I ever tasted it. Lufkin and Brenham are currently neck and neck for the best Texas burger.
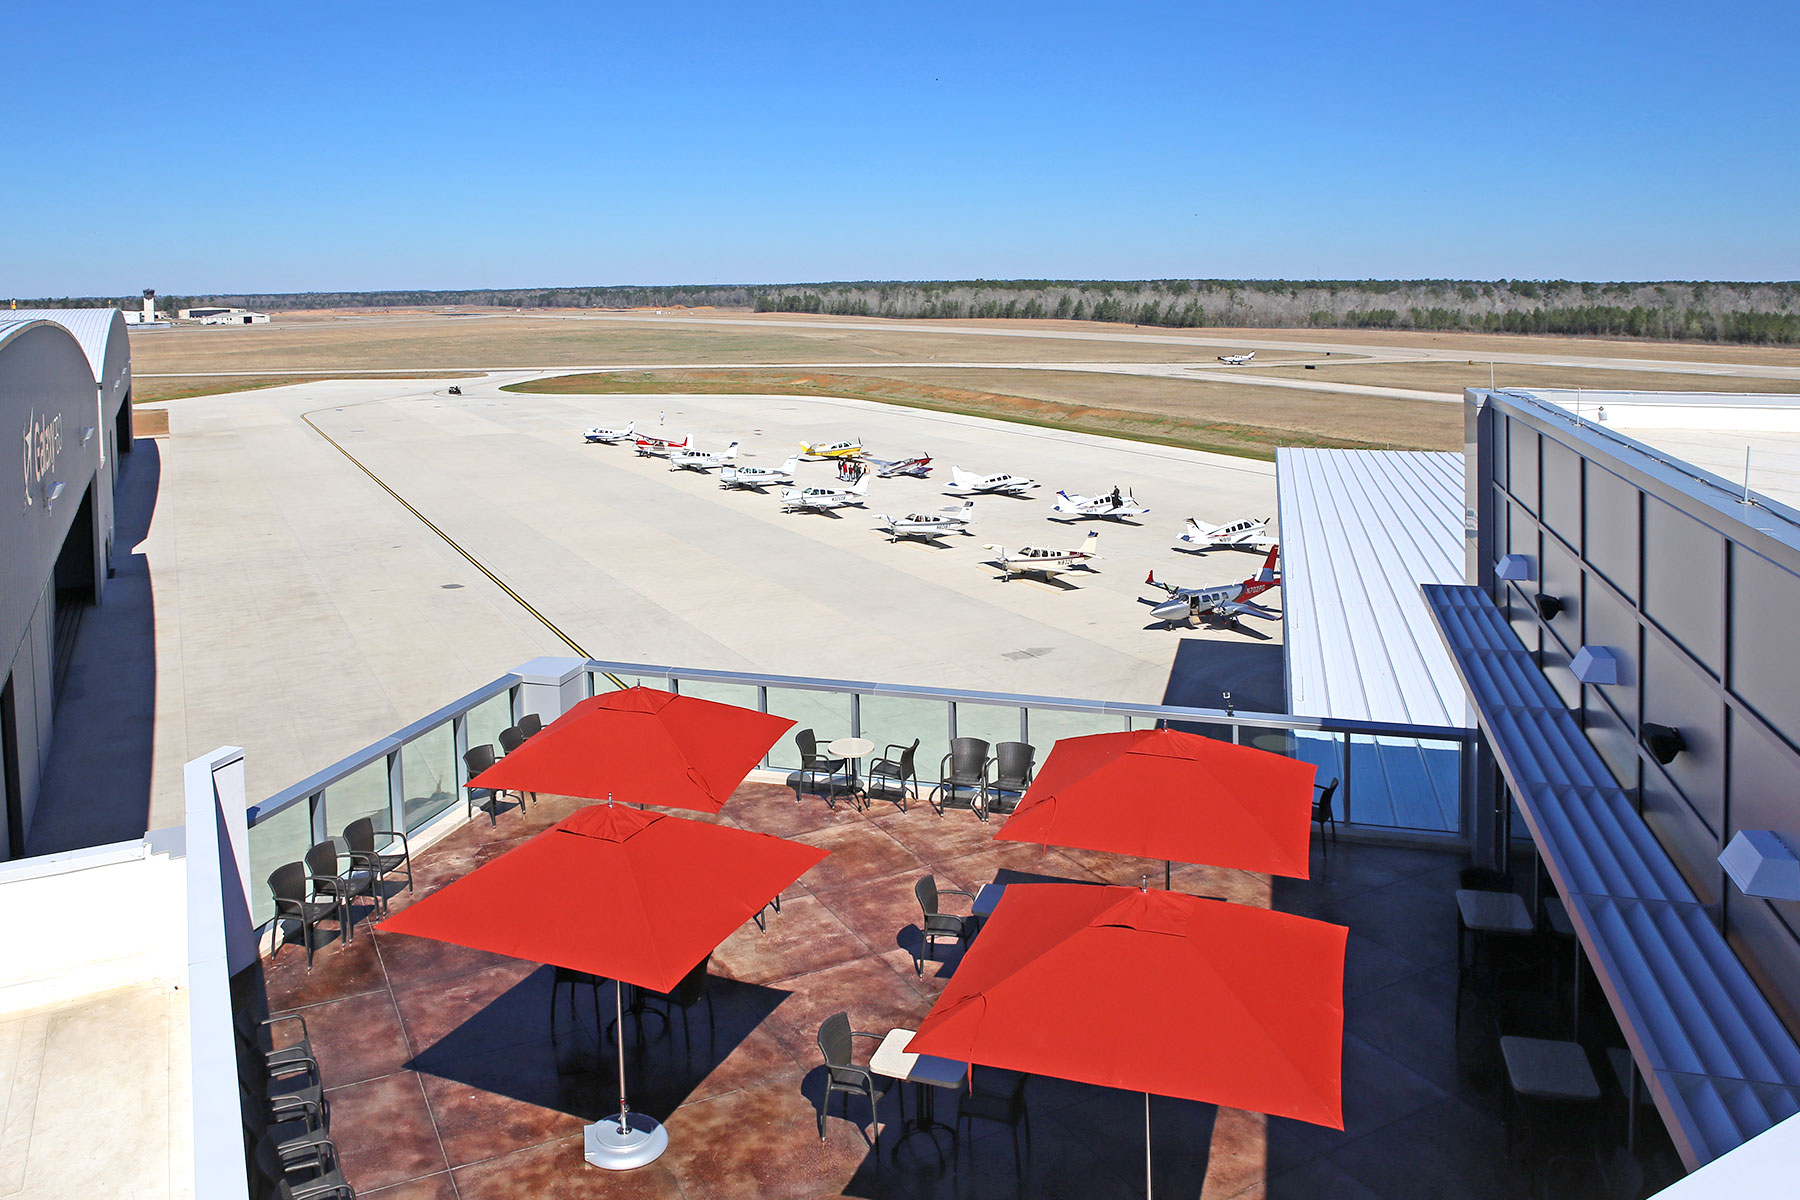
Black Walnut Cafe (KCXO): This airport diner, located at the Galaxy FBO in Conroe on the north side of Houston, is top notch. The food is excellent (I have eaten several different sandwiches and have not been disappointed) and you can’t beat the 3rd floor runway view from the patio. Not a bad place to spend the lunch hour, though make sure you get there before the lunch hour. It fills up quick.
Airport Diner (T82): Right next to the Hangar Hotel, the Airport Diner in Fredericksburg brings back memories of the old soda fountains of the ’40s and ’50s. With plates like the Warthog (their sausage sandwich with Fredericksburg made sausage) and the Whirly Bird (their chicken tenders wrap), the Airport Diner fully embraces the airport theme. Better to stop for lunch on a weekday rather than a weekend as their isn’t a whole ton of seating. Check your NOTAMs as the restaurant is closed on Mondays and Tuesdays.
Radial Engine Cafe (KGPM): A good little stop in the Dallas area for a simple burger, fries, and a Coke. Don’t get the smaller 17/35 runway at GPM confused with the much larger 16/34 runway at GKY just to the west. Approaching from the south, this can be easily done.
Clear Springs Restaurant (KBAZ): Come for the onion rings, stay for the fish. Clear Springs is just a 5 minute drive from the airport and there are always plenty of crew cars available. You could probably make a whole meal out of the onion rings themselves, but the fish is top notch too.
Gate 12 (KCLL): The College Station Airport now has the 12th Man! Aggie Fans will appreciate the Gate 12 experience with all the Texas A&M decorations scattered throughout the restaurant. Bring an appetite if you want to tackle the burgers. They are huge! Parking is only at the FBO. Only military planes get to park in front of the restaurant.
Cooper’s BBQ (KAQO): Llano, TX is known for BBQ. Just fly in to the airport, get a car, and after a 10 minute drive, you can take your pick of any kind of BBQ under the sun. Careful, as it’s easy to over order!
Hangar 6 Restaurant (KUVA): The newest restaurant on the list, located on the ramp at the Uvalde Airport, Hangar 6 tips it’s hat to the military history of the Uvalde airport while serving really good food. Taxi in and walk up to the quaint little joint. They even have a playground for the kids!
Sky Restaurant (KVCT): Not quite within walking distance, but just a short drive from the FBO, Sky Restaurant specializes on the seafood, but they also have good burgers and steaks. VCT is popular amongst the Air Force and Navy trainers in the area, especially around lunch!
Runway Cafe (KLBX): The best place I have found for seafood along the Texas Gulf Coast. With a huge runway to land on and a beautiful FBO next door, this is my go to for Fried Shrimp when I’m in the Houston area.
Delta Charlie’s (KRBD): With quite an extensive menu (and a full bar for those overnight trips), I will definitely make RBD one of my routine stops. Dallas Jet Center recently opened in the terminal, so fueling your stomach and your plane can all be done in one spot.
The Red Baron Restaurant (KDHT): The Panhandle of Texas hides many surprises and the Red Baron restaurant in Dalhart, TX is no exception. For those early morning flights, The Red Baron makes a solid breakfast and a mean cup of coffee. Lunch satisfies even the hungriest pilot. Dalhart has a very spiffy modern FBO to sleep away that burger and fries until your passengers show back up too.
Hogg’s BBQ (KDUX): I came hungry and I left very happy. Hogg’s makes some good West Texas BBQ. Huge helpings and an aviation themed dining room makes for a good choice. Restaurant is located just behind the terminal building. I was there for dinner and it wasn’t too crowded, but I bet lunch is hoppin’!
Aviator’s Grill (KDWH): Located in the Gill Aviation, FBO, Aviator’s Grill has a great selection of creative sandwiches. Hooks can be a little tricky to navigate while taxiing, but just tell ground you are going to Gill, and they will direct you to lunch.
Bill’s Burgers (KBMQ): A short drive from the airport in the Burnet FBO’s new courtesy van deposits you at Bill’s Burgers, the largest burger this side of the Mississippi. Always a popular lunch spot, especially on weekends, hitting lunch early or late is a good plan. Don’t get a full order of fries unless you want to share. It’s huge! Closed on Mondays.
In my book, these are the other great places to stop on a flight in Texas. Always make sure to come hungry! I probably missed a few along the way, so please feel free to add others to the list!
Note: Some of the above restaurants are either closed for COVID, or are only doing takeout. Make sure you call before hand. Google doesn’t always have updated information.
From the time I started flying, I have always had the dream to learn how to fly a seaplane. As I learned in November, it’s actually learning to land a seaplane, and the veterans call them floatplanes.
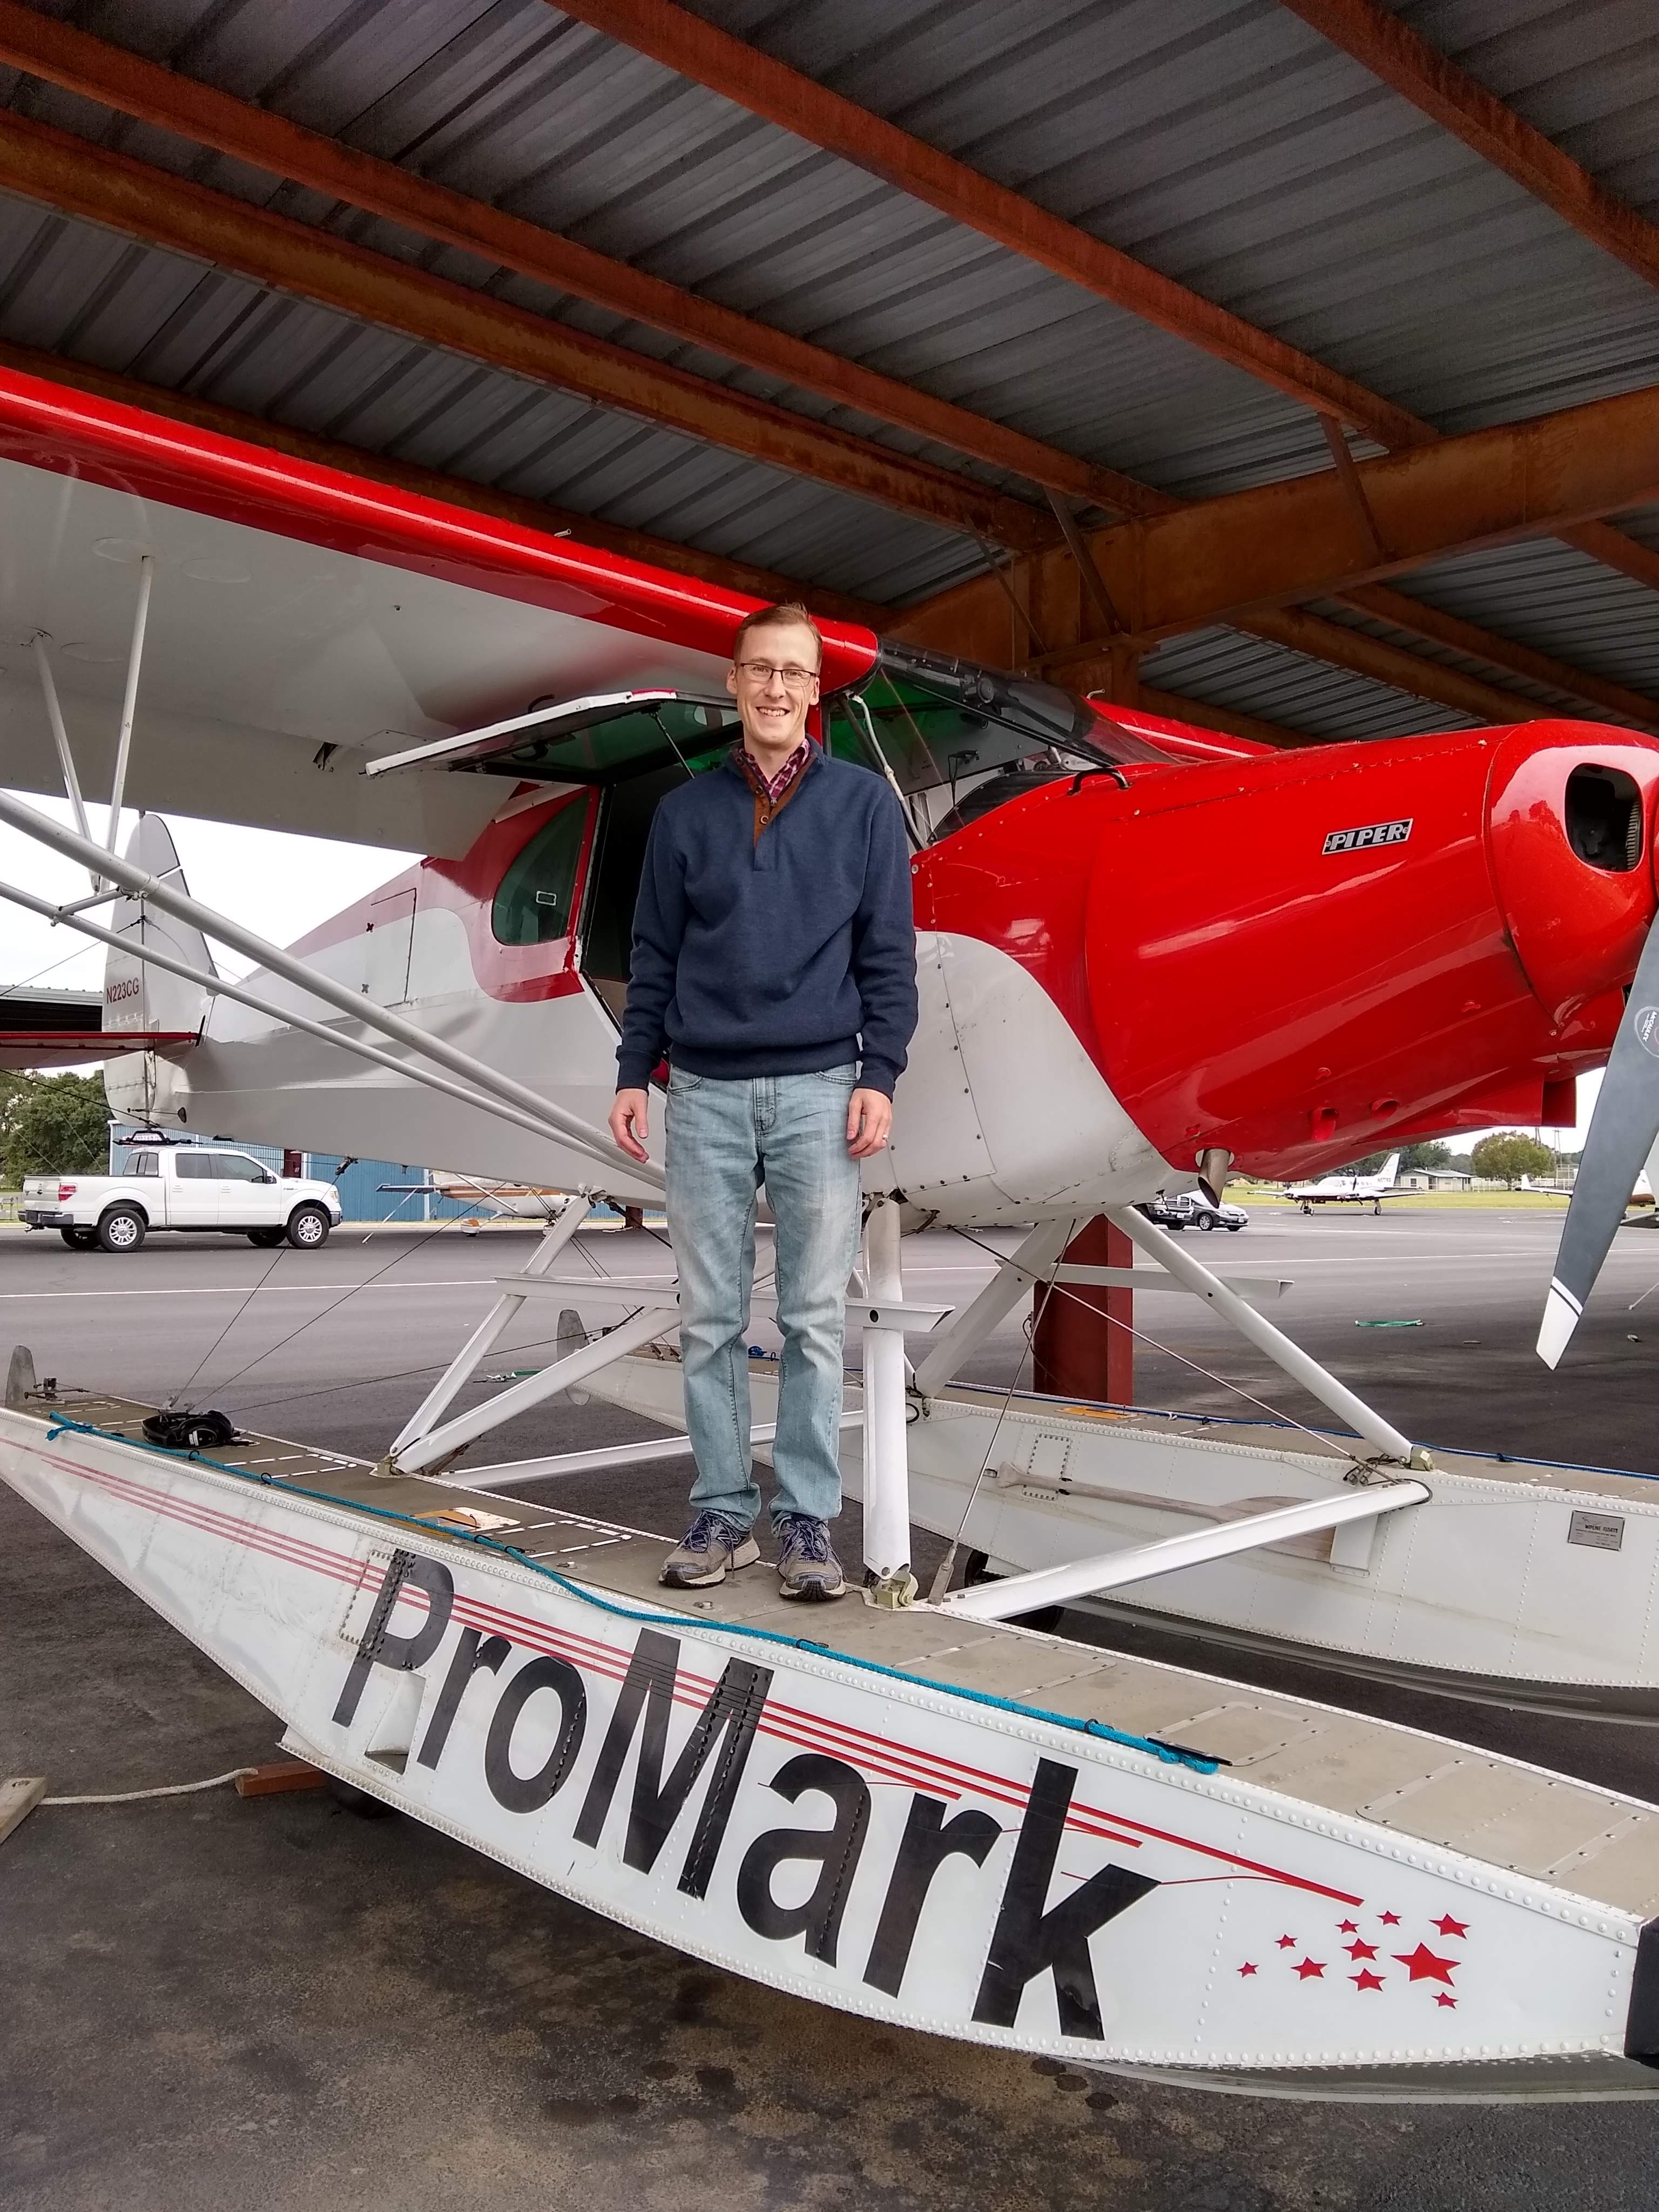
ProMark Aviation at the Burnet Airport (KBMQ) offers a weekend float plane course that is high on fun and low on stress. The school has a Piper PA12 Super Cruiser on amphibious floats (amphibs as I was corrected at one point. I mean, if you’re going to fly a seaplane, er, floatplane, you have to know the lingo) that will land and takeoff on water, but does little else with ease and grace. At 150 HP with those big floats and all the associated rigging hanging underneath the airplane, you are lucky to get to 500 feet before you get to your destination.
We weren’t working on setting any speed records. I was learning the lay of the water. I learned about the step, the keel, pumping the floats, how to read the water, currents, ducks (yes, ducks and birds are important to know about when you are flying low on the water), buoys, docking, and ditching. Step taxiing was fun as you are basically at 3/4 throttle screaming across the top of the water just below flying speed. It’s the best way to taxi a seaplane (truly, it is. You get more air in your engine, you can see better, and you are moving. Just don’t try and turn sharp).
Floatplanes also don’t have any shock absorbers, so the higher the wave, the more you get knocked around, so wind velocity and, in turn, wave height is very important.
A very important nuance of an amphibious floatplane compared to a straight floatplane (one that doesn’t have wheels that come out of the floats), is at one point, you want to make sure your gear is down for landing (runway landing) and at another, you want to make absolutely sure your gear is up for landing (water landing). If you land wheels down in the water, you will capsize, 100% of the time. Thankfully from my good instruction, I did not capsize.
Ken Wittekiend, my instructor, and I spent the majority of the weekend landing and taking off on Lake Buchanan (I was informed by locals it is pronounced “Buk-cannon”, not “Bue-cannon”), which is more open and therefore has more waves. We did one landing on Inks Lake so my kids could see me land, which they thought was the best thing since cheese sticks.
There is a check ride at the end of the training, but, as Ken reassured me, it’s the most fun check ride you’ll ever have. I still hate check rides, but that one I think I hated least of all.
I hope someday I can put my floatplane skills to practice, but for now, I can vouch that I now speak seaplane!
Austin Executive Airport opened a control tower on Friday, February 23rd 2018. The airport is now officially Class D airspace. The charts and A/FD are not updated yet to reflect the tower, but there is a NOTAM with the tower and ground frequency information. The tower hours are from 6am to 10pm. The weather frequency remains the same.
Make sure you check those NOTAMs if you are headed to KEDC anytime soon!