| | |

Flying WAAS GPS Approaches

When flying a WAAS GPS approach, there are several different levels of WAAS signal that a GPS receiver can get. The most precise is an LPV signal. LPV stands for Localizer Performance with Vertical guidance. An LPV approach has the lowest minimums of all the WAAS GPS approaches, typically in the range of 200-300 feet AGL. A GPS glide path (GP) is guaranteed with an LPV approach and the minimum altitude is a decision altitude (DA).

Just like a localizer, an LPV course width get’s tighter and the CDI becomes more sensitive the closer the plane get’s to the runway. Even though the LPV approach minimums are so low and the approach is down to a DA, they still aren’t considered precision approaches by the FAA (which leads to some extra planning when selecting an airport as an alternate that only has GPS approaches, since the AIM specifies only the LNAV minimum are to be considered if an alternate airport only has GPS approaches, bringing the 800 foot ceiling requirement to bear)

An LNAV/VNAV approach is still a WAAS approach that has a GPS glidepath, but is slightly different than an LPV approach. An LNAV/VNAV final approach course does not get more sensitive the closer the plane gets to the runway. The smallest course width on an LNAV/VNAV approach is 0.3 miles either side of center. LNAV/VNAV approaches will, most of the time, have higher minimums than LPV approaches and can have minimums no lower than 250′ AGL.
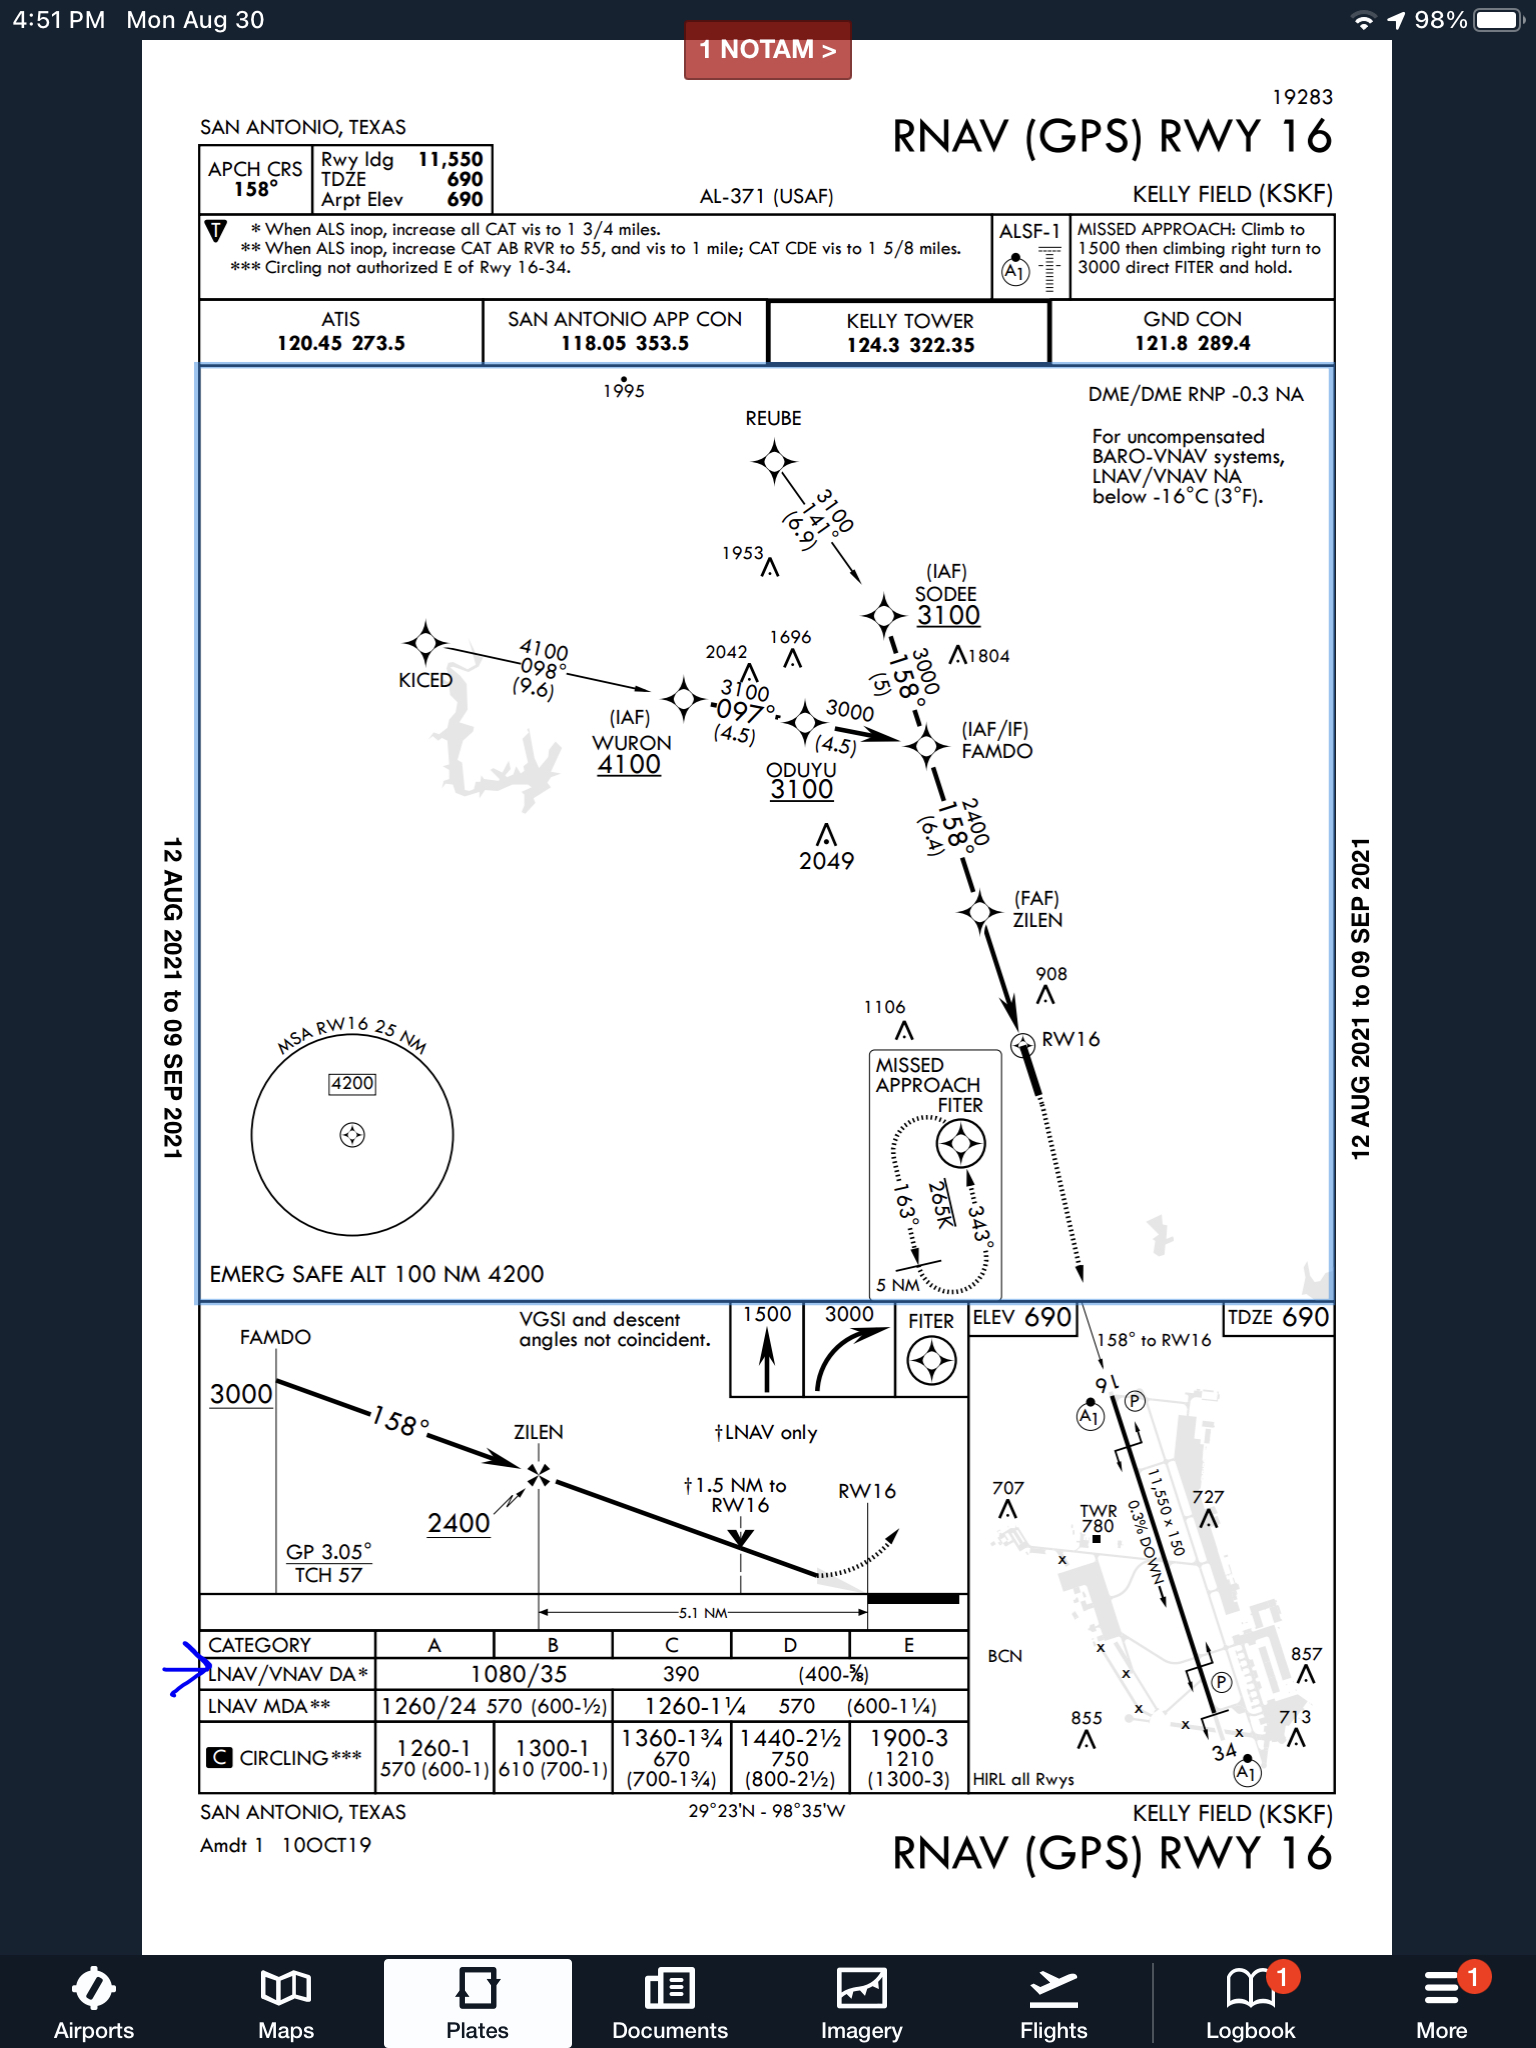
The third type of WAAS approach is strictly a non-precision approach with a Minimum Descent Altitude (MDA). These are designated LP approaches, which stands for Localizer Performance. These are like old school Localizer only approaches that, similar to the lateral portion of an LPV approach, the course width tightens the closer to the runway that a pilot is. There is no glide path by definition of an LP approach, though there is a caveat.

Now, by looking at an approach plate that is a WAAS approach, but only has LP minimums listed, a pilot would assume there would be no glide path. Depending on what type of GPS unit the airplane has, that pilot could be wrong. Garmin Perspective units (Cirrus G1000), all GTN 750s and GTN 650s, All G1000 NXi units, most Garmin 430W and 530W, and all Avidyne IFD 550/540 and 440 units will display an advisory glide path on an LP approach, designated LP+V.
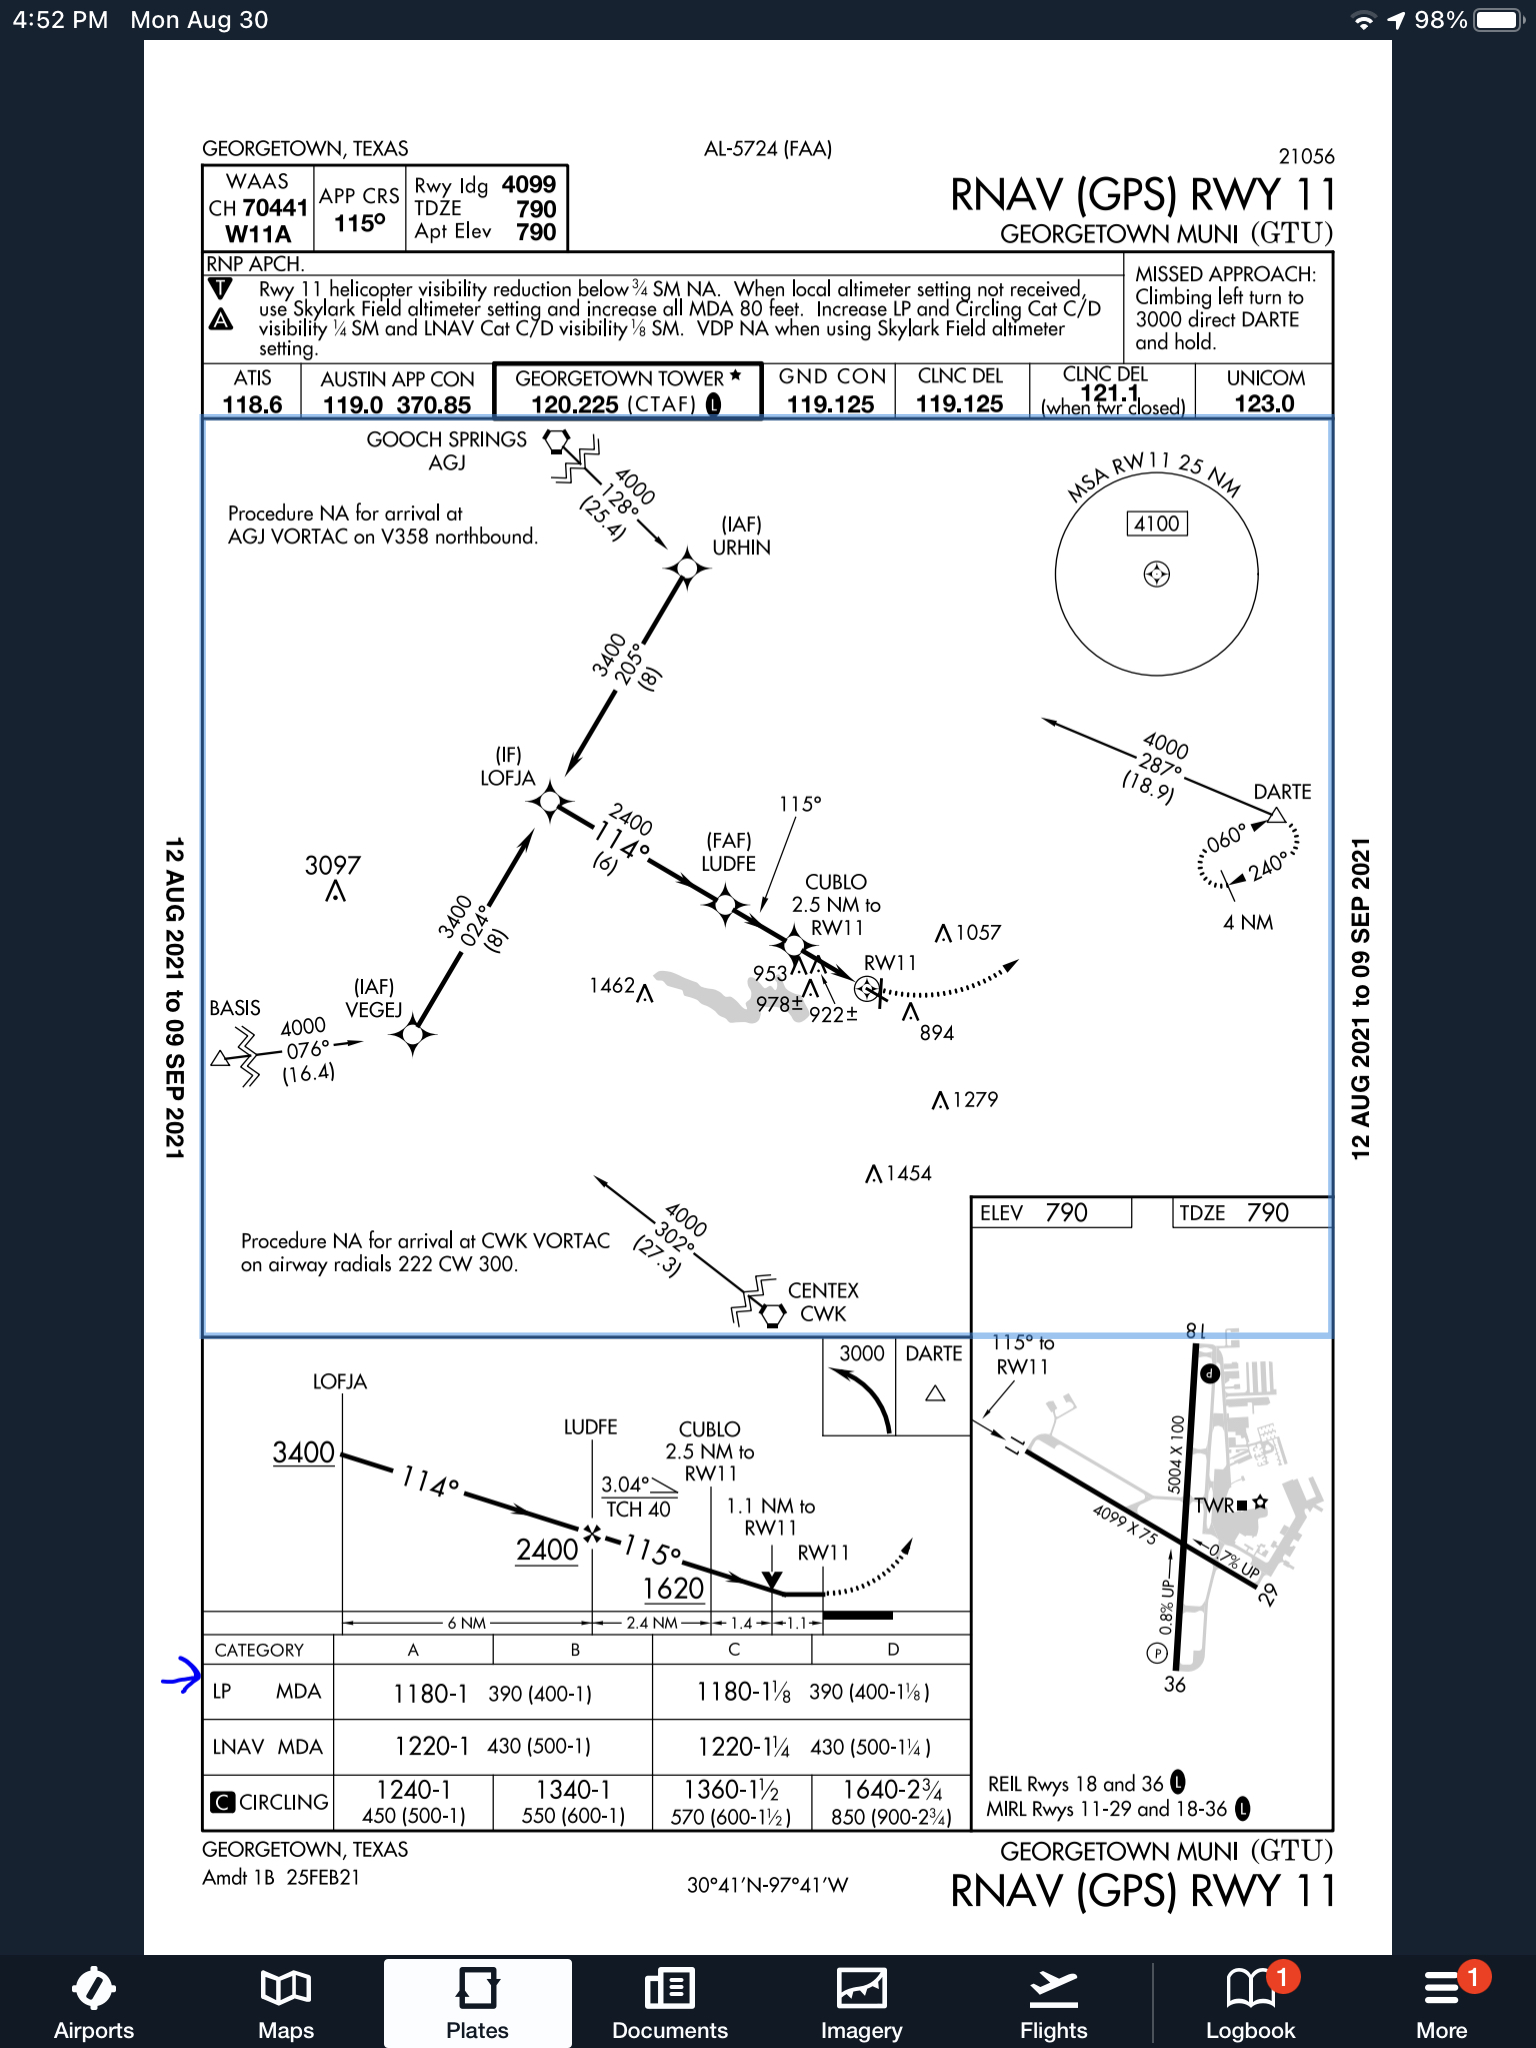
What does LP+V indicate? An advisory glide path is just advisory, but it is totally legal to follow down on a non-precision LP approach. The kicker is obstacle clearance is not guaranteed and the pilot needs to keep an eye on minimum altitudes at the different waypoints on the approach. The big thing I tell people is, when you arrive at the MDA and the runway is in sight, following the advisory glide path below the MDA could get you in trouble with obstacles. Don’t just hone in on your instruments when you break out of the clouds. Look out the windscreen and make sure you won’t hit anything.

If you arrive at the MDA on the advisory glide path and the runway isn’t in sight, DON’T GO BELOW THE MDA! Most autopilots won’t level off at the MDA, even if that altitude is set in the altitude pre-select, so this will involve turning off the autopilot before the MDA and manually leveling off, or engaging the altitude mode of your autopilot at the MDA.

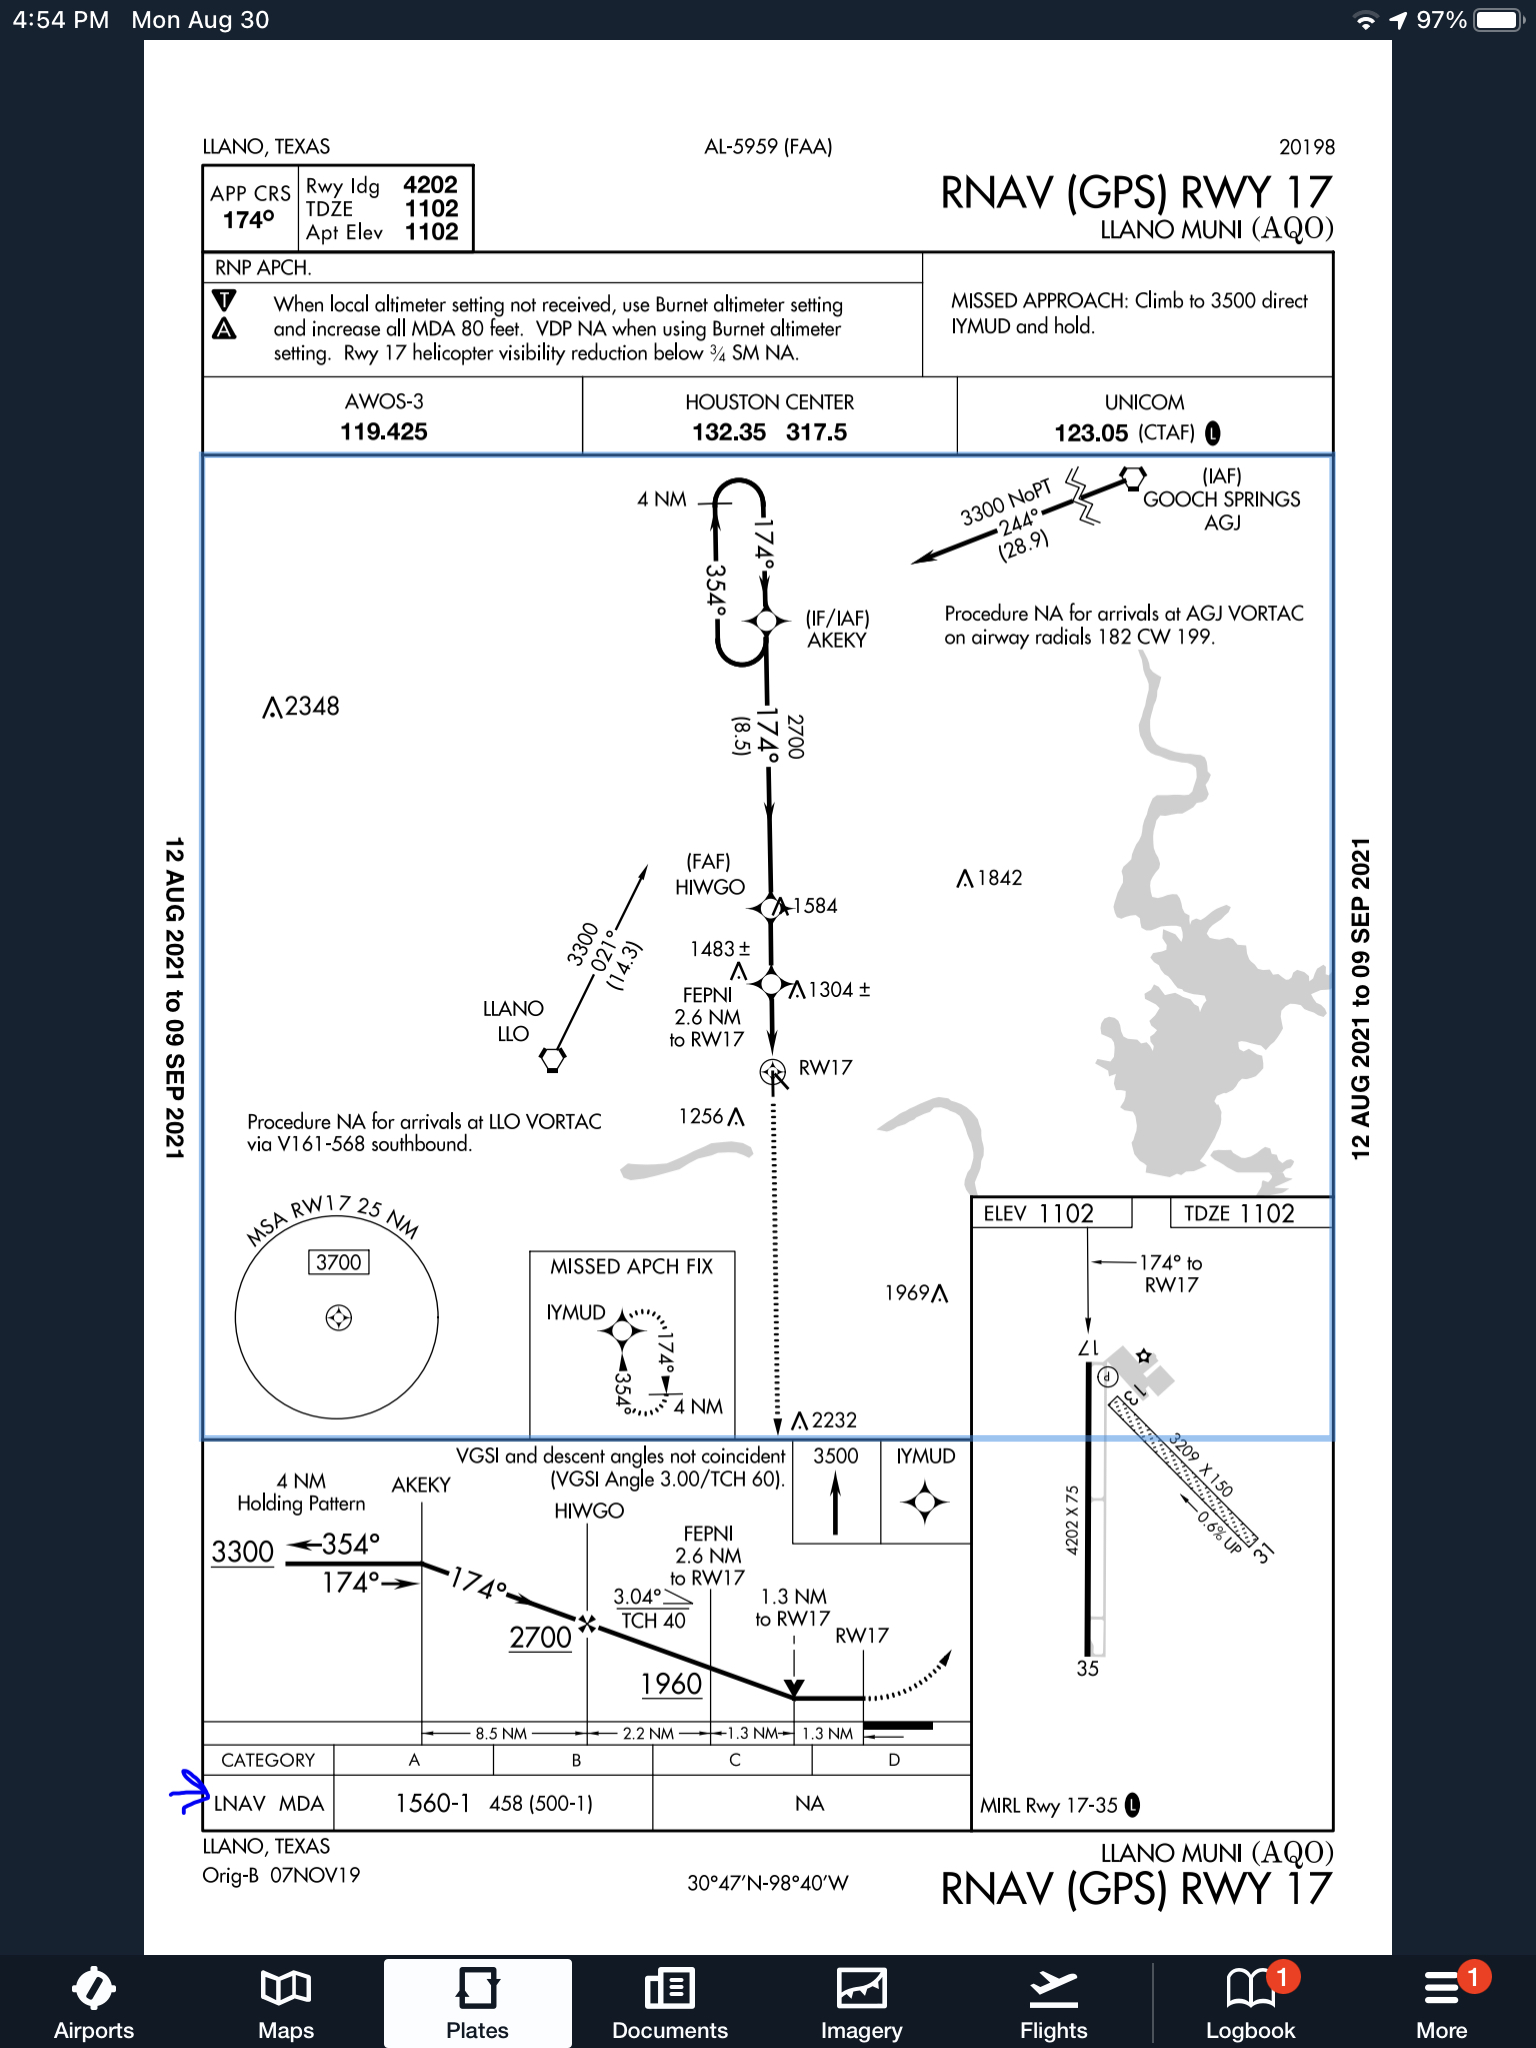
One other type of GPS approach that you will encounter is an LNAV approach. This is a non-WAAS approach down to an MDA, but your GPS unit may still give you a +V. Most modern ones will.
Similar Posts

  • Selecting the Proper Altitude

    One of the first questions a student pilot asks me when starting the cross country portion of his or her training is, how do I know what altitude is best for my flight?  This is a good question, because without taking certain aspects of the flight into account, it’s really just a crap shoot when selecting an altitude.  Craps and flying don’t mix, so let’s take a look at a few considerations when selecting an altitude.

    Sky Coverage

    Sky coverage has several subcategories when it comes to selecting an altitude.  First is how high are the bases?  Is it IFR (VFR pilots would be grounded), marginal VFR (1,000 AGL to 3,000 AGL ceiling), or good VFR (above 3,000 AGL ceiling)?  If the cloud deck is only 2,500 feet off the ground, then VFR pilots are limited to either 1,000 AGL to 2,000 AGL.  This is an excellent segue into why VFR pilots shouldn’t scud run!

    Scattered Clouds

    Second, what kind of cloud deck is it?  Is it an actual ceiling (broken or overcast), or is it a scattered layer?  Few or scattered layers usually allow VFR pilots to find a hole to get higher to some smoother air, making the flight more pleasant.  VFR pilots, always make sure to check the destination weather as it could be scattered where you are departing from, but it might be broken or overcast where you are arriving.

    Last, how high are the tops of the clouds?  Pilots can only get this information in the planning stage from the area forecast or from pilot reports, so most of the time, it’s not very precise information.  If the tops are at 10,000 feet and the pilot is flying a 172 on a 30 mile trip, it doesn’t make much sense to get on top of the clouds.

    Terrain and Obstacles

    Terrain goes hand in hand with sky coverage.  If there are low clouds and high terrain, that doesn’t bode well for trying to stay VFR and not hitting anything.  Obstacles need to be taken into account too, as there are some pretty tall radio towers that can stretch up into a 1,500-2,000 AGL deck of clouds.

    Winds Aloft

    Winds Aloft

    Once the sky coverage and terrain have been considered, it’s time to look at the winds aloft.  Tailwinds are preferred, but, sometimes, a headwind is the only option.  After taking the clouds and terrain into account, this narrows down your altitude to a handful of options.  The winds aloft will further narrow it down.

    Aircraft Performance

    Once you have two or three altitudes in mind, taking a look at the performance charts for your airplane will help nail down that final altitude.  Pull out the POH, compare fuel burn and cruise speed, and you’ll have your altitude selected.

  • Landing Light Replacement

    One evening this summer, my wife and I were flying down the southern shore of Long Island in my father’s E33 Bonanza. We enjoyed the sunset as we flew westbound and our plan was to fly the New York Hudson corridor, where we would arrive just after dark. As we approached New York’s airspace, two voices in my head started having a debate.

    The first voice said: “You should turn on your landing light when you get to New York to make the airplane more visible.”

    The other voice said: “That’s true, but I bet you’ll burn the landing light out”

    Well, as it turned out, both voices were right. My landing light fired right up when I needed it to fly the Hudson, but when it came time to land back home I had no such luck. Unfortunately, this was not the first time that I had been given the chance to practice my blackout landings. This Bonanza model has only one landing/ taxi light which is mounted in the lower cowling behind the propeller. This location is less than ideal because the filament in the bulb is fragile and can be damaged by engine vibration.

    We landed uneventfully and after putting the airplane away, I decided it was time to look into upgrading the lighting to something a little more modern. I was unsure of my options, but seeing as the airplane needed a replacement bulb regardless, it seemed like a good opportunity to make a change.

    After doing a little reading, I learned that HID or LED landing lights would be the best solution to my problem. I was familiar with LED aircraft lights, but had never heard of HID before.

    Here is what I learned:

    HID Landing Lights

    HID, or High Intensity Discharge landing lights, create light by arcing electricity through a sealed gas capsule. They are brighter than LED and traditional incandescent, and the light created more closely resembles the look and feel of sunlight. HID installations require a ballast to carefully regulate the flow of electricity to the gas capsule and also require a “warm up” period after being turned on in order to reach their full brightness.

    Fitting an aircraft with HID landing lights tends to be more expensive and time consuming than installing an LED light and would likely require involvement by an A&P/ IA. However, if you want the brightest light available, HID is probably the best bet.

    Pros

    • Brighter, more natural looking light
    • Draws less power than standard bulbs
    • Long bulb life
    • Does not generate much heat

    Cons

    • More expensive than other lighting options
    • Lights must “warm up” after being turned on
    • Cannot be pulsed easily
    • Cost/complexity of installations

    LED Landing Lights

    LED, or Light Emitting Diode landing lights, have no filament and work by moving electricity through diodes which are connected into a circuit. These lights have become very popular for many uses due to their simplicity, low cost, and brightness.

    While not as bright as HID light, the LED lights require no “warm up period” and can be easily pulsed. LED lights draw much less power from the aircraft’s electrical system than traditional bulbs and boast incredible life length. LED bulb installation is very simple and can often serve as a direct replacement for the original lights.

    Pros

    • Instant light (no warm up)
    • Incredible life length (>5,000 hours)
    • Low Cost
    • Simplicity of installation
    • Can be pulsed easily
    • Low power draw

    Cons

    • Not as bright as HID lighting


    After weighing the options, I decided to replace the incandescent bulb in the Bonanza with an LED bulb. I read the reviews online and talked to some of my friends who work in aviation and eventually decided on the Lycoming Alphabeam. The Alphabeam is FAA/PMA approved and is available through Aircraft Spruce and other aviation parts vendors. The bulb cost around 250-300 dollars and I was able to install it as a direct replacement for our old light. All I had to do was take the old one out, put the new one in, and make a logbook entry.

    Below are some pictures of the installation:

    Last weekend I finally had an opportunity to take the airplane out after dark and see how the new light compared to the old one. I am pleased to say that it did a wonderful job and exceeded my expectations.

    If you are interested in seeing a side by side comparison of the different lighting options, a quick Google search should provide what you are looking for. In my own experience, I would say that the LED light was brighter than the old light and did a very good job illuminating the taxiway and runway. It was extremely nice not to be concerned that my light wouldn’t work as I was setting up for landing at an unfamiliar field after dark. I also enjoyed feeling that I had the option to leave it on during climb and cruise in order to increase my visibility to other aircraft.

    Many models of aircraft have multiple landing/ taxi lights installed which greatly reduces the likelihood of having to land without one. In our case, spending the extra money to upgrade to the LED bulb made sense because of the desire for increased reliability. If you are looking for a relatively inexpensive way to upgrade your airplane, LED or HID lighting may be something to consider.

    Andrew Robinson is a 135 Charter Pilot and flight instructor who lives with his wife and 2 daughters in Pennsylvania.  He flies Pilatus PC-12s and instructs in Beechcraft Bonanzas.

  • Inadvertent IMC Entry

    I ran across the story about the Korean Air flight that crashed in Guam in the late ’90s the other day.  It was a 747 that hit the side of hill about 3 miles short of the runway, killing most of the people on board.  The flight was at night (arrival time was about 1:30am) and the pilot’s lost sight of the runway on a visual approach due to inadvertent IMC entry.  They didn’t execute a missed approach soon enough, got too low, and crashed.

    Korean Air Crash

    These were experienced pilots, mind you, who had flown into that airport a number of times. They were experienced enough to know when to execute a go around.  There were several other factors that led up to the crash, but, ultimately, they lost sight of the runway due to inadvertent IMC entry.

    To all the VFR pilots out there, what do you do if you accidentally fly into a cloud?  It’s a lot easier to encounter inadvertent IMC at night, simply because you can’t see the clouds in front of you.  It is no less dangerous during the day, either.

    So, we’re going back to the basics today.  What really is the best course of action for a VFR pilot when flying into a cloud?  One option (and in my opinion, the best option) is to turn around. Immediately start scanning your instruments, execute a shallow banked 180 degree turn while maintaining altitude, and fly out of the cloud you just flew into.  If you have an autopilot, turn it on immediately and let it do the turn.

    What if you were descending or climbing when you encountered the inadvertent IMC?  In this case, just reverse whatever you were just doing.  If you were descending, climb.  If you were climbing, descend.  Caution is needed, though, as climbing or descending when flying on instruments for an inexperienced IFR pilot could lead to a greater chance of disorientation.

    One thing that could assist in spotting those clouds at night is turning the cockpit lights down.  This will allow you to see outside a little bit better and start to notice when those ground lights are disappearing.

    IMC FlightMost VFR pilots only do instrument flying on flight reviews.  That doesn’t lead to a very high level of proficiency, so go out and grab your instructor and tell him to put you under the hood once a month.  You’ll be a better pilot overall for it.

    IFR pilots, taking a note from the Korean Air flight; if you lose sight of the runway on a visual approach, especially at night, go missed and ask for the instrument approach procedure.  Don’t try and duck down below the clouds as there may be a hill or a mountain directly below you.

  • Checking The Stall Warning Horn

    When a pilot first glances at the title of this article, the first thought that probably goes through that pilot’s head is, well that’s easy.

    And it is, if you are flying a high wing Cessna. On other airplanes, there are a few tricks to checking the stall warning horn. If you get them wrong, you’re liable to get a bill from your maintenance shop for an hour of labor for a problem they couldn’t duplicate.

    Cirrus SR22

    Let’s start with the Cirrus. On the pre-FIKI Cirrus aircraft, there was a small little hole in the wing that contained a diaphragm. That diaphragm sensed a change in airflow at a certain angle of attack just below the critical angle of attack and set off the stall warning horn. Unfortunately, the only way to check that is to suck on the hole during pre-flight.

    I don’t. I verify the hole is clear and that’s about it.

    On the FIKI Cirrus aircraft, there is actually a stall warning vane. It looks like a high wing Cessna vane, but if you turn the batteries on and try and get it to come on during your light and pitot heat check, nada.

    Here’s the trick, and the checklist doesn’t do a good job of describing this.

    • Turn on the Avionics Master
    • Turn on the speaker
    • Put the flaps to full
    • Then move the stall warning vane and you’ll hear the horn

    The speaker and the Avionics Master are so you can actually hear the horn (if you had the headset on while you were doing this, the speaker would be unnecessary). The flaps have to be full because the pitch attitude for the critical angle of attack is lower with the flaps down, so the horn goes off when at a different angle. You then don’t have to use as much force to push the vane.

    Piper PA46

    The early -310P Malibus are pretty simple and straight forward. Move the vane, get the horn.

    In the -350P, you can’t get the horn to come on by moving the vane. So, Piper put a stall test button that’s hidden underneath the upper left side of the instrument panel. Push that to test the horn. On the G1000 PA46, it is located directly above the PFD. On the Avidyne, it’s below and to the left of the pilot’s yoke.


    Testing the stall warning horn is a very important part of pre-flight. A pilot needs to know if the aircraft is close to a stall. The advent of Angle of Attack indicators in small, GA aircraft, have added a greater awareness to the angle of attack during all phases of flight to avoid those stall spins.

    If the stall warning horn goes off or the AOA shows yellow, lower that nose immediately.

  • Cirrus Electrical System Health

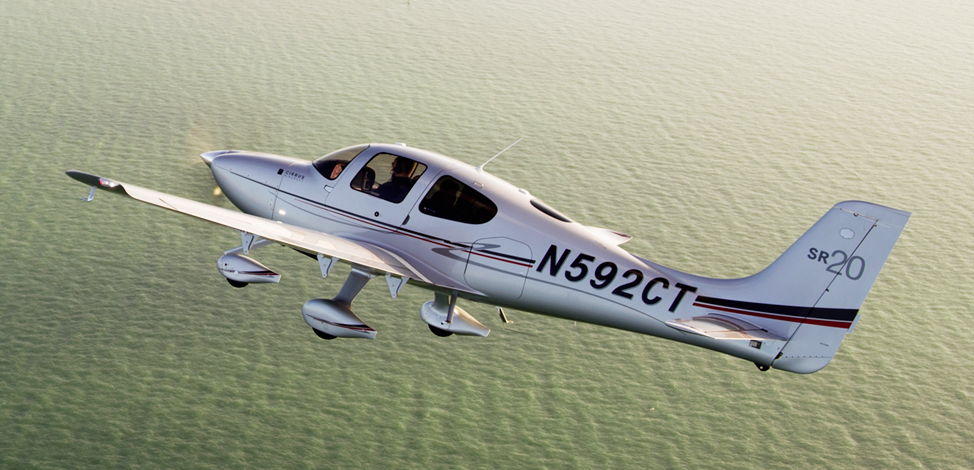
    As all Cirrus pilots know, SR20s and SR22s have 2 batteries in the Cirrus electrical system (technically, they have 3, as Battery 2 is made up of 2 12 volt batteries in series with each other).  Battery 1 provides power to the starter and is a backup for the entire Cirrus electrical system, while Battery 2 provides backup for the Essential Bus items.

    Cirrus Engine Page

    If you look on the engine page of either an Avidyne or a Garmin Cirrus, there is a section showing the Cirrus electrical system health.  With the engine running, you have voltmeters showing the voltage from Alternator 1 and Alternator 2, ammeters showing the amperage output from Alt 1 and Alt 2, and an ammeter showing the charging rate of Battery 1.  There is no indication for Battery 2.

    This brings up a question.  How does the pilot know that Battery 2 has any kind of a charge?  What happens if the whole Cirrus electrical system goes caput and all that’s left is Battery 2?  Will Battery 2 have juice then?

    The answer is actually rather simple.  As part of the pre-flight inspection, the first step in the cabin inspection is to turn the Battery 2 switch on, then check the Essential bus volt meter.  The checklist says the voltmeter should be reading between 23-25 volts.  This tells you how much voltage Battery 2 currently has. The next step (after ensuring the flap lights are out) is the turn Battery 1 on.  Battery 1 then powers the Main Bus and Essential Bus.  The voltage showing on the Main Bus shows how much voltage Battery 1 currently has.

    Easy enough right?  Now you can impress friends and family alike with your Cirrus electrical knowledge!

  • Matching the Airplane with Your Mission

    Has it come time to buy your first airplane?  Have the skies been calling your name?  Or are you just tired of standing in the airport security line then getting shoved in a long metal tube with no leg room?  Or, maybe you are a businessman who does business in remote areas that have local airports but are hard to get to commercially.

    Wherever your need is, you have decided it’s time to make a purchase.  If you are familiar with aviation, you may have an airplane in mind that you would like to have, but is that the right airplane for your mission?  If you are new to aviation, you may have no idea what airplane to go for.  Here are some helpful hints in narrowing down the different airplane options out there to fit your specific mission.

    Flying For Enjoyment, but Not Going Far Fast

    Piper Cherokee

    If you’re just a weekend flyer who is tired of dealing with flight school rentals, but you don’t need to carry a lot of people or go very far, your options are pretty numerous.  Anything from a Cessna 152 to a Piper Cherokee, maybe a Beech Sundowner, or a Bellanca Viking, or anything in between.  If you are content with taking a weekend hop for a hamburger at 100-110 knots, you have limitless options for airplanes.  Tailwheels (Cubs, Citabrias, Huskies) are excellent birds for you well.

    Getting Places Fast With Only You and Maybe One Passenger

    Need to go 200-300 miles fast and not worried about weight?  A Cirrus SR22T, a Columbia 400, or Cessna Corvalis might be just what you need.  Cruise speeds on those are all around 180-190 knots at 10,000 feet. All are oxygen equipped if you want more speed higher up, as the service ceilings are 25,000 feet.  Payloads run in the range of 400-500 pounds with full fuel.  All these have air conditioning options, too.

    Hauling More Weight, but Still Need the Speed?

    Cessna 206 Mission

    A little slower (150-170 knots) but a little bit more payload options are A36 & B36 Bonanzas, Piper Saratogas, Cessna 206s, or Cessna 210s might suit your fancy.  All come in turbo models if you are a high elevation dweller.  The Cessna 206 has been used for many years as cargo and people haulers in remote regions like Alaska, South America, and Africa.  I’ve even seen pictures of snowmobiles being carried in a 206.

    Tired of Oxygen Cannulas?

    The next step up from a Cirrus, Corvalis, or Saratoga is the Piper Malibu.  A bigger brother to the Saratoga, the different PA-46 models offer one of the best options for a single engine piston out there.  All except the Matrix (PA-46-350T) are pressurized, all the pistons cruise about 200 knots, and all are configured with club seating with plenty of leg room.  Useful loads range around 1200-1400 pounds (they hold 120 gallons of fuel, so payloads range from 480-680 pounds).  The original Malibu (PA-46-310P) only burns 16.5 GPH so that allows partial fuel to be carried to allow more people and bags.  All have 6 seats.

    Need to Carry Even More Weight?

    It’s time to get into the piston twin market, then.  A Cessna 414, a Cessna 421, a Cessna 340, a Beech Duke or a Beech Baron are all pretty good options here.  The 421 and the 414 have the largest cabins, while the Duke has the highest useful load.  Cruise speeds range from 200-220 knots, but the cabin is roomier and you get a few more pounds useful load than a piston single.  If you do get into a 421, get good training as they are equipped with Continental geared engines, which can be tricky to operate if you don’t know what you are doing.

    Need to Carry a Lot of People and Go Fast?

    Turboprops are the way to go for you.  King Airs have the most utility while  the Pilatus PC-12 is the cream of the single engine turboprop crop as you can put almost anything you want in it.  If you have 4-5 passengers, stay away from a Piper Meridian as you can’t carry a lot of weight.  Those are better for 2-3 passengers at the most (plus a pilot).  The TBM 900 is pricey, but fast (300-325 knots).  The original TBM 700 can be had for under a million bucks, you get 280 knots, and a very usable useful load.  You still can’t fill all 6 seats with full fuel, but you can do more with it then a Meridian.

    Have a Boatload of Money Sitting Around?

    A jet might be for you then.  Fuel, insurance, maintenance, and hangar costs are high, but jets will get you places real fast with room for all your friends and family.

    Gulfstream


One Comment

Leave a Reply

Your email address will not be published. Required fields are marked *