The Importance of Transition Training

In September, the FAASTeam at the San Antonio FSDO put a special emphasis on transition training (AOPA put out a free course last year covering general transition training topics).  A lot of pilots don’t understand the need for transition training or what it even entails.

Transition training deals mainly with piston engine aircraft, regardless of whether the airplane is a single or twin.  The FAA doesn’t have any special requirements for changing from one piston engine airplane to another, as long as the pilot has the appropriate endorsements (high performance, complex, high altitude, etc.) and is rated in that category and class.

Transition training is promoted mostly by insurance companies. An insurance company looks at a pilots experience when deciding to insure him or her in a new airplane.  If the pilot has only flown Cherokees and Comanches and is now upgrading to a Malibu, then the insurance company is going to require some transition training with a knowledgable instructor.

What is transition training?  It is when an appropriate rated pilot needs to learn how to fly a different airplane.  These are referred to commonly as checkouts, but with more complicated airplanes, the training is actually very in depth.

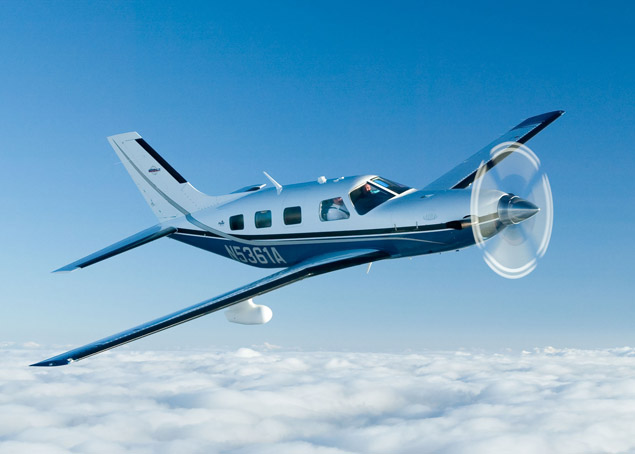
Using the example above, Pilot A just sold his Comanche 260 and bought a 1987 Malibu.  Pilot A says, “A Malibu is a complex, high performance, single engine piston, which is what I had in my Comanche.  I can fly that, no problem.”  In reality, a Malibu has a lot of differences.
pa46-transition-training

First, there are more systems in a Malibu.  You have pressurization, air conditioning, emergency oxygen, turbo charging, and possibly radar.  Not to mention you are dealing with a Continental engine instead of a Lycoming.  And, is it a factory TSIO 520 or a converted 550?  2, 3, or 4 blade prop?  Glass panel or steam gauges?  What kind of autopilot?  Plus, it’s a much heavier airplane so it’s going to fly different, have different rotation and landing speeds and handle differently in stalls.  What’s the sight picture supposed to be on final approach?  What are the emergency procedures?

Overwhelmed yet?

An experienced, insurance approved instructor and training program is a necessity when getting into new airplanes.  It makes for safe pilots and safer skies.

Texas Top Aviation offers Cirrus Transition Training as well as Bonanza Transition Training and Columbia/Corvalis Transition Training.  We are working on an insurance approved Piper PA 46 piston transition course as well (Malibu and Mirage) and will have the course approved by the end of 2016.  Contact us today to schedule your transition training.

Similar Posts

  • That Pesky Rudder

    Whenever I get in an airplane with a pilot for recurrent training, I can assure myself that I will mention rudder usage more than once during the flight.  If it is in a tailwheel (or if the pilot is doing tailwheel training), I’m going to mention the rudder a lot.  How do I know this?  Because basic rudder skills are actually one of the most difficult things to master in flying.

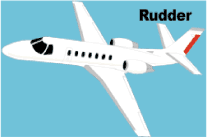
    Let’s start simple.  What does the rudder do?  The dictionary definition is it controls the movement about the vertical axis of the airplane.  If you stick a pole down through the CG of the airplane and rotate the airplane around that pole, this is the vertical axis.  Looking at it another way, the rudder moves the airplane’s nose left and right.  Keep this in mind as we move on.

    Rudder

    Every pilot thinks about the rudder during the takeoff roll.  Because of the torque effect, the pilot must add right rudder during the takeoff roll to stay on the runway centerline.  Depending on the airplane’s horsepower, more rudder pressure is needed in higher powered airplanes.  The problem usually shows up once the airplane gets in the air.

    In the worst situation, after takeoff, the pilot will set both feet on the floor and completely disregard the rudder.  Torque effect and now P-factor are continuing to cause the airplane to yaw left, causing the need for right rudder.  With his feet on the floor, though, the pilot is allowing the airplane to yaw.  It’s not terribly noticeable for him in the front seat, but the back seat passengers (especially in a six seat or larger airplane) are certainly feeling it.

    One particular problem spot on the climb is the climbing left turn.  In a climbing left turn, training says to add left rudder since it is a left turn (see below for the reasoning).  But, since the airplane is climbing and therefore experiencing left yawing tendencies due to the aforementioned effects, the pilot needs to continue pressing the right rudder, though the pressure won’t be as much as in a straight climb.  Watch the ball the next time you make a climbing left hand turn and it’ll make a believer out of you.

    I find only a handful of pilots are this egregious.  Most pilots have rudder problems in turns and in turbulence.  We’ll tackle turns first.  As we all learned when we first started flying, due to adverse yaw, a pilot must add rudder in the turn’s direction.  Again, this isn’t usually where the problem shows up.  During the rollout is the problem area.

    Let’s take a turn to the left.  The pilot rolls in, adding left rudder, arrives at his heading, then begins to roll out with the ailerons.  Left adverse yaw is now being experienced and right rudder is needed to smoothly transition back to level flight.  Need some visual assistance?  Watch the nose the next time you make a turn. If you are working the rudder properly, the nose will pivot on one point in the horizon.  If you aren’t using the rudder properly, the nose will draw a U shape on the horizon.  Try making some turns without rudder, see what it looks like, then use the rudder properly.  You’ll notice a big difference.

    Finally, let’s talk turbulence.  As we all know, turbulence in the hot summer afternoon is quite pronounced. When the airplane experiences a bump, it usually doesn’t bounce straight up in the air.  There is usually some kind of rolling motion involved.  As the pilot corrects this rolling motion by moving the ailerons, adverse yaw is experienced (just like rolling into and out of a turn that we talked about above), so rudder is needed.  There isn’t a need to stomp on the rudder or you’ll cause the airplane to severely yaw in the other direction, but rudder pressure is needed.

    Final approach is where this gets most pilots.  By controlling the nose and not allowing it to move around on final by using the rudder, this will make your approaches a little more stabilized leading to a more successful landing.

    Feeling lost when it comes to the rudder?  Ask your instructor the next time you go fly to do some rudder exercises.  Most instructors don’t emphasize these basic stick and rudder skills which leaves pilots lacking as they move on in their aviation lives.  So make it a point to do some basic rudder work the next time you fly with your instructor.

  • Conroe, TX CPPP

    The Cirrus Pilot Proficiency Program (CPPP) will be coming to the Galaxy FBO at the Lone Star Executive Airport in Conroe, TX again this year.  The dates of the event will be October 14th-16th.

    Wondering what the CPPP program is?

    “CPPP offers a weekend event for Cirrus owners and their partners that focuses on Cirrus-specific knowledge and flying proficiency.  We bring some of the most experienced flight instructors who regularly teach in all kinds of Cirrus airplanes flown for all kinds of missions.  We have prepared an extensive syllabus of ground courses that complement the transition training and delve into areas of greatest need for Cirrus pilots.” (from CirrusPilots.org)

    CPPP

    The weekend starts off with a group dinner on Friday night. The Saturday morning ground session focuses on General Aviation Safety with special focus on the Cirrus accident statistics.  Normal and emergency procedures are also reviewed.

    In the afternoon on Saturday, the attendees are split into two groups.  The first group has a myriad of options for ground sessions covering all topics related to Cirrus aircraft and operations.  The second group flies, then they switch for the second 3 hour session.  Sunday brings the same split, with more courses offered and more flying.

    While the Cirrus pilots are flying and learning more about their airplanes, CPPP offers a Partner in Command course for flying partners on Saturday.  This allows flying partners to be more comfortable in the airplane and teaches them what to do if something were to happen to the pilot.

    All in all, attending a CPPP will improve both Cirrus knowledge and Cirrus flying skills.  It’s highly recommended for all Cirrus pilots.

    To register for the CPPP event in Conroe, check out the CPPP website.

  • A Complex Clearance?

    I was flying in the Rio Grande Valley in south Texas a few weeks ago and heard an IFR clearance given to a King Air that pricked my ears up.  It was a clearance from CRP to LRD, but the routing was one you don’t hear too often anymore.  Because of active military airspace, the routing was via a radial and DME off the CRP VOR (so a point defined by the radial and DME) to another radial and DME point off the LRD VOR.

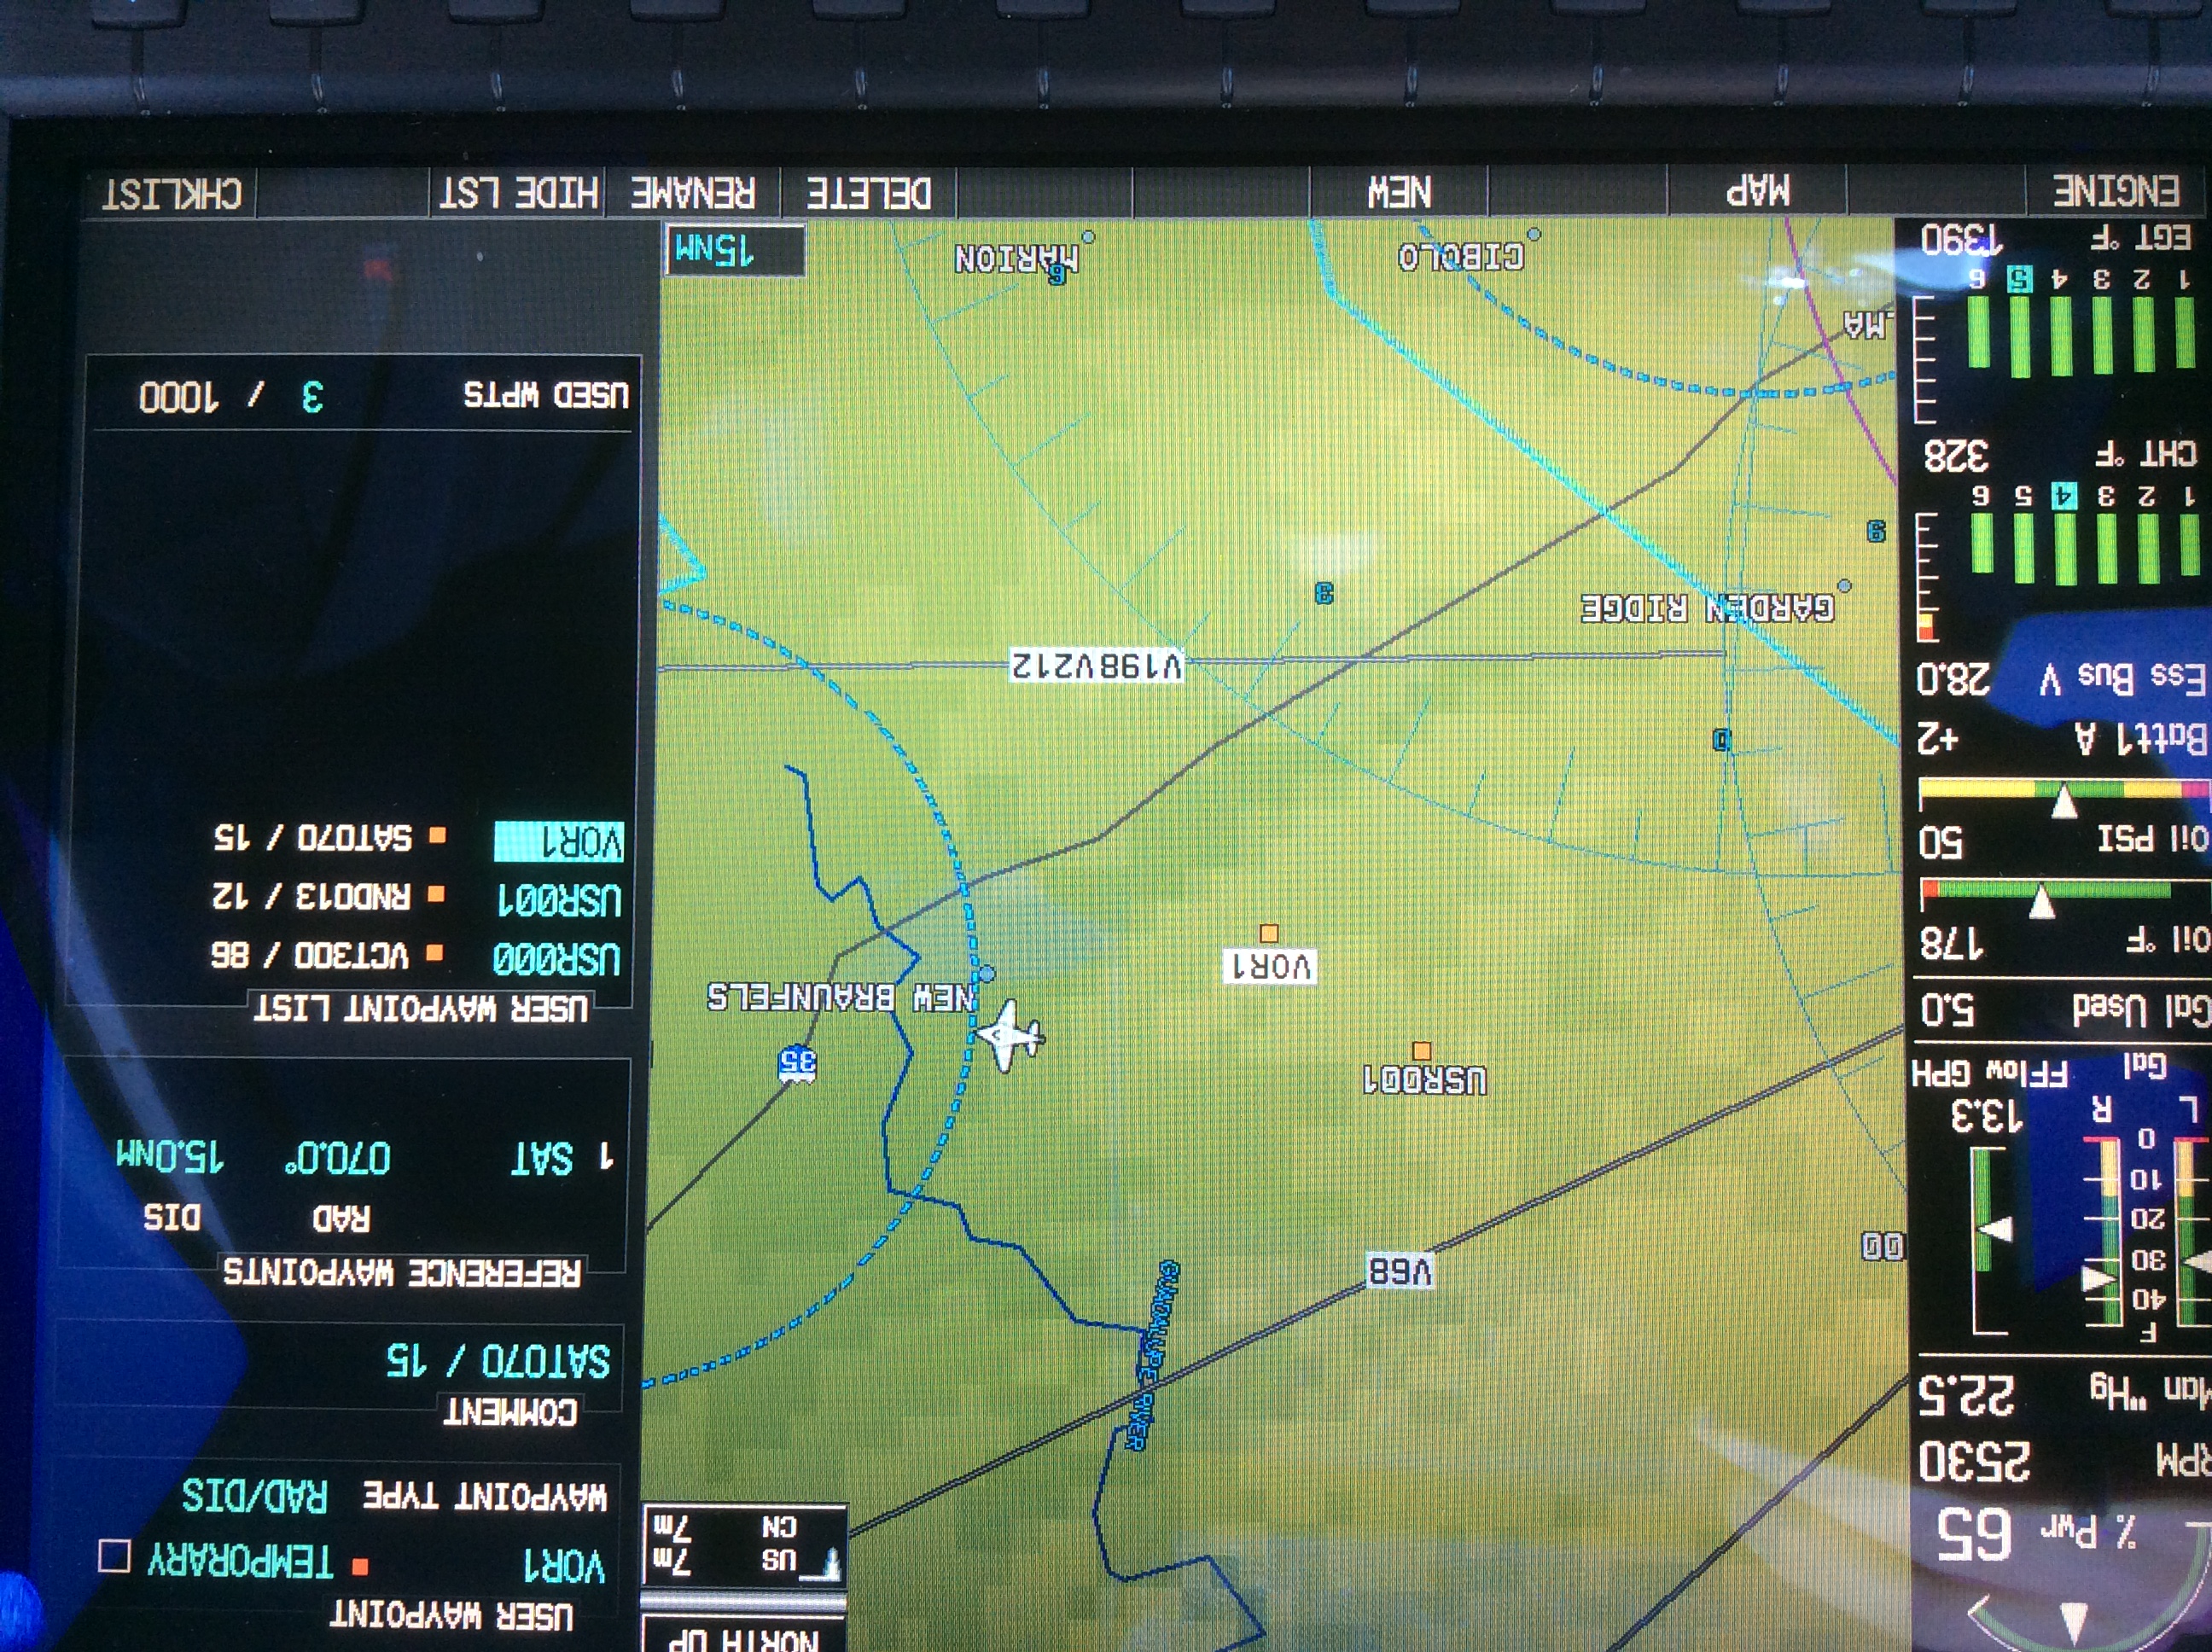
    It took me a second to think about how to do this the easiest (without setting up the VOR and watching the DME).  After a moment’s thought, it’s actually a snap with the G1000.  You create 2 user waypoints, one for each Radial/DME spot, then put those 2 user waypoints in your Flight Plan.

    Here’s how.

    Step 1

    Using the big knob, go to the Waypoint chapter.  Once there, scroll down to the User Waypoint page using the small knob.

    Step 2

    Press the New soft key.  If you want to name the waypoint something specific, you can do that at the top of the page.  If not, it will default to something like VOR 1 or VOR 2.

    Step 3

    Under Waypoint Type, use the small knob to select RAD/DIS (stands for Radial/Distance).

    Step 4

    Under Reference Waypoints, again using the small knob (or your keypad), type or dial in the VOR identifier, the radial from that VOR, and the DME distance.  Press enter and you are done.

    Once you have both User Waypoints created, then just put them in your flight plan (if you forget what you named them, you can just go back to the User Waypoint page), and off you go.

  • Aircraft Purchase: The Logbook & Pre-Purchase Inspections

    Your about to make your dream aircraft purchase.  The plane has low time on the engine, is reasonably priced, and, according to the seller, has no damage history.  You are overjoyed!  Your dream of making an aircraft purchase is finally coming true.  You prepare your offer for the seller, set up the escrow account, and start all the paperwork.

    Two weeks later, the airplane is yours!  You start flying it, though, and the engine starts to have some strange vibrations.  After several flights, it starts to get worse.  You take it to your mechanic to get it looked at and you find out the airplane needs three new cylinders along with some other engine work that is going to total a lot of money.  Plus, your airplane is now going to be in the shop for several weeks.

    All that excitement you just had?  It just went out the window.

    Could this have been prevented?  Probably so, with a logbook inspection and a pre-purchase inspection.

    Aircraft Purchase:  Maintenance Logbooks

    Aircraft Purchase: Logbook Inspection

    Inspecting a logbook can be very daunting when making an aircraft purchase, especially for older airplanes.  This is, however, one of the most vital steps in making a new aircraft purchase.  You can find out many things from looking at the maintenance logs of an airplane.  First, you can check the compression levels of the engine.  Typically, you want compression levels in the 70’s, with it still being okay in the high 60’s.  Anything below 65 and there could be potential problems.

    Second, you can find out if there has been any odd maintenance done pointing to possible unreported damage history.  This is rare, as most aircraft owners are honest and up front when talking about damage history.  But, if there is an entry detailing a prop overhaul after only 50 hours on that prop, you may start to ask some questions.

    Third, you can find out how well the airplane has been maintained.  If a lot of maintenance was completed at each annual, even if it was a lot of small things, then the airplane has been maintained by a good mechanic who is very thorough.  This also involves a check of the ADs, Mandatory SBs, SBs, and SLs that have been issued for the airplane.  If all that has been kept up with, it’s a well maintained airplane.

    Finally, it gives you a good idea of how much the airplane has been flown.  Sure, the ad online will have the total time and time since overhaul, but you can look at the year by year breakdown of how much the airplane has been flown.  It may have been flown a lot earlier in it’s life, but not quite as much recently.  That’s not necessarily a bad thing, but airplanes like to be flown.

    Aircraft Purchase: Pre-Purchase Inspection

    Before making an aircraft purchase, it is extremely vital that whenever you are buying an airplane that you get a pre-purchase inspection done on the airplane.  Even better is getting one done by a mechanic who specializes in that type of airplane (eg. Piper Service Center for Pipers, Cirrus Service Centers for Cirrus, Kevin Mead for PA-46s).  A pre-purchase inspection can save you a lot of money in the end.

    There is always going to be some kind of maintenance issue with an airplane being purchased, whether it is big or small.  Once a pre-purchase inspection is completed, you can take the findings to the seller and negotiate for a lower price based on those findings, or just have the seller fix the items before the sale is completed.

    I would recommend having the seller fix the problems before the sale is completed.  Even though it may take a little longer for the sale to be completed this way, you’ll get to enjoy your airplane right away instead of it being in the shop the next several weeks after you complete the purchase.

    There is the circumstance where the  pre-purchase inspection reveals some serious airworthiness issues which would cause the deal to be voided.  Always put this clause in a purchase agreement, giving you, the buyer, an out if there are serious airworthiness issues.

    When it comes to making an aircraft purchase, it is not a process to be rushed.  Slow and steady usually gets the best airplane for the money, giving you years of enjoyment in the future.

    Looking to make an aircraft purchase?  Daunted by all the work that’s involved to find a good, quality airplane?  Let Texas Top Aviation do your aircraft search for you!  To learn more, visit Texas Top Aviation’s Aircraft Purchase Consultations page.

  • Determining Pattern Altitude

    Figuring out the pattern altitude at an airport should be pretty simple, right?  But, in this day of helpful technology, most pilots actually get it wrong.  How can you always get it right?  Well, it just takes about an extra 15 seconds.  Here’s how.

    Traffic Pattern
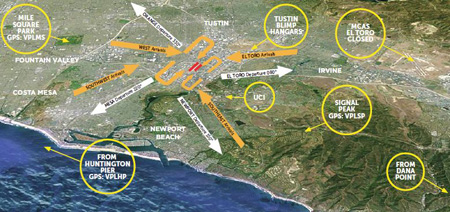
    John Wayne Airport Traffic Patterns

    As outlined in the Aeronautical Information Manual, section 4-3-3, “traffic pattern altitudes for propeller-driven aircraft generally extend from 600 feet to as high as 1,500 feet above the ground.”  Further, in the Pilot’s Handbook of Aeronautical Knowledge on page 13-10, it states:  “1,000 AGL is recommended pattern altitude unless established otherwise.”

    Okay, so for piston driver’s, we’ve got it narrowed down to 1,000 AGL (Above Ground Level for those who don’t like acronyms).  But wait!  There’s that very important phrase at the end of the last quote:  “unless established otherwise.”  That means not all airports have traffic pattern altitudes of 1,000 AGL, or else they wouldn’t put that line in there!

    How do you find out what the TPA (Traffic Pattern Altitude) is for a certain airport if it’s not 1,000 AGL?  Great question!  Your first guess is probably to look on Foreflight.  Though this is a good start, it is not the full answer.

    Let’s use an example.  Look up KAQO, the Llano Airport on Foreflight.  At the top of the page, the airport elevation is stated as 1,101′ MSL and the pattern altitude is stated as 1,902′ MSL.  From what we just learned, 1,902′ MSL is not 1,000 AGL, so is 1,902′ MSL otherwise established?

    On the Airports page with KAQO pulled up, tap the A/FD tab, second to last on the left.  Scroll down to Llano Muni.  Read the whole entry.  Does it state in the entry that pattern altitude is different than 1,000 AGL?  It sure doesn’t.  So, because it is not otherwise established, pattern altitude at KAQO is 2,102′ MSL not 1,902′ MSL.

    Where did Foreflight get that?  I have no idea.  Too often, though, pilots look at the Foreflight pattern altitude and don’t actually check the Airport Facilities Directory (A/FD).  Then, they get the pattern altitude wrong.

    What does it look like when pattern altitude is otherwise established?  Look up KSGR, Sugar Land Regional, on your Foreflight app.  Foreflight states the elevation as 82′ MSL and the Pattern Altitude as 1,000′ MSL.  Is this correct?  Well, tap that A/FD button again and let’s find out.

    On the second line of the A/FD entry, it says TPA-See Remarks.  Down in the remarks section, we find the following:

    TPA-1000 (918) single engine piston acft, TPA-1500 (1418) for twin and turbojet acft, TPA-500 (418) for helicopters within 2NM.

    Foreflight got it right this time for single engine pistons, but if you are in a twin, the pattern altitude is different.  What’s the lesson here?  Always check the A/FD and don’t always go by what Foreflight says.  The A/FD is always right and usually has a little more detail to help set you straight.

    One last thing.  Both the AIM and the Pilot’s Handbook of Aeronautical Knowledge, when talking about pattern altitude, state, “When operating at an airport, traffic pattern altitudes should be maintained unless otherwise required by the applicable distance from cloud criteria in…section 91.155.”  91.155 defines basic VFR weather minimums.  So, to fully interpret what the AIM is saying, we have to take into account the type of airspace we are in to determine if we can safely and legally operate at pattern altitude at a particular airport.

    For example, let’s say we are at KCVB, the Castroville Airport.  Pattern altitude there is 1,602 feet, which is 829 AGL.  CVB is Class G airspace up to 700 AGL, then Class E above that.  Let’s say there is a 700 AGL broken cloud layer.  Pattern altitude is 829 AGL, so you won’t be able to get up that high with a broken ceiling.  What altitude can you do pattern work at to stay legal?

    Class G VFR weather minimums during the day below 1,200 AGL is 1 SM visibility and clear of clouds.  So, legally, you could fly at 699 AGL (which at CVB would be 1,472 MSL) while in the pattern and be legal.  Safe?  Maybe, but probably not if you are skimming the base of the clouds.  Is 1300 MSL a safer pattern altitude in this example?  Well, that is 527 AGL, so probably not, since towers tend to stick up that high sometimes.

    Let’s go back to KSGR and put a 1,000 AGL overcast ceiling there.  SGR is Class D airspace and we already determined pattern altitude there was 1,000 MSL for piston singles.  VFR visibility and cloud clearance requirements in Class D airspace are 1,000 feet above clouds, 500 feet below clouds, and 2,000 feet horizontally from the clouds with 3 SM visibility.  In order to stay 500 feet below the clouds, you would be flying a 582 MSL pattern.  Safe?  Probably not, though it is legal.

    To summarize, don’t take Foreflight’s word for pattern altitude.  Cross reference the A/FD (it only takes 15 seconds at the most) to verify.  If it’s cloudy, it’s really best to stay on the ground, but if you want to find out your legal pattern altitude with a cloud deck, cross reference 91.155.  I don’t recommend flying below pattern altitude because it is there for a reason.

  • Cirrus Simulator Training

    Let’s face it: airplanes are not the best classrooms. The propeller is running, the engine is making lots of noise, the pilot is attempting to multi-task and the instructor is barking orders. That’s almost as much overstimulation as being a parent to 4 kids under 10 (I have experience in that arena!). That’s even before takeoff!

    At Texas Top Aviation, we have observed many situations where a simulator would be an excellent way to introduce different concepts and supplement training. Now, in our Austin Executive (KEDC) office, we finally have a really good simulator.

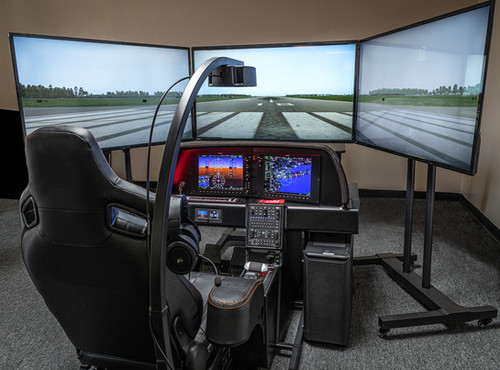
    Meet the Noble Flight Simulator, the next best thing to a Cirrus cockpit. With the Noble Flight Simulator, we can duplicate 6 different types of Cirrus aircraft (G3 SR22, G3 SR22T, G5 SR22, G5 SR22T, G6 SR22, and G6 SR22T). The Garmin Perspective panel easily swaps between the G3 and G5 configuration to the G6 configuration, so the buttons are all in the proper places.

    Having button pushing problems? The simulator is the place to practice.

    Want to experience actual emergencies? An engine failure is a lot less stressful in a simulator.

    Want to pull CAPS (Cirrus Airframe Parachute System)? The Noble Flight Simulator has a realistic CAPS handle with the same amount of pull pressure that the CAPS handle in the airplane has.

    Need an IPC or want to practice approaches? All approaches done on a Noble Flight Simulator are luggable, plus a full IPC can be accomplished.

    Want to save fuel? The Noble Flight Simulator is for you!

    To top it all off, the Noble Flight Simulator that Texas Top Aviation has is classified as an Advanced Aircraft Training Device. It is certified to the highest standards of non-motion simulators, allowing pilots working toward their private and instrument ratings to log a significant amount of time toward that certificate or rating. Up to 20 hours of IFR training is allowed to be logged in an AATD toward an instrument rating. That’s huge!

    Texas Top Aviation is also developing a CAPS specific course to expose Cirrus pilots to the many different scenarios where pulling CAPS would be necessary. This teaches Aeronautical Decision Making to Cirrus pilots who struggle with the decision of whether or not to pull CAPS. Look for CAPS course information under our Aircraft Training page later this summer.

    Interested in checking the simulator out? Contact us today!

Leave a Reply

Your email address will not be published. Required fields are marked *