Cirrus Pilot Proficiency Program (CPPP)-Conroe, KCXO

The Cirrus Pilot Proficiency Program is coming back to the Lone Star Airport in Conroe, TX (KCXO) on October 23rd-25th.  Wondering what the CPPP program is?

“CPPP offers a weekend event for Cirrus owners and their partners that focuses on Cirrus-specific knowledge and flying proficiency.  We bring some of the most experienced flight instructors who regularly teach in all kinds of Cirrus airplanes flown for all kinds of missions.  We have prepared an extensive syllabus of ground courses that complement the transition training and delve into areas of greatest need for Cirrus pilots.” (from CirrusPilots.org)

CPPP

The weekend starts off with a group dinner on Friday night. The Saturday morning ground session focuses on General Aviation Safety with special focus on the Cirrus accident statistics.  Normal and emergency procedures are also reviewed.

In the afternoon on Saturday, the attendees are split into two groups.  The first group has a myriad of options for ground sessions covering all topics related to Cirrus aircraft and operations.  The second group flies, then they switch for the second 3 hour session.  Sunday brings the same split, with more courses offered and more flying.

While the Cirrus pilots are flying and learning more about their airplanes, CPPP offers a Partner in Command course for flying partners on Saturday.  This allows flying partners to be more comfortable in the airplane and teaches them what to do if something were to happen to the pilot.

All in all, attending a CPPP will improve both Cirrus knowledge and Cirrus flying skills.  It’s highly recommended for all Cirrus pilots.

To register for the CPPP event in Conroe, check out the CPPP website.

Similar Posts

  • Cirrus Simulator Training

    Let’s face it: airplanes are not the best classrooms. The propeller is running, the engine is making lots of noise, the pilot is attempting to multi-task and the instructor is barking orders. That’s almost as much overstimulation as being a parent to 4 kids under 10 (I have experience in that arena!). That’s even before takeoff!

    At Texas Top Aviation, we have observed many situations where a simulator would be an excellent way to introduce different concepts and supplement training. Now, in our Austin Executive (KEDC) office, we finally have a really good simulator.

    Meet the Noble Flight Simulator, the next best thing to a Cirrus cockpit. With the Noble Flight Simulator, we can duplicate 6 different types of Cirrus aircraft (G3 SR22, G3 SR22T, G5 SR22, G5 SR22T, G6 SR22, and G6 SR22T). The Garmin Perspective panel easily swaps between the G3 and G5 configuration to the G6 configuration, so the buttons are all in the proper places.

    Having button pushing problems? The simulator is the place to practice.

    Want to experience actual emergencies? An engine failure is a lot less stressful in a simulator.

    Want to pull CAPS (Cirrus Airframe Parachute System)? The Noble Flight Simulator has a realistic CAPS handle with the same amount of pull pressure that the CAPS handle in the airplane has.

    Need an IPC or want to practice approaches? All approaches done on a Noble Flight Simulator are luggable, plus a full IPC can be accomplished.

    Want to save fuel? The Noble Flight Simulator is for you!

    To top it all off, the Noble Flight Simulator that Texas Top Aviation has is classified as an Advanced Aircraft Training Device. It is certified to the highest standards of non-motion simulators, allowing pilots working toward their private and instrument ratings to log a significant amount of time toward that certificate or rating. Up to 20 hours of IFR training is allowed to be logged in an AATD toward an instrument rating. That’s huge!

    Texas Top Aviation is also developing a CAPS specific course to expose Cirrus pilots to the many different scenarios where pulling CAPS would be necessary. This teaches Aeronautical Decision Making to Cirrus pilots who struggle with the decision of whether or not to pull CAPS. Look for CAPS course information under our Aircraft Training page later this summer.

    Interested in checking the simulator out? Contact us today!

  • Lightspeed Zulu 2 vs. The Bose A20

    The debate about which headset is the better product will never cease.  We do know this for sure, though, Lightspeed and Bose make the best noise canceling headsets out there.  David Clark’s offering doesn’t match up with these two.  Newcomer AKG has a light (weight-wise that is, as the headset is equipped with a pair of LED lights as well) ANR headset that the jury is still out on.  For now, Lightspeed and Bose sit atop the ANR kingdom.

    The comparison for this article will be between the Lightspeed Zulu 2 and the Bose A20 headsets, both of which I have used quite extensively in my flying career.  I am officially in the Lighspeed camp at this point and after reading my comparison below, you’ll see why.

    ANR Functionality

    Bose A20

    Between the two, the Bose A20 cancels out more noise, no argument there.  This isn’t to say that the Lightspeed Zulu 2 doesn’t.  Quite the opposite, actually.  The Lightspeed Zulu 2 does a great job of canceling the noise.  But with the A20 on in a C172, you can barely hear the engine running.  The difference before you press the power button and after is extremely noticeable.  I had one client turn to me after turning on the noise canceling function of his new A20 headset and state, “These things are awesome!”

    The other advantage Bose has is a continuation of the noise canceling.  About the only thing I don’t like about the Lightspeed is if you don’t have the headset sized just right on your head, each time you turn your head to look at something, then the suction gets broken around the ear cup and you get some ambient noise.  My glasses probably don’t help with this.  It’s not that big of a deal, you just have to readjust the size of the headset, but, since I’m a little OCD, it bugs me.  Once I get the set sized right, it’s smooth sailing.

    Comfort

    Lightspeed Zulu 2

    Far and away, the Lightspeed Zulu 2 is much more comfortable than the Bose A20.   I flew for 5 hours in the right seat with my Lightspeed set on the other day.  I switched to the left seat for the last leg and used the owner’s A20 headset since it was plugged in on that side already and I noticed quite a bit of difference.  The ear cups seemed to press against my head more.  The pad on top of my head didn’t seem to be as cushiony.  It just wasn’t overall as comfortable as the Lightspeed Zulu 2.

    Bose has made a lot of progress from their original noise canceling headsets.  Those didn’t have much of a cushion on top at all.  After about 2.5 hours, the slim ear cushions began to dig in to the side of your head.  So, the A20 has made some progress, but the Lightspeed Zulu 2 takes the cake in comfort.

    Weight Distribution

    “Wait!”  You Bose boys scream (no pun intended).  “The A20 is lighter than the Zulu 2!”  While this is true (the Zulu 2 weighs in at 15.7 oz while the A20 is only 12 oz), the way that weight is distributed makes a massive amount of difference.  The Lightspeed Zulu 2 feels lighter on top of your noggin than the A20 because the weight of the A20 is firmly planted on the top of your head in a single point.  With the Zulu 2, the weight is distributed evenly across the top of your scalp, so even though the set is heavier, it feels lighter on your head because the weight is not all concentrated on one point.

    All this adds up to why I like the Lightspeed Zulu 2 more than the Bose A20.  As for a practical example, I wore my Lightspeed Zulu 2 set for 9.1 hours one day two weeks ago.  Needless to say, it was a long day.  But, once I climbed out of the airplane, I had no pain on the top of my head and only a very little where my glasses ran along the side of my head.  Now I call that a winner.

  • The Go Around Button

    Back in the old days, when flying an approach in an early Cirrus SR22 (circa 2004; yes, in airplane technology, those were the old days), performing a missed approach procedure was a lot of work.  You were low to the ground and weren’t able to see the runway.  Then, you had to start climbing so you don’t hit the ground, then push a lot of buttons in order to get the GPS and autopilot set fly the missed approach procedure.  It was very easy to get distracted with button pushing, then forget to fly the airplane, putting yourself and passengers in very unsafe circumstances.  The go around button has changed all that.

    Going Missed the Old Fashioned Way

    Let’s stick with our example of the 2004 Cirrus.  The SR22 in 2004 was equipped with the Avidyne Entegra system, complete with dual Garmin 430 GPS units, and an STEC 55x Autopilot.  A very capable IFR flying machine (we could use the same example of a 2004 or 2005 Lancair Columbia 350 or 400 that was equipped the same way, except the screens were vertical instead of horizontal).

    Avidyne Cirrus Go Around Button

    We’ll use the ILS 15 at the Temple airport, KTPL, for our example.  You pass TPL, the outer marker at 1,683 with the glide slope already centered.  Everything is going well so far.  The number 1 Garmin 430 is set to VLOC and the autopilot is showing NAV and APR for the lateral guidance and GS on the vertical, tracking the glide slope.  The last weather report stated the clouds were Broken at 500 feet, so it appears like you’ll be able to get in on the approach.

    As you get closer to the Decision Altitude, the clouds aren’t letting up at all.  You hit 1,000 feet on your altimeter, 120 feet above the minimums, and you still can’t see a thing.  Another 100 feet lower doesn’t change anything, so you elect to proceed with the missed approach.  This means things are about to get busy.

    Here’s the process:

    • Fly the airplane first, meaning shut off the autopilot, pitch the nose up to about 7 degrees, TRIM, add full power, retract the flaps, and step on the right rudder
    • The Garmin 430 is now in SUSP mode, meaning the missed approach point is locked in as the active waypoint.  So, you have to press the OBS button to cause the GPS to cycle over to the missed approach procedure
    • You have to press the VLOC button on the Garmin 430 in order to change the CDI back to GPS
    • You have to re-engage the autopilot by pressing NAV twice (which engages GPS Steering mode)
    • You have to reset your altitude bug (if you hadn’t set it for the missed approach altitude previously)
    • You have to press VS and ALT on your autopilot to have the STEC continue the climb

    That’s a lot of work, isn’t it?  Plus, that’s an extensive amount of head down time in the cockpit, with your eyes looking elsewhere other than the instruments while hand flying.  All very low to the ground, I might add.  Can you see how this can be dangerous?  (Note:  The Avidyne IFD 550 has made this a little easier with automatically switching from VLOC to GPS and automatically engaging the missed approach procedure in the flight plan)

    The advent of the Go Around Button has streamlined the process, leading to safer operations where it matters most.  The functions of the Go Around Button vary based on the airplane, but here are three examples, the Garmin G1000 Cessna Corvalis TT, the Garmin G1000 Piper Mirage, and the Garmin Perspective Cirrus SR22.

    Cessna Corvalis TT

    We’ll take the above situation and swap out the airplanes.  Gone is the 2004 Cirrus SR22.  Insert a 2008 Cessna Corvalis TT, equipped with the Garmin G1000 suite and the GFC 700 autopilot.  The go around button is positioned directly above the twist in throttle.

    Cessna Corvalis G1000 Go Around Button

    When you push the Go Around Button, here’s what the system does:

    • Disconnects the Autopilot
    • Sets the Flight Director for 7.5 degrees pitch up (which is about your normal climb angle) and wings level
    • Switches the CDI back to GPS
    • Takes the GPS out of SUSP mode and cycles the flight plan to the first waypoint on the missed approach procedure

    Here’s what you have to do:

    • Follow the flight director by pitching the nose up and TRIM
    • Add full mixture, prop and throttle (prop & throttle should be full already)
    • Retract the flaps
    • Step on the right rudder
    • Re-engage the autopilot, then press NAV and VS (or FLC) and set your altitude bug if it isn’t already set

    Not too bad, eh?  Makes the whole situation streamlined and safer.

    Piper PA46-350P Mirage

    Same situation, different airplane.  You’ll notice the procedure for the Piper Mirage is almost exactly the same as the  Corvalis procedure.  The difference between the two airplanes is where the autopilot controller is.  In the Corvalis, the autopilot controller is positioned on the left side of the MFD, making it easy to scan back and forth while pushing buttons on the autopilot.

    The Piper Mirage autopilot controller is positioned below both screens and in front of the power quadrant. With this positioning, the pilot’s eyes have to go a lot further to see which autopilot button he is pushing. In this case, it becomes very important to get the airplane climbing and trimmed before going down to engage the autopilot.

    As in the Corvalis, here is what the Go Around button does:

    • Disconnects the Autopilot
    • Sets the Flight Director for 7.5 degrees pitch up (which is about your normal climb angle) and wings level
    • Switches the CDI back to GPS
    • Takes the GPS out of SUSP mode and cycles the flight plan to the first waypoint on the missed approach procedure

    And here’s what you have to do:

    • Follow the flight director by pitching the nose up, then TRIM
    • Add full mixture, prop and throttle (prop & throttle should be full already)
    • Retract the flaps
    • Step on the right rudder
    • Re-engage the autopilot, then press NAV and VS (or FLC) and set your altitude bug if it isn’t already set

    Cirrus SR22

    Cirrus Perspective Go Around Button

    This time, we’ll use the 2010 Cirrus SR22T with the Garmin Perspective and GFC 700 Autopilot. One thing I really like about how Cirrus configured their system is where the Go Around button is.  It’s actually on the throttle itself, making it much more intuitive.  This way, you can press the Go Around button while adding full throttle.

    There is one major difference between the Garmin Perspective in the Cirrus and the G1000 in the Corvalis. When you press the Go Around button in the Cirrus, the autopilot actually stays on.

    Here’s what happens when you press the Go Around button in the Cirrus:

    • Flight Director pitches to 7.5 degrees pitch up and wings level
    • AP Mode switches to Go Around mode, following the flight director
    • GPS comes out of SUSP mode
    • CDI switches back to GPS

    All the pilot really has to do is add power, take the flaps up, then press NAV on the GFC 700 to get the autopilot following the missed approach procedure.

    If you aren’t familiar with the Go Around button or haven’t used the one in your plane lately, it’s good to go up with a knowledgeable instructor and fly a couple of approaches where you perform the published missed approach afterward.  That way, he or she can assist you through the first missed approach, then give you pointers until  you get comfortable with the Go Around button.

  • My 2018 Osh Kosh Experience

    I got the privilege of going to the EAA AirVenture at Osh Kosh this year.  It was my first Osh Kosh experience.  I’ll be the first to tell you, walking in the gate on the first day is mildly overwhelming.  There are people and stuff everywhere.  Airplanes, tents selling everything from airplane parts to mattresses (I wasn’t really sure how mattresses tied to flying), vendors, colleges, and loads of people.

    Photo Courtesy of William Day, copyright 2018, All Rights Reserved

    After I gathered myself from my initial shock, I set out to explore all that I could.  I spent most of the first morning walking around the different manufacturer’s tents, getting a gauge on all the new airplanes I could never afford and only hope to ever fly.

    The short of it is, the Cessna/Textron Denali is going to be stellar once it gets completed.  The Epic E1000 (if it ever gets certified) might take a large market share from TBM, though they will have an uphill climb. The Cirrus Vision Jet is very cool and should be a relatively simple step up for SR22T owners.  The Pilatus Jet is huge.  Finally, the Diamond DA62 would be my below 12,500 airplane and the Piper M350 would be my pressurized plane.  Money being no factor, of course.

    Photo Courtesy of William Day, copyright 2018, All Rights Reserved

    I decided to take in the entire airshow on Day 1, all 4 hours of it.  Upon realizing I would be very stiff necked if I did that each day for the three days I was there, I decided on Day 2 to check out some seminars and learn something.  I took a seaplane ground school course on Day 2, then listened to a NASA presentation on electric airplanes and low boom sonic jet technology (how to make supersonic passenger flight quieter).

    The end of Day 2 at Osh Kosh had to be the highlight.  I got to hang out with Cub Crafters at the 51WI grass strip just north of the OSH Class D airspace.  There was a free BBQ and I got to take a ride in a Carbon Cub.  My landing from the back seat was a bit rusty, but still a very cool experience.  Buzzing the BBQ area in tandem was pretty neat.

    Photo Courtesy of William Day, copyright 2018, All Rights Reserved

    Day 3 brought some cooler temps and some clouds.  We walked out to the vintage airplanes, spending the morning gawking at Cessna 195s and Wacos.  Then I took the plunge to explore all the vendor hangars.  My idea was to walk around and see if I can find some interesting and innovative technology.  Well, after 2 of the 4 hangars, my head was spinning, so I decided to watch the rest of the airshow to let my brain drain out a bit.

    Photo Courtesy of William Day, copyright 2018, All Rights Reserved

    3 Days was a good amount of time to spend.  I don’t think I could have stayed all week, but only a day or two wouldn’t have been worth it.  I flew up with a former student in his TBM 700, which was a very nice way to travel.  We landed and stayed in Green Bay (KGRB), which was super easy and low stress.  Had a great tailwind on the return and made it to Houston non-stop.

    A few closing observations:

    The Stratos 716X Personal Jet

    If Stratos Aircraft is ever able to bring this to market, it sounds awesome.  400 knots, single engine, single pilot, with 6 seats.  Being a single engine jet, similar to the Cirrus Vision Jet, it’s 100 knots faster, plus with the airflow and engine technology, it doesn’t have that big V Tail in the back, thereby reducing drag.  I have a feeling it would find a good market, but the certification process is a bear to get through.  Just ask Epic.

    The Lancair Mako

    This is a legit airplane.  Lots of thought was put in to the design of the Mako by the new Lancair organization in Uvalde, TX (KUVA).  The airplane was extremely comfortable, capable, and pretty cool.  The stick is in the center, with throttles on the side (where the stick would be in a Cirrus or Columbia).  AC, full Garmin integration, and the cool factor of the nose gear retracting, but not having a gear handle. Higher useful load than a Cirrus or Columbia, it would be a great alternative (and cheaper) to one of it’s certified competitors.

    Avionics

    There is a lot of new avionics technology hitting the market.  Dynon, beloved by experimental enthusiasts, is finding a foothold in the certified world with some neat panels.  It will be an uphill battle to take on Garmin, but there is some potential in the retrofit market to offer a cheaper alternative to the Garmin TXi.

    Speaking of the TXi, I played around with the 10.7″ panel at the Garmin booth.  It is extremely intuitive. Garmin did a great job of making it a simple touch screen interface, easy to use, and easy to learn.

    Avidyne is pushing their iPad integration with the IFD 100 iPad app.  It ties via Wifi or Bluetooth to an IFD 550 or 440 navigator, giving an additional screen in the cockpit to work with.  You have the ability to modify flight plans and such on the iPad and it will show up on the GPS units.

    Photo Courtesy of William Day, copyright 2018, All Rights Reserved

    All in all, Osh Kosh was an experience I’m glad to have finally experienced.  I don’t think I would go every year like some folks, but every few years, especially when my sons are older, seems like just enough for me, but not too much.

    All Photos Courtesy of William Day, copyright 2018, All Rights Reserved


  • The Piper Saratoga Turbo

    Piper SaratogaRecently, I assisted with the delivery of a 2007 Piper Saratoga Turbo from San Antonio to New York City.  It was a very nicely equipped airplane, complete with a Garmin G1000 panel, an STEC 55x autopilot, and air conditioning.  The owner joined me on the flight back to get trained in the airplane, getting him comfortable in it over our 2 day excursion back to NYC.  Total flight time was 12 hours, though that did include several stops along the way and landing practice at the airports we stopped at.

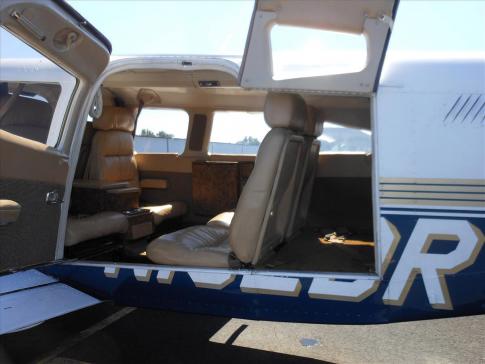
    The 6 seat Turbo Saratoga is a very comfortable, very capable flying machine.  It is made for hauling, with a gross weight of 3,600 pounds, but that’s not to say it isn’t lacking in comfort, either.  The rear cabin has 4 seats, 2 facing forward and 2 facing rear.  It would be a little tight for 4 full size adults in the back seat.  To avoid knee knocking, the plane is an excellent 4 person and bags aircraft (or 4 adults and 2 kids).

    The really nice part about the Piper Saratoga is the baggage door.  Unlike the Bonanza, the Piper Saratoga has a baggage door that opens to the baggage compartment, creating a much easier way to load and unload baggage.  The nose baggage compartment, which holds an additional 100 pounds, is a very nice feature, allowing the bag load to be spread out.

    Piper Saratoga Inside

    We typically saw cruise speeds of 155-165 KTAS depending on altitude.  The highest we went was only about 9,000 feet, so we didn’t get up real high to see what the single turbo could do.  Even though the Lycoming TIO-540 engine burns about 20 gallons an hour, with 102 gallons of gas on board, the fuel consistently outlasted our desire to continue flying.

    Being equipped with the G1000 was a very nice feature of this particular Piper Saratoga.  The screens are nice and big, larger than the displays on a high wing Cessna or a Corvalis.  That allows for easier viewing of approach plates, NEXRAD, and the engine gauges.

    There are always downsides to an airplane, and the Saratoga is no exception.  The STEC Autopilot leaves some to be desired as I felt it hampered the capability of the G1000 when shooting approaches because the 12 knot crosswind limitation on the autopilot. You can still use the autopilot on an approach with higher than 12 knot crosswinds, but the autopilot tends to search around for the final approach course.

    The air conditioning works very nicely, though it did have a tendency to freeze up at altitude.  We discovered that quickly and just decided to turn it off and leave the blower on, since it was cool enough up high anyway.

    Overall, the Turbo Saratoga is a very nice airplane.  The speed leaves a little to be desired (you can get 10 KTAS more out of a Bonanza with a Continental engine, about 20 knots more if it is a Turbo Bonanza), but it is very high on comfort.  The Piper Saratoga makes for a good family airplane or as a hauler.  I liked the airplane a lot and thoroughly enjoyed my time in it.

  • The Avidyne Equipped Cirrus Upgrade

    A History Lesson

    11 years ago, in April of 2009, the Avidyne Corporation unveiled the much bally-hooed Release 9, or R9 as it is commonly known, as a hardware replacement for the Avidyne EX5000 Entegra system in Cirrus Aircraft. The Entegra system was way outdated by that point. Even though Avidyne was the first company to put together a glass PFD in a single engine piston airplane, the company had quickly fallen behind Garmin in keeping up with the ever changing technology landscape.

    Rewind to 2008. Cirrus had been going strong with the Avidyne Entegra since the SR20 and SR22 went to full glass in 2003 (a PFD and an MFD; prior to that, Cirrus aircraft only had an MFD with steam gauges and a Sandel Electronic HSI). Cessna, on the other hand, vaulted past the Avidyne Entegra and went straight to the Garmin G1000 in it’s aircraft, starting in 2004 with the 182 G1000 and 2005 with the 172 G1000. Beechcraft and Columbia went to the G1000 (Columbia started with the Avidyne as well) in 2005.

    Garmin’s technology in 2007 was so much better than Avidyne’s technology that Cirrus decided to switch. I’m sure there were many promises made by Avidyne to Cirrus about what Avidyne was working on (the R9), but the G1000 was out there, available, and being used in a lot of different airplanes with very good results.

    So, in 2008, Cirrus made the switch from the Avidyne Entegra to the Garmin G1000, dubbing it the Cirrus Perspective by Garmin avionics package. Avidyne finally got the R9 to market in 2009, but by that time, Piper was the only airplane manufacturer left putting factory Avidyne panels in their airplanes, and they switched to G1000 later that year.

    The R9 is a fabulous product. It’s fully integrated, has great graphics, has fully redundant displays, a QWERTY keypad (which, by the way, Garmin didn’t do for another 8 years), and a lot of other neat features. There’s a bit of a learning curve, but it’s a really good product for what it is.

    Avidyne, though, was late to the game with their technology. By the time it debuted in 2009, all the GA aircraft manufacturers had long since switched to the Garmin G1000 and weren’t looking back. That left Avidyne with the retrofit market for the many different Avidyne Entegra Cirrus aircraft out there. The only problem was, the retrofit was $80,000 ($95,000 if you wanted to throw in the DFC 100 Autopilot, which is a must have) and not many owners were up for paying that much money, then or now.

    To sum up our brief history lesson, Avidyne knew the Entegra needed to go, but couldn’t get the R9 out quickly enough to convince anyone to stick with Avidyne products. The retrofit market didn’t amount to many sales, so Avidyne doesn’t even make the R9 anymore.

    As a side note, I really, really like the Avidyne R9 and am sad that it didn’t make it into more airplanes.

    So, when the Avidyne Entegra starts to have issues, what’s an owner to do? Keep reading!

    There is Hope

    There are thousands of Cirrus aircraft out there flying with the Avidyne Entegra instrumentation, which is basically 20 year old technology (I’ve had a computer engineer tell me the programming in an Entegra is Windows 98 tech). These things are going to start having problems at some point (many already have), but what solution do owners have that is cost effective and get’s them new technology?

    Remember that little company named Garmin? Well, they have come through again. Announced this summer, the Garmin G500 TXi is now certified as a replacement in the Cirrus Avidyne Entegra equipped aircraft. This means pulling out both the PFD and MFD and replacing them with the G500 TXi on both sides. Engine data is also displayed on the G500TXi MFD, including the percent power and TIT indications, if equipped.

    Cirrus SR22 Equipped with Dual G500 TXi Screens and Dual Garmin GTN 650Xi GPS Units

    The cost for the panel? Two 10.6″ G500 TXi’s run about $16,000 apiece for the units, not including labor. $32,000 for a brand new panel isn’t terrible. Plus, the G500 TXi’s work with the DFC90 autopilot if the Cirrus is already equipped with it. If not, the Garmin GFC 500 autopilot is now approved for the Cirrus at a relatively low price of $7,000, including the servos.

    Still have the original Garmin 430s in your Cirrus? Upgraded to the Avidyne IFD 540/440 stack? Put in dual GTN 650Xi’s? Put in a GTN 750Xi? All are compatible with the G500 TXi panel.

    Want to upgrade everything? It does get kind of pricey at that point, but for just equipment, the cost for a complete panel conversion is somewhere in the area of $65,000 plus labor, still below what the R9 cost, but not cheap either. That would include 2 G500 TXi’s, 2 GTN 650Xi’s, a GFC 500 Autopilot, and all the engine monitoring equipment that the G500 TXi would need.

    Cirrus SR22 Equipped with Dual G500 TXi Screens, a GTN 750Xi, and a GTN 650Xi

    Thankfully, some new technology has finally come to the Generation 1-3 Cirrus. Oh, and by the way, your steam gauge Cirrus is fully upgradable as well.

    Want to read more? Check out Garmin’s website.

Leave a Reply

Your email address will not be published. Required fields are marked *