Field Condition, or FICON, reports show up in NOTAMs both during the summer time and the winter time. In the southern states, FICON reports are seen more in the summertime during and after hard rains and thunderstorms (with the exception of winter 2021 & 2022, where Texans quickly got familiar with FICON reports after some very unusual winter weather). In cold winter climates, FICON reports are a staple during the winter season, showing up during and after snow & ice storms.
The question is, what do those codes mean in the FICON report? You could see 5/5/5, 3/3/3, 3/4/4 and any combination thereof. And why are there three numbers?
Let’s start with the second question first. The three different numbers in the FICON report indicate the 3 different sections of the runway: the touchdown third, midpoint third, and rollout third of the runway.
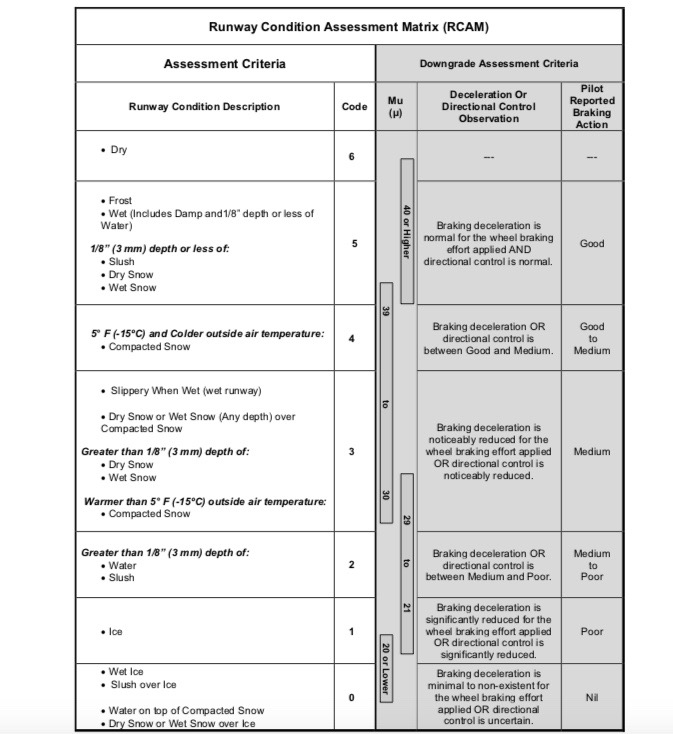
Now, what are those numbers describing? The three numbers are the indication of how slippery that portion of the runway is. This is referred to as a Runway Condition Code (or RCC). The lower the number, the more slippery the runway is. The higher the number, the dryer the runway. The scale is 0-6, with 6 being completely dry and zero being no traction at all.
Here is the FAA table for the RCCs.
Now, in order for those RCC codes to generate, at least 25% of the surface must be wet. If there are just spots of standing water, slush or snow, a FICON report will be issued to report the contaminants, but no codes will be generated.
The Runway Condition Codes are only part of a FICON report. In addition to the codes, a descriptor in the NOTAM will be published describing what percentage of the portion of the runway is affected and by what.
For example: RWY 28 FICON 3/3/3 100 PRCNT 2IN DRY SN OVER COMPACTED SN.
Deciphered, that is saying that all sections of Runway 28 have braking deceleration that is noticeably reduced or direction control is noticeably reduced and 100% of each section has 2 inches of dry snow over compacted snow. Sounds like a runway to avoid!
Braking action reports are separate from FICON reports, but also issued via NOTAM. Braking action reports are issued by the airport manager whereas the FICON reports are computer generated.
Austin Executive Airport opened a control tower on Friday, February 23rd 2018. The airport is now officially Class D airspace. The charts and A/FD are not updated yet to reflect the tower, but there is a NOTAM with the tower and ground frequency information. The tower hours are from 6am to 10pm. The weather frequency remains the same.
Make sure you check those NOTAMs if you are headed to KEDC anytime soon!
KEDC Tower Frequency: 120.3
KEDC Ground: 119.45
Austin Executive Airport opened a control tower on Friday, February 23rd 2018. The airport is now officially Class D airspace. The charts and A/FD are not updated yet to reflect the tower, but there is a NOTAM with the tower and ground frequency information. The tower hours are from 6am to 10pm. The weather frequency remains…
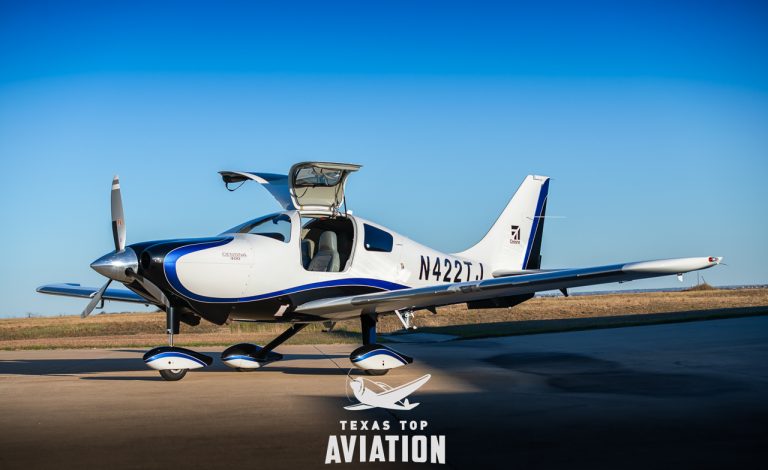
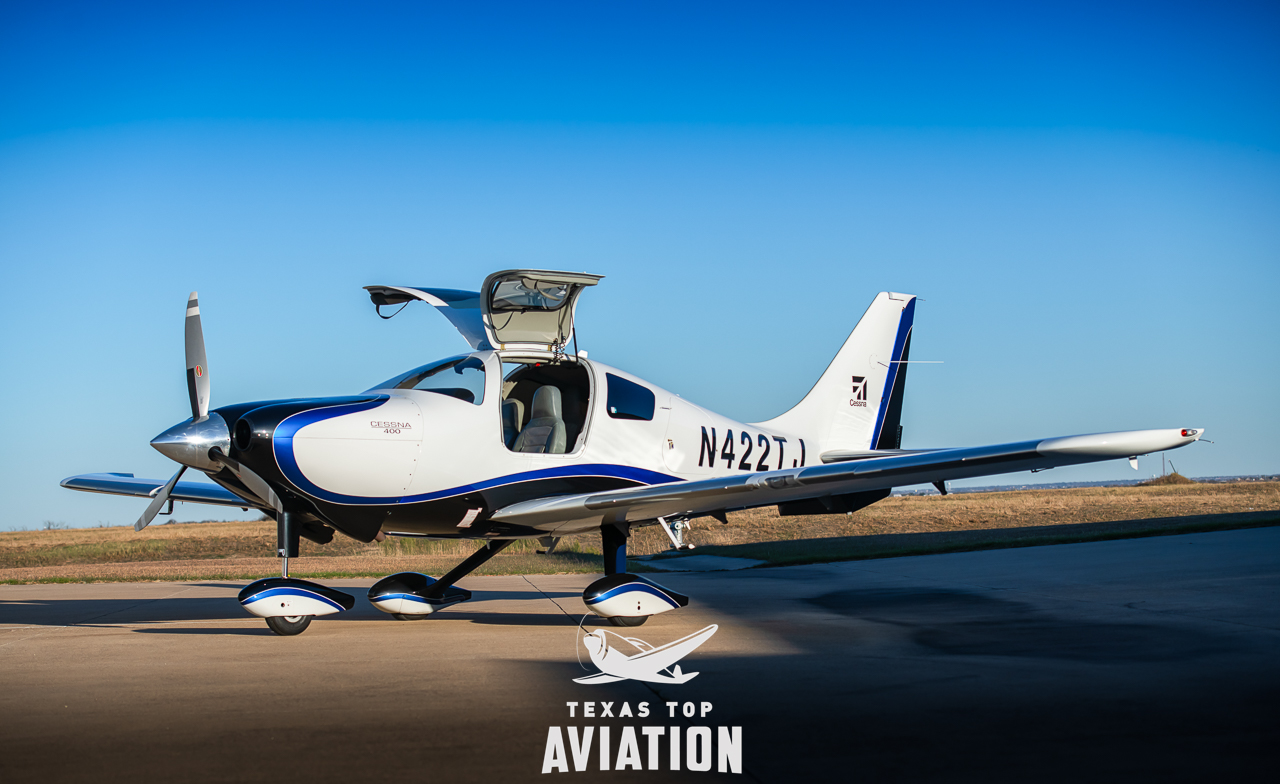
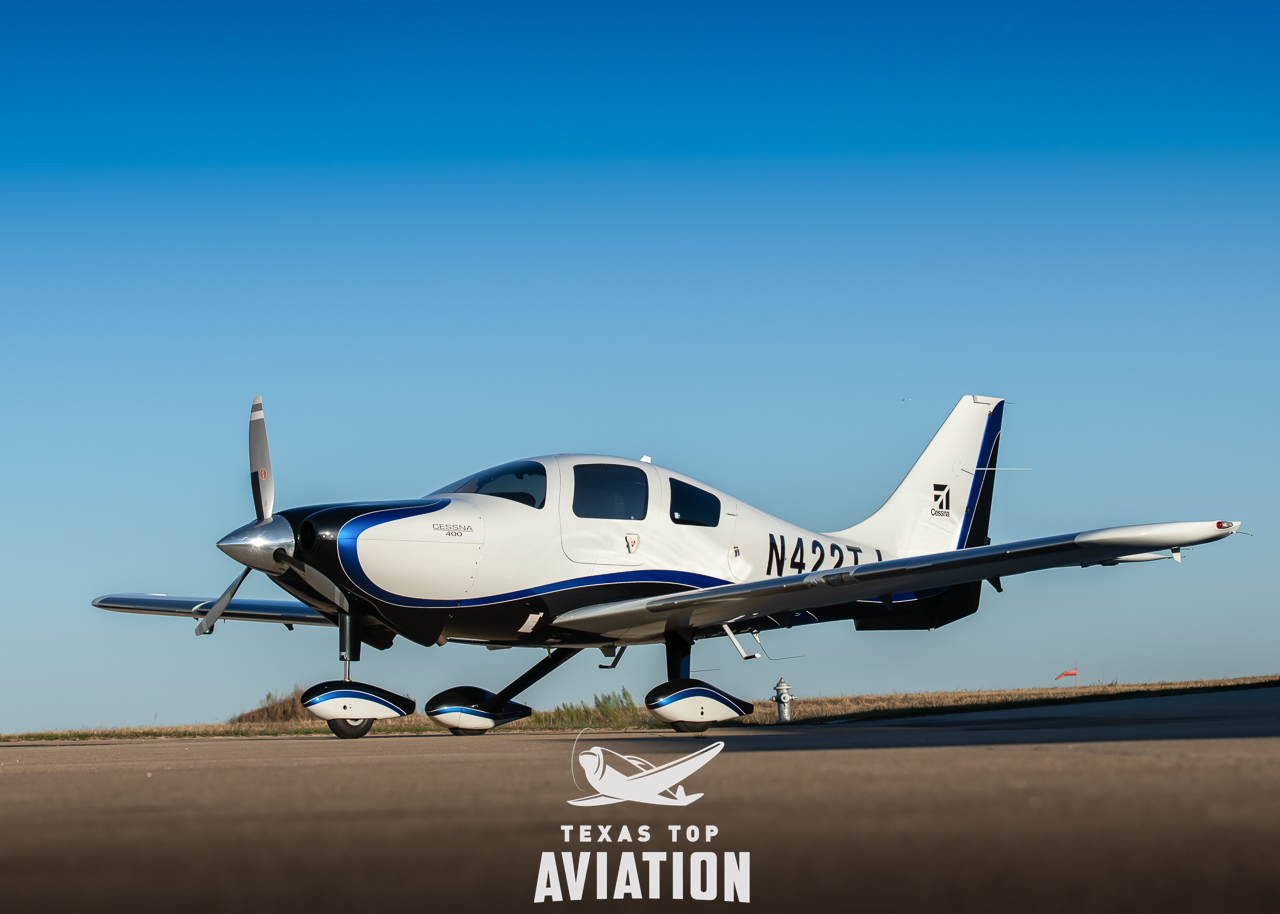
2008 Cessna 400 Corvalis TT (N422TJ) — 235 KTAS and Garmin G1000 glass, priced under a comparable Cirrus.
If you’re weighing a Cessna 400 vs Cirrus, start here. The 2008 Cessna 400 Corvalis TT cruises at 235 knots true — the fastest fixed-gear piston single ever certified. It’s faster than a turbocharged Cirrus on the same fuel and the same class of engine, and it costs less than a comparable SR22T. If you’re shopping a high-performance single for speed and value, N422TJ deserves a hard look.
The Airplane Cirrus Shoppers Overlook
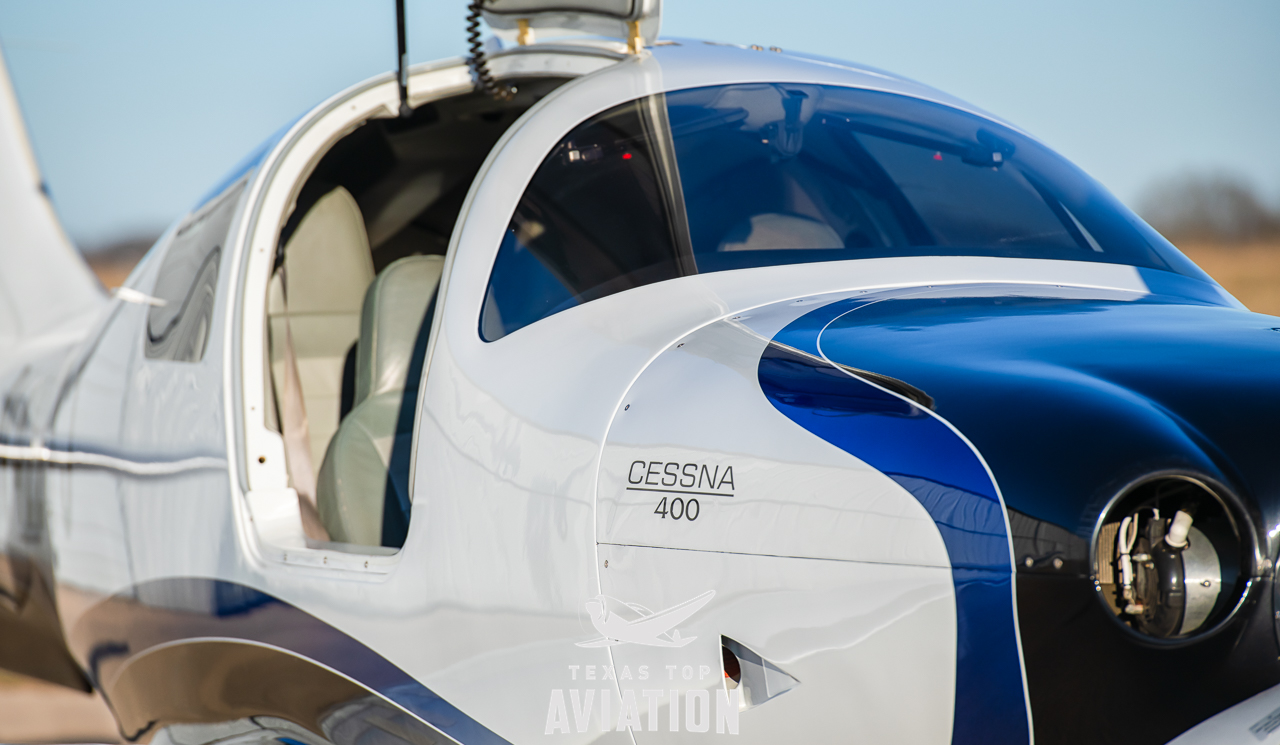
The Cessna 400 is a Lancair design — a clean-sheet, all-composite airframe built to go fast. Cessna certified and refined it, and built N422TJ in 2008. It seats four, carries a real load, and handles weather. Most buyers shopping a high-performance single default to Cirrus, so airplanes like this one get overlooked. That’s where the value is.
Faster on the Same Fuel
The 400’s 235 KTAS is a true max cruise at 25,000 feet on oxygen. A 2011–2012 Cirrus SR22T (Gen 3) trues about 211 KTAS. Both burn 100LL and run turbocharged Continental engines in the same ~310-horsepower class.
That’s about 24 knots up high — roughly 45 minutes off a 1,000-nautical-mile leg — with no bigger engine and no more fuel. And it isn’t only a flight-levels number: at 10,000 feet the 400 still trues about 180 KTAS, roughly 10 knots faster than an SR22T at the same altitude.
Lancair-designed, all-composite, fixed-gear — the airframe that makes 235 knots possible.
The Value Gap
N422TJ is priced at $350,000. A comparable Gen 3 SR22T typically trades between $450,000 and $550,000 used. (A new SR22T is a $1M-plus airplane — not the comparison.) Against the newer turbo Cirrus, that’s roughly $100,000 to $175,000 less for a faster airplane.
N422TJ — no damage history, complete logs since new, Van Bortel-maintained.
Cross-Shopping a Turbonormalized Cirrus SR22
A lot of buyers looking at N422TJ also weigh a Cirrus SR22 with the Tornado Alley turbonormalized engine. It’s a fair comparison — the same ~310-horsepower-class Continental, the same all-composite fixed-gear layout, the same 100LL — so here’s the honest math.
Speed and engine: the turbonormalized SR22 trues around 211 KTAS; the 400 does 235. The 400 also runs a true twin-turbocharged TSIO-550-C, not a turbonormalized system — a true turbo makes boosted power up high, which is a big part of that speed edge.
Avionics and price — 2006–2008: those Cirrus came with the Avidyne Entegra panel. N422TJ’s Garmin G1000 with WAAS and Synthetic Vision is a clear step up — better glass for comparable or less money.
Avionics and price — 2009 and later: Cirrus moved to Garmin Perspective (G1000-class) glass, but the price moved with it. A 2009 SR22 turbonormalized with Perspective typically runs around $400,000 or more — one representative listing is $429,900. N422TJ is $350,000: less money, comparable glass, and 24 knots faster.
The SR22 still brings the CAPS parachute and the Cirrus owner community. But on speed, engine, and price, the Cessna 400 stays ahead.
Metric
Cessna 400 Corvalis TT (N422TJ)
Cirrus SR22T — Gen 3 (2011–2012)
Cirrus SR22 Turbonormalized (2006–2009)
Max cruise (25,000 ft)
235 KTAS
~211 KTAS
~211 KTAS
Cruise at 10,000 ft
~180 KTAS
~170 KTAS
~170 KTAS
Engine
Twin-turbocharged Continental TSIO-550-C (true turbo, ~310 hp class)
Turbocharged Continental (~310 hp class)
Turbonormalized Continental IO-550-N (~310 hp class)
Cessna 400 Corvalis TT vs. Cirrus SR22T (Gen 3) and the turbonormalized SR22. Speeds and prices are typical estimates; verify against the aircraft records and current market.
The fastest fixed-gear piston single ever certified — and it out-runs a turbo Cirrus on the same fuel.
The Avionics You Can’t Buy Anymore
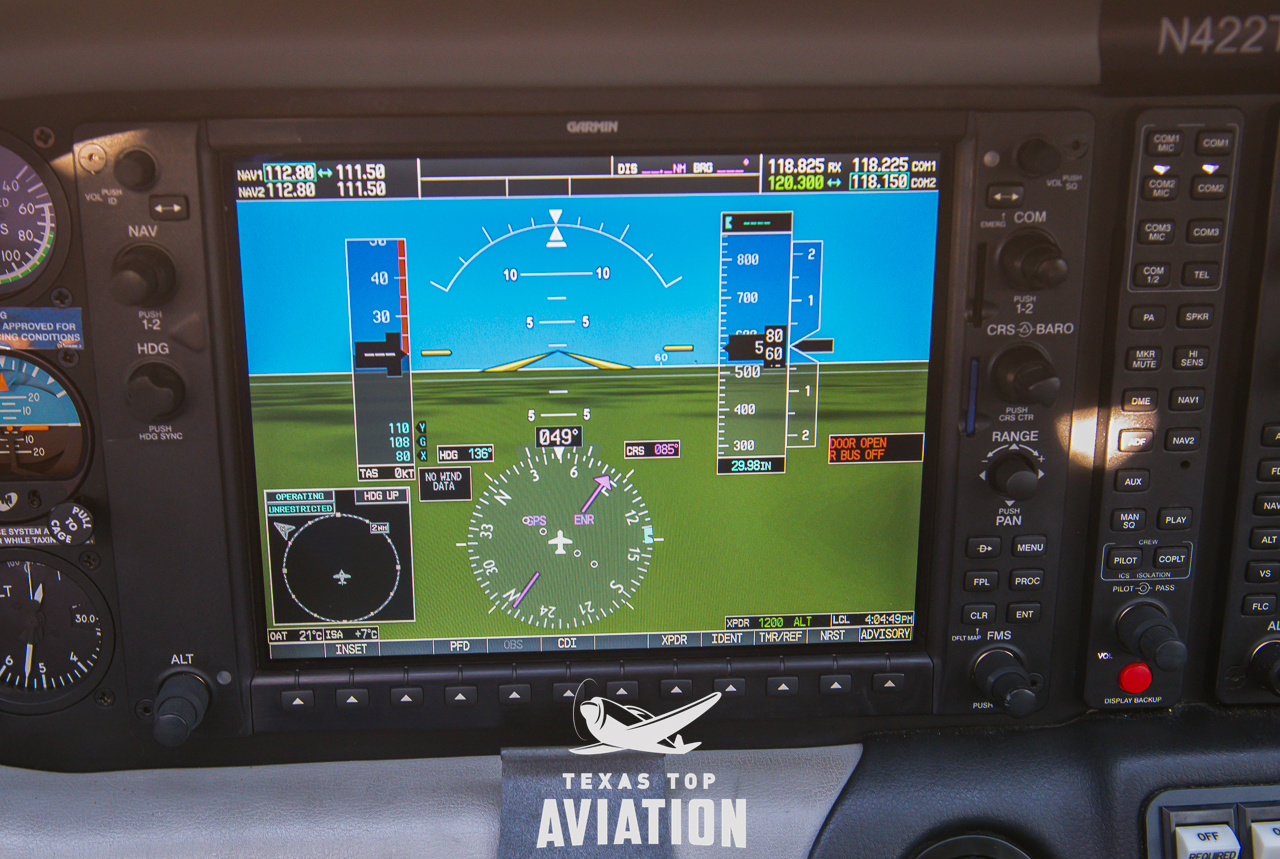
Garmin G1000 with WAAS and Synthetic Vision (SVT) and the GFC-700 autopilot.
N422TJ has a Garmin G1000 with WAAS and Synthetic Vision (SVT) and the GFC-700 autopilot. WAAS gives you LPV approaches — near-ILS precision at runways nationwide.
This matters because the WAAS upgrade path for the G1000 in these airframes is closed. A Cessna 400 that left the factory without WAAS can’t be upgraded — it will never fly an LPV approach. So a WAAS-plus-SVT 400 like this one is a scarce find. You either buy one that has it, or you don’t get it.
Both G1000 displays with synthetic vision — a modern, integrated flight deck.
Built to Actually Go
This airplane is equipped to be flown hard and often:
Thermawing electric de-ice with a backup alternator — a de-ice system (not certified known-ice)
Factory air conditioning
Speed brakes
Hot prop, built-in oxygen, and ADS-B Out
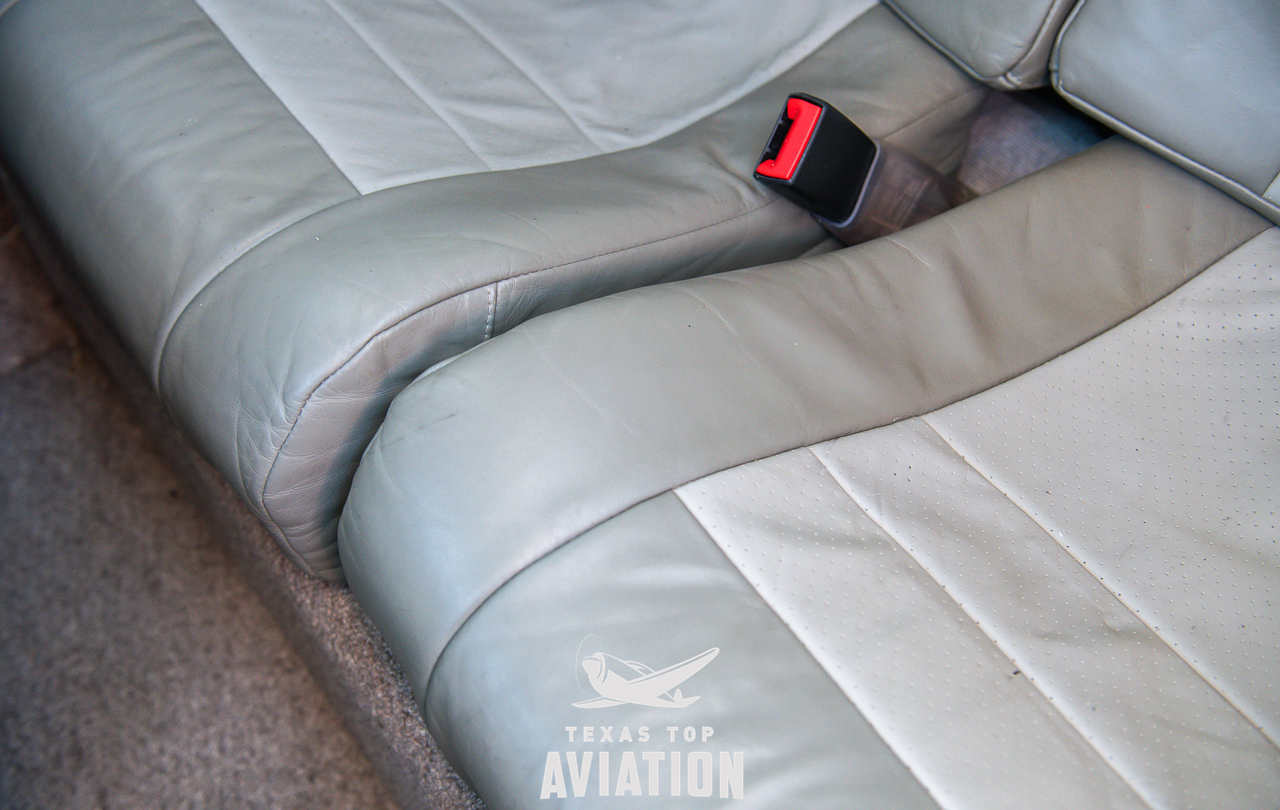
A comfortable four-seat cabin built for real trips.
The engine is a twin-turbocharged Continental TSIO-550-C with about 1,503 hours total time — the original engine, 1,503 since new. No damage history, complete logs since new, maintained by Van Bortel.
Leather interior, comfortable for four.
An Honest Word: What the Cirrus Does Better
One thing every Cirrus has that the 400 doesn’t: the CAPS whole-airframe parachute. Pull the handle and the airplane comes down under canopy. For a lot of buyers that’s the deciding factor, and it’s a fair reason to choose a Cirrus. Cirrus also has a large owner community and a strong support network.
Useful load is comparable across all three airplanes — the 400 is often equal or a little better. If the parachute and the community are your priorities, a Cirrus may be the right airplane, and we can help you find one. If your priorities are speed, avionics, and value, the 400 is hard to beat at this price.
Cessna 400 vs Cirrus: Quick Answers for Shoppers
Is the Cessna 400 faster than a Cirrus SR22T?
Yes. The Cessna 400 Corvalis TT trues up to 235 KTAS at 25,000 feet versus about 211 KTAS for a Gen 3 Cirrus SR22T — about 24 knots faster on the same 100LL and the same ~310-horsepower class of turbocharged Continental engine, or roughly 45 minutes saved on a 1,000-nautical-mile leg. At 10,000 feet the 400 still trues about 180 KTAS, roughly 10 knots faster than an SR22T at that altitude.
How does the Cessna 400 compare to a turbonormalized Cirrus SR22?
The Cessna 400 trues 235 KTAS versus about 211 KTAS for a turbonormalized SR22, and it uses a true twin-turbocharged Continental TSIO-550-C rather than a turbonormalized system. A 2006-2008 SR22 turbo has the older Avidyne Entegra panel, while the 400 has a Garmin G1000 with WAAS and Synthetic Vision. A 2009-and-later SR22 turbo with Garmin Perspective glass typically costs around $400,000 or more, versus $350,000 for N422TJ. The SR22 still offers its CAPS whole-airframe parachute.
Does the 2006-2008 Cirrus SR22 have a Garmin G1000?
No. Cirrus SR22s from 2006-2008 typically came with the Avidyne Entegra glass panel; Garmin-based Perspective glass arrived in 2009. The 2008 Cessna 400 came with the Garmin G1000, and N422TJ has the WAAS and Synthetic Vision version.
How much less is a Cessna 400 than a comparable Cirrus SR22T?
N422TJ is priced at $350,000, while a comparable 2011-2012 Cirrus SR22T (Gen 3) typically sells for about $450,000 to $550,000 used — roughly $100,000 to $175,000 less for a faster airplane.
What is the fastest fixed-gear single-engine airplane?
The Cessna 400 Corvalis TT, at 235 KTAS maximum cruise, is the fastest fixed-gear piston single-engine airplane ever certified.
Does the Cessna 400 have a parachute like the Cirrus?
No. A whole-airframe CAPS parachute is the one meaningful capability the Cirrus offers that the Cessna 400 does not. On speed, avionics, and useful load, the 400 matches or beats a comparable SR22 or SR22T.
Can the Cessna 400’s Garmin G1000 be upgraded to WAAS?
No. The WAAS upgrade path for the G1000 in these airframes is closed, so a non-WAAS Cessna 400 can never gain LPV approach capability. N422TJ already has WAAS plus Synthetic Vision, which makes it a scarce find.
Does the Cessna 400 carry less than a Cirrus SR22?
No. Useful load is comparable — the Cessna 400 is often equal to or a little better than a comparable SR22 or SR22T.
Call to see N422TJ or to talk through the Cessna 400 vs Cirrus decision: (512) 270-1298 · txtopaviation.com. Austin & San Antonio, TX.
The 2008 Cessna 400 Corvalis TT (N422TJ) trues 235 KTAS at FL250 — faster than a Cirrus SR22T — for roughly $100–175K less. An honest speed-and-value comparison.
We spend time training for them, but real-world emergencies are rare enough that it’s easy to get complacent. They don’t always happen to “other pilots,” though, and preparation can make a big difference when things don’t go as planned:
• What if you lose 500 rpm during takeoff, but the engine is running smoothly?
• What if the ammeter drops to zero during a flight in IMC?
• What if your left aileron develops a strong vibration in flight?
Our new seminar is full of expert tips on handling those “up here, but wishing you were down there” scenarios. We focus on how to keep abnormal situations from becoming full-blown emergencies, offer advice on keeping critical problems under control, and give our best advice on off-airport landings.
Find an AOPA Emergency Seminar near you!
Monday January 11, 2016-The Woodlands Waterway, 7pm-9pm
1601 Lake Robbins Drive, The Woodlands, TX 77380
Tuesday January 12, 2016-Wyndham Houston West, 7pm-9pm
14703 Park Row Blvd., Houston, TX 77079
Wednesday January 13, 2016, Holiday Inn San Antonio Airport, 7pm-9pm
77 NE Loop 410, San Antonio, TX 78216
Thursday January 14, 2016, Omni Austin Hotel at Southwark, 7pm-9pm
4140 Governor’s Row, Austin, TX 78744
Courtesy AOPA.org We spend time training for them, but real-world emergencies are rare enough that it’s easy to get complacent. They don’t always happen to “other pilots,” though, and preparation can make a big difference when things don’t go as planned: • What if you lose 500 rpm during takeoff, but the engine is running…
I was flying in the Rio Grande Valley in south Texas a few weeks ago and heard an IFR clearance given to a King Air that pricked my ears up. It was a clearance from CRP to LRD, but the routing was one you don’t hear too often anymore. Because of active military airspace, the routing was via a radial and DME off the CRP VOR (so a point defined by the radial and DME) to another radial and DME point off the LRD VOR.
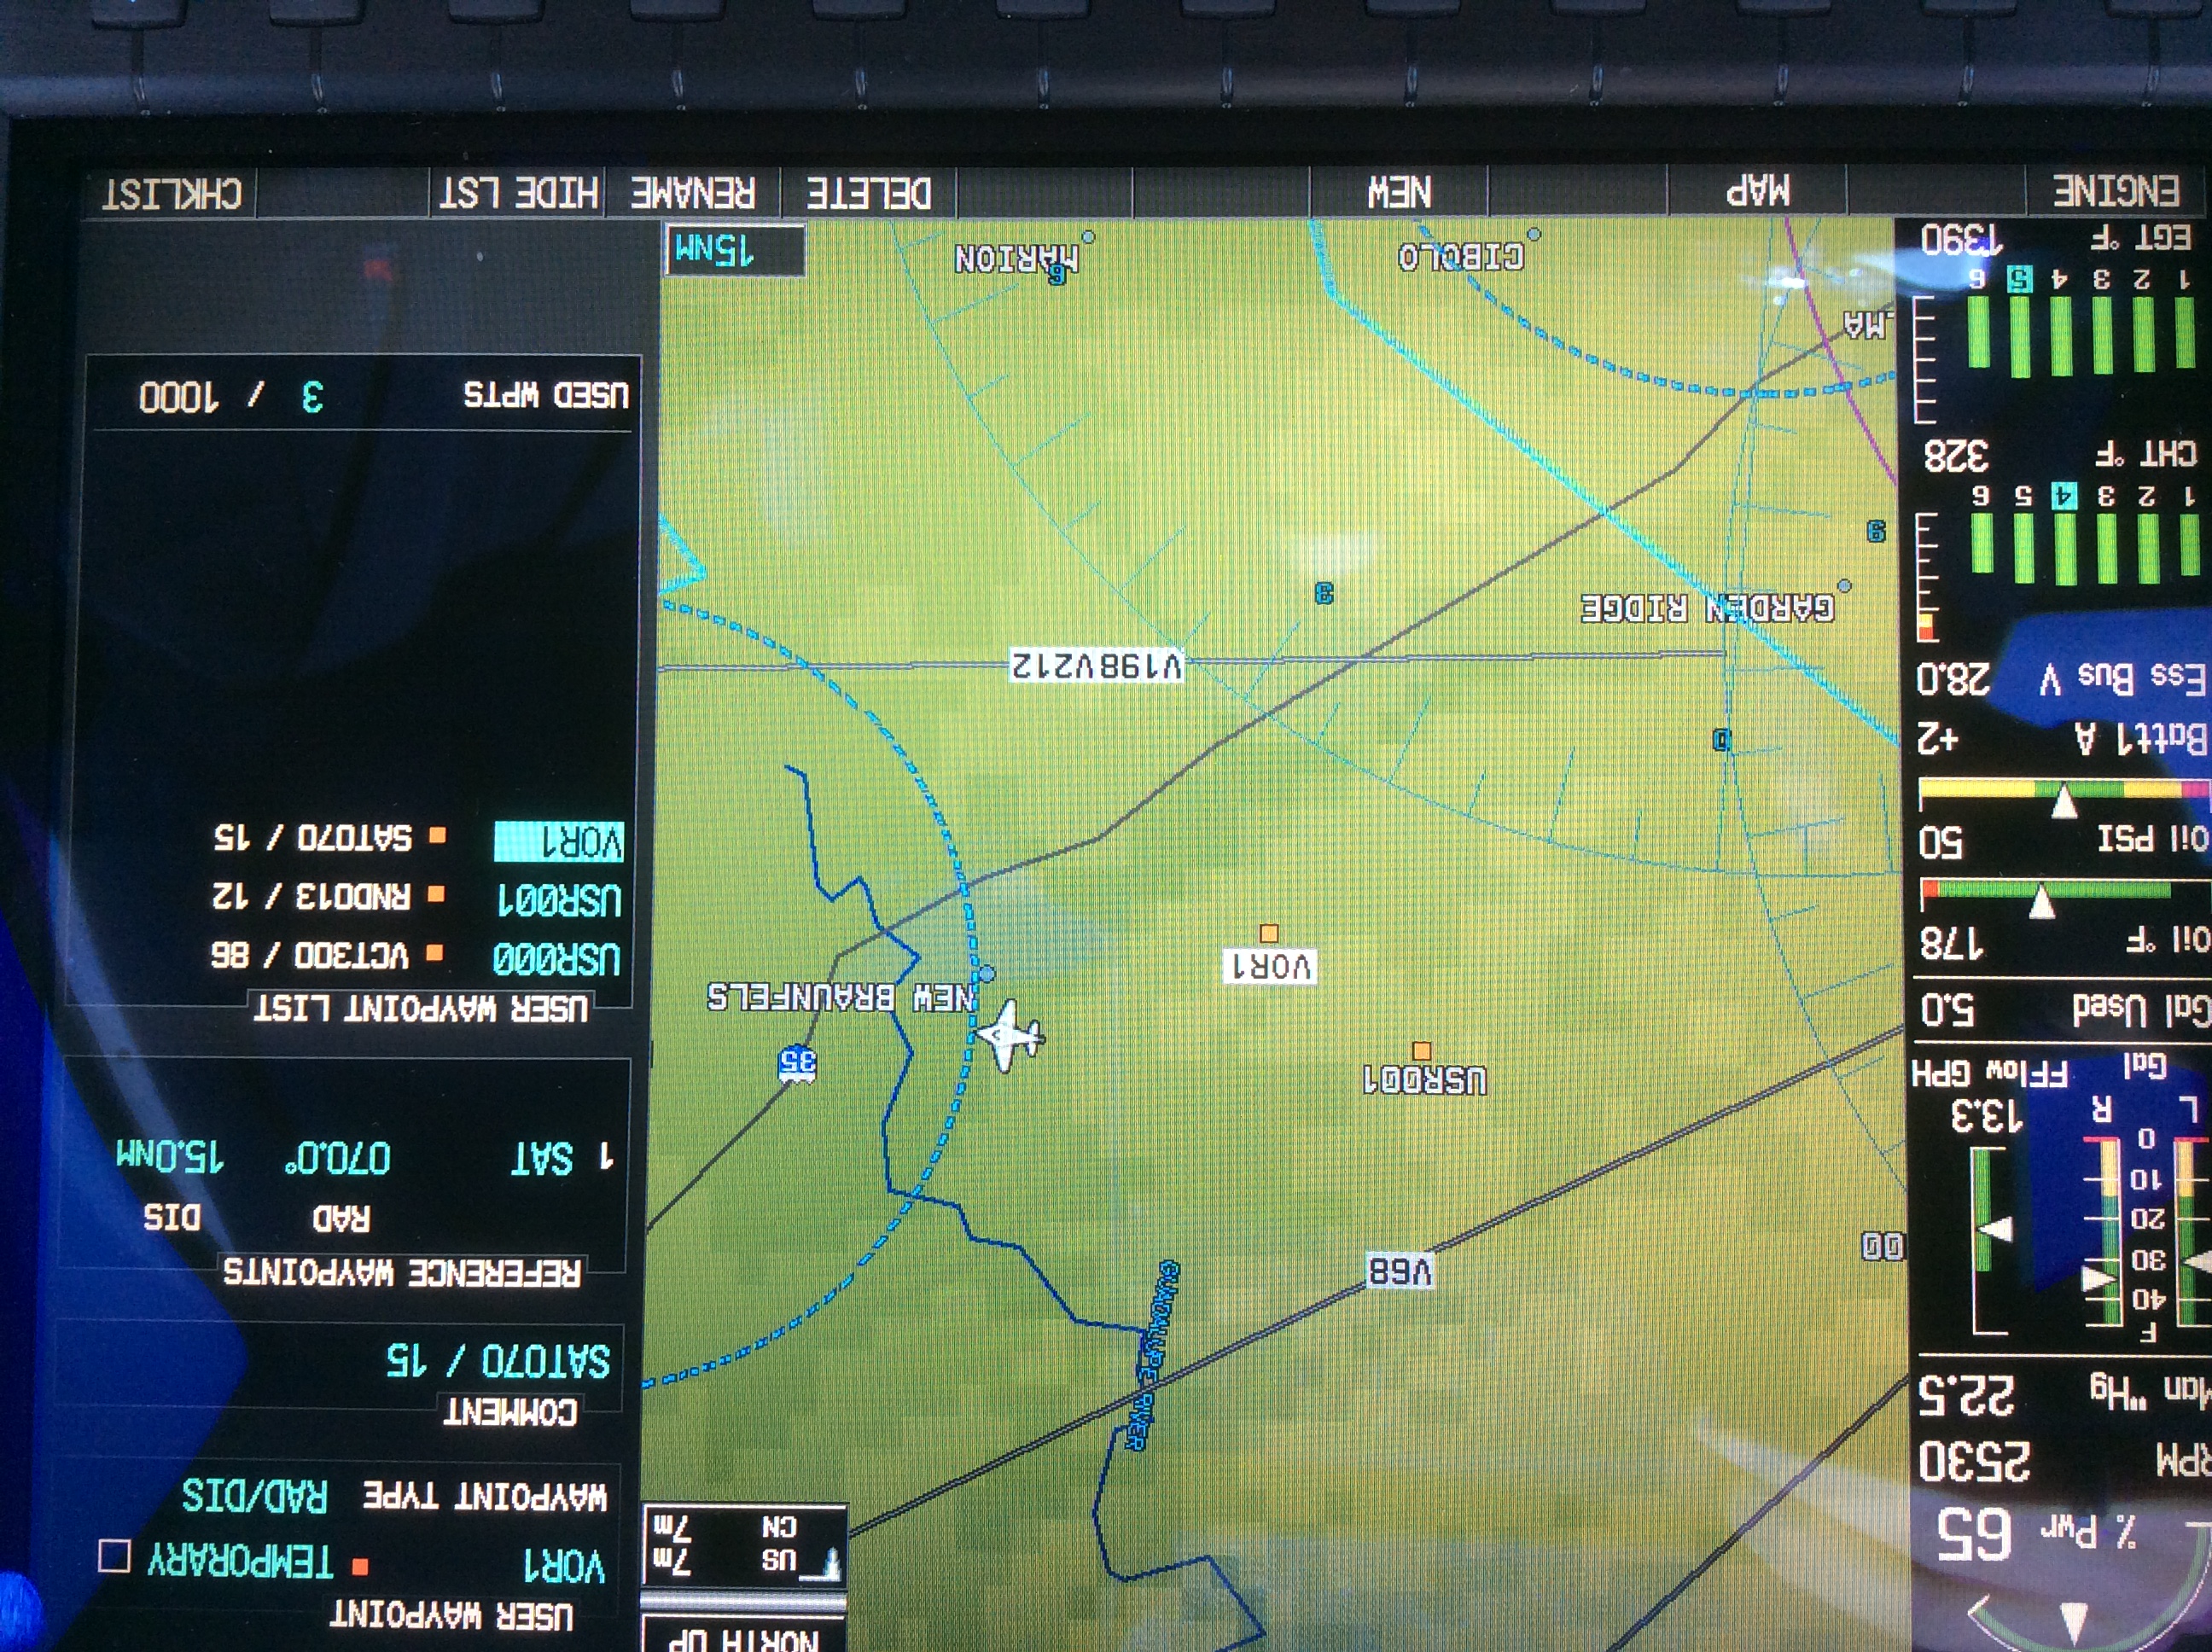
It took me a second to think about how to do this the easiest (without setting up the VOR and watching the DME). After a moment’s thought, it’s actually a snap with the G1000. You create 2 user waypoints, one for each Radial/DME spot, then put those 2 user waypoints in your Flight Plan.
Here’s how.
Step 1
Using the big knob, go to the Waypoint chapter. Once there, scroll down to the User Waypoint page using the small knob.
Step 2
Press the New soft key. If you want to name the waypoint something specific, you can do that at the top of the page. If not, it will default to something like VOR 1 or VOR 2.
Step 3
Under Waypoint Type, use the small knob to select RAD/DIS (stands for Radial/Distance).
Step 4
Under Reference Waypoints, again using the small knob (or your keypad), type or dial in the VOR identifier, the radial from that VOR, and the DME distance. Press enter and you are done.
Once you have both User Waypoints created, then just put them in your flight plan (if you forget what you named them, you can just go back to the User Waypoint page), and off you go.
I was flying in the Rio Grande Valley in south Texas a few weeks ago and heard an IFR clearance given to a King Air that pricked my ears up. It was a clearance from CRP to LRD, but the routing was one you don’t hear too often anymore. Because of active military airspace, the…
The Angelina County Airport in Lufkin, TX (KLFK) will be hosting the Angelina County Airfest on Saturday, October 10th. The airport will open up at 9am.
Prepare for a day of food, fun, and some great performances. There will be warbirds and many other classic airplanes on display, not too mention a number of aerobatic performances as the day goes on.
The Angelina County Airport in Lufkin, TX (KLFK) will be hosting the Angelina County Airfest on Saturday, October 10th. The airport will open up at 9am. Prepare for a day of food, fun, and some great performances. There will be warbirds and many other classic airplanes on display, not too mention a number of aerobatic…
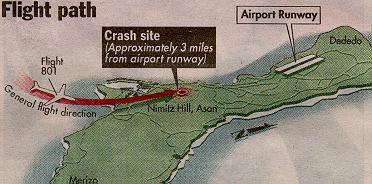
I ran across the story about the Korean Air flight that crashed in Guam in the late ’90s the other day. It was a 747 that hit the side of hill about 3 miles short of the runway, killing most of the people on board. The flight was at night (arrival time was about 1:30am) and the pilot’s lost sight of the runway on a visual approach due to inadvertent IMC entry. They didn’t execute a missed approach soon enough, got too low, and crashed.
These were experienced pilots, mind you, who had flown into that airport a number of times. They were experienced enough to know when to execute a go around. There were several other factors that led up to the crash, but, ultimately, they lost sight of the runway due to inadvertent IMC entry.
To all the VFR pilots out there, what do you do if you accidentally fly into a cloud? It’s a lot easier to encounter inadvertent IMC at night, simply because you can’t see the clouds in front of you. It is no less dangerous during the day, either.
So, we’re going back to the basics today. What really is the best course of action for a VFR pilot when flying into a cloud? One option (and in my opinion, the best option) is to turn around. Immediately start scanning your instruments, execute a shallow banked 180 degree turn while maintaining altitude, and fly out of the cloud you just flew into. If you have an autopilot, turn it on immediately and let it do the turn.
What if you were descending or climbing when you encountered the inadvertent IMC? In this case, just reverse whatever you were just doing. If you were descending, climb. If you were climbing, descend. Caution is needed, though, as climbing or descending when flying on instruments for an inexperienced IFR pilot could lead to a greater chance of disorientation.
One thing that could assist in spotting those clouds at night is turning the cockpit lights down. This will allow you to see outside a little bit better and start to notice when those ground lights are disappearing.
Most VFR pilots only do instrument flying on flight reviews. That doesn’t lead to a very high level of proficiency, so go out and grab your instructor and tell him to put you under the hood once a month. You’ll be a better pilot overall for it.
IFR pilots, taking a note from the Korean Air flight; if you lose sight of the runway on a visual approach, especially at night, go missed and ask for the instrument approach procedure. Don’t try and duck down below the clouds as there may be a hill or a mountain directly below you.
I ran across the story about the Korean Air flight that crashed in Guam in the late ’90s the other day. It was a 747 that hit the side of hill about 3 miles short of the runway, killing most of the people on board. The flight was at night (arrival time was about 1:30am)…







 Most VFR pilots only do instrument flying on flight reviews. That doesn’t lead to a very high level of proficiency, so go out and grab your instructor and tell him to put you under the hood once a month. You’ll be a better pilot overall for it.