Flying the Piper Malibu

Looking for an airplane with more seats, more useful load, and good speed?  Look no further than the PA-46-310P Piper Malibu.  It feels like a corporate airplane, but this turbo charged piston single is good owner/pilot airplane for taking the family on vacation or using on business trips.
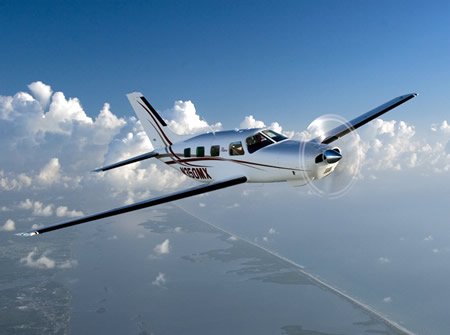
Piper Malibu Texas Top Aviation

The original Piper Malibu, which was manufactured between 1984-1988, is a great next step airplane for Cirrus owners, Saratoga or Lance owners, and Mooney owners looking to move up to a pressurized, 6 seat piston.  The pressurization has got to be one of the best parts of the Piper Malibu.  The ability to climb up to the low flight levels (the service ceiling is FL250, but the airplane performs great between 16,000 and FL190) to catch better winds and get a better true airspeed (the airplane gains about 2.5 KTAS for every thousand feet) without having to wear oxygen makes the ride much more enjoyable.

Equipped with six seats and a 4,100 pound gross weight, the Piper Malibu allows for a lot more carrying ability than a Cirrus or even a Saratoga.  Now, like most piston airplanes, you can’t take 6 average adults, bags, and full fuel, but here’s the great part:  the Continental TSIO 320 only burns 16.5 GPH in cruise at 75% power.  The plane will still fly 200 KTAS at 16.5 GPH.  With 120 gallon capacity, even taking half tanks still allows for a 2.5 hour range with an hour reserve.  At 200 KTAS, that’s 450 miles.  And, you gain an extra 360 pounds useful load at half tanks.  That’s not too shabby.
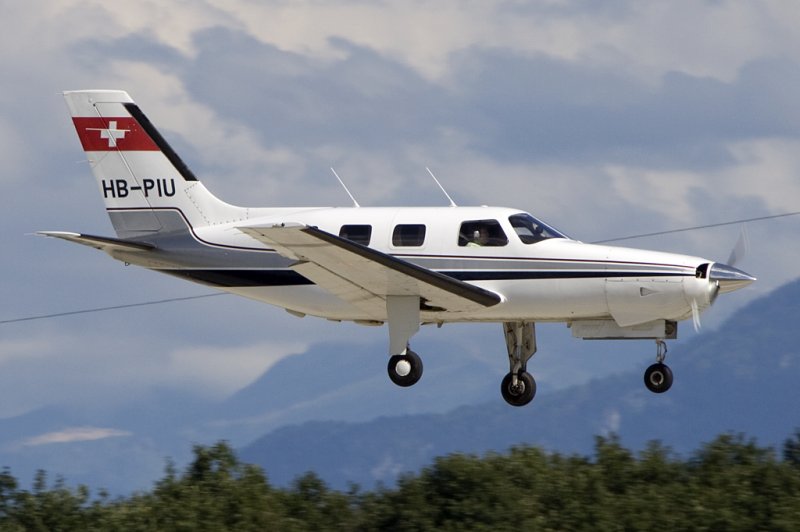
Piper Malibu PA-46 Texas Top Aviation

The Piper Malibu was designed to be comfortable, fast, and be able to carry some baggage.  There are two baggage compartments, one in the nose behind the firewall and one in the rear behind the rear seats.  The nose baggage is wide enough to fit golf clubs in, while the back baggage is large enough to fit rolling suitcases in (the front baggage has no problem with roller bags either).  Lots of weight in bags?  Again, no big deal.  Just plan on taking less fuel and still flying for 2.5 hours.

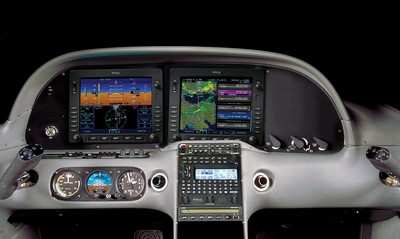
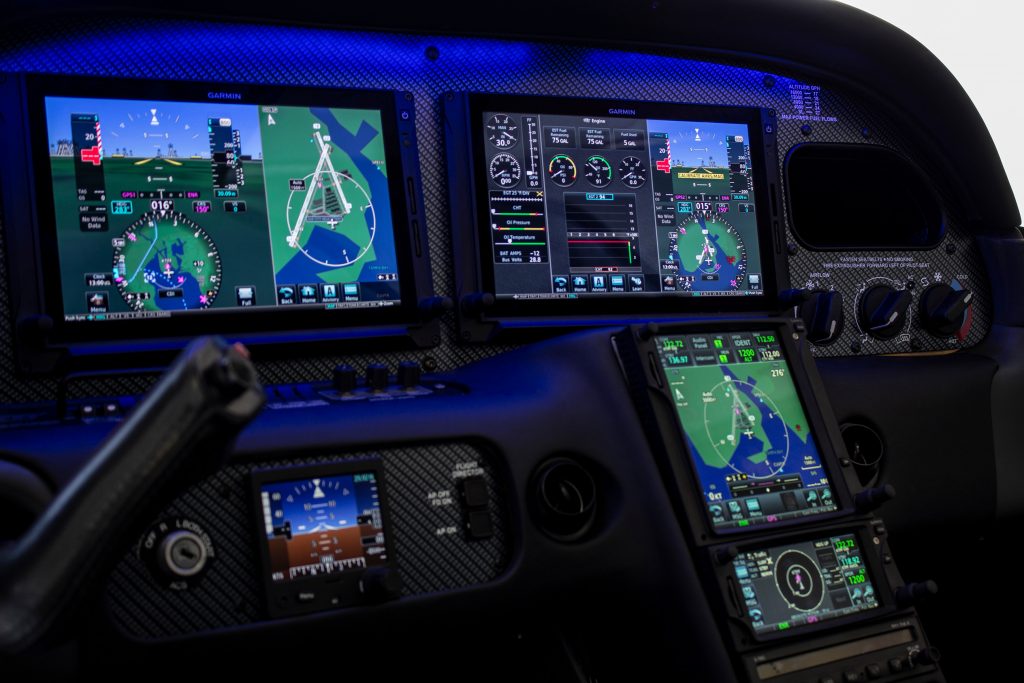
From a pilot’s standpoint, the Piper Malibu is a pretty straightforward airplane to fly, though it does require some specialty training.  A lot of PA-46s on the market right now have upgraded glass panels and digital engine monitors, making piloting the airplane that much more streamlined.  Most Piper Malibus are equipped with the KFC 150 autopilot.  Some have a yaw damper installed, others don’t.  Some have the vertical speed and altitude capture installed, others don’t.  It just depends on that specific airplane.  They aren’t like a Cirrus where they are all made the same.

Looking to upgrade to something with more seats, a higher service ceiling, but not a significant increase in fuel costs?  Look into the Piper Malibu.  You can get one in good shape from about $300,000.


Similar Posts

  • Thunderstorm Avoidance

    Thunderstorms are not to be taken lightly. I know you have probably heard that many times in your flying career. Weather related accidents account for approximately 25% of airline and GA accidents.

    The Airman’s Information Manual suggests giving a 20 mile berth around thunderstorms. If you are an experienced aviator or a newbie please take this piece of advice seriously. At one flight school where I taught, we had the policy of maintaining a 25 mile buffer around isolated thunderstorms. A bit excessive you think? Maybe, but safety is a good thing!

    On this particular day, I was operating a Bell Jet Ranger helicopter during a power line patrol. Power line patrol by itself offers numerous challenges. The job consists of flying along electric power transmission lines at approximately 40 feet above the ground at 40 knots. The crew consisted of me (the pilot) and an observer. The observer is an employee of the power company and it is his job to determine which line(s) will be patrolled during the given day. As I fly along the lines, the observer is checking for anything out of the ordinary such as broken, cracked, or even shot out insulators, excessively large bird nests at the top of structures, or woodpecker holes in wooden poles. The observer knows the lines and he is also a great help in letting me know there is a crossing, and potentially higher, line in our flight path. That makes him a true safety asset!
    Power line thunderstormIt was late afternoon during the summer and we were about to finish up for the day. We only had about another 10 miles of line to follow before calling it a day. Up ahead, I noticed an isolated thunderstorm near our power line. I could see the heavy rain falling below the anvil shaped leading clouds. It appeared to be well beyond the end of our day’s work so we pressed on.

    As we drew closer to the thunderstorm, we were suddenly tossed up on our left side like a dog toy in mid-flight! It seemed like we were 90 degrees to our normal cruise attitude and, to make it worse, we had the doors off on that hot summer day. I was able to recover and we did an immediate about face and high tailed it home. Forget the rest of that line, tomorrow is another day.

    The destructive force of thunderstorms cannot be overstated. In addition to extremely heavy rain, they can contain strong wind shear, large hail, and severe turbulence, each of which can damage or destroy an aircraft. Take care when one of these bad boys is near your flight path. Give it plenty of respect and a lots of room, for safety’s sake.

    Alan VanDoren is a 7000 hour ATP pilot.  He has flown both fixed wing and helicopters as a police pilot, missionary pilot, flight instructor, and most recently as an EMS pilot.  He has flown in five countries around the world and also teaches university level aviation courses in his spare time.

  • Determining Pattern Altitude

    Figuring out the pattern altitude at an airport should be pretty simple, right?  But, in this day of helpful technology, most pilots actually get it wrong.  How can you always get it right?  Well, it just takes about an extra 15 seconds.  Here’s how.

    Traffic Pattern
    John Wayne Airport Traffic Patterns

    As outlined in the Aeronautical Information Manual, section 4-3-3, “traffic pattern altitudes for propeller-driven aircraft generally extend from 600 feet to as high as 1,500 feet above the ground.”  Further, in the Pilot’s Handbook of Aeronautical Knowledge on page 13-10, it states:  “1,000 AGL is recommended pattern altitude unless established otherwise.”

    Okay, so for piston driver’s, we’ve got it narrowed down to 1,000 AGL (Above Ground Level for those who don’t like acronyms).  But wait!  There’s that very important phrase at the end of the last quote:  “unless established otherwise.”  That means not all airports have traffic pattern altitudes of 1,000 AGL, or else they wouldn’t put that line in there!

    How do you find out what the TPA (Traffic Pattern Altitude) is for a certain airport if it’s not 1,000 AGL?  Great question!  Your first guess is probably to look on Foreflight.  Though this is a good start, it is not the full answer.

    Let’s use an example.  Look up KAQO, the Llano Airport on Foreflight.  At the top of the page, the airport elevation is stated as 1,101′ MSL and the pattern altitude is stated as 1,902′ MSL.  From what we just learned, 1,902′ MSL is not 1,000 AGL, so is 1,902′ MSL otherwise established?

    On the Airports page with KAQO pulled up, tap the A/FD tab, second to last on the left.  Scroll down to Llano Muni.  Read the whole entry.  Does it state in the entry that pattern altitude is different than 1,000 AGL?  It sure doesn’t.  So, because it is not otherwise established, pattern altitude at KAQO is 2,102′ MSL not 1,902′ MSL.

    Where did Foreflight get that?  I have no idea.  Too often, though, pilots look at the Foreflight pattern altitude and don’t actually check the Airport Facilities Directory (A/FD).  Then, they get the pattern altitude wrong.

    What does it look like when pattern altitude is otherwise established?  Look up KSGR, Sugar Land Regional, on your Foreflight app.  Foreflight states the elevation as 82′ MSL and the Pattern Altitude as 1,000′ MSL.  Is this correct?  Well, tap that A/FD button again and let’s find out.

    On the second line of the A/FD entry, it says TPA-See Remarks.  Down in the remarks section, we find the following:

    TPA-1000 (918) single engine piston acft, TPA-1500 (1418) for twin and turbojet acft, TPA-500 (418) for helicopters within 2NM.

    Foreflight got it right this time for single engine pistons, but if you are in a twin, the pattern altitude is different.  What’s the lesson here?  Always check the A/FD and don’t always go by what Foreflight says.  The A/FD is always right and usually has a little more detail to help set you straight.

    One last thing.  Both the AIM and the Pilot’s Handbook of Aeronautical Knowledge, when talking about pattern altitude, state, “When operating at an airport, traffic pattern altitudes should be maintained unless otherwise required by the applicable distance from cloud criteria in…section 91.155.”  91.155 defines basic VFR weather minimums.  So, to fully interpret what the AIM is saying, we have to take into account the type of airspace we are in to determine if we can safely and legally operate at pattern altitude at a particular airport.

    For example, let’s say we are at KCVB, the Castroville Airport.  Pattern altitude there is 1,602 feet, which is 829 AGL.  CVB is Class G airspace up to 700 AGL, then Class E above that.  Let’s say there is a 700 AGL broken cloud layer.  Pattern altitude is 829 AGL, so you won’t be able to get up that high with a broken ceiling.  What altitude can you do pattern work at to stay legal?

    Class G VFR weather minimums during the day below 1,200 AGL is 1 SM visibility and clear of clouds.  So, legally, you could fly at 699 AGL (which at CVB would be 1,472 MSL) while in the pattern and be legal.  Safe?  Maybe, but probably not if you are skimming the base of the clouds.  Is 1300 MSL a safer pattern altitude in this example?  Well, that is 527 AGL, so probably not, since towers tend to stick up that high sometimes.

    Let’s go back to KSGR and put a 1,000 AGL overcast ceiling there.  SGR is Class D airspace and we already determined pattern altitude there was 1,000 MSL for piston singles.  VFR visibility and cloud clearance requirements in Class D airspace are 1,000 feet above clouds, 500 feet below clouds, and 2,000 feet horizontally from the clouds with 3 SM visibility.  In order to stay 500 feet below the clouds, you would be flying a 582 MSL pattern.  Safe?  Probably not, though it is legal.

    To summarize, don’t take Foreflight’s word for pattern altitude.  Cross reference the A/FD (it only takes 15 seconds at the most) to verify.  If it’s cloudy, it’s really best to stay on the ground, but if you want to find out your legal pattern altitude with a cloud deck, cross reference 91.155.  I don’t recommend flying below pattern altitude because it is there for a reason.

  • Cirrus SR22 Partnership in Houston

    Ever wanted to be a Cirrus owner, but the economics of being a single owner just don’t make sense for you? If you’re in the Houston area, you now have a chance to join a Cirrus SR22 partnership at the West Houston Airport, KIWS.

    The group, CirrusShare, is a 4 member group, but one of the members is looking to sell his share.  The airplane is a 2007 G3 SR22.  It is in excellent condition, with dual WAAS 430s and air conditioning.

    If you would be interested, please contact Texas Top Aviation for more information.

    N578AG


  • Night Flying

    Ah, fall is finally here.  In Texas, it arrived about a month late, but showed up with a vengeance.  A strong cold front caused a 40 degree temperature drop in 12 hours earlier this week, bringing rain, lower freezing levels, and lots of wind.

    Fall means cooler temps, but fall also means less light.  The sun begins to set sooner, plus the fall back time change in November cause darkness to spring upon an unaware pilot.

    Before getting in to too many night landings tips, just a friendly reminder, passengers can only be carried at night if the PIC has completed 3 takeoffs and landings to a full stop in the last 90 days during the time period of 1 hour after sunset to 1 hour before sunrise.

    Lots of us have been landing long before sunset for most of the past couple of months, so those night flying skills might be a little rusty.  The best way to remedy night flying rustiness?  Call an instructor and go get some practice.

    In the meantime, here are some tips as to what to expect for your next night flying experience.

    1. Your Eyes Are Very Important.  This may seem like an obvious statement, but night vision can be affected by many things.  Before you takeoff, you want to make sure you can see in the dark.  The FAA recommends no bright lights 30 minutes prior to takeoff.  They also recommend using oxygen at night as this greatly improves night vision, even at low altitudes.  Use off center viewing to help spot traffic or other objects in the air.  Finally, when preflighting, use a red flashlight as much as possible, but if you do have to use a white light, close one eye to keep one eye from being blinded.
    2. Utilize Approach Lights on Landing.  Night landings are very different then day landings.  It is very difficult to get the proper depth perception, not too mention see obstacles below you on your final approach to a runway.  PAPI’s, VASI’s, and instrument approach glide slope’s become very important.  If you are VFR only pilot, if your airport has a PAPI or a VASI, keep 2 white and 2 red (or 1 white and 1 red) lights.  If you see 3 red (or 2 red), climb.  If you see 4 red, definitely climb.  If you are an IFR pilot, I highly recommend always flying an approach at night.  What if your airport doesn’t have a PAPI, VASI, or approach with a glide slope?  You might not want to utilize it at night.  One side note on VFR flight: Clouds are nearly invisible at night.  If you do fly into a cloud (a clue is your strobe lights start reflecting back at you), don’t panic.  If you have an autopilot, turn it on and execute a 180 degree level turn.  If you don’t have an autopilot, start scanning your instruments, keep your attitude indicator blue side up, and make a shallow 180 degree while maintaining altitude.  Then call ATC, advise them what happened, and ask for help.  One more note:  I highly recommend that if a pilot finds that he/she will fly at night at lot, get an instrument rating and fly IFR at night.  It’s much safer.
    3. Practice Landings Before Carrying Passengers.  The tendency when landing at night is to level off too high before flaring, causing the airplane to bleed off speed and energy too high above the runway.  This can lead to a stall, a hard landing, and/or too high of a pitch attitude at touch down causing a tail strike. A good tip is start your level off when you can see the tire marks on the runway.  Make sure you practice night landings, preferably with an experienced instructor who is night current and proficient, before carrying any passengers on board, even if you are night current, but haven’t landed at night in a while.
    4. Night Emergencies.  For engine failures at night, you are very limited on options.  Unless you have a Cirrus equipped with a CAPS parachute system, you really have two options if an airport isn’t within gliding distance.  Find a wide, lighted road that appears to be lightly trafficked.  A word of caution, though:  be careful of light poles, fences, concrete medians, cars, and buildings.  The LA freeway would not be a good option (though there are exceptions to this rule as is evidenced by the picture below).  The second option is find a dark spot and pray it’s a field (or the Hudson River).  As you get closer, you can turn your landing light on to see what the ground looks like.  If it looks good, keep the light on and continue.  If you don’t like what you see, turn your landing light off and continue….

    Flying at night can be the best time of day to fly.  It’s usually smoother, cooler, and you get to see all the city lights.  It is a very different environment, however, so make sure to get some training before darkness settles in on your next trip.

  • Using the ICARUS Device to Simulate IFR Conditions

    Most of us who have been through instrument training are familiar with the traditional view limiting devices. There is the original hood, which does a decent job of blocking a pilot’s view of outside, but there are still gaps that allow “peeking”, though that peeking doesn’t really help a pilot fly an approach. It does help them figure out which way is up, so it’s not a true simulation.

    The other problem with a hood is the process of putting it on to begin simulating IFR conditions, then taking it off when it’s time to land. This process takes time and the instructor has to take the controls (or the autopilot flies), losing some of the realism of the simulation.

    Overall, an IFR hood is relatively comfortable. The elastic band sits under your headset, doesn’t squeeze your heard, and doesn’t press underneath your ear cups of the headset, giving you a headache. Hoods are large and somewhat unwieldy.

    Foggles are another way to simulate IFR conditions for training. Most of the time, these are safety glasses that have most of the lens blacked out or fogged out, leaving little slits at the bottom for the pilot’s eyes to see the instruments.

    Foggles aren’t quite as good as an IFR hood at blocking the outside. Due to their shape, there are often cracks that allow more “peeking” then a hood. The process of beginning to simulate IFR conditions and ending the simulated IFR conditions is easier though, since all the pilot has to do is put the foggles on or slip them off, which can often be done one handed (putting them on can be more difficult one handed since they have to fit underneath your headset). Wearing them for a long period of time can get painful as your headset is probably going to start crushing them against the side of your head.

    The best comfort and view limiting combination I have found, so far, is called the ViBAN. It’s very comfortable and does a really good job of simulating IFR by blocking a view of the outside.

    What’s the whole goal behind a view limiting device? When a pilot starts instrument training, ideally, all the training would take place in the clouds, since that is why someone get’s an instrument rating. As we all know, this isn’t possible, hence the need to simulate IFR conditions. The problem with simulating IFR is, it’s not true IFR. True IFR conditions are different then what a hood or a set of foggles can simulate. This can lead to spatial disorientation if a fresh instrument pilot enters the clouds for the first time, having done all his training in simulated conditions.

    I’ve even heard a story of a pilot who did all his IFR training with a hood, passed his check ride, went into the clouds the first time, and put the hood on because he was getting disoriented since he hadn’t ever experienced true IFR.

    What about full motion simulators? How I wish every airport had a full motion simulator for instrument training. Full motion sims are truly the best way to simulate IFR conditions. A pilot can easily get spatially disoriented in a sim if he or she isn’t careful. It’s a great way to simulate IFR conditions, but, alas, this just isn’t possible.

    Are we doomed to just do an okay job of training instrument pilots in simulated IFR conditions with a hood or foggles?

    Nope, at least not anymore.

    Enter the ICARUS Device. The ICARUS Device, which stands for Instrument Conditions Awareness Recognition and Understanding System, is an amazing piece of equipment which truly simulates IFR conditions in the training environment. The ICARUS is a plastic shield that uses a Polymer Dispersed Liquid Crystal film that allows the degradation of a pilot’s visibility. It clips on to a baseball cap and is attached to a battery. That battery is then bluetoothed to an iPad or iPhone App that allows the instructor to put the pilot into and take him out of simulated IFR conditions.

    Originally designed for helicopter training, it’s an excellent tool for fixed wing IFR training too. I’ve been using it for the last month and a half and I am hooked. The customer’s that I have used it with truly say that they cannot see a thing outside. Because the plastic shield turns white, it really does give the view that the pilot is in the clouds. The inner ear certainly believes it. The curve of it fits the glare shield in most planes nicely (there is some custom cutting that would have to take place for specifically rounded glare shields, but it fits Cirrus and Piper Saratogas nicely, the two planes I have used it in), and it sits away from the pilot’s face, blocking out all windows, which is what clouds do.

    The greatest thing from an instructor’s standpoint is the ICARUS Device app. The pilot puts the device on before taxi and I set the app to VMC. This completely clears the ICARUS Device so the pilot can see just fine for taxi and takeoff. Then, at about 400 AGL, I tap the <1/2 VIS button on the app, and boom, the pilot is in the clouds. I even have a time delay to slowly make the ICARUS Device opaque to simulate slowly entering the clouds. I do the same thing on an approach, except in the reverse order, simulating we are slowly exiting the clouds.

    The ICARUS Device is a game changer for IFR training. It’s comfortable, easy to use, the battery lasts for a long time (though bring a standard USB charging cord with you in the plane because the battery failure mode makes the ICARUS Device opaque instead of transparent. You don’t want that to happen at 200 AGL!), and, most important, it truly simulates IFR conditions.

    After using it, I believe all flight schools and CFII should get one of these, both in the fixed wing and helicopter world. It’s the best option for simulating IFR conditions.

    Checkout the ICARUS Device website for more information and to hear the story of the company.


    Texas Top Aviation, LLC was given an ICARUS Device by the ICARUS Device company to test. Texas Top Aviation, LLC was not paid for our above opinion on the ICARUS Device (trust me, if it was terrible, I would have told you!).

  • Stephanie Mertz Joins Texas Top Aviation

    Texas Top Aviation has added a new member to our instructing team. Stephanie Mertz was hired in March 2019 and will be specializing in G1000 & Instrument instruction.

    Stephanie graduated from LeTourneau University in Longview, Texas with a degree in Aeronautical Science, earning her commercial single and multi ratings while there. She began her aviation career in Ontario, California flying a Pilatus PC-12 for charter and medical trips. While operating the PC-12, she gained valuable experience flying all over the US and Mexico.

    In 2013, Stephanie moved back to East Texas with her husband where she worked as a contract pilot flying a variety of Citations as well as a Falcon 10. A few years later, she became involved in her local Ninety-Nines chapter and joined their mentorship program.

    After earning her CFI, CFII, and MEI, Stephanie returned to her alma mater to pass on her flying passions to college students through flight instructing. After a year of teaching at LeTourneau, she and her husband, with their first baby in tow, moved to the Austin area. Now she is instructing with Texas Top Aviation while acting as a mentor for other women working on achieving their flying dreams.

Leave a Reply

Your email address will not be published. Required fields are marked *