Mooney Enters the Training Market with the Mooney M10

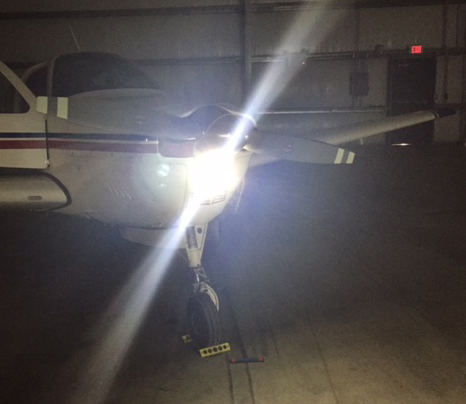
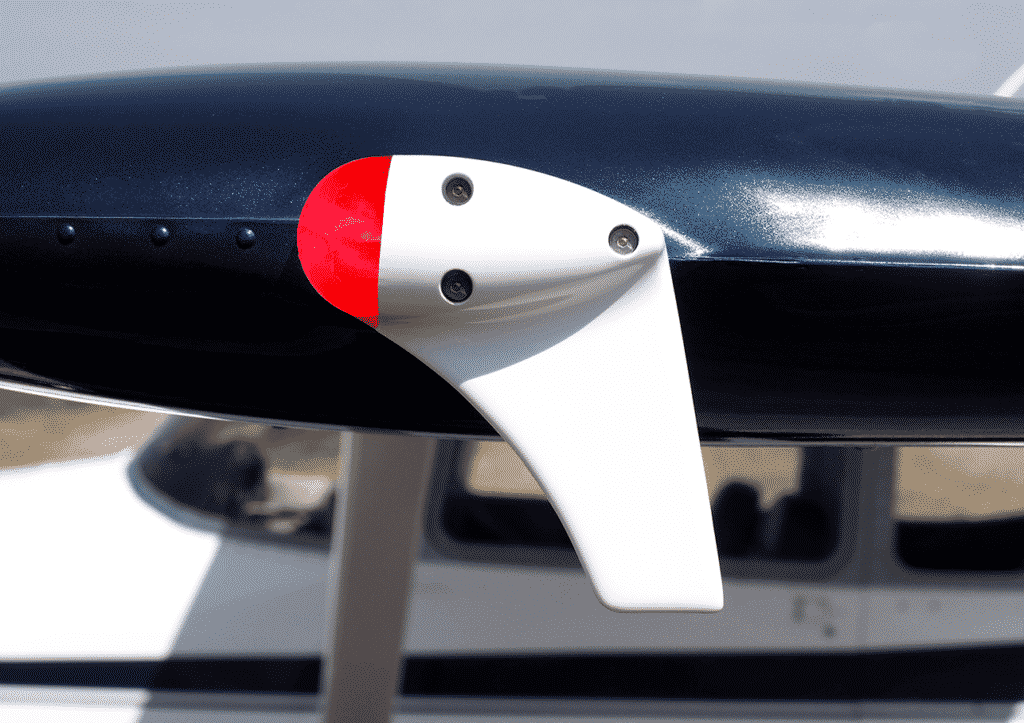
Earlier this week, Mooney announced they would be following competitors Piper (with their Archer DX) and Redbird (with their retrofitted 172 known as the Redhawk) into the training market with the Mooney M10 T and Mooney M10 J.  Mooney, which hasn’t manufactured a primary trainer since the Mooney M10 Cadet in 1970, is planning on putting Jet A burning Continental Engines in the new aircraft.  The mockup was unveiled at Airshow China.

The Mooney M10 T is a 3 seat, fixed gear trainer sporting a Continental CD-135 engine.  At 135 HP, the initial design data claims the Mooney M10 T will be able to cruise at 140 KTAS at 75% power, allowing the Jet A engine to burn between 4-5 gallons per hour while holding 42 gallons of fuel.  As with other Jet A piston powered airplanes, the Mooney M10 T will have a Fully Automated Digital Engine Control (or FADEC) system.  This leaves just a single power lever in the cockpit, allowing the pilot to set a percent power and the FADEC computer will set the manifold pressure, prop speed, and mixture.

The Mooney M10 J has a slightly bigger engine, the 155 HP Continental CD-155.  It also is equipped with retractable gear.  Initially, Mooney is predicting 160 KTAS at 75% power for the Mooney  M10 J.  The airplane will come as a two-seater, but will have a third seat as an option.  Mooney says that the Mooney M10 J will allow pilots to make an easy transition to the bigger and faster M20J that has been popular for many years amongst “Mooniacs.”
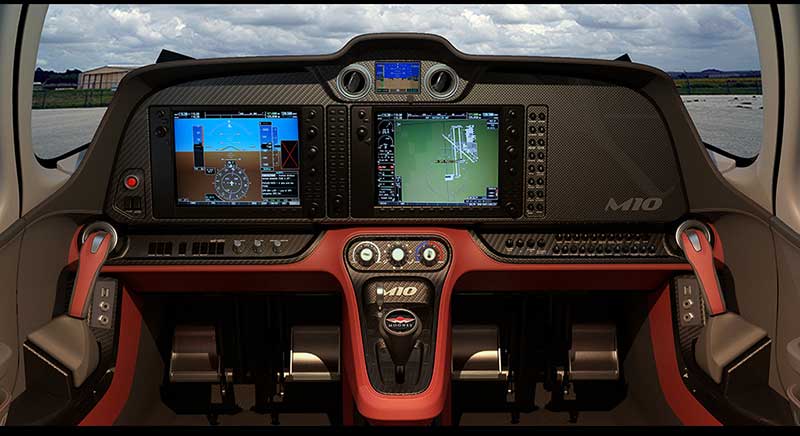
Mooney M10 Interior

In a new direction for Mooney, the Mooney M10 T Mooney M10 J will both be composite airplanes with side sticks, instead of the traditional sheet metal exterior with a yoke as Mooney aircraft have been in the past. Also venturing from the more powerful Mooney aircraft is the fact that the Mooney M10 T and Mooney M10 J will have two doors.  Remaining, though, is the swept tail that Mooney aircraft are known for.  Both airplanes will be equipped with Garmin G1000 panels, while the Mooney M10 J will also have the GFC 700 autopilot, marketing more toward aircraft owners rather than students.

The only downside that I read about was the time between replacements for the engines.  For the CD-135 engine in the Mooney M10 T, time between replacement is 1,500 hours, whereas the CD-155 only has a 1,200 hour replacement time.

Mooney expects certification and deliveries to begin for the Mooney M10 T and Mooney M10 J in 2017.

Mooney M10T and M10J

Information courtesy of AOPA and Mooney International.  Images courtesy of Mooney International.

Similar Posts

  • The Go Around Button

    Back in the old days, when flying an approach in an early Cirrus SR22 (circa 2004; yes, in airplane technology, those were the old days), performing a missed approach procedure was a lot of work.  You were low to the ground and weren’t able to see the runway.  Then, you had to start climbing so you don’t hit the ground, then push a lot of buttons in order to get the GPS and autopilot set fly the missed approach procedure.  It was very easy to get distracted with button pushing, then forget to fly the airplane, putting yourself and passengers in very unsafe circumstances.  The go around button has changed all that.

    Going Missed the Old Fashioned Way

    Let’s stick with our example of the 2004 Cirrus.  The SR22 in 2004 was equipped with the Avidyne Entegra system, complete with dual Garmin 430 GPS units, and an STEC 55x Autopilot.  A very capable IFR flying machine (we could use the same example of a 2004 or 2005 Lancair Columbia 350 or 400 that was equipped the same way, except the screens were vertical instead of horizontal).

    Avidyne Cirrus Go Around Button

    We’ll use the ILS 15 at the Temple airport, KTPL, for our example.  You pass TPL, the outer marker at 1,683 with the glide slope already centered.  Everything is going well so far.  The number 1 Garmin 430 is set to VLOC and the autopilot is showing NAV and APR for the lateral guidance and GS on the vertical, tracking the glide slope.  The last weather report stated the clouds were Broken at 500 feet, so it appears like you’ll be able to get in on the approach.

    As you get closer to the Decision Altitude, the clouds aren’t letting up at all.  You hit 1,000 feet on your altimeter, 120 feet above the minimums, and you still can’t see a thing.  Another 100 feet lower doesn’t change anything, so you elect to proceed with the missed approach.  This means things are about to get busy.

    Here’s the process:

    • Fly the airplane first, meaning shut off the autopilot, pitch the nose up to about 7 degrees, TRIM, add full power, retract the flaps, and step on the right rudder
    • The Garmin 430 is now in SUSP mode, meaning the missed approach point is locked in as the active waypoint.  So, you have to press the OBS button to cause the GPS to cycle over to the missed approach procedure
    • You have to press the VLOC button on the Garmin 430 in order to change the CDI back to GPS
    • You have to re-engage the autopilot by pressing NAV twice (which engages GPS Steering mode)
    • You have to reset your altitude bug (if you hadn’t set it for the missed approach altitude previously)
    • You have to press VS and ALT on your autopilot to have the STEC continue the climb

    That’s a lot of work, isn’t it?  Plus, that’s an extensive amount of head down time in the cockpit, with your eyes looking elsewhere other than the instruments while hand flying.  All very low to the ground, I might add.  Can you see how this can be dangerous?  (Note:  The Avidyne IFD 550 has made this a little easier with automatically switching from VLOC to GPS and automatically engaging the missed approach procedure in the flight plan)

    The advent of the Go Around Button has streamlined the process, leading to safer operations where it matters most.  The functions of the Go Around Button vary based on the airplane, but here are three examples, the Garmin G1000 Cessna Corvalis TT, the Garmin G1000 Piper Mirage, and the Garmin Perspective Cirrus SR22.

    Cessna Corvalis TT

    We’ll take the above situation and swap out the airplanes.  Gone is the 2004 Cirrus SR22.  Insert a 2008 Cessna Corvalis TT, equipped with the Garmin G1000 suite and the GFC 700 autopilot.  The go around button is positioned directly above the twist in throttle.

    Cessna Corvalis G1000 Go Around Button

    When you push the Go Around Button, here’s what the system does:

    • Disconnects the Autopilot
    • Sets the Flight Director for 7.5 degrees pitch up (which is about your normal climb angle) and wings level
    • Switches the CDI back to GPS
    • Takes the GPS out of SUSP mode and cycles the flight plan to the first waypoint on the missed approach procedure

    Here’s what you have to do:

    • Follow the flight director by pitching the nose up and TRIM
    • Add full mixture, prop and throttle (prop & throttle should be full already)
    • Retract the flaps
    • Step on the right rudder
    • Re-engage the autopilot, then press NAV and VS (or FLC) and set your altitude bug if it isn’t already set

    Not too bad, eh?  Makes the whole situation streamlined and safer.

    Piper PA46-350P Mirage

    Same situation, different airplane.  You’ll notice the procedure for the Piper Mirage is almost exactly the same as the  Corvalis procedure.  The difference between the two airplanes is where the autopilot controller is.  In the Corvalis, the autopilot controller is positioned on the left side of the MFD, making it easy to scan back and forth while pushing buttons on the autopilot.

    The Piper Mirage autopilot controller is positioned below both screens and in front of the power quadrant. With this positioning, the pilot’s eyes have to go a lot further to see which autopilot button he is pushing. In this case, it becomes very important to get the airplane climbing and trimmed before going down to engage the autopilot.

    As in the Corvalis, here is what the Go Around button does:

    • Disconnects the Autopilot
    • Sets the Flight Director for 7.5 degrees pitch up (which is about your normal climb angle) and wings level
    • Switches the CDI back to GPS
    • Takes the GPS out of SUSP mode and cycles the flight plan to the first waypoint on the missed approach procedure

    And here’s what you have to do:

    • Follow the flight director by pitching the nose up, then TRIM
    • Add full mixture, prop and throttle (prop & throttle should be full already)
    • Retract the flaps
    • Step on the right rudder
    • Re-engage the autopilot, then press NAV and VS (or FLC) and set your altitude bug if it isn’t already set

    Cirrus SR22

    Cirrus Perspective Go Around Button

    This time, we’ll use the 2010 Cirrus SR22T with the Garmin Perspective and GFC 700 Autopilot. One thing I really like about how Cirrus configured their system is where the Go Around button is.  It’s actually on the throttle itself, making it much more intuitive.  This way, you can press the Go Around button while adding full throttle.

    There is one major difference between the Garmin Perspective in the Cirrus and the G1000 in the Corvalis. When you press the Go Around button in the Cirrus, the autopilot actually stays on.

    Here’s what happens when you press the Go Around button in the Cirrus:

    • Flight Director pitches to 7.5 degrees pitch up and wings level
    • AP Mode switches to Go Around mode, following the flight director
    • GPS comes out of SUSP mode
    • CDI switches back to GPS

    All the pilot really has to do is add power, take the flaps up, then press NAV on the GFC 700 to get the autopilot following the missed approach procedure.

    If you aren’t familiar with the Go Around button or haven’t used the one in your plane lately, it’s good to go up with a knowledgeable instructor and fly a couple of approaches where you perform the published missed approach afterward.  That way, he or she can assist you through the first missed approach, then give you pointers until  you get comfortable with the Go Around button.

  • Pancake Fly-In At KCVB

    For those of you in the Hill Country looking to kick off the Christmas month right, head over to the Castroville Airport (KCVB) on Saturday, December 6th and get yourself a short stack of flapjacks.  For just $5, you can get yourself a good hearty breakfast that includes coffee or juice and bacon or sausage.  The eating starts at 0800 and goes until 1200, local time.  Come with an empty belly and an empty gas tank as CVB currently has some of the lowest priced gas in South Texas, currently listed at $4.70/gallon.

    There will be plenty of hangar flying, lots of airplanes to look at, and most importantly, lots of pancakes!

    CVB Pancake Breakfast

  • Piper PA46 Partnership in San Antonio

    A Piper PA46 partnership is being formed in the San Antonio area. Two to three partners are being sought to purchase either a Piper PA46-310P Malibu or a ’90s model Piper PA46-350P Mirage.

    The Piper PA46 Malibu is the original Piper PA46 airframe. It is equipped with a Continental TSIO 520, 310HP engine (though many have been upgraded to the Continental TSIO 550C engine, which is a great upgrade), is complex, and pressurized (the best feature about the airplane!). The six seat airframe travels around 185-190 KTAS at FL200 on 16-17 GPH, giving an incredible range with 120 gallons of fuel.

    The Piper Mirage is what Piper designated the PA46 when it switch to the Lycoming TIO 540 350HP engine in 1989. The airframe remained the same, but the engine eeks out a few more KTAS at 22-25 GPH depending on how high the cruise altitude is.

    Both the Piper Malibu and the ’90s model Mirage are equipped with the KFC 150 autopilot. A lot of the Piper PA46 airframes still have a Garmin 530W/430W or dual 430Ws, but a large number have been upgraded to the Garmin GTN 750/650, while a few have opted for the Avidyne IFD 540/440 GPS units. There are a fair number still with steam gauges, while some have upgraded to Aspen units or the Garmin G500 or G500TXi.

    If you are located in the San Antonio area and interested in a 3-4 way partnership on a Piper PA46, please Contact Us. The purchase price will be between $300,000-$450,000, so only interested parties that can afford a budget of $100,000-$150,000 please.

    The plane will be based at Stinson Field (KSSF) or New Braunfels (KBAZ).

  • Oh, Deer (Part 1)

    As far as I knew when I woke up, October 26, 2016 would be an ordinary day for me. It was a Wednesday, and I was scheduled to fly our Company’s BE58 Baron on a charter from Wings Field (KLOM), a non-towered airport just north of Philadelphia, to Pittsburgh International Airport (KPIT) and spend the day there waiting for my 3 passengers to finish up their meetings. The plan was to fly them back to Wings that evening and then make the short hop back to home base at Lancaster, PA. (KLNS).

    It was a flight that I had done countless times, and I was comfortable with the airports, the passengers, and the airplane. Everything went smoothly that morning and my short flight from Lancaster to Wings was uneventful. I even made it there in time to spill coffee all down the front of my pants before my passengers arrived. The weather was clear, calm and beautiful as we loaded into the Baron and the sun was just starting to come up as I taxied toward runway 24 for departure. I was departing VFR and had an IFR plan on file which I intended to pick up with Harrisburg Approach once we were airborne. According to my calculations, I was on schedule to be drinking my coffee at the Pittsburgh FBO right around 8:30.

    At 7:05, I advanced the throttles for departure. A few moments later, I received a very unpleasant surprise. I was quickly approaching rotation speed when 2 deer ran onto the runway directly in front of the aircraft. It was still dark enough that I was relying on my landing/ taxi lights to illuminate the runway for take-off.  As a result, I was unable to see the animals before it was too late. I don’t remember making a conscious decision to pull back on the yoke, but it was that or plow directly into them at about 85 knots. I pulled up as quickly as I could and the airplane rotated immediately.  A fraction of a second later I heard and felt a sickening THUD.

    There was no doubt that I had hit one of them, but, somewhat unbelievably, the airplane was climbing as though nothing had happened. I put the nose down to get the airspeed back up and began to try and piece together what damage the airplane had sustained. Based on the noise and the feeling of the impact, my suspicion was that I had hit the deer with the left main landing gear. A review of the instrumentation showed no abnormalities and the airplane was behaving normally, so I didn’t suspect any damage to the airframe/ flight controls. I couldn’t see anything out the windows that looked unusual, and somewhat unbelievably I still had 3 green lights.

    After gaining a safe amount of speed and altitude, I turned around and told the passengers that we had hit a deer. It was obvious that we had hit something and I was sure that they wanted to know what was going on. Then, I checked all my indications again and satisfied with what I was seeing, tried to bring up the landing gear. No dice. When I pulled the gear lever to the up position, the master “GEAR UP” warning light came on and I got a horn. There was never any change in the 3-green indication and the gear motor never came to life at all.

    At this point it was obvious that, minimally I was going to have to divert to Lancaster and have the maintenance guys look at the airplane to see if anything was broken. I figured that they would either give me the green light to continue or I would just jump into one of our PC12s and complete the trip while they worked on the Baron.

    The landing gear’s refusal to come up was my first indication that there was substantial damage. I set course for Lancaster and called our Chief Pilot. After explaining the situation to him, we agreed that KLNS was the best option and that he would let the maintenance guys know that I was coming.

    The logic was that proceeding to Lancaster would allow a visual check of the landing gear by maintenance people as well as the tower and result in the safest outcome if an emergency landing were required. Lancaster would likely have better services available in terms of emergency responders and, not to mention, I was fairly certain that there was a dead deer on the only runway at Wings that I didn’t feel like hitting for a second time. In addition, the relatively long runway at Lancaster combined with light traffic at that time of day made it the ideal option to divert to.

    I again turned around to brief the passengers. I told them that we were going to have to make precautionary landing before continuing to our intended destination and that I would be performing a few low passes for the tower.

    Due to the drag from the landing gear, the flight to Lancaster seemed to take forever. The long cruise home, however, gave me time to try and reach someone on the ground at Wings in hope of having the runway inspected and cleaned off before other traffic tried to use it. After several attempts to raise anyone on the Unicom/ CTAF frequency, I called Philadelphia Approach for help instead. Philly answered right away and I explained to them what had happened. I requested that they call over to Wings on the phone or send someone out to check the runway. They told me that they would get it done and asked if there was any other way that they could assist me. I told them I was headed to Lancaster and that I appreciated their offer, but didn’t require any further assistance. I then switched over to Lancaster Tower and let them know that I was about 15-20 minutes out, but I would need to perform a couple of passes to have them check my gear. The tower cleared me for a low approach over runway 26.

    I arrived at LNS at about 7:30. I performed my first low pass by the tower, not really expecting anything to appear out of place. I figured I had bent something or damaged the squat switch, but not much more. I climbed to pattern altitude and awaited the good word. Shortly after the fly-by, Tower reported that the left main gear didn’t appear to be down and locked. They suggested that I make another pass. The airport maintenance personnel chimed in, reporting the same. We had just started discussing whether cranking the gear a little by hand might help when Philly approach called the Lancaster tower on the phone.

    Philly informed Lancaster that someone had inspected the runway at Wings and found the left main strut and wheel in the grass. I quickly concluded that cranking the gear down probably wouldn’t help!

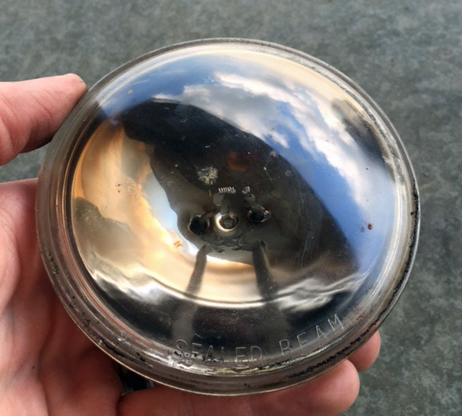
    This was found in the grass by the runway at Wings Field

    To Be Continued…

    (Read Part 2 Here)

    Andrew Robinson is an airline pilot for Piedmont Airlines.  He is a former 135 Charter Pilot and flight instructor who lives with his wife and 2 daughters in Pennsylvania.  He instructs in Beechcraft Bonanzas.

  • Upgrading Avionics

    There are many different ways to upgrade an instrument panel.  Putting in a 696 here, a JPI engine monitoring system there, even an Electronic HSI.  But, if you want to swing for the fences and get a serious upgrade, you have to go for a complete glass instrument panel.  For good measure, you might as well throw in a touch screen GPS while you are at it.

    Which panel to go with?  There are two mainstream options (Garmin and Aspen) and a handful of other companies that make glass panel replacements (Avidyne being one, King for a short period of time at the end of the last decade being another with the KFD 840).  Around 2010, there were a lot of companies trying to get into the glass panel retrofit game, but many of the products didn’t gain a whole lot of popularity, leaving Garmin and Aspen at the top of the heap.

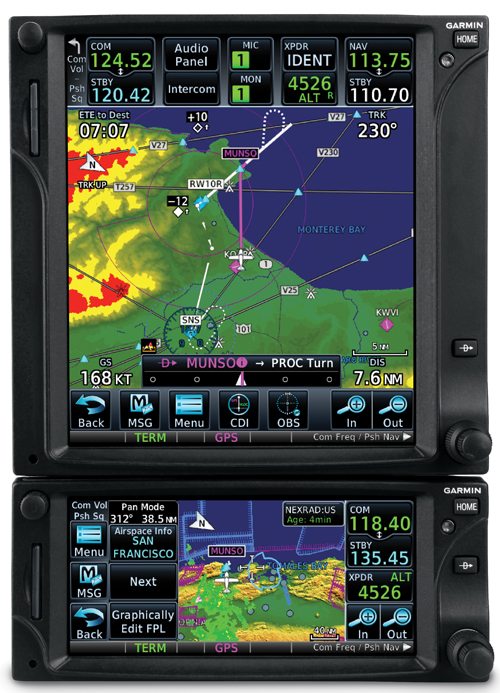
    What about the touch screen GPS market?  Garmin has this pretty much cornered as well, with Avidyne and King just getting into the game.  The gap between Garmin’s GTN series and Avidyne and King is pretty wide.

    Garmin GTN Series

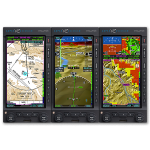
    The answer is pretty easy when it comes to the GPS (go with Garmin!), but not so easy when it comes to the panel.  The G500 and the Aspen Evolution series are both excellent interfaces with strong reliability, so which one do you go with?  Feature-wise, both have a lot of the same features: traffic, weather, terrain, synthetic vision, to name a few.  The presentation for each feature is a little different between the two interfaces.  It just depends on what you like better.

    The nice thing about the Aspen system is you can go glass, but you have options on how much glass you want:  1 screen, 2 screens, or 3 screens?  With the single screen PFD, you have all your instrumentation, traffic, weather, and optional synthetic vision.  You don’t need the synthetic vision for the traffic and weather, as it shows up behind your HSI.  It is an honest to goodness glass panel retrofit.

    When you decide to upgrade to 2 screens, this is where Aspen has a leg up.  The second screen is a completely redundant PFD and, if you get the 2 hour emergency backup battery installed, acts as the backup instrumentation to the main PFD.  This means you can take out the old steam gauge standby instruments.  This helps clean the panel up.

    I personally don’t see the need for 3 screens, but maybe there is someone out there who needs it.

    One selling point that Aspen has over Garmin is the wide variety of autopilots and GPS units that Aspen units are compatible with.  The G500 is only compatible with King autopilots, it’s own GFC 700 autopilot (which would be a retrofit), some Collins autopilots, and the Century 21, 31, 41, and 2000.  This does cover a wide array of autopilots, but it keeps some on the outside.  Aspen, on the other hand, is compatible with most autopilots on the market.

    Finally, let’s talk price.  Going with an Aspen EFD 1000 PFD (this is the single screen Aspen) will run you somewhere in the area of $12,000.  The price will vary based on the shop and the airplane.  When you want to add a screen, it’s an additional $6,000.  This is for the base, so if you want to add weather or synthetic vision, it’ll run you a little more.

    The Garmin G500 comes in around $20,000, again depending on the shop and the airplane.  The screens are bigger on the G500, which is kind of nice, and you are buying a Garmin product, which has a fabulous track record in the aviation industry.

    Decisions, decisions.  There really is no wrong answer here.  Both are excellent products with very good track records.  Both have really nice features and don’t hardly fail.  Really, the choice comes down to what you want.

    Need training on your upgraded GPS or glass panel retrofit?  Contact Texas Top Aviation for thorough training on your new avionics today.

  • Picking Up an IFR Clearance

    Picking up an IFR clearance at first can seem very simple.  But, when taking off from an untowered field, especially if a pilot is based at a towered airport, it can be a little more complex.  Based at an untowered field?  The towered procedures are a little more streamlined, but still different.

    Towered Airports

    Class B or Class C

    At Class B or Class C airports, there is a dedicated frequency to get an IFR clearance and VFR departure instructions called Clearance Delivery.  It is published in the airport facilities directory as well as most approach plates.  Before you call Clearance Delivery, get the ATIS and tell the controller you have it as well as where you are located on the airport.

    CRAFT

    Class D

    Some Class D airports have a Clearance Delivery frequency (see KADS, Addison, TX), but for the most part, you’ll get your IFR clearance on the Ground frequency.  If there is a dedicated Clearance Delivery frequency, the ATIS will specify whether or not to get your clearance on it or on ground control.

    Class D towers are only part time towers, usually closing between 7pm and 10pm local time, depending on how busy the airspace is.  These airports usually have published Clearance Delivery frequencies to contact either the local approach control or center to pick up an IFR clearance on the ground.  They will be published on approach plates and in the A/FD.

    Untowered Airports

    Class E

    There are a number of Class E airports that are Class E all the way down to the surface (see KLFK, Angelina County).  At these airports, there will either be a Clearance Delivery frequency or you call on the Center or Approach frequency to get your clearance (at KLFK, you call Center as there is no Clearance Delivery frequency.  At Temple, KTPL, there is a published Clearance Delivery frequency which you would be talking to Grey Approach).

    Class G

    There are two ways to pick up an IFR clearance at a Class G airport, one typically a little safer than the other.

    The first option is to take off and maintain VFR while calling Center or Approach control.  They will give you your clearance making you IFR and allowing you to enter the clouds.  This option can be unsafe depending on the terrain surrounding the airport and how low the ceiling is.  If the ceiling is overcast at 1,000, you can legally remain VFR in Class G airspace at 500 AGL, but that isn’t the safest option and you might not be able to raise ATC at that altitude.

    The second, and safer option, is to call on the phone.  Flight Service has a nationwide Clearance Delivery phone number that every pilot should have saved in their contacts (888-766-8267).  Typically, you want to wait to call them until after you are done with your runup because they only give you a five or ten minute window to get off the ground.  With bluetooth equipped headsets, this usually isn’t a problem.

    Be prepared when calling Clearance Delivery on the phone to wait a few minutes.  Us pilots aren’t good at being patient sometimes, but the FSS has to call Center on the phone to get your clearance and release and this can take a few minutes.  Be prepared for that going in and just be patient.  Remember, this is the safer option!

    There are a handful of Class G airports around the US that have a GCO, a Ground Communications Outlet. With a GCO, you tune up the frequency, then click the mic 4 times to talk to ATC or 6 times to talk to FSS.  Each mic click must be at least one second, so if you click the mic too quickly, it won’t work.

    At certain airports that are underlying an approach control’s airspace, you can actually call the TRACON directly and get your clearance from them (5C1, the Boerne Stage Airport, for example.  San Antonio approach is the controlling agency and you can call them directly to pick up your clearance).  It’s a good practice to get the TRACON phone number and save that in your contacts as well.

Leave a Reply

Your email address will not be published. Required fields are marked *