|

Garmin Smart Glide

Recently, I was training a customer who had a brand new instrument panel installed in his TBM 700. The avionics shop that did the work (Abilene Aero, who I highly recommend for any panel installs, located at KABI) told us when we picked the plane up that the new Garmin GTN 750Xi had the most recent software update, which included the Garmin Smart Glide.

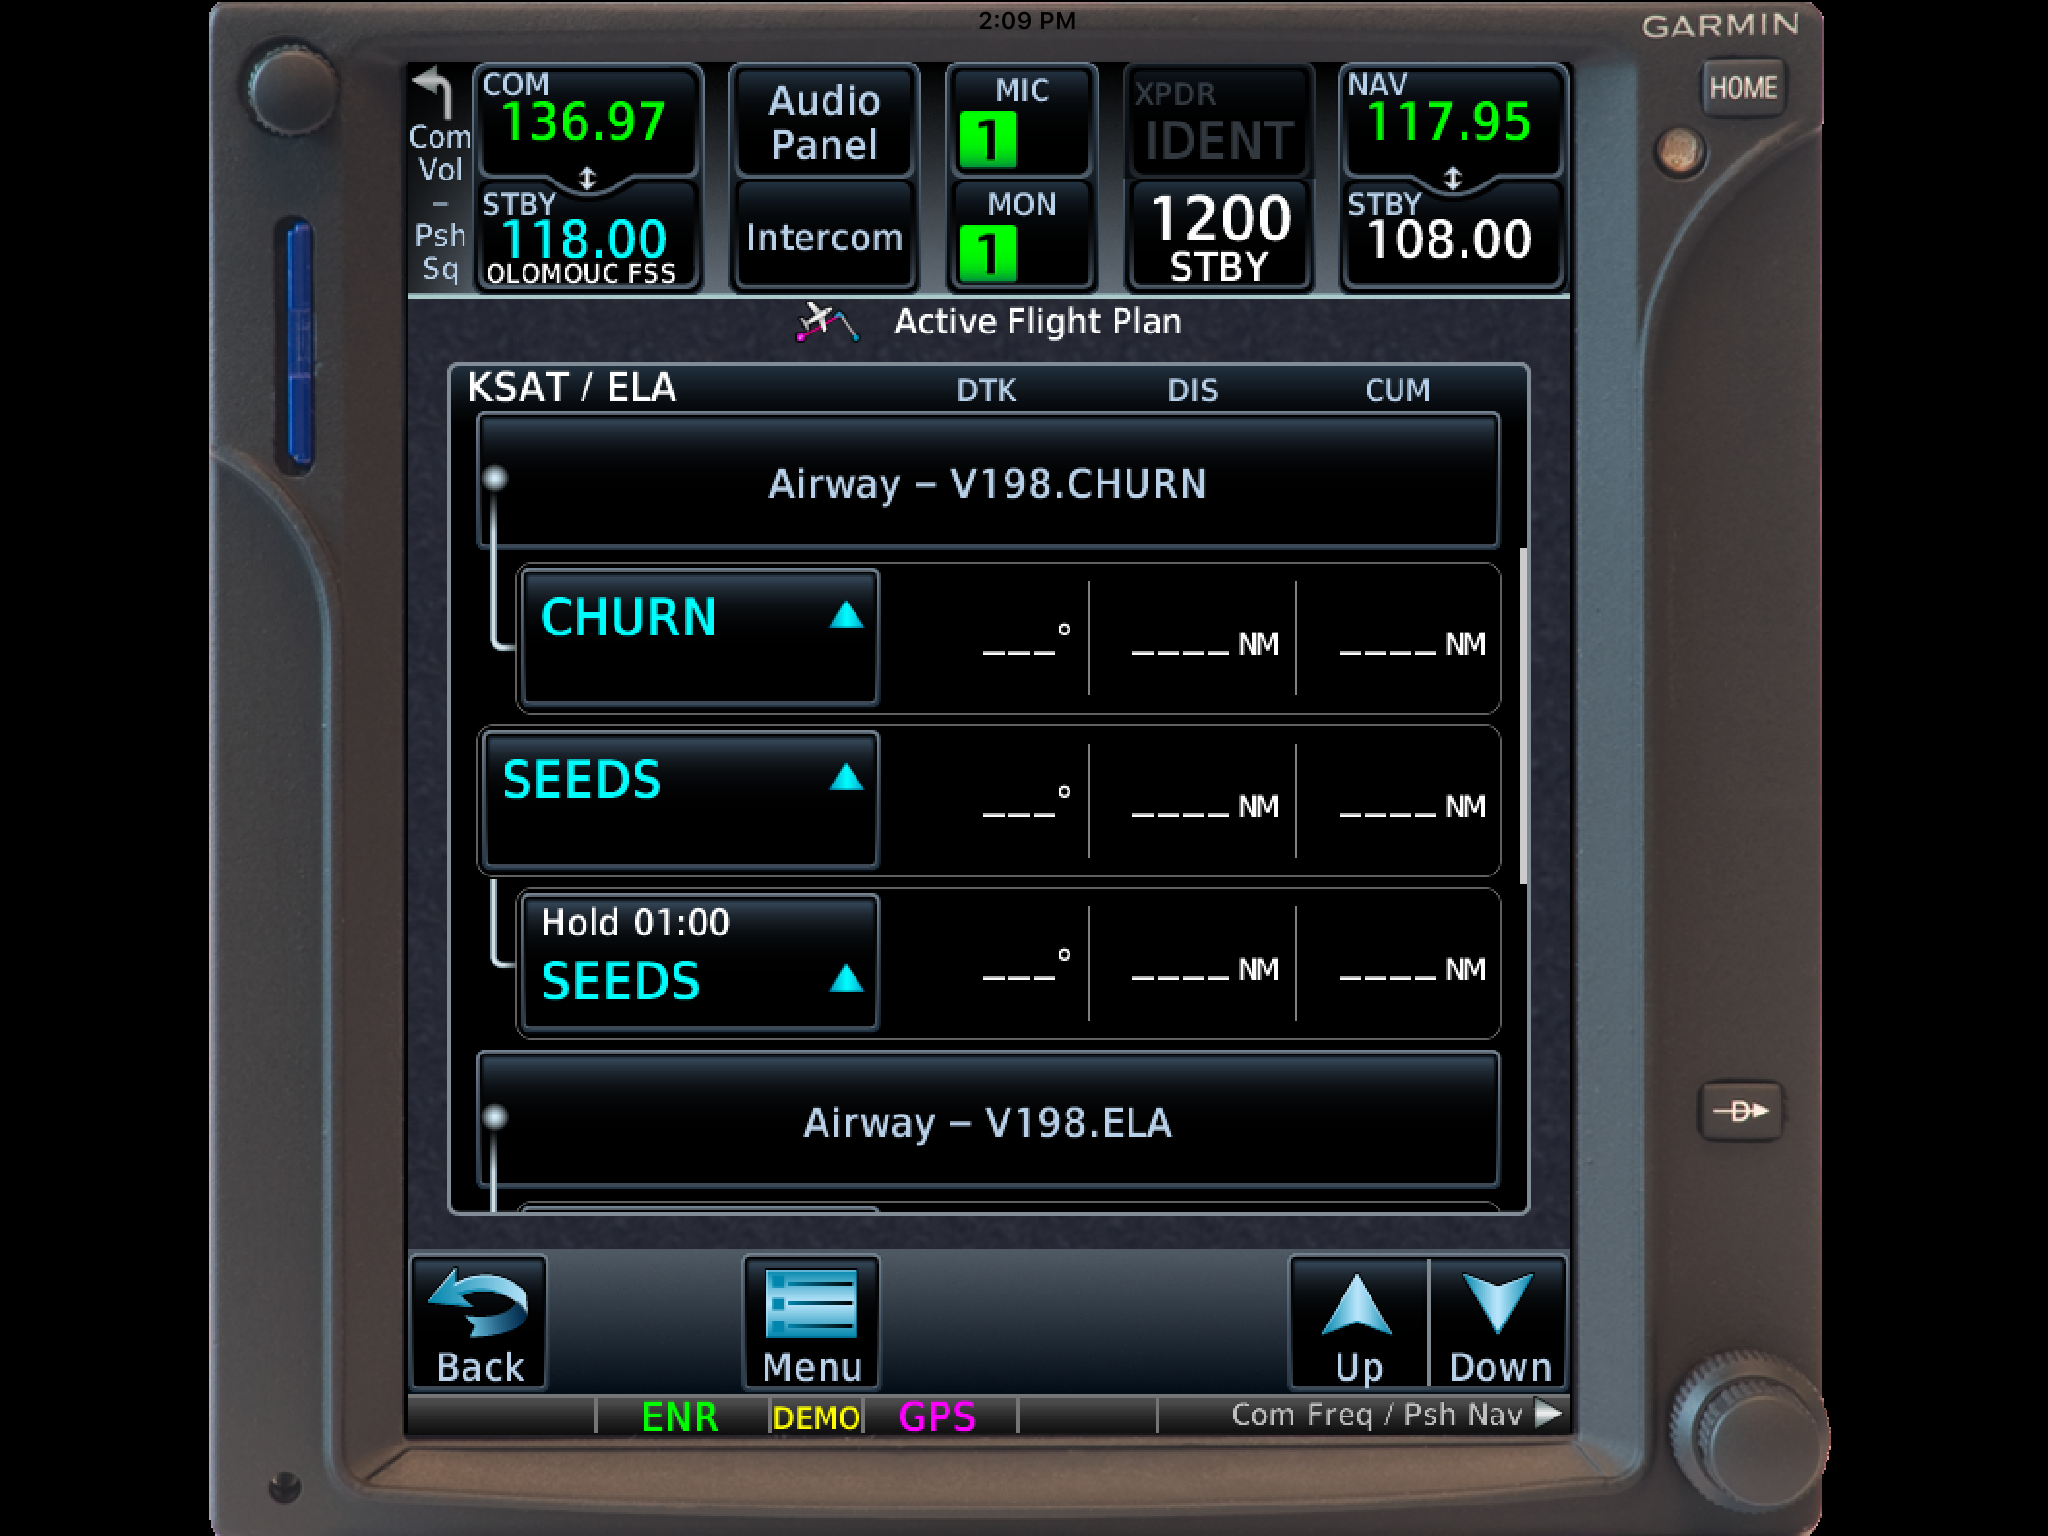
I had never used the Garmin Smart Glide before, so I was eager to check it out during our training. When we got to engine failures, we pushed the Emergency button on the Home page of the GTN 750Xi, and then the magic happened.

The plane was also equipped with a Garmin G600TXi PFD and the Garmin GFC 600 Autopilot. In order for Smart Glide to work, there has to be either a GTN 750Xi or GTN 650Xi installed, along with a G500TXi or G600TXi and a Garmin Autopilot. Garmin is working on getting the legacy G500 as well as the GI 275 and G5 to work with the above GPS units for Smart Glide as well.

Here’s what happens. The plane loses it’s engine. The pilot’s workload and stress level suddenly goes way up. Trim the airplane for best glide, find the nearest airport, attempt restart. Do it quickly so you have time to focus on the glide. Oh yeah, squawk 7700 and declare your emergency. All the while plummeting toward the ground in a somewhat controlled crash. Yikes.

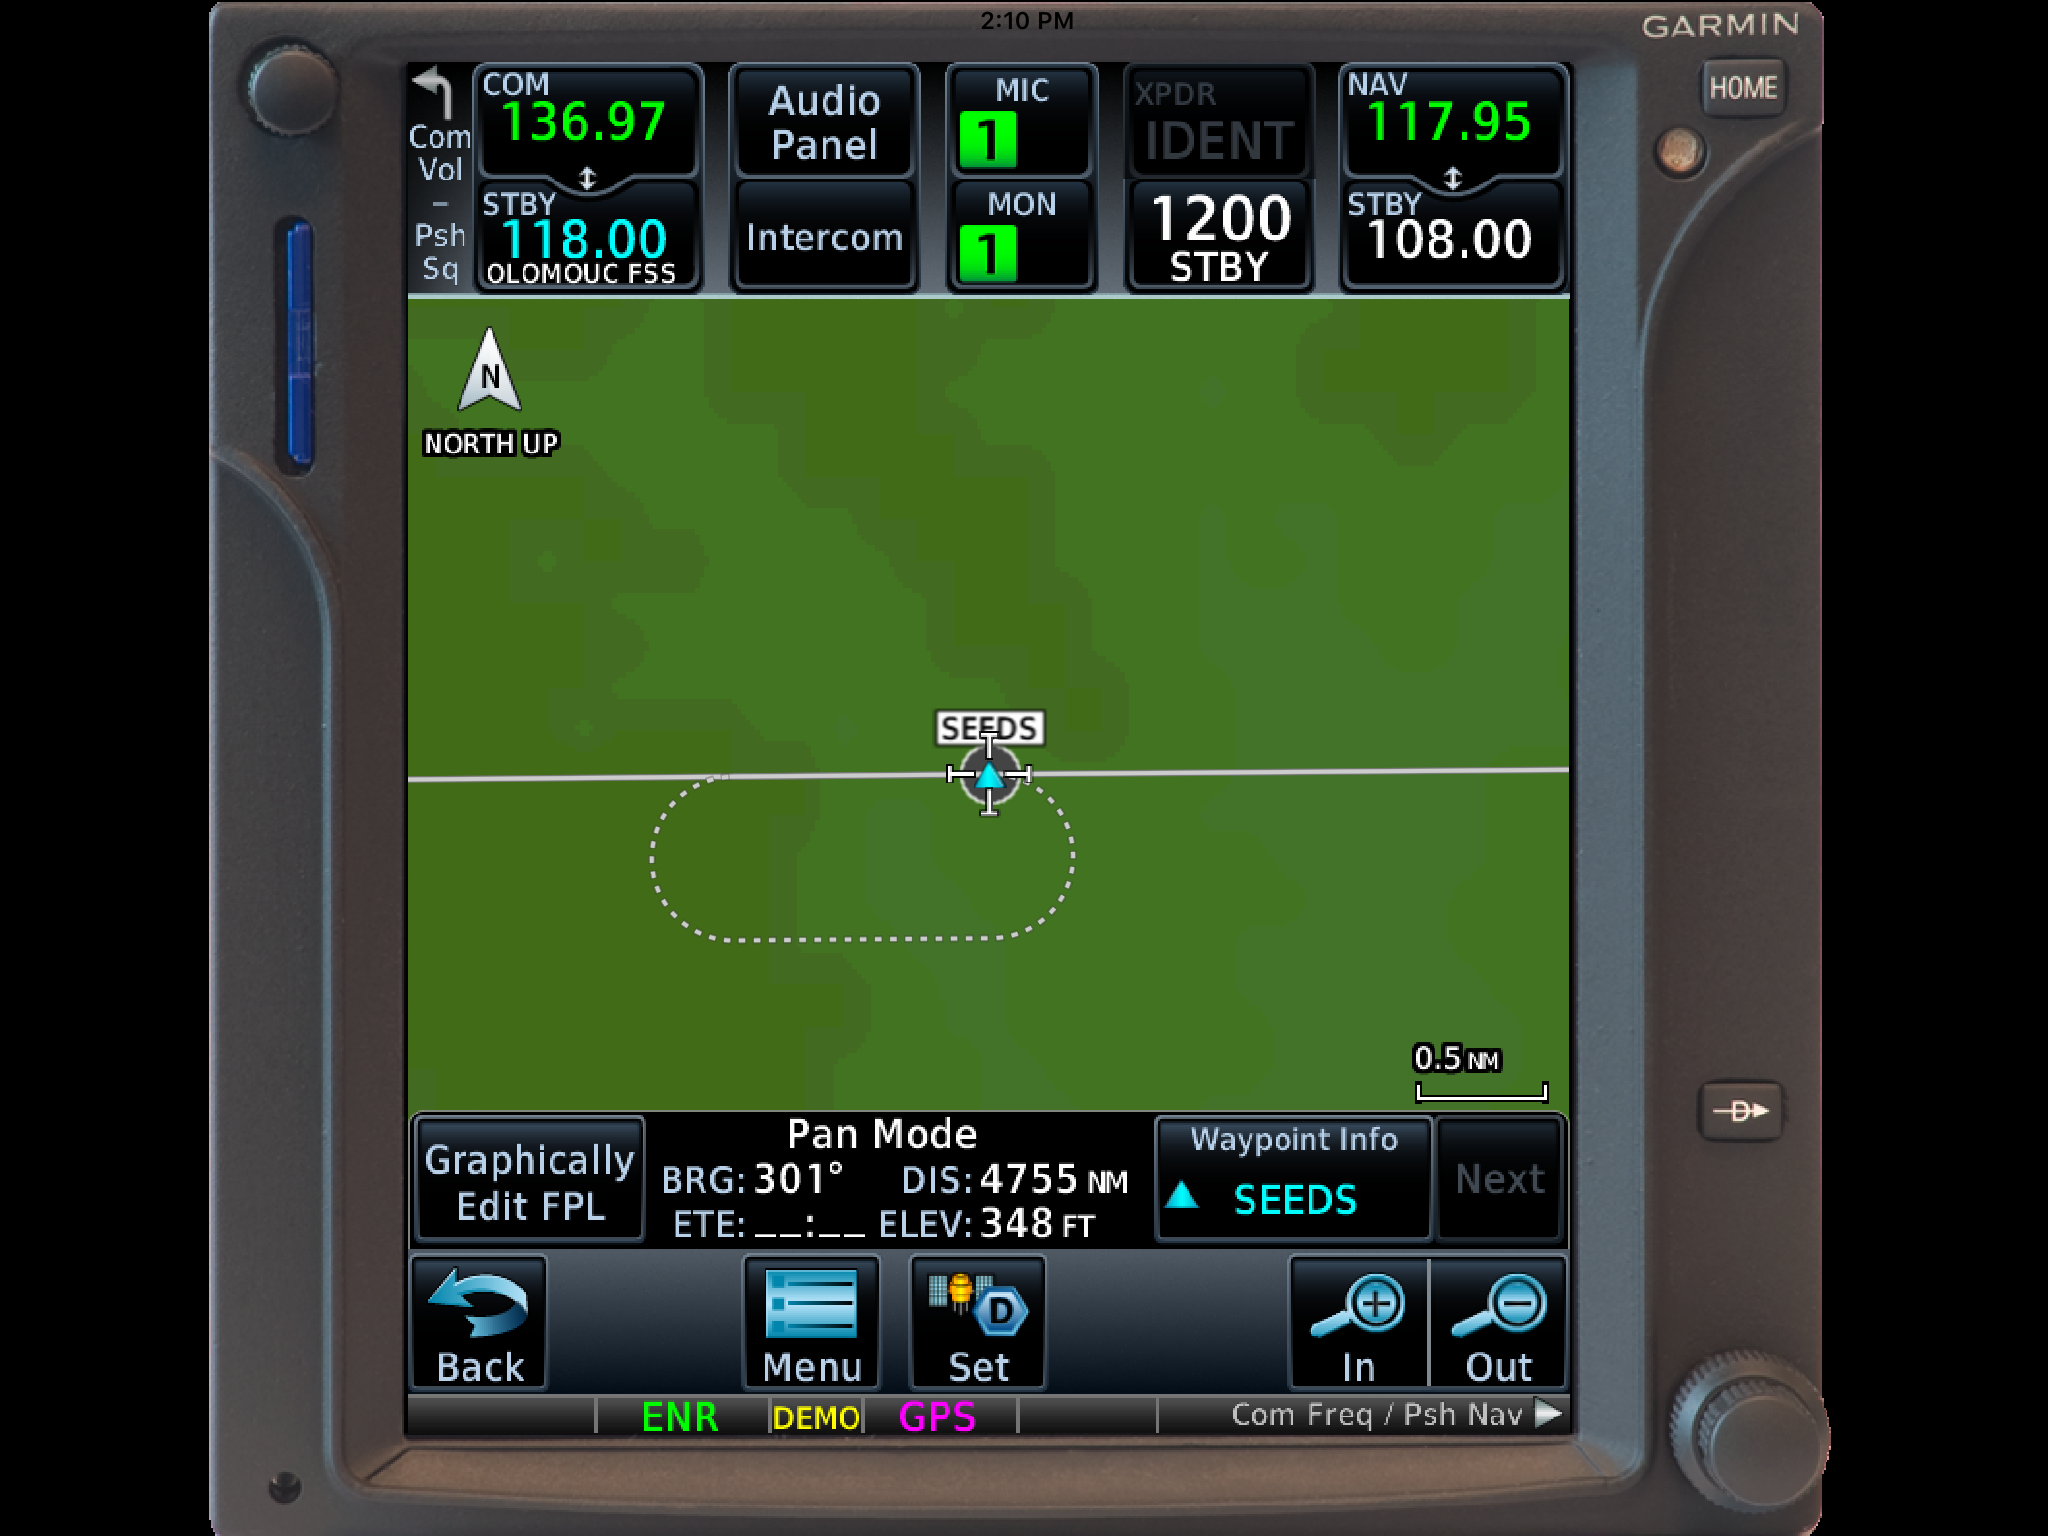
Garmin Smart Glide takes over the flying part, allowing the pilot to handle the restart, while making it much easier to squawk, talk and plan the engine out landing. On the home page of the GTN 750Xi/650Xi, the pilot simply taps the Emergency icon on the bottom of the screen. The Autopilot comes on and goes into IAS mode and maintains best glide while descending. The GPS immediately analyzes the Glide Advisor, and turns to the nearest airport in the glide ring (if there is no airport within gliding distance, the GTN 750Xi advises the pilot). Then, the Autopilot flies directly to the Nearest airport, allowing the pilot the ability to take attempt a restart.
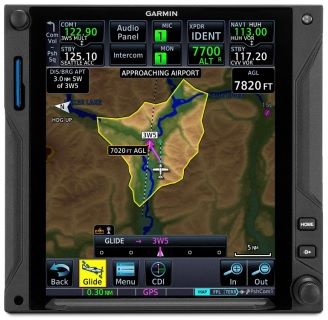
Once it is determined that the engine won’t start, the Garmin Smart Glide has excellent situation awareness tools. On all screens, the pilot is constantly being advised of how high AGL the plane is currently, while advising also of how high AGL the plane will be over the airport that the glide is set up for. There is also a short cut on the screen to tap to squawk 7700 as well as runway length information at the airport.

The Garmin Smart Glide Button wasn’t installed yet in the TBM, but that will make things even easier when it is (it will be certified in January). This is amazing technology that all Garmin GTN 750Xi pilots should have their software updated to. Remember, you have to have a Garmin Autopilot and a Garmin PFD for it all to work.

Similar Posts

  • The Go Around Button

    Back in the old days, when flying an approach in an early Cirrus SR22 (circa 2004; yes, in airplane technology, those were the old days), performing a missed approach procedure was a lot of work.  You were low to the ground and weren’t able to see the runway.  Then, you had to start climbing so you don’t hit the ground, then push a lot of buttons in order to get the GPS and autopilot set fly the missed approach procedure.  It was very easy to get distracted with button pushing, then forget to fly the airplane, putting yourself and passengers in very unsafe circumstances.  The go around button has changed all that.

    Going Missed the Old Fashioned Way

    Let’s stick with our example of the 2004 Cirrus.  The SR22 in 2004 was equipped with the Avidyne Entegra system, complete with dual Garmin 430 GPS units, and an STEC 55x Autopilot.  A very capable IFR flying machine (we could use the same example of a 2004 or 2005 Lancair Columbia 350 or 400 that was equipped the same way, except the screens were vertical instead of horizontal).

    Avidyne Cirrus Go Around Button

    We’ll use the ILS 15 at the Temple airport, KTPL, for our example.  You pass TPL, the outer marker at 1,683 with the glide slope already centered.  Everything is going well so far.  The number 1 Garmin 430 is set to VLOC and the autopilot is showing NAV and APR for the lateral guidance and GS on the vertical, tracking the glide slope.  The last weather report stated the clouds were Broken at 500 feet, so it appears like you’ll be able to get in on the approach.

    As you get closer to the Decision Altitude, the clouds aren’t letting up at all.  You hit 1,000 feet on your altimeter, 120 feet above the minimums, and you still can’t see a thing.  Another 100 feet lower doesn’t change anything, so you elect to proceed with the missed approach.  This means things are about to get busy.

    Here’s the process:

    • Fly the airplane first, meaning shut off the autopilot, pitch the nose up to about 7 degrees, TRIM, add full power, retract the flaps, and step on the right rudder
    • The Garmin 430 is now in SUSP mode, meaning the missed approach point is locked in as the active waypoint.  So, you have to press the OBS button to cause the GPS to cycle over to the missed approach procedure
    • You have to press the VLOC button on the Garmin 430 in order to change the CDI back to GPS
    • You have to re-engage the autopilot by pressing NAV twice (which engages GPS Steering mode)
    • You have to reset your altitude bug (if you hadn’t set it for the missed approach altitude previously)
    • You have to press VS and ALT on your autopilot to have the STEC continue the climb

    That’s a lot of work, isn’t it?  Plus, that’s an extensive amount of head down time in the cockpit, with your eyes looking elsewhere other than the instruments while hand flying.  All very low to the ground, I might add.  Can you see how this can be dangerous?  (Note:  The Avidyne IFD 550 has made this a little easier with automatically switching from VLOC to GPS and automatically engaging the missed approach procedure in the flight plan)

    The advent of the Go Around Button has streamlined the process, leading to safer operations where it matters most.  The functions of the Go Around Button vary based on the airplane, but here are three examples, the Garmin G1000 Cessna Corvalis TT, the Garmin G1000 Piper Mirage, and the Garmin Perspective Cirrus SR22.

    Cessna Corvalis TT

    We’ll take the above situation and swap out the airplanes.  Gone is the 2004 Cirrus SR22.  Insert a 2008 Cessna Corvalis TT, equipped with the Garmin G1000 suite and the GFC 700 autopilot.  The go around button is positioned directly above the twist in throttle.

    Cessna Corvalis G1000 Go Around Button

    When you push the Go Around Button, here’s what the system does:

    • Disconnects the Autopilot
    • Sets the Flight Director for 7.5 degrees pitch up (which is about your normal climb angle) and wings level
    • Switches the CDI back to GPS
    • Takes the GPS out of SUSP mode and cycles the flight plan to the first waypoint on the missed approach procedure

    Here’s what you have to do:

    • Follow the flight director by pitching the nose up and TRIM
    • Add full mixture, prop and throttle (prop & throttle should be full already)
    • Retract the flaps
    • Step on the right rudder
    • Re-engage the autopilot, then press NAV and VS (or FLC) and set your altitude bug if it isn’t already set

    Not too bad, eh?  Makes the whole situation streamlined and safer.

    Piper PA46-350P Mirage

    Same situation, different airplane.  You’ll notice the procedure for the Piper Mirage is almost exactly the same as the  Corvalis procedure.  The difference between the two airplanes is where the autopilot controller is.  In the Corvalis, the autopilot controller is positioned on the left side of the MFD, making it easy to scan back and forth while pushing buttons on the autopilot.

    The Piper Mirage autopilot controller is positioned below both screens and in front of the power quadrant. With this positioning, the pilot’s eyes have to go a lot further to see which autopilot button he is pushing. In this case, it becomes very important to get the airplane climbing and trimmed before going down to engage the autopilot.

    As in the Corvalis, here is what the Go Around button does:

    • Disconnects the Autopilot
    • Sets the Flight Director for 7.5 degrees pitch up (which is about your normal climb angle) and wings level
    • Switches the CDI back to GPS
    • Takes the GPS out of SUSP mode and cycles the flight plan to the first waypoint on the missed approach procedure

    And here’s what you have to do:

    • Follow the flight director by pitching the nose up, then TRIM
    • Add full mixture, prop and throttle (prop & throttle should be full already)
    • Retract the flaps
    • Step on the right rudder
    • Re-engage the autopilot, then press NAV and VS (or FLC) and set your altitude bug if it isn’t already set

    Cirrus SR22

    Cirrus Perspective Go Around Button

    This time, we’ll use the 2010 Cirrus SR22T with the Garmin Perspective and GFC 700 Autopilot. One thing I really like about how Cirrus configured their system is where the Go Around button is.  It’s actually on the throttle itself, making it much more intuitive.  This way, you can press the Go Around button while adding full throttle.

    There is one major difference between the Garmin Perspective in the Cirrus and the G1000 in the Corvalis. When you press the Go Around button in the Cirrus, the autopilot actually stays on.

    Here’s what happens when you press the Go Around button in the Cirrus:

    • Flight Director pitches to 7.5 degrees pitch up and wings level
    • AP Mode switches to Go Around mode, following the flight director
    • GPS comes out of SUSP mode
    • CDI switches back to GPS

    All the pilot really has to do is add power, take the flaps up, then press NAV on the GFC 700 to get the autopilot following the missed approach procedure.

    If you aren’t familiar with the Go Around button or haven’t used the one in your plane lately, it’s good to go up with a knowledgeable instructor and fly a couple of approaches where you perform the published missed approach afterward.  That way, he or she can assist you through the first missed approach, then give you pointers until  you get comfortable with the Go Around button.

  • AOPA Rusty Pilot Seminar in San Marcos

    “AOPA Rusty Pilot presented by AOPA Ambassador Pat Brown at Tempus Training Solutions”
    Topic: A Rusty Pilots Seminar
    On Saturday, July 16, 2016 at 09:00 Central Daylight Time
    Location:
    Tempus Training Solutions
    2080 Airport Dr.

    San Marcos, TX 78666

    Select Number:
    EA2769634

    Description:

    Life may have gotten in the way, but the dream of flight can be yours again. Returning to the skies is not as difficult as most rusty pilot think. We’re inviting you back in the cockpit and will help you get there. Come and participate in a FREE Rusty Pilot program with fellow lapsed pilots. We will help you understand what’s changed in aviation since you’ve last took the controls and brush up on your aviation knowledge. The Rusty Pilot program is developed by AOPA in partnership with local flight training providers in order to create the best environment for getting you back in the air and a part of the general aviation community.

    It is easier than most people think:

    • No FAA checkride or test
    • Medical may not be required

    As a Bonus, by attending, you get two to three hours of free ground instruction towards your flight review!

    Register Now!

    https://ww2.eventrebels.com/er/Registration/StepRegInfo.jsp?ActivityID=16910&StepNumber=1

    To view further details and registration information for this seminar, click here.

  • 7 Reasons An Airplane Buyer Should Use An Airplane Broker

    In the realm of buying airplanes, navigating through the complexities of the market can be as challenging as piloting through turbulent skies. Whether you’re a seasoned aircraft owner or a new pilot looking to acquire your first aircraft, enlisting the expertise of an airplane broker can significantly streamline the buying process. Here are some compelling reasons why engaging an airplane broker is a smart move for buyers:

    1. Expertise and Experience:
      Aircraft brokers are seasoned professionals with in-depth knowledge of the aviation industry. They understand what aircraft models fit different missions (you don’t want to have an expensive jet for 200 mile trips for 2 people), market trends, airplane values, and technical knowledge to help avoid “lemon” airplanes before even the inspection begins. Leveraging broker expertise can help buyers make informed decisions, avoid pitfalls, and secure the best deal possible.
    2. Access to a Vast Network:
      Airplane brokers have extensive networks comprising sellers, manufacturers, and maintenance facilities. This network gives buyers access to the experts on the aircraft they are wanting to buy. Whether you’re in the market for a brand-new aircraft or a pre-owned gem, brokers can tap into their connections to make sure the airplane selected is a well maintained aircraft.
    3. Time and Resource Efficiency:
      Searching for the right aircraft can be a time-consuming and labor-intensive process. From researching available options to arranging pre-buy inspections and negotiations, the tasks can quickly pile up. By entrusting these responsibilities to a broker, buyers can save valuable time and resources. Brokers handle the legwork, allowing buyers to focus on family, life and work while still staying informed and involved in the decision-making process.
    4. Objective Guidance and Advocacy:
      When emotions run high during the aircraft buying process, having an impartial advocate can be invaluable. Airplane brokers act as trusted advisors, offering objective guidance and a high level of knowledge about different airplanes. That knowledge comes in handy when evaluating aircraft specifications, assessing market value and negotiating terms. Brokers provide valuable insights and ensure that buyers make well-informed decisions aligned with their goals.
    5. Streamlined Transaction Process:
      Purchasing an aircraft involves navigating a complex web of legal, financial, and logistical considerations. Brokers are well-versed in handling these intricacies and can streamline the transaction process from start to finish. They coordinate with legal experts, financial institutions, escrow companies, maintenance shops and regulatory authorities to ensure a seamless and hassle-free experience for buyers, minimizing potential delays and complications along the way.
    6. Cost-Effective Solutions:
      While some buyers may be hesitant to engage a broker due to concerns about additional costs, the reality is that brokers often help buyers save money in the long run. By leveraging their industry knowledge and negotiation skills, brokers can steer buyers away from airplanes that are potential money pits and toward airplanes that have excellent maintenance pedigrees. Brokers are often able to secure favorable pricing and connect buyers to other experts in maintenance, insurance, and other essential services.
    7. Peace of Mind:
      Perhaps most importantly, working with an airplane broker provides buyers with peace of mind throughout the buying process. From the initial search to the final closing, buyers can rest assured knowing that they have a dedicated professional by their side, guiding them every step of the way and ensuring a successful outcome.

    While purchasing an aircraft can be a daunting endeavor, enlisting the services of an airplane broker can turn the journey into a smooth and rewarding experience. With their expertise, industry connections, and commitment to client satisfaction, brokers empower buyers to make informed decisions, secure the best possible deal, and embark on their aviation adventures with confidence. So, whether you’re in the market for a single-engine propeller plane or a luxurious corporate jet, consider partnering with an airplane broker to navigate the skies of aircraft acquisition with ease.


    Texas Top Aviation, LLC has 10 years of experience helping our customers purchase amazing airplanes. We specialize in TBM, Piper PA46, Cirrus and Columbia aircraft, but have extensive knowledge about a wide variety of piston and turbine aircraft. Contact us today to discuss our services for your next airplane.

  • Flying To Mexico

    I took a Piper Malibu to Cabo San Lucas a few weeks back.  This was my second trip flying to Mexico, but the first where I arranged everything.  Cabo is a beautiful place and the MMSL airport is a fabulous facility. For those who haven’t been fying to Mexico before, MMSL is the place to go.  The folks there are extremely helpful and do most of the paperwork for you.  You just have to pass along your information to them.

    Mexico Flying

    Flying to Mexico and back out is different than flying in the US.  First of all, don’t forget your passport. The authorities on both sides frown upon that.  You’ll probably get sent back to the US (or sent back to Mexico if you are on your return trip).  Your aircraft also needs, Mexican insurance (talk to your US insurance agent) a radio license, and a customs decal.

    Second, you’ll have to file an ICAO specific flight plan for flying to Mexico.  This is available on Foreflight now, but I really like Fltplan.com’s way of doing it.  I don’t fly internationally enough to remember what everything means, but Fltplan.com does a great job of walking pilots through the the different classifications.  It’s almost impossible to get confused.

    Third, you have to fill out an eAPIS form.  This has to be done at least 24 hours prior to departure from the US, but it can be done as far in advance as you’d like.  If your departure time changes or your passengers change, you can edit the eAPIS form to bring it current.

    Flying to Mexico IFR is a lot simpler than flying VFR.  I have only flown IFR and it is very easy.  I’m already on a flight plan, already squawking a discreet code, and already on radar, so there really isn’t any way I can mess up the ADIZ penetration.  I really recommend going in and out of Mexico IFR instead of VFR.

    Once you land in Mexico, you have to close your IFR flight plan.  The tower doesn’t do this for you.  After clearing customs, you’ll have to pay a landing fee and sign your flight plan confirming you have arrived and closing it out.

    When departing, you have to file another eAPIS 24 hours in advance.  Wherever you plan on clearing Customs in the US, you’ll need to call the Customs office no less than 1 hour, but not more than 23 hours before arrival.  It’s called an Advanced Notice of Arrival.

    You’ll need to fill out a paper flight plan before departing, clear customs again to leave, then away you go.

    There are a lot of really fun getaways in Mexico and flying there doesn’t have to be difficult.  When you have the right information, flying to Mexico can be a breeze!

  • A Complex Clearance?

    I was flying in the Rio Grande Valley in south Texas a few weeks ago and heard an IFR clearance given to a King Air that pricked my ears up.  It was a clearance from CRP to LRD, but the routing was one you don’t hear too often anymore.  Because of active military airspace, the routing was via a radial and DME off the CRP VOR (so a point defined by the radial and DME) to another radial and DME point off the LRD VOR.

    It took me a second to think about how to do this the easiest (without setting up the VOR and watching the DME).  After a moment’s thought, it’s actually a snap with the G1000.  You create 2 user waypoints, one for each Radial/DME spot, then put those 2 user waypoints in your Flight Plan.

    Here’s how.

    Step 1

    Using the big knob, go to the Waypoint chapter.  Once there, scroll down to the User Waypoint page using the small knob.

    Step 2

    Press the New soft key.  If you want to name the waypoint something specific, you can do that at the top of the page.  If not, it will default to something like VOR 1 or VOR 2.

    Step 3

    Under Waypoint Type, use the small knob to select RAD/DIS (stands for Radial/Distance).

    Step 4

    Under Reference Waypoints, again using the small knob (or your keypad), type or dial in the VOR identifier, the radial from that VOR, and the DME distance.  Press enter and you are done.

    Once you have both User Waypoints created, then just put them in your flight plan (if you forget what you named them, you can just go back to the User Waypoint page), and off you go.

  • Oh, Deer (Part 2)

    Read Part 1 Here

    Only now did I begin to realize the severity of the situation. The deer had completely broken the left main gear off of the airplane. Obviously, landing in this condition would not be ideal. Landing without a nose wheel is one thing, but landing without one of the mains would be a very dangerous and undesirable proposition.

    The company’s maintenance guys arrived on the scene while I executed a few more low passes so that they could take a look. We all came to the same conclusion that the best situation for landing would be to retract the other two wheels so I could land on the belly. Unfortunately, the landing gear wouldn’t retract. Cranking the emergency gear handle didn’t work either as it is not designed to bring the wheels up, only to put them down.

    I flew circles around the airport for a while as different options were all discussed. I owe a lot to the guys on the ground who were digging through the manuals coming up with solutions. Eventually, it was decided that I would try cranking the gear up by hand, even though the checklist in the airplane said that it could only be used to lower the gear. Even if we damaged the hand cranking mechanism, it would be worthwhile…plus, I’d already torn off the left main entirely, surely a little damage to the retraction mechanism wouldn’t be the end of the world!

    Following the checklist, I pulled the CB for the gear motor and started cranking. To my great relief, the “in transit” light illuminated and the three green indication went away. It was difficult work to crank the gear up manually. The handle is in a very poor location in Barons and Bonanzas, plus I was working against gravity. It is also possible that there was some debris from the missing wheel causing friction or binding. While I was cranking, the rescue crews were being coordinated while extra vehicles and people had been called in from the city for support.

    After some time had passed, enough to get a slightly sore arm from cranking, the lights indicated that the gear was up and locked. I lined up for one more pass hoping to verify that the landing gear was up and the landing gear doors were closed. After the final go ahead from everyone on the ground, all that was left was the landing.

    I had been doing my best to keep the passengers informed of what was happening throughout the whole flight, but I felt bad for them as the news changed from the beginning of the flight: “precautionary landing” was quite different than the briefing I ended up giving them before we landed. I informed them that I was going to be “… killing the engines and landing with the gear up….” They did an impressive job of staying calm and being responsive. Before we landed, I made sure that they were all briefed on what to expect, how to unbuckle, and how to evacuate from the airplane. It is difficult to convince someone that everything is going to be fine when there are hordes of emergency vehicles (including ambulances) waiting next to the runway in anticipation of your landing.

    Shortly before landing, I went through my flows and callouts, then verified by use of the checklist to ensure I hadn’t missed anything. I distinctly remember sitting in the airplane preparing for the landing, all the while being in complete disbelief that this was a real situation. I never imagined that I could be flying an airplane that was missing a wheel strut. Previously, my assumption had been that if there was an event serious enough to shear off one of my mains, the airplane wouldn’t continue flying. It all seemed like a bad dream.

    I elected to use runway 26 since it was the longest. I wanted to be able to carry extra speed in order to give myself extra time between pulling the mixtures and landing so that I could feather the props and turn the fuel shut off valves to the off position (never thought I’d have to do that!) without being rushed. As I made my final approach with the engines shut off, I went through my final memory items and couldn’t help but laugh about just how backwards everything was from normal arrival procedure. GUMPS: Gas- Off (normally on the fullest tank), Under carriage- Up (Definitely not normal), Mixtures- Idle cut off (I normally save this for when I’m parked on the ramp), Props- Feathered (Again, never thought I’d have to do that in real life), Seatbelts- On (the only one that stayed the same!).

    On final approach for runway 26 with the gear up and the props feathered.
    Photo Credit: www.lancasteronline.com

    I’ve had several remarks about how quiet the airplane must have been during the final un-powered glide to the runway, and while that is absolutely true, I must confess that I never noticed. I was so focused on the task at hand that the silence in the airplane simply wasn’t something that stuck out to me. What did make an impression on me, however, was the acceleration the airplane experienced when the props were feathered. I’ve heard it preached many times the importance of feathering the propeller on a dead engine, but never truly appreciated the importance of it until I did it myself. I remember the airplane accelerating noticeably as though I had hit a boost button which was hidden somewhere in the cockpit for just such an occasion.

    Although I didn’t notice the lack of noise upon killing the engines, the sickening, deafening noise which was produced during the touchdown and deceleration is something which I will never forget. Another thing that surprised me was the smoke which filled the cockpit and cabin as we slowed down. This was produced by the friction between the belly and the runway, although nothing was burning.

    I don’t know how long the airplane actually slid for after touching down, but it felt like an eternity. However, when the noise subsided and the motion stopped everything returned to real time. I unfastened my seat belt, opened the door and climbed out onto the wing. I helped the passengers evacuate and we retreated to a safe distance on the side of the runway while the firefighters rushed in to do their job.

    It was 8:35 am. So, from the time we took off to the time we landed was almost exactly an hour and a half. Not surprisingly, the passengers elected not to continue on to Pittsburgh and instead accepted a ride home in a car. The rest of my day was a blur of paperwork, reports, and phone calls.

    To Be Continued…

    Read Part 3 Here

    Andrew Robinson is an airline pilot for Piedmont Airlines.  He is a former 135 Charter Pilot and flight instructor who lives with his wife and 2 daughters in Pennsylvania.  He instructs in Beechcraft Bonanzas.

Leave a Reply

Your email address will not be published. Required fields are marked *