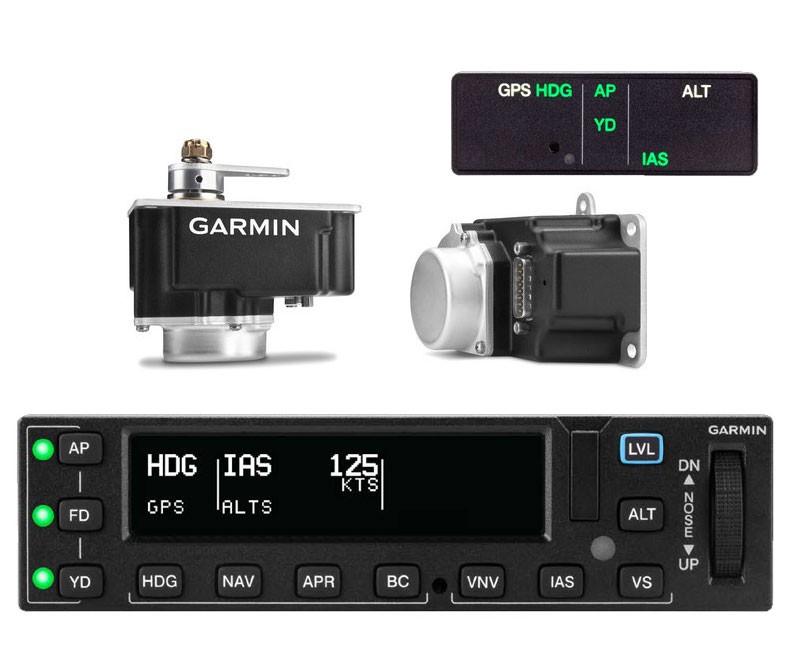
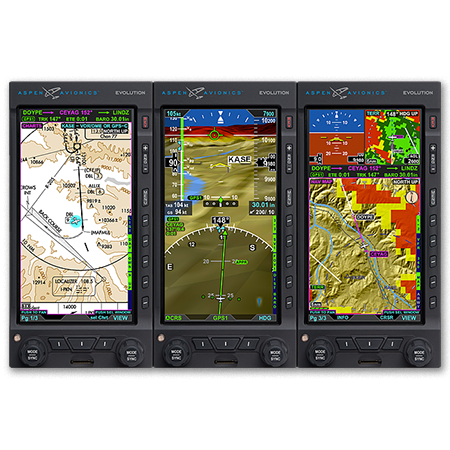
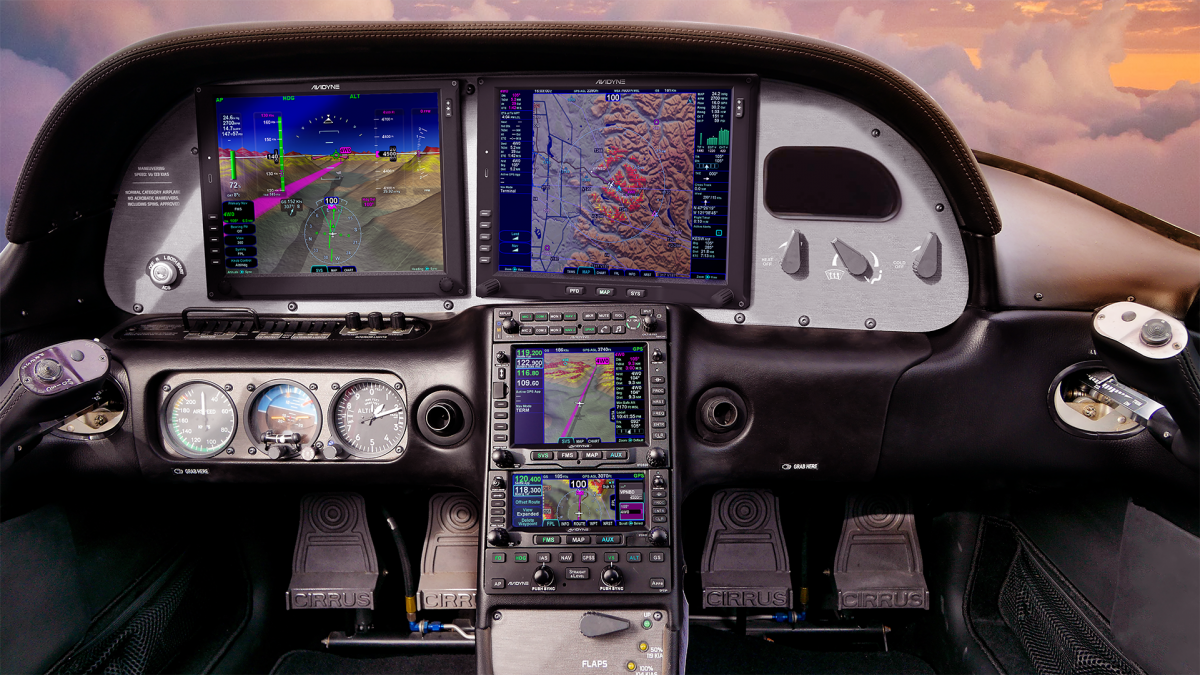
In the fall of 2021, Garmin announced the long awaited confirmation that the Garmin GFC 600 autopilot is now certified for the Piper Meridian. The Garmin GFC 600 autopilot has been certified for all other types of the Piper PA46 line of aircraft, but the Meridian was last in line. The airplane has to have been manufactured prior to 2009 and have Avidyne avionics, Meggitt, or have been retrofitted with a Garmin G500 (no G1000 aircraft since those already have the GFC 700 autopilot).
The Garmin GFC 600 autopilot is the ultimate digital autopilot. The integration with the Garmin G500, GTN 750 and GTN 650 units is a beautiful thing. The autopilot communicates with all the heading and altitude bugs, flies approaches smoothly, and even has a level button.
In the latest technological marvel from Garmin, Garmin Safe Glide, the GFC 600 autopilot is critical in reducing pilot workload in an engine failure situation. It flies the airplane for you and takes you to the nearest airport, reducing the stress and allowing the pilot to troubleshoot the situation.
Texas Top Aviation recommends Abilene Aero in Abilene, Texas for any and all avionics installs. They have worked with several of our customers in the last year, are extremely knowledgable and do excellent work. Call them for a quote on a new Garmin GFC 600 autopilot in your Piper Meridian.
If you are based in Houston, or heading into or out of the Houston airspace under IFR, have you updated your charts? If not, you may hear a clearance stating: “N67889, cleared to Amarillo via the BORRN 1 Departure, CRGER Transition, Direct. Climb via the departure, expect 8000 in 10 minutes. Departure frequency 123.8, Squawk 3365.” You manage to get the clearance written down, but have completely messed up the spelling of both BORRN and CRGER, so you have no idea where the intersections are. After stumbling through a readback, you ask ground to spell the fixes for you.
Then, more bad news. You haven’t updated your GPS cards yet, so the departure isn’t in your 430. It’s an RNAV only departure, so you can’t fly it based on the NAV Radio. You were planning on updating your iPad when you got to Amarillo, so you don’t have the departure on there, either.
This has probably already happened to a few people today already.
Houston airspace got a major overhaul today. There are 20 new DPs and 29 new STARs guiding IFR traffic into and out of Houston airspace (including one named the DOOBI 1 Arrival, named after the Dooby Brothers band).
The FAA’s goal in all these changes, according to AOPA, is to “bring fuel efficiencies, time efficiencies, and reduce carbon emissions” (from Benet J. Wilson’s May 15th article on AOPA.com). The FAA issued a NOTAM today valid until June 6th describing what routes for pilots to file. The NOTAM also contains contingency plans for pilots flying without updated charts (like our example above).
Pilots should expect these wide scale procedure additions and changes to start showing up in other Class B airspace across the country. As always, make sure those charts are updated, GPS databases are current, and you do some studying of your route before you file your flight plan.
When a pilot first glances at the title of this article, the first thought that probably goes through that pilot’s head is, well that’s easy.
And it is, if you are flying a high wing Cessna. On other airplanes, there are a few tricks to checking the stall warning horn. If you get them wrong, you’re liable to get a bill from your maintenance shop for an hour of labor for a problem they couldn’t duplicate.
Cirrus SR22
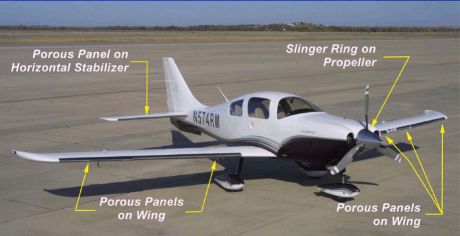
Let’s start with the Cirrus. On the pre-FIKI Cirrus aircraft, there was a small little hole in the wing that contained a diaphragm. That diaphragm sensed a change in airflow at a certain angle of attack just below the critical angle of attack and set off the stall warning horn. Unfortunately, the only way to check that is to suck on the hole during pre-flight.
I don’t. I verify the hole is clear and that’s about it.
On the FIKI Cirrus aircraft, there is actually a stall warning vane. It looks like a high wing Cessna vane, but if you turn the batteries on and try and get it to come on during your light and pitot heat check, nada.
Here’s the trick, and the checklist doesn’t do a good job of describing this.
Turn on the Avionics Master
Turn on the speaker
Put the flaps to full
Then move the stall warning vane and you’ll hear the horn
The speaker and the Avionics Master are so you can actually hear the horn (if you had the headset on while you were doing this, the speaker would be unnecessary). The flaps have to be full because the pitch attitude for the critical angle of attack is lower with the flaps down, so the horn goes off when at a different angle. You then don’t have to use as much force to push the vane.
Piper PA46
The early -310P Malibus are pretty simple and straight forward. Move the vane, get the horn.
In the -350P, you can’t get the horn to come on by moving the vane. So, Piper put a stall test button that’s hidden underneath the upper left side of the instrument panel. Push that to test the horn. On the G1000 PA46, it is located directly above the PFD. On the Avidyne, it’s below and to the left of the pilot’s yoke.
Testing the stall warning horn is a very important part of pre-flight. A pilot needs to know if the aircraft is close to a stall. The advent of Angle of Attack indicators in small, GA aircraft, have added a greater awareness to the angle of attack during all phases of flight to avoid those stall spins.
If the stall warning horn goes off or the AOA shows yellow, lower that nose immediately.
The FAA defines personal minimums “as an individual pilot’s set of procedures, rules, criteria, and guidelines for deciding whether and under what conditions to operate (or continue operating) in the National Airspace System.” Have you actually given thought as to why we choose the personal minimums we do? From the beginning of initial pilot training, weather minimums were established for day-to-day training and during solo flight. I didn’t realize it at first, but I later learned these limits were not just an insurance mandate, but these minimums were set at the time to safely operate an aircraft based on my “then” current experience.
So here’s the question: what are your personal minimums and WHY do YOU have them? Do you ever lower or raise your minimums? Are your minimums based solely on your overall experience level or do they take into account other variables such as advanced avionics? For pilots that fly multiple aircraft like I do, can and do your minimums change in regard to category or type of aircraft you are flying? It’s a judgment decision on how you chose your minimums. However, it’s important that time is taken before you strap into the cockpit for each flight to critically think about the different risk factors and variables which may affect your decision for the minimums you choose.
To guide us, let’s try briefly apply the FAA’s Personal Minimums Checklist to see how risk factors might shape what personal minimums or decisions we make for the day. Remember, just because you have been flying with a certain set of minimums one day, doesn’t mean you can’t adjust your minimums to a higher value given an ever-changing situation.
The acronym most pilots have heard is PAVE:
Pilot– We all should be familiar with the acronym IMSAFE associated with this. It addresses variables such as Illness, Medication, Stress, Alcohol, Fatigue, and Emotion. But how do you adjust your personal minimums using this guideline? Have you ever thought about raising your minimums for a training flight if you only got 4-6 hours of sleep, instead of 8? Or if you anticipate a hard IFR flight with a long day, maybe taking a safety pilot to mitigate the chance of a mistake if you’re forecasting having to shoot an approach to your weather planning minimums.
Aircraft– Personally, this is a really important factor for me when deciding what minimums to apply. I often spend a large majority of my time asking myself; is this aircraft properly equipped for the flight? This question goes beyond just looking at the logbook for a properly equipped and legal aircraft. A professional pilot should think further. Am I flying a traditional 6-pack “steam gauge” layout, non-slaved compass card, with a separate OBS gauge for course guidance? What if the aircraft doesn’t have an auto-pilot? What if I’m flying an aircraft equipped with a dual auto-pilot, dual GPS with an integrated glass cockpit? I can comfortably say my personal minimums change depending on the equipment I have available.
A pilot should also look at his/her recency with the aircraft. For example, if you are qualified to fly both airplanes and helicopters, maybe you should choose to have higher personal minimums in one particular airframe or if you haven’t flown that airframe within 30, 60 or 90 days. This is a very important factor for the owner/pilot.
EnVironment– Most of the time, when we think of environment, we ask ourselves, is the weather legal for me to take off and, more importantly, can I conduct this flight safely? Basic flight planning should have taught us to take into consideration crosswind limits, day versus night, and the type of airspace the flight is conducted in. Thought should also be given to how you set your personal minimums in regards to the particular type of environment you might rarely encounter. Flying an approach to your minimums in the flat plains of Texas during the day is one thing, but how would you adjust your weather minimums flying to a new airport, at night, with no moon illumination, in the mountains of Colorado? Could you reduce the risk and adjust your minimums in this scenario with two pilots?
External Pressures – What external pressures are affecting your flight? Passengers, the owner, “get-there-it is”, the desire to impress someone? Although external pressures should never be a factor when conducting a flight, they almost always play a role in your decision whether to conduct the flight or not. For example, a professional pilot gets hired to do a flight and the weather is below their personal minimums. The pilot could be tempted to lower their minimums by 100 feet to take the flight for a paying customer. This scenario plays out every day across the country whether it’s a professional pilot or owner/pilot. It would be foolish not to consider this type of pressure. Always make sure you have a plan if and when you encounter this situation. Planning your flight and having a plan to deal with these potential scenarios ahead of time ensures you stick to your minimums. It can be as simple as telling your passengers, or the owner, well ahead of your flight what your personal minimums are to accept the flight, and to ensure they, or you, have a back-up plan!
Most pilots will never break a hard limitation such as an airframe cross wind limitation, or engine limit, but the chances of breaking a personal minimum are realistic. Think about the last time you went on a diet and broke your plan because you were tempted by your friends or family during an outing. Self-imposed personal minimums can be hard to enforce and we need to acknowledge this as humans. Here are a few techniques that you can use to assist in making a decision using personal minimums and help reduce the influence of external pressures.
Step 1: Sit down with your CFI/CFII and fill out a personal minimums worksheet. Filling one out by yourself is a good start but having an outside objective view will help in making sure your personal minimums are realistic. Remember, it is easy to convince ourselves that we can do something even though we have set personal minimums. Talk with other pilots to see if you have set realistic expectations.
Step 2: Preflight planning must start a few days in advanced. It can be as easy as checking what the forecast might be and looking at the projected route, near-by alternate airports, and various approaches. This can be done quickly and will give you a heads up on whether the flight can be safely conducted or not. By alerting the passengers or owner early enough, alternate plans can be developed. An extra pilot can be added, the passengers can fly commercial, bring along a CFI, or cancel the trip altogether and seek alternate transportation. The main point is the decision was made well ahead of the flight when conditions didn’t look favorable. This helps in removing external pressures and ensures you don’t go below your personal minimums.
Step 3: Never be afraid to ask for a second opinion. Part 135 operators have set procedures for conducting flights which assist the pilots in making decisions. These set procedures help remove external pressures by allowing the pilot to say, “The rules don’t allow for this, or this is how we will conduct the flight!” However, under Part 91, the pilot has to take ownership for all phases of the flight. This is where talking it out with another pilot helps with mitigating external factors and the environment. Ideally, this person should have more experience and be able to talk through the situation. For instance, if I’m flying to a new destination, I often seek the advice from another pilot who’s familiar with the area. They may have key insights into weather patterns, preferred approaches, or hazards to avoid. In certain situations, asking for another pilot’s opinion might be what influences your go/no-go decision! You’ll be amazed how much you can learn just from talking to other pilots.
Step 4: Continue to build your experience and knowledge base. Building experience requires us to push our abilities, and sometimes this may be to the limit. However, this can be done in a controlled training environment or just going out and experiencing it. Get a new license, fly regularly with a CFI/CFII, and always try and take advantage of training opportunities. For example on your next flight from point A to point B, practice hand flying an approach, do a short field landing, a quick steep turn, etc. Quality flight time is always better than quantity. Continue to challenge yourself and try not to become complacent.
Personal minimums are a tool to assist in every pilot’s aeronautical decision making process. Use your personal minimums to guide your final go/no-go decision and remember to stick to the plan. I encourage you to review the FAA’s Risk Management Handbook (FAA-H-8083-2). Appendix B has Sample Risk Management Scenarios and reviewing them will give a better understanding how to apply the techniques discussed to your everyday flying.
Pedro Vargas-Lebron is a King Air 200 and uH-60 Blackhawk Instructor pilot with the Texas Army National Guard. Pedro is a CFI/CFII/MEI both in airplanes and helicopters with over 4000 hours of flight time, half as an instructor pilot.
Are you a Cirrus pilot with a Garmin Perspective? Still can’t figure out the use of the go around button? Read on!
When it comes to flying an instrument approach, we as pilots are assuming we are going to land. Most of the time, we won’t even take off if the ceilings or visibilities are below the minimums for an approach. 95% of the time, we do land.
There is the other 5% of the time when something unexpected happens, whether we get a full scale deflection, or we don’t see the runway at the published minimums, and we have to perform a missed approach.
When instructing, missed approach procedures are actually what I see the most deficiency in when instructing an instrument rated pilot. It’s not necessarily configuring the airplane for a missed approach procedure, it’s the button pushing involved in setting up the GPS properly. When a pilot isn’t proficient in the button pushing, that button pushing distracts the pilot from actually flying the airplane, which can lead to a dangerous situation.
I am going to spend a few articles on flying a missed approach with different GPS and different autopilot configurations. Today, I will be addressing the Garmin Perspective with a GFC 700 Autopilot, which is what all Cirrus Aircraft after 2009 are equipped with.
The Garmin Perspective Missed Approach Procedure
Once the decision to execute a missed approach has been made, here is the step by step procedure:
Full Mixture and Full Throttle
Simultaneously push the Go Around button on the underside of the throttle. This does the following:
Sets the Garmin Perspective Flight Director to Go Around Mode (7.5 degrees pitch up and wings level)
Takes the Garmin Perspective GPS out of Suspend Mode
Switches the CDI back to GPS mode if it is in a different mode
Garmin Perspective with GFC 700 Autopilot stays on
Flaps up
Confirm airplane is climbing
Set altitude bug for missed approach altitude (assuming it isn’t there already)
Set NAV mode and IAS mode on the Garmin Perspective GFC 700 Autopilot
That’s it. When Garmin and Cirrus got together to create the Garmin Perspective with the GFC 700 Autopilot, they tried to make as simple but robust system as possible. Once you have the procedure down for the right buttons to press, then the procedure is relatively straight forward.
He’s very sneaky, creeping unexpectedly and attacking after the propeller begins to turn.
He’s very cunning, veiling his intentions until, BOOM, he attacks.
Beware of the Lunch Monster!
Whenever I am doing a full day of training (which is usually how transition training courses are planned out, in full day sessions), I always plan a lunch stop. My metabolism has the speed of a rocket ship, so I get hungry and need some sustenance in the middle of the day. I have a running list of airports to stop at that have good lunch spots at them or nearby, so my customers and I usually end up at one of those airports.
Almost without fail, if a customer is having an excellent flying morning, nailing all the procedures, picking up all the techniques, and overall, flying pretty well, then eats lunch, the afternoon doesn’t go quite as well. Doing some of the same things we did that morning, but the customer’s performance isn’t quite as good. Most of the time, it’s just a brain lockup or landings aren’t quite as squeaky as they were in the morning.
Part of it is fatigue after flying for 2-3 hours in the morning. The other part is what I call the Lunch Monster. Eating a big lunch can sap away brain power and cause a person to lose energy around 2-3pm, leading to an afternoon lull (or the Lunch Monster attacking!).
Diet contributes to energy levels too. “Eating a lunch that is too big is the most common reason for feeling sleepy in the afternoon,” says Rebecca Solomon a nutritionist at Mount Sinai Hospital in Manhattan. “All your energy goes into digesting the enormous meal.”
The goal is to keep the body’s Cortical and Cortisone levels even since they’re the hormones released by the body in reaction to stress–they produce the fight or flight response. Their levels are elevated when you have sugar, caffeine and processed food, so you feel awake and energetic. But a few hours later, when those levels drop, you’re sluggish.
Solomon recommends eating a meal that’s balanced with healthy fats (from olive oil or avocados, for instance) with protein and healthy carbohydrates (whole wheat bread or pasta). The portion will vary for people of different sizes, but a general rule is you should be hungry about four hours after the meal.
Another healthy eating habit: Consume small portions of foods throughout the day, including almonds, carrots and hummus and fruit. Enjoy lunch around 1:30 or 2 p.m., just before the time you normally feel fatigued.
Now, most of the stops on my list of restaurants don’t fit the bill of healthy fats and healthy carbohydrates (plenty of protein, though, especially the BBQ joints). For those days, bringing along a snack like almonds or dried fruit is a great idea to munch on mid-afternoon. Trimming down the amount eaten at lunch helps a lot too.
So, the next time you have a long day of flying or training, beware the lunch monster and prep some good snacks when your flight instructor says you’re stopping for BBQ!
Figuring out the pattern altitude at an airport should be pretty simple, right? But, in this day of helpful technology, most pilots actually get it wrong. How can you always get it right? Well, it just takes about an extra 15 seconds. Here’s how.
John Wayne Airport Traffic Patterns
As outlined in the Aeronautical Information Manual, section 4-3-3, “traffic pattern altitudes for propeller-driven aircraft generally extend from 600 feet to as high as 1,500 feet above the ground.” Further, in the Pilot’s Handbook of Aeronautical Knowledge on page 13-10, it states: “1,000 AGL is recommended pattern altitude unless established otherwise.”
Okay, so for piston driver’s, we’ve got it narrowed down to 1,000 AGL (Above Ground Level for those who don’t like acronyms). But wait! There’s that very important phrase at the end of the last quote: “unless established otherwise.” That means not all airports have traffic pattern altitudes of 1,000 AGL, or else they wouldn’t put that line in there!
How do you find out what the TPA (Traffic Pattern Altitude) is for a certain airport if it’s not 1,000 AGL? Great question! Your first guess is probably to look on Foreflight. Though this is a good start, it is not the full answer.
Let’s use an example. Look up KAQO, the Llano Airport on Foreflight. At the top of the page, the airport elevation is stated as 1,101′ MSL and the pattern altitude is stated as 1,902′ MSL. From what we just learned, 1,902′ MSL is not 1,000 AGL, so is 1,902′ MSL otherwise established?
On the Airports page with KAQO pulled up, tap the A/FD tab, second to last on the left. Scroll down to Llano Muni. Read the whole entry. Does it state in the entry that pattern altitude is different than 1,000 AGL? It sure doesn’t. So, because it is not otherwise established, pattern altitude at KAQO is 2,102′ MSL not 1,902′ MSL.
Where did Foreflight get that? I have no idea. Too often, though, pilots look at the Foreflight pattern altitude and don’t actually check the Airport Facilities Directory (A/FD). Then, they get the pattern altitude wrong.
What does it look like when pattern altitude is otherwise established? Look up KSGR, Sugar Land Regional, on your Foreflight app. Foreflight states the elevation as 82′ MSL and the Pattern Altitude as 1,000′ MSL. Is this correct? Well, tap that A/FD button again and let’s find out.
On the second line of the A/FD entry, it says TPA-See Remarks. Down in the remarks section, we find the following:
TPA-1000 (918) single engine piston acft, TPA-1500 (1418) for twin and turbojet acft, TPA-500 (418) for helicopters within 2NM.
Foreflight got it right this time for single engine pistons, but if you are in a twin, the pattern altitude is different. What’s the lesson here? Always check the A/FD and don’t always go by what Foreflight says. The A/FD is always right and usually has a little more detail to help set you straight.
One last thing. Both the AIM and the Pilot’s Handbook of Aeronautical Knowledge, when talking about pattern altitude, state, “When operating at an airport, traffic pattern altitudes should be maintained unless otherwise required by the applicable distance from cloud criteria in…section 91.155.” 91.155 defines basic VFR weather minimums. So, to fully interpret what the AIM is saying, we have to take into account the type of airspace we are in to determine if we can safely and legally operate at pattern altitude at a particular airport.
For example, let’s say we are at KCVB, the Castroville Airport. Pattern altitude there is 1,602 feet, which is 829 AGL. CVB is Class G airspace up to 700 AGL, then Class E above that. Let’s say there is a 700 AGL broken cloud layer. Pattern altitude is 829 AGL, so you won’t be able to get up that high with a broken ceiling. What altitude can you do pattern work at to stay legal?
Class G VFR weather minimums during the day below 1,200 AGL is 1 SM visibility and clear of clouds. So, legally, you could fly at 699 AGL (which at CVB would be 1,472 MSL) while in the pattern and be legal. Safe? Maybe, but probably not if you are skimming the base of the clouds. Is 1300 MSL a safer pattern altitude in this example? Well, that is 527 AGL, so probably not, since towers tend to stick up that high sometimes.
Let’s go back to KSGR and put a 1,000 AGL overcast ceiling there. SGR is Class D airspace and we already determined pattern altitude there was 1,000 MSL for piston singles. VFR visibility and cloud clearance requirements in Class D airspace are 1,000 feet above clouds, 500 feet below clouds, and 2,000 feet horizontally from the clouds with 3 SM visibility. In order to stay 500 feet below the clouds, you would be flying a 582 MSL pattern. Safe? Probably not, though it is legal.
To summarize, don’t take Foreflight’s word for pattern altitude. Cross reference the A/FD (it only takes 15 seconds at the most) to verify. If it’s cloudy, it’s really best to stay on the ground, but if you want to find out your legal pattern altitude with a cloud deck, cross reference 91.155. I don’t recommend flying below pattern altitude because it is there for a reason.