It’s winter time, so that means winter weather for the aviation community. For single engine piston pilots, that means dealing with icing conditions. For us Texan flyers, ice only presents an issue for maybe a week out of the year (the exception being for those Panhandle residents!), but it’s nice to have some protection.
Most single engine pistons do not come with ice protection from the factory and, of those that do, most are not Flight Into Known Icing (FIKI) approved. The systems are “get out of jail” systems that can reduce the amount of ice you pick up if you accidentally get into icing conditions and you are on your way out. The Cirrus SR22 line of aircraft has had the TKS system option since 2006, with the new FIKI system being available since 2010. The Cessna TTx has a FIKI option that was debuted in 2014.
The above mentioned airplanes use TKS systems. There are a handful of single engine pistons that use boots that are FIKI certified: the Piper PA46 line (Malibu, Mirage, and Matrix) and the Cessna P210 and T210 line (though not all are equipped with boots).
If you find yourself flying into wintry conditions often and want some protection for your clean wing airplane, there are some aftermarket options for a lot of airplanes now. Do note that all these systems do come with a pretty hefty price tag, but can be worth it if you fly into icing a good bit.
CAV Ice Protection TKS Systems
CAV Ice Protection is a TKS system outfitter. What is TKS fluid? According to Flying Magazine:
“TKS systems dispense an ethylene glycol-based fluid with a freezing point below minus 70 degrees F through porous titanium panels attached to the leading edge of the wing and empennage. The fluid is released through thousands of the panels’ laser-drilled holes, which are not much larger than the size of a human hair. As air flows over the wing and empennage, it disperses the fluid, coating the surfaces, and preventing the formation and adherence of ice.”
The advantages of a TKS system are the whole entire wing gets coated to get rid of any extra ice that adheres to the top or bottom of the wing surface. The disadvantage is there is only a finite amount of fluid, so when it runs out, you don’t have any more protection. The fluid also adds extra weight agains the useful load of the airplane.
CAV Offers a Basic TKS system for the following single engine piston aircraft:
Beech Bonanza
Cessna 182, 206, 210, 350, & 400
Columbia 350 & 400
Piper PA32
Mooney M20
CAV Offers a full FIKI System for the following single engine piston aircraft:
Ice Shield is another after market de-ice option. Ice Shield makes boots for wing leading edges. The advantage of boots is they activate instantaneously, getting rid of ice where it builds up first, on the wing leading edge. No running out of fluid and only the added weight of the system. Ice Shield also offers heated windscreens for several the Piper Saratoga line and the A36, B36, and G36 Bonanza line.
Ice Shield has boots for the following single engine piston aircraft:
One other company, Kelly Aerospace, makes an electric leading edge de-icer called the ThermaWing for the Cessna/Columbia 350/400 line. You can read a review of the ThermaWing here, or check out Kelly Aerospace’s website.
It was a rainy Thursday afternoon and I was eating lunch with my family when my phone rang. My wife and I had just been discussing how miserable the weather was, so it was only natural that about 30 minutes later I was soaking wet and sitting in one of our Aerostars getting ready to take off for Ohio. I didn’t have much information about who I would be flying, or why, but I knew that I was going to pick someone up to fly them home; something about a missing airplane. So off I went into the muck. My biggest concern at that point being whether or not my clothes would ever dry out.
I arrived uneventfully and walked happily into the FBO, but found myself quickly in a very different atmosphere. It turned out I had two passengers to pick up, a husband and wife, and they had arrived at the FBO before me. As I walked in the door, the wife received a phone call. The person on the phone told her that search teams had found her father’s airplane crashed in the woods and that he was dead. I learned the rest of the details quickly and it was hard to stomach.
She was travelling home that day to be with family until they were able to locate her father. She was pregnant with her first baby and was in her third trimester. The baby was to be her dad’s first grandchild. He’d owned a Lake Amphibian for years and had stayed at home to work while his wife was out of town. He was last seen leaving work on Tuesday of that week and was reported missing on Thursday by his co-workers. Airport security footage showed him pulling the airplane out and taking off at 20:48 (after sunset) on Tuesday night.
After a few minutes we loaded the Aerostar and took off. It was the saddest flight I’ve ever done. Understandably, my passanger sobbed on and off from the time she got off the phone until we landed a couple of hours later. The weather seemed appropriate as we flew along through the rain and were greeted at our destination by a grief stricken family and a few reporters.
I said a sad goodbye and left, but I couldn’t help but think about their situation. It really hit close to home with me as it was easy to draw parallels between my family and theirs: she was very close in age to me and pregnant with her first child. My wife and I were new parents. Her dad had owned his airplane for about the same length of time that my dad has owned his Bonanza. Additionally, it isn’t uncommon for my parents to go a couple days without being able to reach each other because they both travel.
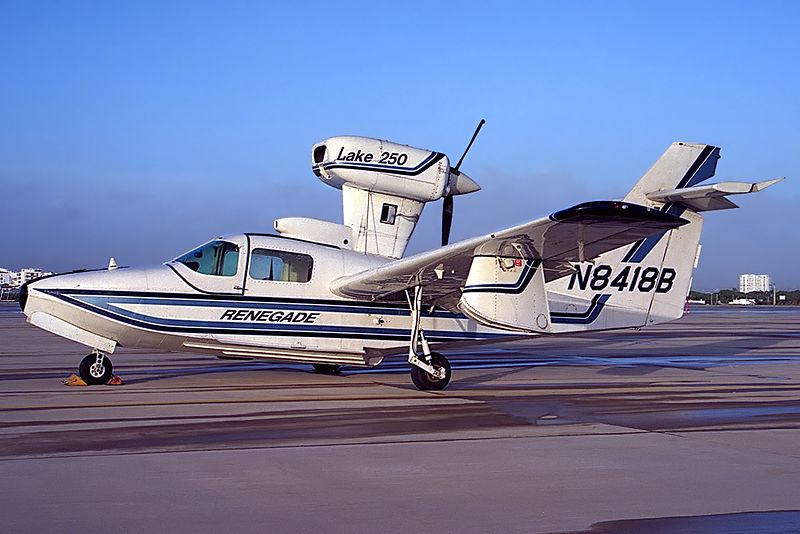
A Lake 250, the same type of aircraft involved in the accident.
But what happened..?
In the time since the accident, the NTSB has published their findings and unfortunately, it makes the situation sadder. It was completely avoidable.
Airport security cameras showed that after removing the airplane from the hangar, the pilot did not complete a preflight inspection or even a walkaround of any kind. He simply climbed in and left. The investigators were unable to find any traces or odor of fuel in the wreckage, nor any mechanical abnormalities with the airplane. In fact, according to the report, the engine was put on a test stand and ran perfectly. It would seem that the pilot simply never checked the fuel quantity and took off. The airport cameras captured the take off and a bright flash about 30 seconds after the aircraft departed.
Here is an excerpt from the report:
The National Transportation Safety Board determines the probable cause(s) of this accident as follows: The pilot’s attempted 180-degree return to the runway immediately after takeoff in dark night conditions, which resulted in collision with trees and terrain. Also causal was the pilot’s inadequate preflight inspection, which resulted in a takeoff with little-to-no fuel on board the airplane.
Interestingly, the report also details their ability to use logbook information and fuel receipts to show the airplane was taken on a long cross country on its last flight and likely not fueled again.
Another thing which stuck out in my mind upon learning the details of the crash was how important it is to let someone know when you’re going flying. Having another person know roughly when a flight is leaving, where it’s going and and when to expect it back could potentially save the lives of the people on board. In the case of this accident, the pilot didn’t alert anyone that he was going flying and therefore, no one realized he was missing for 2 days.
From reading the NTSB report I don’t get the impression that he survived the crash, but I can’t help thinking about the possibility that he, or others in similar circumstances, could survive a crash and then die from their injuries because no one knew to look for them. When I flew charter, we weren’t legally allowed to take off VFR without letting someone at the company know the details of the flight. I’ve adopted this as my personal policy as well. One text message could be the difference between being rescued or not.
Finally, every pilot should ensure that a proper walk around is completed! It’s easy to assume everything is okay with an airplane, especially one that no one else has access too. In addition to a thorough preflight, I like to walk all the way around the airplane and visual check fuel caps, doors, chocks, ropes, etc., immediately before getting in to ensure that everything is ready. I know a couple of pilots who have taken off with various panels and compartments open simply because they got distracted during their walk around and never closed them. (A good policy is to never walk away and leave something open). Perhaps even more mind boggling is that he apparently didn’t look at the fuel gauges after start up and before take off. I also have to wonder how much fuel he had remaining upon completion of the previous flight.
“Aviation in itself is not inherently dangerous. But to an even greater degree than the sea, it is terribly unforgiving of any carelessness, incapacity or neglect” is likely a familiar quote to just about every pilot. It is often written on a poster with a picture of an old timey bi-plane hanging out of a tree, but I think that it is absolutely on point. Carelessness in the preflight and neglecting basic pilot responsibilities (in this case fuel planning) cost this father his life and his opportunity to meet his first grandchild.
I know this article is a real downer, but it’s supposed to be. Its tragic that accidents take place which are completely avoidable. Obviously this case was beyond the normal realm of carelessness and neglect, but, we as pilots need to be extremely careful not to get so comfortable with an airplane that we stop doing the things which are so basic and important to safety. One of my professors in school used to say “aviation is fun, but it plays for keeps,” which is an effective way to remind myself how important it is to do it right.
*Out of respect to the family, I have not included any specific names, tail numbers or airports in this article.
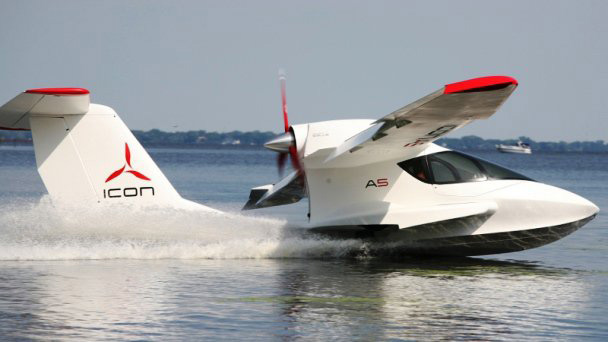
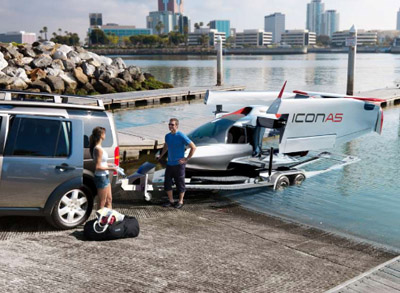
Most pilots have seen the Icon A5 light sport amphibious aircraft. It’s a neat design that can land on water or on a runway. The high wing design with a pusher prop has foldable wings that allow it to be put on a trailer and towed behind a vehicle, allowing it to be offloaded at boat ramps (it also begs the question can you wakeboard behind it?).
Apparently, not all non-pilots know about the Icon A5. Last week, one landed in the water near a beach in Southern California, but most of the beach goers and local authorities believed it had crash landed in the water. Emergency crews were dispatched, but everyone was surprised when the two occupants crawled out on the wings, had a cup of coffee, and took back off.
When filing an IFR flight plan, part of the process is determining whether or not an alternate airport is required. An alternate airport is required when the following conditions exist(as is outlined by the FAA in 91.169 (b)):
The weather conditions at the destination airport
From 1 hour before your arrival time to 1 hour after your estimated time of arrival, the weather conditions are forecast to be below
2,000 Feet AGL and/or
3 statute miles visibility
Let’s paint a scenario. You are traveling from KSAT (San Antonio International Airport) to KHBV (Jim Hogg County Airport in Hebbronville, TX). You start to file your flight plan and get down to the space where you put your alternate in. Since Laredo (KLRD) is the closest airport with a TAF, you check Laredo’s TAF and see that the forecast conditions there at your ETA are ceilings 1,500 and visibility of 2sm.
Based on this information, you need an alternate airport. Now, the process of finding one. In Part 91.169 (c), the forecast conditions at the alternate airport must be at or above:
600 Feet AGL and 2sm visibility for a precision approach, or
800 Feet AGL and 2sm visibility for a non-precision approach
Alright, now we have some guidance. Laredo is the nearest airport to KHBV, and we know the forecast from the above TAF showing the conditions are forecast to be above the alternate minimums outlined in Part 91, so let’s pick Laredo. All done?
Not quite. A lot of airports have Non-Standard Alternate Minimums. How do you figure out if they do? The easiest way is to look at any approach plate for the airport. In the notes section of the government plates, there will be a black triangle with an A in it. That means there are non-standard alternate minimums published for that airport (in layman’s terms, different than the ones stated above in Part 91).
Now the question is, where do you find those non-standard alternate minimums? On Foreflight:
Go to the Airports page
Tap the Procedures button
Tap the Arrival button
Tap the Alternate Minimums option
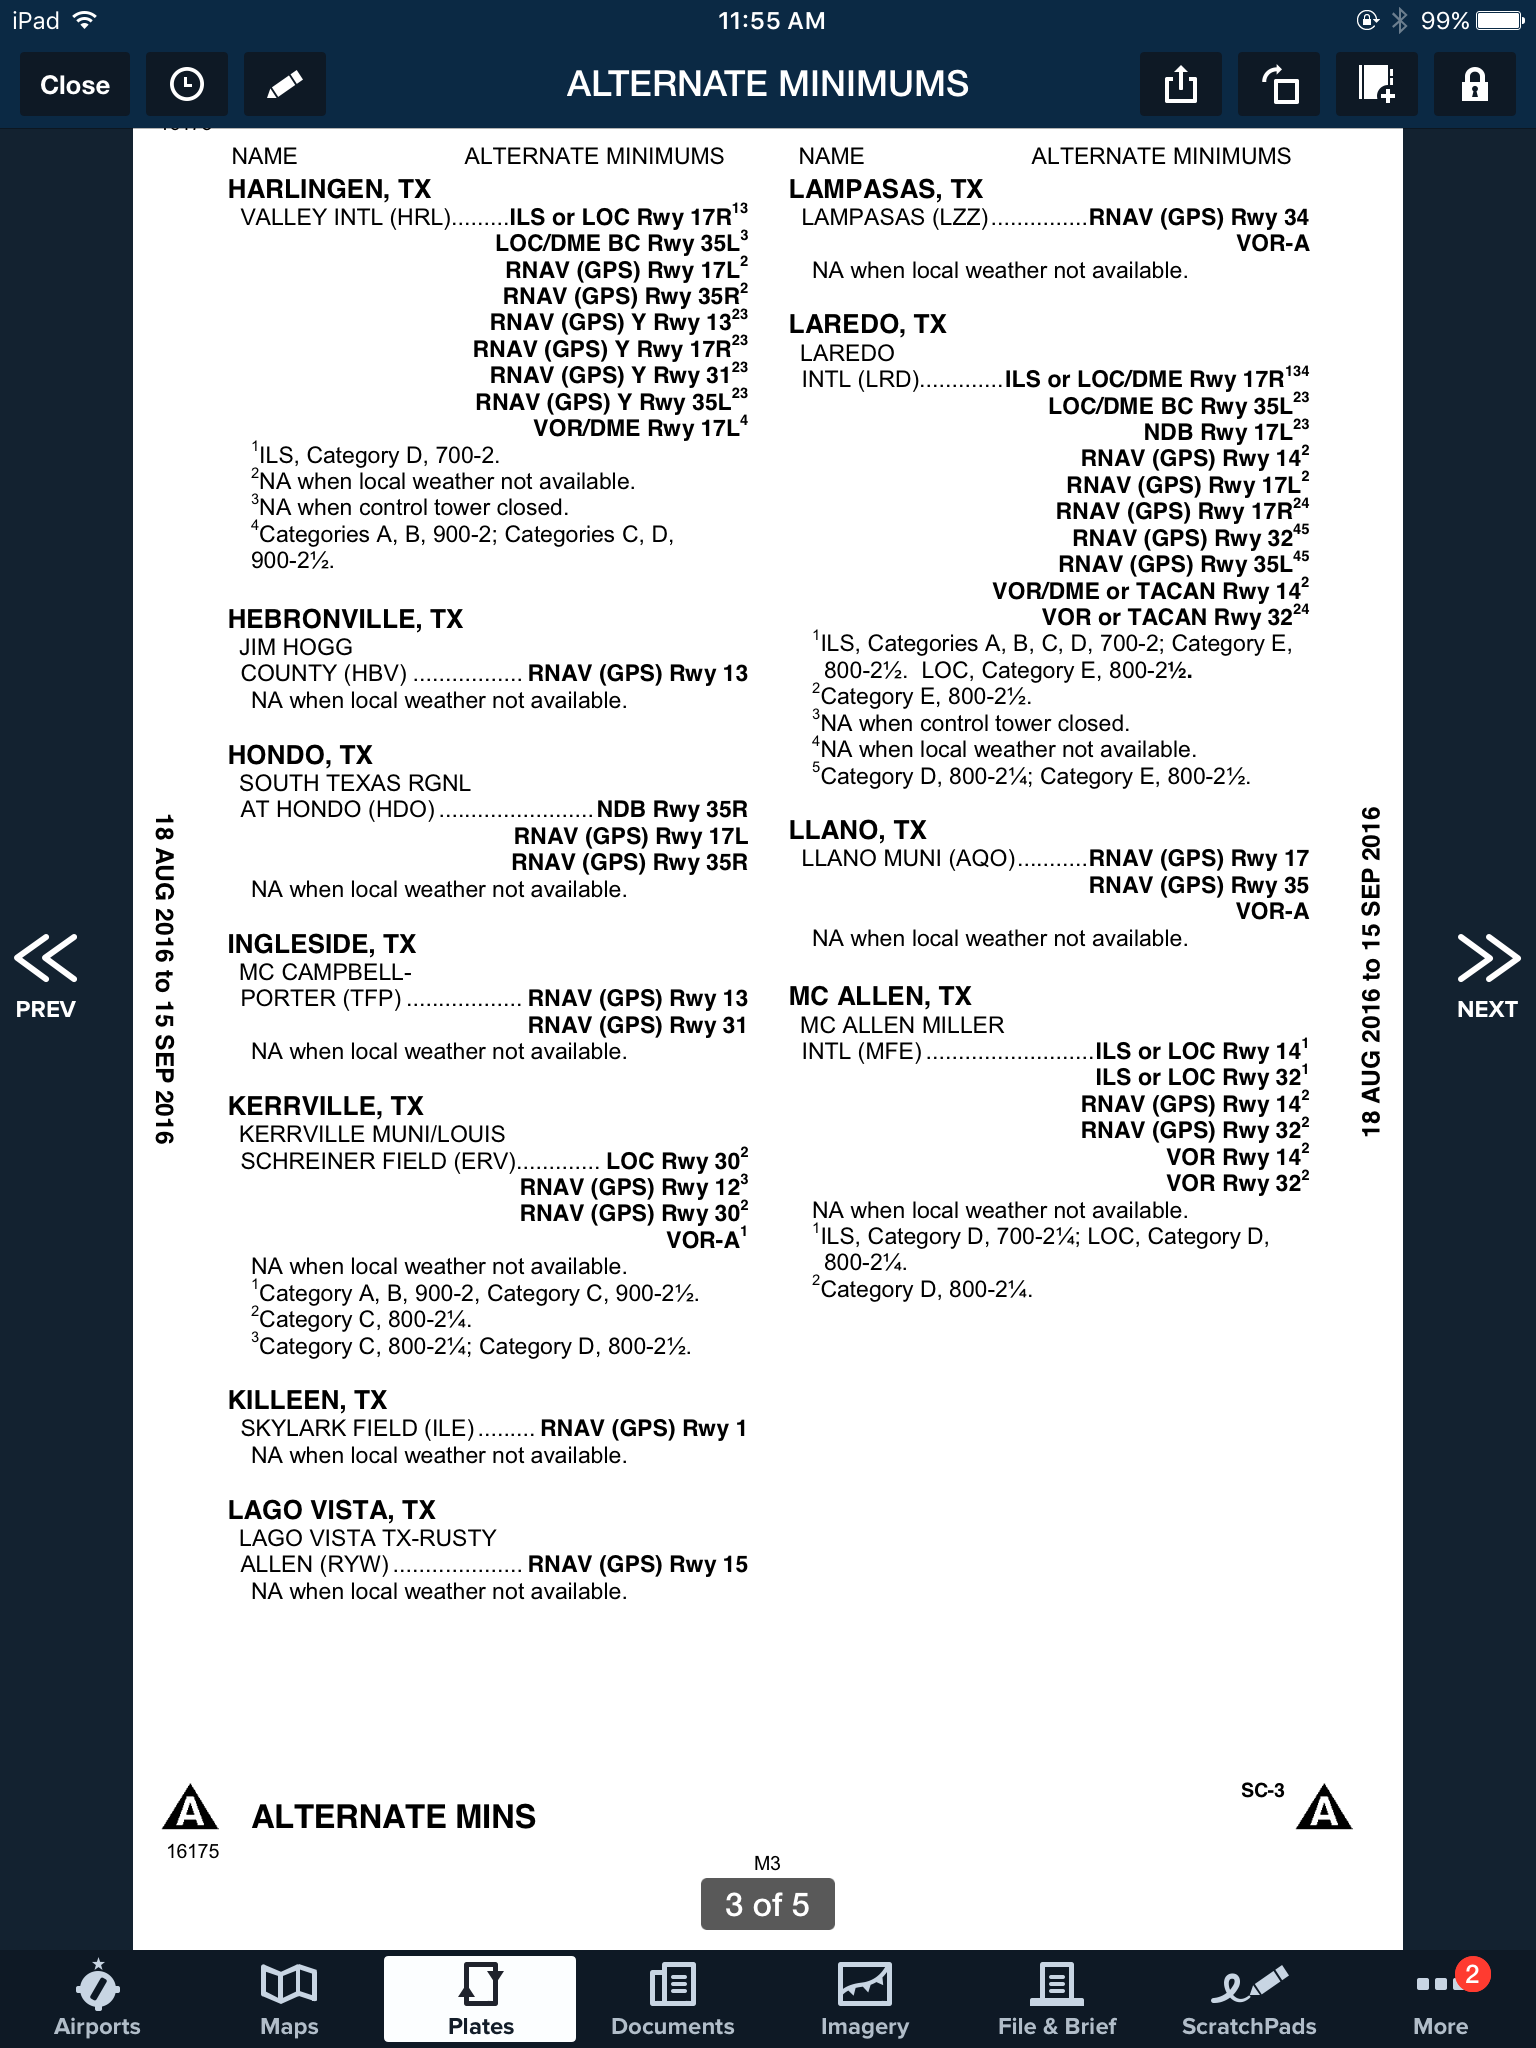
This brings up the IFR Alternate Minimums document for all the airports with non-standard alternate minimums in that area. Scroll through to find Laredo.
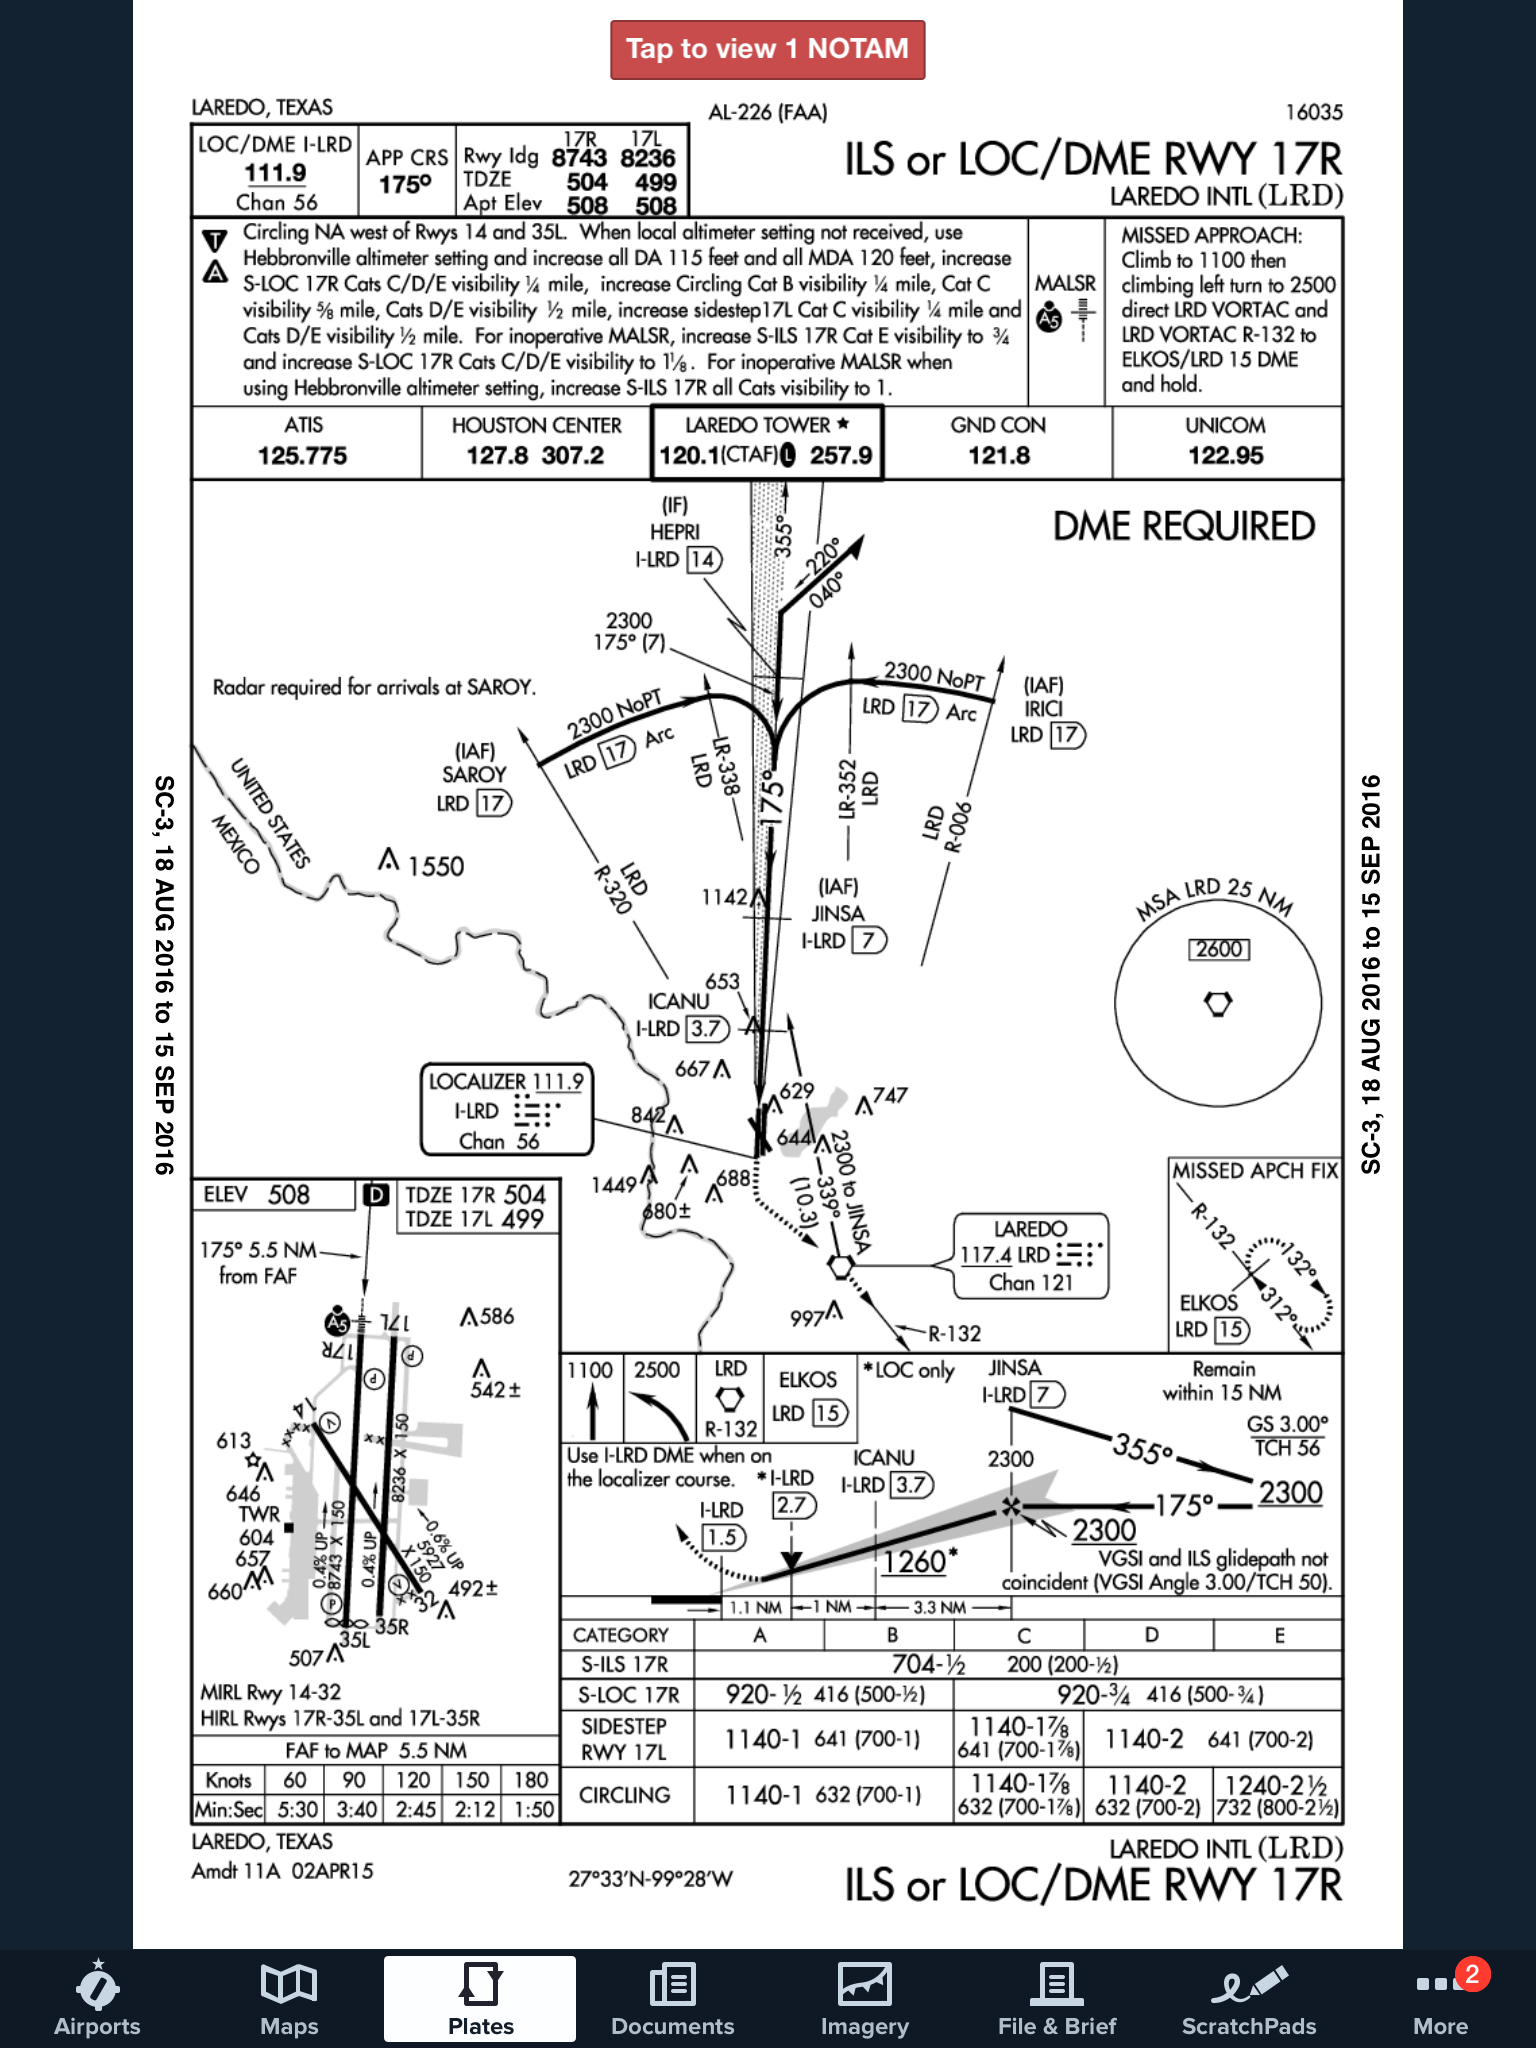
As you can see, there are several notes there concerning the different approaches into Laredo. For our example, we’ll say the winds are out of the south and we are planning on flying the ILS 17R if we cannot get into KHBV and have to come to Laredo. The note there is that the Alternate Minimums for the ILS 17R are actually 700 AGL ceilings and 2sm instead of the above state 600 AGL ceilings and 2sm, the procedure is NA if the tower is closed, and NA if the local weather isn’t received.
What does this tell us? If the forecasted ceilings at Laredo were below 600 AGL instead of 700 AGL, we would not be able to use LRD as an alternate airport if we were planning on flying the ILS 17R. The RNAV approaches are all fair game, so a GPS equipped aircraft would have no problem.
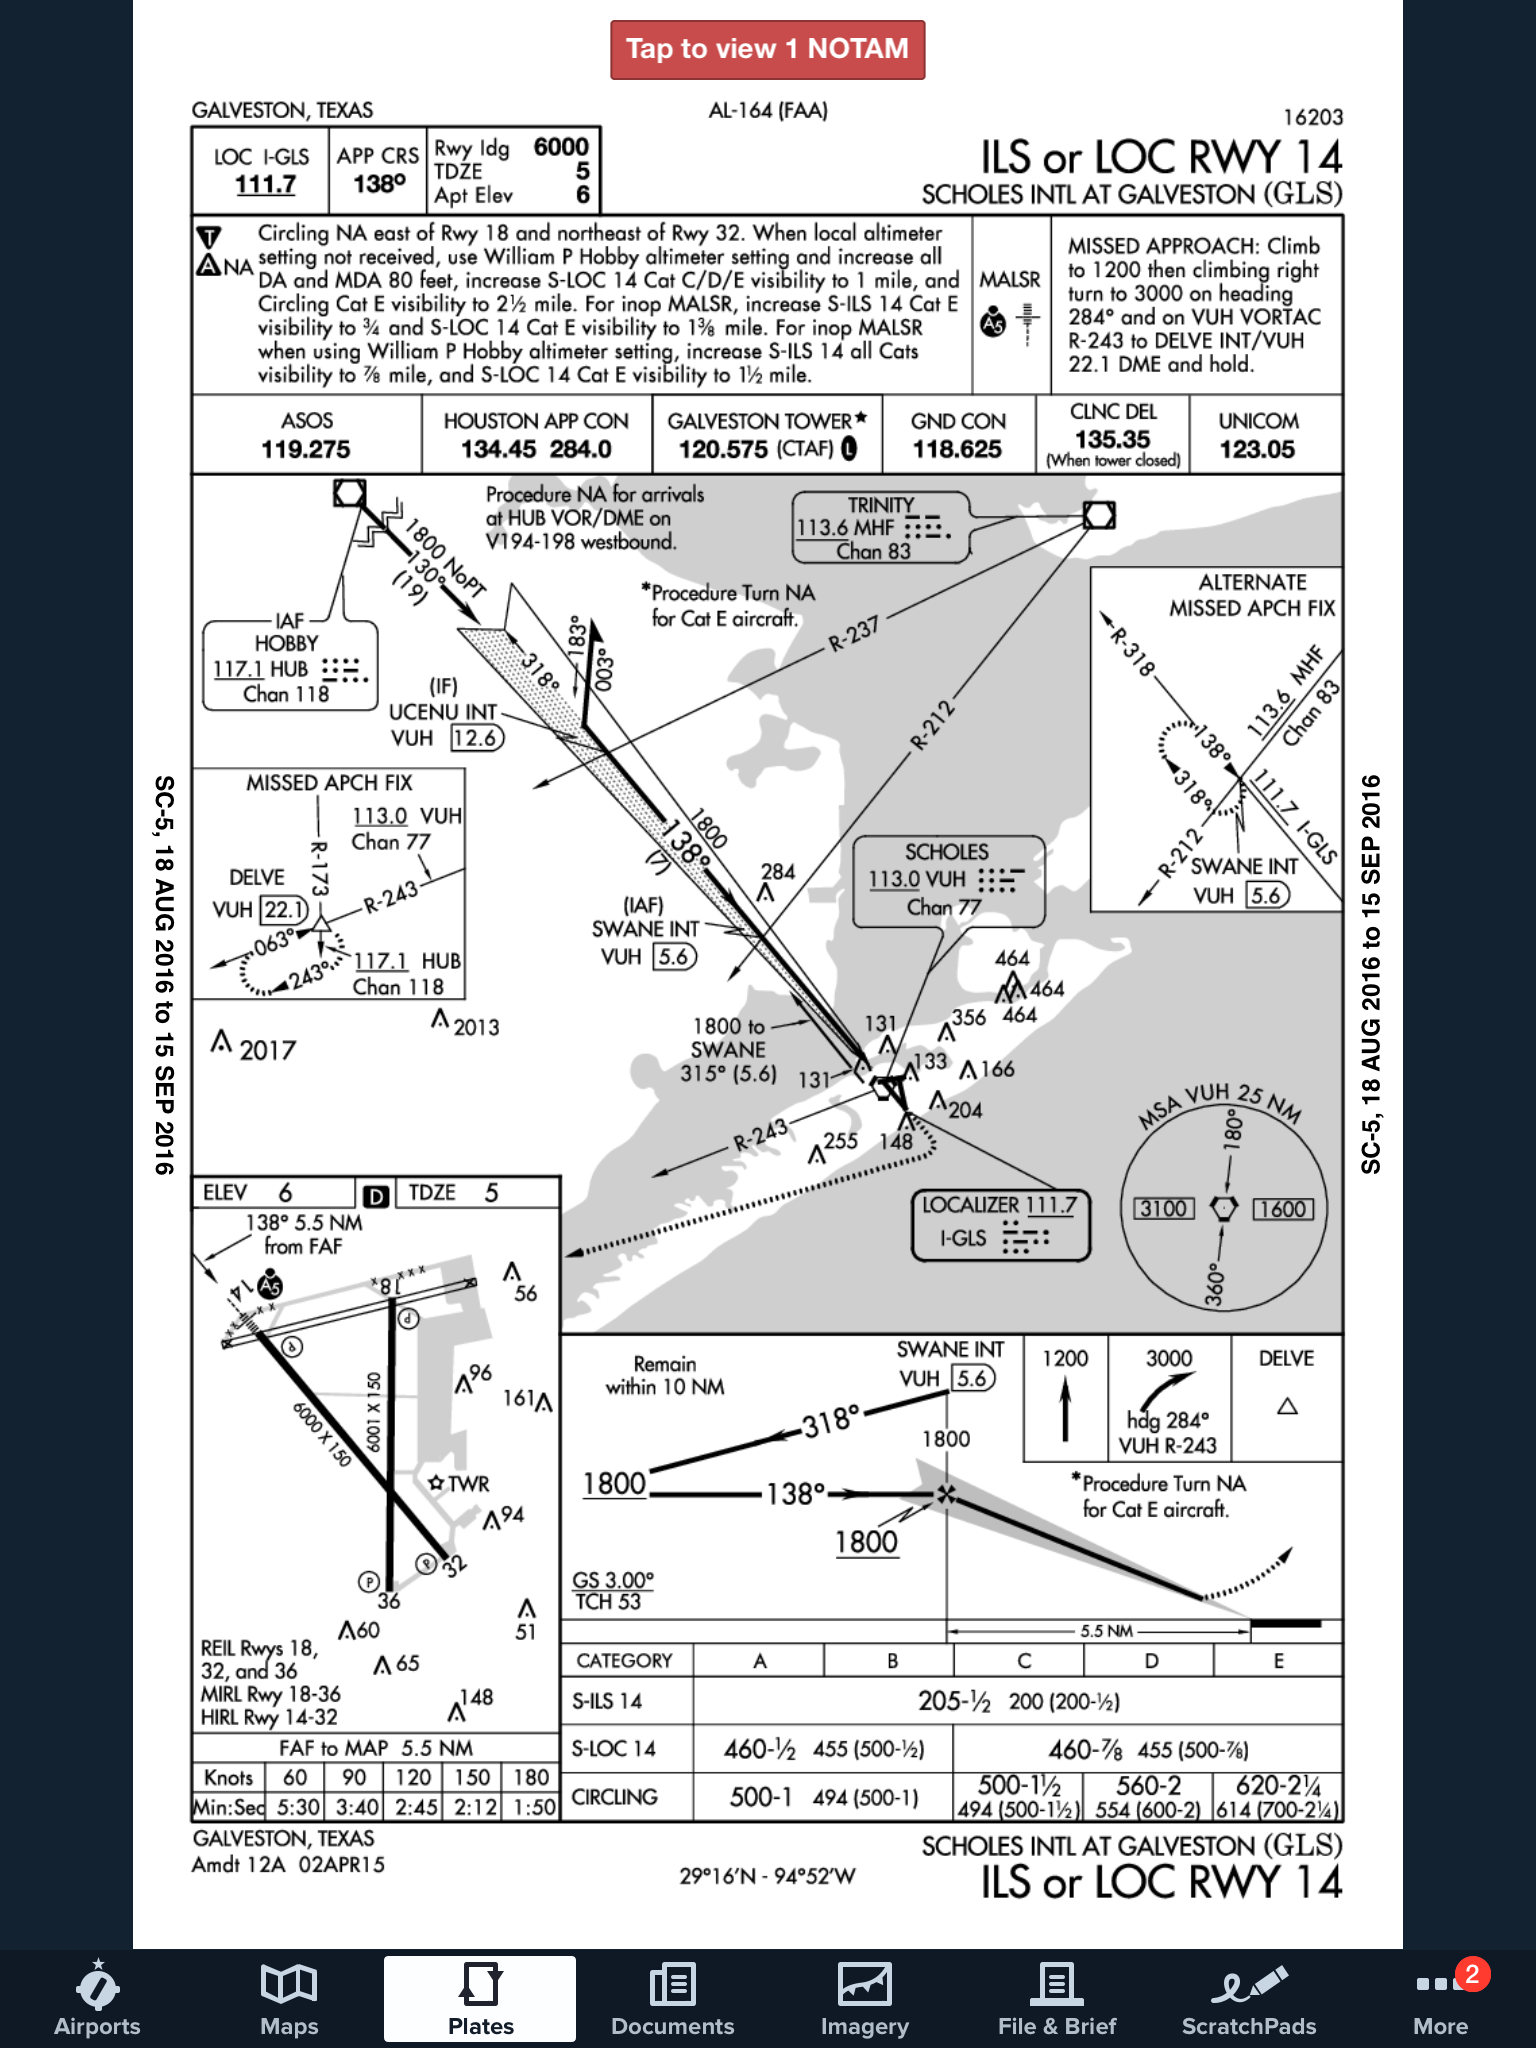
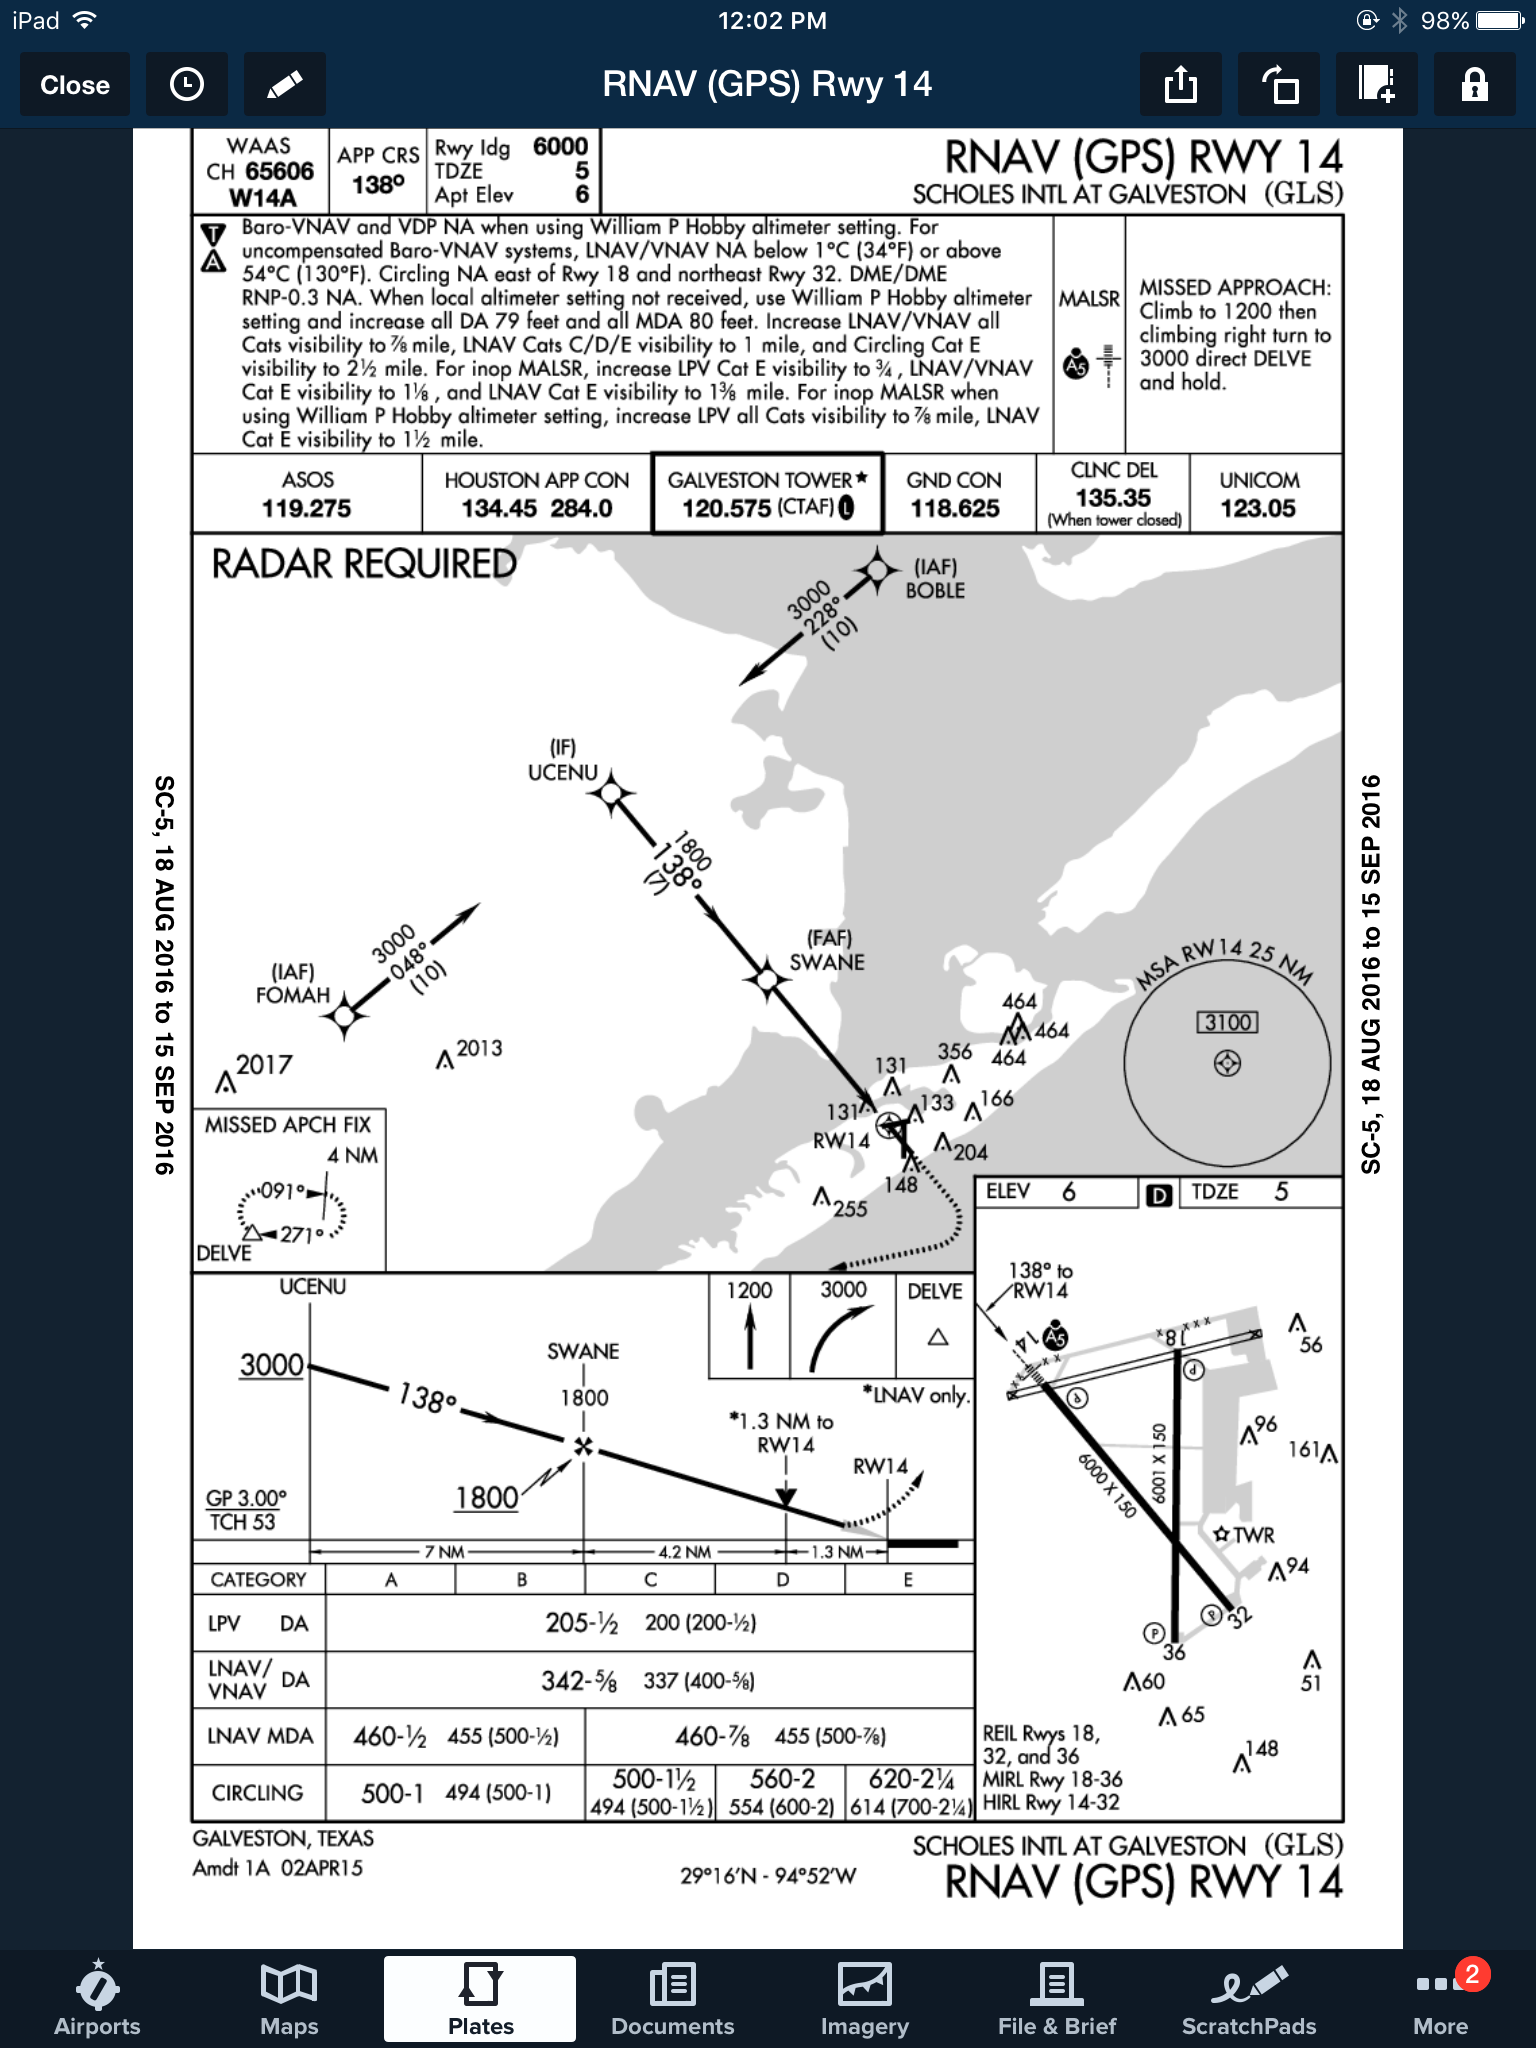
On top of that, some approaches at a certain airport are not authorized to be used in the case of the airport being used as an alternate. At the Galveston airport (KGLS), the ILS 14 is NA as an alternate procedure, but all the RNAV approaches are available.
Picking an alternate seems simple at first, but there are actually a lot of things to consider in the process.
Need help remember all this stuff? AOPA has put out a kneeboard sheet that helps all IFR pilots remember those important things when it comes to IFR flying. Check it out here.
The debate about which headset is the better product will never cease. We do know this for sure, though, Lightspeed and Bose make the best noise canceling headsets out there. David Clark’s offering doesn’t match up with these two. Newcomer AKG has a light (weight-wise that is, as the headset is equipped with a pair of LED lights as well) ANR headset that the jury is still out on. For now, Lightspeed and Bose sit atop the ANR kingdom.
The comparison for this article will be between the Lightspeed Zulu 2 and the Bose A20 headsets, both of which I have used quite extensively in my flying career. I am officially in the Lighspeed camp at this point and after reading my comparison below, you’ll see why.
ANR Functionality
Between the two, the Bose A20 cancels out more noise, no argument there. This isn’t to say that the Lightspeed Zulu 2 doesn’t. Quite the opposite, actually. The Lightspeed Zulu 2 does a great job of canceling the noise. But with the A20 on in a C172, you can barely hear the engine running. The difference before you press the power button and after is extremely noticeable. I had one client turn to me after turning on the noise canceling function of his new A20 headset and state, “These things are awesome!”
The other advantage Bose has is a continuation of the noise canceling. About the only thing I don’t like about the Lightspeed is if you don’t have the headset sized just right on your head, each time you turn your head to look at something, then the suction gets broken around the ear cup and you get some ambient noise. My glasses probably don’t help with this. It’s not that big of a deal, you just have to readjust the size of the headset, but, since I’m a little OCD, it bugs me. Once I get the set sized right, it’s smooth sailing.
Comfort
Far and away, the Lightspeed Zulu 2 is much more comfortable than the Bose A20. I flew for 5 hours in the right seat with my Lightspeed set on the other day. I switched to the left seat for the last leg and used the owner’s A20 headset since it was plugged in on that side already and I noticed quite a bit of difference. The ear cups seemed to press against my head more. The pad on top of my head didn’t seem to be as cushiony. It just wasn’t overall as comfortable as the Lightspeed Zulu 2.
Bose has made a lot of progress from their original noise canceling headsets. Those didn’t have much of a cushion on top at all. After about 2.5 hours, the slim ear cushions began to dig in to the side of your head. So, the A20 has made some progress, but the Lightspeed Zulu 2 takes the cake in comfort.
Weight Distribution
“Wait!” You Bose boys scream (no pun intended). “The A20 is lighter than the Zulu 2!” While this is true (the Zulu 2 weighs in at 15.7 oz while the A20 is only 12 oz), the way that weight is distributed makes a massive amount of difference. The Lightspeed Zulu 2 feels lighter on top of your noggin than the A20 because the weight of the A20 is firmly planted on the top of your head in a single point. With the Zulu 2, the weight is distributed evenly across the top of your scalp, so even though the set is heavier, it feels lighter on your head because the weight is not all concentrated on one point.
All this adds up to why I like the Lightspeed Zulu 2 more than the Bose A20. As for a practical example, I wore my Lightspeed Zulu 2 set for 9.1 hours one day two weeks ago. Needless to say, it was a long day. But, once I climbed out of the airplane, I had no pain on the top of my head and only a very little where my glasses ran along the side of my head. Now I call that a winner.
The safest pilots are the ones who attempt to gain as much knowledge and learning about their airplane and environment as possible. These pilots are the ones who enjoy learning, going to seminars and conventions, and soak up all the MMOPA magazine articles in each issue. These pilots are the ones who get as much training as they can, above and beyond what the minimum requirements are.
If you are one of these pilots and you own a Piper PA46, then this blog is for you.
Casey Aviation, one of the best Piper PA46 training companies out there, recently released all of their Malibu, Mirage, Matrix, Meridian, and JetProp systems training videos for free. These are some fantastic videos that Casey Aviation created which go much more in depth than any power point presentation could.
The great thing about the videos is they give the viewer an all access “inside look” to the specific airplane. Joe Casey, owner of Casey Aviation, takes off cowlings, crawls under the nose gear compartment, and even shows an airplane with the interior out so all the flap cables and environmental systems can be seen.
I have started referring all of my PA46 customers to the Casey Aviation videos as part of the prep work for our training sessions.
To access the videos, check out the Casey Aviation website.
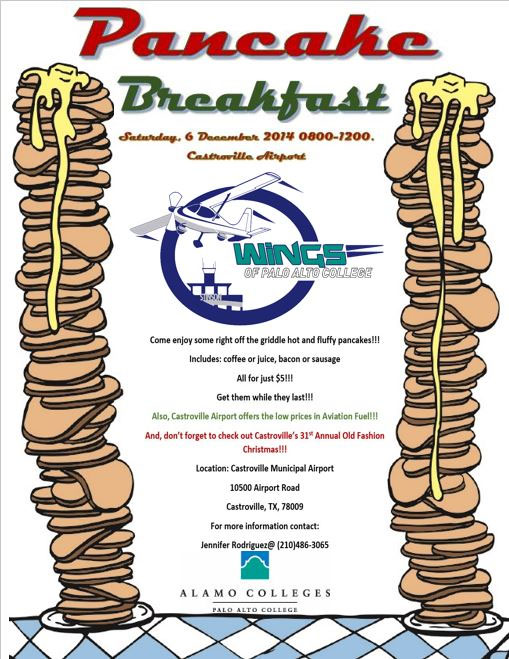
For those of you in the Hill Country looking to kick off the Christmas month right, head over to the Castroville Airport (KCVB) on Saturday, December 6th and get yourself a short stack of flapjacks. For just $5, you can get yourself a good hearty breakfast that includes coffee or juice and bacon or sausage. The eating starts at 0800 and goes until 1200, local time. Come with an empty belly and an empty gas tank as CVB currently has some of the lowest priced gas in South Texas, currently listed at $4.70/gallon.
There will be plenty of hangar flying, lots of airplanes to look at, and most importantly, lots of pancakes!

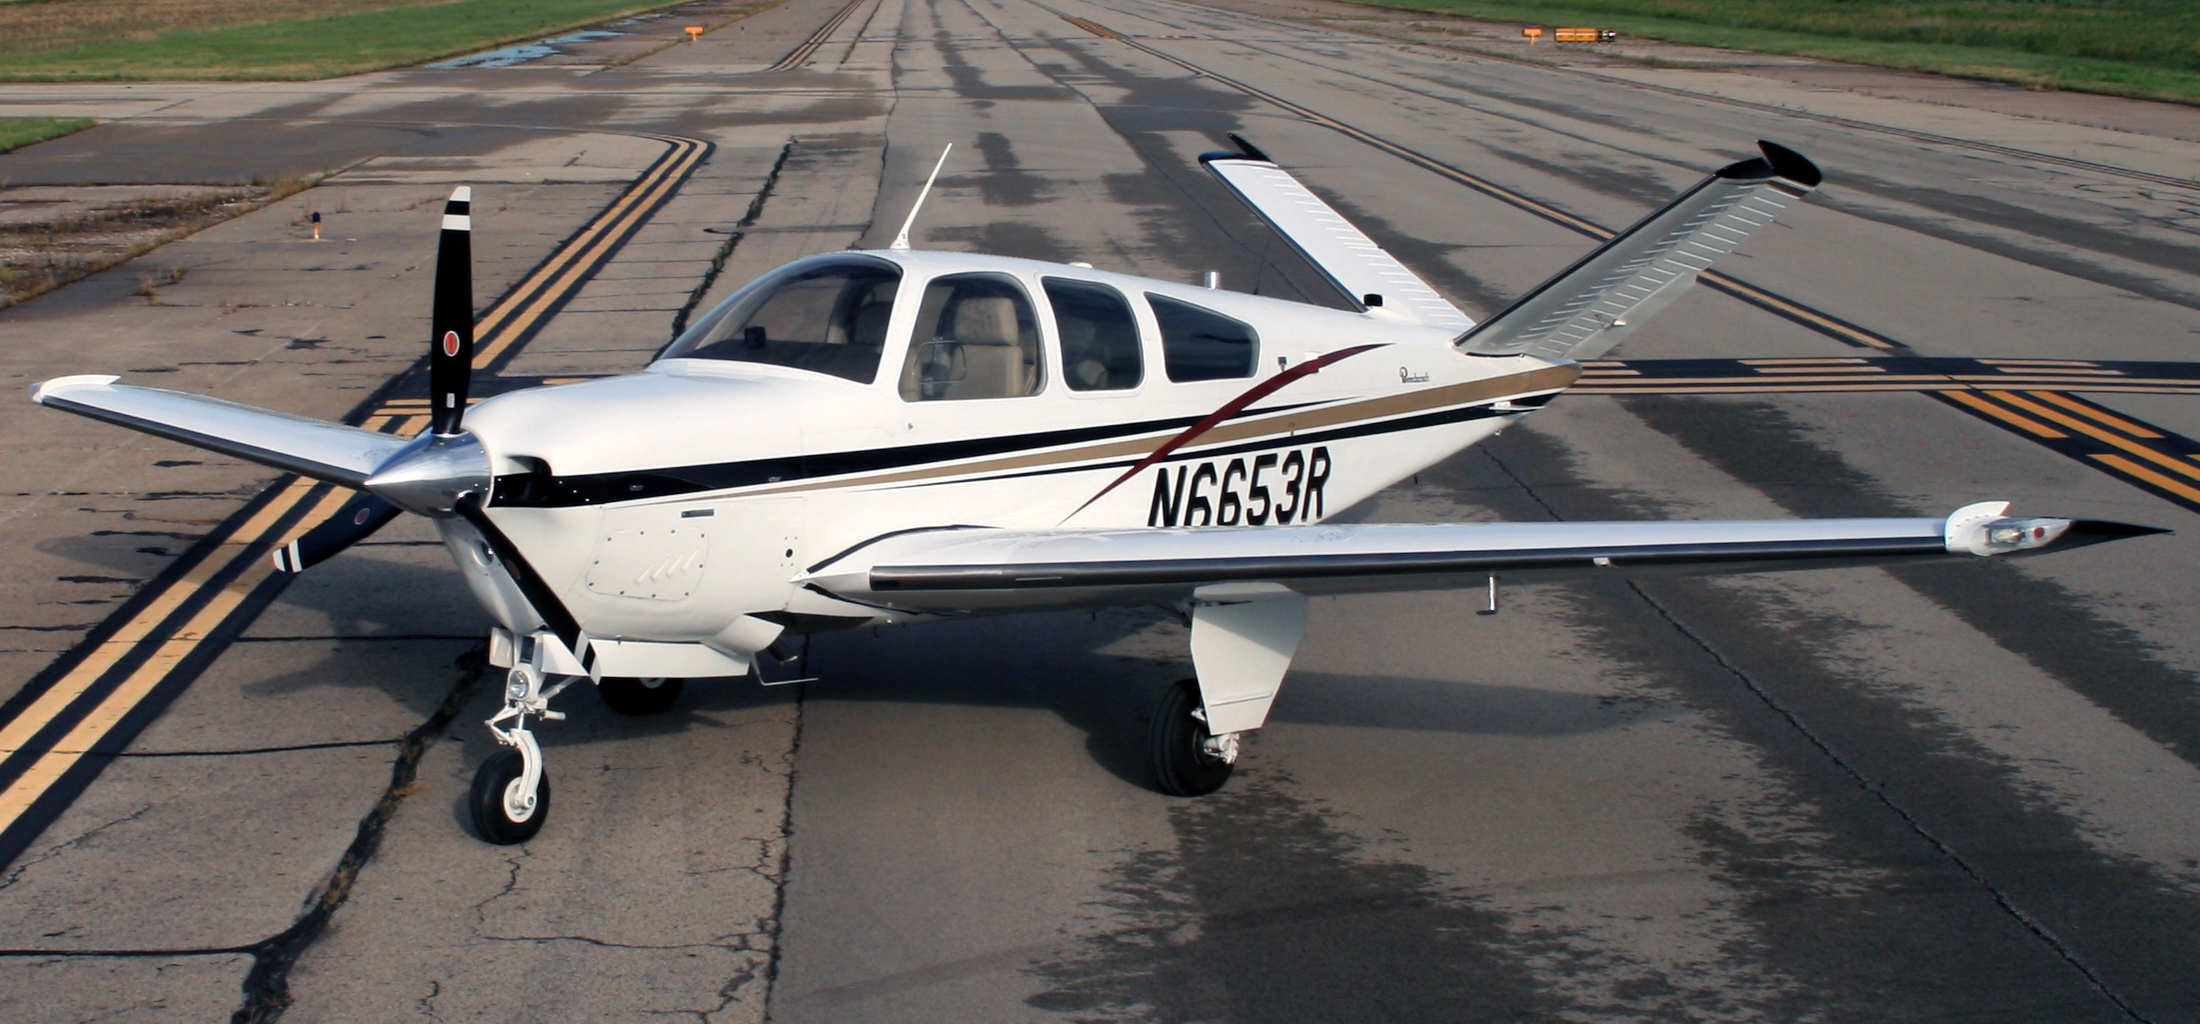
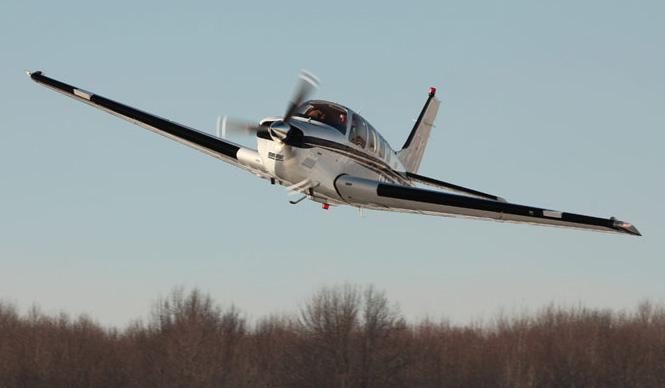 Ice Shield is another after market de-ice option. Ice Shield makes boots for wing leading edges. The advantage of boots is they activate instantaneously, getting rid of ice where it builds up first, on the wing leading edge. No running out of fluid and only the added weight of the system. Ice Shield also offers heated windscreens for several the Piper Saratoga line and the A36, B36, and G36 Bonanza line.