April 18th, 2020 was supposed to mark the MMOPA Spring Safety Stand Down, an event held around the country for PA46 owners which counted toward the Master Aviator program. Sadly, due to the COVID-19 repercussions, the in person event had to be canceled.
Thankfully, due to modern technology, the event has been rescheduled to a nationwide webcast. The date for the Online MMOPA Safety Standdown in Saturday, August 8th. Joe Casey and Travis Holland will be hosting the MMOPA Safety Standdown.
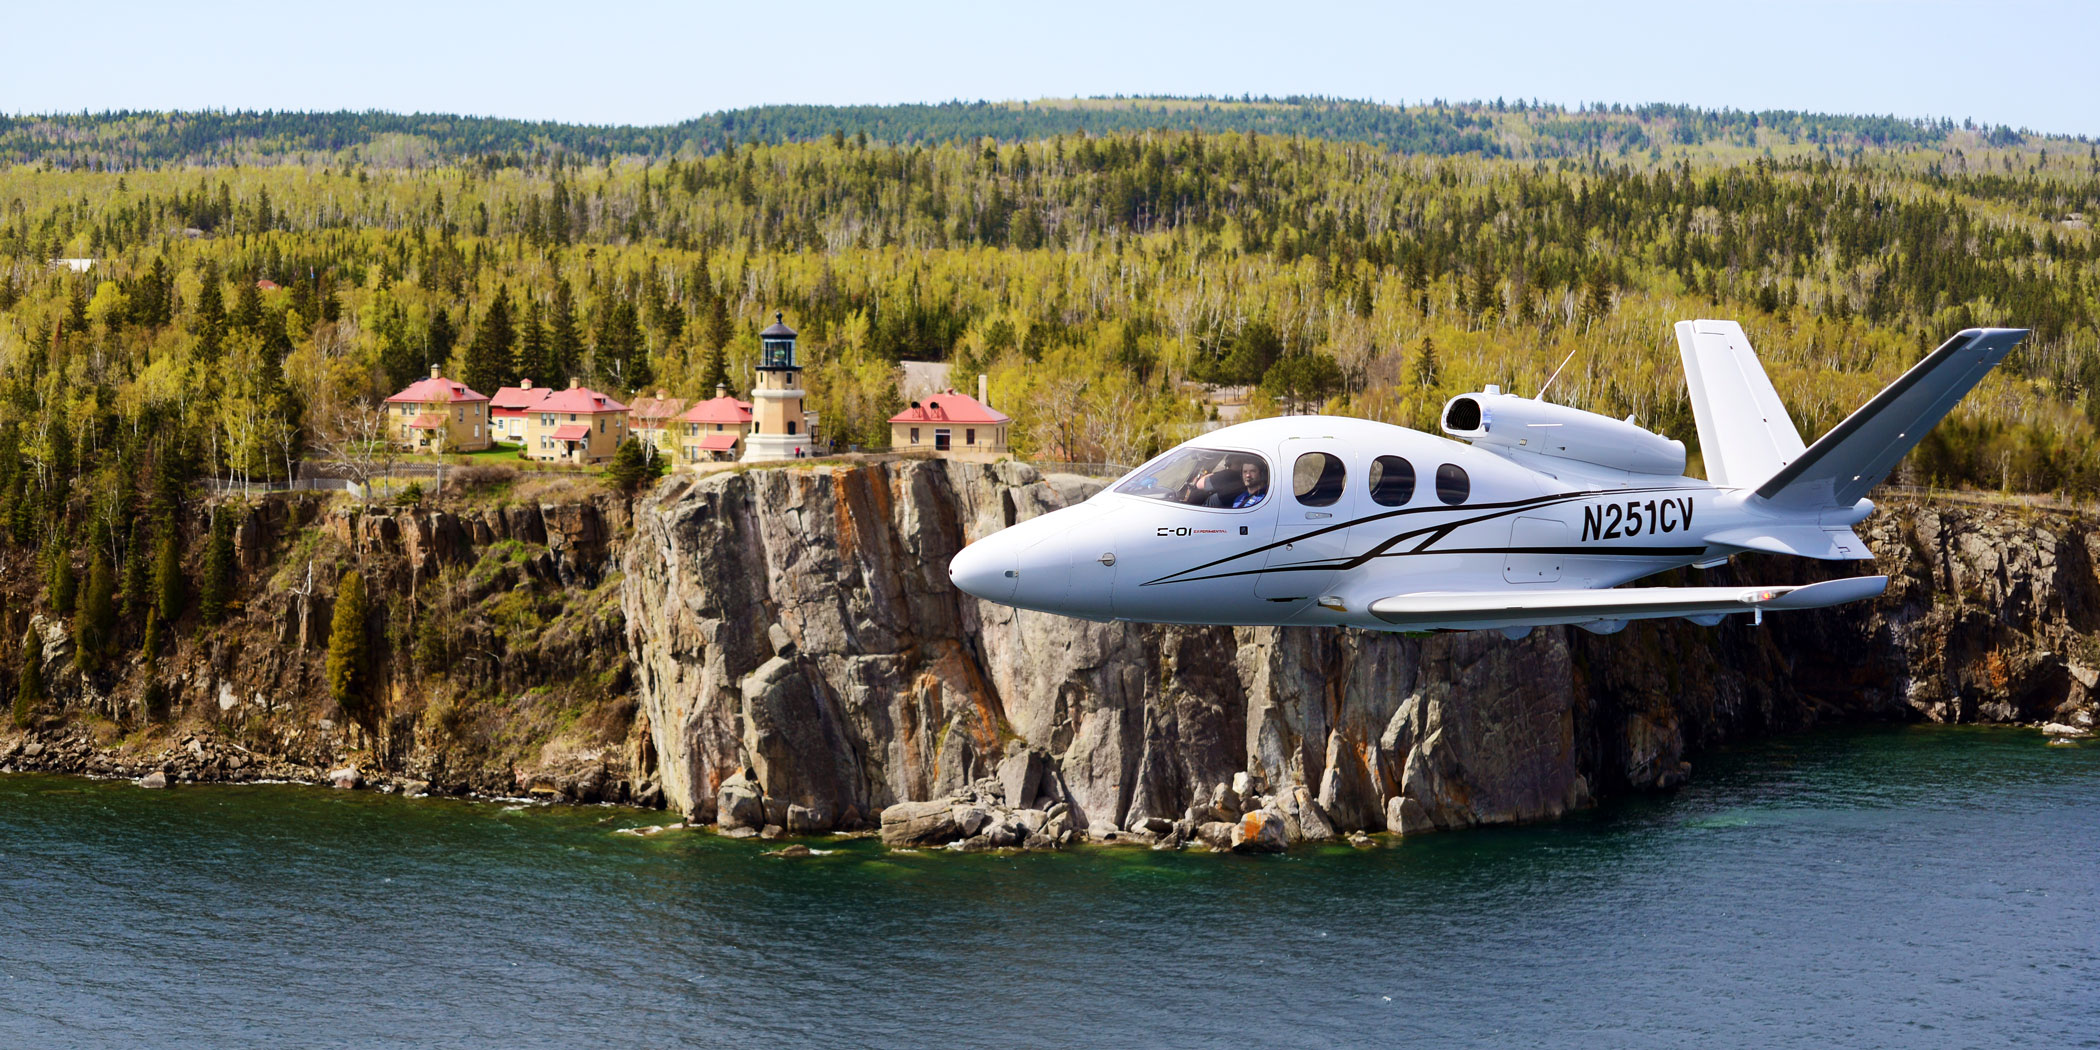
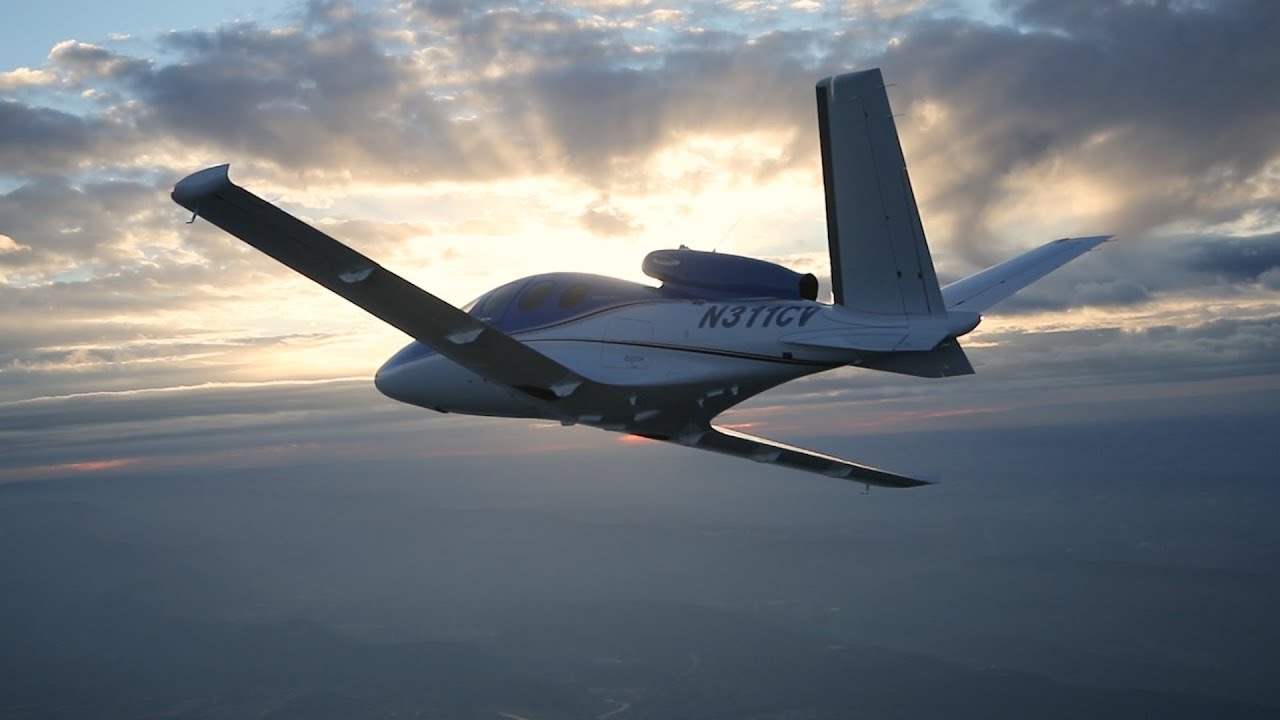
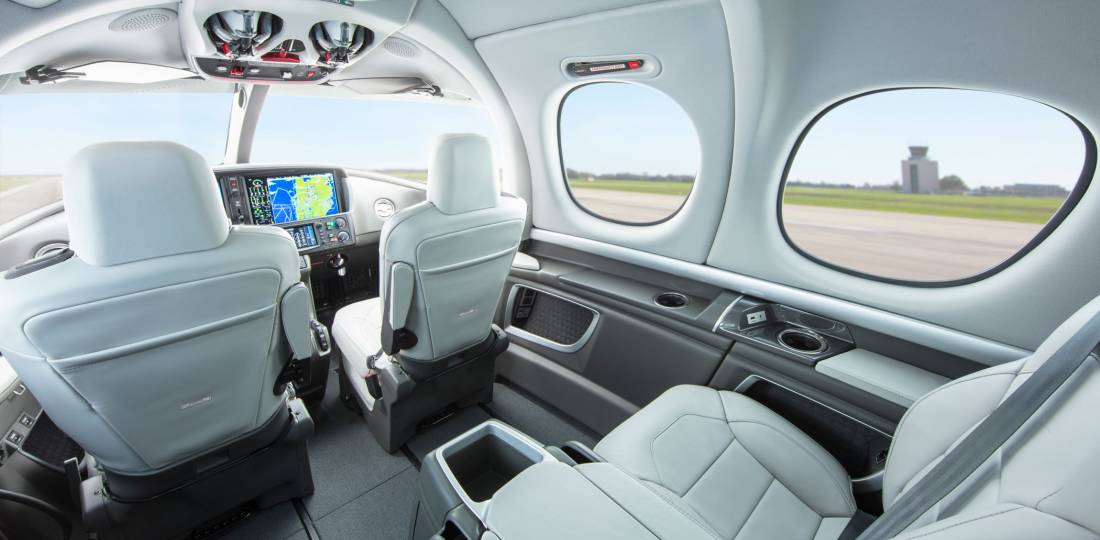
The long anticipated certification of the Cirrus Vision Jet finally happened. On October 30th, the FAA awarded certification to Cirrus’ single engine jet. Marketed as the world’s first single engine personal jet, the Cirrus Vision Jet will seat five adults, two children, and cruise around 300 knots.
The Williams FJ33-5A Turbo Fan engine is operated by a FADEC, single handle throttle, similar to the throttle in the piston powered Cirrus family. In fact, the SR series was taken into consideration when designing the Cirrus Vision Jet in order to simplify the upgrade for pilots. Many of the buttons and knobs are in the same places in the Cirrus Vision Jet.
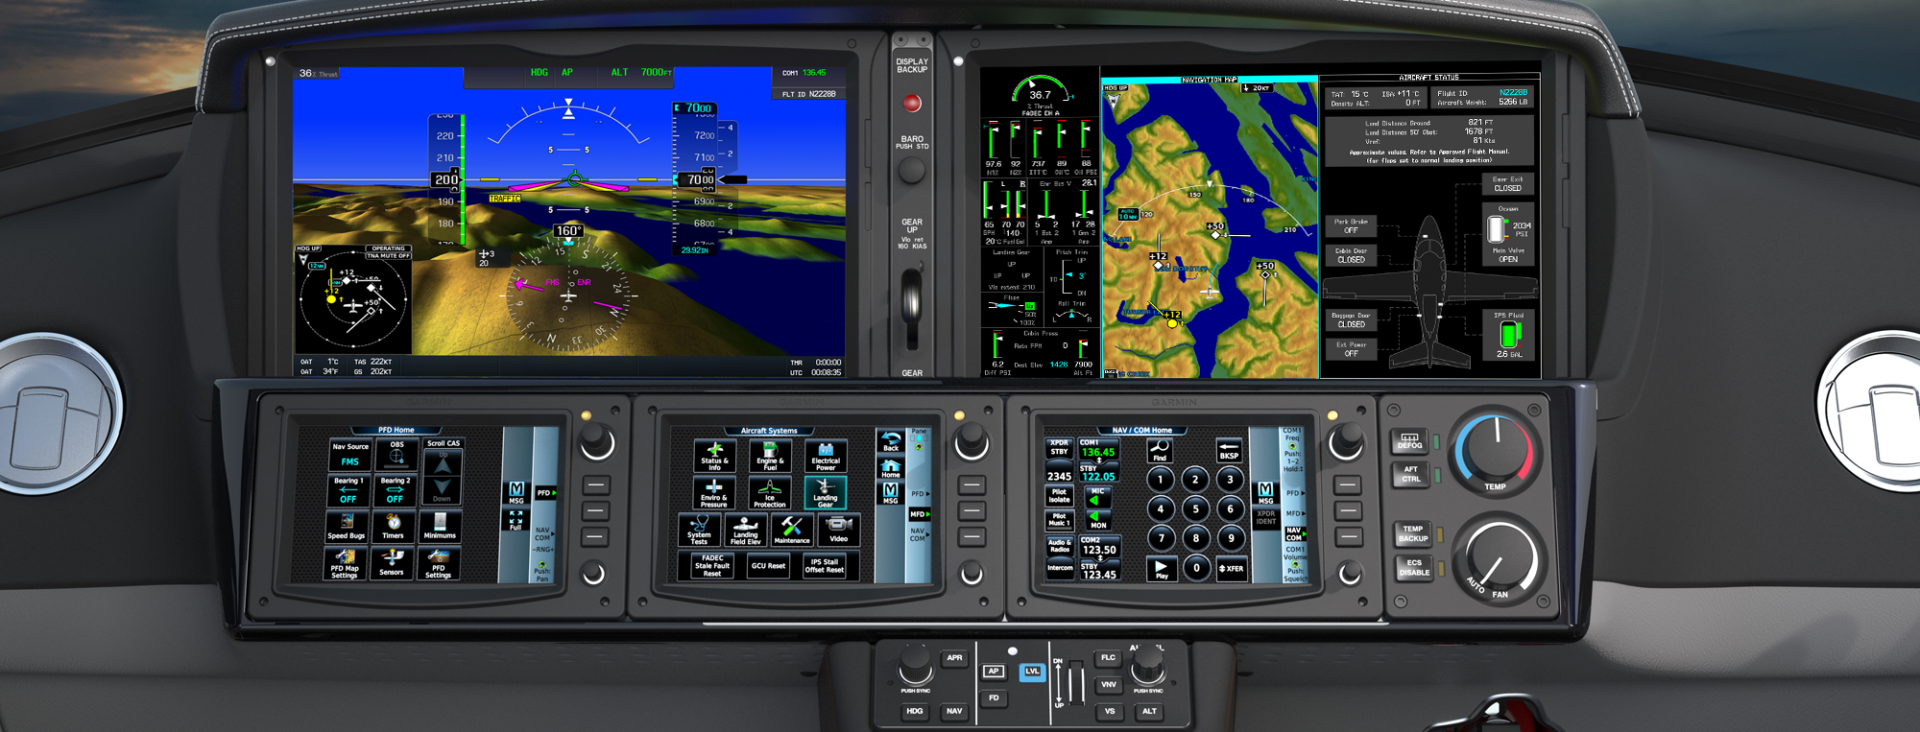
The Cirrus Vision Jet is equipped with the Cirrus Perspective Touch by Garmin that is very similar to the Cirrus Perspective by Garmin in the piston powered line. Equipped also with the Flight Into Known Icing system and the Cirrus Airframe Parachute System (CAPS), both of which are standard.
Unlike the piston powered Cirrus lines, the CAPS system on the Cirrus Vision Jet is actually mounted in the nose. Also, unlike the piston lines, the jet CAPS is integrated with the aircraft avionics to slow the airplane to between 67 and 160 knots when the system is activated. In the jet, the CAPS system was designed to withstand higher weights, higher speeds and higher altitudes.
Cirrus hopes to start deliveries of the Vision Jet by the end of the year, with many more rolling off the line in 2017. All Cirrus Vision Jet pilots will need to be type rated in order to fly the aircraft. Cirrus is doing all the type rating training in house at their new Vision Center in Knoxville, Tennessee.
The long anticipated certification of the Cirrus Vision Jet finally happened. On October 30th, the FAA awarded certification to Cirrus’ single engine jet. Marketed as the world’s first single engine personal jet, the Cirrus Vision Jet will seat five adults, two children, and cruise around 300 knots. The Williams FJ33-5A Turbo Fan engine is operated…
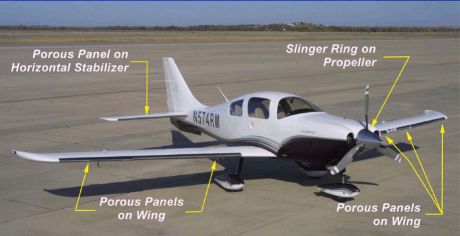
When cleaning airplanes, the majority of people don’t know how to properly maintain their TKS panels. TKS panels provide wing leading edge, horizontal stabilizer leading edge, and, in the case of FIKI airplanes, vertical stabilizer leading edge de-icing protection. For those not familiar with them, they are metal strips that have thousands of holes drilled into them where the TKS fluid seeps out. They have become quite prevalent on Cirrus aircraft, the Cessna TTx, and Mooney aircraft manufactured in the last decade or so. The system is also known as a weeping wing system.
Being on the leading edges, these panels pick up bugs very easily. For the uninitiated, it would make sense to just use normal airplane cleaner to spray the panels and scrub the bugs. Don’t!
Using anything that contains Methyl Ethyl Ketone (MEK) as that can harm the TKS bladders behind the panels. Any aircraft cleaner containing wax could cause the pores to clog, preventing the TKS fluid from properly seeping onto the wing.
What’s the best thing to do? Soap and water with a soft cloth is a good start (again, make sure it doesn’t have wax in it. Dish soap would be suitable). No hose available? Just simply turn the TKS system on, let it run till you start to see fluid drip off the wings onto the ground, and use the fluid to clean the panels.
A soft cloth would work fine, but, if the panels are really buggy, take a green scouring pad to do some scrubbing. Just make sure the scrubbing motion is up and down with the grain, not side to side. You can find the green scouring sponges on the dishwashing aisle in the grocery store. Just leave one in the hangar for when you need it.
When cleaning airplanes, the majority of people don’t know how to properly maintain their TKS panels. TKS panels provide wing leading edge, horizontal stabilizer leading edge, and, in the case of FIKI airplanes, vertical stabilizer leading edge de-icing protection. For those not familiar with them, they are metal strips that have thousands of holes drilled…
As far as I knew when I woke up, October 26, 2016 would be an ordinary day for me. It was a Wednesday, and I was scheduled to fly our Company’s BE58 Baron on a charter from Wings Field (KLOM), a non-towered airport just north of Philadelphia, to Pittsburgh International Airport (KPIT) and spend the day there waiting for my 3 passengers to finish up their meetings. The plan was to fly them back to Wings that evening and then make the short hop back to home base at Lancaster, PA. (KLNS).
It was a flight that I had done countless times, and I was comfortable with the airports, the passengers, and the airplane. Everything went smoothly that morning and my short flight from Lancaster to Wings was uneventful. I even made it there in time to spill coffee all down the front of my pants before my passengers arrived. The weather was clear, calm and beautiful as we loaded into the Baron and the sun was just starting to come up as I taxied toward runway 24 for departure. I was departing VFR and had an IFR plan on file which I intended to pick up with Harrisburg Approach once we were airborne. According to my calculations, I was on schedule to be drinking my coffee at the Pittsburgh FBO right around 8:30.
At 7:05, I advanced the throttles for departure. A few moments later, I received a very unpleasant surprise. I was quickly approaching rotation speed when 2 deer ran onto the runway directly in front of the aircraft. It was still dark enough that I was relying on my landing/ taxi lights to illuminate the runway for take-off. As a result, I was unable to see the animals before it was too late. I don’t remember making a conscious decision to pull back on the yoke, but it was that or plow directly into them at about 85 knots. I pulled up as quickly as I could and the airplane rotated immediately. A fraction of a second later I heard and felt a sickening THUD.
There was no doubt that I had hit one of them, but, somewhat unbelievably, the airplane was climbing as though nothing had happened. I put the nose down to get the airspeed back up and began to try and piece together what damage the airplane had sustained. Based on the noise and the feeling of the impact, my suspicion was that I had hit the deer with the left main landing gear. A review of the instrumentation showed no abnormalities and the airplane was behaving normally, so I didn’t suspect any damage to the airframe/ flight controls. I couldn’t see anything out the windows that looked unusual, and somewhat unbelievably I still had 3 green lights.
After gaining a safe amount of speed and altitude, I turned around and told the passengers that we had hit a deer. It was obvious that we had hit something and I was sure that they wanted to know what was going on. Then, I checked all my indications again and satisfied with what I was seeing, tried to bring up the landing gear. No dice. When I pulled the gear lever to the up position, the master “GEAR UP” warning light came on and I got a horn. There was never any change in the 3-green indication and the gear motor never came to life at all.
At this point it was obvious that, minimally I was going to have to divert to Lancaster and have the maintenance guys look at the airplane to see if anything was broken. I figured that they would either give me the green light to continue or I would just jump into one of our PC12s and complete the trip while they worked on the Baron.
The landing gear’s refusal to come up was my first indication that there was substantial damage. I set course for Lancaster and called our Chief Pilot. After explaining the situation to him, we agreed that KLNS was the best option and that he would let the maintenance guys know that I was coming.
The logic was that proceeding to Lancaster would allow a visual check of the landing gear by maintenance people as well as the tower and result in the safest outcome if an emergency landing were required. Lancaster would likely have better services available in terms of emergency responders and, not to mention, I was fairly certain that there was a dead deer on the only runway at Wings that I didn’t feel like hitting for a second time. In addition, the relatively long runway at Lancaster combined with light traffic at that time of day made it the ideal option to divert to.
I again turned around to brief the passengers. I told them that we were going to have to make precautionary landing before continuing to our intended destination and that I would be performing a few low passes for the tower.
Due to the drag from the landing gear, the flight to Lancaster seemed to take forever. The long cruise home, however, gave me time to try and reach someone on the ground at Wings in hope of having the runway inspected and cleaned off before other traffic tried to use it. After several attempts to raise anyone on the Unicom/ CTAF frequency, I called Philadelphia Approach for help instead. Philly answered right away and I explained to them what had happened. I requested that they call over to Wings on the phone or send someone out to check the runway. They told me that they would get it done and asked if there was any other way that they could assist me. I told them I was headed to Lancaster and that I appreciated their offer, but didn’t require any further assistance. I then switched over to Lancaster Tower and let them know that I was about 15-20 minutes out, but I would need to perform a couple of passes to have them check my gear. The tower cleared me for a low approach over runway 26.
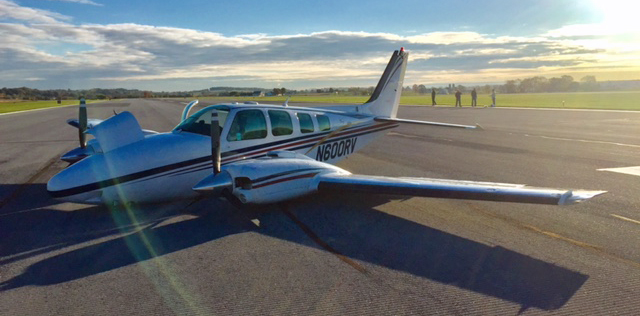
I arrived at LNS at about 7:30. I performed my first low pass by the tower, not really expecting anything to appear out of place. I figured I had bent something or damaged the squat switch, but not much more. I climbed to pattern altitude and awaited the good word. Shortly after the fly-by, Tower reported that the left main gear didn’t appear to be down and locked. They suggested that I make another pass. The airport maintenance personnel chimed in, reporting the same. We had just started discussing whether cranking the gear a little by hand might help when Philly approach called the Lancaster tower on the phone.
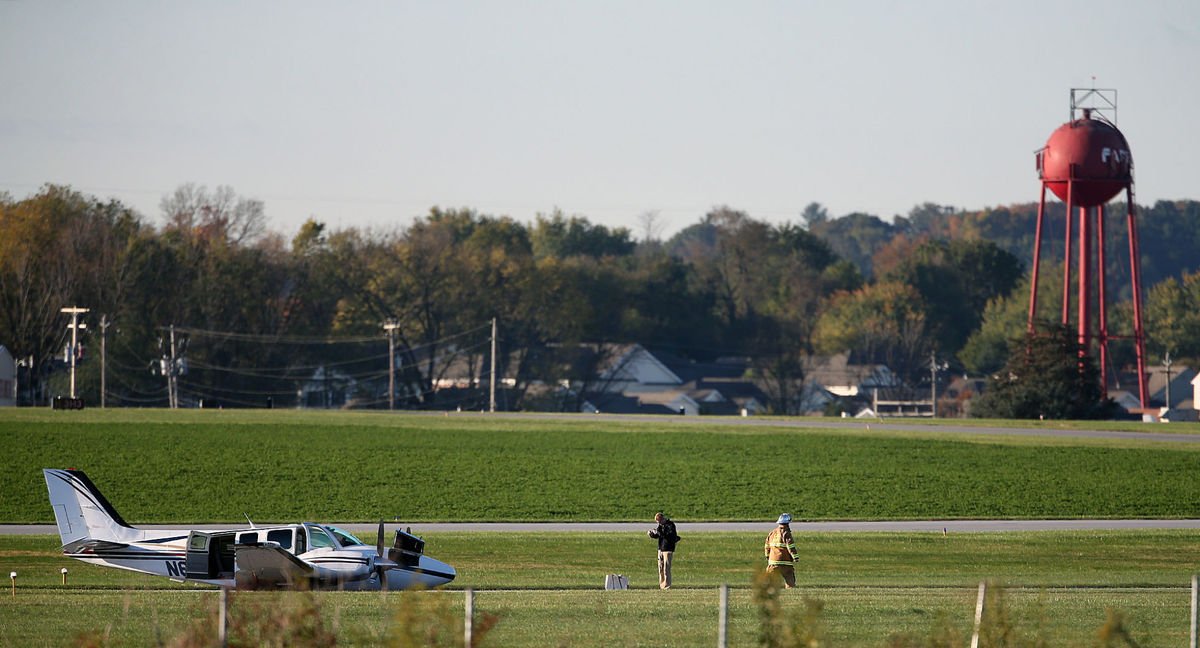
Philly informed Lancaster that someone had inspected the runway at Wings and found the left main strut and wheel in the grass. I quickly concluded that cranking the gear down probably wouldn’t help!
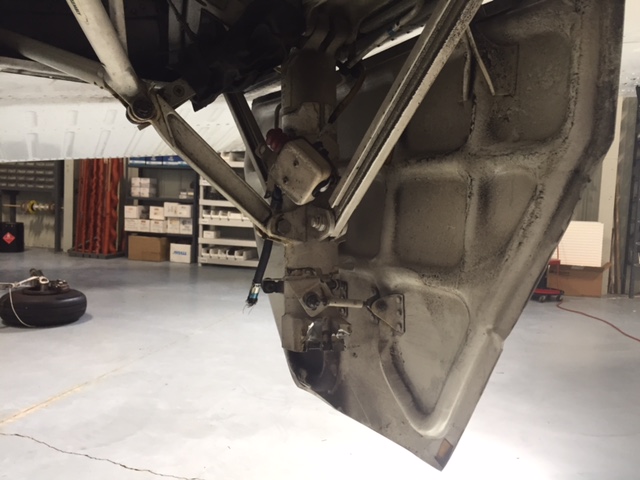
This was found in the grass by the runway at Wings Field
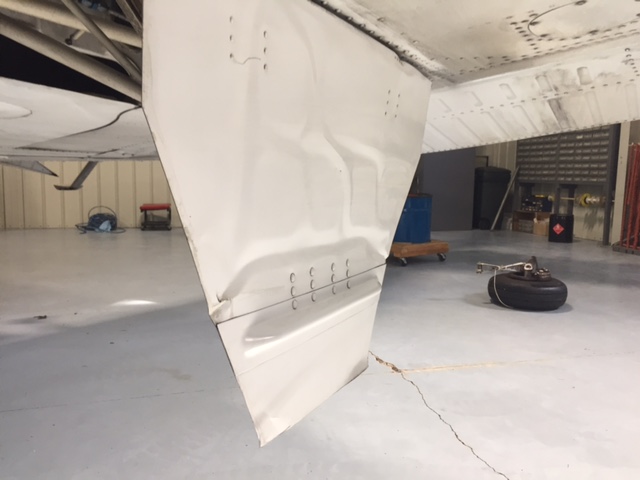
The gear door and strut after the accident.
If you think about the fact that I hit the deer with the wheel, but it didn’t hit the gear door, it becomes apparent just how close the airplane was to clearing the animal completely.
Andrew Robinson is an airline pilot for Piedmont Airlines. He is a former 135 Charter Pilot and flight instructor who lives with his wife and 2 daughters in Pennsylvania. He instructs in Beechcraft Bonanzas.
As far as I knew when I woke up, October 26, 2016 would be an ordinary day for me. It was a Wednesday, and I was scheduled to fly our Company’s BE58 Baron on a charter from Wings Field (KLOM), a non-towered airport just north of Philadelphia, to Pittsburgh International Airport (KPIT) and spend the…
In January, Cirrus announced the Generation 2 SF50 Vision Jet. After getting the Generation 1 Vision Jet certified in late 2016, Cirrus didn’t waste any time in starting in on improvements.
The improvements are pretty sweet, making the G2 Vision Jet even easier to fly and step into for Cirrus’ target market, SR22 owners.
Here are the improvements on the G2 Vision Jet.
RVSM Approval
The G2 Vision Jet has received RVSM approval, allowing the airplane to fly at 31,000 feet. RVSM stands for Reduced Vertical Separation Minimums (read more about RVSM here). RVSM airspace starts at 28,000 feet, the G1 Vision Jet’s ceiling. Now that the G2 Vision Jet is RVSM certified, it can fly at 31,000 feet.
For piston pilots, you are left scratching your head as to the advantage of this. In a jet, the higher you go, the thinner the air, so the faster you go, and the less fuel you burn since the thin air needs less fuel to mix with. This caps out at a certain altitude and the speed begins dropping and you start losing efficiency (even though the fuel burn is quite low).
According to Cirrus, at 31,000 feet, the G2 Vision Jet cruises over 300 KTAS and gets a range boost to almost 1,200 nm.
Garmin Perspective Touch+
Cirrus & Garmin have taken the new NXi interface and paired it with the Garmin Perspective Touch to create the Touch+. You can read about the improvements on the NXi here, all of which are included in the Touch+ in the G2 Vision Jet.
The big improvement that is included in the Touch+ is Autothrottle capability. An Autothrottle is integrated with the autopilot. It automatically adjusts power settings and speeds based on the phase of flight without the pilot having to touch the throttle. Pretty cool.
New Cabin
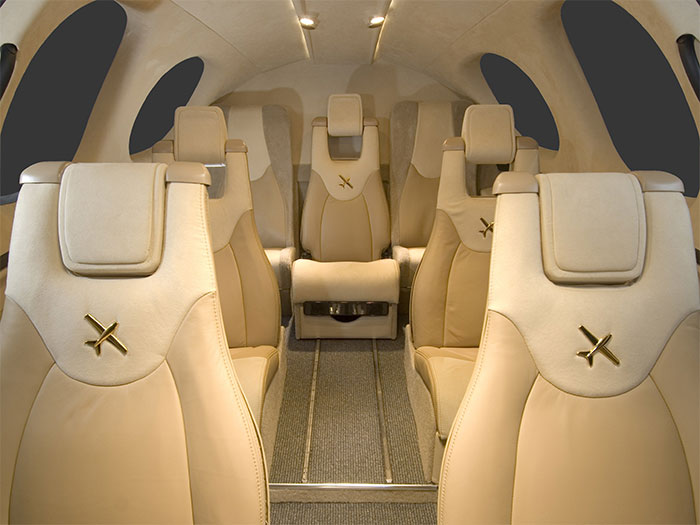
The G2 Vision Jet has a redesigned cabin as well, making it an extremely passenger friendly airplane. The second row has been redesigned and equipped with a center console. There is also a drop down TV screen that allows passengers to connect their mobile devices to it to watch movies or videos while traveling (no internet on board, yet. That’ll probably be the G3 Vision Jet!).
Cirrus also put in more noise reduction in the cabin, creating a quieter ride for passengers. Cirrus also allows for multiple different seating configurations, depending on the needs of the owner.
As always, Cirrus is on the leading edge of airplane technology, creating airplanes that are easy as well as fun to fly. I’m excited to see how they continue to improve the design to both the SR22 and the Vision Jet.
Well, that was fast. In January, Cirrus announced the Generation 2 SF50 Vision Jet. After getting the Generation 1 Vision Jet certified in late 2016, Cirrus didn’t waste any time in starting in on improvements. The improvements are pretty sweet, making the G2 Vision Jet even easier to fly and step into for Cirrus’ target…
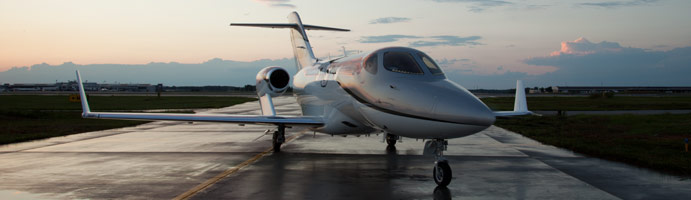
We have all been hearing about the HondaJet for quite a while now. It’s been in testing for a number of years, but it sounds like certification and deliveries will commence early in 2015. Honda says they expect FAA certification in the first part of 2015 and deliveries will commence soon thereafter.
For those of you in the San Antonio area, if you’d like to get a glimpse of the first production HondaJet, it will be at Landmark Aviation at KSAT on Wednesday, October 29th. Cutter Aviation is hosting the event, as they will handle the regional sales for Honda. No flights will be conducted, but folks are welcome to walk around the airplane, climb inside, and give it a good once over.
For those planning on attending, RSVP is required. Contact Lisa Harris at Cutter to RSVP either by phone (602-267-4054) or by email (lharris@cutteraviation.com). Drinks and snacks will be served. The event runs from 5:30pm-8:00pm.
We have all been hearing about the HondaJet for quite a while now. It’s been in testing for a number of years, but it sounds like certification and deliveries will commence early in 2015. Honda says they expect FAA certification in the first part of 2015 and deliveries will commence soon thereafter. For those of…
Throughout the whole event, I learned quite a few things both about flying and about myself. Here are some of the lessons which I have taken away from the accident:
No flight is routine: When I took off that morning I was about as relaxed as I could have been while going to fly. I was flying an airplane that I knew well, in beautiful weather, to familiar airports and even carrying passengers which I had taken on this exact trip more than a dozen times. The accident brought into startling clarity that anything can happen at any time. I had done everything right that morning (preflight, weather briefing, planning, etc) , and none of that did anything to stop the deer from jumping out onto the runway. All we can do is ensure the items we do have control over are covered and try to be prepared to deal with anything else that arises. This ties directly into my next point:
Making sure everything is correct: When you do go fly, make sure that you have all your paperwork and personal details taken care of. I can think of a few times over the course of my flying career where something wasn’t quite right with the paperwork, or perhaps I had forgotten my wallet and I was tempted to go fly anyway. “It’s 8pm on Sunday, I’m not going to get ramp checked.” Well, I can assure you that the paperwork and questionnaires which were required to be submitted to the FAA, NTSB, and Insurance companies would have uncovered any discrepancies in my logbooks, currency, or legality. It isn’t worth the risk of flying without having everything in place just in case something happens. It isn’t just a random ramp check which can get a pilot into trouble.
Ask for help: The story of my collision with a deer would have had a very different outcome if it weren’t for the help that I received from countless the people on the ground. If you’re ever in a situation where you could use a hand, don’t be afraid to ask for help. If I had simply turned around and landed back at Wings, I wouldn’t even have had any idea that my landing gear was missing! The people in the control tower, the maintenance guys, the approach controllers in Philly, the emergency responders, and many more people all played their part in orchestrating a successful outcome.
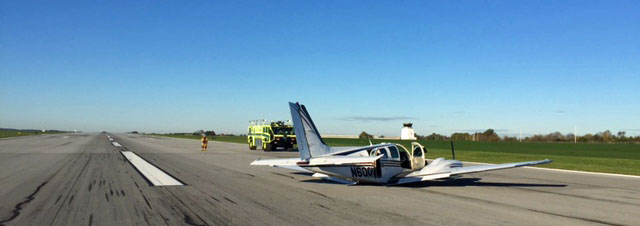
Airplane sitting on the runway after the firefighters had checked it out Photo credit: www.lancasteronline.com
Dealing with the Paperwork: I have had dealings with the FAA before, but never for an accident. I was afraid that the investigation would be a witch hunt and I would have to defend myself while someone poured over all my planning and paperwork looking for potential errors. But, my fears were totally unfounded. Although I did have to answer many phone calls, write many reports, and fill out much paperwork, the FAA, NTSB, and Insurance companies were very patient in waiting for my responses and even complimentary in how the situation played out. I really enjoyed working with all of them and appreciated their encouragement and help.
Emotional Response: After the dust had settled and the smoke had cleared, I was left standing on the side of the runway with the passengers and my boss. I offered to fly them back to Philadelphia or continue to Pittsburgh and assured our Chief Pilot that I was feeling fine and ready to fly again. Fortunately, there wasn’t a need. Over the next week or two, I noticed a change in myself. I wasn’t fine. I have never had headaches, but shortly after I landed I developed a headache that didn’t go away for days. I had trouble focusing on anything and I had trouble finding motivation to do much but sit and stare at a wall. I wasn’t sharp and I caught myself making silly mistakes in my normally routine activities. I wasn’t depressed, or sad, it was just an unwanted mental and physiological response to the stress and shock of what happened that morning in the Baron. I didn’t feel like myself for quite some time and I even found myself a little on edge whenever I lined up for takeoff on subsequent charters for while afterward. Eventually I started to feel normal again, but it was a slow process.
Feather the Props: I can’t tell you what a difference it makes when those props go from wind milling to feathered. It became clear to me that feathering a prop could make a huge difference in deciding the outcome of an emergency situation.
Good training and checklists usage: This one is pretty straight forward, but it’s worth mentioning. Good training and proficiency make all the difference when the odds are against you. Make sure that you use all your resources when your back is against the wall, and that includes the checklists. Under the stress of the flight I had forgotten to close the cowl flaps and would likely have landed with them open without the aid of the Emergency Procedures Checklist. This would have resulted in unnecessary damage to the airframe.
No need to rush: There is no denying that I had things stacked in my favor that day. I had nice weather, extra gas, daylight hours, and even the luxury of landing at my home airport. But, regardless of all those variables, there is no need to rush into anything. Ask questions, find answers and come up with a plan. Obviously not all emergencies present the pilot with the luxury of time, but use all time and resources you have to your advantage.
Polish up those procedures: The deer accident really made me want to go out and brush up on all the emergency procedures which I hadn’t performed since my last checkride. The realization that I could need any of them at any time was really hit home after I hit that deer. Additionally, make sure you know who to call if something ever does happen.
Know the systems: Familiarity with the systems on the airplane makes it easier to troubleshoot and solve issues on the fly and makes it easier to spot a problem in the first place. Knowing how systems work and what their normal indications should be helps make decisions regarding when to divert and where to land easier.
The irony isn’t lost on me that the last article that I wrote for this newsletter dealt with how to avoid making gear up landings and the high cost required to repair one. I never would have imagined when I wrote that article last fall that I would be writing one only a few months later detailing my own gear up landing.
The bottom line is that there is nothing a person can do to prepare for every situation which might arise throughout the course of a flight, and it’s also impossible to know which emergency you may have to deal with if a situation arises. All we can do is stack odds in our favor by making sure that we address the things within our control such as aircraft maintenance, careful flight planning, checking weather, and having personal minimums set in place to keep us from flying outside of our skill sets and comfort zones.
Additionally, ensuring that you are knowledgeable and proficient in your aircraft’s procedures will give you the best chance for success. When things start going wrong, keep calm, and ask for help. Work the problem instead of guessing or rushing into a less than desirable solution. No one wants to be caught in an emergency like a deer in a landing light!
Andrew Robinson is an airline pilot for Piedmont Airlines. He is a former 135 Charter Pilot and flight instructor who lives with his wife and 2 daughters in Pennsylvania. He instructs in Beechcraft Bonanzas.
Read Part 1 & Part 2 Throughout the whole event, I learned quite a few things both about flying and about myself. Here are some of the lessons which I have taken away from the accident: No flight is routine: When I took off that morning I was about as relaxed as I could have…