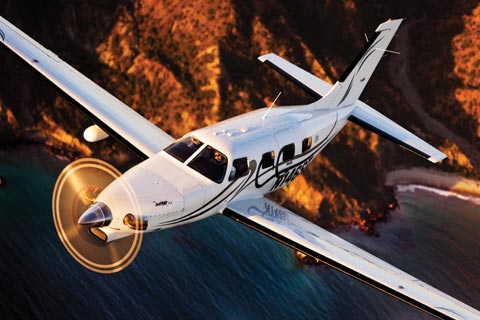
Recently, I assisted with the delivery of a 2007 Piper Saratoga Turbo from San Antonio to New York City. It was a very nicely equipped airplane, complete with a Garmin G1000 panel, an STEC 55x autopilot, and air conditioning. The owner joined me on the flight back to get trained in the airplane, getting him comfortable in it over our 2 day excursion back to NYC. Total flight time was 12 hours, though that did include several stops along the way and landing practice at the airports we stopped at.
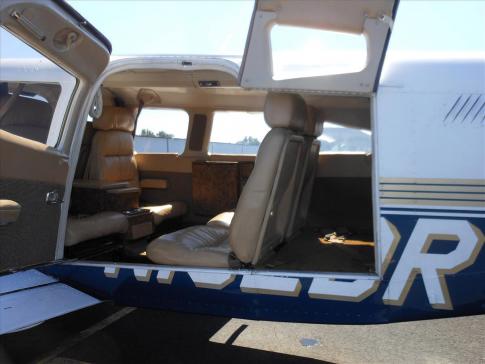
The 6 seat Turbo Saratoga is a very comfortable, very capable flying machine. It is made for hauling, with a gross weight of 3,600 pounds, but that’s not to say it isn’t lacking in comfort, either. The rear cabin has 4 seats, 2 facing forward and 2 facing rear. It would be a little tight for 4 full size adults in the back seat. To avoid knee knocking, the plane is an excellent 4 person and bags aircraft (or 4 adults and 2 kids).
The really nice part about the Piper Saratoga is the baggage door. Unlike the Bonanza, the Piper Saratoga has a baggage door that opens to the baggage compartment, creating a much easier way to load and unload baggage. The nose baggage compartment, which holds an additional 100 pounds, is a very nice feature, allowing the bag load to be spread out.
We typically saw cruise speeds of 155-165 KTAS depending on altitude. The highest we went was only about 9,000 feet, so we didn’t get up real high to see what the single turbo could do. Even though the Lycoming TIO-540 engine burns about 20 gallons an hour, with 102 gallons of gas on board, the fuel consistently outlasted our desire to continue flying.
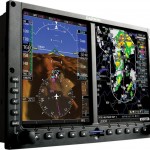
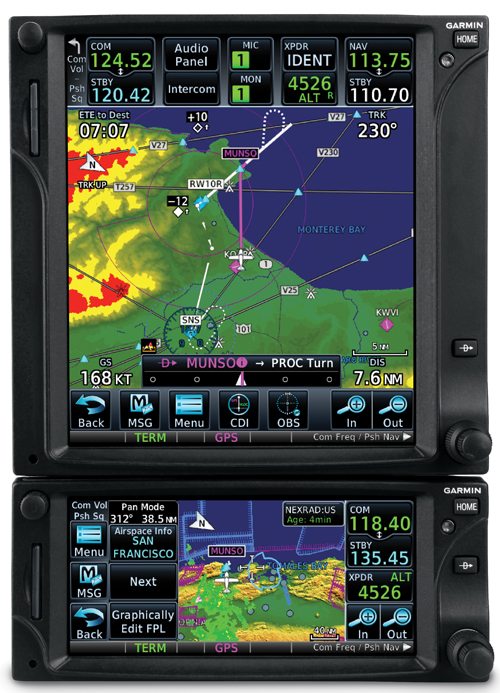
Being equipped with the G1000 was a very nice feature of this particular Piper Saratoga. The screens are nice and big, larger than the displays on a high wing Cessna or a Corvalis. That allows for easier viewing of approach plates, NEXRAD, and the engine gauges.
There are always downsides to an airplane, and the Saratoga is no exception. The STEC Autopilot leaves some to be desired as I felt it hampered the capability of the G1000 when shooting approaches because the 12 knot crosswind limitation on the autopilot. You can still use the autopilot on an approach with higher than 12 knot crosswinds, but the autopilot tends to search around for the final approach course.
The air conditioning works very nicely, though it did have a tendency to freeze up at altitude. We discovered that quickly and just decided to turn it off and leave the blower on, since it was cool enough up high anyway.
Overall, the Turbo Saratoga is a very nice airplane. The speed leaves a little to be desired (you can get 10 KTAS more out of a Bonanza with a Continental engine, about 20 knots more if it is a Turbo Bonanza), but it is very high on comfort. The Piper Saratoga makes for a good family airplane or as a hauler. I liked the airplane a lot and thoroughly enjoyed my time in it.
There are many different ways to upgrade an instrument panel. Putting in a 696 here, a JPI engine monitoring system there, even an Electronic HSI. But, if you want to swing for the fences and get a serious upgrade, you have to go for a complete glass instrument panel. For good measure, you might as well throw in a touch screen GPS while you are at it.
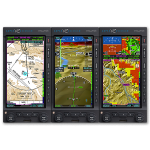
The Garmin G500
The Aspen EFD 2500
Which panel to go with? There are two mainstream options (Garmin and Aspen) and a handful of other companies that make glass panel replacements (Avidyne being one, King for a short period of time at the end of the last decade being another with the KFD 840). Around 2010, there were a lot of companies trying to get into the glass panel retrofit game, but many of the products didn’t gain a whole lot of popularity, leaving Garmin and Aspen at the top of the heap.
What about the touch screen GPS market? Garmin has this pretty much cornered as well, with Avidyne and King just getting into the game. The gap between Garmin’s GTN series and Avidyne and King is pretty wide.
The answer is pretty easy when it comes to the GPS (go with Garmin!), but not so easy when it comes to the panel. The G500 and the Aspen Evolution series are both excellent interfaces with strong reliability, so which one do you go with? Feature-wise, both have a lot of the same features: traffic, weather, terrain, synthetic vision, to name a few. The presentation for each feature is a little different between the two interfaces. It just depends on what you like better.
The nice thing about the Aspen system is you can go glass, but you have options on how much glass you want: 1 screen, 2 screens, or 3 screens? With the single screen PFD, you have all your instrumentation, traffic, weather, and optional synthetic vision. You don’t need the synthetic vision for the traffic and weather, as it shows up behind your HSI. It is an honest to goodness glass panel retrofit.
When you decide to upgrade to 2 screens, this is where Aspen has a leg up. The second screen is a completely redundant PFD and, if you get the 2 hour emergency backup battery installed, acts as the backup instrumentation to the main PFD. This means you can take out the old steam gauge standby instruments. This helps clean the panel up.
I personally don’t see the need for 3 screens, but maybe there is someone out there who needs it.
One selling point that Aspen has over Garmin is the wide variety of autopilots and GPS units that Aspen units are compatible with. The G500 is only compatible with King autopilots, it’s own GFC 700 autopilot (which would be a retrofit), some Collins autopilots, and the Century 21, 31, 41, and 2000. This does cover a wide array of autopilots, but it keeps some on the outside. Aspen, on the other hand, is compatible with most autopilots on the market.
Finally, let’s talk price. Going with an Aspen EFD 1000 PFD (this is the single screen Aspen) will run you somewhere in the area of $12,000. The price will vary based on the shop and the airplane. When you want to add a screen, it’s an additional $6,000. This is for the base, so if you want to add weather or synthetic vision, it’ll run you a little more.
The Garmin G500 comes in around $20,000, again depending on the shop and the airplane. The screens are bigger on the G500, which is kind of nice, and you are buying a Garmin product, which has a fabulous track record in the aviation industry.
Decisions, decisions. There really is no wrong answer here. Both are excellent products with very good track records. Both have really nice features and don’t hardly fail. Really, the choice comes down to what you want.
Need training on your upgraded GPS or glass panel retrofit? Contact Texas Top Aviation for thorough training on your new avionics today.
There are many different ways to upgrade an instrument panel. Putting in a 696 here, a JPI engine monitoring system there, even an Electronic HSI. But, if you want to swing for the fences and get a serious upgrade, you have to go for a complete glass instrument panel. For good measure, you might as…
Type Clubs Lead By Example with Standard Operating Practices
This article appeared in the May 2019 edition of EAA’s Sport Aviation Magazine. It is used with permission. For other articles by Charlie Precourt, please visit EAA.org and join for a full subscription.
Imagine a year when there are no fatal accidents in general aviation. Does that seem impossible? The airlines achieved that many years ago, and so can we if we focus on the right things in our safety pro- grams. In fact, the overall trend in GA accident rates over the last few years is very encouraging. AOPA’s Air Safety Institute published its annual GA Accident Scorecard recently (see www.EAA.org/ extras), revealing fatal accidents from 2008 to 2017 are down more than 30 percent. Nevertheless, there were 185 fatal accidents in 2017, so we still have a long way to go. But, there are many developments in safety programs across GA that can keep the trend going.
One such development that I’ve advocated through a couple of type clubs is establishing standard operating practices (SOP). When I flew for both the U.S. Air Force and NASA, we had what we called standard operating procedures. They were the law for our flying. That is, we had to follow them procedurally because the folks that paid our salaries said so. The objective was to ensure we all used the same playbook, minimizing the risk that one of us might develop a bad in-flight habit that increased risk to the organization.
One way to think about SOPs is to recognize the difference between procedure and technique. For example, you have to follow the manufacturer’s pilot’s operating handbook (procedure)where it says to lower the landing gear before landing. If you don’t, you are in for a bad day. However, it does not tell you exactly when to lower the gear; that’s left to technique.
In the middle, between procedure and technique, is a best practice. In this example, lowering the gear just before the final approach fix is a “standard practice.” It is the generally accepted “best” place to lower the gear. In GA, however, aircraft owners don’t generally answer to a boss, so I prefer the term practices instead of procedures.
However, whether or not someone is paying us to fly, following best practices just makes sense. If you have a good set of practices, they enable you to do things the same way every time, leaving lots of brain cells to manage the unusual, the things that might go wrong. The safest approach to accomplishing a flight task is one that leverages consistency. On the other hand, if you are inconsistent, doing flight tasks differently each time, you’ll always be struggling to keep up. So, in my involvement with the safety committees for both the Malibu Mirage Owners and Pilots Association and the Citation Jet Pilots Association, there has been broad acceptance of recently developed standard operating practices.
The good news in this development is that a culture of safety is growing broadly across most sectors of GA through these type club initiatives. Perhaps more importantly, there is much to learn from each other about the effectiveness of these various initiatives. EAA has seen a four-year drop of 47 percent in fatal accidents among homebuilts! So, there must be something right going on there — a major focus on appropriate transition training before flying a new homebuilt (as a standard operating practice) is paying off.
So, what is covered in the SOPs these type clubs have developed? The following outlines the kinds of standard practices other type clubs have set up and represent SOPs you could establish for yourself regardless of the type of aircraft you fly. You just have to fill in the blanks for your particular type and commit to sticking to them in your flying. These are notional and are practices (not mandatory procedures). They don’t tell you how to fly your aircraft; they give you things to think about when you do. If you take a bit of time to set your own SOPs and then stick with them, you’ll be a far safer pilot. Here are some ideas:
Duty Day
Set the maximum number of hours of flight time during a calendar day and rest hours off between flying days. One example is a maximum of eight hours in the air and a minimum of 10 hours off until flying again.
Cargo
Establish best practices for what you will carry as cargo. One example is no lithium batteries in the baggage compartment.
Flight Planning and Preparation
What are your limitations for the types of flight you’ll take on? Consider SOPs such as designating a suitable alternate airport for all flights. Another might be for first flights after significant maintenance, such as no flight at night or in IMC until a day-VMC functional check flight has been done.
Runway Field Length Guidelines
Establish an appropriate minimum field length for your aircraft and commit to not going into shorter fields. Consider sea level operations and high-altitude airports as well.
Surface Operations
What should be your maximum wind conditions for taxi, takeoff, or landing? Maximum acceptable crosswinds on landing? Set them in your SOP and stick to them.
En Route
Consider establishing practices like no non-operationally necessary conversation below 10,000 feet MSL, during any segment of an approach procedure, or during the last 1,000 feet before leveloff during climb or descent. Also consider declaring “minimum fuel” when the fuel state becomes less than fuel to destination plus 45 minutes at current burn, even if flying day VFR.
Approach and Landing
Consider establishing personal minimums in your SOPs for things like visual approaches. Perhaps use a 1,500-foot ceiling and 3 miles’ visibility for day and 5 miles for night, even though these exceed the FAA’s requirements.
Pilot Limitations, Training, & Currency
FAR Part 91 rules allow us to fly with pretty marginal levels of currency. Consider setting your own SOP to something more appropriate for the kind of aircraft you fly and the kind of flying you do in it. For example, consider these ideas as SOPs:
If you have less than 100 hours of time-in-type or have not flown at least 15 hours as pilot in command in the last 90 days, use a minimum planned fuel reserve of one hour.
Also, if flying IFR in this situation, use a minimum visibility for takeoff of 1 mile.
On instrument approaches, increase the published minimums by one- half mile visibility and add 200 feet to the decision altitude or minimum descent altitude.
Perform landings at a weight that allows a full stop in 60 percent of available runway length.
Consider an SOP that establishes you will fly with a CFI on a refresher flight before flying as pilot in command if you have not logged at least an hour of flight time and one takeoff and landing in an aircraft of the same type within the preceding 45 days.
Maneuver Standards
Wherever there are “techniques” associated with things like takeoffs and climbs, cruise, use of autopilot, power settings, and approaches and landings, you can write down your preferred technique as your own SOP. Describe each maneuver in enough detail (speeds, altitudes, power settings, configurations, etc.) to define a routine you will use each time. This ensures you fly consistently each flight and leverage the power of the standard operating practice, that is, to give you the bandwidth you need should you encounter an unexpected event or an emergency.
SOPs are among the exciting concepts underway to make safety programs work for us. Hats off to type clubs like MMOPA and CJP and many others that are taking the initiative. But even if you’re not in this kind of group, you can still set up your own SOPs. Let’s all look forward to our first year in GA without a fatal accident — and let’s make it soon! Fly safe!
Charlie Precourt is a former NASA chief astronaut, space shuttle commander, and Air Force test pilot. He built a VariEze, owns a Piper JetPROP, and is a member of the EAA board of directors.
Type Clubs Lead By Example with Standard Operating Practices This article appeared in the May 2019 edition of EAA’s Sport Aviation Magazine. It is used with permission. For other articles by Charlie Precourt, please visit EAA.org and join for a full subscription. Imagine a year when there are no fatal accidents in general aviation. Does…
Glass panel displays, ballistic parachute aircraft recovery systems, portable tablet computers enabling paperless cockpits, and widely available three axis autopilot systems have changed the way we fly, the way we train, and the way we are expected to perform on check rides. Our training and testing paradigms have tried to stay in synch, yet always seem to be catching up to the latest levels of technology.
This is very apparent when we instructors are preparing a student for an FAA practical test. When training aircraft had no autopilots, no GPS, and certainly no parachutes, the general philosophy was that during training, the student should have the lowest level of technology available. This was also the expectation on the check ride. This theory has changed over the years and now the Practical Test Standards require that an applicant integrate all available technology while demonstrating mastery of his or her aircraft. This raises numerous questions from instructors and students about what technology will be available for each task.
One example of this dilemma is found when contemplating an instrument airplane practical test in a Cirrus SR20/SR22. The test requires the task “Instrument Approach without Primary Flight Display”, which has taken the place of what was the partial panel approach, accomplished without use of gyroscopic heading and attitude indicators. In the Cirrus, the standby attitude indicator, standby airspeed, and standby altimeter are available, as is the Multi-Function Display. Guidance from the FAA has us shooting a GPS approach using the moving map display on the MFD after disabling the PFD. Those of us who trained and tested in steam gauge aircraft think that this task should be fairly easy. With a fully functional Attitude Indicator and a nice big moving map display showing our course, a reasonably competent instrument pilot should have little trouble adapting to this setup and flying a good approach.
But, in the Cirrus specifically, and perhaps in other aircraft as well, another question comes up. Can the applicant use the autopilot (which still works just fine after a display failure) during the approach without the PFD? A rather famous DPE who writes for a national magazine says “yes”, opining that not to allow its use would be introducing simultaneous multiple systems failures, which is strictly forbidden in the minds of some. If we follow this logic, we would not test simulated engine failure emergencies in these aircraft either, because to do so would imply failure of not only the engine, but the CAPS parachute system as well. In my former role as a pilot examiner, I always said no, that the approach should be hand flown. Here is my logic.
I was amazed that flight instructors and examiners would accept the substitution of autopilot technology for the skill required to fly an approach without the PFD. I would argue that the intent and the well described emphasis of the PTS is that the applicant must demonstrate the ability to control the airplane after a loss of the primary flight display, not observe and monitor the autopilot controlling the airplane! This argument was generally unpersuasive, so I approached from a different point of view, that of a concerned family member.
“Aunt Betty” represents a future passenger flying with the soon to be rated instrument pilot. Here is the question posed to Aunt Betty: “When we train and test pilots for instrument proficiency, we require them to demonstrate the ability to safely and skillfully fly the airplane without their primary instruments. Now, Betty, in this airplane, we can test this task in one of two ways. We would like your input on which way you would prefer, seeing as you will be a frequent passenger with your nephew. We can either have the pilot (might be your son, brother, husband, or nephew) demonstrate that he can fly the airplane by hand without the PFD, which does require a little more skill and a slightly different technique, or, we can require the pilot to perform this task using the autopilot so that the pilot basically monitors the airplane flying itself on the approach.
“Now, Aunt Betty, a pilot allowed to use the autopilot system on this approach may not have the skill or technique to fly the approach by hand in the clouds should the autopilot shut down due to turbulence or mechanical failure. Should this happen to a pilot without the skill and practice normally required, the odds of a fatal accident occurring would be quite high.
“So what do you think, Aunt Betty? Would you feel more comfortable flying with this fellow if he has demonstrated mastery of the aircraft (sans PFD) without the autopilot or only with its assistance?”
This leads us to a larger discussion about the use of other technology, iPad, GPS moving map, and more. If technology is used as a replacement for pilot proficiency during training and testing, we end up with less skillful, less competent and ultimately less safe pilots. But, if we require that our students demonstrate mastery with the lowest available level of automation and technology (which, by the way, implies excellent fundamental aircraft control skills) then, when technology is added into the equation, we have a safer pilot.
Technology can be a value added safety multiplier, or it can be a crutch needed to make up for lack of fundamental and advanced skills. Crutch or Safety Multiplier, which one will you choose? I know which one Aunt Betty prefers.
Charles McDougal is a flight instructor, corporate pilot, and former DPE who offers basic and advanced flight instruction in the San Antonio area. To find out more information about Charles or to contact him, visit his website, www.flighttrainingcoalition.com.
Glass panel displays, ballistic parachute aircraft recovery systems, portable tablet computers enabling paperless cockpits, and widely available three axis autopilot systems have changed the way we fly, the way we train, and the way we are expected to perform on check rides. Our training and testing paradigms have tried to stay in synch, yet always…
When I was doing my instrument and multi-engine training, we did a lot of circle to land approaches. As a student, I could never figure out why these types of approaches would ever be practical when you could an approach straight in to another runway. But, as a good student, I never asked my instructors the purpose of them, I just did them to the best of my ability.
Now, having been flying in the IFR system for almost a decade, I’m finally beginning to fully understand the practical purpose of a circle to land approach. I have actually elected to do an approach where I had to circle to land on several occasions in actual IMC conditions.
One important note to remember on circle to land approaches is that the minimum descent altitude (MDA) is always higher than on a straight in approach. The reason for this is that you are basically joining the pattern for a different runway and you have to be able to visually keep yourself clear of towers and other obstacles. So, you need a higher visibility and a higher ceiling than if you were just lining up to come straight in.
Here are a couple of practical circumstances where it would make sense to do a circle to land approach.
Airports with only 1 straight in approach
This one is easy. There are a number of airports scattered around the US that have only 1 straight in instrument approach published for it. Around my part of Texas, the first one that pops into my mind is the RNAV 31 at T85 in Yoakum, TX. Most of the year, the prevailing wind is out of the south, so 13 is the favored runway at T85. During the winter is when most of the IMC weather happens in South Texas, so that is why the approach is for 31.
Of course, especially this year during the summer, there are some IMC days where an approach to T85 would be necessary. When there is a strong wind out of the south, landing on 31 is impractical, so a pilot would fly the approach to 31, then circle to land on 13.
Approaching from the opposite direction
Take a look at the RNAV 19 at KBMQ, Burnet, TX. The two initial approach fixes (IAF) are IXANY and JIBAJ. If a flight is approaching BMQ from the west or north, this is an easy approach to join. If a flight is coming from Austin (directly the the east and a little south) or San Antonio (almost directly south), it would be a bit of extra flying to get configured properly for the approach. Especially coming from Austin, because the degree of turn to join at JIBAJ wouldn’t make the approach practical.
Well, how about vectors? Unfortunately, Houston Center doesn’t have this approach depicted so vectors aren’t a possibility. Center can give you vectors north to make the angle a little easier to join at JIBAJ, but they can’t vector you onto the approach.
Direct DLORA to join is another option, but again, if you are approaching from the southeast, the angle is wrong.
Insert the RNAV 01 approach with a circle to land. AMUSE is right on V163, so it’s really easy to join the approach there coming from the south. Coming from Austin, joining the approach at SUBIE works out great. Fly down to the MDA, join the left downwind for 19, and everyone is happy.
VOR Circle to Land Approaches
Every instrument pilot has had an instructor “force” them to do a VOR A or VOR B approach and no one enjoys them. I personally think they are good practice. With the number of RNAV systems and RNAV approaches out there, though, VOR approaches are becoming a bit archaic.
They do have a place in this discussion, though. A VOR approach is given an A or B designation when the angle of the final approach course is greater than 30 degrees to the runway (VOR A KLZZ), or the final approach course is lined up with the runway, but the MDA is too high to practically descend and land (VOR A KGRK or the VOR/DME C KASE).
So, there are practical uses for a Circle to Land approach. The next time you do some IMC work with an instructor, ask him/her if you can include one.
When I was doing my instrument and multi-engine training, we did a lot of circle to land approaches. As a student, I could never figure out why these types of approaches would ever be practical when you could an approach straight in to another runway. But, as a good student, I never asked my instructors…
A new app came out last year that fits a need for many owners. Coflyt, available on the Apple App Store for $14/month for up to two airplanes, helps immensely with staying organized. Those questions of, “When is my oil change due?” or “Has the plane had it’s IFR inspections?” are easily answered by checking the app instead of having to dig through maintenance logs.
Not only does Coflyt help keep track of maintenance, but it also houses squawk lists that owner’s can send to maintenance shops as well as keeping track of Airworthiness Directives. If the pilot remembers at the end of flights to put the amount in, it even shows how much fuel is remaining in the airplane.
For flying clubs and partnerships, it provides easy scheduling without having to share calendars. Payments can also be taken and flights tracked. No more paper flight sheets after flights to track down.
As a pilot, it helps immensely to be organized. For $14 a month ($36/month for partnerships or flying clubs), that’s a small price to pay.
A new app came out last year that fits a need for many owners. Coflyt, available on the Apple App Store for $14/month for up to two airplanes, helps immensely with staying organized. Those questions of, “When is my oil change due?” or “Has the plane had it’s IFR inspections?” are easily answered by checking…
We’ve all heard it said…”reduce the throttle by no more than 1-inch every minutes to ensure you don’t shock-cool your engine”. Does this advice apply to a PA46 engine? Can a PA46 engine (Lycoming 540 or Continental 520/550) really be shock-cooled? How should the engine temperature be managed?
Metals expand and contract with temperature, and the various metals in an air-cooled aviation engine expand and contract at a different rates. Shock-cooling supposedly occurs when the engine changes temperature quickly and the different metals in the engine cool (and therefore change shape) at different rates. When the change occurs dramatically supposed scoring, rubbing, and marking of the metal can occur, which can cause catastrophic results.
So, let’s back to the original question…can a PA46 engine suffer shock-cooling and should a pilot operate the engine so as to avoid shock cooling? Simply put, I’ve never seen nor heard of any piston PA46 engine suffer shock-cooling. In 5000+ hours flying the piston PA46 and 16 years of flying/managing/training in the Malibu/Mirage/Matrix, it simply has not happened to me nor anyone I know. Does it mean that it cannot happen or has never happened? No. But, it is certainly not a prolific threat to our fleet.
Should the owner/pilot operate the engine with a cautious eye cast toward the potential of shock cooling? Well, sort of…but, let’s flesh this out. My suggestion is that a pilot should operate the engine with conservatism in movement of temperature, but only because this is a good operating practice with any machine, and any flying machine is (by definition) not “overbuilt”. And, there are many ways to change the temperature of the engine…not just by reducing power. Here’s a partial list of ways to cool your PA46 engine:
Reduce power: Obvious…yes. When the engine produces less power, less heat is generated. Reducing power in a piston engine will almost always result in less temperature.
Lower the nose: By descending (and leaving power in a cruise setting) the airspeed will increase and cool the engine.
Enrichen the mixture: Fuel has a cooling effect on the engine, so the richer the mixture the cooler the engine.
Lower the landing gear: Yes…you read that right…engine cooling will occur when you lower the landing gear because more air will flow over the cylinders. Notice the landing gear doors on the PA46 have air louvers. Air flows into the engine nacelle on the front, passes down through the cylinders (along with the oil cooler, intercoolers, and other components) and then out the louvers of the closed gear doors. When the landing gear is lowered the “back door is opened” and a LOT more airflows over the cylinders.
My suggestion is that a pilot only perform ONE of these actions at a time when beginning a descent. This suggestion was presented to me by Chad Menne (Owner, Malibu Aerospace) some time ago and I’ve operated engines this way ever since. If you are at a higher altitude and simultaneously reduced the power, lowered the landing gear, started a big descent, and enrichened the mixture in one flail swoop, I think there’s a chance that your engine would suffer some negative effects that could be called “shock cooling”. So, when you do start a descent, pick one “cooling action” to accomplish at a time. I’m sure you’ll not hurt your engine.
Simply put, shock cooling is not a huge factor in the PA46 community, and a PA46 pilot does not need to be overly cautious. The “one inch per minute” rule may apply in some other airframes, but in the PA46 world it is not applicable.
Joe Casey’s aviation story began in 1990 with his first flight near Nacogdoches, TX in a Cessna 172. From lift-off, Joe knew he would have a lifetime passion flying just about anything that will leave the ground…He was completely hooked.
Along with being an FAA Designated Pilot Examiner (DPE), Joe is an ATP/CFI-AHMG and Commercial Rotorcraft/Glider Pilot in the civilian world and also a UH-60/AH-64 Pilot-in-Command/Instructor/Examiner Pilot in the US Army Reserves. His passion for the last 19 years, however, has been the PA-46 Malibu/Mirage/Matrix/Jetprop/Meridian. Has has amassed over 6,500 hours in various PA-46 airframes and believe it to be one of the finest flying machines available for the serious cross-country pilot with an eye for efficiency.
Now, Joe has flown more than 12,200 hours in just about every imaginable environment. Whether providing initial/recurrent training in the PA-46’s, TBM’s, instructing in NVG’s in a UH-60 Blackhawk, flying the King Air series of airplanes, giving tailwheel endorsements, or taking kids flying for the first time, he simply loves flying machines and the people who fly them.
We’ve all heard it said…”reduce the throttle by no more than 1-inch every minutes to ensure you don’t shock-cool your engine”. Does this advice apply to a PA46 engine? Can a PA46 engine (Lycoming 540 or Continental 520/550) really be shock-cooled? How should the engine temperature be managed? Metals expand and contract with temperature, and…

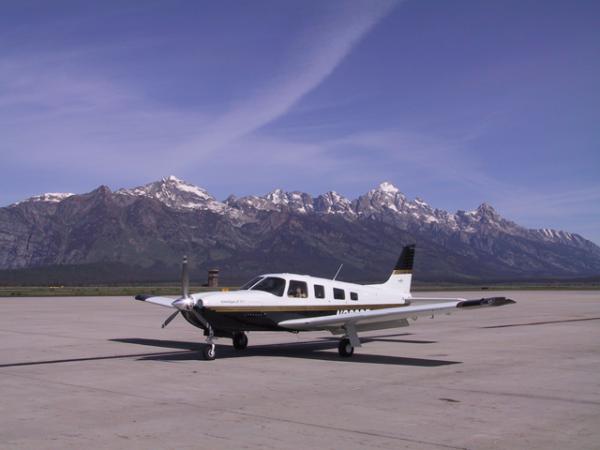 Recently, I assisted with the delivery of a 2007 Piper Saratoga Turbo from San Antonio to New York City. It was a very nicely equipped airplane, complete with a Garmin G1000 panel, an STEC 55x autopilot, and air conditioning. The owner joined me on the flight back to get trained in the airplane, getting him comfortable in it over our 2 day excursion back to NYC. Total flight time was 12 hours, though that did include several stops along the way and landing practice at the airports we stopped at.