If you are based in Houston, or heading into or out of the Houston airspace under IFR, have you updated your charts? If not, you may hear a clearance stating: “N67889, cleared to Amarillo via the BORRN 1 Departure, CRGER Transition, Direct. Climb via the departure, expect 8000 in 10 minutes. Departure frequency 123.8, Squawk 3365.” You manage to get the clearance written down, but have completely messed up the spelling of both BORRN and CRGER, so you have no idea where the intersections are. After stumbling through a readback, you ask ground to spell the fixes for you.
Then, more bad news. You haven’t updated your GPS cards yet, so the departure isn’t in your 430. It’s an RNAV only departure, so you can’t fly it based on the NAV Radio. You were planning on updating your iPad when you got to Amarillo, so you don’t have the departure on there, either.
This has probably already happened to a few people today already.
Houston airspace got a major overhaul today. There are 20 new DPs and 29 new STARs guiding IFR traffic into and out of Houston airspace (including one named the DOOBI 1 Arrival, named after the Dooby Brothers band).
The FAA’s goal in all these changes, according to AOPA, is to “bring fuel efficiencies, time efficiencies, and reduce carbon emissions” (from Benet J. Wilson’s May 15th article on AOPA.com). The FAA issued a NOTAM today valid until June 6th describing what routes for pilots to file. The NOTAM also contains contingency plans for pilots flying without updated charts (like our example above).
Pilots should expect these wide scale procedure additions and changes to start showing up in other Class B airspace across the country. As always, make sure those charts are updated, GPS databases are current, and you do some studying of your route before you file your flight plan.
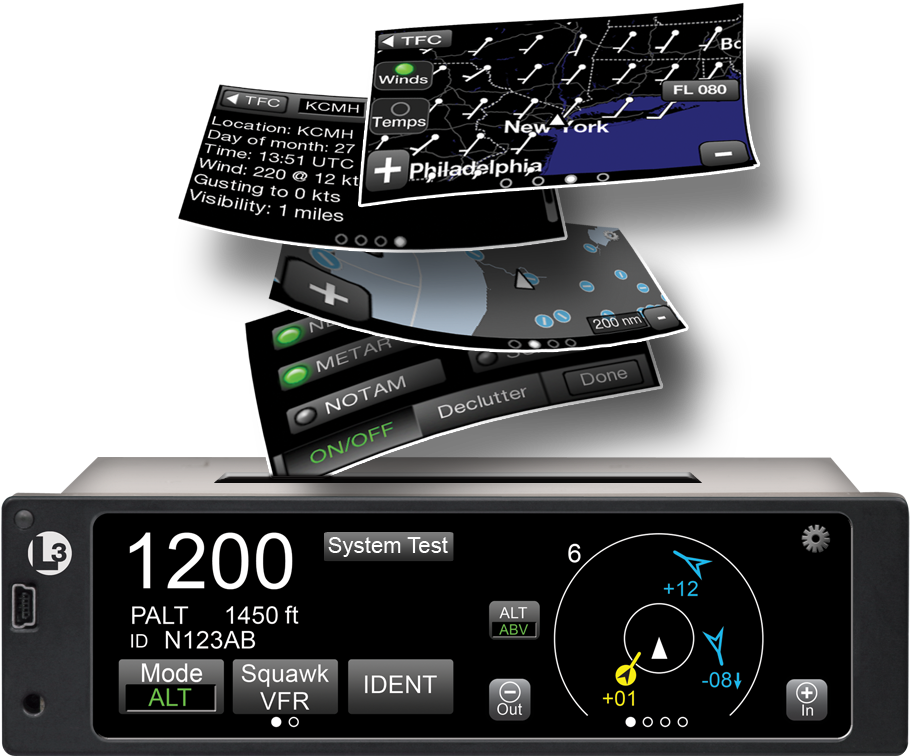
L-3 has jumped into the ADS-B transponder game with their Lynx line of products. Aircraft owners have a myriad of options with the Lynx line, from simply becoming ADS-B compliant with the NGT-1000 ($2,100, with ADS-B out that works with the GTX 327 and GTX 330), or going all in with the NGT-9000 touch screen transponder complete with ADS-B In, a traffic screen and NEXRAD ($6,800).
The NGT 1000/2000/2500 line works with the existing transponder in the airplane (as long as it’s a Garmin GTX 327 or 330). The 2000 gives ADS-B In capability, allowing the pilot to access NEXRAD and traffic, plus has a Wifi source to broadcast all the information to an iPad. The 2500 includes all of that, plus gives the pilot MFD capability as well. An optional control panel is available if the airplane is not equipped with one of the aforementioned Garmin transponders.
The L-3 Lynx NGT-9000 is an actual transponder replacement. It is a touch screen device that has a multitude of ADS-B features that, quite frankly, are really cool on a transponder. The ADS-B traffic is displayed on the unit itself and can also be sent, via the optional Wifi connection, to an iPad on the WingXPro or SkyRadar apps. The optional L-3 NextGen Active Traffic can also be installed to receive traffic callouts (this does not include resolution advisories). Already have SkyWatch? The L-3 Lynx can use the equipment.
The L-3 Lynx NGT-9000 is also capable of displaying NEXRAD as well as METARs, TAFs, NOTAMs, and TFRs and a myriad of other weather products, all on it’s moving map. It seems that L-3 has taken the transponder and turned it into something awesome.
To read more about the L-3 Lynx line of transponders, you can visit their website.
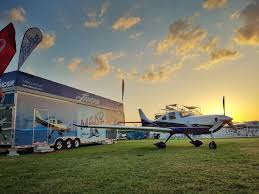
A brand-new event for Lancair owners, the 2018 Great American Lancair Rally will be a multi-stage “grand tour” of the Western US. Starting and ending in Central Texas, the Rally will take place September 24th through October 5th 2018.
The Rally will begin in Uvalde, TX (KUVA) on September 24th at the Lancair headquarters. There will be 6 legs, with stops at:
Sedona, Arizona (KSEZ)
Paso Robles, California (KPRB)
Redmond, Oregon (KRDM)
Spanish Fork, Utah (KSPK)
Taos, New Mexico (KSKX)
San Marcos, TX (KHYI)
At each stop, there will be food, drinks, and fun for everyone.
Lancair plans on making instructors available to pilots who would like any kind of training along the way. Hank Gibson from Texas Top Aviation will be one of the instructors available.
Lancair plan to make the Great American Lancair Rally an annual event, with the 2019 Rally spanning the eastern half of the country.
The Great American Lancair Rally is open to all Lancair owners, potential owners and interested aviators. Fly a different airplane? All makes and models are welcome!
For more information & to register, check out the 2018 Great American Lancair Rally’s website.
Ever since I moved out to the Philadelphia area, the Hudson River corridor in New York City has become one my favorite places to fly. It’s hard to overstate the beauty of the city from low over the river. Every time I have a family member or friend come to visit, I try and take them over to see the city from the air.
Each time I fly up the river I can’t believe that we are actually allowed to do so, flying below the tops of the buildings and close enough that you feel that you could reach and out touch them. The draw back to the Hudson River Corridor is that it can be busy, intimidating, and confusing. However, with some reading and preparation, the Skyline flight is easy to do and extremely rewarding.
Having the right weather is an important first step. The second step is try to arrive during ideal lighting conditions. If possible, select a smooth, calm day to make it easier to maintain a track down the correct side of the river. I always try and target arrival at the city around sunset. The view is spectacular any time of day, but having the lights from the city while the sun is just setting gives the best viewing. I’ve also flown over and done the whole flight after dark, which is always spectacular.
View of the World Trade Center
The first method of flying the river is to utilize VFR flight following. If the controllers aren’t too busy, they will provide advisories to aircraft that request the Skyline. The nice thing about doing it this way is that the controller will clear you into the NY bravo airspace and keep you above the traffic flying the Skyline in the VFR corridor below. This is the method that I have always preferred as I enjoy the added benefit of the traffic advisories and it’s nice not to worry about position reporting on the radio.
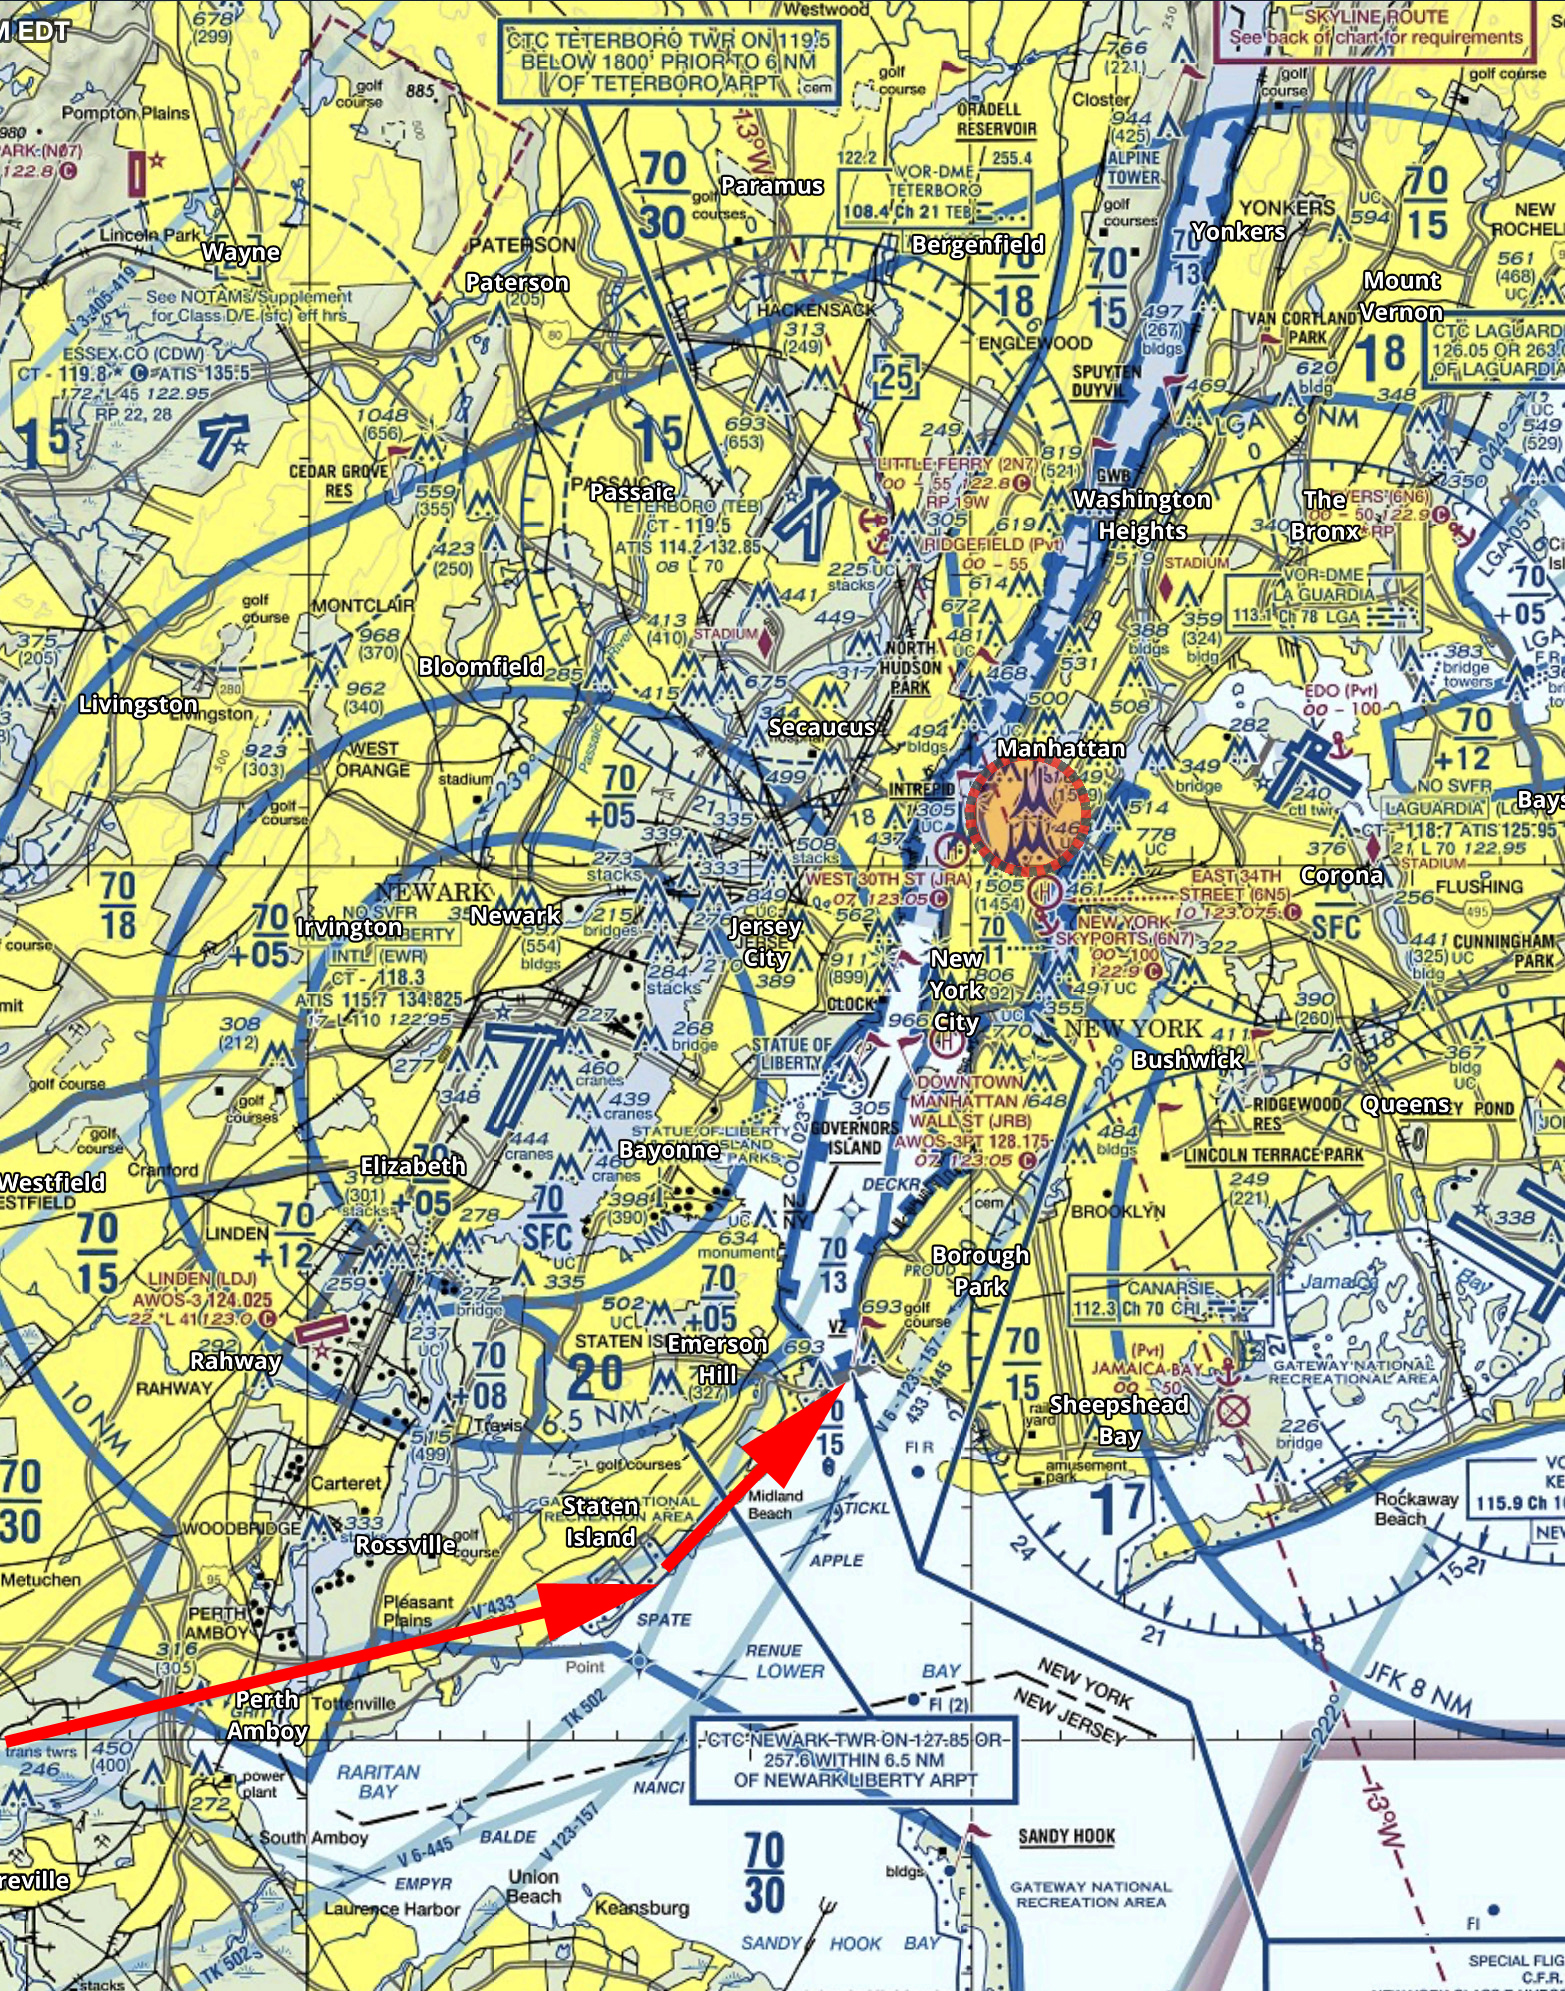
If you want to get flight following, head toward the corridor and request the Skyline route with NY Approach. (Remember to stay clear of the Bravo until you’re cleared in!) Once you’re cleared into the Bravo and approaching the corridor, they will hand you off to Newark/ LaGuardia Tower for traffic advisories over the river. I like to approach from the south and ask for a 180 over the George Washington Bridge. This allows me to fly past the city a second time before exiting the corridor over the VZ (Verrazano Bridge) and heading back toward home.
In red is the path I typically fly. I descend to 1400’ and fly toward the APPLE intersection picking up the shoreline around Staten Island and hugging it until crossing the middle of the VZ. Newark normally clears me into the Bravo at 1400’ or 1500’ to fly up the corridor.
Pros:
Better traffic Awareness
No position reports
Cons:
Flying slightly higher reduces the view
If the controllers are busy, they may deny your request for advisories
Can be intimidating to talk to NY Approach/ Newark/ LaGuardia
The other option is to fly in the VFR corridor. If you want to do it via this method there are just a few things you need to make sure you’re familiar with before you go. When in the VFR corridor you’ll need to make required position reports on a CTAF frequency. Make sure that you have the proper charts and have studied pictures of the landmarks so that you know what you’re looking for. I tend to plan on this as a backup in the event that the controllers won’t give me advisories.
Pros:
Doesn’t require talking to controllers/ class B clearance
More freedom to select altitude and routing as desired
Cons:
Less traffic awareness
Required position reporting
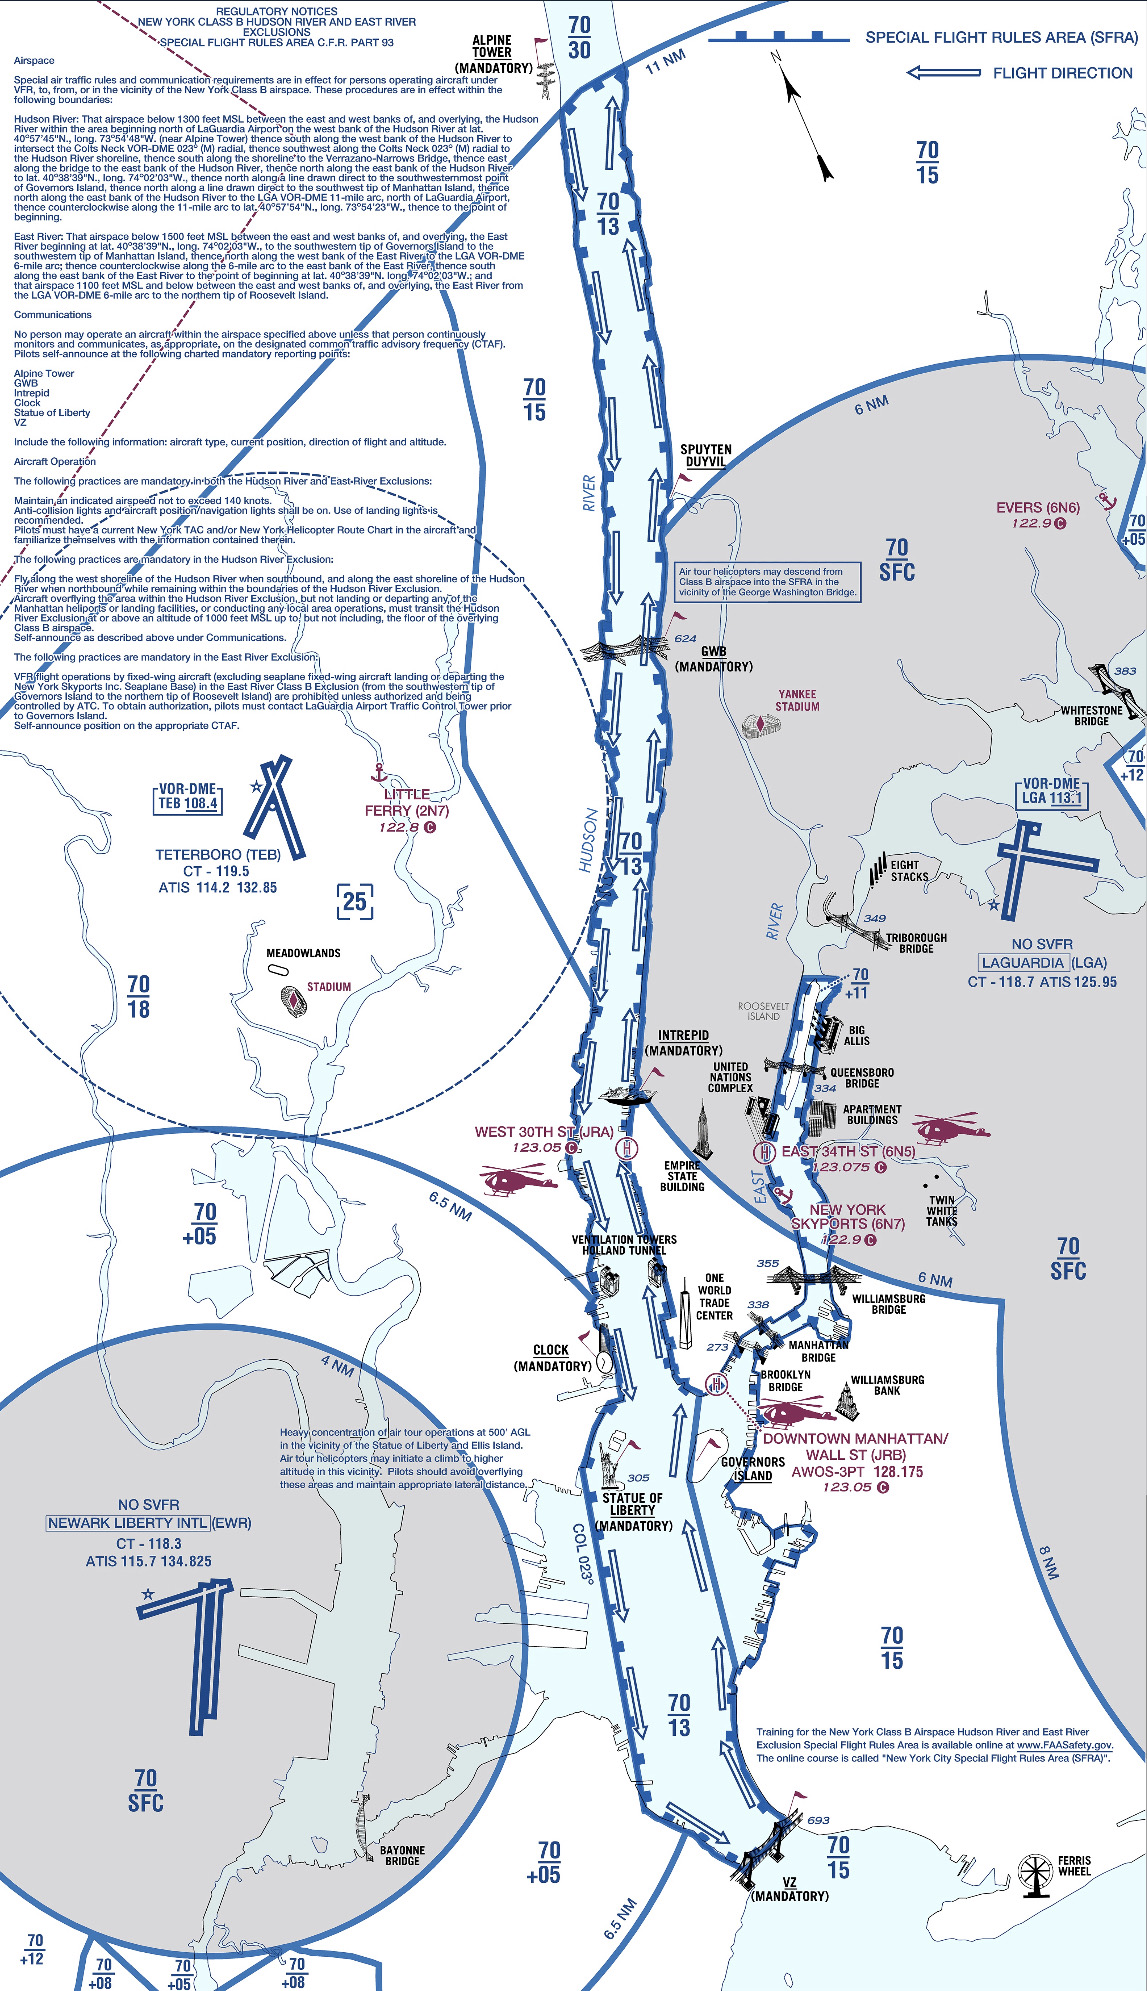
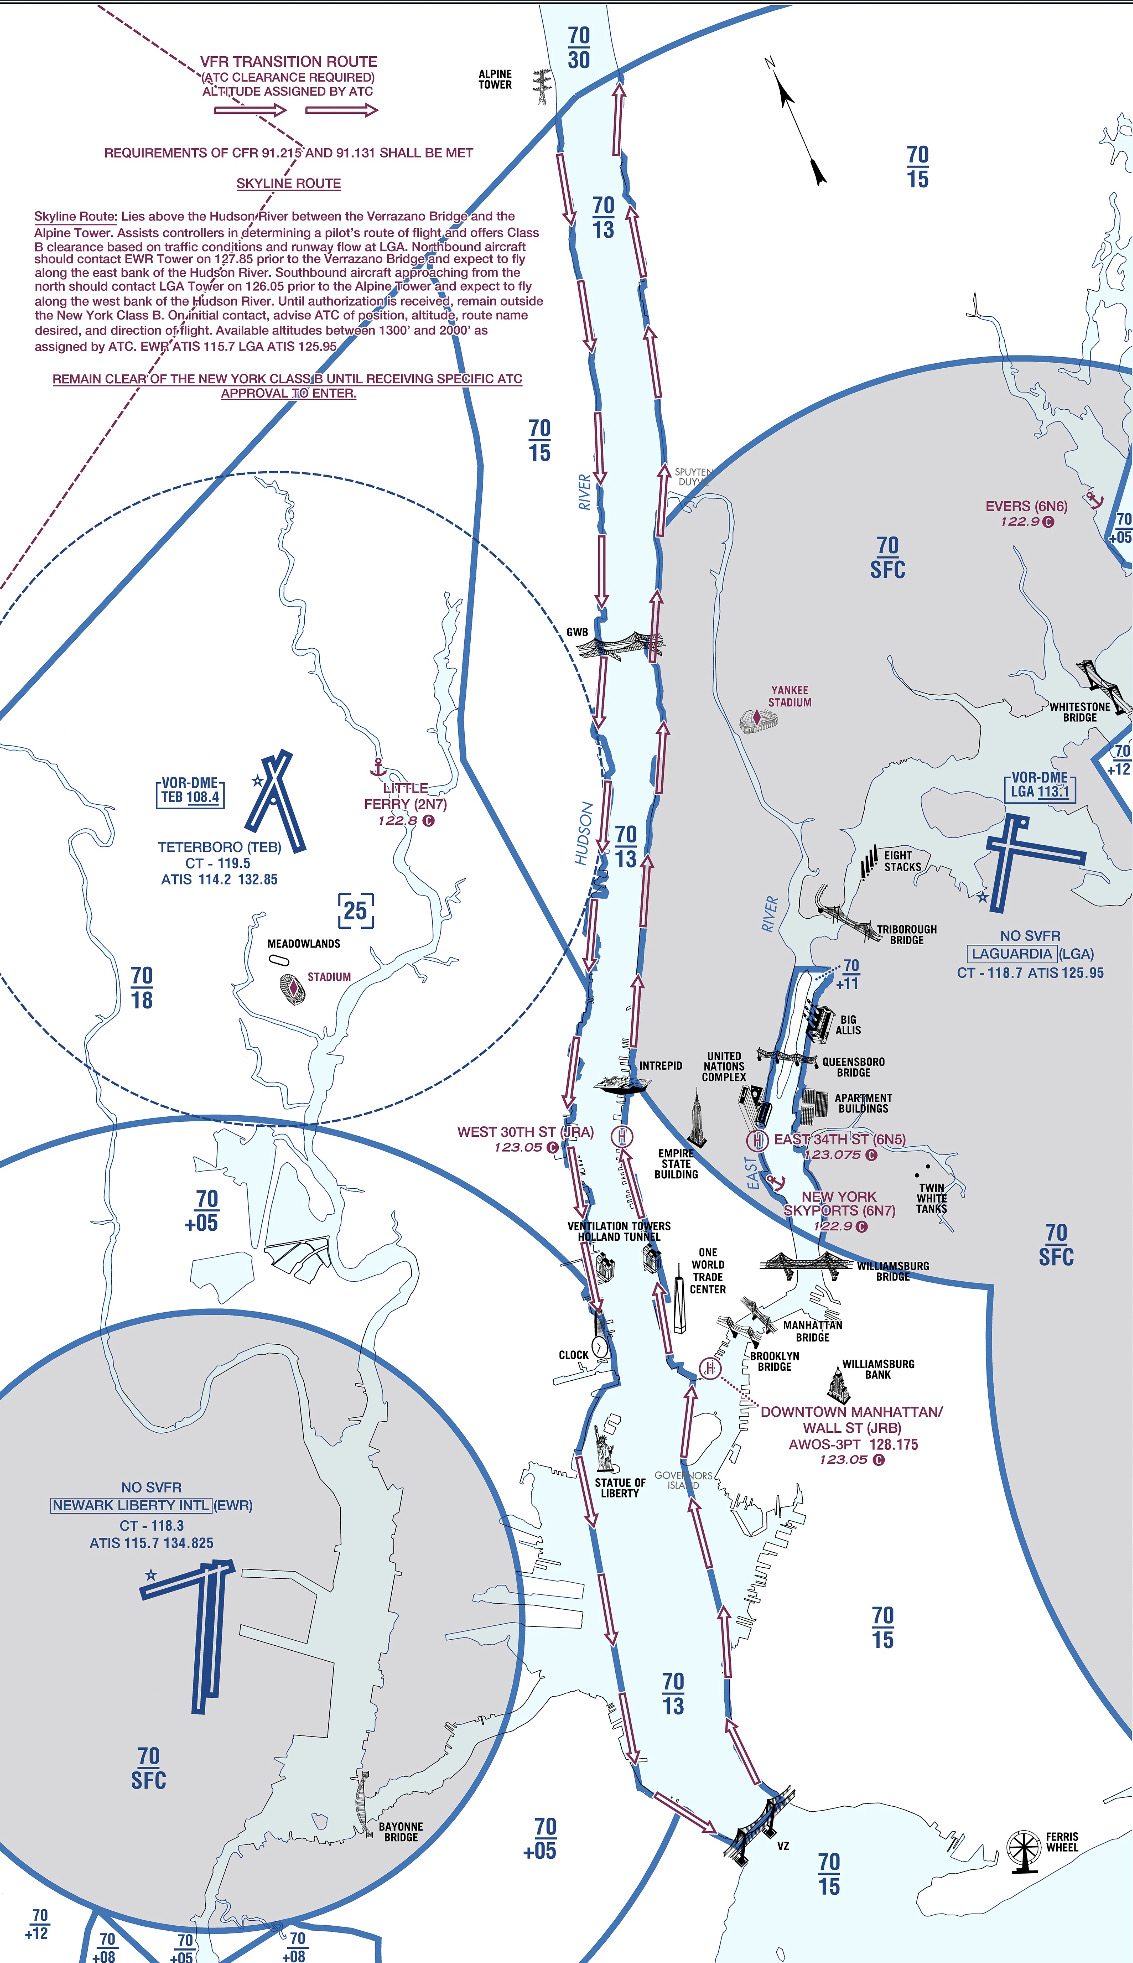
All the requirements and guidelines for flying the corridor can be found on the back of the NYC TAC chart. Any pilot flying the river is required to have one of these or a NYC helicopter route chart on board. If you’re using Foreflight, look in the Documents section under FAA Fly Charts and select the NYC TAC chart in order to read the back of page.
Below you’ll find examples of the diagrams/ instructions printed on the back of the NYC TAC charts.
You can see the traffic flow requires northbound airplanes to hug the east side of the river, while the southbound traffic stays on the west side. The VFR reporting positions (listed from North to South) are: Alpine Tower, George Washington Bridge, Intrepid aircraft carrier, Goldman Sachs (clock), Statue of Liberty, VZ (Verrazano Bridge). Each position report should include aircraft type, position, direction, and altitude.
Other things to be aware of: NYC is always a hotspot for TFR’s. There are often TFR’s for baseball games or presidential movements so make sure to check before you head that way. Additionally, there is a speed restriction in place of 140 kts, though I’m not sure why anyone sightseeing would want to go that fast anyhow.
I realize that all of the procedures and restrictions can be overwhelming, but with the proper preparation, the Hudson Skyline is one of the most incredible places in the world to operate an airplane. There are a lot of things that are easy to get excited about that don’t live up to expectation, but this isn’t one of them. I’ve never taken anyone to the river that wasn’t impressed by what they saw and that’s why I plan to keep going back.
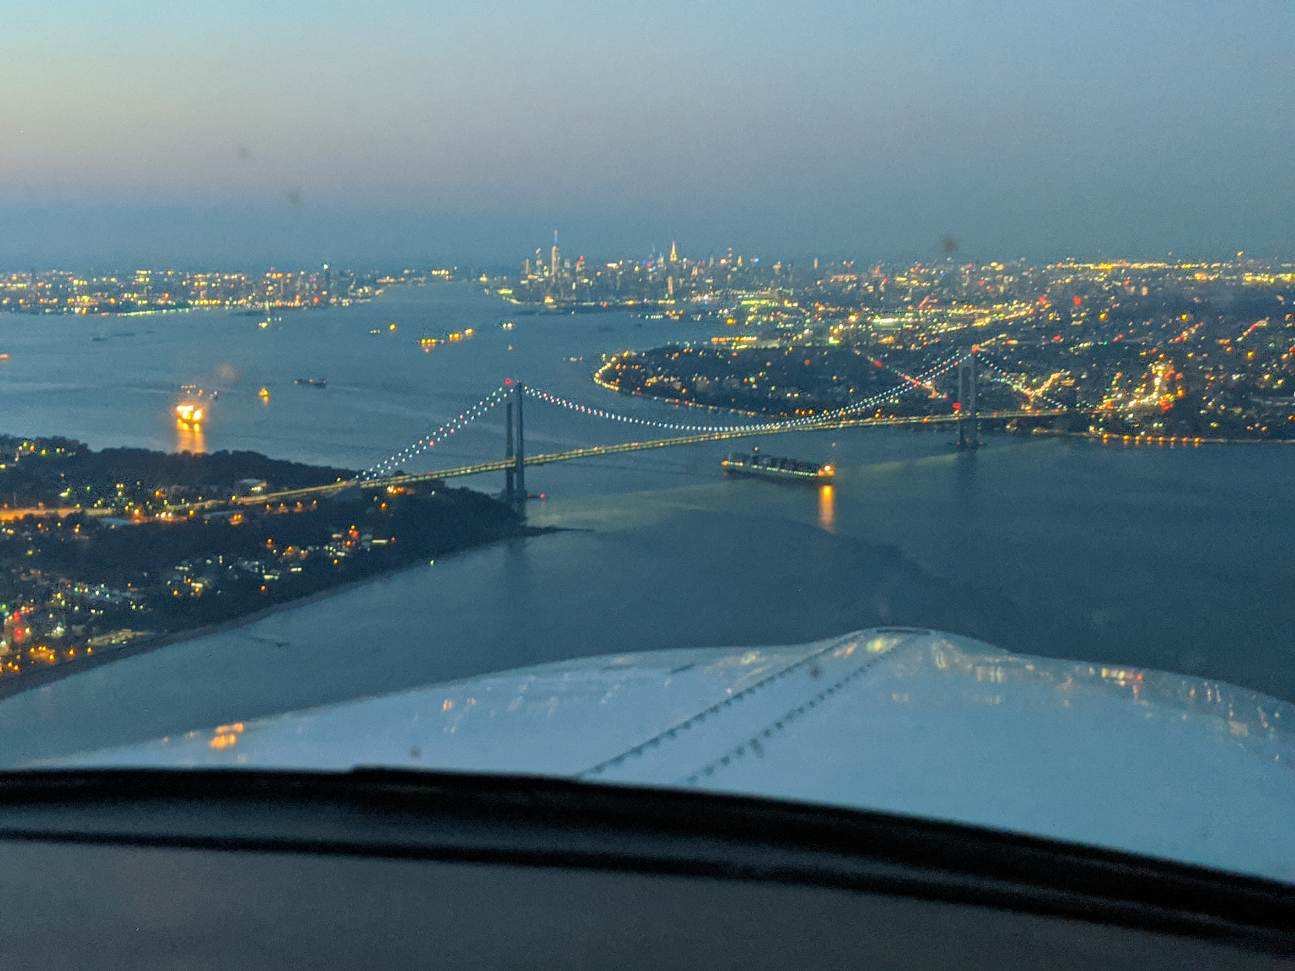
About to cross the VZ looking north toward the city
Some of a pilot’s favorite words are heard on the ATIS: “Winds, Calm.” These words set off all sorts of happy bells and hallelujah choruses. Most pilots spend their lives fighting the winds. On those rare days when the winds are calm, great happiness ensues.
But, are calm wind landings more complicated then everyone thinks? Well, they can be if the proper planning doesn’t go into them.
Let’s think about wind. We have surface wind and we have winds aloft. Sometimes the surface winds are calm. When this happens, certain airports have preferred calm wind runways which are supposed to be used in these conditions. Winds aloft are almost never calm. 95% of the time, there is some kind of wind even 100-200 feet above the surface.
Here is the question pilot’s face when coming into an airport with calm winds: which runway do I use? Do I use the calm wind runway? Do I use the runway that is easiest to enter the pattern for? Do I use the one with the shortest taxi?
A lot of technologically advanced aircraft have a wind indicator on the PFD. This tool is often forgotten in calm surface wind conditions. On the contrary, this is probably the most important tool a pilot can have when figuring out which runway to use when the winds are reported calm.
Here’s why. That wind indicator is showing the pilot what the winds aloft are. The winds aloft should determine what runway is going to be used. If the wind indicator is depicting a south wind, then a south runway should be used. Even if it is a 5 knot wind at pattern altitude, it’ll still be a headwind coming in on final approach. If the north facing runway is used, that same 5 knot headwind can blow an airplane halfway down the runway before the ground speed drops off enough for it to land.
So, the next time you are coming into an airport and the winds are reported calm, take a look at your wind indicator on your PFD when deciding which runway to use. It’ll probably save a few go arounds!
The Garmin G1000/Perspective combined with the Garmin GFC 700 Autopilot can be a great tool in descent planning. When you want to end up at pattern altitude a certain distance from the airport or you get a clearance to cross a fix at a certain altitude, Garmin VNV is a great tool. Here’s how to use it.
VFR Garmin VNV Use
Let’s say you want to end up at pattern altitude 3nm from your destination, but you don’t want to descend down into the bumps before you have to. Here’s how to set it up:
Go to the Flight Plan page on the MFD
Press the ATK OFST soft key on the bottom of the MFD. It stands for Along Track Offset, which, in laymen’s terms, means you are setting a point along your track a certain distance from your destination. In this case, it will be 3nm
Input the distance using either the keypad or the small FMS knob and press enter
Select the altitude you want to be at (in this case pattern altitude) and press enter
You will see a point 3nm before you destination appear on your magenta line and a Top Of Descent (TOD) appear where you need to start your descent
1 minute before the Top Of Descent, an indicator will appear next to your altimeter
To have the GFC 700 Autopilot fly the descent for you, you have to do two things
Set the Altitude bug for the desired altitude
Press VNV on the autopilot
All you have to do now is manage power
IFR Garmin VNV Use
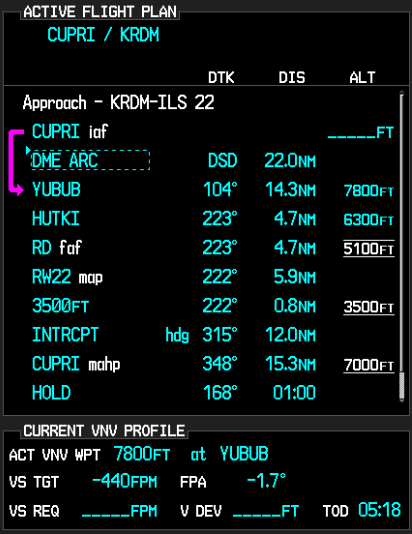
Let’s say you are told to cross a fix at a specific altitude. Here’s how to use Garmin VNV to plan it out.
Go to the Flight Plan page on the MFD
Turn the cursor on and highlight the altitude blank next to the fix in the flight plan
Input the desired altitude
You will see a Top Of Descent (TOD) point appear along your course where you need to start your descent
1 minute before the Top Of Descent, an indicator will appear next to your altimeter
To have the GFC 700 Autopilot fly the descent for you, you have to do two things
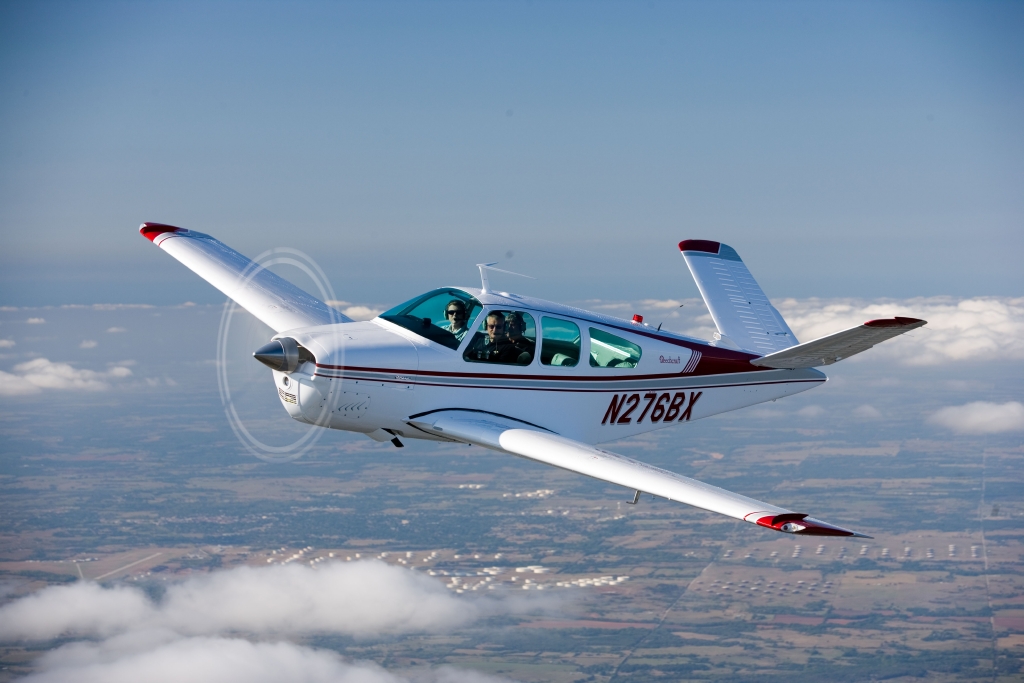
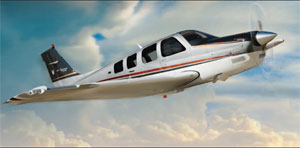
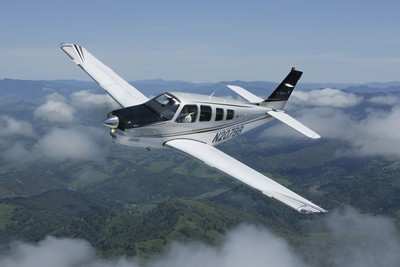
If you walk up to any Beechcraft Bonanza sitting on the ramp at an airport and ask the owner, “How do you like your Bonanza?” be prepared to stand there and listen for 15-20 minutes while he brags about his airplane.
The thing about Beechcraft Bonanza owners is that they are almost a part of a cult. They will tell you up and down why the Bonanza is the best airplane out there. They’ll tell you why all the others don’t even come close. They’ll tell you about the payload, the six seats, the variety of configurations you can select from, the ability to land pretty much anywhere. By the time you walk away, you will probably be convinced to buy one yourself.
Bonanza’s are great airplanes. For those of you new to the single engine piston market, a good comparison for a Beechcraft Bonanza would be a Suburban. Not the flashiest ride out there, but extremely capable, comfortable, and family conscious. If you’re hauling a load, you’ll take a Bonanza over a Cirrus or Mooney any day. Have six people? No problem!
One of the best things about a Beechcraft Bonanza is the variety of designs. Four seats, six seats, long range tanks, tip tanks, turbo charged, normally aspirated, steam gauge, G1000, Aspen or G500 retrofitted, dual yoke, single yoke, leather, cloth, and a variety of different colors out there on the market make finding a Bonanza that fits your need pretty easy.
When it comes to picking out an airplane, the first question is always the mission. If you’re thinking about a Beechcraft Bonanza, you’ve already determined you need something with a good useful load. Do you need four seats or six? Depends on how often you’ll be carrying someone or how new of an airplane you want. Older Bonanzas have four seats, but a lot have had significant updating. Newer A36 and B36 Bonanzas have six seats, but are going to cost you more.
Do you need a turbo charged Bonanza? If you’re in a high elevation area or expect to visit the mountains a lot, then absolutely. If you want a better cruise speed and don’t mind a little less useful load, then go for it. If you’re more concerned about being able to load it up and you aren’t going to cross the Rockies often, then normally aspirated is what you want. You’re probably looking at about 160-170 KTAS with the normally aspirated whereas you get between 180-190 KTAS at altitude with the turbo.
Do you need tip tanks? Tip tanks have two advantages. One is the most obvious: you get to carry more fuel, therefore you get to go farther without having to stop (or when you stop for the bathroom, you don’t have to fill up with gas). The other advantage is you get a bump up in useful load. I talked to a Beechcraft Bonanza owner a few weeks ago who had tip tanks on his. He told me max gross on his Bonanza was 3,800 pounds and was eligible for an upgrade of up to 4,000 pounds and all it took was paper work for the STC. That’s quite a bit of load!
Are Bonanzas hard to fly? When moving up from a typical 172 or Cherokee that most people learn to fly in, it does take some adjustment. But, with good Bonanza training from a qualified Bonanza training instructor, then the transition is no problem. There are tons of resources out there to aid all future and present Bonanza owners in their foray into the Bonanza nation. With the American Bonanza Society and Bonanza Pilot Training, there is no lack of training, thoughts and opinions.
In need of an airplane that can pretty much do whatever you need? Then a Bonanza may be right for you.






11 Comments