| |

Setting Standards

Type Clubs Lead By Example with Standard Operating Practices

This article appeared in the May 2019 edition of EAA’s Sport Aviation Magazine. It is used with permission. For other articles by Charlie Precourt, please visit EAA.org and join for a full subscription.

Imagine a year when there are no fatal accidents in general aviation. Does that seem impossible? The airlines achieved that many years ago, and so can we if we focus on the right things in our safety pro- grams. In fact, the overall trend in GA accident rates over the last few years is very encouraging. AOPA’s Air Safety Institute published its annual GA Accident Scorecard recently (see www.EAA.org/ extras), revealing fatal accidents from 2008 to 2017 are down more than 30 percent. Nevertheless, there were 185 fatal accidents in 2017, so we still have a long way to go. But, there are many developments in safety programs across GA that can keep the trend going.

One such development that I’ve advocated through a couple of type clubs is establishing standard operating practices (SOP). When I flew for both the U.S. Air Force and NASA, we had what we called standard operating procedures. They were the law for our flying. That is, we had to follow them procedurally because the folks that paid our salaries said so. The objective was to ensure we all used the same playbook, minimizing the risk that one of us might develop a bad in-flight habit that increased risk to the organization.

One way to think about SOPs is to recognize the difference between procedure and technique. For example, you have to follow the manufacturer’s pilot’s operating handbook (procedure)where it says to lower the landing gear before landing. If you don’t, you are in for a bad day. However, it does not tell you exactly when to lower the gear; that’s left to technique.

In the middle, between procedure and technique, is a best practice. In this example, lowering the gear just before the final approach fix is a “standard practice.” It is the generally accepted “best” place to lower the gear. In GA, however, aircraft owners don’t generally answer to a boss, so I prefer the term practices instead of procedures.

However, whether or not someone is paying us to fly, following best practices just makes sense. If you have a good set of practices, they enable you to do things the same way every time, leaving lots of brain cells to manage the unusual, the things that might go wrong. The safest approach to accomplishing a flight task is one that leverages consistency. On the other hand, if you are inconsistent, doing flight tasks differently each time, you’ll always be struggling to keep up. So, in my involvement with the safety committees for both the Malibu Mirage Owners and Pilots Association and the Citation Jet Pilots Association, there has been broad acceptance of recently developed standard operating practices.

The good news in this development is that a culture of safety is growing broadly across most sectors of GA through these type club initiatives. Perhaps more importantly, there is much to learn from each other about the effectiveness of these various initiatives. EAA has seen a four-year drop of 47 percent in fatal accidents among homebuilts! So, there must be something right going on there — a major focus on appropriate transition training before flying a new homebuilt (as a standard operating practice) is paying off.

So, what is covered in the SOPs these type clubs have developed? The following outlines the kinds of standard practices other type clubs have set up and represent SOPs you could establish for yourself regardless of the type of aircraft you fly. You just have to fill in the blanks for your particular type and commit to sticking to them in your flying. These are notional and are practices (not mandatory procedures). They don’t tell you how to fly your aircraft; they give you things to think about when you do. If you take a bit of time to set your own SOPs and then stick with them, you’ll be a far safer pilot. Here are some ideas:

Duty Day

Set the maximum number of hours of flight time during a calendar day and rest hours off between flying days. One example is a maximum of eight hours in the air and a minimum of 10 hours off until flying again.

Cargo

Establish best practices for what you will carry as cargo. One example is no lithium batteries in the baggage compartment.

Flight Planning and Preparation

What are your limitations for the types of flight you’ll take on? Consider SOPs such as designating a suitable alternate airport for all flights. Another might be for first flights after significant maintenance, such as no flight at night or in IMC until a day-VMC functional check flight has been done.

Runway Field Length Guidelines

Establish an appropriate minimum field length for your aircraft and commit to not going into shorter fields. Consider sea level operations and high-altitude airports as well.

Surface Operations

What should be your maximum wind conditions for taxi, takeoff, or landing? Maximum acceptable crosswinds on landing? Set them in your SOP and stick to them.

En Route

Consider establishing practices like no non-operationally necessary conversation below 10,000 feet MSL, during any segment of an approach procedure, or during the last 1,000 feet before leveloff during climb or descent. Also consider declaring “minimum fuel” when the fuel state becomes less than fuel to destination plus 45 minutes at current burn, even if flying day VFR.

Approach and Landing

Consider establishing personal minimums in your SOPs for things like visual approaches. Perhaps use a 1,500-foot ceiling and 3 miles’ visibility for day and 5 miles for night, even though these exceed the FAA’s requirements.

Pilot Limitations, Training, & Currency

FAR Part 91 rules allow us to fly with pretty marginal levels of currency. Consider setting your own SOP to something more appropriate for the kind of aircraft you fly and the kind of flying you do in it. For example, consider these ideas as SOPs:

  • If you have less than 100 hours of time-in-type or have not flown at least 15 hours as pilot in command in the last 90 days, use a minimum planned fuel reserve of one hour.
  • Also, if flying IFR in this situation, use a minimum visibility for takeoff of 1 mile.
  • On instrument approaches, increase the published minimums by one- half mile visibility and add 200 feet to the decision altitude or minimum descent altitude.
  • Perform landings at a weight that allows a full stop in 60 percent of available runway length.
  • Consider an SOP that establishes you will fly with a CFI on a refresher flight before flying as pilot in command if you have not logged at least an hour of flight time and one takeoff and landing in an aircraft of the same type within the preceding 45 days.

Maneuver Standards

Wherever there are “techniques” associated with things like takeoffs and climbs, cruise, use of autopilot, power settings, and approaches and landings, you can write down your preferred technique as your own SOP. Describe each maneuver in enough detail (speeds, altitudes, power settings, configurations, etc.) to define a routine you will use each time. This ensures you fly consistently each flight and leverage the power of the standard operating practice, that is, to give you the bandwidth you need should you encounter an unexpected event or an emergency.
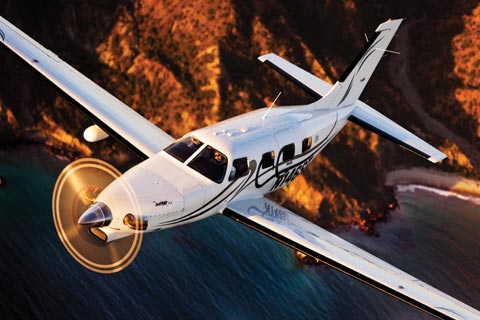
SOPs are among the exciting concepts underway to make safety programs work for us. Hats off to type clubs like MMOPA and CJP and many others that are taking the initiative. But even if you’re not in this kind of group, you can still set up your own SOPs. Let’s all look forward to our first year in GA without a fatal accident — and let’s make it soon!
Fly safe!


Charlie Precourt is a former NASA chief astronaut, space shuttle commander, and Air Force test pilot. He built a VariEze, owns a Piper JetPROP, and is a member of the EAA board of directors.

Similar Posts

  • Synthetic Vision Technology

    Let’s say you’re flying in the mountains of Colorado on a cloudy day.  There’s a solid layer from the surface all the way up to 14,000 feet.  You’re inbound to Eagle (KEGE) on the RNAV (GPS) D approach.  There are mountains next to you and below you, but you aren’t concerned since you can see them all.  The base of the last reported overcast layer was 3,000 feet, so you know you’ll break out before the MDA and land no problem.

    At 11,100 over AWACC, you clearly see the top of the mountain below you.  You are comfortably above it. You already have the runway in sight as well.  You pop out of the clouds on the approach at 9,700 feet, spot the airport and follow the tower’s instructions to circle north of the runway for a left base for runway 7.

    How could you see the mountains inside the clouds?  You have Synthetic Vision installed on your glass panel, that’s how.

    Aspen Synthetic Vision
    Aspen Synthetic Vision

    Synthetic Vision, which has actually been around since the ’70s when NASA and the US Military first developed it, was first FAA certified for the Gulfstream PlaneView flight deck in 2009.  Garmin, Avidyne, and Aspen are the main general aviation manufacturers of synthetic vision these days.  All Garmin PFDs are now equipped with Synthetic Vision while Aspen gives you the option to upgrade to Synthetic Vision when you get one of their PFDs installed.  Avidyne gives you Synthetic Vision in their R9 upgrade for the Cirrus.

    What is Synthetic Vision?  Basically, it’s a 3-D picture on the primary flight display showing terrain, obstacles, traffic, and runways.  It greatly enhances situation awareness in areas of terrain or high obstacles during IFR conditions or at night.

    The goal behind the development of Synthetic Vision was to decrease the amount of controlled flight into terrain (CFIT) accidents.  A CFIT accident consists of a perfectly airworthy airplane flown by a pilot (or autopilot) unintentionally into terrain. These accidents can happen in low visibility conditions or at night, but the reason is mainly due to the pilot losing track of his position in relation to obstacles or terrain (or water as was the case with JFK Jr.).

    With Synthetic Vision, the goal is to enhance pilot knowledge of what is around the airplane at all times. When you’re at altitude, the terrain below you looks flat.  When you start descending down amongst the rocks, the hills or mountains start to rise up on your screen.  For those used to the coloration with the 2-D terrain feature on a GPS unit, it translates very easily to the terrain coloration on a Synthetic Vision equipped PFD. Terrain that is between 100 and 500 feet below the aircraft is shown as yellow, while terrain closer than 100 feet is depicted as red.

    Garmin Synthetic Vision
    Garmin Synthetic Vision


    One neat feature on Garmin units is the Highway in the Sky.  When a pilot puts a course or a flight plan in the GPS, the PFD displays magenta boxes at the altitude selected displaying the route.  It’s handy when hand flying to just “fly through the boxes.”  They also display descent angles on approaches.

    Synthetic Vision is still optional on Garmin and Aspen units, but I highly recommend springing for it.  It will give you a higher level of safety and keep you out of the rocks.

  • Flying WAAS GPS Approaches

    When flying a WAAS GPS approach, there are several different levels of WAAS signal that a GPS receiver can get. The most precise is an LPV signal. LPV stands for Localizer Performance with Vertical guidance. An LPV approach has the lowest minimums of all the WAAS GPS approaches, typically in the range of 200-300 feet AGL. A GPS glide path (GP) is guaranteed with an LPV approach and the minimum altitude is a decision altitude (DA).

    Just like a localizer, an LPV course width get’s tighter and the CDI becomes more sensitive the closer the plane get’s to the runway. Even though the LPV approach minimums are so low and the approach is down to a DA, they still aren’t considered precision approaches by the FAA (which leads to some extra planning when selecting an airport as an alternate that only has GPS approaches, since the AIM specifies only the LNAV minimum are to be considered if an alternate airport only has GPS approaches, bringing the 800 foot ceiling requirement to bear)

    An LNAV/VNAV approach is still a WAAS approach that has a GPS glidepath, but is slightly different than an LPV approach. An LNAV/VNAV final approach course does not get more sensitive the closer the plane gets to the runway. The smallest course width on an LNAV/VNAV approach is 0.3 miles either side of center. LNAV/VNAV approaches will, most of the time, have higher minimums than LPV approaches and can have minimums no lower than 250′ AGL.

    The third type of WAAS approach is strictly a non-precision approach with a Minimum Descent Altitude (MDA). These are designated LP approaches, which stands for Localizer Performance. These are like old school Localizer only approaches that, similar to the lateral portion of an LPV approach, the course width tightens the closer to the runway that a pilot is. There is no glide path by definition of an LP approach, though there is a caveat.

    Now, by looking at an approach plate that is a WAAS approach, but only has LP minimums listed, a pilot would assume there would be no glide path. Depending on what type of GPS unit the airplane has, that pilot could be wrong. Garmin Perspective units (Cirrus G1000), all GTN 750s and GTN 650s, All G1000 NXi units, most Garmin 430W and 530W, and all Avidyne IFD 550/540 and 440 units will display an advisory glide path on an LP approach, designated LP+V.

    What does LP+V indicate? An advisory glide path is just advisory, but it is totally legal to follow down on a non-precision LP approach. The kicker is obstacle clearance is not guaranteed and the pilot needs to keep an eye on minimum altitudes at the different waypoints on the approach. The big thing I tell people is, when you arrive at the MDA and the runway is in sight, following the advisory glide path below the MDA could get you in trouble with obstacles. Don’t just hone in on your instruments when you break out of the clouds. Look out the windscreen and make sure you won’t hit anything.

    If you arrive at the MDA on the advisory glide path and the runway isn’t in sight, DON’T GO BELOW THE MDA! Most autopilots won’t level off at the MDA, even if that altitude is set in the altitude pre-select, so this will involve turning off the autopilot before the MDA and manually leveling off, or engaging the altitude mode of your autopilot at the MDA.

    One other type of GPS approach that you will encounter is an LNAV approach. This is a non-WAAS approach down to an MDA, but your GPS unit may still give you a +V. Most modern ones will.

  • MMOPA Operating Practices for the Piper PA46

    I have the privilege of serving on the Malibu & M-Class Owners and Pilot’s Association Safety Committee.  Along with 6 other Piper PA46 instructors, we were tasked with two things last year leading up to the MMOPA Convention in Colorado Springs last October.  The first was to develop a Master Aviator Program (more on that in a later article).  The second was to develop Operating Practices for the Piper PA46 fleet that we as instructors could all get on board with to teach the same thing, allowing everyone in the fleet to fly approaches and patterns the same way.

    When I started instructing in the piston Piper PA46 line (the Malibu, Mirage, and Matrix), I was surprised to find that there were no recommendations anywhere that I could find for approach and pattern power settings and airspeeds.  This led to some experimentation on my part trying to find out what works well for the airplane.  I had originally been given good training in a Malibu, but hadn’t flown one for several years, so my numbers were a bit rusty.

    I have been in the Cirrus world for a very long time.  One thing I greatly appreciated from an instructing point of view about Cirrus was the abundance of guidance the factory gives instructors and pilots on how the airplane is supposed to be flown.  All CSIPs and all Cirrus pilots should (theoretically) be teaching and flying the exact same way.

    I was quite surprised that Piper didn’t put out similar information.  I wasn’t as familiar with MMOPA at the time, but was surprised they didn’t have any information either.

    I apparently wasn’t the only one with a desire to have a little bit more standardization.

    So, without further ado, here are the MMOPA Operating Practices that the Safety Committee put together.  If you are a new Piper PA46 pilot, these numbers are what you will expect to use when you do your Initial training.  If you are a seasoned Piper PA46 pilot, you probably fly these numbers, or pretty close to them already.

    These are tried and true power settings and speeds for the approach phase and landing phase.  They work. That was the goal of the Safety Committee:  put down in writing something repeatable to enhance safety.  I believe we have accomplished that.

  • Redbird Skyport Fly-In Rescheduled

    The Bluebonnet Fly-In at Redbird Skyport has been rescheduled due to weather and the recent flooding in San Marcos.  The new date for the Bluebonnet Fly-In will be Saturday, June 6th from 10am-4pm.

    Hank Gibson of Texas Top Aviation will still be presenting on Garmin 430/530 Approaches this Saturday at 2pm in the large conference room at Redbird.

  • Garmin Perspective Missed Approaches

    Are you a Cirrus pilot with a Garmin Perspective?  Still can’t figure out the use of the go around button?  Read on!

    When it comes to flying an instrument approach, we as pilots are assuming we are going to land.  Most of the time, we won’t even take off if the ceilings or visibilities are below the minimums for an approach.  95% of the time, we do land.

    There is the other 5% of the time when something unexpected happens, whether we get a full scale deflection, or we don’t see the runway at the published minimums, and we have to perform a missed approach.

    When instructing, missed approach procedures are actually what I see the most deficiency in when instructing an instrument rated pilot.  It’s not necessarily configuring the airplane for a missed approach procedure, it’s the button pushing involved in setting up the GPS properly.  When a pilot isn’t proficient in the button pushing, that button pushing distracts the pilot from actually flying the airplane, which can lead to a dangerous situation.

    I am going to spend a few articles on flying a missed approach with different GPS and different autopilot configurations.  Today, I will be addressing the Garmin Perspective with a GFC 700 Autopilot, which is what all Cirrus Aircraft after 2009 are equipped with.

    The Garmin Perspective Missed Approach Procedure

    Once the decision to execute a missed approach has been made, here is the step by step procedure:

    • Full Mixture and Full Throttle
    • Simultaneously push the Go Around button on the underside of the throttle.  This does the following:
      • Sets the Garmin Perspective Flight Director to Go Around Mode (7.5 degrees pitch up and wings level)
      • Takes the Garmin Perspective GPS out of Suspend Mode
      • Switches the CDI back to GPS mode if it is in a different mode
      • Garmin Perspective with GFC 700 Autopilot stays on
    • Flaps up
    • Confirm airplane is climbing
    • Set altitude bug for missed approach altitude (assuming it isn’t there already)
    • Set NAV mode and IAS mode on the Garmin Perspective GFC 700 Autopilot

    Garmin perspective

    That’s it.  When Garmin and Cirrus got together to create the Garmin Perspective with the GFC 700 Autopilot, they tried to make as simple but robust system as possible.  Once you have the procedure down for the right buttons to press, then the procedure is relatively straight forward.

  • Lightspeed Tango Headset

    I recently purchased the new, wireless, Lightspeed Tango headset.  I’m a little OCD, so when a headset wire is banging against my shoulder while I’m trying to tune a radio or point something out, it’s a little annoying. A headset without the wires caught my eye.

    As I’ve stated before in a previous article, I really like Lightspeed headsets.  They are more comfortable than Bose, and a little bit more affordable too.  The noise canceling quality is very high in the different Lightspeed models.  I personally believe it got even better with the Lightspeed Tango.

    Lightspeed Tango

    Let’s talk about the obvious first.  Not having a wire connecting you to the headset jacks is really nice.  You’re not tethered to anything, so your head is free to move anywhere without getting yanked back in place. Lightspeed developed a new technology, called Lightspeed Link, which bypasses Bluetooth or Wifi and connects the Panel Interface to the headset wirelessly.

    The Link technology works pretty well.  The only problem I have noticed is in certain airplanes, I occasionally lose one ear, but after I wiggle the input wires around, the deaf ear comes back up.  It may be a loose connector in the plane itself.

    The really nice thing about the Lightspeed Tango is the fact that it doesn’t need AA batteries anymore. Lightspeed put rechargeable lithium ion batteries in both the Panel Interface and the headset.  You get 12 hours of battery life out of both, far surpassing any length of time you would want to be in an airplane.  If the battery dies, there is a handy aux cable that can connect the Panel Interface directly to the headset (the ion batteries recharge with the included wall charger and USB cables in 2 hours).

    Though the Lightspeed Tango is slightly heavier than the Zulu 2 due to the Link hardware and the lithium ion battery, it is still extremely comfortable.  The ear cups actually fit better over my ears and give me a better seal with glasses on then the Zulu 2 did.  As with all Lightspeed products, there is no squeezing of my head and the cushions on top of the headset sit very comfortably on top of my head.

    The Bluetooth is much simpler to use than the Zulu 2 and definitely simpler than the Bose A20.  Sound quality is very good for phone calls and music.  The volume control on the headset itself is set to make smaller adjustments so you don’t have to deal with wide swings in volume.

    Overall, I’m a big fan of the Lightspeed Tango.  I am recommending them to all the pilots I talk to.  Rolling in at $400 cheaper than the Bose, you can’t go wrong.

    Lightspeed Tango 3

Leave a Reply

Your email address will not be published. Required fields are marked *