| |

Stratos 716X

Cirrus Vision Jet, meet your competition.

In July, Stratos Aircraft completed the first test flight of the single engine Stratos 716X personal jet. Stratos, based in Redmond, OR, is taking a page out of Epic Aircraft’s book in how the company is planning on bringing the Stratos 716X to market.

Epic Aircraft first released the Epic LT composite single engine turboprop in the early 2000s as an experimental. The first kit was completed and flying in 2005. Epic’s goal was to bring the airplane to market as a certified aircraft, a feat that took them almost 20 years to do, achieving full certification earlier this year.

Stratos Aircraft is hoping to learn a lot from their Bend, OR neighbors. The 716X is going to start off as a limited release experimental kit, while the company is working on achieving certification for the airplane. Once the plane is certified, it will be dubbed the Stratos 716. The 716X experimental kits will be assembled through a factory builder assist program (no garage built single engine jets here!). The kit will cost $2.5 million assembled, while the expected cost of the certified Stratos 716 will be $3.5 million.

Now, let’s talk about the airplane. 400 KTAS. One engine.

That’s right, you did hear correctly. The Stratos 716X is expected to cruise at 400 KTAS on only one engine. Compared to the Cirrus Vision Jet, that’s 100 knots faster. Think, “I’ll be relaxing at the hotel pool with a drink in hand when you are landing” type speeds. The fuel burn of the Pratt & Whitney JT15D-5 engine (3,000 lbs of thrust) is about 25 GPH more than the Vision Jet (the Stratos 716X will burn about 98 GPH of Jet A while the Vision Jet averages about 75 GPH of Jet A).

Comparing the two engines, the above numbers start to make sense. The Williams FJ33 engine on the Vision Jet only puts out 1,850 lbs of thrust, significantly less than the 3,000 lbs of thrust that the Stratos 716X Pratt & Whitney JT15D-5 puts out.

What does that mean to the pilot? In the Stratos 716X, it means less takeoff roll, better climb rate, faster cruise (as evidence by the 400 KTAS expected cruise speed), and a better payload. More power = more weight carrying capacity. And, the 716X is expected to have a service ceiling of 41,000 feet. I probably wouldn’t want to go that high single pilot with one engine, but I’d be very happy with that speed in the mid-30s.

The cabin, based on the pictures I’ve seen, looks very comfortable. The Stratos 716X seats 6 and can be configured in several different ways. Baggage is no problem as Stratos Aircraft stretched the fuselage from their original 714 Proof of Concept aircraft, adding a very roomy baggage compartment above the engine compartment. The passenger compartment is as big as a Phenom 100, providing more leg and head room than the Vision Jet. The front seats have plenty of legroom too, as Stratos has opted for a side stick instead of a yoke.

The avionics for the Stratos 716X are expected to be the Garmin G3X Touch for the panel which will be driven by a Garmin GTN 750 GPS. Autopilot will be integrated within the G3X. I would imagine that once the plane is certified, the panel will be switched to a Garmin G1000 NXi and a GFC 700 will be installed.

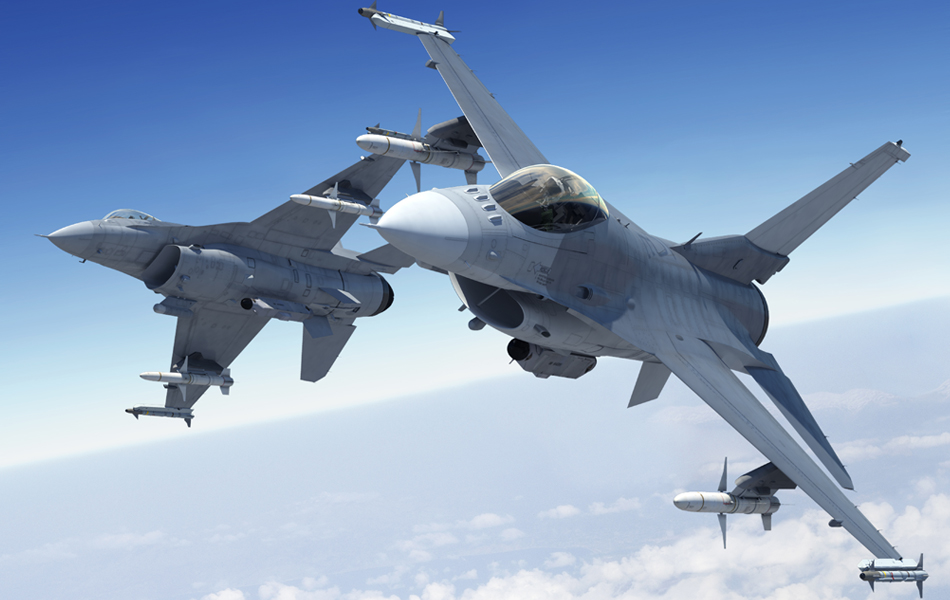
The genius of the design of the Stratos 716X is the aerodynamics of the engine placement. Instead of hanging the engine out in the slip stream and going with a drag inducing V-Tail like Cirrus did, Stratos took some notes from the myriad of single engine military fighter jets out there, placing the engine inside the fuselage. The fuselage is then built around the engine with two air scoops for intake directly in front of the wings. With two intakes instead of one, that leads to more air flow, which again, means more power. The Vision Jet has only one.

I’m going to keep tabs on the Stratos 716X (as I kept tabs on the Epic E1000). I’m hoping Stratos gets several flying soon (the company expects to do 3 kits a year till the airplane gets certified) and certification comes quickly after.

I got to stick my head in the mockup of the Stratos 716X when I went to Osh Kosh in 2018. I was very impressed and was excited to see the airplane was finally airborne this summer.

For more information about the Stratos 716X, check out the Stratos website.

Similar Posts

  • Jeppesen vs. Aeroservices Charts

    Many people ask, which set of charts is better? Should I use the FAA Aeroservices charts on Foreflight or pay extra for the Jeppesen charts? Since you have to pay for Jeppesen, they are probably better, right?

    I am not here to say which one is better as a chart preference is just that, a preference for one over the other or for certain features. After a while, muscle memory and routine take over and you probably wont even notice the difference.

    History

    In 1934, Elroy Jeppesen began making his own charts and sold them to other pilots. His little company grew into the giant Boeing chart company we know today. Jeppesen charts are used internationally and therefore include information that might otherwise seem common knowledge, like transition altitudes. The key is, you cannot get FAA Aeroservices charts for international destinations. Jeppesen is the only option for outside the US.

    National Aerospace Charting Office (NACO), or the new(er) name “Aeroservices” or FAA chart, whatever you decide to call them, are United States government issued charts. In addition to civilian use, Aeroservices charts are used by the military so there will be some terminology that does not apply to civilians. The best part about FAA Aeroservices charts are… they’re free!

    If you are in the middle of a transition or trying to decide which charts to use, you have come to the right place. Here are a few key differences.

    Obstacle Departure Procedure Chart
    KAXX (Angel Fire, New Mexico) ODP

    1. Frequencies: FAA Chart provides the AWOS so you have all departure frequencies in once place.
    2. Airport: Jeppesen highlight the airport, which is a nice feature so you can easily see the flow from the airport.
    3. Notes and Remarks: Jeppesen bolds the speed restriction all over the chart so you won’t miss it. All other requirements are in the top right corner. Note the transition altitude 18,000′. Since Jeppesen is used internationally, it is published on the chart since other countries have different transition altitudes. It takes up a chunk of chart real estate, but it’s clear, easy to read, and always in the same place. The FAA charts post all the requirements and restrictions as notes off to the side. Since it’s in the same space as the chart graphic, it’s easy for the eyes to catch while studying the plate.
    4. Take off Minimums: NOT APPLICABLE for PART 91 – however, it’s wise for all pilots to look and abide by them. Jeppesen displays the standard take off minimums table, as well as the rate of climb table, which is nice to have all in one place. The FAA chart gives the non standard information but you need to know/look up the rest in the Digital Terminal Procedures Supplemental document. (Hint: It’s in the Documents section of Foreflight)
    5. Take Off Obstacles: About the same on both charts
    6. Route Description: Similar on both charts, but larger font and clearer description on the FAA chart. When there are different routes from different runways, the FAA chart layout is really helpful.
    7. Graphic Layout: Jeppesen and FAA use the same graphics for all their different charts and plates which makes it easy to read once you are familiar with the respective charts. FAA charts are easy to read and distractions are kept to a minimum. Jeppesen charts make things bold and enlarge pertinent information so you won’t miss it.
    8. Airport altitude: This is only on the Jeppesen chart (the FAA chart doesn’t include it), but it is very helpful for situational awareness. As you brief the arrival altitudes, I think it’s important to have an idea what AGL you are at.

    Approach Charts

    One thing pilots love about Jeppesen approach charts is the clear set up for an approach brief. The top section is created as a “briefing strip” starting with the frequencies, then navigation frequencies, minimums, airport elevation and the missed approach. It’s very natural and user friendly.

    FAA charts have a slightly bigger picture of the approach planview, but the profile view and minimums section can get a bit cluttered. It can feel a little discontinuous when briefing the approach to bounce all over the page. However, some pilots really like the small airport diagram in the corner, which I find really helpful for situational awareness (particularly for students learning circle approaches). Non- standard alternate and takeoff minimums are also clearly noted, but unfortunately we must hunt elsewhere to find them. The Jeppesen alternate minimums and takeoff minimums will both be on the airport diagram

    1. Frequencies: Getting weather and tuning radios is easy on the Jeppesen charts – just follow the briefing strip. The frequency section on the FAA charts is still easy to read, but closer to the center of the page. It’s split up from the nav frequencies and other important briefing information.
      a. FAA charts are created by the government and have military specific information, which are the odd looking frequencies and channels on the chart.
    2. Approach Navigation: On a Jeppesen chart, you will continue to the next line to verify your frequency, course and set minimums (assuming you are straight in on the ILS). On the FAA chart, you will then have to skip to the top of the chart to get the frequency and course, and then scan to the bottom of the page to input your minimums. However, since you could be flying a localizer approach or a circle to land, it’s a good reminder that not everyone using this approach chart will be using the same Decision Altitude (DA). The FAA chart also includes runway distance information so pilots can make determinations of approach speeds and stopping distance if the runway is wet or icy.
    3. Missed Approach – Textual
    4. Approach Lighting
    5. Missed Approach- Graphical: The missed approach information is the same on both charts. The lighting information is key for determining a missed approach and is next to the missed approach text on the FAA chart. It’s found next to the missed approach graphic on the Jeppesen chart. Personally, I find it easier to find and read the lighting information on the Jeppesen chart. Remember, on both charts, the placement of the PAPI on the chart indicates the physical location of the lights (left or right of the runway).
    6. Notes: Both charts have a notes box, but they use them a little differently. Once again, remember that Jeppesen charts are used internationally and include the transition altitudes and altimeter setting info. On both charts, the notes section will be where other critical information will be shared which isn’t really applicable for this airport. On the FAA chart, the tower frequency is starred to note that there are operating hours (you’ll have to check the chart supplement AF/D to find out what those hours are). There is also an L next to the frequency to indicate it is the pilot controlled lighting frequency. You will also find the note about the VGSI and the Approach Glide path next to the profile view on the FAA chart, whereas the Jeppesen chart has that note in the notes section at the top. The FAA chart also has the T and an A in black triangles to note that this airport has non- standard alternate and take off minimums. Again, those are found in separate documents when using FAA charts and on the Airport Diagram when using Jeppesen charts.
    7. Minimum Sector Altitude: Similar on both charts, but in different locations (reminder: ATC vector altitudes may be lower. It is the pilot’s responsibility for safety of flight to maintain safe obstacle clearance, so if you are ever concerned about going below the MSA – just ask ATC).
    8. Planview: Other then differences in size, visuals, and text, the information displayed on both is very similar.
    9. Profile View: Again, the displays look different and pilots will have their preference, but the information is the same.
    10. Minimums: Jeppesen charts not only note the category for each approach with its designated letter, but also displays it in knots. It is recommended that if you increase your approach speed (based on flaps or gusty winds or perhaps a faster speed for a circle to land approach) that you should use the higher category minimums. The reference guide makes that easy to look up. The other benefit of the Jeppesen charts is right the table that contains the time from the final approach fix to the missed approach point for a localizer approach, it also shows the rate of descent with the associated ground speed to maintain a 3 degree glideslope. Now there is no excuse not to set pitch and power! The minimums posted in parenthesis are for the military, but RVR in statute miles is also included.
    11. Airport diagram: Only on the FAA charts, this particular feature is particularly useful for situational awareness. The arrow pointing to the runway shows the direction the approach is arriving from so planning a circle to land is a cinch. There is also a lot of other information that can be gathered from the airport diagram for quick reference or to help a disoriented pilot: lighting, displaced thresholds, closed taxiways, and runway placement and lengths. This is easily one of the best perks of an FAA chart.

    Arrival/ Departure Charts: Sewzy 5 Arrival KAUS

    The Jeppesen lay out is very attractive and draws the pilots eye in a clear way to all the important information. The colors pop out, so the required altitudes and speeds are easy to read and remember. The chart, which is the proper scale, shows MORAs , easy to find airports (and runway layouts) and is over all easy to follow. However, the texts, while very clearly laid out, are small and difficult to read and pushed to the very edges of the chart. FAA charts are simple and fairly easy to read, but the airports are not as obvious and the flow to the airport requires a good look. The table on the Jeppesen chart is a really nice format, but the text and Notes for arrivals on the FAA chart are easy to find and much easier to read quickly.

    1. Frequency: FAA charts include the approach frequency on the arrival, which is helpful for having radios tuned. During a busy time when the controller changes your frequency, all you have to do is verify the frequency you already set, rather then totally stop what you’re doing to switch it. The Jeppesen charts add the airport elevation next to the ATIS, which really aids situational awareness.
    2. Notes: Jeppesen notes are clearly numbered and tucked away nicely in a box, but the FAA chart notes pop out in the middle of the page and are easy to skim for pertinent information.
    3. Planview: I think Jeppesen is the clear winner here- it is so easy to read, it only takes one glance to know where the primary airport is and how the arrival flows. The chart being at the proper scale offers the pilot important geographical information and over all is a clean look. Notice the small series of arrows after SMRFF on the the Jeppesen chart; those indicate the pilot should expect radar vectors. The FAA charts include those instructions in the text, but I find the visual reference on the chart helpful. The FAA charts are equally clean, with altitude and speed restrictions easy to read even if they don’t jump out. When there are multiple airports that the arrival serves, the airports are clearly marked, though, I think it would be nice to have a little more information surrounding the primary airport for better situational awareness.
    4. MSA: only on the Jeppesen chart
    5. Primary airport: The runway alignment and grey highlight on the Jeppesen chart stands out very clearly, while the FAA airports are a little more obscure.
    6. Arrival route description: The table on the Jeppesen chart is easy to follow but the text is very small and pushed to the bottom. The route description is much easier to find and read on the FAA chart.

    Airport Diagram

    The Jeppesen Airport Diagram page has it all: frequencies, airport diagram, runway info, take-off minimums, departure procedures and alternate minimums. It’s a one-stop shop. It makes preflight planning easy when its all at your fingertips.

    The FAA charts usually require a little more searching for different pieces of airport information. The Airport Diagram itself is just the airport layout. Above, you will see a simple FAA Airport diagram. It’s clean and simple, perfect for a knee board print out.

    In the flight planning process, as you look at what approaches you will be using for the airport, you might see an A or T inside a triangle. Those indicate that you will need to look in the Alternate Minimum or Take off minimum documents for more information. The Takeoff Minimums document (see below) is also where you will find any obstacle departure procedures for that airport. Apps like Foreflight help you out by posting the take off minimums under the departure tab. Even though it’s a little more difficult to read, I didn’t crop out the airport information so you can see what it looks like in context.

    FAA Alternate Minimums on the Left and Takeoff Minimums and Obstacle Departure Procedures on the Right
  • PopSocket iPad Yoke Mount

    I was recently clued in to a really cool (and very cost efficient) iPad yoke mount.

    It’s called a PopSocket and you won’t find it on any aviation website (I have to credit Joe Casey of Casey Aviation with this nifty find).

    It’s very simple.  You take the mount (see right) and stick it to your yoke.  Then you pick one of a ton of designs from PopSocket and stick it to the back of your iPad (you can even create your own design!  B2 Bomber anyone?).

    It’s low profile, doesn’t get in the way of anything, and is easily removable.  The PopSocket mounts are $10 apiece (depending on the size of your iPad, you may want to get 2).  The PopSocket is $10, so at the most, you’ll be in $40 plus tax and shipping.  Most mounts on Sporty’s are upwards of $50 and require a lot of installation, are big and bulky, and usually require lots of juggling to get the iPad in and out of the mount.

    Give the PopSocket a try.

  • Cirrus Embark

    Free training?

    Yes, you heard correctly.  Last fall, Cirrus released a program called Cirrus Embark.  The Cirrus Embark program offers 3 Free Days of Training to new purchasers of used Cirrus aircraft.  The 3 Days is equivalent to the Cirrus VFR Transition Training Course.

    Previously, Cirrus offered free factory training to anyone who purchased a new Cirrus from the Cirrus factory. Now, anyone buying a used Cirrus gets the same offer through Cirrus Embark at their home airport with a local CSIP training provider.

    IFR pilot?  No problem.  The Cirrus IFR Advanced Transition Training Course is 5 days in length, but the Cirrus Embark program covers the first 3, reducing the out of pocket pay to only 2 days.

    Want more information?  Check out the Cirrus Embark website.

    To get more information on both the VFR and IFR Cirrus Transition Training Courses, visit the Texas Top Aviation Cirrus Training Page.

  • Medical Reforms Get Passed

    On July 15th, the medical reforms that AOPA and many other aviation advocacy organizations had pushed so hard for were passed into law.  President Obama signed the medical reforms law on the 15th, but, before practical application of the law takes place, the FAA has to translate the law into regulations.

    Doctor

    What do the new medical reforms mean for medical certificates and flying?  First, you still have to get a medical examination at some point in your flying career.  Student pilots will still need an initial medical examination. Initially, for pilots who have held a medical certificate at some point over the previous 10 years, a new medical examination may not be needed (this still has to be regulated by the FAA so exact details aren’t known yet).

    So, if you’re medical certificate has expired but you have had one in the past 10 years, you qualify.  But, if you have had your medical certificate revoked, suspended, withdrawn or denied, you don’t qualify.

    Once that student pilot receives the initial medical certificate (or the experienced pilot decides to start flying again), all that needs be accomplished is to take a free, online course on aeromedical factors every two years and meet with a physician at least once every four years.

    There are some operating limitations that will be put into place for folks operating without a third class medical.  Pilot’s can operate aircraft with no more than 6 seats that weigh less than 6,000 pounds, can carry 5 passengers, and are able to operate in day or night VFR or IFR conditions.  Pilot’s may not operate for hire, nor climb above 18,000 feet or fly faster than 250 knots.

    It will take some time for the FAA to put the regulations in place, but the process has begun.

  • Learning From Other’s Mistakes:  An Overview of the 2024 Piper PA-46 Accidents

    The Piper PA-46 series, which includes models like the piston engine Piper Malibu and Piper Mirage, and the turboprops Piper Meridian, M500, and M600, is a popular choice for private pilots and business aviation. Known for its impressive speed, range, and pressurization, the PA-46 is a very capable single pilot aircraft. However, like all high-performance aircraft, it presents its own set of challenges and risks, especially when pilot error or adverse conditions come into play.

    The 2024 PMOPA (Piper M-Class Owner’s and Pilot’s Association) Convention was the first weekend in November and one of the sessions every year is the PA-46 Safety Review.  Sadly, in 2024, the accidents involving various PA-46 models pointed out several areas related to decision making that all pilots need to put be aware of. These accidents highlight critical issues in weather awareness, pilot training, and decision-making, and they provide valuable lessons for other pilots in any type of aircraft.

    Overview of the 2024 Piper PA-46 Accidents

    The Piper PA-46 is generally regarded as a reliable and capable aircraft, but the safe outcome of a flight often times depends on the pilot’s decision making.  There always can be mechanical malfunctions, but those still require good pilot decision making to be able to walk away from the accident.

    In 2024, multiple accidents occurred involving different variants of the PA-46, with many of the accidents occurring during critical phases of flight like takeoff or landing. Some of the key factors contributing to these accidents included:

    1. Weather Challenges: In several cases, adverse weather conditions, such as low visibility, thunderstorms, or high winds, contributed to accidents. Despite most PA-46’s being equipped with NexRad and weather radar, pilots sometimes underestimated or misjudged the weather risks.
    2. Pilot Decision-Making: A recurring theme in these accidents was pilot error—specifically, poor decision-making when faced with challenging conditions. In some cases, pilots continued flights despite deteriorating weather or failed to react appropriately to emergency situations.
    3. Mechanical Failures: As with every airplane, systems fail on a Piper PA-46.  Several accidents were due to engine power loss.  Proper training teaches pilots how to have the right mindset and skills to handle those engine power loss situations, taking a bad situation and having the best possible outcome due to good decision making and gliding skills.

    Three Key Lessons for Pilots

    The Piper PA-46 accidents of 2024 serve as valuable reminders about the importance of pilot preparation, decision-making, and risk management. Here are three critical lessons pilots can take away from these accidents:

    1. Prioritize Pre-Flight Weather Planning

    Poor weather conditions were a significant factor in some of the crashes in 2024. Pilots of high-performance aircraft must place a strong emphasis on weather pre-flight planning, especially when flying into regions prone to rapidly changing weather or severe conditions and across frontal systems. Pilots should:

    • Stay up-to-date with weather briefings before and during the flight, including calls to Flight Service Station if there is serious weather along the route.
    • Be proactive in altering flight plans or delaying departures when weather conditions become unfavorable.
    • Utilize onboard weather radar and other tools to monitor changing conditions in real time and avoid nasty looking weather systems.  ADS-B and XM Weather are delayed information.  They are not meant to be used to find holes through storm systems.
    • Finally, don’t try to shoot through holes!  They are called sucker holes for a reason.

    2. Master Emergency Procedures

    Pilots of all aircraft, not just PA-46 models, need to practice engine-out procedures multiple times a year with an instructor, not just at recurrent training.  The goal is to make emergency procedures second nature which creates the right mindset to handle the emergency, creating a much better outcome. Training should focus on:

    • Engine-out procedures immediately after takeoff, climbing out at low altitude, and at cruise.
    • Performance with the propeller feathered and unfeathered, recognizing how the feathered prop increases glide range.
    • Practicing forced landings and other emergency scenarios regularly to build confidence and competence.

    3. Always Plan for an Emergency Landing

    It is very important to know your options in the event of an emergency. When flying over mountainous or remote areas, pilots should always have a contingency plan for where to land if something goes wrong.  An emergency engine out brief should be a part of every pre-takeoff briefing to put the pilot in the right mindset. Pilots should:

    • Brief an engine failure on the runway, low altitude, and at an altitude that allows for a safe return to the airport in the event of an engine failure as part of every pre-takeoff briefing.
    • Study the flight route in detail and identify suitable emergency landing sites along the way, especially when flying in areas with limited options.
    • Consider the terrain, weather conditions, and available options in the event of an engine failure or other emergency.
    • Use terrain awareness and other onboard tools to help identify suitable landing areas in real-time, including the ForeFlight Glide Advisor.

    Conclusion

    The Piper PA-46 series, while a capable and reliable aircraft, demands a high level of skill and preparation from its pilots. The accidents in 2024 serve as a sobering reminder of the critical importance of weather awareness, emergency training, and proper flight planning. By learning from these accidents, pilots can make better decisions, have the right mindset, and reduce the risk of similar accidents in the future.

    By prioritizing weather awareness, mastering emergency procedures, and always having a contingency plan for forced landings, pilots of the Piper PA-46 can improve their ability to handle the challenges posed by these high-performance aircraft. These lessons are not just for PA-46 pilots, but for all pilots striving to fly safely and confidently.

  • Cirrus Austin, Texas Get Together

    The South Central Cirrus Owner’s and Pilot’s Association (COPA) Region is hosting a Fly In dinner at the Austin Executive Airport (KEDC) on Friday, October 8th.  The event is from 5-9pm.  There will be a cash bar, a catered dinner ($25/person), a special guest speaker, and great mingling amongst the Cirrus owners and pilots in our region!

    Fly in or drive to EDC.  The dinner will be in the Henrickson Jet Center’s main hangar.  You will need to RSVP so event organizers can get a proper head count.  The link to RSVP is here.

    Cirrus Aircraft will be bringing two new 2016 SR22s that will be available for viewing.

    Register for the CATGT before the slots are all filled up!

    cirrus-sr22-sunset

4 Comments

  1. I for one would prefer a yoke to a side stick any day, but I must be in the minority…
    I would also recommend staying with the g3x configuration rather than locking into the airframe tied nxi configuration. This hasn’t, and isn’t working well for legacy g1000 owners at all.
    However, it is a good looking plane, and the thought of 400knots with a jet for less than a meridian is very intriguing!
    Best of luck!

  2. Looks like a cool plane, I’m not a big fan of the vision jet. But I’d prefer a yoke, when the turbulence gets nasty I can’t see a non fbw side stick giving you the ability to have as much control as a yoke, or the Embraer style horns.

Leave a Reply

Your email address will not be published. Required fields are marked *