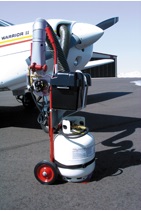
On March 30th, Texas Governor Greg Abbott issued an Executive Order mandating that all travelers (including Texas air travelers operating or traveling in private aircraft) from the following designated areas were to self-quarantine for 14 days (or the extent of their stay in Texas, whichever was shorter) upon entering the State:
California
Louisiana
Washington State
Atlanta, Georgia
Chicago, Illinois
Detroit, Michigan
Miami, Florida
If you traveled to Texas by air from any of the above designated areas, you are required to fill out the Arrivals from Areas Designated for Mandatory Self-Quarantine Form. Failure to do so could lead to a $1,000 fine or 180 days in jail, or both. For private aircraft owners/operators, put your Tail Number in for Flight Number and “Private” for Airline.
Aircraft owners, stay away from the designated areas listed above and you won’t have any worries. A lot of you reading this are from Texas, so make Louisiana a fly over state for now and don’t make any landings in Cajun country.
I was flying in the Rio Grande Valley in south Texas a few weeks ago and heard an IFR clearance given to a King Air that pricked my ears up. It was a clearance from CRP to LRD, but the routing was one you don’t hear too often anymore. Because of active military airspace, the routing was via a radial and DME off the CRP VOR (so a point defined by the radial and DME) to another radial and DME point off the LRD VOR.
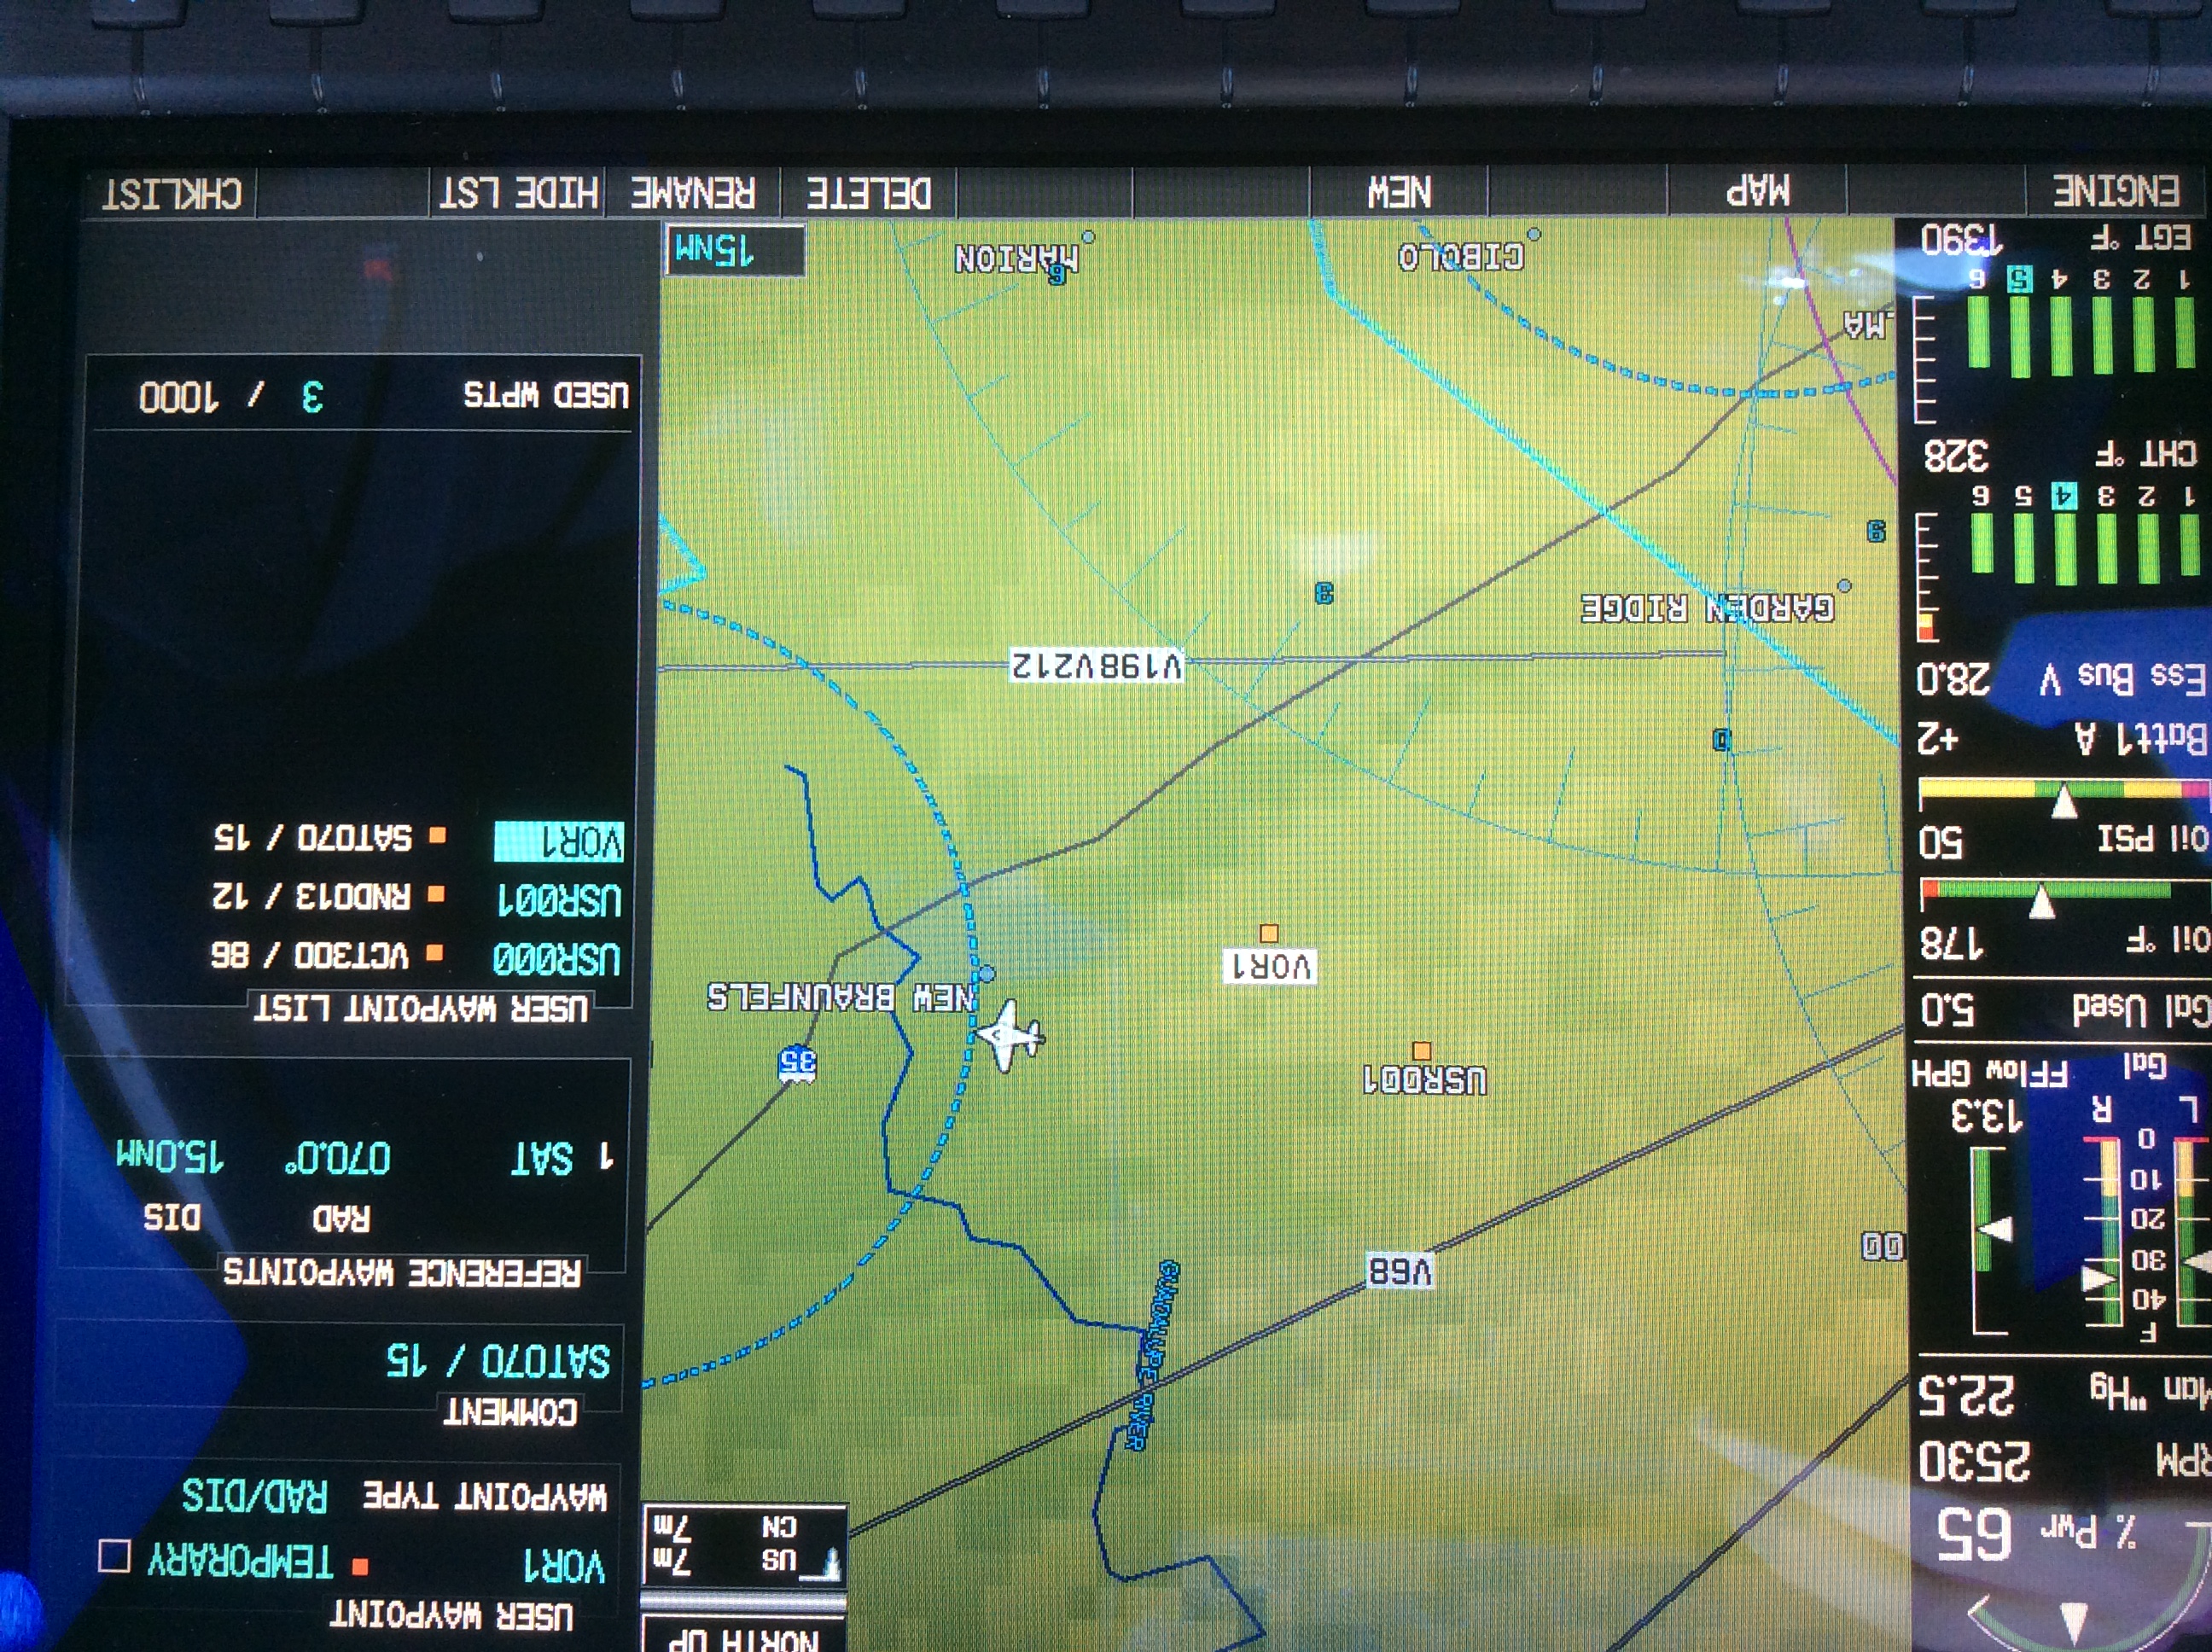
It took me a second to think about how to do this the easiest (without setting up the VOR and watching the DME). After a moment’s thought, it’s actually a snap with the G1000. You create 2 user waypoints, one for each Radial/DME spot, then put those 2 user waypoints in your Flight Plan.
Here’s how.
Step 1
Using the big knob, go to the Waypoint chapter. Once there, scroll down to the User Waypoint page using the small knob.
Step 2
Press the New soft key. If you want to name the waypoint something specific, you can do that at the top of the page. If not, it will default to something like VOR 1 or VOR 2.
Step 3
Under Waypoint Type, use the small knob to select RAD/DIS (stands for Radial/Distance).
Step 4
Under Reference Waypoints, again using the small knob (or your keypad), type or dial in the VOR identifier, the radial from that VOR, and the DME distance. Press enter and you are done.
Once you have both User Waypoints created, then just put them in your flight plan (if you forget what you named them, you can just go back to the User Waypoint page), and off you go.
I was flying in the Rio Grande Valley in south Texas a few weeks ago and heard an IFR clearance given to a King Air that pricked my ears up. It was a clearance from CRP to LRD, but the routing was one you don’t hear too often anymore. Because of active military airspace, the…
The Malibu and M-Class Owner’s and Pilot’s Association (MMOPA) announced new Safety Foundation Training videos in September. The videos are aimed at both new Piper PA46 pilots and existing Piper PA46 pilots, all in the effort to fly the Piper PA46 to the highest and safest standards.
Six videos have been released thus far, with the promise of more to come. The topics of the first videos are:
Instrument Approach
Visual Approach
Manual Gear Extension
Emergency Descent
Descent Planning
Takeoff and Climb
Eventually, the goal is to release high quality training videos encompassing all aspects of Piper PA46 flying.
To view the videos, you will need an MMOPA membership. The link to the MMOPA Safety and Education Foundation video page is: https://www.mmopasafety.org/education/
The Malibu and M-Class Owner’s and Pilot’s Association (MMOPA) announced new Safety Foundation Training videos in September. The videos are aimed at both new Piper PA46 pilots and existing Piper PA46 pilots, all in the effort to fly the Piper PA46 to the highest and safest standards. Six videos have been released thus far, with…
Flying a missed approach can be stressful enough. When you haven’t done one in a while and your GPS isn’t showing you how to get to the missed approach point and you can’t remember which button to press, that adds a lot more stress. Recipe for disaster? Quite possibly!
No need to fear, we are here to help. The procedure for getting a Garmin 530 or 430 to give you missed approach guidance is actually simple and straightforward, if you know what to do!
Note:Because of the variety of different autopilot configurations in different airplanes, this article will focus solely on the GPS.
What the GPS is Thinking
The way Garmin designed the Garmin 530 and Garmin 430 is to be as helpful to pilots as possible. Their thinking was, 95% of the time, a pilot will make a landing on an instrument approach. This is pretty accurate as most of the time, this is what happens. Most general aviation pilots don’t fly approaches to minimums all that often, thus negating the need for a missed approach.
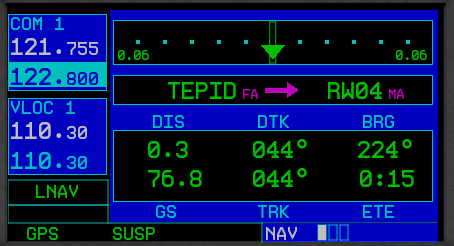
Garmin designed their software with this in mind. When an airplane crosses the missed approach point, the GPS will go into what’s called suspend mode (a SUSP annunciation appears above the OBS key). It will keep the missed approach point as the active waypoint because it assumes the pilot is going to land.
This can be confusing to pilots. This is what happens when software engineers and pilots come together. Engineers often believe they are smarter than pilots! (See the Airbus fly by wire roll out)
The Procedure
In the case of a missed approach, the button pushing on the GPS is actually relatively simple. There is no SUSP key to take the GPS out of SUSP mode (thanks Garmin!). Instead, you press the OBS key. This will take the GPS out of SUSP mode, making the first waypoint on the missed approach procedure the active waypoint. Your GPS will now give you guidance on the missed approach procedure.
If you are going missed off an ILS, LOC, or VOR approach, then there is one more key you’ll have to press. Your CDI needle (whether it is digital or analog, an HSI or just a CDI gauge) will be reading off the NAV radio and your CDI indication on the GPS will be VLOC. After you press the OBS key, press the CDI key on the GPS so you will start getting course guidance from the GPS again.
That’s it. Button pressing on the different autopilots will vary, but if you are familiar with yours, you’ll be able to tell it to follow the GPS and climb to the proper altitude.
Flying a missed approach can be stressful enough. When you haven’t done one in a while and your GPS isn’t showing you how to get to the missed approach point and you can’t remember which button to press, that adds a lot more stress. Recipe for disaster? Quite possibly! No need to fear, we are…
Recently, I did my TBM and Meridian recurrent training with Joe Casey of Casey Aviation. I always like being challenged my more seasoned instructors than me because I always get to learn something. When I learn something, it makes me a better instructor and allows me to give better instruction to my customers. Plus, there is still a bunch that I don’t know!
Joe has a podcast titled The Malibu Guru (because he really is the Malibu guru!). During our training, we did a podcast together and he interviewed me. I get to tell about Texas Top Aviation and some exciting things coming up this summer (hint: the biggest exciting thing is called The Aviator’s Academy). Before I give too much away, take a listen to the podcast.
Recently, I did my TBM and Meridian recurrent training with Joe Casey of Casey Aviation. I always like being challenged my more seasoned instructors than me because I always get to learn something. When I learn something, it makes me a better instructor and allows me to give better instruction to my customers. Plus, there…
Figuring out the pattern altitude at an airport should be pretty simple, right? But, in this day of helpful technology, most pilots actually get it wrong. How can you always get it right? Well, it just takes about an extra 15 seconds. Here’s how.
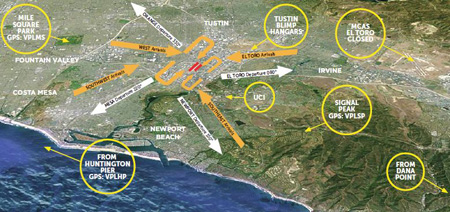
John Wayne Airport Traffic Patterns
As outlined in the Aeronautical Information Manual, section 4-3-3, “traffic pattern altitudes for propeller-driven aircraft generally extend from 600 feet to as high as 1,500 feet above the ground.” Further, in the Pilot’s Handbook of Aeronautical Knowledge on page 13-10, it states: “1,000 AGL is recommended pattern altitude unless established otherwise.”
Okay, so for piston driver’s, we’ve got it narrowed down to 1,000 AGL (Above Ground Level for those who don’t like acronyms). But wait! There’s that very important phrase at the end of the last quote: “unless established otherwise.” That means not all airports have traffic pattern altitudes of 1,000 AGL, or else they wouldn’t put that line in there!
How do you find out what the TPA (Traffic Pattern Altitude) is for a certain airport if it’s not 1,000 AGL? Great question! Your first guess is probably to look on Foreflight. Though this is a good start, it is not the full answer.
Let’s use an example. Look up KAQO, the Llano Airport on Foreflight. At the top of the page, the airport elevation is stated as 1,101′ MSL and the pattern altitude is stated as 1,902′ MSL. From what we just learned, 1,902′ MSL is not 1,000 AGL, so is 1,902′ MSL otherwise established?
On the Airports page with KAQO pulled up, tap the A/FD tab, second to last on the left. Scroll down to Llano Muni. Read the whole entry. Does it state in the entry that pattern altitude is different than 1,000 AGL? It sure doesn’t. So, because it is not otherwise established, pattern altitude at KAQO is 2,102′ MSL not 1,902′ MSL.
Where did Foreflight get that? I have no idea. Too often, though, pilots look at the Foreflight pattern altitude and don’t actually check the Airport Facilities Directory (A/FD). Then, they get the pattern altitude wrong.
What does it look like when pattern altitude is otherwise established? Look up KSGR, Sugar Land Regional, on your Foreflight app. Foreflight states the elevation as 82′ MSL and the Pattern Altitude as 1,000′ MSL. Is this correct? Well, tap that A/FD button again and let’s find out.
On the second line of the A/FD entry, it says TPA-See Remarks. Down in the remarks section, we find the following:
TPA-1000 (918) single engine piston acft, TPA-1500 (1418) for twin and turbojet acft, TPA-500 (418) for helicopters within 2NM.
Foreflight got it right this time for single engine pistons, but if you are in a twin, the pattern altitude is different. What’s the lesson here? Always check the A/FD and don’t always go by what Foreflight says. The A/FD is always right and usually has a little more detail to help set you straight.
One last thing. Both the AIM and the Pilot’s Handbook of Aeronautical Knowledge, when talking about pattern altitude, state, “When operating at an airport, traffic pattern altitudes should be maintained unless otherwise required by the applicable distance from cloud criteria in…section 91.155.” 91.155 defines basic VFR weather minimums. So, to fully interpret what the AIM is saying, we have to take into account the type of airspace we are in to determine if we can safely and legally operate at pattern altitude at a particular airport.
For example, let’s say we are at KCVB, the Castroville Airport. Pattern altitude there is 1,602 feet, which is 829 AGL. CVB is Class G airspace up to 700 AGL, then Class E above that. Let’s say there is a 700 AGL broken cloud layer. Pattern altitude is 829 AGL, so you won’t be able to get up that high with a broken ceiling. What altitude can you do pattern work at to stay legal?
Class G VFR weather minimums during the day below 1,200 AGL is 1 SM visibility and clear of clouds. So, legally, you could fly at 699 AGL (which at CVB would be 1,472 MSL) while in the pattern and be legal. Safe? Maybe, but probably not if you are skimming the base of the clouds. Is 1300 MSL a safer pattern altitude in this example? Well, that is 527 AGL, so probably not, since towers tend to stick up that high sometimes.
Let’s go back to KSGR and put a 1,000 AGL overcast ceiling there. SGR is Class D airspace and we already determined pattern altitude there was 1,000 MSL for piston singles. VFR visibility and cloud clearance requirements in Class D airspace are 1,000 feet above clouds, 500 feet below clouds, and 2,000 feet horizontally from the clouds with 3 SM visibility. In order to stay 500 feet below the clouds, you would be flying a 582 MSL pattern. Safe? Probably not, though it is legal.
To summarize, don’t take Foreflight’s word for pattern altitude. Cross reference the A/FD (it only takes 15 seconds at the most) to verify. If it’s cloudy, it’s really best to stay on the ground, but if you want to find out your legal pattern altitude with a cloud deck, cross reference 91.155. I don’t recommend flying below pattern altitude because it is there for a reason.
Figuring out the pattern altitude at an airport should be pretty simple, right? But, in this day of helpful technology, most pilots actually get it wrong. How can you always get it right? Well, it just takes about an extra 15 seconds. Here’s how. As outlined in the Aeronautical Information Manual, section 4-3-3, “traffic pattern…
It’s summertime and the weather is hot! Over this dry, sunny season, winter flying is probably the last thing on your mind. However, now is the perfect time to start getting things in place for winter and that includes having a plan for taking care of your airplane.
Why are preparations for winter ops needed in the first place? Cold weather, especially during the engine start and warm up period, can be very damaging to your engine if precautions aren’t taken to ensure that safe temperatures exist inside the engine before you turn the key. I always thought that the biggest problem associated with cold weather was engine oil. The logic is since cold oil is thicker and less viscous as the temperature drops, it is not able to circulate quickly throughout the engine to provide proper lubrication upon starting.
While cold oil may be a factor, the introduction of multiviscocity oils has greatly reduced that issue. The real problem is created by the different ways that various parts of the engine respond to heat. Because aluminum expands more quickly when heated than steel does, the pistons (made of aluminum) expand more quickly than the cylinders (made of steel). This can lead to scuffing on the sides of the cylinder barrel. In the same way, differential heating can reduce clearances which are designed to provide cooling oil to bearings and other vital engine parts, thereby causing damage which greatly reduces the life of the engine.
So how cold is TOO cold? Unfortunately, that is a difficult question to answer. Because there is so much variation between engines, airplanes, and environments, there really isn’t any one specific answer. An older, more worn out engine may actually be less susceptible to cold weather damage than a newer, tighter engine because its internal clearances are probably not as tight as they were a few thousand hours ago. I have heard of some people who preheat their airplanes anytime the temperature falls below about 40 degrees. For us northerners, this seems excessive. On our E33A Bonanza which has a Continental IO520, we generally preheat the airplane when it is cold soaked in temperatures below freezing (32° F).
Here are a few of the best ways to get your machine ready for a cold weather flight:
Heated Hangar: Nothing beats a heated hangar for warming up an airplane. The warm air is evenly distributed around the engine and in the cockpit (your avionics and gyros will thank you!). The airplane will need to be in the hangar for a while in order to warm up the guts of the engine. Often, the easiest way is to have the airplane pulled in the evening before the planned departure and left overnight. Many FBOs will hangar airplanes overnight for a small fee and it is well worth the price. We almost always have our charter airplanes put into hangars overnight when on a winter trip to ensure that we don’t have any trouble when we depart the next day. This practice has the added benefit of keeping the airframe clear of any ice and snow that may accumulate before you are scheduled to leave.
Electric Engine Heaters: Multipoint electronic heaters use heating pads that are placed around the engine in order to heat up the various components such as cylinders, the oil pan and crankcase. Most of these systems are designed to be activated by being plugged into a wall outlet with an extension cord. Preheating for a winter flight is as simple as going to the airport the night before and plugging it in. Two well known manufacturers of multipoint engine heaters are Reiff and Tanis. These systems are relatively inexpensive and can be a life saver if you regularly travel in colder climates. If an engine heater is the right choice for you, it is recommended to avoid less expensive models that heat only the oil pan.
Pictured above is the Reiff system. The heated bands go around the cylinder bases and the pad at the bottom of the picture heats the oil pan. Picture Courtesy of www.reiffpreheat.com
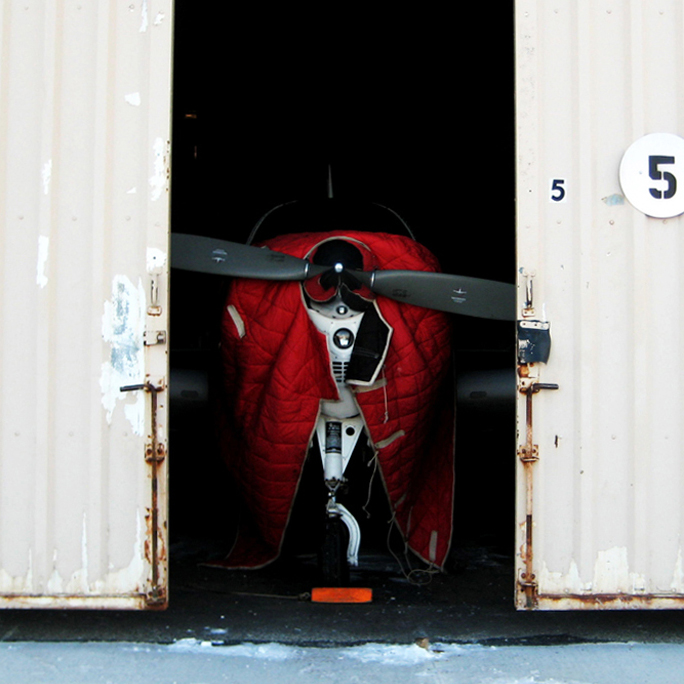
Covers and Blankets: If it is especially cold or you have to preheat outside, having something to insulate the cowling and keep the wind out can be very useful. Regular blankets will work long as you can secure them in place. If you have an ongoing need for additional insulation, there are companies that make custom blankets and propeller covers to fit your airplane. If you are landing and then taking off again relatively quickly, using a few blankets and cowl plugs will work nicely to keep the engine warm while it is sitting outside. In a pinch, placing a couple of powered light bulbs in the cowling overnight with insulation on top can result in sufficient temperatures for starting the engine.
Even with the multipoint electric heater, we still use a blanket while preheating to help keep everything toasty.
Forced Air: This method is used widely by FBO’s and flight schools. Hot air is produced in a portable heater and is then pumped into the engine compartment via the openings at the front or bottom of the cowling. This method has the benefit of not requiring any additional equipment to be installed on the aircraft beforehand and can be very effective provided there is adequate time for the engine to heat completely before removal.
Pictured above is a Red Dragon engine preheater. Photo courtesy of Red Dragon’s website: www.flameengineering.com
Winter Baffles: When the air temperature starts to drop into the teens and lower, you may find it difficult to keep your engine temperatures warm enough in cruise flight. The problem is that the air entering the cowling inlets is so cold that it overcools the engine. The solution is to install additional baffling in the engine inlets to reduce the amount of airflow into the cowling. These additional baffles are usually just sheets of aluminum that are cut to the correct size and are bolted in and removed quickly and easily as needed. Some pilots swear by them while others complain that they can cause uneven cooling. If you have questions about winter baffling, I’d suggest talking to your mechanic about your specific airplane.
Winter flying can be extremely rewarding. After their hands thaw from preflight, a pilot is often rewarded with smooth air, improved performance and outstanding views. Just don’t forget to prepare the airplane for the cold. The preparation is often as simple as plugging in an extension cord or making a phone call to the FBO. So whether you live in the north or the south, take good care of your engine so that it can keep taking good care of you.
It’s summertime and the weather is hot! Over this dry, sunny season, winter flying is probably the last thing on your mind. However, now is the perfect time to start getting things in place for winter and that includes having a plan for taking care of your airplane. Why are preparations for winter ops needed…