I was flying in the Rio Grande Valley in south Texas a few weeks ago and heard an IFR clearance given to a King Air that pricked my ears up. It was a clearance from CRP to LRD, but the routing was one you don’t hear too often anymore. Because of active military airspace, the routing was via a radial and DME off the CRP VOR (so a point defined by the radial and DME) to another radial and DME point off the LRD VOR.
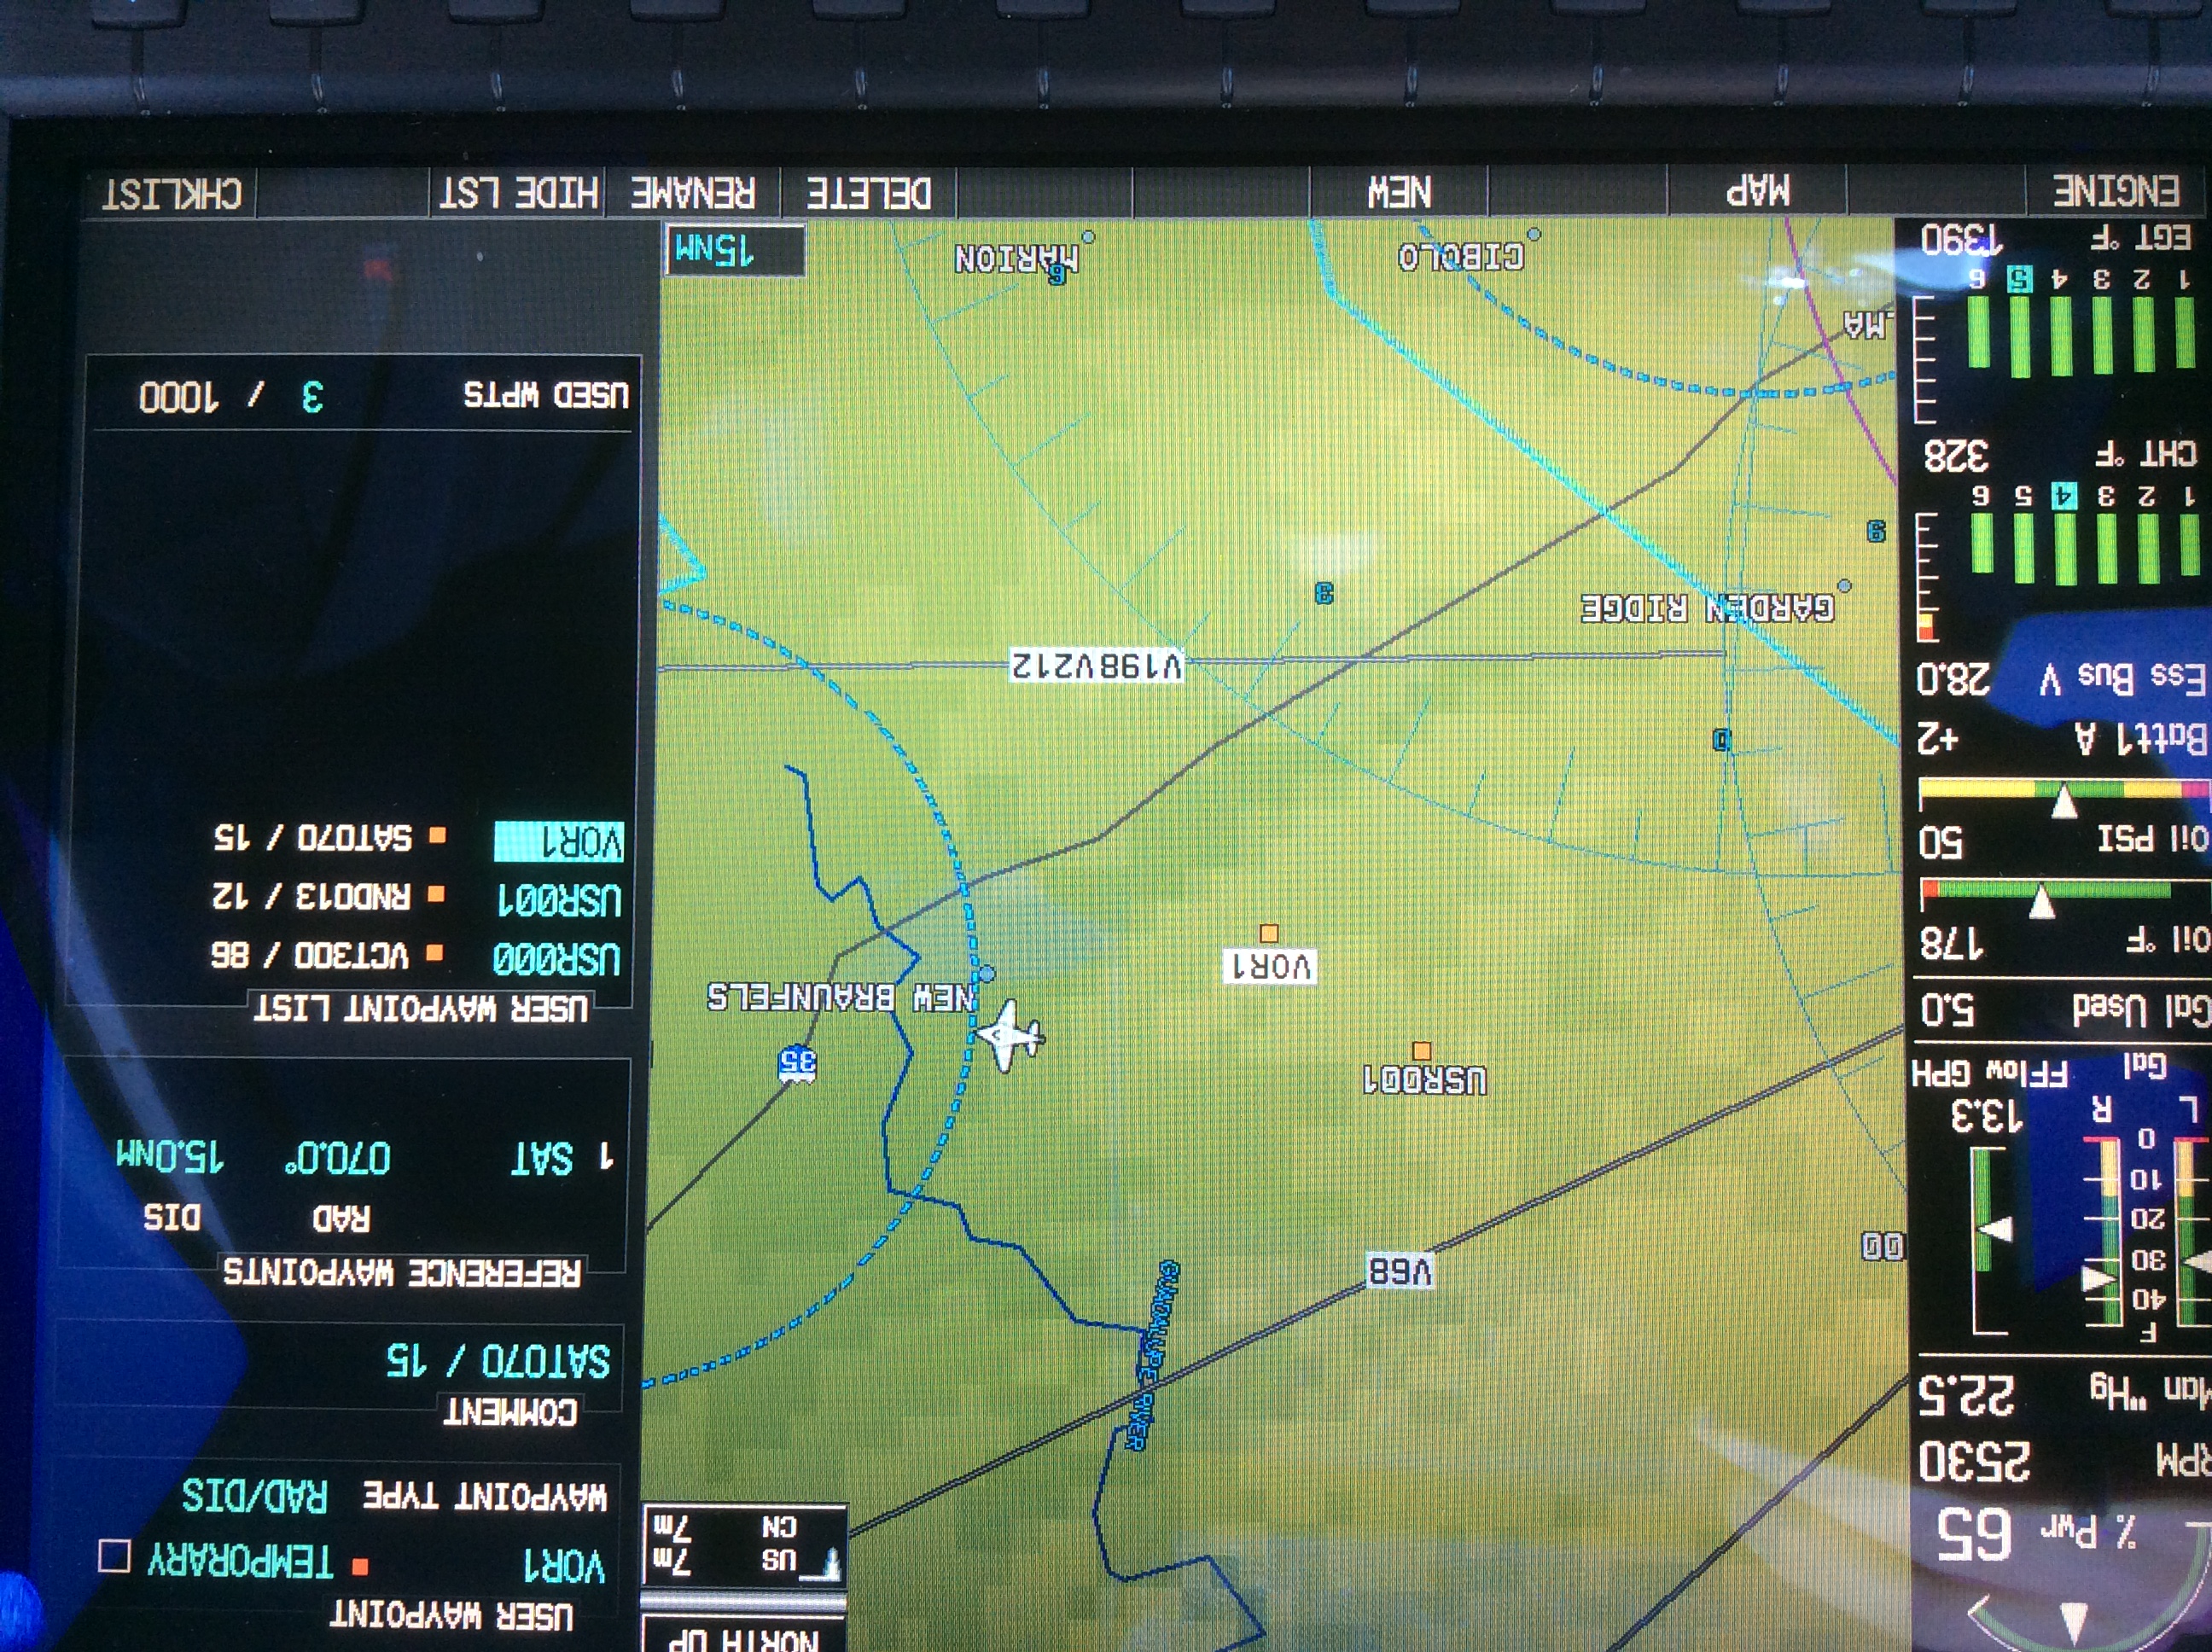
It took me a second to think about how to do this the easiest (without setting up the VOR and watching the DME). After a moment’s thought, it’s actually a snap with the G1000. You create 2 user waypoints, one for each Radial/DME spot, then put those 2 user waypoints in your Flight Plan.
Here’s how.
Step 1
Using the big knob, go to the Waypoint chapter. Once there, scroll down to the User Waypoint page using the small knob.
Step 2
Press the New soft key. If you want to name the waypoint something specific, you can do that at the top of the page. If not, it will default to something like VOR 1 or VOR 2.
Step 3
Under Waypoint Type, use the small knob to select RAD/DIS (stands for Radial/Distance).
Step 4
Under Reference Waypoints, again using the small knob (or your keypad), type or dial in the VOR identifier, the radial from that VOR, and the DME distance. Press enter and you are done.
Once you have both User Waypoints created, then just put them in your flight plan (if you forget what you named them, you can just go back to the User Waypoint page), and off you go.
I was recently clued in to a really cool (and very cost efficient) iPad yoke mount.
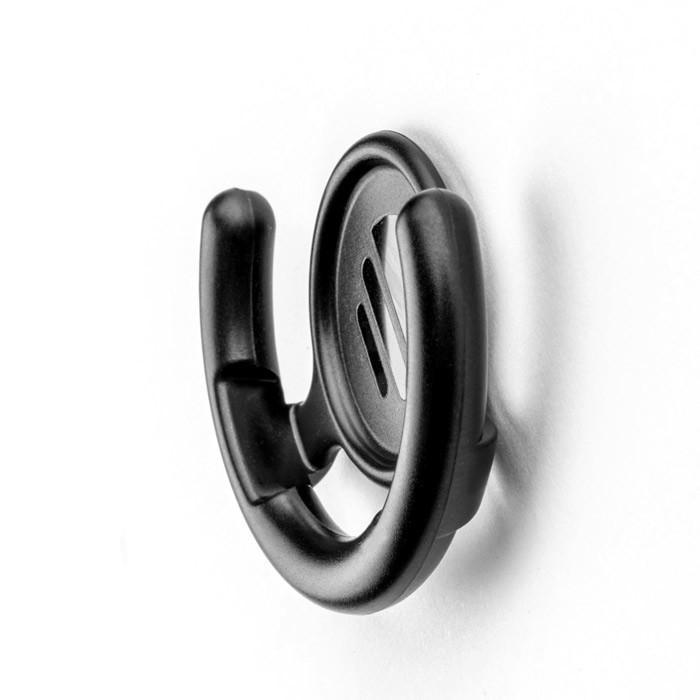
It’s called a PopSocket and you won’t find it on any aviation website (I have to credit Joe Casey of Casey Aviation with this nifty find).
It’s very simple. You take the mount (see right) and stick it to your yoke. Then you pick one of a ton of designs from PopSocket and stick it to the back of your iPad (you can even create your own design! B2 Bomber anyone?).
It’s low profile, doesn’t get in the way of anything, and is easily removable. The PopSocket mounts are $10 apiece (depending on the size of your iPad, you may want to get 2). The PopSocket is $10, so at the most, you’ll be in $40 plus tax and shipping. Most mounts on Sporty’s are upwards of $50 and require a lot of installation, are big and bulky, and usually require lots of juggling to get the iPad in and out of the mount.
Give the PopSocket a try.
I was recently clued in to a really cool (and very cost efficient) iPad yoke mount. It’s called a PopSocket and you won’t find it on any aviation website (I have to credit Joe Casey of Casey Aviation with this nifty find). It’s very simple. You take the mount (see right) and stick it to…
We’ve all been there. You’re flying into an unfamiliar airport at night, you’re having difficulty seeing the field, and trouble identifying the runway. Airports can be hard to identify for a variety of reasons, but approaching in darkness only makes it more difficult. Perhaps the airport is located in a densely populated area and the airport lights bleed into the city lights. Maybe the airport that you’re approaching is located amid terrain that obstructs your view.
Situations like these are not uncommon for charter pilots. Just a few evenings ago I was descending IFR into Asheville, NC (KAVL) on a dark night with high overcast and scattered showers. Although the airport was VFR, the surrounding hills made me doubtful that I would be able to see the field in time to safely and comfortably descend for the visual approach that I was expecting.
Fortunately, there are some things we can do to help find our destination and set us up for the approach. Here are a few tricks that I use regularly when I find myself in this position:
When flying into an untowered/closed tower airport: Make sure that you have the right lighting frequency. Some airports have pilot-controlled lighting that is operated on a different frequency than the CTAF. If the lights don’t seem to be working, consult your AFD. If the AFD advises that your frequency is correct, double check the NOTAMs to make sure that the lights haven’t been taken out of service.
For towered airports: Ask the tower controller to turn up the intensity of the runway lights. This has helped me find the runway countless times. This request can be especially useful at airports that are located in a highly lit area. Controllers are happy to honor this request and will often leave the lights at the bright setting until you advise them that you are ready for them to be turned back to normal intensity.
Load an approach: If you are an instrument rated pilot, loading an instrument approach is a great way to get oriented with a runway when you need a little help. You may need to coordinate with the tower or controlling agency if you want to fly the approach, but this has the added bonus of giving the pilot altitudes for terrain/obstacle clearance should there be any hazards present.
Use OBS mode: If you are flying an airplane that has equipment capable of doing so, you can use the Omni Bearing Selector (OBS) button to help align you with the runway. If using this strategy, just remember: THIS IS NOT AN INSTRUMENT APPROACH. It will not provide you with obstacle clearance, nor will it line you up directly with the runway.
The pictures below should help clarify how to use the OBS to assist in airport orientation.
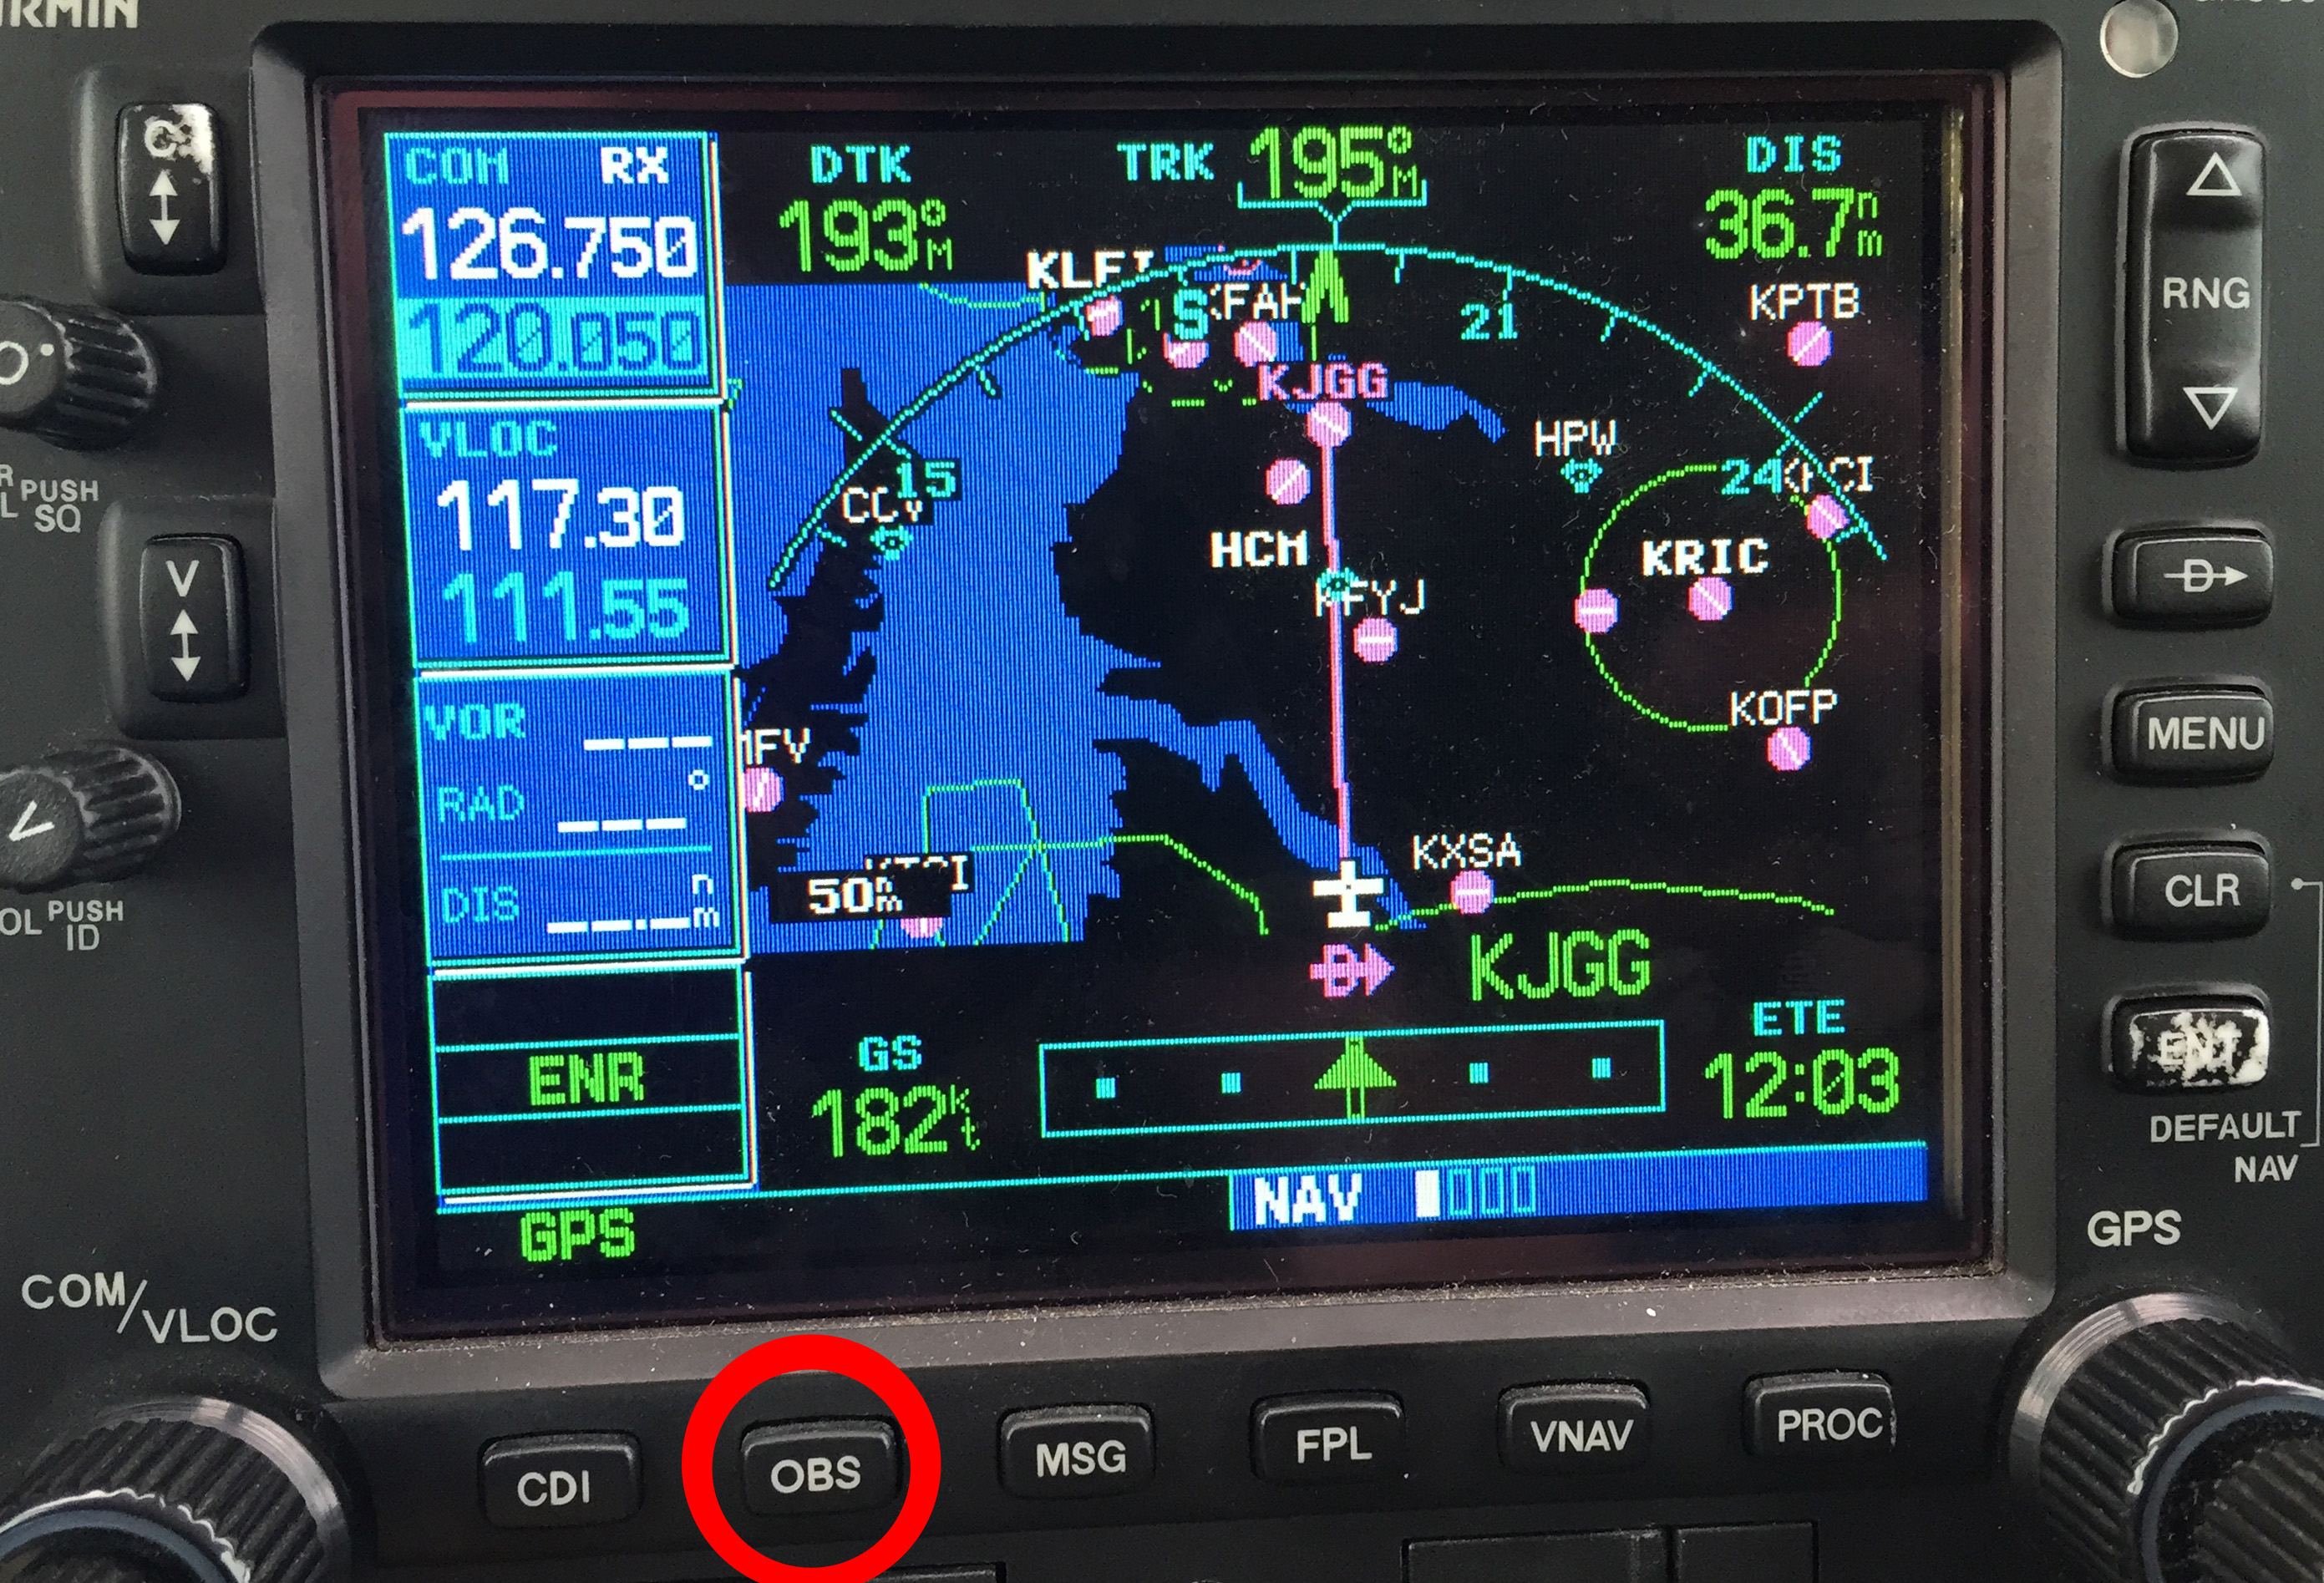
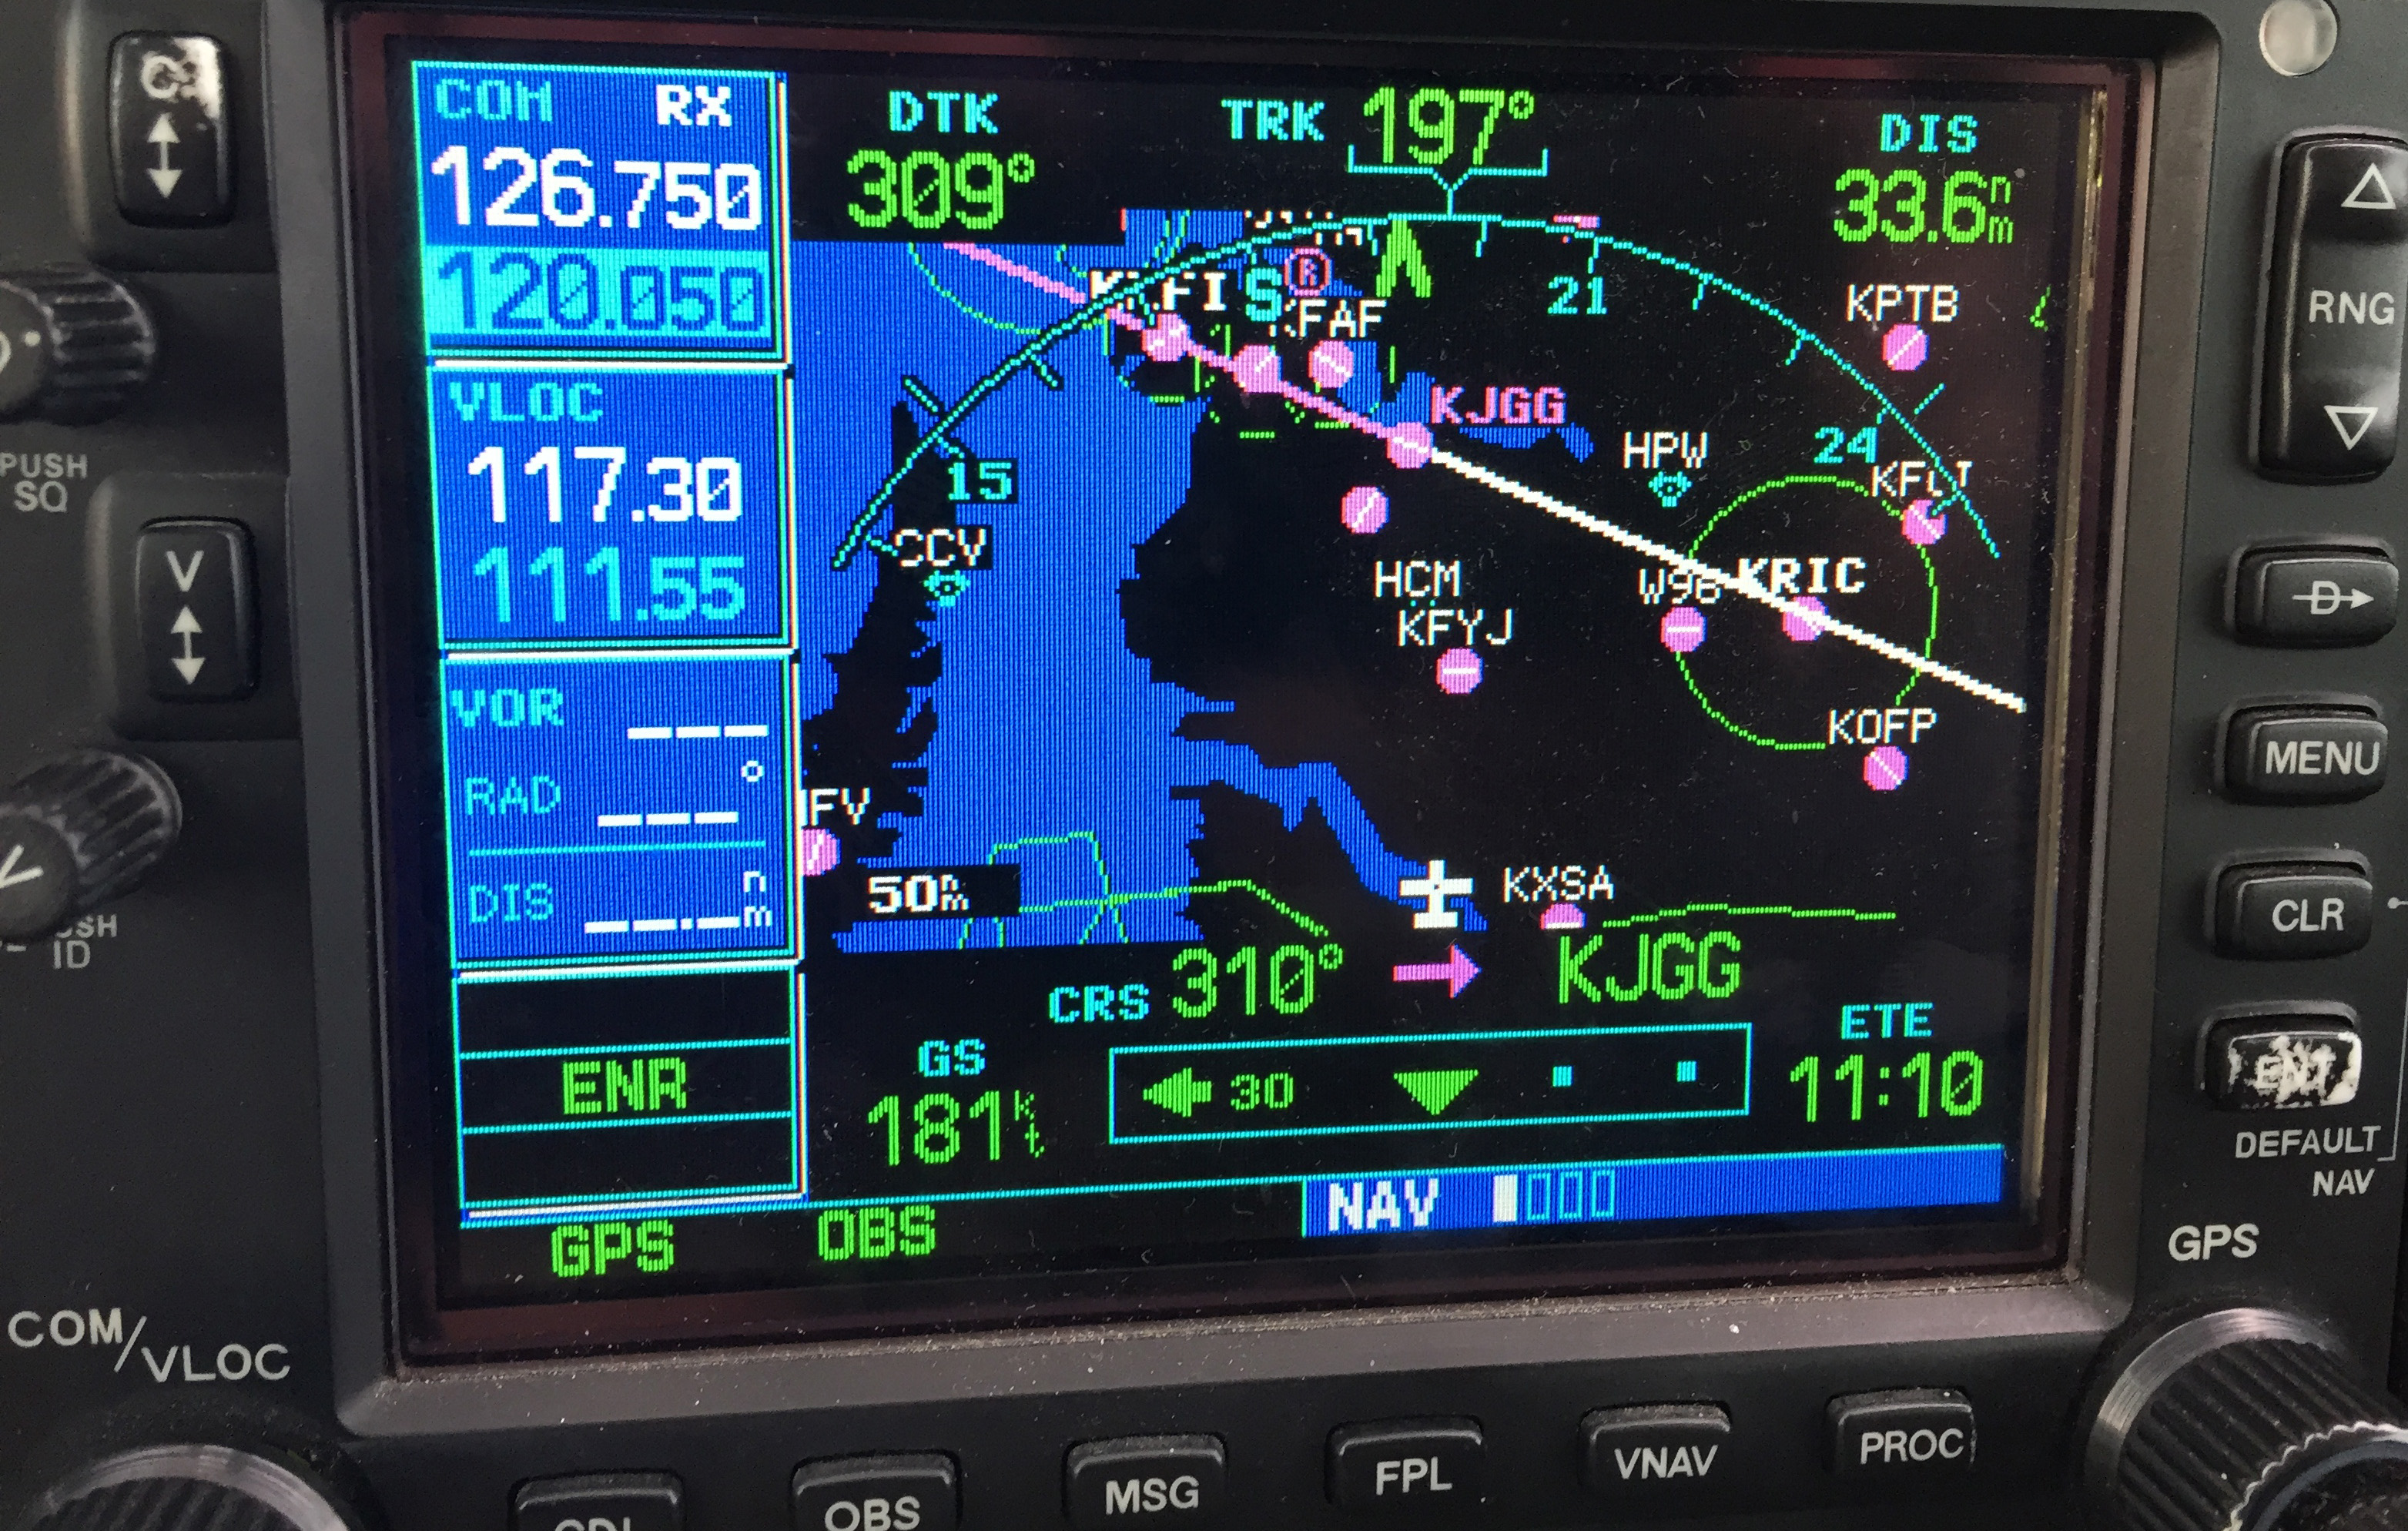
Step 1- Have the destination set as the next way point in your flight plan. In the picture below, The GPS is set to navigate direct to KJGG. Press the OBS button (circled in red) to engage the OBS mode.
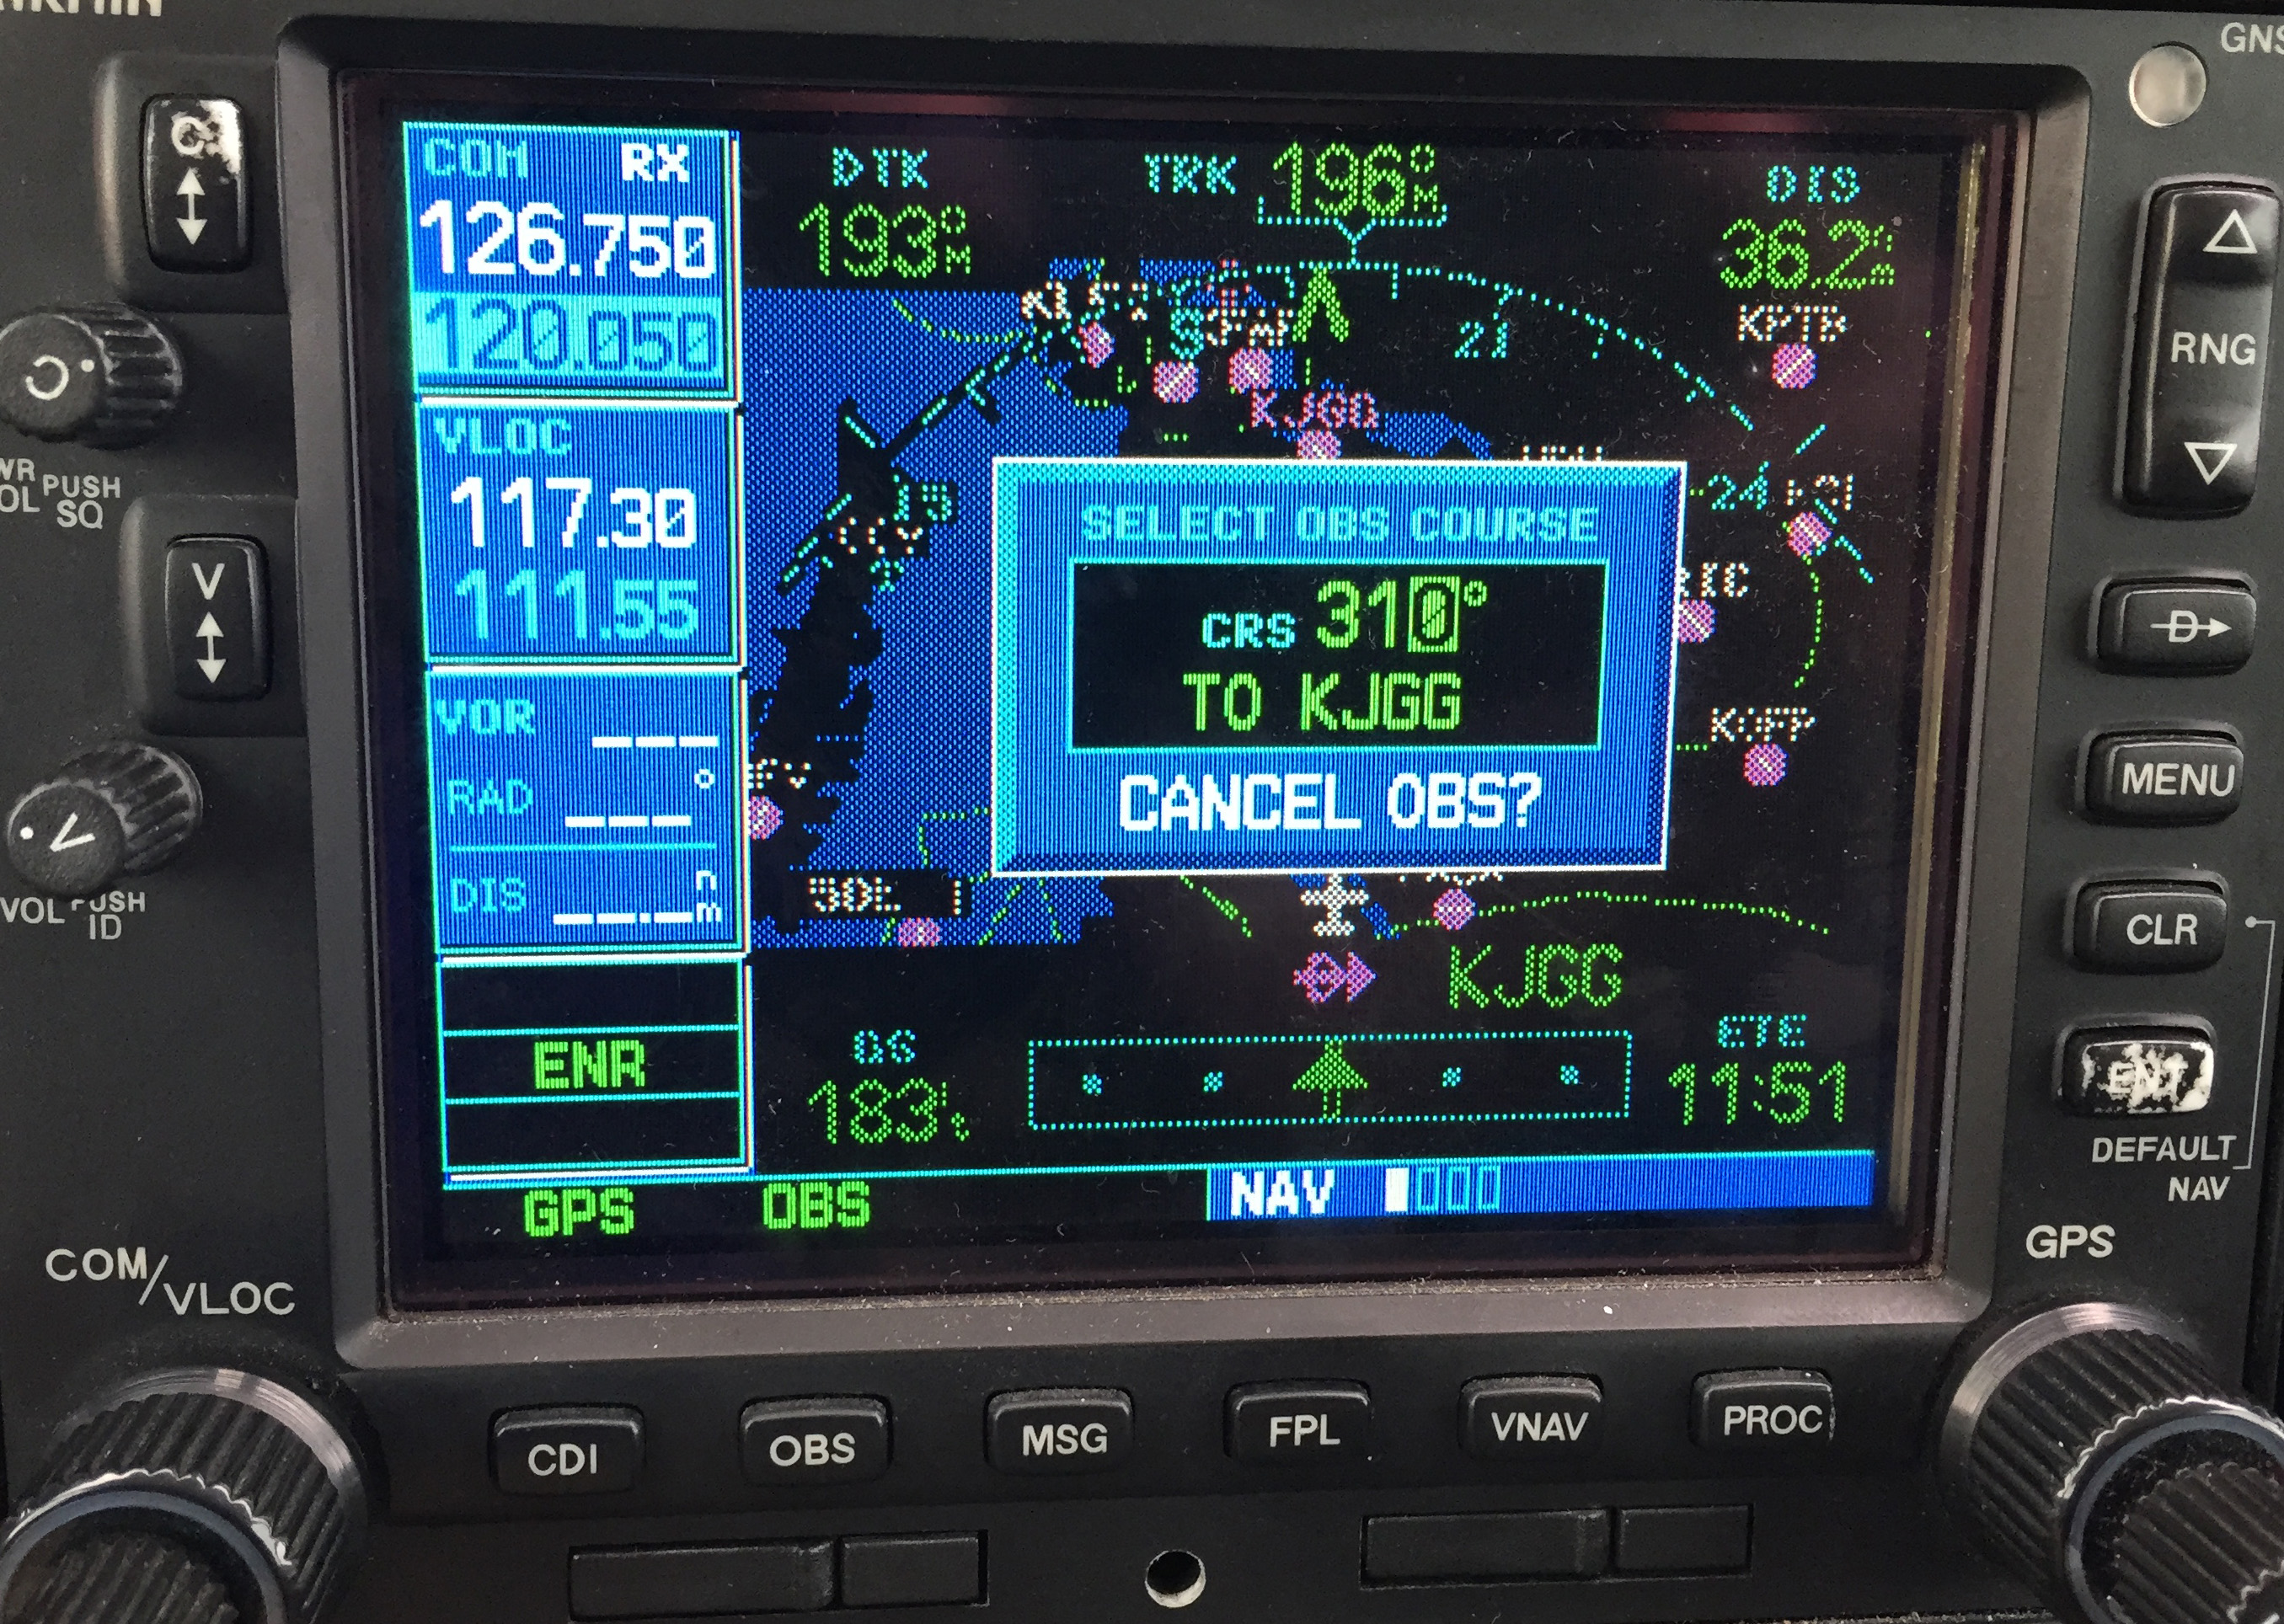
Step 2- Once OBS is selected, use either the window on the screen (which should come up automatically when you press the button in step 1) or the OBS selec tor on your navigation head to select the inbound radial. In this example, I have selected 310 degrees, the landing runway at KJGG.
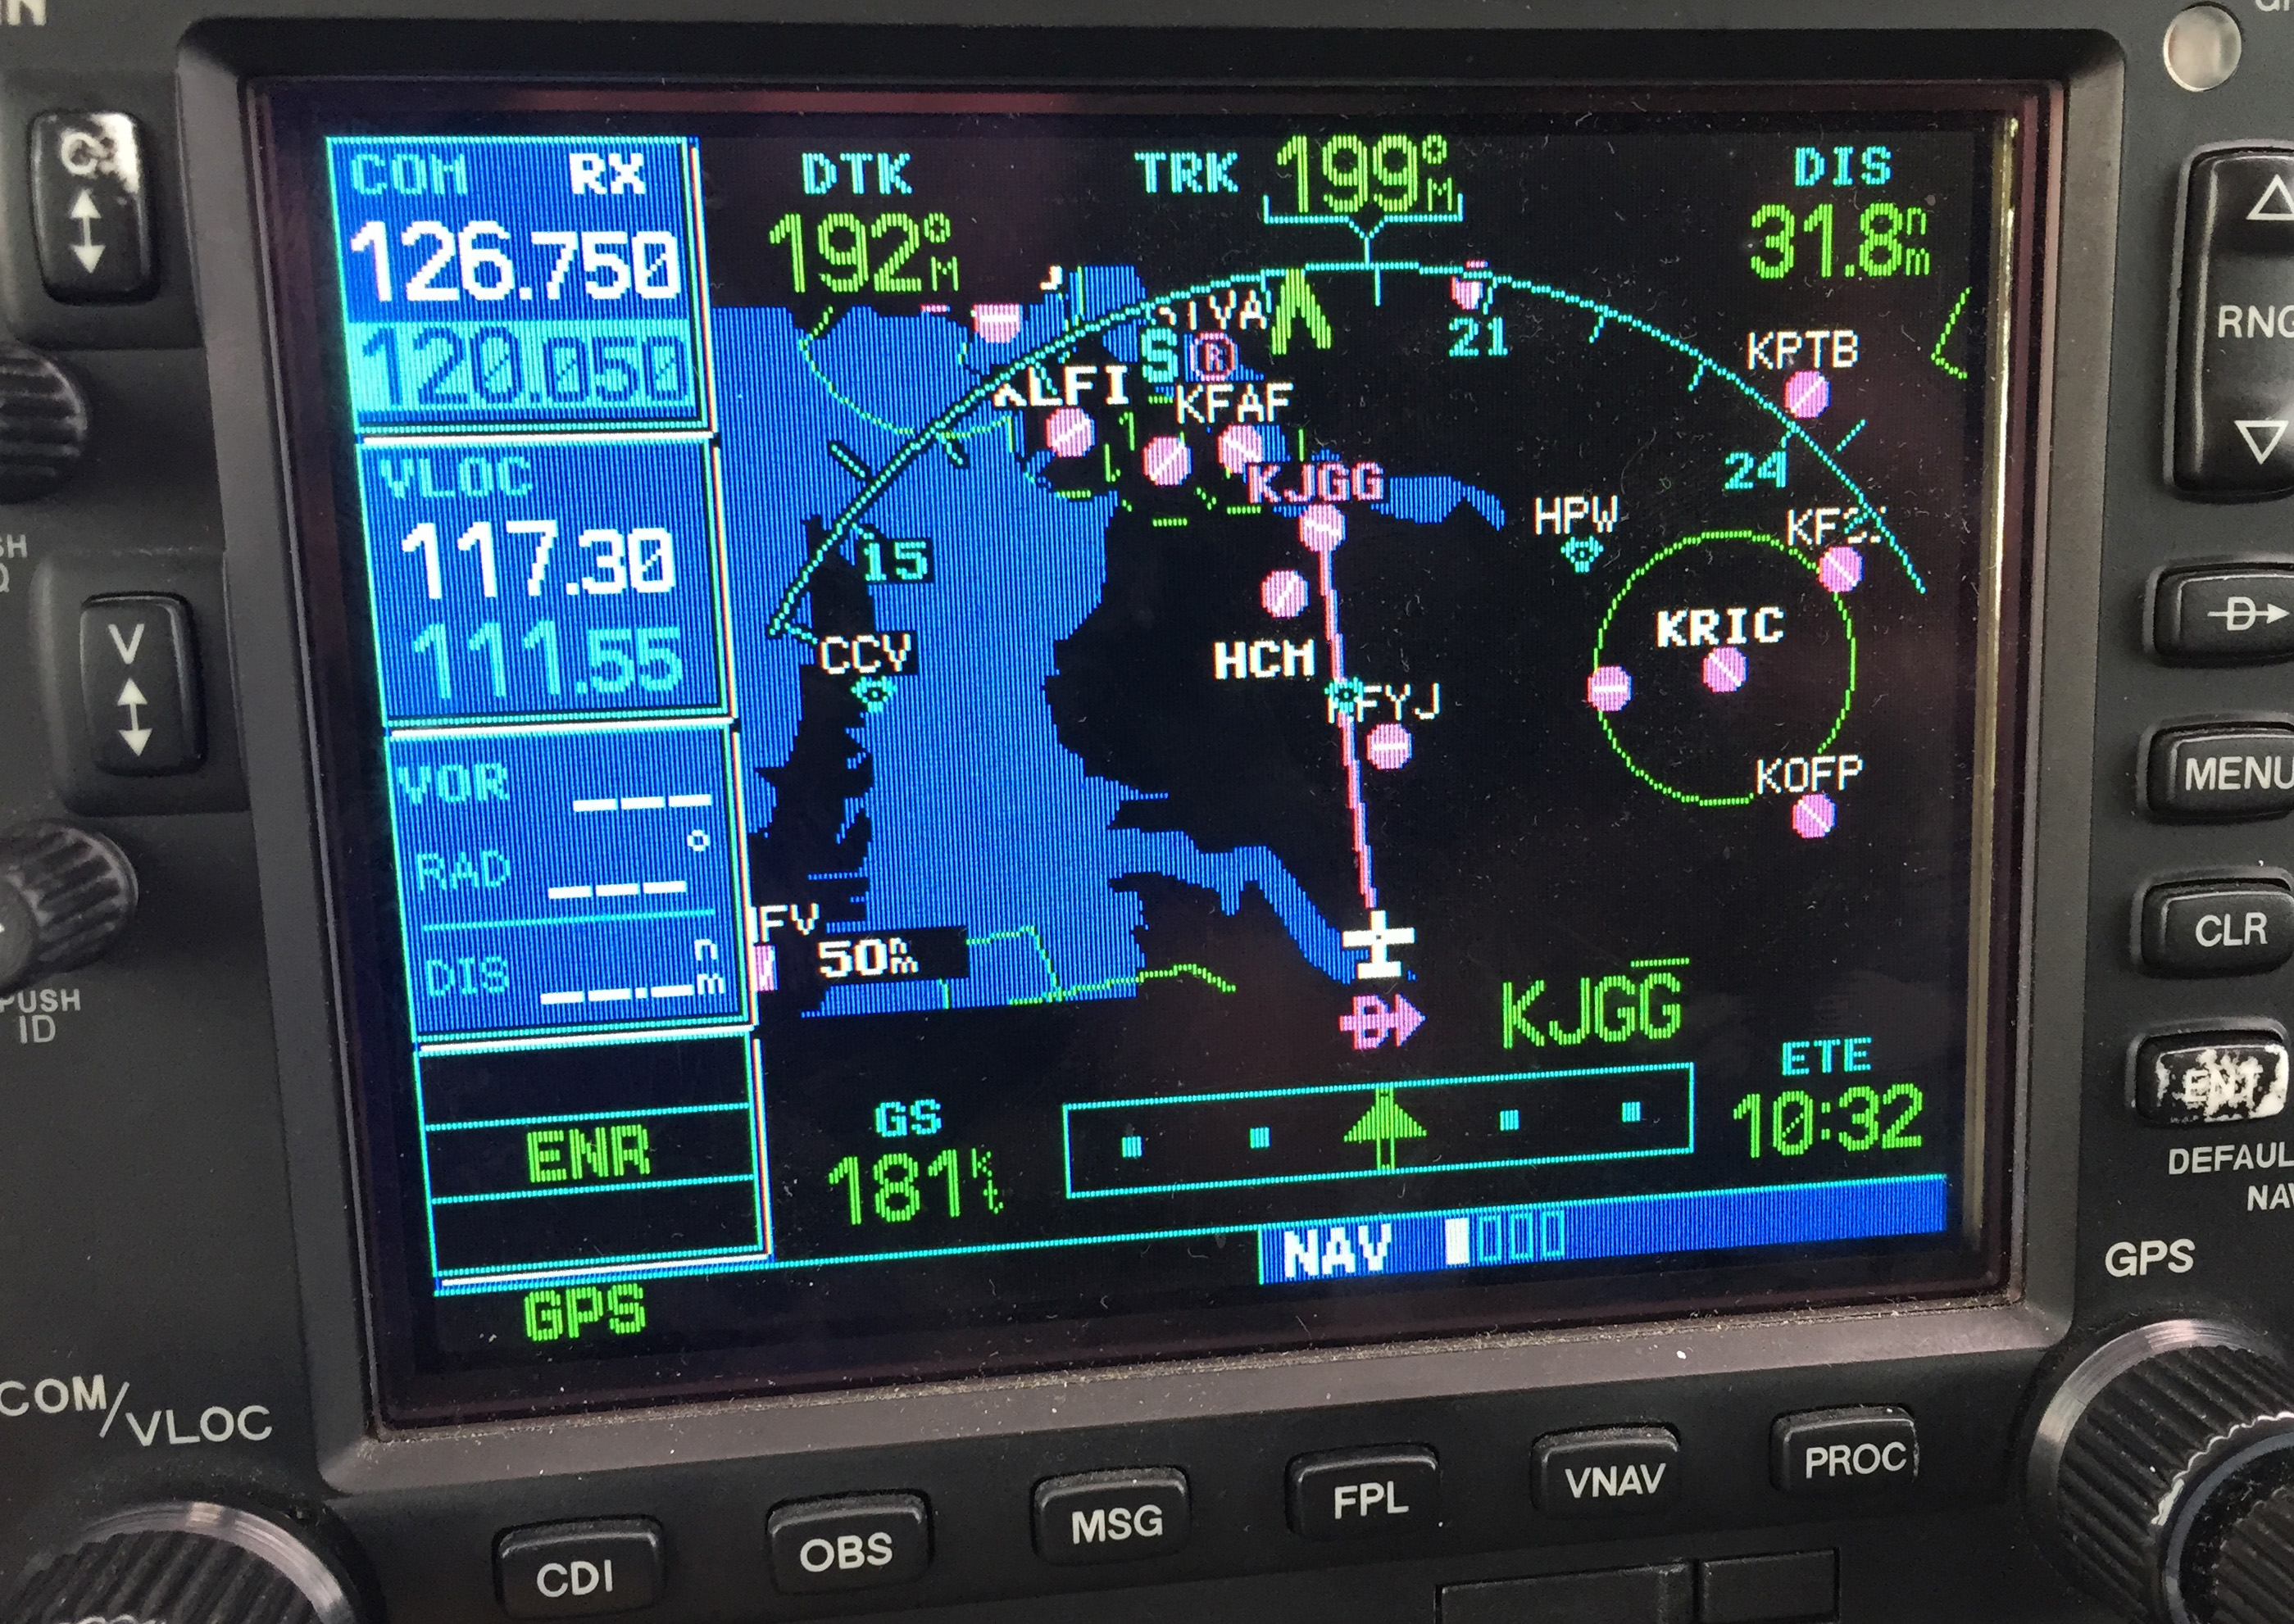
Step 3- The GPS now shows an inbound course to the airport of 310 degrees. It appears as a magenta line. The line serves as an excellent aid in airport/ runway orientation. Remember that this will not line you up perfectly with the runway, but it can still be extremely useful in planning a pattern entry or for getting your bearings.
Note: As shown below, If you press the OBS button again, the GPS will return to the navigation as previously set.
1. Ask for vectors to the airport/ runway: If you have VFR flight following or are talking to a tower equipped to provide vectors, asking for them can be a good choice. Although the controllers may not always be able to accommodate your request due to workload or equipment limitations, most will be happy to comply if they are able. Some pilots may feel silly asking for help, but my policy has always been that I’d rather feel silly for asking than look silly for being lost.
In the case of the Asheville flight mentioned in the opening of this article, my solution was to ask the controller fo r direct to the final approach fix of the assigned runway. Upon arriving there, I had no trouble seeing the VASI and was in good position to fly the visual approach. If I had wanted to be positioned a little further out, I could have asked to fly to a different fix or simply asked to be cleared for the approach in lieu of the visual. Just remember to keep your intentions clear when communicating them to the controller.
The best way to approach an airport day or night, familiar or unfamiliar, is with careful preparation. Having lighted landmarks picked out as well as being acquainted with the airport layout will pay off when it comes time to plan your pattern entry or find the airport on a dark night. Use the resources available to you to get you safely to your destination.
Andrew Robinson is a 135 Charter Pilot and flight instructor in Pennsylvania. He flies Pilatus PC-12s and instructs in Beechcraft Bonanzas.
We’ve all been there. You’re flying into an unfamiliar airport at night, you’re having difficulty seeing the field, and trouble identifying the runway. Airports can be hard to identify for a variety of reasons, but approaching in darkness only makes it more difficult. Perhaps the airport is located in a densely populated area and the…
He’s very sneaky, creeping unexpectedly and attacking after the propeller begins to turn.
He’s very cunning, veiling his intentions until, BOOM, he attacks.
Beware of the Lunch Monster!
Whenever I am doing a full day of training (which is usually how transition training courses are planned out, in full day sessions), I always plan a lunch stop. My metabolism has the speed of a rocket ship, so I get hungry and need some sustenance in the middle of the day. I have a running list of airports to stop at that have good lunch spots at them or nearby, so my customers and I usually end up at one of those airports.
Almost without fail, if a customer is having an excellent flying morning, nailing all the procedures, picking up all the techniques, and overall, flying pretty well, then eats lunch, the afternoon doesn’t go quite as well. Doing some of the same things we did that morning, but the customer’s performance isn’t quite as good. Most of the time, it’s just a brain lockup or landings aren’t quite as squeaky as they were in the morning.
Part of it is fatigue after flying for 2-3 hours in the morning. The other part is what I call the Lunch Monster. Eating a big lunch can sap away brain power and cause a person to lose energy around 2-3pm, leading to an afternoon lull (or the Lunch Monster attacking!).
Diet contributes to energy levels too. “Eating a lunch that is too big is the most common reason for feeling sleepy in the afternoon,” says Rebecca Solomon a nutritionist at Mount Sinai Hospital in Manhattan. “All your energy goes into digesting the enormous meal.”
The goal is to keep the body’s Cortical and Cortisone levels even since they’re the hormones released by the body in reaction to stress–they produce the fight or flight response. Their levels are elevated when you have sugar, caffeine and processed food, so you feel awake and energetic. But a few hours later, when those levels drop, you’re sluggish.
Solomon recommends eating a meal that’s balanced with healthy fats (from olive oil or avocados, for instance) with protein and healthy carbohydrates (whole wheat bread or pasta). The portion will vary for people of different sizes, but a general rule is you should be hungry about four hours after the meal.
Another healthy eating habit: Consume small portions of foods throughout the day, including almonds, carrots and hummus and fruit. Enjoy lunch around 1:30 or 2 p.m., just before the time you normally feel fatigued.
Now, most of the stops on my list of restaurants don’t fit the bill of healthy fats and healthy carbohydrates (plenty of protein, though, especially the BBQ joints). For those days, bringing along a snack like almonds or dried fruit is a great idea to munch on mid-afternoon. Trimming down the amount eaten at lunch helps a lot too.
So, the next time you have a long day of flying or training, beware the lunch monster and prep some good snacks when your flight instructor says you’re stopping for BBQ!
He prowls around, preying on innocent pilots. He’s very sneaky, creeping unexpectedly and attacking after the propeller begins to turn. He’s very cunning, veiling his intentions until, BOOM, he attacks. Beware of the Lunch Monster! Whenever I am doing a full day of training (which is usually how transition training courses are planned out, in…
Type Clubs Lead By Example with Standard Operating Practices
This article appeared in the May 2019 edition of EAA’s Sport Aviation Magazine. It is used with permission. For other articles by Charlie Precourt, please visit EAA.org and join for a full subscription.
Imagine a year when there are no fatal accidents in general aviation. Does that seem impossible? The airlines achieved that many years ago, and so can we if we focus on the right things in our safety pro- grams. In fact, the overall trend in GA accident rates over the last few years is very encouraging. AOPA’s Air Safety Institute published its annual GA Accident Scorecard recently (see www.EAA.org/ extras), revealing fatal accidents from 2008 to 2017 are down more than 30 percent. Nevertheless, there were 185 fatal accidents in 2017, so we still have a long way to go. But, there are many developments in safety programs across GA that can keep the trend going.
One such development that I’ve advocated through a couple of type clubs is establishing standard operating practices (SOP). When I flew for both the U.S. Air Force and NASA, we had what we called standard operating procedures. They were the law for our flying. That is, we had to follow them procedurally because the folks that paid our salaries said so. The objective was to ensure we all used the same playbook, minimizing the risk that one of us might develop a bad in-flight habit that increased risk to the organization.
One way to think about SOPs is to recognize the difference between procedure and technique. For example, you have to follow the manufacturer’s pilot’s operating handbook (procedure)where it says to lower the landing gear before landing. If you don’t, you are in for a bad day. However, it does not tell you exactly when to lower the gear; that’s left to technique.
In the middle, between procedure and technique, is a best practice. In this example, lowering the gear just before the final approach fix is a “standard practice.” It is the generally accepted “best” place to lower the gear. In GA, however, aircraft owners don’t generally answer to a boss, so I prefer the term practices instead of procedures.
However, whether or not someone is paying us to fly, following best practices just makes sense. If you have a good set of practices, they enable you to do things the same way every time, leaving lots of brain cells to manage the unusual, the things that might go wrong. The safest approach to accomplishing a flight task is one that leverages consistency. On the other hand, if you are inconsistent, doing flight tasks differently each time, you’ll always be struggling to keep up. So, in my involvement with the safety committees for both the Malibu Mirage Owners and Pilots Association and the Citation Jet Pilots Association, there has been broad acceptance of recently developed standard operating practices.
The good news in this development is that a culture of safety is growing broadly across most sectors of GA through these type club initiatives. Perhaps more importantly, there is much to learn from each other about the effectiveness of these various initiatives. EAA has seen a four-year drop of 47 percent in fatal accidents among homebuilts! So, there must be something right going on there — a major focus on appropriate transition training before flying a new homebuilt (as a standard operating practice) is paying off.
So, what is covered in the SOPs these type clubs have developed? The following outlines the kinds of standard practices other type clubs have set up and represent SOPs you could establish for yourself regardless of the type of aircraft you fly. You just have to fill in the blanks for your particular type and commit to sticking to them in your flying. These are notional and are practices (not mandatory procedures). They don’t tell you how to fly your aircraft; they give you things to think about when you do. If you take a bit of time to set your own SOPs and then stick with them, you’ll be a far safer pilot. Here are some ideas:
Duty Day
Set the maximum number of hours of flight time during a calendar day and rest hours off between flying days. One example is a maximum of eight hours in the air and a minimum of 10 hours off until flying again.
Cargo
Establish best practices for what you will carry as cargo. One example is no lithium batteries in the baggage compartment.
Flight Planning and Preparation
What are your limitations for the types of flight you’ll take on? Consider SOPs such as designating a suitable alternate airport for all flights. Another might be for first flights after significant maintenance, such as no flight at night or in IMC until a day-VMC functional check flight has been done.
Runway Field Length Guidelines
Establish an appropriate minimum field length for your aircraft and commit to not going into shorter fields. Consider sea level operations and high-altitude airports as well.
Surface Operations
What should be your maximum wind conditions for taxi, takeoff, or landing? Maximum acceptable crosswinds on landing? Set them in your SOP and stick to them.
En Route
Consider establishing practices like no non-operationally necessary conversation below 10,000 feet MSL, during any segment of an approach procedure, or during the last 1,000 feet before leveloff during climb or descent. Also consider declaring “minimum fuel” when the fuel state becomes less than fuel to destination plus 45 minutes at current burn, even if flying day VFR.
Approach and Landing
Consider establishing personal minimums in your SOPs for things like visual approaches. Perhaps use a 1,500-foot ceiling and 3 miles’ visibility for day and 5 miles for night, even though these exceed the FAA’s requirements.
Pilot Limitations, Training, & Currency
FAR Part 91 rules allow us to fly with pretty marginal levels of currency. Consider setting your own SOP to something more appropriate for the kind of aircraft you fly and the kind of flying you do in it. For example, consider these ideas as SOPs:
If you have less than 100 hours of time-in-type or have not flown at least 15 hours as pilot in command in the last 90 days, use a minimum planned fuel reserve of one hour.
Also, if flying IFR in this situation, use a minimum visibility for takeoff of 1 mile.
On instrument approaches, increase the published minimums by one- half mile visibility and add 200 feet to the decision altitude or minimum descent altitude.
Perform landings at a weight that allows a full stop in 60 percent of available runway length.
Consider an SOP that establishes you will fly with a CFI on a refresher flight before flying as pilot in command if you have not logged at least an hour of flight time and one takeoff and landing in an aircraft of the same type within the preceding 45 days.
Maneuver Standards
Wherever there are “techniques” associated with things like takeoffs and climbs, cruise, use of autopilot, power settings, and approaches and landings, you can write down your preferred technique as your own SOP. Describe each maneuver in enough detail (speeds, altitudes, power settings, configurations, etc.) to define a routine you will use each time. This ensures you fly consistently each flight and leverage the power of the standard operating practice, that is, to give you the bandwidth you need should you encounter an unexpected event or an emergency.
SOPs are among the exciting concepts underway to make safety programs work for us. Hats off to type clubs like MMOPA and CJP and many others that are taking the initiative. But even if you’re not in this kind of group, you can still set up your own SOPs. Let’s all look forward to our first year in GA without a fatal accident — and let’s make it soon! Fly safe!
Charlie Precourt is a former NASA chief astronaut, space shuttle commander, and Air Force test pilot. He built a VariEze, owns a Piper JetPROP, and is a member of the EAA board of directors.
Type Clubs Lead By Example with Standard Operating Practices This article appeared in the May 2019 edition of EAA’s Sport Aviation Magazine. It is used with permission. For other articles by Charlie Precourt, please visit EAA.org and join for a full subscription. Imagine a year when there are no fatal accidents in general aviation. Does…
Talk about star treatment. The Lajitas Golf Resort rolled out the red carpet for the 2019 Texas Top Aviation Lajitas Fly In. I had been to Lajitas twice before; once in July when it was hot, miserable and bumpy. The second time was the week before our Fly In. Both times, everyone from the airport folks to the bus drivers to the front desk and restaurant staff were top notch. It made for a very pleasurable experience.
If you haven’t been out to Lajitas (or don’t even know where it is) and you’re a pilot (you don’t even have to play golf), you have missed a sure gem. Lajitas is positioned on the southern tip of the Big Bend area of Texas, right on the Rio Grande river. Lajitas has great lodging with several different room options from big to small, an excellent restaurant for 3 square a day (and even a bakery for sweets, coffee, and breakfast tacos in the mornings), and a 5 star golf course in Black Jack Crossing.
Why is this all relevant to us aviators? Lajitas has it’s own private airport, 89TE. Complete with a 5,500 foot asphalt runway, VFR conditions most of the year, and reasonable fuel prices, Lajitas is the pilot’s gateway to the resort and the entire Big Bend area. If you wait until the fall, a brand new, 7,000 foot concrete runway should be completed and an IFR approach should be available. An AWOS is in the works too.
The resort and airport are so far south, radar and radio coverage with Albuquerque Center is pretty poor below about 15,000 feet, and non-existent below 10,000 feet. This isn’t a big concern as any airplanes in the area should be on 122.9 and the airport manager will make contact with you, give you a weather report, and assign a runway.
Once you are on the ground, there will be a resort bus waiting to whisk you and all your friends to the resort for your getaway.
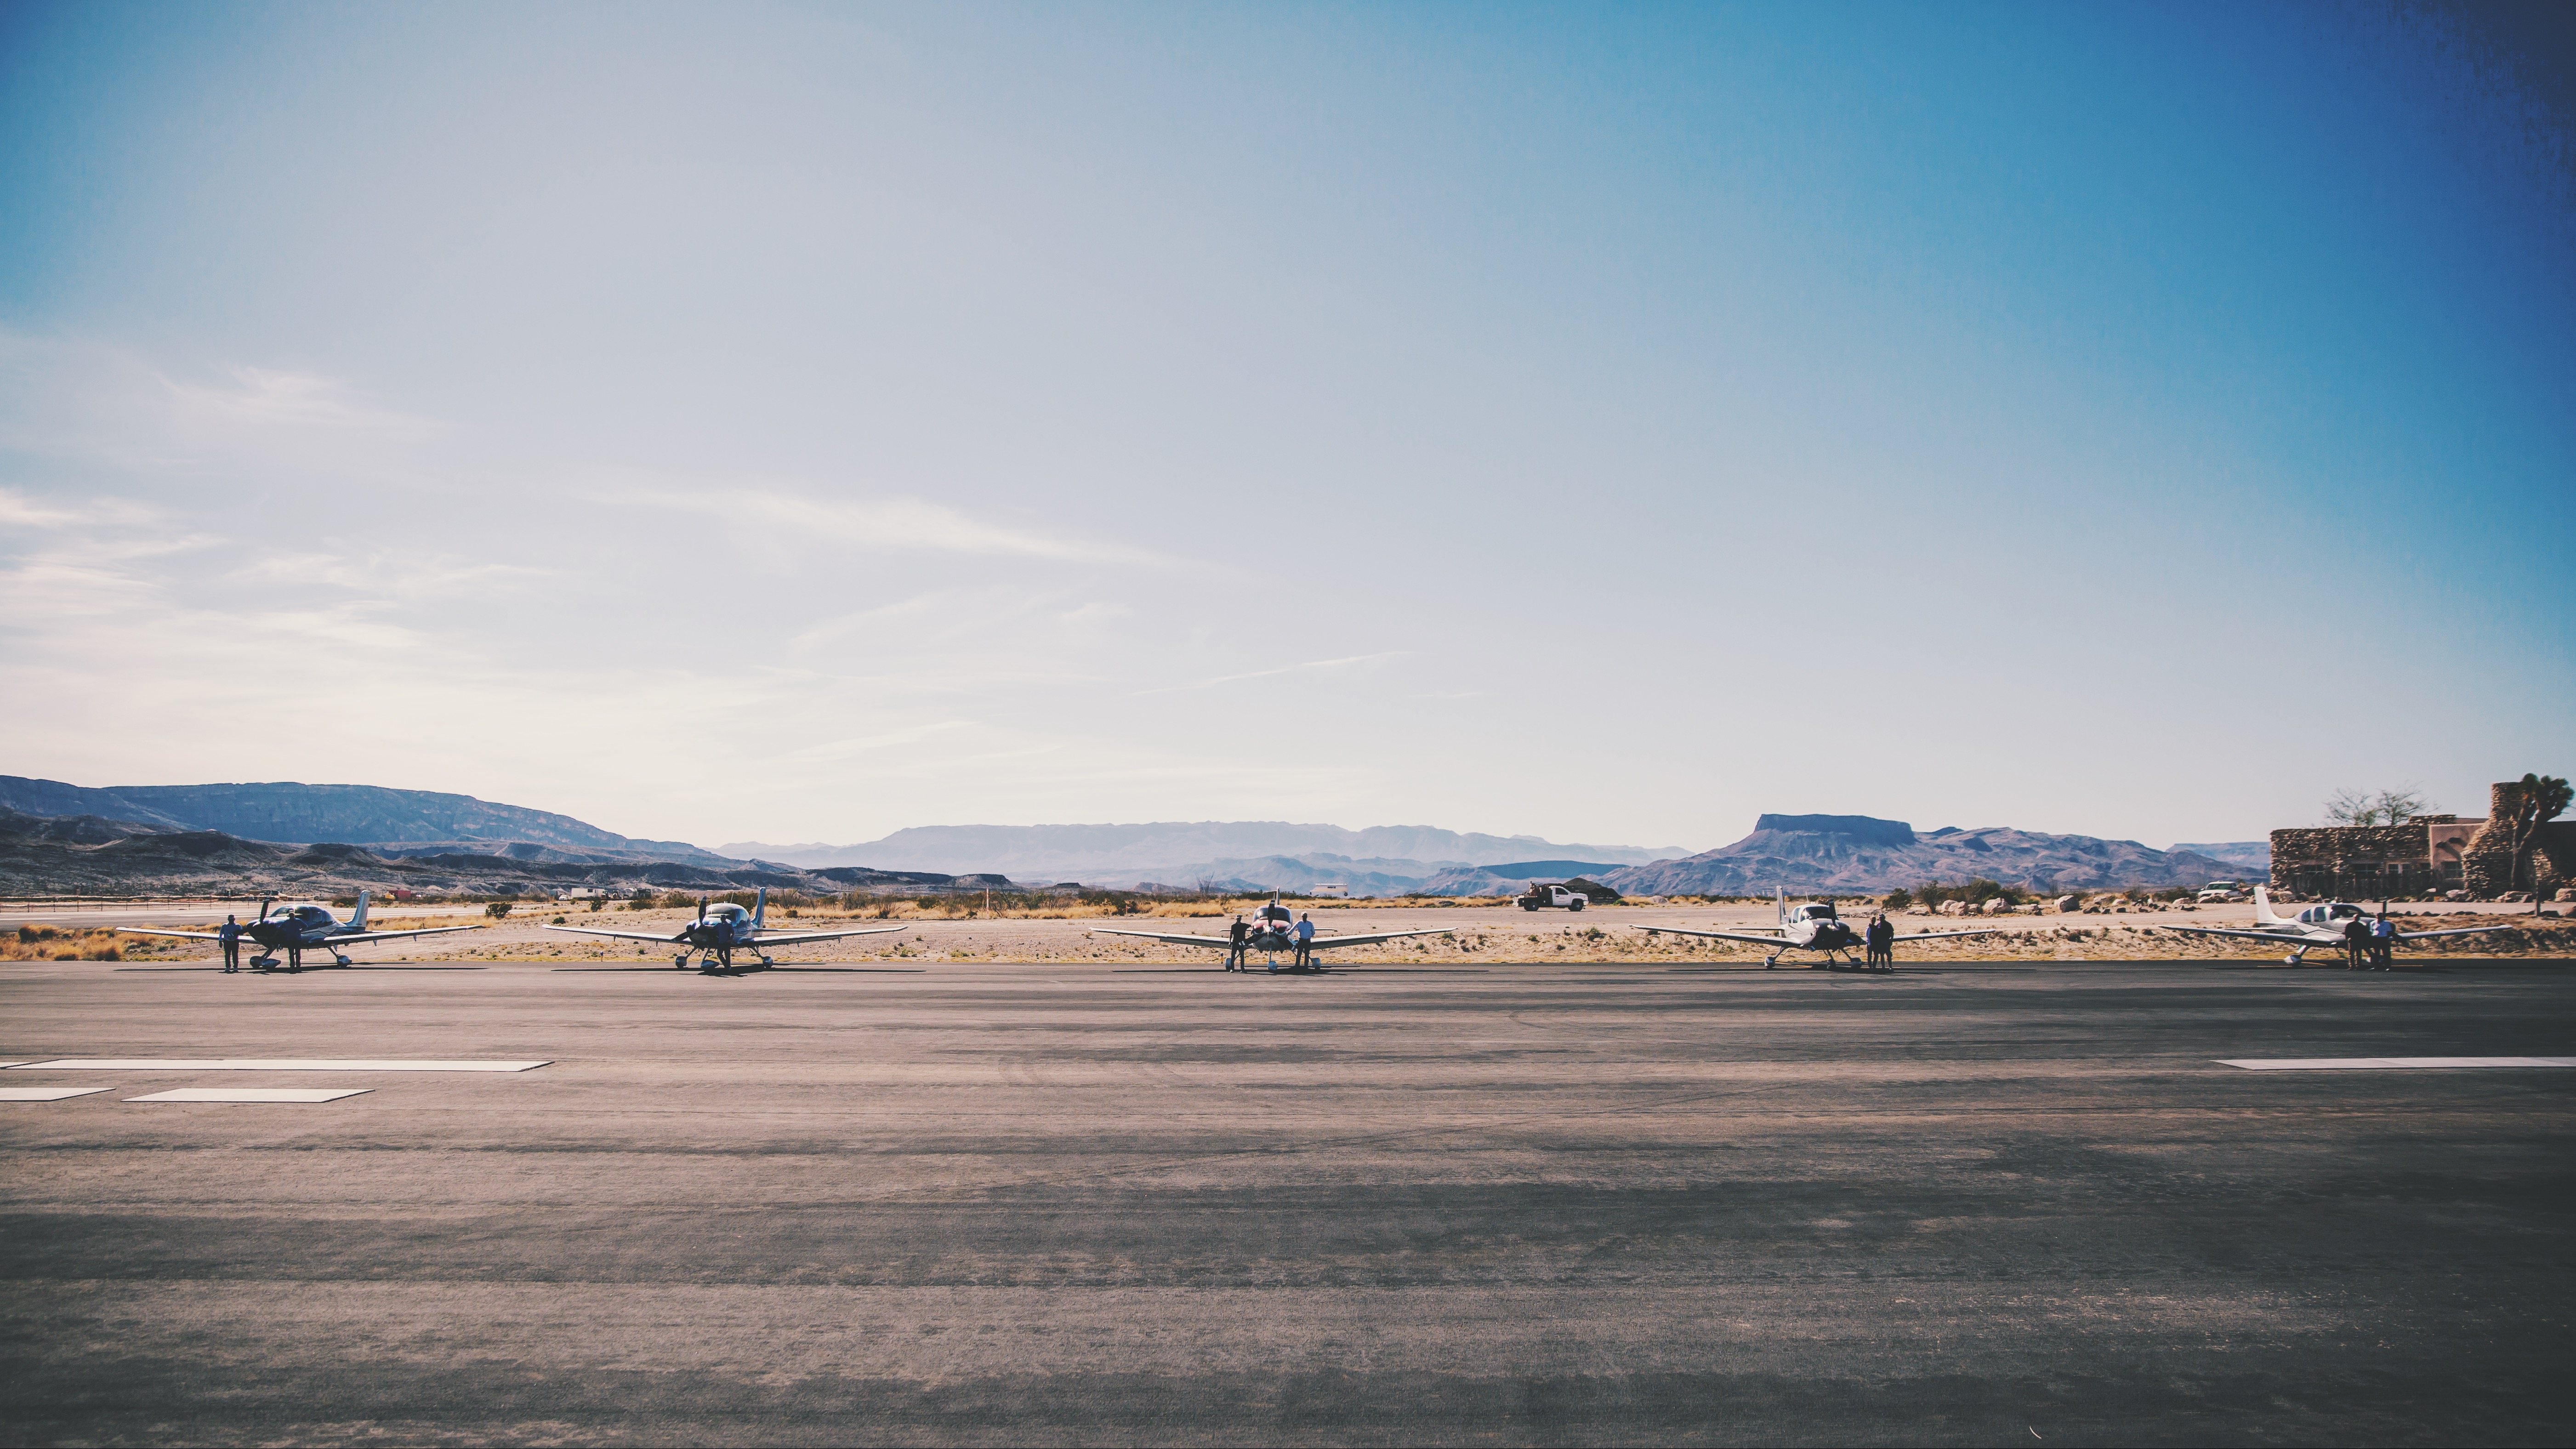
The 2019 Texas Top Aviation Lajitas Fly In was a big hit. We had 7 airplanes total: 5 Cirrus SR22s, 1 Piper Matrix, and 1 Citation M2. There were 15 attendees total, including 13 golfers. Everyone raved about the resort and the golf course. The only hiccup in the weekend was the cold front that blasted through on Friday afternoon, kicking up a lot of dust. Golfing on Saturday was windy too, but Sunday morning was absolutely perfect.
Thanks again to the folks at Lajitas for the star treatment!
Interested in participating in the next Texas Top Aviation Fly In? Contact Us or Sign Up for Our Newsletter and we will make sure you find out about the next one so you don’t miss out!
Talk about star treatment. The Lajitas Golf Resort rolled out the red carpet for the 2019 Texas Top Aviation Lajitas Fly In. I had been to Lajitas twice before; once in July when it was hot, miserable and bumpy. The second time was the week before our Fly In. Both times, everyone from the airport…
Has it come time to buy your first airplane? Have the skies been calling your name? Or are you just tired of standing in the airport security line then getting shoved in a long metal tube with no leg room? Or, maybe you are a businessman who does business in remote areas that have local airports but are hard to get to commercially.
Wherever your need is, you have decided it’s time to make a purchase. If you are familiar with aviation, you may have an airplane in mind that you would like to have, but is that the right airplane for your mission? If you are new to aviation, you may have no idea what airplane to go for. Here are some helpful hints in narrowing down the different airplane options out there to fit your specific mission.
Flying For Enjoyment, but Not Going Far Fast
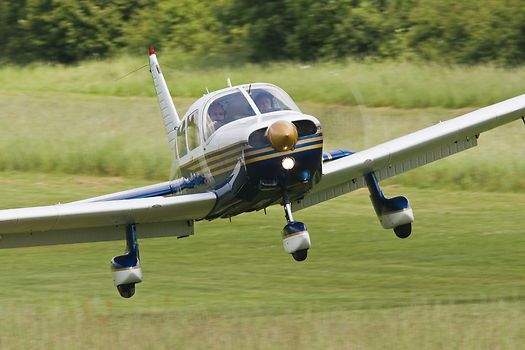
If you’re just a weekend flyer who is tired of dealing with flight school rentals, but you don’t need to carry a lot of people or go very far, your options are pretty numerous. Anything from a Cessna 152 to a Piper Cherokee, maybe a Beech Sundowner, or a Bellanca Viking, or anything in between. If you are content with taking a weekend hop for a hamburger at 100-110 knots, you have limitless options for airplanes. Tailwheels (Cubs, Citabrias, Huskies) are excellent birds for you well.
Getting Places Fast With Only You and Maybe One Passenger
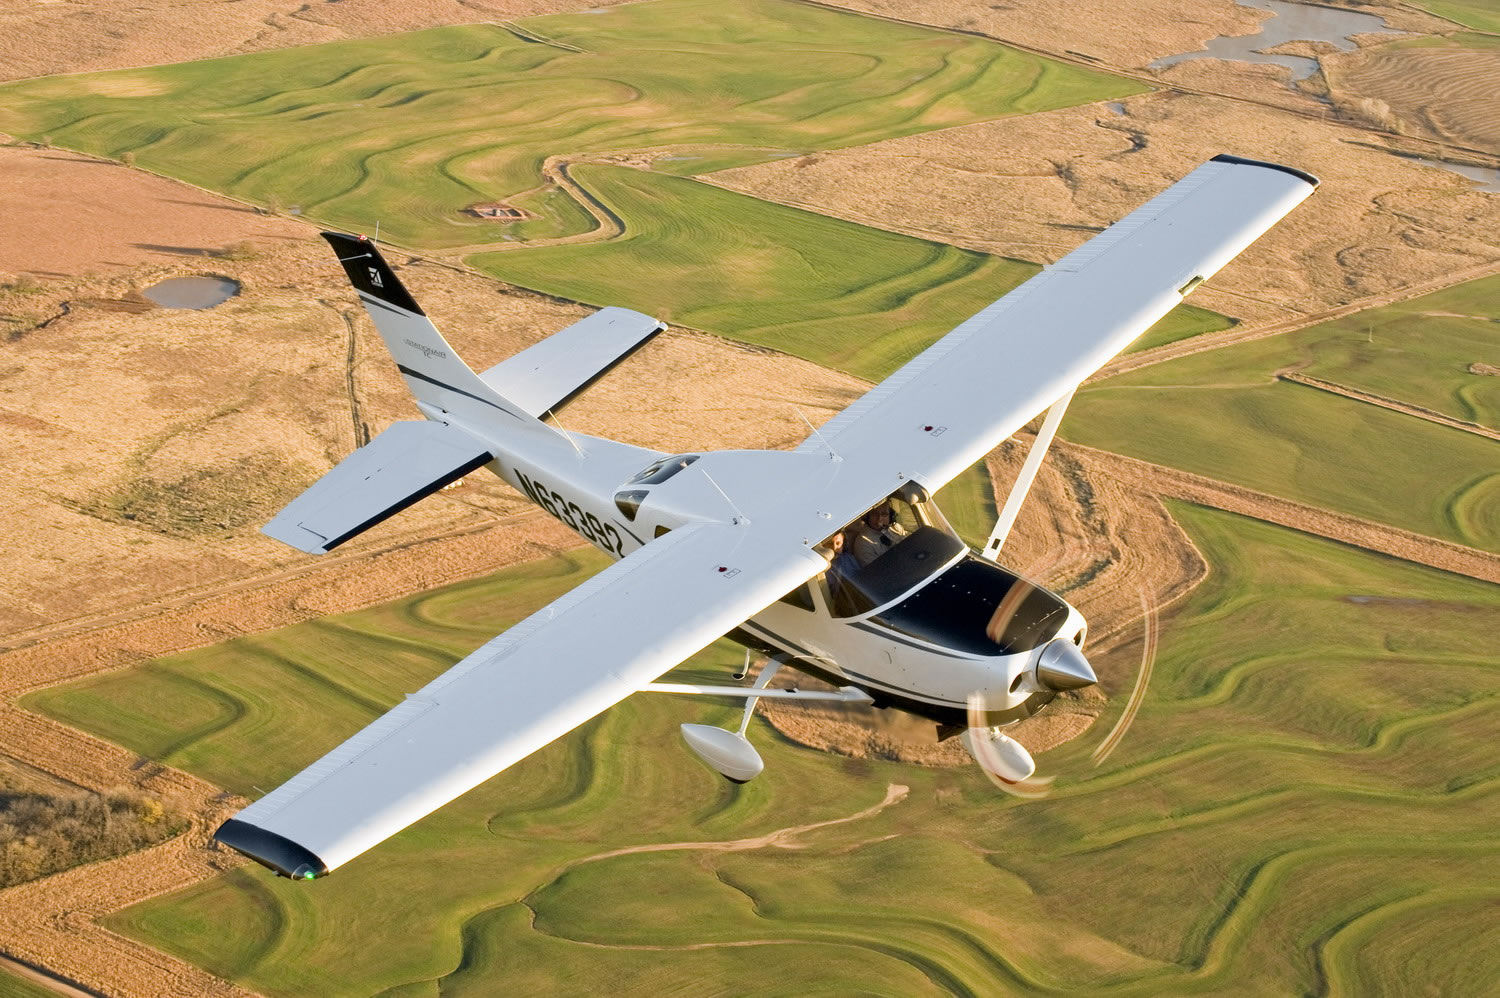
Need to go 200-300 miles fast and not worried about weight? A Cirrus SR22T, a Columbia 400, or Cessna Corvalis might be just what you need. Cruise speeds on those are all around 180-190 knots at 10,000 feet. All are oxygen equipped if you want more speed higher up, as the service ceilings are 25,000 feet. Payloads run in the range of 400-500 pounds with full fuel. All these have air conditioning options, too.
Hauling More Weight, but Still Need the Speed?
A little slower (150-170 knots) but a little bit more payload options are A36 & B36 Bonanzas, Piper Saratogas, Cessna 206s, or Cessna 210s might suit your fancy. All come in turbo models if you are a high elevation dweller. The Cessna 206 has been used for many years as cargo and people haulers in remote regions like Alaska, South America, and Africa. I’ve even seen pictures of snowmobiles being carried in a 206.
Tired of Oxygen Cannulas?
The next step up from a Cirrus, Corvalis, or Saratoga is the Piper Malibu. A bigger brother to the Saratoga, the different PA-46 models offer one of the best options for a single engine piston out there. All except the Matrix (PA-46-350T) are pressurized, all the pistons cruise about 200 knots, and all are configured with club seating with plenty of leg room. Useful loads range around 1200-1400 pounds (they hold 120 gallons of fuel, so payloads range from 480-680 pounds). The original Malibu (PA-46-310P) only burns 16.5 GPH so that allows partial fuel to be carried to allow more people and bags. All have 6 seats.
Need to Carry Even More Weight?
It’s time to get into the piston twin market, then. A Cessna 414, a Cessna 421, a Cessna 340, a Beech Duke or a Beech Baron are all pretty good options here. The 421 and the 414 have the largest cabins, while the Duke has the highest useful load. Cruise speeds range from 200-220 knots, but the cabin is roomier and you get a few more pounds useful load than a piston single. If you do get into a 421, get good training as they are equipped with Continental geared engines, which can be tricky to operate if you don’t know what you are doing.
Need to Carry a Lot of People and Go Fast?
Turboprops are the way to go for you. King Airs have the most utility while the Pilatus PC-12 is the cream of the single engine turboprop crop as you can put almost anything you want in it. If you have 4-5 passengers, stay away from a Piper Meridian as you can’t carry a lot of weight. Those are better for 2-3 passengers at the most (plus a pilot). The TBM 900 is pricey, but fast (300-325 knots). The original TBM 700 can be had for under a million bucks, you get 280 knots, and a very usable useful load. You still can’t fill all 6 seats with full fuel, but you can do more with it then a Meridian.
Have a Boatload of Money Sitting Around?
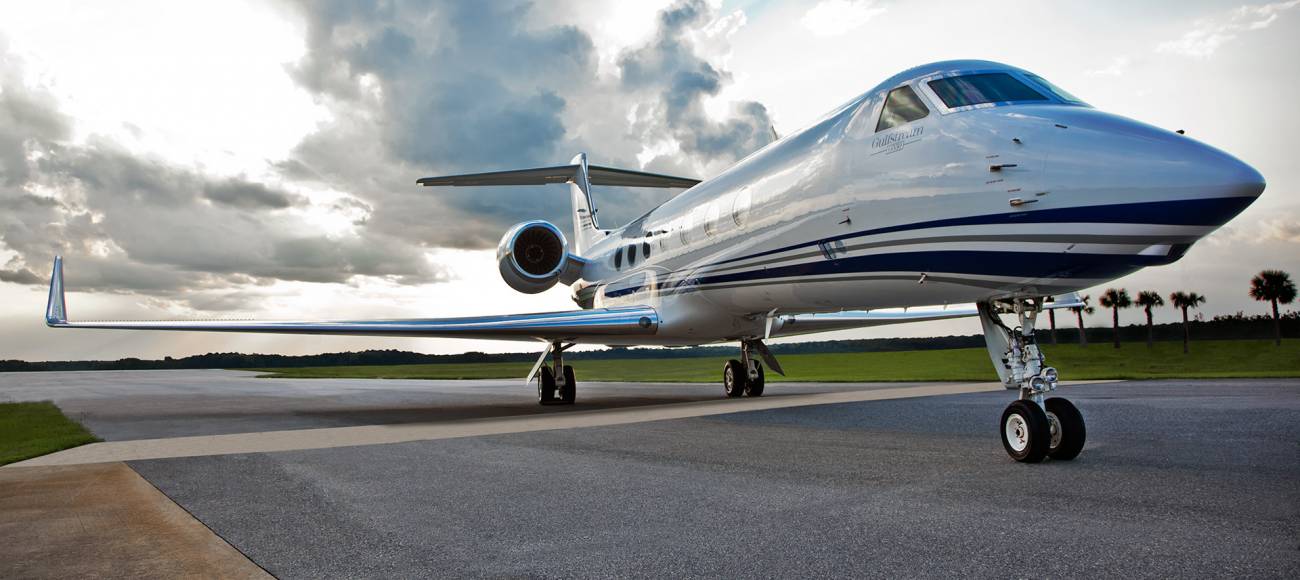
A jet might be for you then. Fuel, insurance, maintenance, and hangar costs are high, but jets will get you places real fast with room for all your friends and family.
Has it come time to buy your first airplane? Have the skies been calling your name? Or are you just tired of standing in the airport security line then getting shoved in a long metal tube with no leg room? Or, maybe you are a businessman who does business in remote areas that have local…