Texas Top Aviation wants to express our heartfelt concerns and prayers for those affected by Hurricane Harvey along the Texas Gulf Coast and in Houston. We have several customers in Houston and hope and pray that they are all safe.
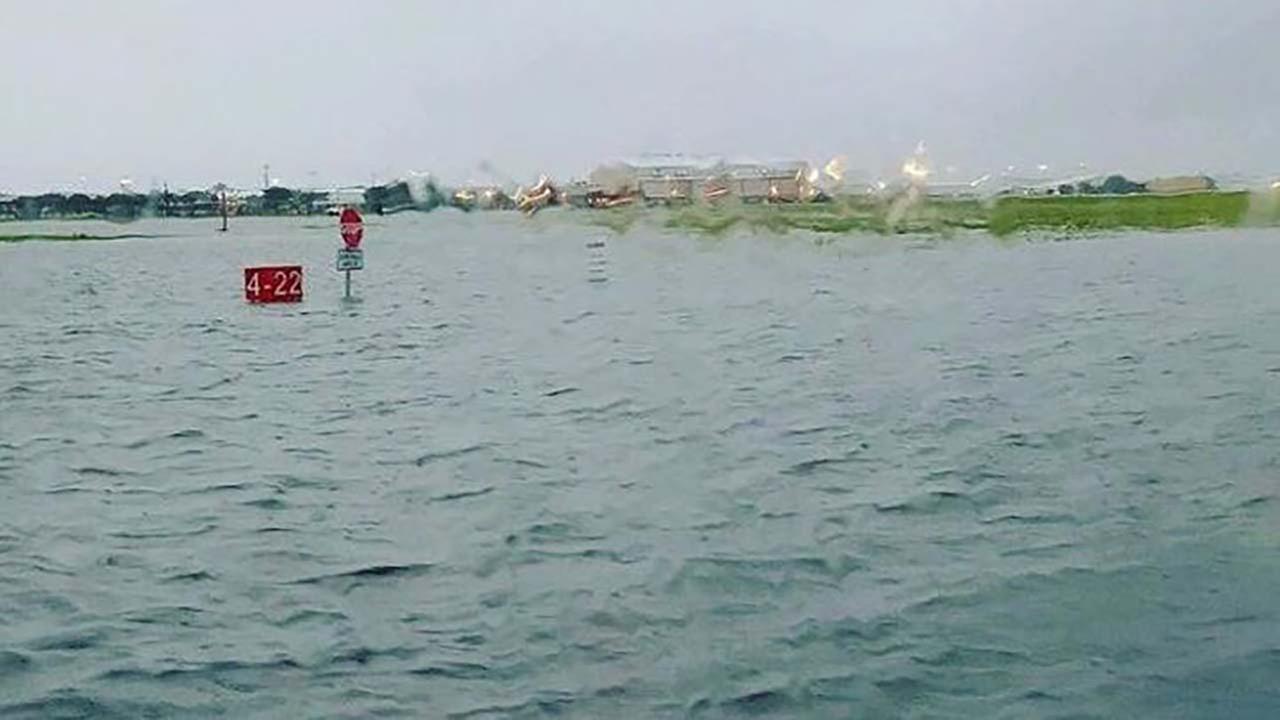
The Houston Hobby Airport after Hurricane Harvey’s Torrential downpour
If you would like to donate to the relief effort, there are several organizations that are accepting support. A few are below.
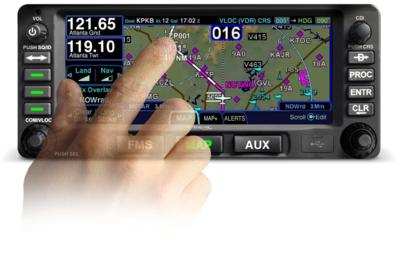
Avidyne’s plug and play replacement for the Garmin 430, the Avidyne IFD 440, finally received certification from the FAA last week. The touch screen GPS unit is being marketed as a simple swap out for the Garmin 430. This release follows up Avidyne’s release last year of the IFD 540, also a plug and play replacement, but for the Garmin 530.
The features and touch screen of the GPS units sound quite nifty, but it will be hard for Avidyne to compete with the GTN 750 and 650 from Garmin. The unit prices for the IFD 540 and 440 will be less (and installation is simpler), but we will see how the company does.
The STC allows for installation in 1,000 makes and models of aircraft, according to the company, so there are a lot of possibilities for installs.
In conjunction, Avidyne also released a new version of it’s software for both GPS units. According to Avidyne, this will unlock multiple features that enhances the capabilities of both units.
To read more on the IFD 440 and it’s bigger brother, the IFD 540, check out Avidyne’s website.
Avidyne’s plug and play replacement for the Garmin 430, the Avidyne IFD 440, finally received certification from the FAA last week. The touch screen GPS unit is being marketed as a simple swap out for the Garmin 430. This release follows up Avidyne’s release last year of the IFD 540, also a plug and play…
Just south of the equator in the mountains of Papua, Indonesia on the island of New Guinea, pilots spend their days carrying food, building supplies, doctors, pigs, and passengers into some of the most remote and extreme airstrips on the planet. That’s where I fly.
Each morning I load my Cessna Grand Caravan with 2,600 lbs of (insert strange cargo here) and depart my home base of Wamena just after the sun sends its first rays of light across the waking skies above. I spend my day winding through narrow valleys and crossing high altitude mountain passes with building clouds and poor communication, only to land on short, narrow airstrips with steep slopes and little room for error. Most of these one-way in, one-way out runways require me to commit to landing well before touchdown due to terrain that is too close to allow for a safe go-around. Everything better be right when I cross that decision point or I could be in for some excitement.
The need to keep wide margins of safety might seem obvious in environments like mine, but that doesn’t make them any less important where you fly. You may be a new pilot or an old timer, but keeping your margin should always be on the top of your priority list.
Let’s unpack this further. Margin is not just maintaining the regulatory requirements for cloud clearances or minimum altitudes. It’s more than planning for an alternate airport or carrying the required fuel reserve. Margin is breathing room. It is that extra maneuvering room, the Plan C, the well thought out options that provide you multiple “outs” in any given situation. Margin is what gets you home when things take a turn for the worse.
Margin comes in all shapes and sizes. For myself it includes maintaining double my required turn radius in narrow valleys or choosing not to land when my groundspeed is just 1 knot too high at a short and slippery airstrip. For you, it could be determining a ceiling or visibility minimum requirement that is more conservative than the legal ones or setting a wind limitation that you know is reasonable. When it comes down to it, keeping your margin means you don’t push to the ragged edge of your skill or the aircraft’s capability.
Margin can also refer to your mental or emotional capacity. Are you mentally prepared to divert and miss that important event because the weather is getting bad? Are you ready to handle the disappointment of passengers when you arrive over your airstrip and choose not to land due to approaching rain or a factor that is difficult for a non-pilot to understand? Are you willing to cancel a flight on an important client because you are coming down with a cold or didn’t get adequate sleep? As the PIC of your flying machine, you alone are responsible for the safety of the aircraft and the people on board and those are the tough calls that only you can make.
Fatigue, overconfidence, and complacency are the biggest obstacles to keeping your margin. They are all very subtle dangers and you may be experiencing them without even recognizing it. Fatigue can slow down your thought process leaving you behind the plane and backed into a corner before you know it. Overconfidence might cause you to push weather or commit to a course of action that has no favorable alternatives. Complacency will lead you to believe that, because you have 2000 hours in a particular make and model, you don’t need to do a thorough preflight or complete the pre-landing checklist.
Regardless of experience level, operating environment, fancy avionics, and level of proficiency, margin is something that we all need plenty of. So as you go about your upcoming flights, be asking yourself what you can do to build in more margin. It just might be what gets you home.
Pete Greenwald is a transplant to Atlanta, Georgia who has fallen in love with all things Southern, including his wife, Ashley. As a pilot and A&P with Mission Aviation Fellowship, he flies the Cessna Grand Caravan in Papua, Indonesia serving people who live in isolation. In his spare time he is on the hunt for the best burger around.
Just south of the equator in the mountains of Papua, Indonesia on the island of New Guinea, pilots spend their days carrying food, building supplies, doctors, pigs, and passengers into some of the most remote and extreme airstrips on the planet. That’s where I fly. Each morning I load my Cessna Grand Caravan with 2,600…
A couple of months ago, I had a life-threatening experience while flying. Thankfully, with my flight training, along with a lot of luck, I am here to talk about it.
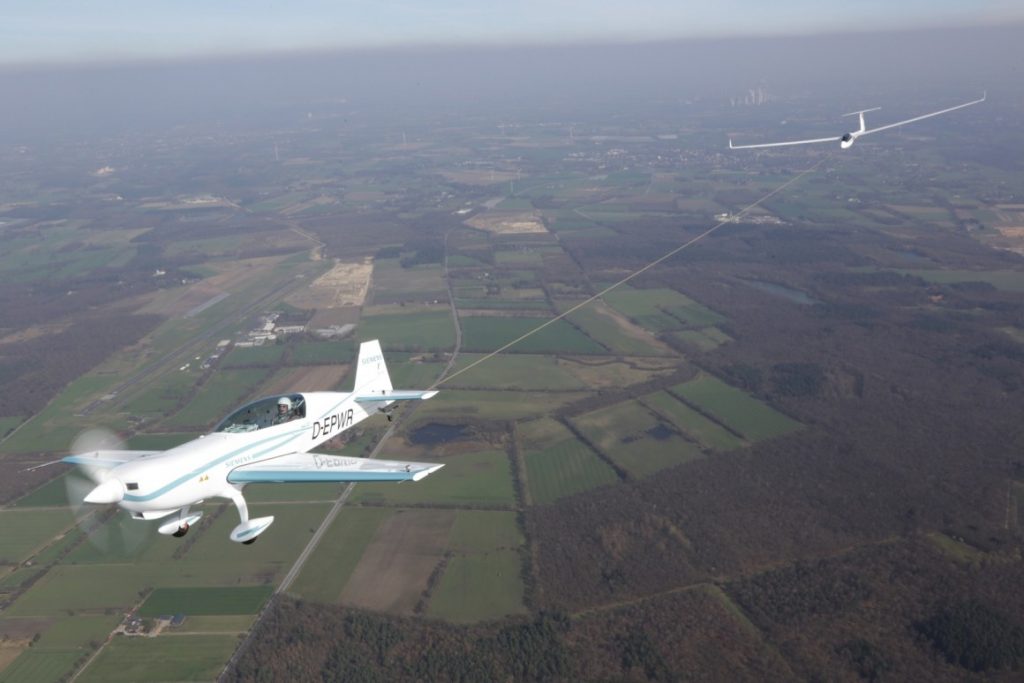
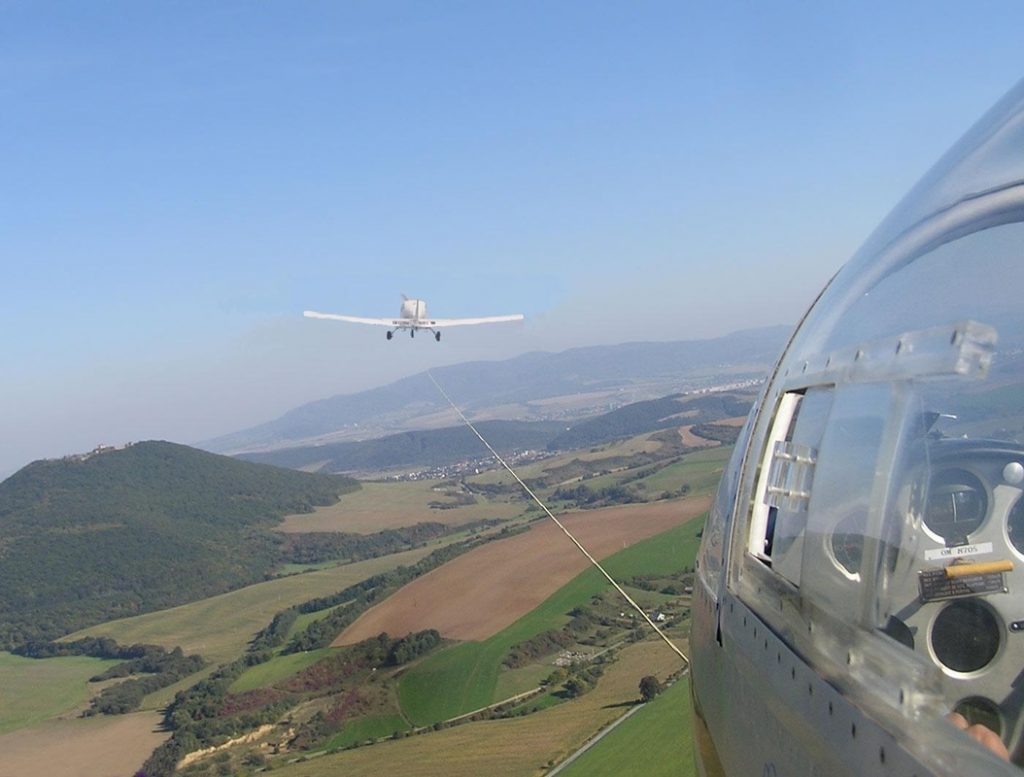
One of my many piloting jobs is as a glider tow pilot. For those not familiar with gliding, since a glider doesn’t have an engine, every time a glider pilot goes and flies, it’s a team effort. A powered airplane (anything from a Super Cub to a turbine powered Air Tractor) is attached to the glider via a tow rope, which is about 200 feet long. Once the glider pilot gives the go ahead over the airport’s CTAF, then the tow plane begins it’s takeoff roll, pulling the glider along behind it.
The glider becomes airborne prior to the tow plane, then the tow plane will circle the airport environment till it get’s to the pre-determined altitude to release the glider. Some tows are pattern tows and some are higher (not usually above 3,000 AGL), depending on the request from the glider pilot. Once the altitude is reached, the glider pilot pulls a handle in the glider to release the tow rope, then begins his glide. The rope stays attached to the tail of the tow plane, which in turn descends back down to the runway and lands. The tow plane also has a tow rope release handle in case of emergency.
On this particular tow, the plan was to tow the glider up to 3,000 AGL. Upon reaching 2,500 AGL, the glider pilot called me on the radio and stated that his rear canopy had opened up. I looked over my shoulder and sure enough, the rear canopy was fully opened while he was still in level flight behind me. I asked him if he wanted me to tow him closer to the field, but he didn’t reply.
Now, as an experienced tow pilot, I know a glider canopy popping open should not be an emergency situation. It’s definitely abnormal, but would be similar to a door or window popping open in a powered airplane. Not a big deal. If too much force from the relative wind is applied to the canopy, it would snap off; however, a glider can easily land without a rear canopy.
About 5 seconds after I radioed the pilot (and received no reply), I felt my tail instantaneously lift up into a completely vertical position, which caused my nose to go straight down. The next thing I knew, a whole lot of earth suddenly filled my windscreen and I was in what’s known as a graveyard spiral.
A graveyard spiral (as defined from the Airplane Flying Handbook pg 4-23), “is a descending turn during which airspeed and G-load can increase rapidly….the airplane is flying very tight circles, in a nearly vertical attitude and will be accelerating since it isn’t stalled.” It’s also known as a spiral dive.
Back to the story. At this point, I tried to reach for the glider release handle. Unfortunately, due to the shoulder straps holding me against the seat, plus the g’s, and also the quart of oil and tow bar that flew forward and hit me in the back of the head, I couldn’t reach it. I was semi-upside down at a certain point, which dislodged the oil and tow bar from the floor of the baggage compartment. They sailed over the seat and nearly gave me a concussion.
At this point, 2,500 feet above the ground, I had a choice to either fight for my life at a very low altitude or to sit back and become part of a big explosion.
I decided to fight for my life.
As I was spiraling to the ground, I felt the tow rope snap. Up to this point, I had still been attached to the glider. The rope snapping was a good thing, as my airplane was now under my control, not attached to, and being affected by, a glider (more on that later). I now had a lifeline, no pun intended.
After I felt the rope snap, my instincts and training kicked in. I initiated the spin recovery procedure using the PARE acronym. This task was difficult to do as I had a lot of debris flying from the rear of the plane to the front, blocking my view out of the windshield. There was also debris around my feet, hampering my ability to use the rudder pedals. The spiral finally stopped and I recovered approximately 500 feet above the tree tops. It took my heart a lot longer to stop spinning.
After barely regaining my emotions, I tried to evaluate the condition of the plane. Were all the pieces of the plane still there, was the engine damaged, did my control surfaces still work?
Once I advanced the throttle and saw an increase in my engine RPM, I started an immediate climb to give me altitude to get back to the airport. I had engine power but I wasn’t sure how long it would last if I had damage. Now, what they don’t teach you during spin training is that when this happens unexpectedly, you will become very disorientated. You have just been spiraling unexpectedly and your equilibrium will be out of whack. As I leveled out just over the tree tops, I was too low to visually see any landmarks, nor could I see the airport. Once I was able to climb, I was able to orient myself and figure out where the airport was.
I had to be very careful getting back to the airport and landing without radio communication, since my radio was knocked out with all of the FOD from the baggage area. Thankfully, the landing was uneventful. After I landed, I saw the glider limp in over the trees. The rear canopy was totally gone, while the front canopy and other parts of the glider had suffered major damage. Miraculously, my airplane wasn’t damaged, except for the wire from the radio which came loose during the spiral.
So, how did all this happen, you ask? Well, the glider pilot made 2 huge mistakes. First, in gliding, the moment the glider pilot loses visual sight of the tow plane, you are supposed to release the tow rope. He did not do that and almost killed both of us.
Second, as pilots we are taught to always fly the airplane first. Everything else, no matter what it is, always comes after flying the airplane. As I stated previously, the loose canopy is not an emergency situation, but since the glider pilot did not aviate first and was distracted, it was almost a fatal day for 2 people and 2 airframes.
So, what caused this chain of events? By getting distracted by the open canopy, the glider pilot inadvertently pulled back on the stick while trying to close the canopy. Then, by not releasing the glider from the tow plane, the glider pilot climbed rapidly with an excessive rate of climb while still being attached to me. The rapid climb is what pulled my tail up, causing my nose to drop and put me into the spiral. The tow rope snapping set into motion my recovery, since up till that point, I literally had no control. An extremely high lift wing was attached to my tail, pulling it up, and there was absolutely nothing I could do about it.
We all spend time practicing and demonstrating emergency maneuvers during our flight training and during flight reviews. Many times you might think, I’ll never need to use this stuff. Thankfully, some of the procedures I learned in the past kicked in at a time of need, even though my heart was beating out of my chest.
At some point in every pilot’s career, some type of spin training or Upset Recovery Training would be highly recommended. Then, when things go wrong, remember to always aviate first, then handle all the other things that need to be handled.
Interested in spin training or Upset Recovery Training (UPRT)? Check out the list of Malibu & M-Class Owner’s and Pilot’s Association (MMOPA) approved UPRT vendors and schedule UPRT training today.
by Lance Stick & Hank Gibson A couple of months ago, I had a life-threatening experience while flying. Thankfully, with my flight training, along with a lot of luck, I am here to talk about it. One of my many piloting jobs is as a glider tow pilot. For those not familiar with gliding, since…
Two pilots walk into an FBO. “Nice airplane,” Pilot 1 says to Pilot 2. “What kind of panel do you have in it?”
“I just went all glass,” Pilot 2 says. “Put in the Garmin G500 TXi, a GTN 750, and upgraded to the GFC 600 Autopilot. Even put in the Mid-Continent standby instruments. It’s a pretty sweet set up. What about you?”
“Wow, sounds like it!” Pilot 1 responds. “I went a different route. I liked all my old BendixKing instruments, so I stuck with the company. I put in a BendixKing AeroVue Touch panel, a BendixKing KSN 770 touch screen GPS, kept my KFC 225 autopilot, got the ADS-B out compliant BendixKing KT 74 transponder, and finished it off with a King AeroFlight KI 300 Digital Backup instrument.”
Wait, what? BendixKing?
Yes, my friends, BendixKing is still around.
We are all used to the latest and greatest Garmin products these days. Don’t get me wrong, Garmin and Aspen make great retro-fit products for your instrument panel, while Garmin and Avidyne are at the top of the touch-screen GPS market, but don’t forget about BendixKing. They are staying in the game too.
BendixKing announced in April the xVue Touch for experimental aircraft, with the STC for the AeroVue Touch for certified aircraft coming later this summer. The xVue and AeroVue touch are pretty nifty units, comparable in features to what Garmin is doing with the G500 TXi and G600 TXi. It will be difficult to claw back into a competitive market share with Garmin, but BendixKing might find a niche market of followers.
Let’s take a look at the unit.
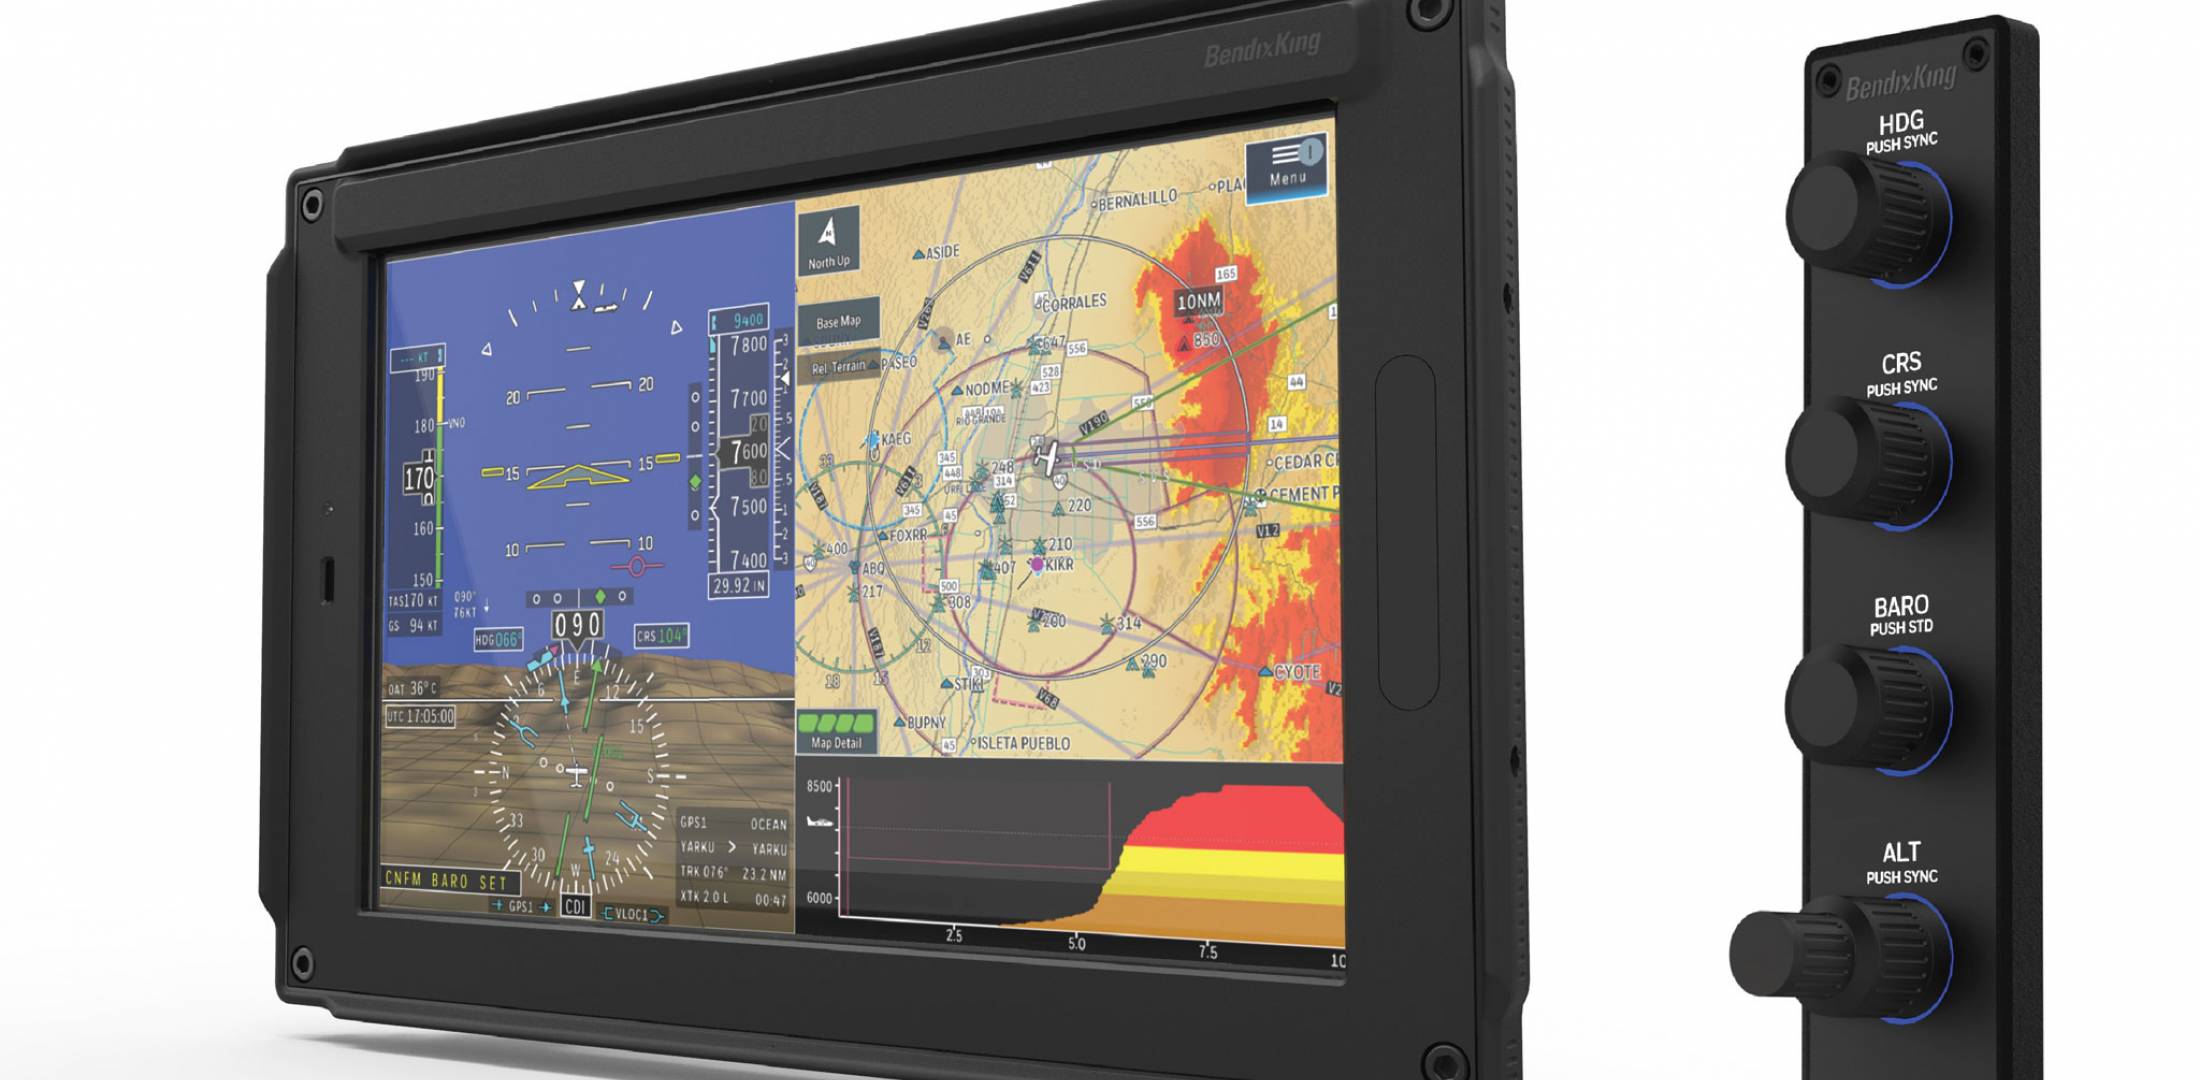
BendixKing AeroVue Touch
Now, I have not used the BendixKing AeroVue Touch or the xVue Touch, only read about them. But, what I’ve read sounds pretty cool. The display has really good resolution (BendixKing brags it is the highest screen resolution available), synthetic vision that comes standard (Garmin & Aspen charge extra for synthetic vision), plus VFR Sectional Charts & IFR High and Low Enroute charts, making paper charts even more obsolete.
The display is 10.1 inches and can be easily swapped between a full screen instrument mode or a split screen setup as seen above. Apparently, BendixKing has 3-D moving maps available on the AeroVue Touch too, which is standard.
The one thing Garmin has on the BendixKing AeroVue Touch right now is engine information. The G500TXi has a full complement of engine gauges available; the AeroVue Touch doesn’t, yet. BendixKing says it’s in the works, as well as radio information and autopilot control. I’m assuming the future autopilot control software would mean you could remotely mount an autopilot controller and input all functions from the AeroVue Touch display. The nice thing about these future upgrades is all the software updates are free through BendixKing.
The sticker price for the forthcoming unit is going to be about $12,600. Garmin’s 10.5 inch G500 TXi is $16,000, while Aspen doesn’t offer anything quite that big.
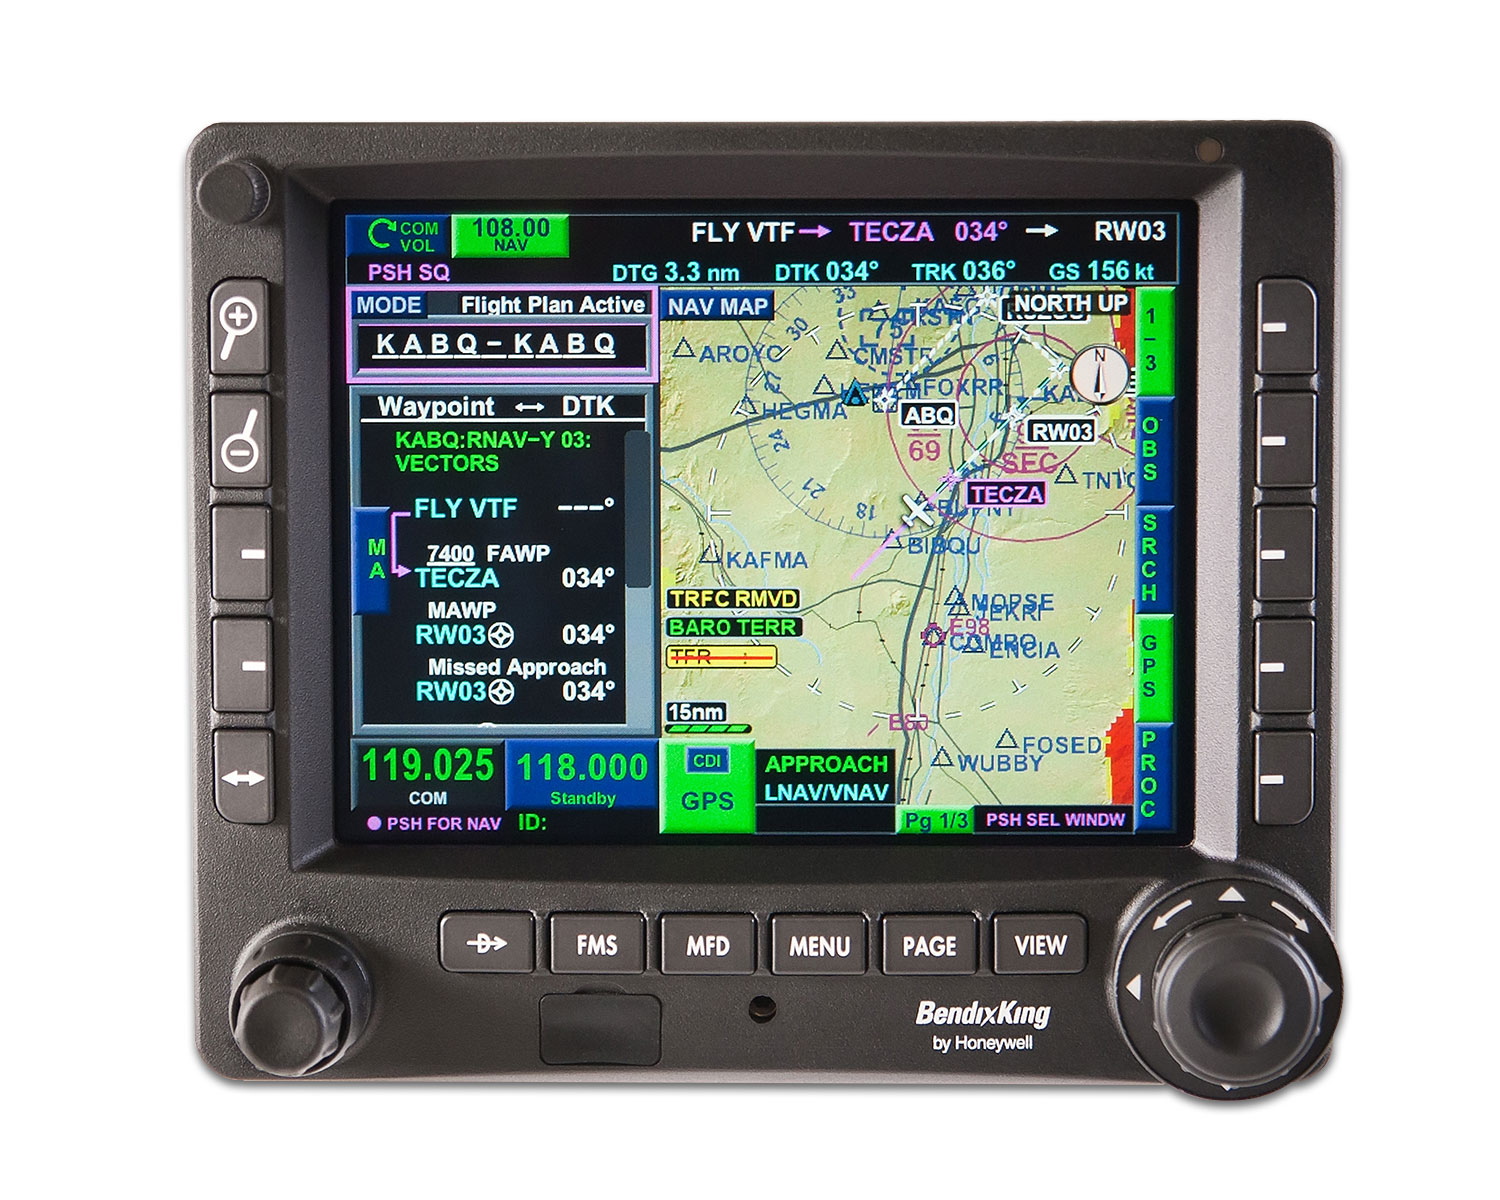
BendixKing KSN 770
I’ve been keeping my eye on the BendixKing KSN 770 Touchscreen WAAS GPS for a few years now. It never really has caught on quite like the Garmin GTN 750 or the Avidyne IFD 540. BendixKing took the same route that Avidyne did in creating a hybrid touch GPS (or mini-MFD if you want to look at it that way) where a pilot can perform functions either using the touch screen or utilizing soft keys on the edges. I like the hybrid touch approach as I have been bounced around in turbulence while trying to tap something into a Garmin GTN 750 and it can prove difficult.
Similar to the AeroVue Touch, BendixKing utilized split screen technology in the KSN 770. It’s a full WAAS unit that is already certified. It’s sticker price is $14,200, compared to the Garmin GTN 750 at $17,200 and the Avidyne IFD 540 at $15,000.
Other BendixKing Gadgets
Here are some other BendixKing Gadgets both available now and in the works:
KFC 230 AeroCruz Touchscreen Digital Autopilot-2 or 3 axis options. Will be the only touchscreen digital autopilot available on the market. Also able to utilize the servos from older KFC autopilots. Should be available late fall or winter ’18.
Two pilots walk into an FBO. “Nice airplane,” Pilot 1 says to Pilot 2. “What kind of panel do you have in it?” “I just went all glass,” Pilot 2 says. “Put in the Garmin G500 TXi, a GTN 750, and upgraded to the GFC 600 Autopilot. Even put in the Mid-Continent standby instruments. It’s…
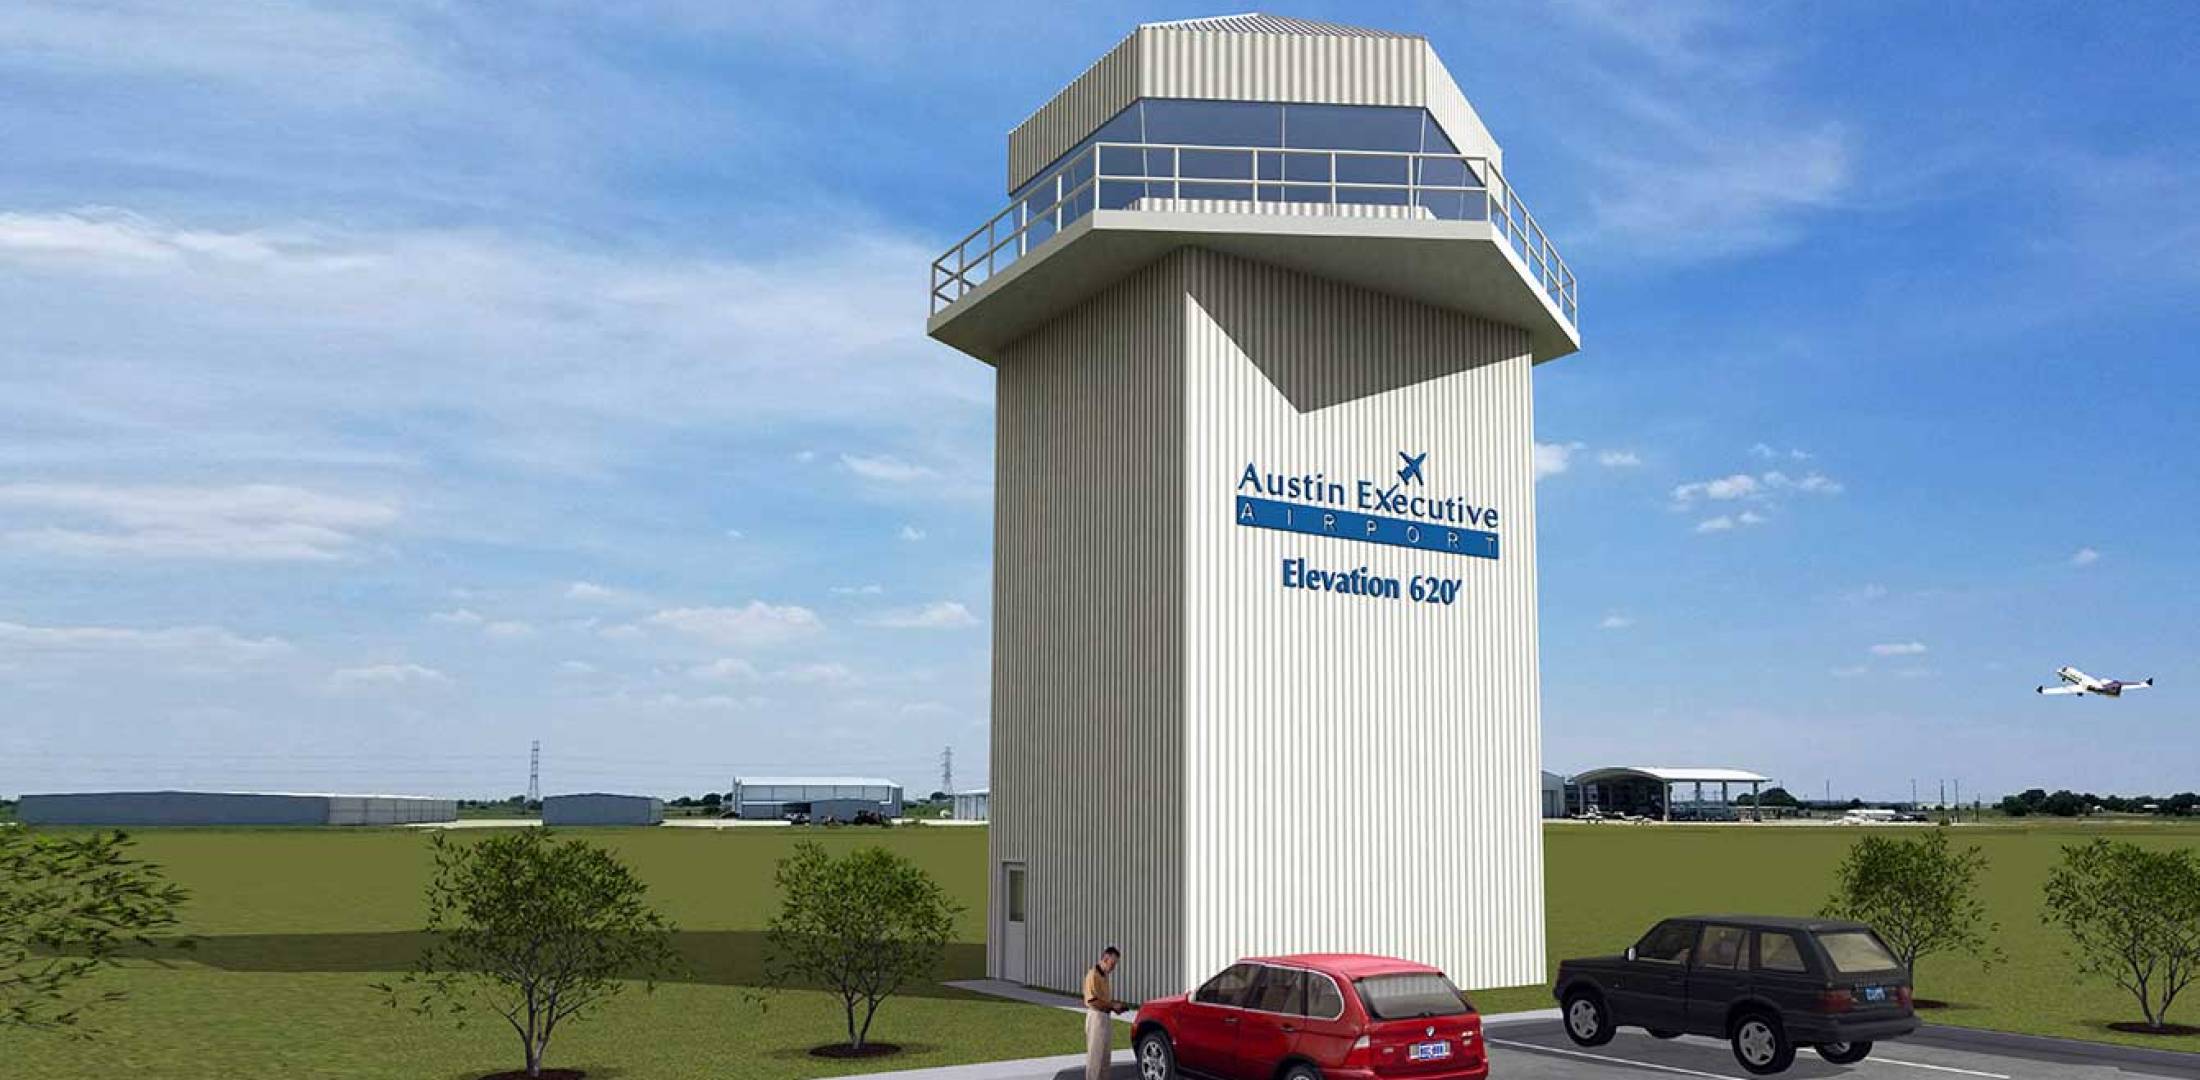
Austin Executive Airport opened a control tower on Friday, February 23rd 2018. The airport is now officially Class D airspace. The charts and A/FD are not updated yet to reflect the tower, but there is a NOTAM with the tower and ground frequency information. The tower hours are from 6am to 10pm. The weather frequency remains the same.
Make sure you check those NOTAMs if you are headed to KEDC anytime soon!
KEDC Tower Frequency: 120.3
KEDC Ground: 119.45
Austin Executive Airport opened a control tower on Friday, February 23rd 2018. The airport is now officially Class D airspace. The charts and A/FD are not updated yet to reflect the tower, but there is a NOTAM with the tower and ground frequency information. The tower hours are from 6am to 10pm. The weather frequency remains…
The FAA started their Pilot Proficiency Award Program (commonly known as FAA WINGS) in 1996. It is run by the FAA Safety Team, or the FAASTeam. The intent of the program was, and is, to “improve the nation’s accident rate by conveying safety principles and practices through training, outreach, and education” (taken from faasafety.gov). The FAA WINGS program, free of charge, encourages pilots to pursue recurrent training to enhance their overall knowledge of all the aspects of aviation.
The FAA WINGS program has evolved over the years, but with the current structure, pilot’s accomplish tasks, both knowledge and flying, for credit that adds up to the equivalent of a flight review. Pilot’s must accrue three knowledge credits and three flight credits to complete a phase, and each phase acts as a flight review.
FAA WINGS has three levels, the basic, advanced, and master level. Under each level, you accomplish different phases. The basic level is “designed for pilot’s [desiring] a higher level of proficiency than … a normal flight review” (faasafety.gov). The flying tasks in the basic phase are based on the private or commercial pilot PTS, depending on the airman’s certificate level. The knowledge courses revolve around many different areas, all of which can be viewed on the FAASafety Team’s website. Most are free, but there are some courses that have a cost associated with them. In the advanced and master phases of the FAA WINGS program, the tasks have higher standards, challenging pilots to hold themselves to those higher standards.
One unique aspect of the FAA WINGS program is the opportunity to attend a safety seminar for credit. Throughout the year, there are many different safety seminars that take place in the different FSDO areas. The FAA WINGS seminars range from a study of accidents, to GPS usage and anything in between. You can even get FAA WINGS credit for attending the Bonanza BPPP or the Cirrus CPPP programs.
As an instructor, I highly recommend to all my customers to enroll in the FAA WINGS program and use it. This keeps pilot proficiency at a high level, which in turn keeps safety at a high level as well. Plus, you get to learn a lot too!
If you’d like to enroll in the FAA WINGS program, visit faasafety.gov to create an account. Then, find a good instructor and start working on those phases!
The FAA started their Pilot Proficiency Award Program (commonly known as FAA WINGS) in 1996. It is run by the FAA Safety Team, or the FAASTeam. The intent of the program was, and is, to “improve the nation’s accident rate by conveying safety principles and practices through training, outreach, and education” (taken from faasafety.gov). The FAA…