AOPA recapped the year in the general aviation industry recently. A lot happened in 2016 including the certification of both the Cirrus Vision Jet and the Honda Jet. Several other manufacturers debuted new models, including Mooney with their Ovation Ultra and it’s 2 doors and Cub Crafters with their faster XCub.
To read the full year in review, you can read the AOPA Article here.
I have the privilege of serving on the Malibu & M-Class Owners and Pilot’s Association Safety Committee. Along with 6 other Piper PA46 instructors, we were tasked with two things last year leading up to the MMOPA Convention in Colorado Springs last October. The first was to develop a Master Aviator Program (more on that in a later article). The second was to develop Operating Practices for the Piper PA46 fleet that we as instructors could all get on board with to teach the same thing, allowing everyone in the fleet to fly approaches and patterns the same way.
When I started instructing in the piston Piper PA46 line (the Malibu, Mirage, and Matrix), I was surprised to find that there were no recommendations anywhere that I could find for approach and pattern power settings and airspeeds. This led to some experimentation on my part trying to find out what works well for the airplane. I had originally been given good training in a Malibu, but hadn’t flown one for several years, so my numbers were a bit rusty.
I have been in the Cirrus world for a very long time. One thing I greatly appreciated from an instructing point of view about Cirrus was the abundance of guidance the factory gives instructors and pilots on how the airplane is supposed to be flown. All CSIPs and all Cirrus pilots should (theoretically) be teaching and flying the exact same way.
I was quite surprised that Piper didn’t put out similar information. I wasn’t as familiar with MMOPA at the time, but was surprised they didn’t have any information either.
I apparently wasn’t the only one with a desire to have a little bit more standardization.
So, without further ado, here are the MMOPA Operating Practices that the Safety Committee put together. If you are a new Piper PA46 pilot, these numbers are what you will expect to use when you do your Initial training. If you are a seasoned Piper PA46 pilot, you probably fly these numbers, or pretty close to them already.
These are tried and true power settings and speeds for the approach phase and landing phase. They work. That was the goal of the Safety Committee: put down in writing something repeatable to enhance safety. I believe we have accomplished that.
I got a call today from a friend asking me about oxygen requirements. That got my brain pondering about the different items the FAA would like all pilots to know. I did a little refreshing and found several other tidbits directly from the FAA that I thought worth sharing. No matter what you’re flying, I think these apply to all of us.
First off, what are our general oxygen requirements? If you jump on over to the FAR’s and take a look at 91.211 you’ll see:
1. At cabin pressure altitudes above 12,500ft MSL to 14,000ft MSL, pilots
required to use oxygen unless the segment is less than 30 minutes of flight.
2. At cabin pressure altitudes above 14,000ft MSL, the crew is required to use
oxygen.
3. At cabin pressure altitudes above 15,000ft MSL, each occupant must be provided the use of oxygen. This doesn’t necessarily mean they have to use it.
Things get a little more in depth when you get to pressurized aircraft.
These requirements are also listed in 91.211:
1. If you’re flying above Flight Level 250, a 10 minute supply of oxygen is
required for each person onboard.
2. If you’re flying above Flight Level 350-410, and one pilot leaves their seat, the other pilot will be required to wear an oxygen mask, unless both seats are equipped with quick-donning oxygen masks.
There are three basic components to any oxygen system in an aircraft: the storage system, the delivery system, and the mask or cannula. First, there are several types of storage systems.
Gaseous aviators breathing oxygen is the first. This is the standard green tank that everyone is familiar with. There are two types of tanks. Either the high- pressure with 1800-2200 psi or the low pressure tank with 400-450 psi. The major issue with these and General Aviation aircraft is weight. Some of these tanks can get bulky and heavy and therefore don’t work for everyone.
Liquid aviators breathing oxygen or LOX is another form of storage. The major advantage of LOX is that it has a 900 to 1 expansion ratio, meaning that 1 liter of liquid oxygen can be expanded into 900 gaseous liters of Aviators Breathing Oxygen. The disadvantages of LOX are they are extremely volatile and have to be stored at -197F. If it comes in contact with exposed skin, severe frost bite can occur.
Sodium chlorate candles or oxygen generators have a weight advantage like LOX. They’re essentially a canister that when activated mix sodium chloride and iron powder and produce oxygen. They general have a 600 to 1 expansion ratio, which goes back to the weight savings. However, once these are started they are very hard to stop. Another disadvantage is these devices produce a fair amount of heat, so proper precautions need to be taken.
Next are the delivery systems. The main systems are Continuous Flow, Diluter Demand, and Pressure Demand. Continuous Flow, is exactly as it sounds. The oxygen is allowed to flow continuously from the tank to the user. The benefits of continuous flow are you don’t need a complicated mask or regulator. The downside to this system is since it continuously pumps oxygen, you’re wasting oxygen when you exhale. Most of continuous flow systems are used on aircraft that generally fly below 28,000 feet.
Diluter Demand was designed to fix the negative of the Continuous Flow systems. Diluter Demand only sends oxygen to the user when the user inhales. The system also allows cabin air to be introduced in, sending the perfect mixture of oxygen to the user when needed. These systems are very efficient and generally tend to be used up to 40,000 feet.
Pressure Demand is designed to essentially “over inflate” the users lungs. This will basically pressurize the the users lugs and allow the user to fly above 40,000 feet. This is needed at flights above FL400 because 100% oxygen without positive pressure will not suffice.
The final portion of the oxygen system is the mask or cannula. Nasal cannulas generally are more comfortable and are regulated to 18,000 feet service altitude. Masks come in a couple different variants. From re-breathers to quick-donning, most masks accomplish the same task with a few small differences. Quick-donning must be able to be put on within five seconds and are rated up to FL400.
Since that was a lot of information, what does all of it mean to you? Most fair weather flyers will never run into any of this. However, the high performance owner/operator will run into oxygen use situations a fair amount. Taking the family up to Colorado on a ski trip, jumping up to 12,500 feet to get above some weather, or flying above 5,000 feet at night on a long xc are all situations where you may want to have oxygen on board.
If you are planning on doing any of this type of flying or are currently doing these types of flights, training is a must. If you’ve never been in an altitude chamber, I would highly recommend it. In college, I went with a group to Oklahoma City to the FAA’s headquarters where they hold a class on Hypoxia and High Altitude flying. It’s very informative to be in the chamber as it simulates being oxygen deprived. You get to see how you’ll react and what kind of symptoms you’ll have when in a loss of oxygen situation. Each person has different symptoms, so it’s important to see how you will react.
It’s also good to fly with an experienced instructor. Finding an instructor who will allow you to learn in a safe environment is worth its weight in gold.
Ryne Bergren is currently a First Officer with Mesa Airlines in the CRJ 900. Ryne has experience in many different areas of aviation, from corporate to airlines to teaching to ferrying across the Atlantic Ocean. His passion is for all things that travel across the big blue sky.
As pilots, we are all familiar with the IM SAFE acronym that the FAA puts out. It comes up as part of the ground training over Human Factors during private pilot ground school. We all memorize it, spit it out for our check rides, then most of us promptly forget about it.
When I was training for my pilot’s licenses, I was at a Part 141 school that was very standardized (LeTourneau University, who has a fabulous aviation school). Before each flight, we had to do a self evaluation based on the weather and the IM SAFE checklist. Based on our answers, we would then determine if the conditions were conducive to flying as well as if I was physically okay to fly.
This was a great tool because not only do pilots have to pre-flight the airplane, they also need to pre-flight themselves. It’s very easy to fall into one of the “Hazardous Attitudes” if there is a pressing meeting or you haven’t flown in a while and it’s a beautiful day, but maybe you aren’t physically fit to control an airplane.
Let’s break down the IM SAFE checklist to dig a little deeper into the physically fit side of flying.
Illness
This one is pretty easy. Are you sick? If so, how sick? If you can’t hardly talk or your body feels like it was hit by a truck, then flying probably isn’t in your best interest.
The tricky area can become if you are only a little sick. Maybe you have a cough or a little cold or a headache is starting to form. You probably could go fly, but is it really a good idea? It could be something worse, or it may be nothing. You have to know yourself and put limits on yourself before you wake up on the day of your big meeting two states over. Set illness personal minimums and stick to them.
Medication
There are a slew of drugs, both prescription and over the counter, that pilots cannot take and fly. AOPA has a hotline to call for pilots to find out if they can fly with the medication they are taking, or what meds they can take to give them relief and still operate an aircraft.
Another great resource is your medical examiner. Just give him/her a call and they will be more than happy to let you know what you can and can’t take. They’ve been educated in the area of aviation so they are very knowledgeable.
Stress
This is a huge one that pilots ignore a lot. Maybe it was a stressful day at work, maybe you are running late to the airport, your meeting got moved up, whatever. Stress can jump on you and mess up a pilot’s thinking very quickly. If you have a lot of other things on your mind and you aren’t able to focus just on flying, it might be a good idea to stay on the ground.
Alcohol
Out of the whole IM SAFE list, the alcohol limitations are very clearly defined. 8 hours bottle to throttle, no more than 0.04% BAC, no operating an airplane while under the influence, and no carrying passengers who are visibly intoxicated. For your personal minimums, it’s a good idea to increase that time to 12, 18 or even 24 hours bottle to throttle.
Fatigue
Learning to fly while a college student led to a fair share of canceled flights due to fatigue. I operate best on 8 hours of sleep in the past 24 hours. I can function on 6, but anything less than 6 hours, my performance drastically drops off, sometimes to a point where I wouldn’t be safe. I discovered this while with my flight instructor attempting to do a holding pattern and completely botching it up.
I observed this as a CFI quite often. If I was doing ground with a student and they were struggling, my first question would be, how much sleep did you get last night? More often than not, if I had to ask that question, I would get an average answer of 3 to 4 hours (I even had one guy show up for a flight block on 2 hours sleep. I sent him back to the dorm).
Fatigue is very easily overlooked because it’s not measurable. Needing to get a flight lesson done or needing to get somewhere when you are obviously fatigued is not a good idea. Make sure you get a good night’s sleep before a flight and don’t be afraid to cancel if you didn’t. Set some sleep personal minimums and make them hard and fast.
Eating
Don’t skip meals and fly. Performance greatly decreases when a pilot is hungry. At the very least, stick a couple of food bars in your flight bag to give you some nourishment.
Also, stay hydrated, especially in the summer time. I carry a huge bottle of water with me on all my flights because I get headaches if I don’t drink enough. Getting dehydrated on a long flight can lead to all sorts of performance problems (over hydration is also a problem in the air, but that’s what Gatorade bottles are for, right?).
All this to say, have some personal minimums when it comes to you and your body. Check the plane, check the weather and check yourself. If anything falls in the “red” area in any one of those three categories, stay on the ground and don’t press your luck.
A couple of months ago, I had a life-threatening experience while flying. Thankfully, with my flight training, along with a lot of luck, I am here to talk about it.
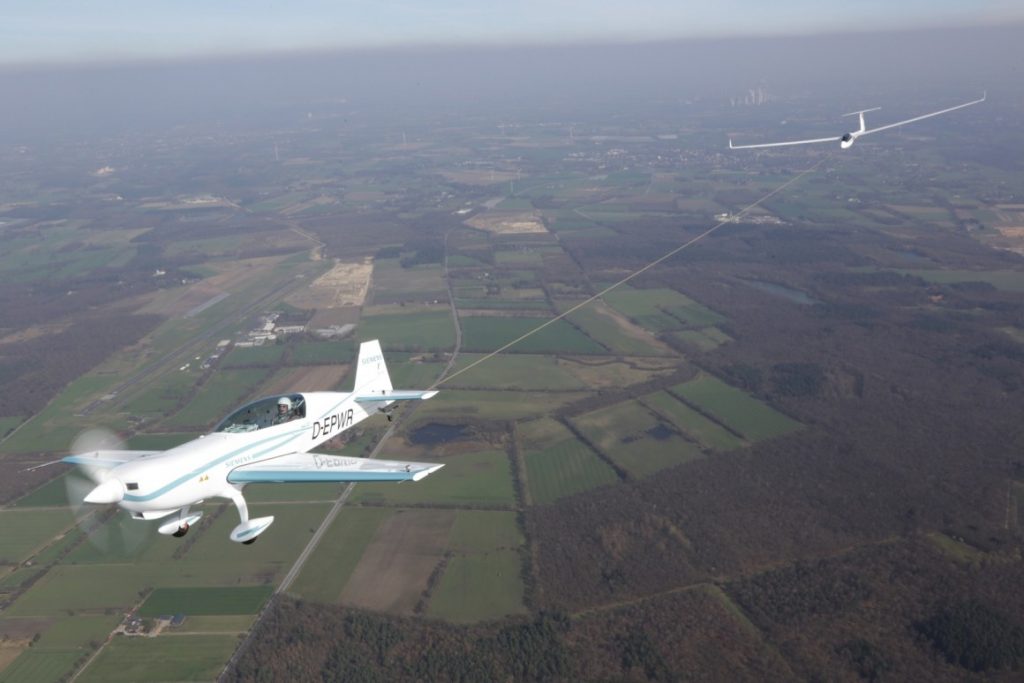
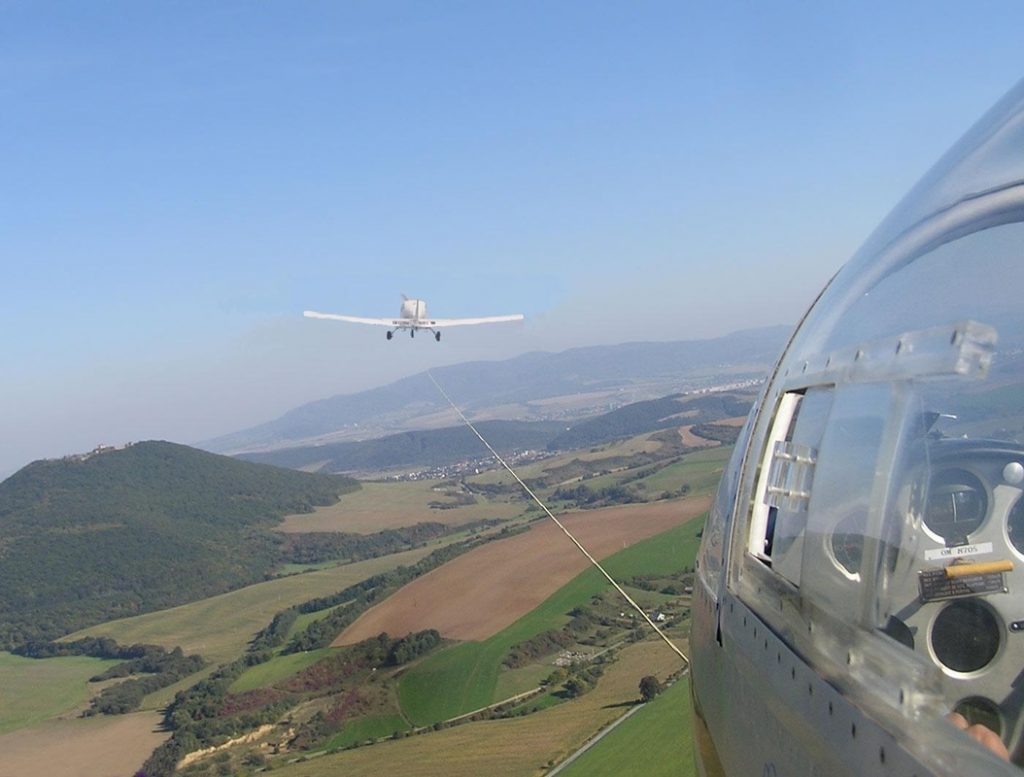
One of my many piloting jobs is as a glider tow pilot. For those not familiar with gliding, since a glider doesn’t have an engine, every time a glider pilot goes and flies, it’s a team effort. A powered airplane (anything from a Super Cub to a turbine powered Air Tractor) is attached to the glider via a tow rope, which is about 200 feet long. Once the glider pilot gives the go ahead over the airport’s CTAF, then the tow plane begins it’s takeoff roll, pulling the glider along behind it.
The glider becomes airborne prior to the tow plane, then the tow plane will circle the airport environment till it get’s to the pre-determined altitude to release the glider. Some tows are pattern tows and some are higher (not usually above 3,000 AGL), depending on the request from the glider pilot. Once the altitude is reached, the glider pilot pulls a handle in the glider to release the tow rope, then begins his glide. The rope stays attached to the tail of the tow plane, which in turn descends back down to the runway and lands. The tow plane also has a tow rope release handle in case of emergency.
On this particular tow, the plan was to tow the glider up to 3,000 AGL. Upon reaching 2,500 AGL, the glider pilot called me on the radio and stated that his rear canopy had opened up. I looked over my shoulder and sure enough, the rear canopy was fully opened while he was still in level flight behind me. I asked him if he wanted me to tow him closer to the field, but he didn’t reply.
Now, as an experienced tow pilot, I know a glider canopy popping open should not be an emergency situation. It’s definitely abnormal, but would be similar to a door or window popping open in a powered airplane. Not a big deal. If too much force from the relative wind is applied to the canopy, it would snap off; however, a glider can easily land without a rear canopy.
About 5 seconds after I radioed the pilot (and received no reply), I felt my tail instantaneously lift up into a completely vertical position, which caused my nose to go straight down. The next thing I knew, a whole lot of earth suddenly filled my windscreen and I was in what’s known as a graveyard spiral.
A graveyard spiral (as defined from the Airplane Flying Handbook pg 4-23), “is a descending turn during which airspeed and G-load can increase rapidly….the airplane is flying very tight circles, in a nearly vertical attitude and will be accelerating since it isn’t stalled.” It’s also known as a spiral dive.
Back to the story. At this point, I tried to reach for the glider release handle. Unfortunately, due to the shoulder straps holding me against the seat, plus the g’s, and also the quart of oil and tow bar that flew forward and hit me in the back of the head, I couldn’t reach it. I was semi-upside down at a certain point, which dislodged the oil and tow bar from the floor of the baggage compartment. They sailed over the seat and nearly gave me a concussion.
At this point, 2,500 feet above the ground, I had a choice to either fight for my life at a very low altitude or to sit back and become part of a big explosion.
I decided to fight for my life.
As I was spiraling to the ground, I felt the tow rope snap. Up to this point, I had still been attached to the glider. The rope snapping was a good thing, as my airplane was now under my control, not attached to, and being affected by, a glider (more on that later). I now had a lifeline, no pun intended.
After I felt the rope snap, my instincts and training kicked in. I initiated the spin recovery procedure using the PARE acronym. This task was difficult to do as I had a lot of debris flying from the rear of the plane to the front, blocking my view out of the windshield. There was also debris around my feet, hampering my ability to use the rudder pedals. The spiral finally stopped and I recovered approximately 500 feet above the tree tops. It took my heart a lot longer to stop spinning.
After barely regaining my emotions, I tried to evaluate the condition of the plane. Were all the pieces of the plane still there, was the engine damaged, did my control surfaces still work?
Once I advanced the throttle and saw an increase in my engine RPM, I started an immediate climb to give me altitude to get back to the airport. I had engine power but I wasn’t sure how long it would last if I had damage. Now, what they don’t teach you during spin training is that when this happens unexpectedly, you will become very disorientated. You have just been spiraling unexpectedly and your equilibrium will be out of whack. As I leveled out just over the tree tops, I was too low to visually see any landmarks, nor could I see the airport. Once I was able to climb, I was able to orient myself and figure out where the airport was.
I had to be very careful getting back to the airport and landing without radio communication, since my radio was knocked out with all of the FOD from the baggage area. Thankfully, the landing was uneventful. After I landed, I saw the glider limp in over the trees. The rear canopy was totally gone, while the front canopy and other parts of the glider had suffered major damage. Miraculously, my airplane wasn’t damaged, except for the wire from the radio which came loose during the spiral.
So, how did all this happen, you ask? Well, the glider pilot made 2 huge mistakes. First, in gliding, the moment the glider pilot loses visual sight of the tow plane, you are supposed to release the tow rope. He did not do that and almost killed both of us.
Second, as pilots we are taught to always fly the airplane first. Everything else, no matter what it is, always comes after flying the airplane. As I stated previously, the loose canopy is not an emergency situation, but since the glider pilot did not aviate first and was distracted, it was almost a fatal day for 2 people and 2 airframes.
So, what caused this chain of events? By getting distracted by the open canopy, the glider pilot inadvertently pulled back on the stick while trying to close the canopy. Then, by not releasing the glider from the tow plane, the glider pilot climbed rapidly with an excessive rate of climb while still being attached to me. The rapid climb is what pulled my tail up, causing my nose to drop and put me into the spiral. The tow rope snapping set into motion my recovery, since up till that point, I literally had no control. An extremely high lift wing was attached to my tail, pulling it up, and there was absolutely nothing I could do about it.
We all spend time practicing and demonstrating emergency maneuvers during our flight training and during flight reviews. Many times you might think, I’ll never need to use this stuff. Thankfully, some of the procedures I learned in the past kicked in at a time of need, even though my heart was beating out of my chest.
At some point in every pilot’s career, some type of spin training or Upset Recovery Training would be highly recommended. Then, when things go wrong, remember to always aviate first, then handle all the other things that need to be handled.
Interested in spin training or Upset Recovery Training (UPRT)? Check out the list of Malibu & M-Class Owner’s and Pilot’s Association (MMOPA) approved UPRT vendors and schedule UPRT training today.
I’ve noticed that a lot of general aviation pilots tend to ignore the flight director on the attitude indicator. A lot of pilots don’t even know what it’s there for or how to use it. Talk to any airline pilot, though, and he or she will tell you how important the flight director actually is.
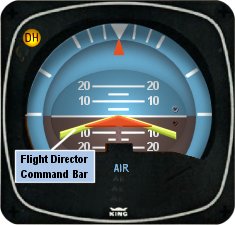
In most high performance airplanes, the flight director comes on when the autopilot comes on. Essentially, the autopilot is following the flight director, which tells the autopilot where to go. The flight director can also be used with the autopilot off, when hand flying an approach, for example. By turning the flight director on, it will show you where you need to fly to stay on course and on glide slope.
The flight director is most often controlled by the autopilot controller. The same buttons you use to put the autopilot in heading mode also tells the flight director to follow the heading bug when the autopilot is off. When you move the heading bug (or change course on the GPS, depending on which mode you have selected), the flight director will show you when you need to turn and when you need to stop turning. It directs your flight attitude, hence the name.
I recently discovered it’s a great backup when you have some instruments on the fritz. I went on a long flight in a steam gauge Piper Malibu and the attitude indicator started reading erratically. While flying straight and level, it would randomly indicate that I was in a 10 degree bank to the right, swing back and show wings level, then show a 3 degree turn left. This went on for a while. We were in VMC conditions, so legality wasn’t a problem, but it was kind of disorienting.
After a little while of this, the autopilot started acting up. It would start oscillating the pitch up and down, making it seem like we were going through a moguls course in the air. I ended up turning the autopilot off and hand flying the airplane.
This led to a conundrum, since my attitude indicator was unreliable. I could definitely look outside, since it was VMC, seeing when I was level and when I wasn’t. That would create a higher workload for me, which on a long flight like I was on, would lead to an increase in fatigue. The solution? The flight director!
I turned the autopilot off, but I left the flight director up. It wasn’t referencing the bank angle that the attitude indicator was showing since the KFC 150 goes off of the turn coordinator. So, if I just followed the attitude indicator, I could just keep scanning the instruments and relieve a little bit of my workload.
It actually worked really well. By just following the flight director, I was able to stay on course and on altitude with only minor attitude adjustments whenever we hit turbulence.
So, if you’re attitude indicator and autopilot decide to stop working on you, then bring up the flight director, push the same buttons you would if you were using the autopilot, and it works as a great backup.
Recently, I did my TBM and Meridian recurrent training with Joe Casey of Casey Aviation. I always like being challenged my more seasoned instructors than me because I always get to learn something. When I learn something, it makes me a better instructor and allows me to give better instruction to my customers. Plus, there is still a bunch that I don’t know!
Joe has a podcast titled The Malibu Guru (because he really is the Malibu guru!). During our training, we did a podcast together and he interviewed me. I get to tell about Texas Top Aviation and some exciting things coming up this summer (hint: the biggest exciting thing is called The Aviator’s Academy). Before I give too much away, take a listen to the podcast.





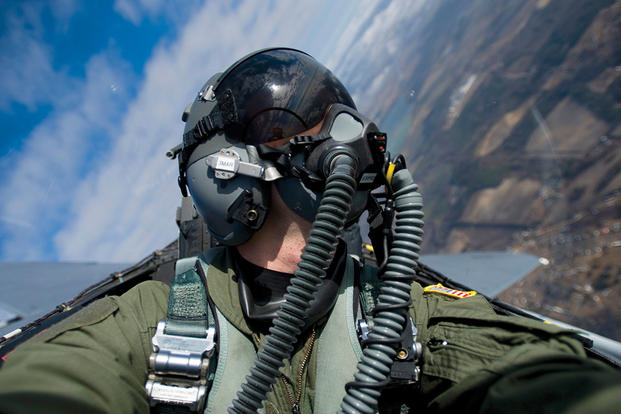
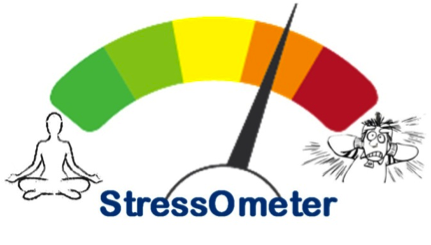 This is a huge one that pilots ignore a lot. Maybe it was a stressful day at work, maybe you are running late to the airport, your meeting got moved up, whatever. Stress can jump on you and mess up a pilot’s thinking very quickly. If you have a lot of other things on your mind and you aren’t able to focus just on flying, it might be a good idea to stay on the ground.