Cirrus Announces The New Cirrus G6 SR20 & SR22

Earlier this month, Cirrus announced the new Cirrus G6 SR20 and SR22.  To the naked eye, they look like incredible airplanes.  There is new lighting and the updated Cirrus Perspective+ avionics in both models, plus the SR20 is now a Lycoming powered airplane.

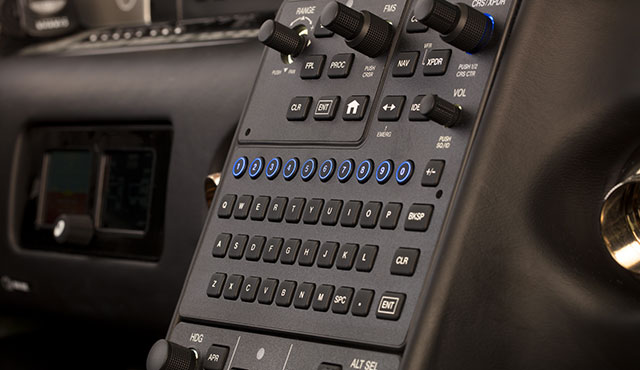
The Perspective+ in the Cirrus G6 is based on Garmin’s G1000 NXi platform.  The keypad is updated to a QWERTY keypad, allowing for quicker inputting of data since our fingers are already used to the setup.  A home button was added to the center stack to get back to the map page without having to hold down the CLR key.  The bug knobs were moved down to the autopilot, while the display of the GFC 700 was altered slightly to match the Vision Jet setup.

Cirrus G6 Perspective+

The Perspective+ also boasts a 10-fold increase in processor speed, allowing the system to move quicker than the standard Perspective.  The ability to wirelessly update databases has also been included.

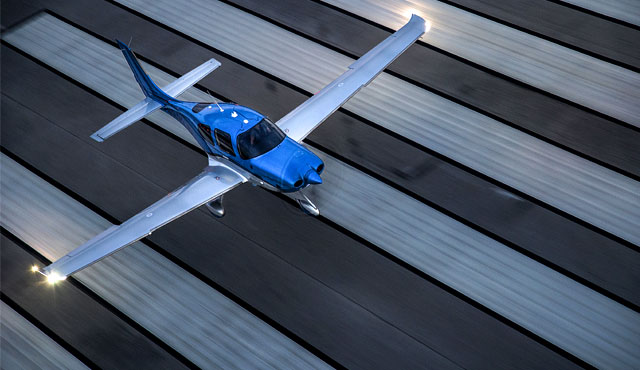
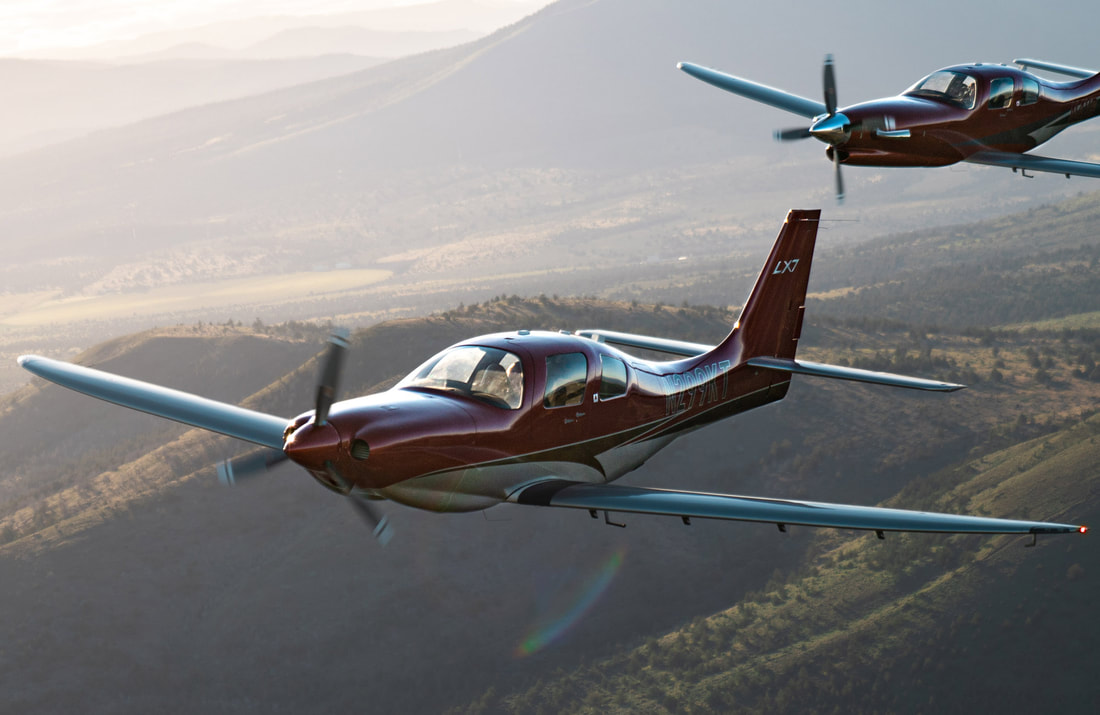
The exterior of the Cirrus G6 SR22 and SR20 models has changed as well.  Cirrus has added the Spectra wing tip lighting system to the Cirrus G6.  It incorporates an entire light panel that runs the length of the wing tip.  The LED dual strobe setup helps with aircraft visibility and ramp appeal.

Cirrus G6

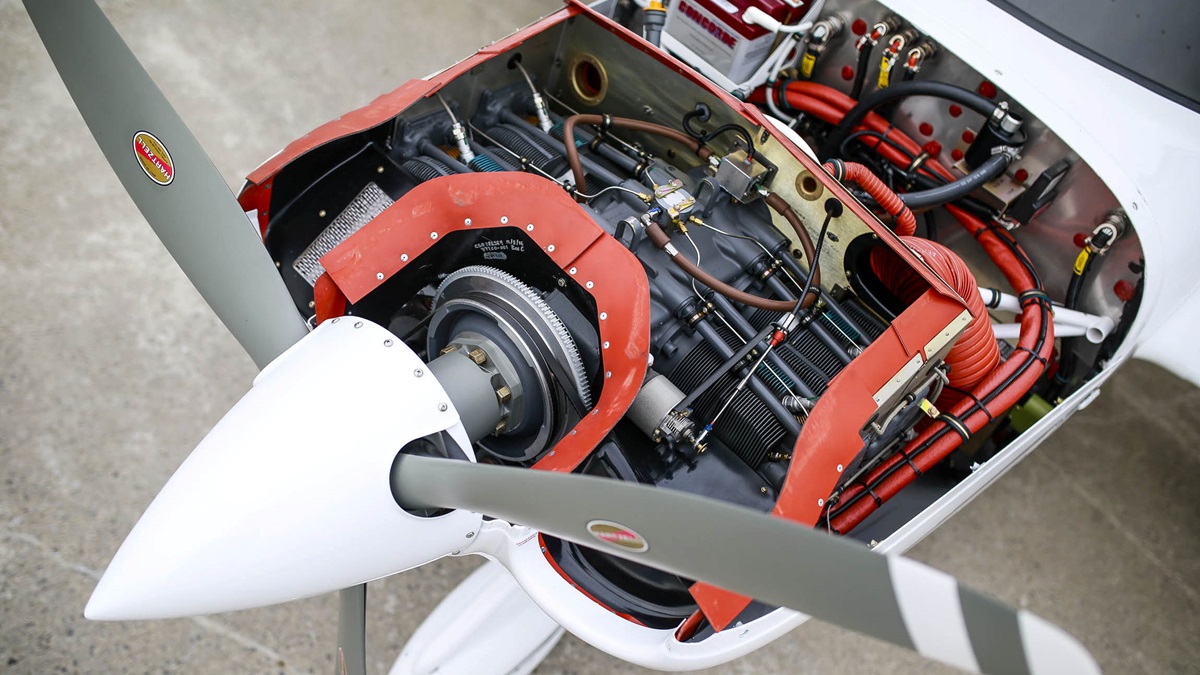
The SR20 engine has been changed to the Lycoming IO-390, 215 HP engine.  The Continental IO-360-ES 6 cylinder engine comes out of the SR20 and the 4 cylinder Lycoming goes in.  2 less cylinders will help with useful load and the extra 15 HP will help with takeoff and climb performance.

SR20 Lycoming

The new Cirrus G6 is available for order and delivery immediately.  To read all the details and specs on the Cirrus G6, you can check out Cirrus’ website.

Similar Posts

  • Redbird Skyport Bluebonnet Fly-In at KHYI

    Bluebonnet Fly In

    Come out to Redbird Skyport at the San Marcos Municipal Airport on Saturday, May 30th for the Bluebonnet Fly-In.  Hank Gibson from Texas Top Aviation will be giving a safety presentation at 2pm in the large conference room entitled “Is The Approach Activate?  Flying Garmin Approaches.”

    Join Texas Top Aviation and Redbird Skyport as we open the summer together at the Bluebonnet Fly-In.

    To Register for the Safety Seminar, please click here.

  • Cirrus G2 Vision Jet

    Well, that was fast.

    In January, Cirrus announced the Generation 2 SF50 Vision Jet.  After getting the Generation 1 Vision Jet certified in late 2016, Cirrus didn’t waste any time in starting in on improvements.

    The improvements are pretty sweet, making the G2 Vision Jet even easier to fly and step into for Cirrus’ target market, SR22 owners.

    Here are the improvements on the G2 Vision Jet.

    RVSM Approval

    The G2 Vision Jet has received RVSM approval, allowing the airplane to fly at 31,000 feet.  RVSM stands for Reduced Vertical Separation Minimums (read more about RVSM here).  RVSM airspace starts at 28,000 feet, the G1 Vision Jet’s ceiling.  Now that the G2 Vision Jet is RVSM certified, it can fly at 31,000 feet.

    For piston pilots, you are left scratching your head as to the advantage of this.  In a jet, the higher you go, the thinner the air, so the faster you go, and the less fuel you burn since the thin air needs less fuel to mix with.  This caps out at a certain altitude and the speed begins dropping and you start losing efficiency (even though the fuel burn is quite low).

    According to Cirrus, at 31,000 feet, the G2 Vision Jet cruises over 300 KTAS and gets a range boost to almost 1,200 nm.

    Garmin Perspective Touch+

    Cirrus & Garmin have taken the new NXi interface and paired it with the Garmin Perspective Touch to create the Touch+.  You can read about the improvements on the NXi here, all of which are included in the Touch+ in the G2 Vision Jet.

    The big improvement that is included in the Touch+ is Autothrottle capability.  An Autothrottle is integrated with the autopilot.  It automatically adjusts power settings and speeds based on the phase of flight without the pilot having to touch the throttle.  Pretty cool.

    New Cabin

    The G2 Vision Jet has a redesigned cabin as well, making it an extremely passenger friendly airplane.  The second row has been redesigned and equipped with a center console.  There is also a drop down TV screen that allows passengers to connect their mobile devices to it to watch movies or videos while traveling (no internet on board, yet.  That’ll probably be the G3 Vision Jet!).

    Cirrus also put in more noise reduction in the cabin, creating a quieter ride for passengers.  Cirrus also allows for multiple different seating configurations, depending on the needs of the owner.

    As always, Cirrus is on the leading edge of airplane technology, creating airplanes that are easy as well as fun to fly.  I’m excited to see how they continue to improve the design to both the SR22 and the Vision Jet.

  • Calm Wind Landings

    Some of a pilot’s favorite words are heard on the ATIS:  “Winds, Calm.”  These words set off all sorts of happy bells and hallelujah choruses.  Most pilots spend their lives fighting the winds.  On those rare days when the winds are calm, great happiness ensues.

    Limp Wind Sock

    But, are calm wind landings more complicated then everyone thinks?  Well, they can be if the proper planning doesn’t go into them.

    Let’s think about wind.  We have surface wind and we have winds aloft. Sometimes the surface winds are calm.  When this happens, certain airports have preferred calm wind runways which are supposed to be used in these conditions.  Winds aloft are almost never calm.  95% of the time, there is some kind of wind even 100-200 feet above the surface.

    Here is the question pilot’s face when coming into an airport with calm winds: which runway do I use?  Do I use the calm wind runway?  Do I use the runway that is easiest to enter the pattern for?  Do I use the one with the shortest taxi?

    A lot of technologically advanced aircraft have a wind indicator on the PFD. This tool is often forgotten in calm surface wind conditions.  On the contrary, this is probably the most important tool a pilot can have when figuring out which runway to use when the winds are reported calm.

    Here’s why.  That wind indicator is showing the pilot what the winds aloft are. The winds aloft should determine what runway is going to be used.  If the wind indicator is depicting a south wind, then a south runway should be used.  Even if it is a 5 knot wind at pattern altitude, it’ll still be a headwind coming in on final approach.  If the north facing runway is used, that same 5 knot headwind can blow an airplane halfway down the runway before the ground speed drops off enough for it to land.

    So, the next time you are coming into an airport and the winds are reported calm, take a look at your wind indicator on your PFD when deciding which runway to use.  It’ll probably save a few go arounds!

  • Garmin GTN 750 Tips & Tricks

    The Garmin GTN 750 is an awesome piece of equipment.  Garmin tried to make the user interface with the touch screen as simple as possible (though there still is a bit of a learning curve when moving up from a Garmin 530W).  Garmin also integrated several key features that the 530W did not have that makes flying with a Garmin GTN 750 in IFR all that much better.

    The two features of the Garmin GTN 750 I want to focus on today are the “Load Airway” feature and the “Hold at Waypoint” feature.  If a pilot isn’t looking for these specifically, they can actually be a bit hard to find.  The “Load Airway” feature is especially handy when flying IFR long distances with several airways as part of the clearance.  Here’s how to utilize both.

    Load Airway

    1. On your flight plan page, insert the waypoint that you will be joining the airway, or, if your clearance was radar vectors to join an airway, then insert the waypoint on the airway that begins the leg you will be joining on.
    2. Tap the waypoint you just inserted.
    3. A menu will pop up.  Tap Load Airway.
    4. Select the Airway you want from the next menu that pops up.
    5. Then, a list of waypoints will display to exit the airway.  Select the waypoint where you will be exiting the airway.
      1. Note:  Garmin defaults to listing these waypoints alphabetically.  If you unselect the “Sort Alpha” option, it will sort the waypoints by direction and distance from the entry waypoint.  This is a little more practical, easier to work with, and how I recommend doing it.  This way you can either scroll up or down depending on the direction of travel on the airway and find your exit waypoint.
    6. Tap Load.
    7. The Airway and all the waypoints in between your entry and exit waypoints appear in your flight plan.
    8. If you are getting vectors to join the airway, you’ll need to use the Activate Leg function to activate the leg you will be joining the airway on.
      1. On the Flight Plan page, tap the waypoint that ends the leg you want to activate.
      2. On the menu that pops up, tap Activate Leg.

    Hold At Waypoint

    The Garmin GTN 750 allows pilots to place a holding pattern at any waypoint that is in the Nav Database (or any user created waypoint).  Here’s how to do it.

    1. On the Flight Plan page, tap the Waypoint that you want to hold at.
    2. On the menu that pops up, tap Hold At Waypoint
    3. On the next menu that pops up, input either the inbound or outbound course, right or left turns, leg time or distance, and the EFC time, then tap Load.
    4. You will see the hold now as a Waypoint in your flight plan.


    Once the hold is entered, the GPS will go into Suspend mode, suspending the Flight Plan Waypoint Sequencing.  Once you are ready to depart the hold, you will have to tap Unsuspend before crossing the holding point on the inbound leg, then the GPS will resume normal waypoint sequencing.

    These are 2 of the really cool, gee-wiz features of the Garmin GTN 750.  Following the above steps will make IFR flying much easier for the pilot, as well as much more enjoyable!

  • Contact Approaches

    Almost all IFR pilots are familiar with visual approaches and what the requirements are in order to fly a visual approach. As a refresher, the Instrument Procedures Handbook defines a Visual Approach as “an ATC authorization for an aircraft on an IFR flight plan to proceed visually to the airport of intended landing; it is not an [Instrument Approach Procedure]” (page 4-56).

    For ATC to issue a Visual Approach, the pilot must have the airport or the traffic to follow in sight. Once the pilot reports the airport or the traffic in sight, ATC can clear the aircraft for a visual approach.

    A limiting factor for a visual approach is ATC’s Minimum Vectoring Altitude. “This altitude, based on terrain and obstruction clearance, provides controllers with minimum altitudes to vector aircraft in and around a particular location” (Instrument Procedures Handbook page 1-42). ATC has to restrict aircraft to these MVAs, which can sometimes be quite high due to terrain or obstacles in the vicinity of the airport.

    Every pilot has been in a situation with a high MVA that ATC can’t get them below, but it’s solidly MVFR or VFR at the destination airport. The MVA keeps the pilot in the clouds, so a visual approach isn’t possible since the pilot can’t see the airport or the traffic to follow. This can lead to extra time to go out and fly an approach.

    Enter a Contact Approach. A Contact Approach is different then a Visual Approach. “The main differences between a visual approach and a contact approach are: a pilot must request a contact approach, while a visual approach may be assigned by ATC or requested by the pilot; and a contact approach may be approved with 1sm visibility if the flight can remain clear of clouds, while a visual approach requires the pilot to have the airport in sight, or a preceding aircraft to be followed, and the ceiling must be at least 1,000 feet AGL with at least 3sm visibility” [Instrument Procedures Handbook page 4-57].

    Here’s the simplified explanation: A pilot does not have to have the airport in sight to request a contact approach. All that is required is for the airport to be reporting at least 1sm visibility and for the pilot to remain clear of clouds.

    When would this be helpful for an IFR pilot? Good question. Here’s a scenario.

    Pilot Smalls is about 20 minutes from his destination, which is an uncontrolled airport with only one approach to runway 17. He is approaching from the south and the initial approach fix for the approach to 17 is about 15 miles north of the airport. The airport is under Center control. When he has arrived at this destination in the past, Center usually could only vector him down to 4,000 AGL. He is very familiar with this airport and the surrounding area as he comes to this destination at least 2-3 times a month for business.

    Pilot Smalls listens to the AWOS, which is reporting a 2500 foot scattered layer and 10 miles visibility. He knows it is right traffic for 17 since there is a 2,000 foot antenna on the east side of the field. There is some hilly terrain around, but all the terrain is well below pattern altitude and doesn’t cause a safety issue.

    Looking out at the clouds, Pilot Smalls observes that the cloud layer is scattered to broken, but more scattered on the west side of the airport, with several large openings that he can see the ground through. Center asks for his approach request and Pilot Smalls requests a visual approach. Center gives him a descent to 4,000 AGL, their MVA for the area. They tell him to report the airport in sight for the visual approach.

    At 4,000 AGL, Pilot Smalls is going through the scattered layer of clouds, but can see the ground in between the clouds and deems he has room to maneuver safely between the clouds and stay clear of them. He can’t see the airport, so a visual approach seems unlikely. He can’t cancel IFR because then he would have to keep the VFR cloud clearance and visibility requirements in Class E airspace (1,000 feet above, 500 below and 2sm horizontally), which isn’t possible in this case.

    5 miles from the airport, ATC states, “N12345, I’m going to have to send you out for the approach since you don’t have the airport in sight.” Pilot Smalls then requests a Contact Approach. ATC clears him for the Contact Approach to his destination, so Pilot Smalls descends through a break in the clouds, remaining clear of clouds, until he gets below the base of the ceiling. He maneuvers onto the right downwind, lands and cancels IFR.

    Contact approaches can be useful at controlled and uncontrolled airports. The first time you request one, do so with a higher ceiling and some room to maneuver to keep your safety margins. After you’ve done a few, you can determine what your personal minimums are for a Contact Approach.

    I would not recommend doing a Contact Approach at an airport you are unfamiliar with. It’s vital to know what obstacles are around since on a Contact Approach, the pilot is now responsible for traffic avoidance and terrain avoidance, whereas on a visual approach, ATC resumes that responsibility.

    For more reading on Contact Approaches and another good scenario, check out Bold Method’s article on Contact Approaches.

  • Cirrus SR22 Partnership in Houston

    Ever wanted to be a Cirrus owner, but the economics of being a single owner just don’t make sense for you? If you’re in the Houston area, you now have a chance to join a Cirrus SR22 partnership at the West Houston Airport, KIWS.

    The group, CirrusShare, is a 4 member group, but one of the members is looking to sell his share.  The airplane is a 2007 G3 SR22.  It is in excellent condition, with dual WAAS 430s and air conditioning.

    If you would be interested, please contact Texas Top Aviation for more information.

    N578AG


Leave a Reply

Your email address will not be published. Required fields are marked *