Night Flying

Ah, fall is finally here.  In Texas, it arrived about a month late, but showed up with a vengeance.  A strong cold front caused a 40 degree temperature drop in 12 hours earlier this week, bringing rain, lower freezing levels, and lots of wind.

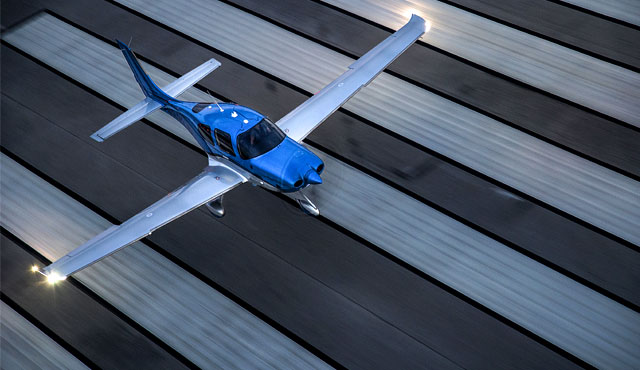
Fall means cooler temps, but fall also means less light.  The sun begins to set sooner, plus the fall back time change in November cause darkness to spring upon an unaware pilot.

Before getting in to too many night landings tips, just a friendly reminder, passengers can only be carried at night if the PIC has completed 3 takeoffs and landings to a full stop in the last 90 days during the time period of 1 hour after sunset to 1 hour before sunrise.

Lots of us have been landing long before sunset for most of the past couple of months, so those night flying skills might be a little rusty.  The best way to remedy night flying rustiness?  Call an instructor and go get some practice.

In the meantime, here are some tips as to what to expect for your next night flying experience.

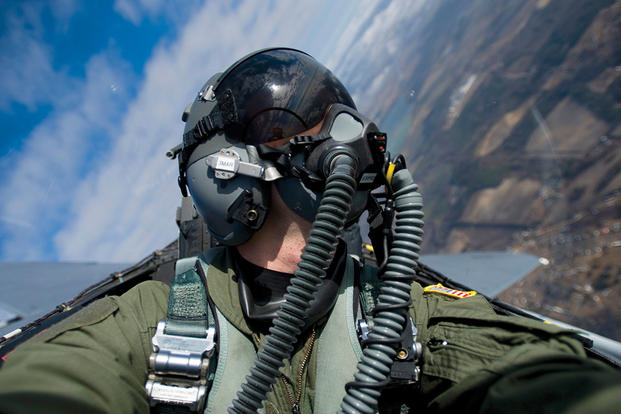
  1. Your Eyes Are Very Important.  This may seem like an obvious statement, but night vision can be affected by many things.  Before you takeoff, you want to make sure you can see in the dark.  The FAA recommends no bright lights 30 minutes prior to takeoff.  They also recommend using oxygen at night as this greatly improves night vision, even at low altitudes.  Use off center viewing to help spot traffic or other objects in the air.  Finally, when preflighting, use a red flashlight as much as possible, but if you do have to use a white light, close one eye to keep one eye from being blinded.
  2. Utilize Approach Lights on Landing.  Night landings are very different then day landings.  It is very difficult to get the proper depth perception, not too mention see obstacles below you on your final approach to a runway.  PAPI’s, VASI’s, and instrument approach glide slope’s become very important.  If you are VFR only pilot, if your airport has a PAPI or a VASI, keep 2 white and 2 red (or 1 white and 1 red) lights.  If you see 3 red (or 2 red), climb.  If you see 4 red, definitely climb.  If you are an IFR pilot, I highly recommend always flying an approach at night.  What if your airport doesn’t have a PAPI, VASI, or approach with a glide slope?  You might not want to utilize it at night.  One side note on VFR flight: Clouds are nearly invisible at night.  If you do fly into a cloud (a clue is your strobe lights start reflecting back at you), don’t panic.  If you have an autopilot, turn it on and execute a 180 degree level turn.  If you don’t have an autopilot, start scanning your instruments, keep your attitude indicator blue side up, and make a shallow 180 degree while maintaining altitude.  Then call ATC, advise them what happened, and ask for help.  One more note:  I highly recommend that if a pilot finds that he/she will fly at night at lot, get an instrument rating and fly IFR at night.  It’s much safer.
  3. Practice Landings Before Carrying Passengers.  The tendency when landing at night is to level off too high before flaring, causing the airplane to bleed off speed and energy too high above the runway.  This can lead to a stall, a hard landing, and/or too high of a pitch attitude at touch down causing a tail strike. A good tip is start your level off when you can see the tire marks on the runway.  Make sure you practice night landings, preferably with an experienced instructor who is night current and proficient, before carrying any passengers on board, even if you are night current, but haven’t landed at night in a while.
  4. Night Emergencies.  For engine failures at night, you are very limited on options.  Unless you have a Cirrus equipped with a CAPS parachute system, you really have two options if an airport isn’t within gliding distance.  Find a wide, lighted road that appears to be lightly trafficked.  A word of caution, though:  be careful of light poles, fences, concrete medians, cars, and buildings.  The LA freeway would not be a good option (though there are exceptions to this rule as is evidenced by the picture below).  The second option is find a dark spot and pray it’s a field (or the Hudson River).  As you get closer, you can turn your landing light on to see what the ground looks like.  If it looks good, keep the light on and continue.  If you don’t like what you see, turn your landing light off and continue….
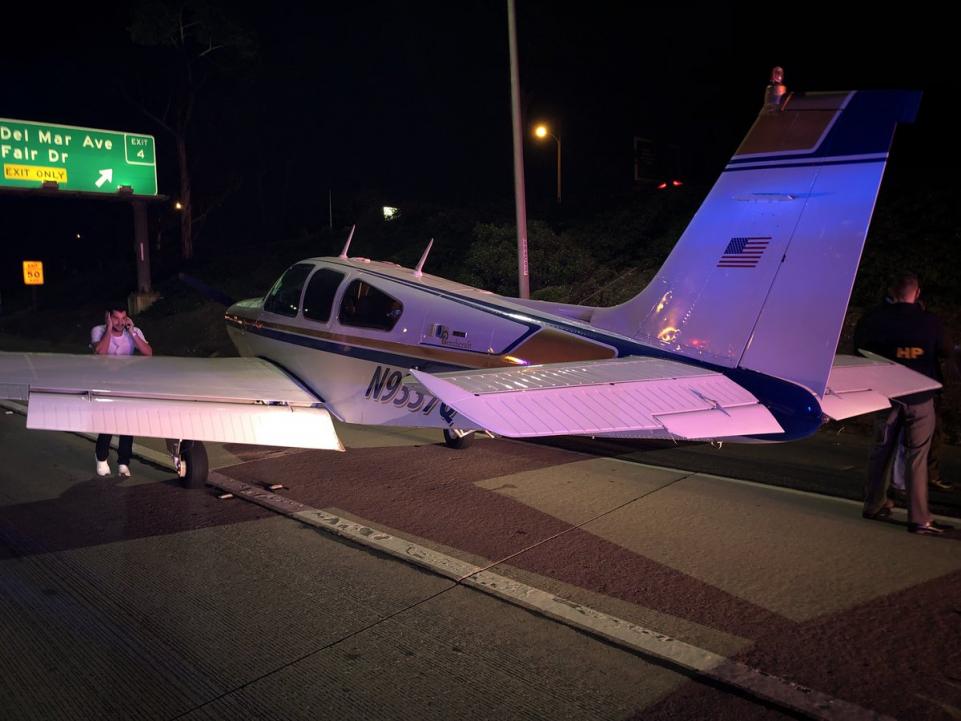
Flying at night can be the best time of day to fly.  It’s usually smoother, cooler, and you get to see all the city lights.  It is a very different environment, however, so make sure to get some training before darkness settles in on your next trip.

Similar Posts

  • AOPA Air Safety Foundation Survival Seminar

    The AOPA’s Air Safety Foundation will be returning to Texas this coming week with their After the Crash:  Surviving An Aircraft Accident seminar.  Though aircraft accidents are rare to most pilots, they still happen.  It is best to be prepared with the proper knowledge and supplies in case you are stranded in a remote area while awaiting help to arrive.

    The seminar will cover the following items:

    • How and what to pack in a survival kit
    • Ways to help search parties find you
    • What to do first immediately after the off airport landing
    • How to survive will awaiting rescue

    The seminar will be put on in Houston, San Antonio, and Austin on three consecutive nights, the 20th-22nd, so everyone will get a chance to attend.  The location and times are below.

    No signup is necessary, just show up and be ready to learn.  The seminar does count for WINGs credit and there will be a sign in sheet at each event.

    The AOPA Air Safety Foundation puts on numerous seminars throughout the country during the year covering a wide variety of topics relevant to general aviation pilots.  The content is always interesting and the presenter always knowledgeable and entertaining.  Hope to see you there!

    Tuesday, January 20th

    Wyndham Hotel, Houston West
    14703 Park Row Blvd.
    Houston, TX 77079
    7:00pm-9:00pm

    Wednesday, January 21st

    Doubletree Hotel, San Antonio Airport
    37 NE Loop 410
    San Antonio, TX 78216
    7:00pm-9:00pm

    Thursday, January 22nd

    Omni Hotel, Southpark
    4140 Governor’s Row
    Austin, TX 78744
    7:00pm-9:00pm

    For more information on the event and the locations, please click here.

  • TBM Debuts the 960 at Sun N Fun

    This is a Press Release from Daher’s website, the maker of the TBM 960.

    Sun ‘n Fun Aerospace Expo, Lakeland, Florida, April 5, 2022 – Daher today unveiled the latest high-end version of its TBM pressurized single turboprop aircraft family – the TBM 960 – which incorporates Pratt & Whitney Canada’s advanced PT6E-66XT engine and a fully digital e-throttle, along with a digitally-controlled cabin that incorporates an all-new environmental control system, LED ambience lighting and electrically-dimmable windows.

    The TBM 960 was introduced at the Sun ‘n Fun Aerospace Expo in Lakeland, Florida, where Daher is exhibiting the first production airplane (exhibit stand #MD-22B).

    “The TBM 960 is the quintessential TBM, representing the fifth evolution of our very fast turboprop aircraft family since the TBM 900-series’ introduction in 2014,” commented Nicolas Chabbert, the Senior Vice President of Daher’s Aircraft Division. “It takes the maximum advantage of today’s turboprop technology to provide digital control of the engine and the propeller.”

    The TBM 960 retains the rapid speed of Daher’s TBM family while enabling lower fuel consumption. At Daher’s recommended cruise setting of 308 kts., the fuel consumption is only 57 U.S. gallons per hour, which is a 10% fuel economy compared to maximum cruise setting for more sustainability.

    At the heart of this latest TBM version is the intelligent PT6E-66XT powerplant and Hartzell Propeller’s five-blade RaptorTM composite propeller, both of which are linked to the dual-channel digital Engine and Propeller Electronic Control System (EPECS).

    With the EPECS, the PT6E-66XT’s startup is fully automated after a single-switch activation. The cockpit’s power lever is an e-throttle, using a single forward position from takeoff to landing – with the EPECS optimizing powerplant performance throughout the flight envelope while

    Daher unveils the TBM 960 at Sun ‘n Fun Aerospace Expo

    reducing pilot workload by integrating all functions and protecting the engine’s life. Analysis of engine parameters is driven by 100-plus smart data inputs.

    The RaptorTM propeller is fully integrated into the propulsion system. It is specifically designed to reduce overall weight and improve the TBM 960’s takeoff distance, climb and cruise speed. Turning at 1,925 rpm during maximum power output, the Raptor contributes to limiting noise and vibration. Its sound level during takeoff is just 76.4 decibels, meeting the most stringent international noise standards.

    With its G3000® integrated flight deck, the TBM 960 retains Daher’s e-copilot® concentration of technological innovation and safety systems in the TBM, which can be compared to an “electronic copilot.” This includes an icing protection system, flight envelope monitoring through the Electronic Stability and Protection (ESP) and the Under-speed Protection (USP) systems, the Emergency Descent Mode (EDM) function, as well as the game-changing HomeSafeTM emergency autoland system.

    New to the TBM 960 is the Garmin GWXTM 8000 doppler weather radar with advanced surveillance features such as lightning and hail prediction, turbulence detection, zero blind range for close-in returns, and ground clutter suppression. The TBM 960 also is the first application of Garmin’s GDL® 60 next-generation data transmitter for automatic database upload and interconnection with mobile devices.

    The TBM 960’s Prestige cabin extends Daher’s use of digital power inside the aircraft, featuring an all-new environmental control system, LED ambience strip lighting integrated into both sides of the overhead ceiling panel, and electronically-dimmable windows – all controlled by a PassengerComfortDisplay(PCD). Enhancementsinthecabin’sstyleandcomfortalsoinclude new ergonomically enhanced seats, USB-A and USB-C power plugs, individual cupholders and headset hangers for each occupant.

    For the TBM 960, a fifth TBM paint scheme – called Sirocco, based on the creativity of French designer Alexandre Echasseriau – has been added to the aircraft’s style customization possibilities.

    The TBM 960 has been certified by EASA (the European Union Aviation Safety Agency); with certification by the U.S. FAA (Federal Aviation Administration) currently underway. Deliveries will begin in the first half of 2022.

    With the new aircraft’s launch, Daher’s TBM family is now offered in two versions: the TBM 960 and TBM 910.

    About Daher – www.daher.com

  • Brady Texas Fly In (KBBD)

    6th Annual Armed Forces Weekend Celebration & Fly-In, May 20-21, in Brady, TX and Curtis Field (KBBD)!

    Friday Night on the Square – FREE

    Fly-In Saturday, 9-4 – FREE

    A Night in London with Sentimental Journey Orchestra
    Saturday night 7-11 PM
    Tickets for Dinner & Dance, $30 available at www.morganmilitaryaviationmuseum.com.

    Some fuel is available for warbirds! Please contact the airport if you would like to bring one!

    Warbirds

  • Cirrus Braking Systems: A Hot Topic

    You just bought your Cirrus SR22. You do some flying, and soon find yourself with a brake temp sticker that isn’t white anymore. You remember from your transition training that any color other than white is a no go. You now ponder…. I don’t remember getting on the brakes hard, or riding the brakes while taxiing, but sure enough they aren’t white anymore. You now start thinking that all the horrible rumors of Cirrus brakes are true. They overheat so fast!

    I would like to share some little-known facts about the Cirrus factory equipped braking system. Following the procedures below can help make the brakes last a little longer. There is also a very popular STC that allows upgraded brakes to be installed on all SR series aircraft. More to come on that.

    Notice the Top Yellow sticker is far darker than the Bottom. The Yellow temperature indicator turns at 300 Degrees, while the bottom Blue indicator turns at 330 Degrees. This is an indication to the pilot that if the bottom sticker has turned colors, that the braking system has exceeded 330 degrees and is in need of servicing.

    Above is a photograph of an SR22 G1 braking system with turned brake temp stickers. The first things you may notice is that there are in fact two brake temperature stickers. We can only see the bottom blue sticker from the inspection port on the wheel pants. The other is higher on the caliper; in order to see it, the wheel pant must be removed. This isn’t common knowledge because there is no mention of this additional indicator in the POH.

    Now you may be asking yourself, what can I do to extend the service life of my factory equipped Cirrus brakes? Here are some tips. First, always taxi at 1000 RPM and use the rudder as much as you can while only tapping the brakes. This is not fool proof, since sometimes, depending on the grade, you will have no choice but to utilize brake tapping to keep the aircraft going straight. Taxiing is not typically where the brakes get overheated, though, but this is still a good practice to follow.

    What we tend to see is that the Cleveland brakes are generally overheated on landing. We always recommend to make sure your final approach speed is not excessive, land in the first 1/3 of the runway, and let the aircraft rollout to a smooth stop. What tends to happen is that the aircraft is too fast, and the pilot tries to exit at a certain taxi way, or brakes hard and continues to ride the brakes after landing during taxi. If you do your best to avoid these habits, it will serve you well.

    This braking system remained unchanged all the way until the 2016 G5 Cirrus SR series. Starting in 2016, the factory equipped G5 and G6 Cirrus SR series all now come standard with a single piston hydraulic braking system from Beringer. The Cirrus Beringer brakes far exceed the braking power and durability of the old system. The new system is more robust, withstands heat better, and is is very well built. There is also an option for an upgraded dual caliper system to increase durability and stopping power. A braking system STC for the older Cirrus G1 through early G5 models was created to upgrade those airplanes to the better stopping power and cooling of the Cirrus Beringer brakes.

    Seen above is a page from a Beringer catalog highlighting the Cirrus SR series STC kits. Your local Cirrus service center will be able to quote prices for the kits. We have over 1000Hrs spent behind Beringer equipped Cirrus aircraft and the difference is quite apparent. The pilot has better control of the aircraft, no spongy pedal, and the confidence to get the plane stopped without possibly overheating the braking system. This, in our opinion, is one of the best upgrades you can do to your Cirrus.
    Above is what an STC upgraded braking kit from Beringer looks like, as well as the new temperature indicator for the pre/post flight inspection. Notice the black spot on the left hand picture. These brakes have been overheated.

    One other difference for a pilot to note is that once upgraded to the Cirrus Beringer brakes, there is only one temperature indicator and it changes color at a whopping 450 Degrees Fahrenheit! Needless to say, it can handle some heat! The new temperature indicator is now Orange in color and turns grey/black when overheated.

    On the left are the original Cirrus factory brakes. On the right is the caliper to the new Beringer brakes for a Cirrus.
    Dual Caliper Cirrus Beringer Brakes

    The Cirrus Beringer brakes upgrade is quite a step up in the world of slowing down. However, this doesn’t mean that they are completely issue free. There is one little-known problem with Beringer brakes that is not that big of a deal and can be fixed with relative ease.

    The rotor on the Beringer braking systems is “free floating,” meaning it is not necessarily “fixed” in position when secured down to the spindle. It is “keyed” into the wheel rim with the male and female side interlocking.

    The brakes occasionally will get noisy, causing a “knocking” noise when brakes are applied. This noise is caused by the small metal tabs that tighten up the space between the wheel and the brake rotor. This is so the small tabs wear with use instead of the aluminum rim that they are fixed to. So, if your Beringers are making a knocking noise when brakes applied, this is most likely your culprit.

    These gaps above are the “keyed” position where the rotor finds home in the rim. Without these tabs that wear with use, we would be replacing the rim more often than the much cheaper replaceable tabs.

    It is highly recommended to upgrade your original Cirrus factory brakes to the new Beringer braking system. You will deal with less maintenance, less chance of a brake overheat, and less confusion on whether or not your brakes are airworthy. For more info, you can check out the Cirrus website for the single or dual caliper Beringer brakes.


    Zach Anderson is a Cirrus Standardized Instructor Pilot (CSIP) for Texas Top Aviation. Zach comes from a auto mechanic background and is very familiar with the ins and outs of maintenance. He started working for Texas Top Aviation in December 2020.

  • Weather Avoidance

    I began flying a Piper Malibu earlier this year.  For those of you not familiar with the original PA-46, a Malibu has a Continental TSIO-320 engine, with 310 HP.  It’s pressurized and cruises at about 185-200 KTAS.

    A few things are introduced to the equation when pilots start flying higher, faster, and farther.  When you start flying over longer distances, weather becomes more of an issue.  On a quick hop from, say, Austin to Dallas, you can be pretty sure of what the weather will be since it’s a short trip.  When you fly from Austin to LA, leave in the morning, land once along the way, and arrive in the afternoon after spending six and a half hours in the air, weather can change a lot in that amount of time.

    A must for any pilot flying high and over long distances is some kind of Nexrad system, whether it be a Garmin 696, or it shows up on your GPS or MFD.  Having this situation awareness is very helpful when planning ahead as to what to do about weather.  A stormscope is also a handy tool, since you can see where the lightning is with it.

    Cold fronts can be pretty nasty, depending on how strong and how fast they are moving.  A strong, fast moving cold front usually has a lot of convective activity associated with it.  The tricky thing with storms associated with fronts is that storms form in lines, most of the time.  If you’re trying to cross a front in the morning, you can usually get high enough over the clouds with a pressurized airplane since the temperature is still relatively low to get clear of the cumulonimbus clouds.  The cloud tops will only be around ten or twelve thousand feet.

    CB CloudCrossing fronts in the afternoon when daytime heating is pushing the tops of the CBs up to the 20-40 thousand foot range, it’s best to land, have a meal, stretch your legs, and wait till the sun starts to go down before pushing on.  Do not, under any circumstances, try and go through the cumulonimbus clouds associated with a cold front in a small airplane.  Not only is it uncomfortable (the turbulence bounces you around pretty good), but you’ll get ice, scare the passengers, and, if you’re in the heart of a storm, the plane could come apart.

    When crossing mountains, the weather is always highly unpredictable.  If it’s a clear day, no matter your altitude, you’ll probably pick up some turbulence from all the rising air off the peaks.  If there is moisture in the air, there are going to be isolated to scattered thunderstorms in the summer time.  The advantage of flying high when there are isolated or scattered storms is you can utilize the see and avoid method.

    See and avoid is simple.  When the storms aren’t embedded in other clouds, it’s actually rather easy to spot the big, rising clouds and go around them.  The same concept holds true when avoiding those pesky pop up thunderstorms in humid areas like Houston and Florida.

    Rain ShaftsOne thing that I learned this summer was this.  Sometimes, with an area of closely grouped storms, the cloud base is actually quite high (some storms I went underneath in New Mexico had cloud bases of 15,000 MSL).  The thing to do here is just stay below the bases of the clouds and go around the areas of rain.  These will be visible and you’ll be able to navigate around them.  With bases even as low 9-10 thousand feet, it’s a much better idea to stay below the clouds, sacrifice some speed, and dodge the rain shafts.

    The most important concept to take away is don’t fly into a thunderstorm.  If there are a bunch of really high clouds in front of you and you don’t see a safe way around them, descend down and land, wait it out, and then continue on your way.

  • Flying Eyes Sunglasses

    I am on a mission in flying for my head to be as comfortable as possible.  I’m currently going through the process of experimenting with different ANR headsets to see which ones squeeze my head the least (which I’ll be writing a future article about).  In the meantime, I decided to focus on sunglasses.

    I wear glasses (can’t do contacts anymore since they irritate my eyes), so anytime I have a headset on, I have frames running underneath my ear cups.  I had a pair of prescription sunglasses for years that were okay, but still caused soreness above my ears after more than 3 hours of flying.  I routinely fly 4-5 hours a day in training folks, so I had to find a better solution.

    I saw an ad in Flying Magazine one month for Flying Eyes sunglasses.  It was a relatively new company with a cool concept.  A pilot started the company with the goal to create as thin a pair of sunglasses frames as possible to increase the comfort and decrease the ANR loss when wearing sunglasses.  What the company came up with is pretty cool.

    The ultra-thin frames on the all the different Flying Eyes models are made out of Resilamide.  The material is so strong that the frames can be bent back and forth while not breaking.  The company even brags that the frames are virtually unbreakable.  I had to try these out.

    I ordered a pair of the Golden Eagle Sport sunglasses.  The process of getting prescription lenses in them was no big deal and took about a week.  The eyeglasses shop initially thought the shape of the lens could be an issue, but it proved no problem at all.  The lens manufacturer even managed to chip the frames, but Flying Eyes sent a new set of frames for free, even though it was not at all their fault.

    In about a month and a half of flying with them, they are very comfortable.  Some squeeze on the side of my head after extended periods of wear underneath a headset, but I’m exploring headset options currently (see above).  Much improved over my last set of sunglasses.

    Flying Eyes offers several different frame models, some of which are prescription compatible and some which aren’t.  The Golden Eagle Sport frames run about $180.  Orders can be placed on the Flying Eyes website.

    Ordering new sunglasses from Flying Eyes?  Use this link to receive 10% off your order.

Leave a Reply

Your email address will not be published. Required fields are marked *