Epic E1000 Gets the GFC 700

When the Epic E1000 was finally certified in the spring of 2020, there was much celebrating across the aviation world. Epic Aircraft expended a lot of time and energy getting the E1000 certified and into production (more information on that journey here and in Flying Magazine here).

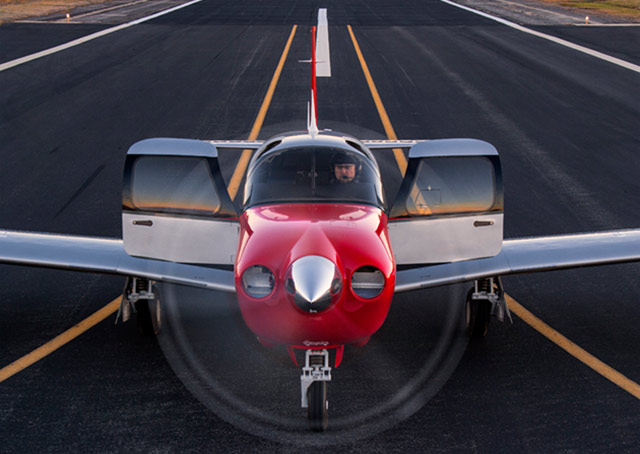
The airplane is amazing. In the single engine, 6 seat turboprop market, it easily blows away the competition. With it’s 1,200 SHP PT6-67A, it has double the horsepower of the M600 (600 SHP), and 350 more horsepower than the TBM 940 (850 SHP). It’s 60 KTAS faster than the M600 and, even though the TBM can keep up (both airplanes have equal top cruise speeds of 330 KTAS), the Epic E1000 can carry a payload of 1,024 pounds with full fuel, while the 940 can only carry 584 pounds with full fuel. The TBM carries about 15 minutes more of fuel, but to me, that’s pretty negligible.
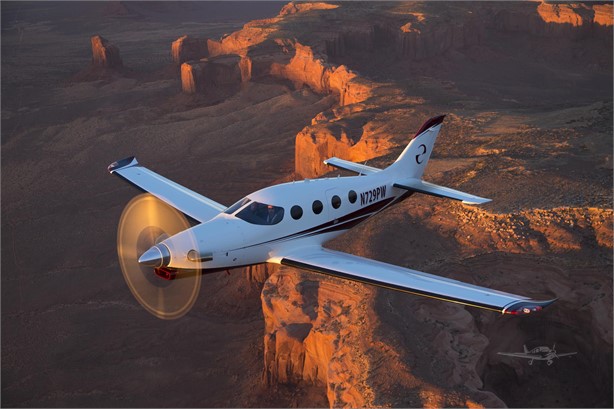
Did I mention climb rates? The E1000 climbs at an average of 1500 FPM at Vy (it’s capable of 4,000 FPM), making it to 25,000 feet in 10 minutes. The TBM climbs at 1000 FPM, taking 13 minutes to climb to the same altitude, while the M600 settles in at about 800 FPM, reaching FL250 in 21 minutes.

If you expand the comparison to include the Pilatus PC-12, the two airplanes have 1,200 SHP, but the Epic is 50 KTAS faster and they both have about the same weight carrying ability.

In the most important arena, price, the E1000 is around a million dollars cheaper than the TBM 940.

The one drawback to the Epic E1000 that immediately was noticeable was the autopilot. Epic originally installed the STEC 2100 autopilot to pair with the G1000 (and later the G1000 NXi). Epic decided to stick with the STEC 2100 through certification for the plane since that autopilot was on all of the E1000s paperwork going through all the levels of FAA approval. To change to the GFC 700 during the certification process would have been a massive undertaking that probably would have delayed certification.

The STEC 2100 is a good autopilot, but, as any G1000 pilot can tell you, the lack of integration between any STEC autopilot and Garmin panel leaves some to be desired. Not all the bugs talk, which often requires dual data entry, which can lead to forgetting to do both the bug and the autopilot when things get busy. Hello, altitude deviation.

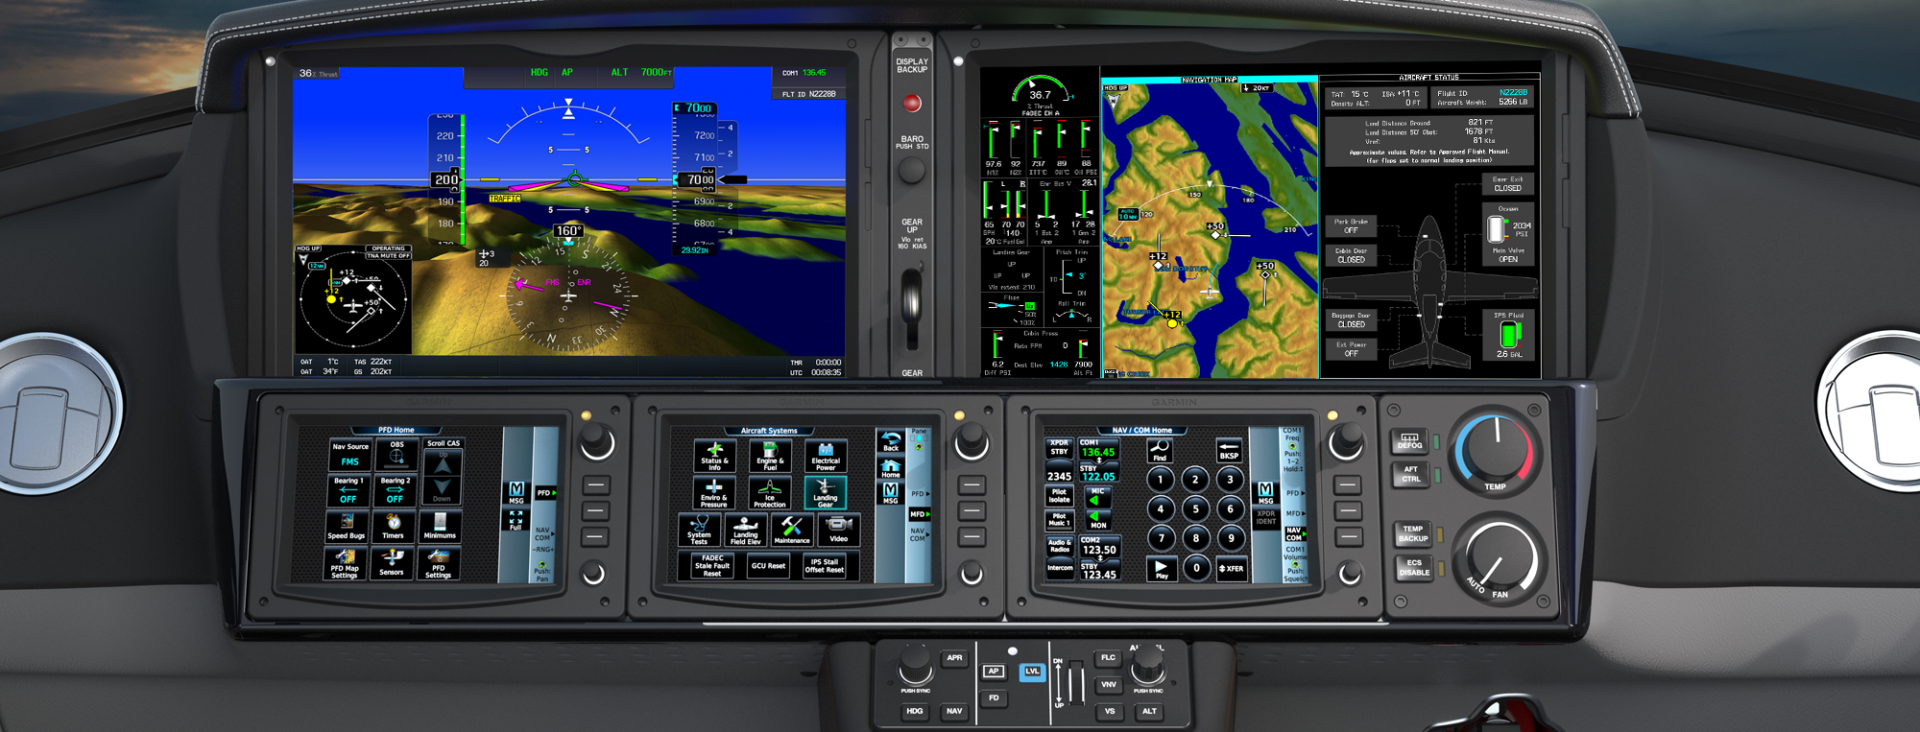
The goal for Epic was never to leave the STEC autopilot in the airplane. The first E1000s were rolled off the line with the STEC, but Epic didn’t take long to change the autopilot to the much more integrated Garmin GFC 700. That took place this winter (2020), and the E1000 received it’s first upgrade, with Epic dubbing the airplane the Epic E1000 GX.
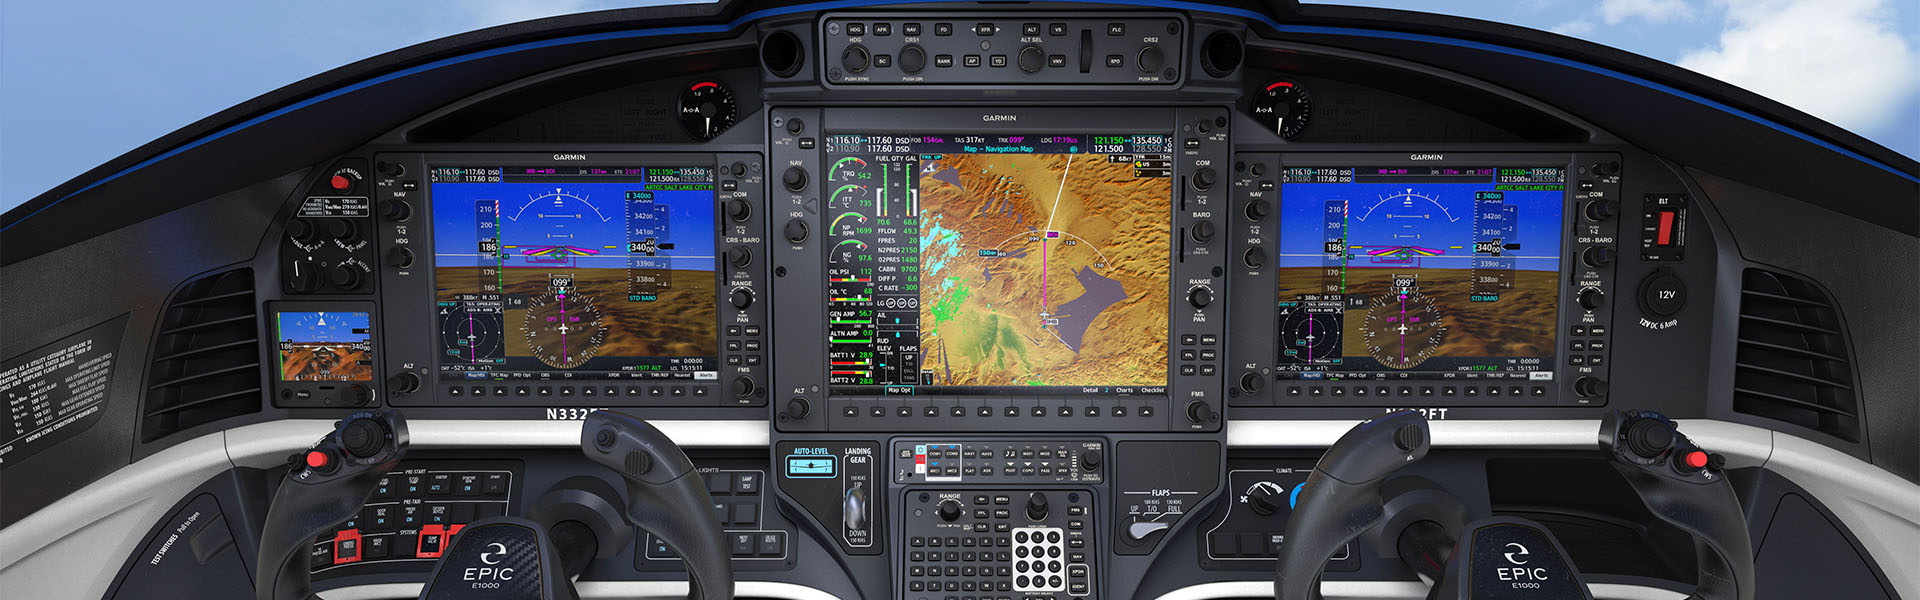
I expect the innovators in Bend, OR, where Epic is based and where tons of innovation in aviation happens (Lancair/Columbia started in Bend while RDD is based there as well), to quickly come out with more avionics upgrades for the airplane. I wouldn’t be surprised to see a G3000 version at some point, complete with auto throttles and the new Garmin Autoland. Epic would be smart to follow in the steps of Daher and offer two models, one with the G1000 and one with the G3000 (the TBM 910 has the G1000 NXi while the TBM 940 has the G3000).

I have yet to fly in an Epic E1000, but I would certainly jump at the chance to do so. Someone asked me yesterday what airplane I would buy if I had a blank check. With the GFC 700 now in the Epic, it would absolutely be the E1000 GX.


Similar Posts

  • Checking The Stall Warning Horn

    When a pilot first glances at the title of this article, the first thought that probably goes through that pilot’s head is, well that’s easy.

    And it is, if you are flying a high wing Cessna. On other airplanes, there are a few tricks to checking the stall warning horn. If you get them wrong, you’re liable to get a bill from your maintenance shop for an hour of labor for a problem they couldn’t duplicate.

    Cirrus SR22

    Let’s start with the Cirrus. On the pre-FIKI Cirrus aircraft, there was a small little hole in the wing that contained a diaphragm. That diaphragm sensed a change in airflow at a certain angle of attack just below the critical angle of attack and set off the stall warning horn. Unfortunately, the only way to check that is to suck on the hole during pre-flight.

    I don’t. I verify the hole is clear and that’s about it.

    On the FIKI Cirrus aircraft, there is actually a stall warning vane. It looks like a high wing Cessna vane, but if you turn the batteries on and try and get it to come on during your light and pitot heat check, nada.

    Here’s the trick, and the checklist doesn’t do a good job of describing this.

    • Turn on the Avionics Master
    • Turn on the speaker
    • Put the flaps to full
    • Then move the stall warning vane and you’ll hear the horn

    The speaker and the Avionics Master are so you can actually hear the horn (if you had the headset on while you were doing this, the speaker would be unnecessary). The flaps have to be full because the pitch attitude for the critical angle of attack is lower with the flaps down, so the horn goes off when at a different angle. You then don’t have to use as much force to push the vane.

    Piper PA46

    The early -310P Malibus are pretty simple and straight forward. Move the vane, get the horn.

    In the -350P, you can’t get the horn to come on by moving the vane. So, Piper put a stall test button that’s hidden underneath the upper left side of the instrument panel. Push that to test the horn. On the G1000 PA46, it is located directly above the PFD. On the Avidyne, it’s below and to the left of the pilot’s yoke.


    Testing the stall warning horn is a very important part of pre-flight. A pilot needs to know if the aircraft is close to a stall. The advent of Angle of Attack indicators in small, GA aircraft, have added a greater awareness to the angle of attack during all phases of flight to avoid those stall spins.

    If the stall warning horn goes off or the AOA shows yellow, lower that nose immediately.

  • Aircraft Purchase: The Logbook & Pre-Purchase Inspections

    Your about to make your dream aircraft purchase.  The plane has low time on the engine, is reasonably priced, and, according to the seller, has no damage history.  You are overjoyed!  Your dream of making an aircraft purchase is finally coming true.  You prepare your offer for the seller, set up the escrow account, and start all the paperwork.

    Two weeks later, the airplane is yours!  You start flying it, though, and the engine starts to have some strange vibrations.  After several flights, it starts to get worse.  You take it to your mechanic to get it looked at and you find out the airplane needs three new cylinders along with some other engine work that is going to total a lot of money.  Plus, your airplane is now going to be in the shop for several weeks.

    All that excitement you just had?  It just went out the window.

    Could this have been prevented?  Probably so, with a logbook inspection and a pre-purchase inspection.

    Aircraft Purchase:  Maintenance Logbooks

    Aircraft Purchase: Logbook Inspection

    Inspecting a logbook can be very daunting when making an aircraft purchase, especially for older airplanes.  This is, however, one of the most vital steps in making a new aircraft purchase.  You can find out many things from looking at the maintenance logs of an airplane.  First, you can check the compression levels of the engine.  Typically, you want compression levels in the 70’s, with it still being okay in the high 60’s.  Anything below 65 and there could be potential problems.

    Second, you can find out if there has been any odd maintenance done pointing to possible unreported damage history.  This is rare, as most aircraft owners are honest and up front when talking about damage history.  But, if there is an entry detailing a prop overhaul after only 50 hours on that prop, you may start to ask some questions.

    Third, you can find out how well the airplane has been maintained.  If a lot of maintenance was completed at each annual, even if it was a lot of small things, then the airplane has been maintained by a good mechanic who is very thorough.  This also involves a check of the ADs, Mandatory SBs, SBs, and SLs that have been issued for the airplane.  If all that has been kept up with, it’s a well maintained airplane.

    Finally, it gives you a good idea of how much the airplane has been flown.  Sure, the ad online will have the total time and time since overhaul, but you can look at the year by year breakdown of how much the airplane has been flown.  It may have been flown a lot earlier in it’s life, but not quite as much recently.  That’s not necessarily a bad thing, but airplanes like to be flown.

    Aircraft Purchase: Pre-Purchase Inspection

    Before making an aircraft purchase, it is extremely vital that whenever you are buying an airplane that you get a pre-purchase inspection done on the airplane.  Even better is getting one done by a mechanic who specializes in that type of airplane (eg. Piper Service Center for Pipers, Cirrus Service Centers for Cirrus, Kevin Mead for PA-46s).  A pre-purchase inspection can save you a lot of money in the end.

    There is always going to be some kind of maintenance issue with an airplane being purchased, whether it is big or small.  Once a pre-purchase inspection is completed, you can take the findings to the seller and negotiate for a lower price based on those findings, or just have the seller fix the items before the sale is completed.

    I would recommend having the seller fix the problems before the sale is completed.  Even though it may take a little longer for the sale to be completed this way, you’ll get to enjoy your airplane right away instead of it being in the shop the next several weeks after you complete the purchase.

    There is the circumstance where the  pre-purchase inspection reveals some serious airworthiness issues which would cause the deal to be voided.  Always put this clause in a purchase agreement, giving you, the buyer, an out if there are serious airworthiness issues.

    When it comes to making an aircraft purchase, it is not a process to be rushed.  Slow and steady usually gets the best airplane for the money, giving you years of enjoyment in the future.

    Looking to make an aircraft purchase?  Daunted by all the work that’s involved to find a good, quality airplane?  Let Texas Top Aviation do your aircraft search for you!  To learn more, visit Texas Top Aviation’s Aircraft Purchase Consultations page.

  • Iridium Zoleo Allows In Flight Messaging

    Satellite communications company Iridium now has a really nifty little product called the Iridium Zoleo Satellite Communicator. Most pilots who fly newer Cirrus Aircraft will be familiar with the company name Iridium. Iridium manufactures the built in satellite phone that is an option in all Cirrus after 2012. The Iridium Zoleo brings messaging capability to any airplane in a cost effective and simple manner.

    The Iridium Zoleo is a device roughly the size of a walkie-talkie. It links up with the Iridium satellite network to send and receive messages and emails anywhere in the world (or air!). To make things easier, the Iridium Zoleo links with a phone via Bluetooth to a free app that allows the user to write a message directly from the phone and send through the device.

    The Iridium Zoleo is affordable at only $200. A plan has to be purchased in order to send messages, with 3 different levels of subscription offered: 25 messages a month for $20, 250 messages a month for $35, or unlimited messages per month for $50. Each plan offers a $6 upgrade to allow unlimited worldwide breadcrumbs and tracking.

    The Iridium Zoleo has a 200 hour battery life and is designed to be shock, dust, and water resistant. Plus, the device has a built in SOS that can be used anywhere in the world. So, you can take it rafting down the Grand Canyon, hiking in the Andes, flying over the Atlantic, or SOS if you are stranded in the middle of the Indian Ocean.

    Click here to read more about Zoleo and here to read more about the Zoleo plans.

  • The Avidyne Equipped Cirrus Upgrade

    A History Lesson

    11 years ago, in April of 2009, the Avidyne Corporation unveiled the much bally-hooed Release 9, or R9 as it is commonly known, as a hardware replacement for the Avidyne EX5000 Entegra system in Cirrus Aircraft. The Entegra system was way outdated by that point. Even though Avidyne was the first company to put together a glass PFD in a single engine piston airplane, the company had quickly fallen behind Garmin in keeping up with the ever changing technology landscape.

    Rewind to 2008. Cirrus had been going strong with the Avidyne Entegra since the SR20 and SR22 went to full glass in 2003 (a PFD and an MFD; prior to that, Cirrus aircraft only had an MFD with steam gauges and a Sandel Electronic HSI). Cessna, on the other hand, vaulted past the Avidyne Entegra and went straight to the Garmin G1000 in it’s aircraft, starting in 2004 with the 182 G1000 and 2005 with the 172 G1000. Beechcraft and Columbia went to the G1000 (Columbia started with the Avidyne as well) in 2005.

    Garmin’s technology in 2007 was so much better than Avidyne’s technology that Cirrus decided to switch. I’m sure there were many promises made by Avidyne to Cirrus about what Avidyne was working on (the R9), but the G1000 was out there, available, and being used in a lot of different airplanes with very good results.

    So, in 2008, Cirrus made the switch from the Avidyne Entegra to the Garmin G1000, dubbing it the Cirrus Perspective by Garmin avionics package. Avidyne finally got the R9 to market in 2009, but by that time, Piper was the only airplane manufacturer left putting factory Avidyne panels in their airplanes, and they switched to G1000 later that year.

    The R9 is a fabulous product. It’s fully integrated, has great graphics, has fully redundant displays, a QWERTY keypad (which, by the way, Garmin didn’t do for another 8 years), and a lot of other neat features. There’s a bit of a learning curve, but it’s a really good product for what it is.

    Avidyne, though, was late to the game with their technology. By the time it debuted in 2009, all the GA aircraft manufacturers had long since switched to the Garmin G1000 and weren’t looking back. That left Avidyne with the retrofit market for the many different Avidyne Entegra Cirrus aircraft out there. The only problem was, the retrofit was $80,000 ($95,000 if you wanted to throw in the DFC 100 Autopilot, which is a must have) and not many owners were up for paying that much money, then or now.

    To sum up our brief history lesson, Avidyne knew the Entegra needed to go, but couldn’t get the R9 out quickly enough to convince anyone to stick with Avidyne products. The retrofit market didn’t amount to many sales, so Avidyne doesn’t even make the R9 anymore.

    As a side note, I really, really like the Avidyne R9 and am sad that it didn’t make it into more airplanes.

    So, when the Avidyne Entegra starts to have issues, what’s an owner to do? Keep reading!

    There is Hope

    There are thousands of Cirrus aircraft out there flying with the Avidyne Entegra instrumentation, which is basically 20 year old technology (I’ve had a computer engineer tell me the programming in an Entegra is Windows 98 tech). These things are going to start having problems at some point (many already have), but what solution do owners have that is cost effective and get’s them new technology?

    Remember that little company named Garmin? Well, they have come through again. Announced this summer, the Garmin G500 TXi is now certified as a replacement in the Cirrus Avidyne Entegra equipped aircraft. This means pulling out both the PFD and MFD and replacing them with the G500 TXi on both sides. Engine data is also displayed on the G500TXi MFD, including the percent power and TIT indications, if equipped.

    Cirrus SR22 Equipped with Dual G500 TXi Screens and Dual Garmin GTN 650Xi GPS Units

    The cost for the panel? Two 10.6″ G500 TXi’s run about $16,000 apiece for the units, not including labor. $32,000 for a brand new panel isn’t terrible. Plus, the G500 TXi’s work with the DFC90 autopilot if the Cirrus is already equipped with it. If not, the Garmin GFC 500 autopilot is now approved for the Cirrus at a relatively low price of $7,000, including the servos.

    Still have the original Garmin 430s in your Cirrus? Upgraded to the Avidyne IFD 540/440 stack? Put in dual GTN 650Xi’s? Put in a GTN 750Xi? All are compatible with the G500 TXi panel.

    Want to upgrade everything? It does get kind of pricey at that point, but for just equipment, the cost for a complete panel conversion is somewhere in the area of $65,000 plus labor, still below what the R9 cost, but not cheap either. That would include 2 G500 TXi’s, 2 GTN 650Xi’s, a GFC 500 Autopilot, and all the engine monitoring equipment that the G500 TXi would need.

    Cirrus SR22 Equipped with Dual G500 TXi Screens, a GTN 750Xi, and a GTN 650Xi

    Thankfully, some new technology has finally come to the Generation 1-3 Cirrus. Oh, and by the way, your steam gauge Cirrus is fully upgradable as well.

    Want to read more? Check out Garmin’s website.

  • MMOPA Vision Video

    The Malibu & M-Class Owner’s and Pilot’s Association recently released their MMOPA Vision Video. It is a great video detailing the history of the Piper PA46 & the history of MMOPA. The PA46 would have ceased to exist without the founding of the original Malibu Coalition.

    Checkout the video above (and Texas Top Aviation’s Hank Gibson even gets a cameo!).

  • Flying the Hudson River Corridor

    Ever since I moved out to the Philadelphia area, the Hudson River corridor in New York City has become one my favorite places to fly. It’s hard to overstate the beauty of the city from low over the river. Every time I have a family member or friend come to visit, I try and take them over to see the city from the air.

    Each time I fly up the river I can’t believe that we are actually allowed to do so, flying below the tops of the buildings and close enough that you feel that you could reach and out touch them. The draw back to the Hudson River Corridor is that it can be busy, intimidating, and confusing. However, with some reading and preparation, the Skyline flight is easy to do and extremely rewarding.

    Having the right weather is an important first step. The second step is try to arrive during ideal lighting conditions. If possible, select a smooth, calm day to make it easier to maintain a track down the correct side of the river. I always try and target arrival at the city around sunset. The view is spectacular any time of day, but having the lights from the city while the sun is just setting gives the best viewing. I’ve also flown over and done the whole flight after dark, which is always spectacular.

    View of the World Trade Center

    The first method of flying the river is to utilize VFR flight following. If the controllers aren’t too busy, they will provide advisories to aircraft that request the Skyline. The nice thing about doing it this way is that the controller will clear you into the NY bravo airspace and keep you above the traffic flying the Skyline in the VFR corridor below. This is the method that I have always preferred as I enjoy the added benefit of the traffic advisories and it’s nice not to worry about position reporting on the radio.

    If you want to get flight following, head toward the corridor and request the Skyline route with NY Approach. (Remember to stay clear of the Bravo until you’re cleared in!) Once you’re cleared into the Bravo and approaching the corridor, they will hand you off to Newark/ LaGuardia Tower for traffic advisories over the river. I like to approach from the south and ask for a 180 over the George Washington Bridge. This allows me to fly past the city a second time before exiting the corridor over the VZ (Verrazano Bridge) and heading back toward home.

    In red is the path I typically fly. I descend to 1400’ and fly toward the APPLE intersection picking up the shoreline around Staten Island and hugging it until crossing the middle of the VZ. Newark normally clears me into the Bravo at 1400’ or 1500’ to fly up the corridor.

    Pros:

    • Better traffic Awareness
    • No position reports

    Cons:

    • Flying slightly higher reduces the view
    • If the controllers are busy, they may deny your request for advisories  
    • Can be intimidating to talk to NY Approach/ Newark/ LaGuardia 

    The other option is to fly in the VFR corridor. If you want to do it via this method there are just a few things you need to make sure you’re familiar with before you go. When in the VFR corridor you’ll need to make required position reports on a CTAF frequency. Make sure that you have the proper charts and have studied pictures of the landmarks so that you know what you’re looking for. I tend to plan on this as a backup in the event that the controllers won’t give me advisories.

    Pros:

    • Doesn’t require talking to controllers/ class B clearance
    • More freedom to select altitude and routing as desired

    Cons: 

    • Less traffic awareness
    • Required position reporting

    All the requirements and guidelines for flying the corridor can be found on the back of the NYC TAC chart. Any pilot flying the river is required to have one of these or a NYC helicopter route chart on board. If you’re using Foreflight, look in the Documents section under FAA Fly Charts and select the NYC TAC chart in order to read the back of page.

    Below you’ll find examples of the diagrams/ instructions printed on the back of the NYC TAC charts.

    You can see the traffic flow requires northbound airplanes to hug the east side of the river, while the southbound traffic stays on the west side. The VFR reporting positions (listed from North to South) are: Alpine Tower, George Washington Bridge, Intrepid aircraft carrier, Goldman Sachs (clock), Statue of Liberty, VZ (Verrazano Bridge). Each position report should include aircraft type, position, direction, and altitude.

    Other things to be aware of:
    NYC is always a hotspot for TFR’s. There are often TFR’s for baseball games or presidential movements so make sure to check before you head that way. Additionally, there is a speed restriction in place of 140 kts, though I’m not sure why anyone sightseeing would want to go that fast anyhow.

    I realize that all of the procedures and restrictions can be overwhelming, but with the proper preparation, the Hudson Skyline is one of the most incredible places in the world to operate an airplane. There are a lot of things that are easy to get excited about that don’t live up to expectation, but this isn’t one of them. I’ve never taken anyone to the river that wasn’t impressed by what they saw and that’s why I plan to keep going back.

    About to cross the VZ looking north toward the city

One Comment

  1. If Epic adds the g3000 and the auto land system it will be the ultimate personal aircraft.

Leave a Reply

Your email address will not be published. Required fields are marked *