Garmin VNV

The Garmin G1000/Perspective combined with the Garmin GFC 700 Autopilot can be a great tool in descent planning.  When you want to end up at pattern altitude a certain distance from the airport or you get a clearance to cross a fix at a certain altitude, Garmin VNV is a great tool.  Here’s how to use it.

VFR Garmin VNV Use

Let’s say you want to end up at pattern altitude 3nm from your destination, but you don’t want to descend down into the bumps before you have to.  Here’s how to set it up:

  • Go to the Flight Plan page on the MFD
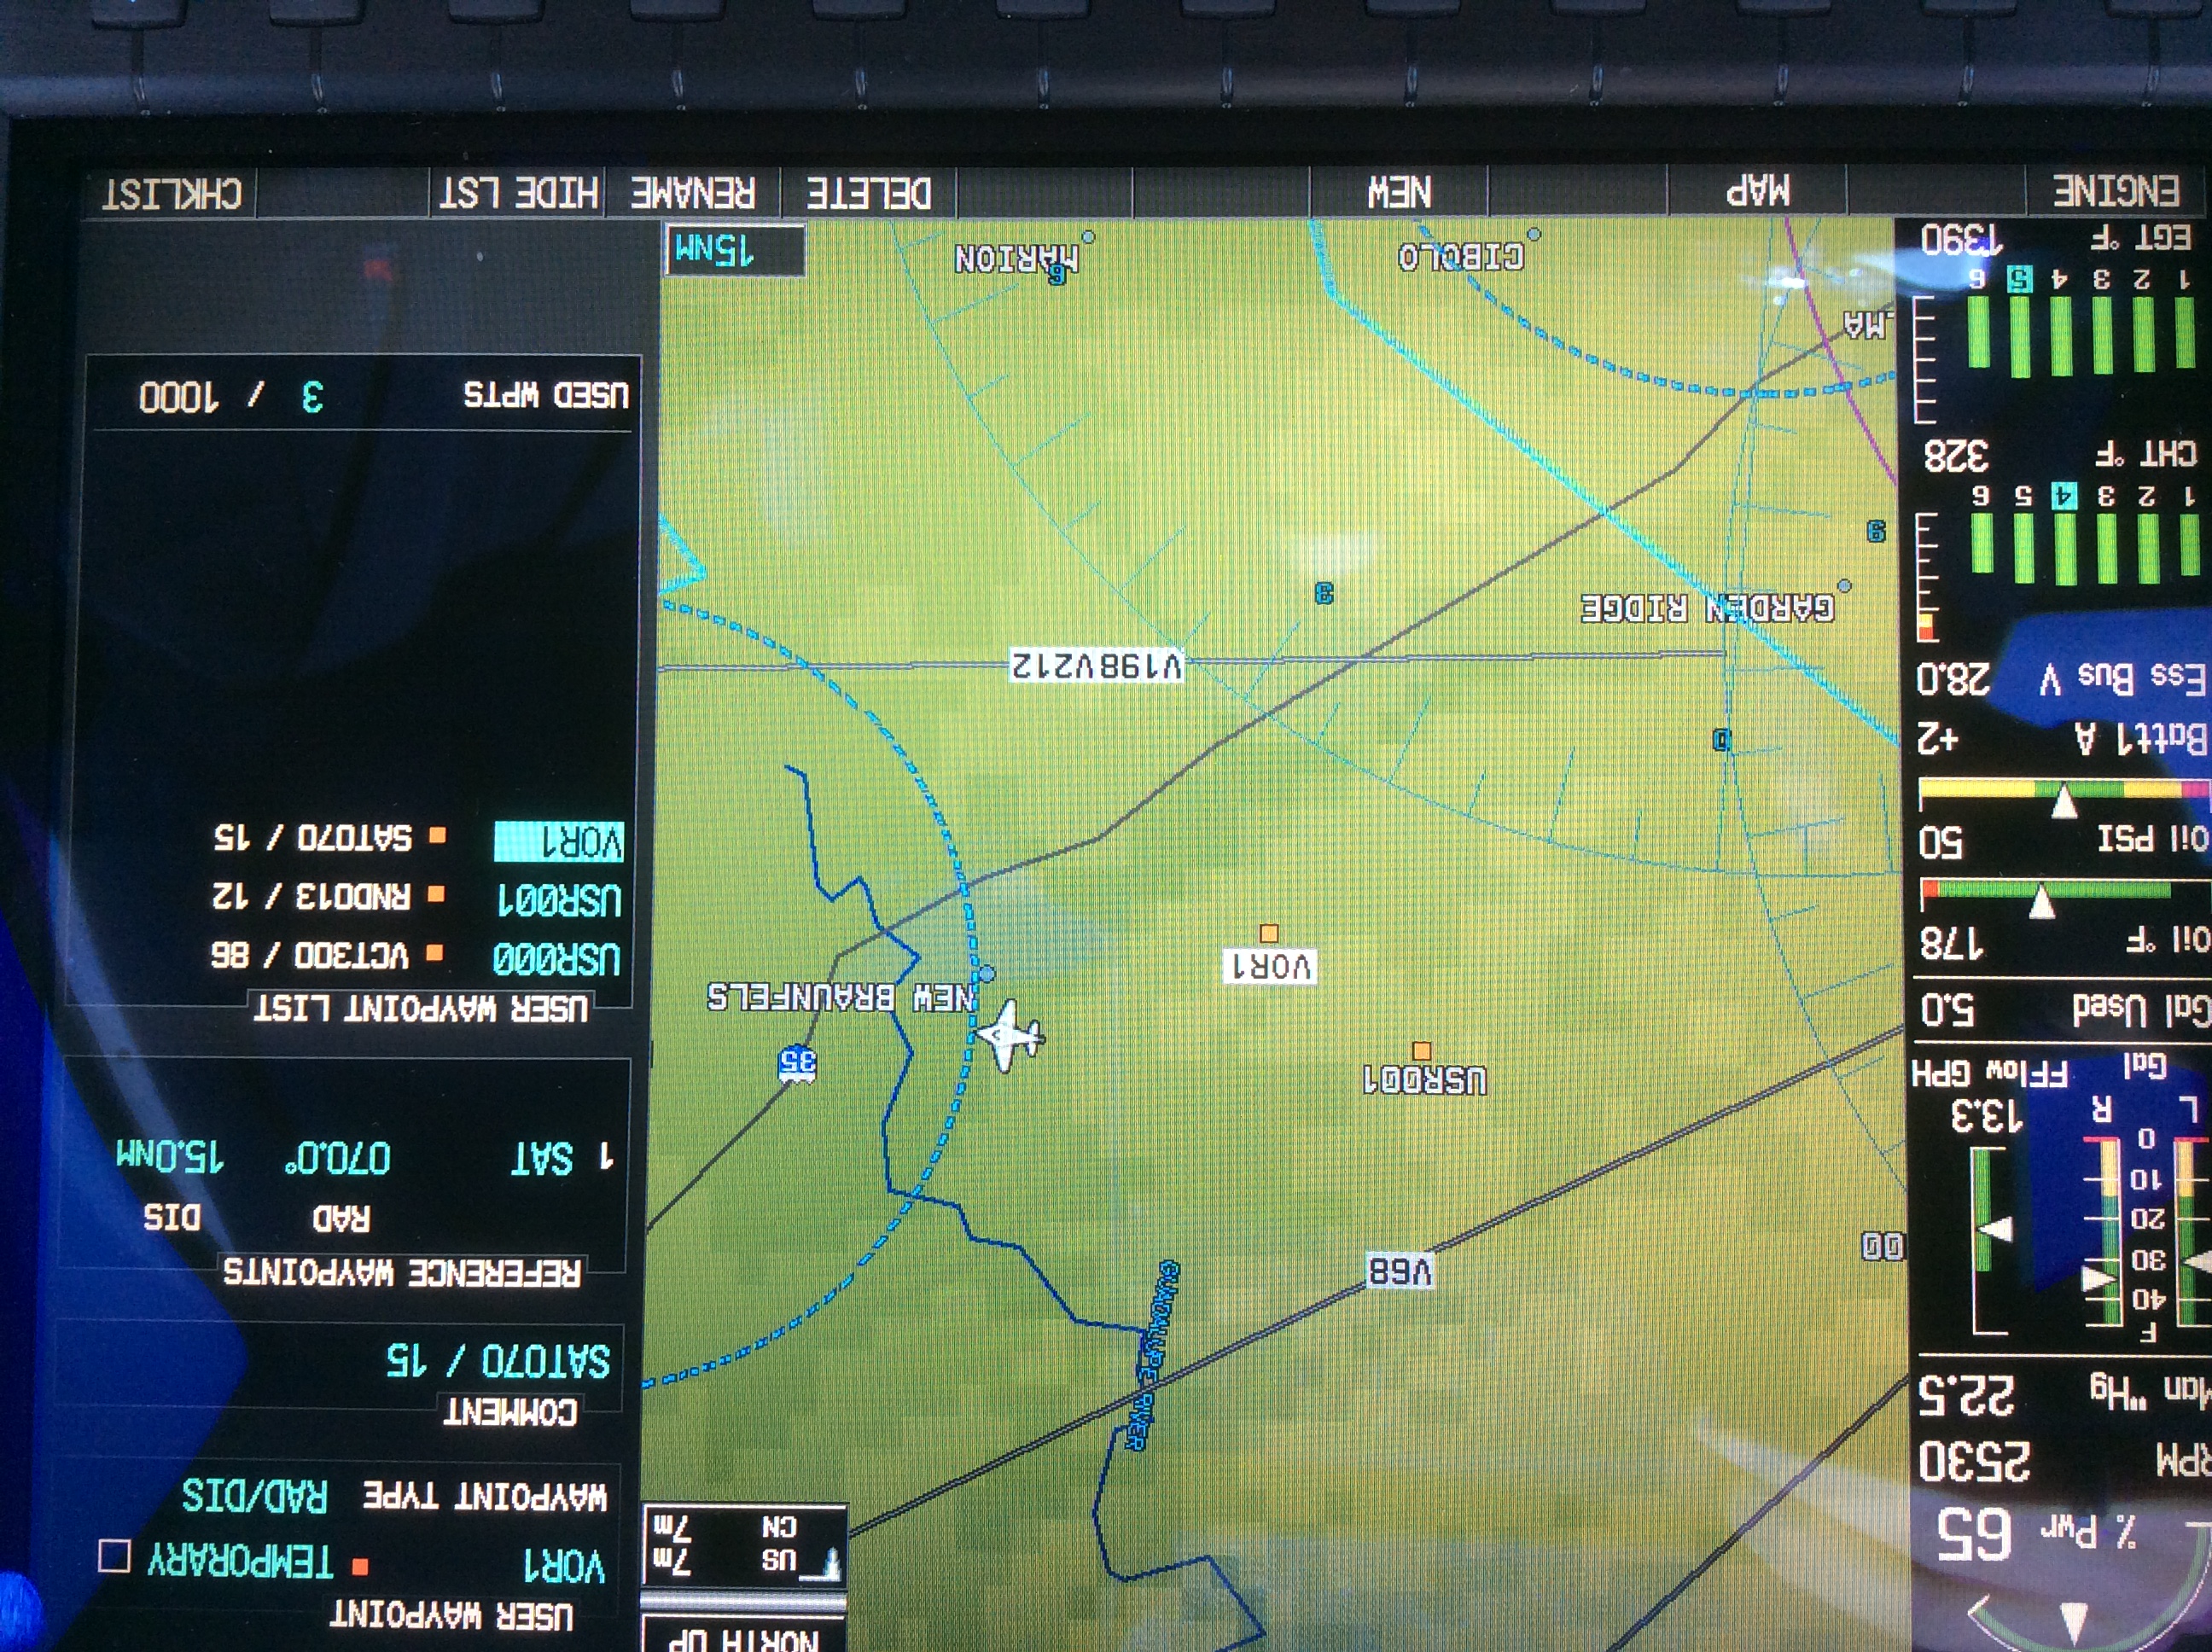
  • Press the ATK OFST soft key on the bottom of the MFD.  It stands for Along Track Offset, which, in laymen’s terms, means you are setting a point along your track a certain distance from your destination.  In this case, it will be 3nm
  • Input the distance using either the keypad or the small FMS knob and press enter
  • Select the altitude you want to be at (in this case pattern altitude) and press enter
  • You will see a point 3nm before you destination appear on your magenta line and a Top Of Descent (TOD) appear where you need to start your descent
  • 1 minute before the Top Of Descent, an indicator will appear next to your altimeter
  • To have the GFC 700 Autopilot fly the descent for you, you have to do two things
    • Set the Altitude bug for the desired altitude
    • Press VNV on the autopilot
  • All you have to do now is manage power

IFR Garmin VNV Use

Let’s say you are told to cross a fix at a specific altitude.  Here’s how to use Garmin VNV to plan it out.
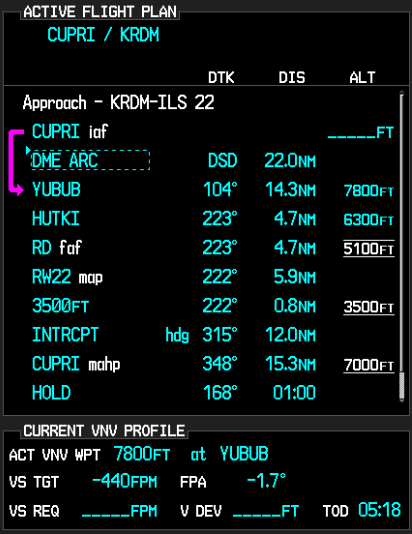
  • Go to the Flight Plan page on the MFD
  • Turn the cursor on and highlight the altitude blank next to the fix in the flight plan
  • Input the desired altitude
  • You will see a Top Of Descent (TOD) point appear along your course where you need to start your descent
  • 1 minute before the Top Of Descent, an indicator will appear next to your altimeter
  • To have the GFC 700 Autopilot fly the descent for you, you have to do two things
    • Set the Altitude bug for the desired altitude
    • Press VNV on the autopilot
  • All you have to do now is manage power

Similar Posts

  • Iridium Zoleo Allows In Flight Messaging

    Satellite communications company Iridium now has a really nifty little product called the Iridium Zoleo Satellite Communicator. Most pilots who fly newer Cirrus Aircraft will be familiar with the company name Iridium. Iridium manufactures the built in satellite phone that is an option in all Cirrus after 2012. The Iridium Zoleo brings messaging capability to any airplane in a cost effective and simple manner.

    The Iridium Zoleo is a device roughly the size of a walkie-talkie. It links up with the Iridium satellite network to send and receive messages and emails anywhere in the world (or air!). To make things easier, the Iridium Zoleo links with a phone via Bluetooth to a free app that allows the user to write a message directly from the phone and send through the device.

    The Iridium Zoleo is affordable at only $200. A plan has to be purchased in order to send messages, with 3 different levels of subscription offered: 25 messages a month for $20, 250 messages a month for $35, or unlimited messages per month for $50. Each plan offers a $6 upgrade to allow unlimited worldwide breadcrumbs and tracking.

    The Iridium Zoleo has a 200 hour battery life and is designed to be shock, dust, and water resistant. Plus, the device has a built in SOS that can be used anywhere in the world. So, you can take it rafting down the Grand Canyon, hiking in the Andes, flying over the Atlantic, or SOS if you are stranded in the middle of the Indian Ocean.

    Click here to read more about Zoleo and here to read more about the Zoleo plans.

  • Inadvertent IMC Entry

    I ran across the story about the Korean Air flight that crashed in Guam in the late ’90s the other day.  It was a 747 that hit the side of hill about 3 miles short of the runway, killing most of the people on board.  The flight was at night (arrival time was about 1:30am) and the pilot’s lost sight of the runway on a visual approach due to inadvertent IMC entry.  They didn’t execute a missed approach soon enough, got too low, and crashed.

    Korean Air Crash

    These were experienced pilots, mind you, who had flown into that airport a number of times. They were experienced enough to know when to execute a go around.  There were several other factors that led up to the crash, but, ultimately, they lost sight of the runway due to inadvertent IMC entry.

    To all the VFR pilots out there, what do you do if you accidentally fly into a cloud?  It’s a lot easier to encounter inadvertent IMC at night, simply because you can’t see the clouds in front of you.  It is no less dangerous during the day, either.

    So, we’re going back to the basics today.  What really is the best course of action for a VFR pilot when flying into a cloud?  One option (and in my opinion, the best option) is to turn around. Immediately start scanning your instruments, execute a shallow banked 180 degree turn while maintaining altitude, and fly out of the cloud you just flew into.  If you have an autopilot, turn it on immediately and let it do the turn.

    What if you were descending or climbing when you encountered the inadvertent IMC?  In this case, just reverse whatever you were just doing.  If you were descending, climb.  If you were climbing, descend.  Caution is needed, though, as climbing or descending when flying on instruments for an inexperienced IFR pilot could lead to a greater chance of disorientation.

    One thing that could assist in spotting those clouds at night is turning the cockpit lights down.  This will allow you to see outside a little bit better and start to notice when those ground lights are disappearing.

    IMC FlightMost VFR pilots only do instrument flying on flight reviews.  That doesn’t lead to a very high level of proficiency, so go out and grab your instructor and tell him to put you under the hood once a month.  You’ll be a better pilot overall for it.

    IFR pilots, taking a note from the Korean Air flight; if you lose sight of the runway on a visual approach, especially at night, go missed and ask for the instrument approach procedure.  Don’t try and duck down below the clouds as there may be a hill or a mountain directly below you.

  • Cirrus Alternator Failure

    A Cirrus is an electric airplane.  There are no vacuum pumps and therefore no vacuum driven instruments. The Klapmeier brothers did this on purpose, trying to make it a modern airplane.  No vacuum systems means no vacuum pump failures, hence there is a lower likelihood of instrument failures in IMC.

    What Cirrus did instead was put a lot of electricity producing and storing devices in the airplane.  All SR20 and SR22s are equipped with 2 engine driven alternators and 2 backup batteries.  Alternator 1 is a 28 volt alternator (the amperage varies based on whether or not you have an air conditioner) while Alternator 2 is a 28.5 volt alternator.  There are 2 24 volt backup batteries, as well.  Battery 1 is also used for starting.

    In traditional airplanes that have 1 alternator, an alternator failure can affect a lot of things.  Depending on how many electronics are in the airplane, the battery can get depleted quite quickly.

    The Cirrus electrical system is quite ingenious.  It’s a little bit different based on whether you have an Avidyne Cirrus or a Garmin Perspective Cirrus.  I will discuss that further below.

    The main goal of this article is to talk through what happens in the event of a #1 Cirrus Alternator Failure (an Alternator 2 failure actually isn’t a big deal at all, though Alt 2 is required for IFR flight), the procedure for trying to fix it, and a technique I have developed that makes the pilot’s job easier.  First, let’s go through the #1 Cirrus Alternator Failure procedure.

    Alternator 1 Failure

    In either avionics configuration, the Cirrus Alternator Failure procedure is the same.

    • Check and reset the circuit breaker for Alternator 1 (Reset only once)
    • Cycle the Alternator 1 master switch
    • If Alternator 1 doesn’t come back online, leave the Alternator 1 master switch off and shed load on the battery

    Avidyne Entegra

    The Avidyne Entegra has 2 busses, the Main Bus and the Essential Bus.  Alternator 2 isn’t set to come on until the engine RPM reaches 1700.  While on the ground, Alternator 1 runs both the Main and Essential Buses.  In the air, Alternator 1 runs the Main Bus and Alternator 2 runs the Essential Bus.  Since Alt 2 is 28.5 volts, the higher voltage won’t allow the power from Alt 1 to cross over and run the Essential Bus.  There are also 2 one-way directional diodes that prevent the voltage from Alt 2 to cross over and run the Main Bus.

    Having said all that, when Alternator 1 fails, Battery 1 is now running the items on the Main Bus.  There are a significant number of items on the Main Bus which causes the 24 volt battery to quickly lose it’s charge. This precipitates the need for shedding load.  Items like GPS 2, the air conditioner and aircraft lights can all be turned off.

    In the above scenario, Alternator 2 is running the Essential Bus still that has all the Essential items on it.  Those include:

    • The PFD
    • Flight Instruments and associated Avidyne computers
    • Engine Instruments and associated Avidyne computers
    • GPS 1
    • Com 1
    • Nav 1
    • Autopilot
    • Stall Warning
    • Charging Battery 2

    Note 2 important items that are not on the Essential Bus:  the flaps and the landing light (which is very handy at night).  Those two are only on the Main Bus, which Battery 1 is now powering.

    Let’s further enhance our scenario.  You are flying over Nevada (quite remote and not a lot of airports) at night, 30 minutes from the nearest airport when your Alt 1 fails.  When you get to the airport you are planning on landing at, you want to have your flaps and your landing light, but we don’t know how long Battery 1 will last.

    The solution (this is where my technique comes in):  Turn off the Battery 1 master switch.  This is an easy solution to ensuring you have battery power to use your flaps and landing light.  Instead of going through and shedding load, simply turn off the source.  You’ll still have all the above items on the Essential Bus, which is all you need to keep safely flying.  Then, when you get to your landing airport, turn Battery 1 back on to utilize your flaps and landing light.

    Garmin Perspective

    Cirrus wired the Garmin Perspective plane a little bit differently.  There are now 2 Main Buses along with the Essential Bus.  Alternator 1 runs Main Bus 1, while Alternator 2 runs Main Bus 2 and the Essential Bus. Both Alternators are running all the time.  The Alternator 1 Failure procedure remains the same.

    The cool thing that comes along with the second Main Bus in the Perspective is the amount of items you still have available to you in the event of an Alternator 1 failure.  The only items you lose will be:

    • Yaw Damper
    • Landing Light
    • Air Conditioner and associated components
    • EVS Camera
    • 12 Volt power supply in armrest

    Everything else is powered off of Alternator 2.  That’s not much.  The only item you really want on the above list is the landing light if you are going to be landing at night.

    Follow the Alternator 1 Failure procedure, then do my technique again.  Turn off Battery 1 to save the battery power in order to use the landing light when needed.

    Cirrus did a great job creating an all electric airplane with plenty of backups in case something fails.  I focused mainly on the Alternator 1 failure here.  If Alternator 2 fails, the system is wired for Alternator 1 to run everything while still charging Battery 1 and 2.  No big deal.

    In my experience, turning off Battery 1 to conserve battery power is just a simpler solution when shedding load in the event of a Cirrus Alternator Failure.

  • New Houston Airspace Procedures

    If you are based in Houston, or heading into or out of the Houston airspace under IFR, have you updated your charts?  If not, you may hear a clearance stating: “N67889, cleared to Amarillo via the BORRN 1 Departure, CRGER Transition, Direct.  Climb via the departure, expect 8000 in 10 minutes.  Departure frequency 123.8, Squawk 3365.”  You manage to get the clearance written down, but have completely messed up the spelling of both BORRN and CRGER, so you have no idea where the intersections are.  After stumbling through a readback, you ask ground to spell the fixes for you.

    Then, more bad news.  You haven’t updated your GPS cards yet, so the departure isn’t in your 430.  It’s an RNAV only departure, so you can’t fly it based on the NAV Radio.  You were planning on updating your iPad when you got to Amarillo, so you don’t have the departure on there, either.

    This has probably already happened to a few people today already.

    Houston airspace got a major overhaul today.  There are 20 new DPs and 29 new STARs guiding IFR traffic into and out of Houston airspace (including one named the DOOBI 1 Arrival, named after the Dooby Brothers band).

    The FAA’s goal in all these changes, according to AOPA, is to “bring fuel efficiencies, time efficiencies, and reduce carbon emissions” (from Benet J. Wilson’s May 15th article on AOPA.com).  The FAA issued a NOTAM today valid until June 6th describing what routes for pilots to file.  The NOTAM also contains contingency plans for pilots flying without updated charts (like our example above).

    Pilots should expect these wide scale procedure additions and changes to start showing up in other Class B airspace across the country.  As always, make sure those charts are updated, GPS databases are current, and you do some studying of your route before you file your flight plan.

  • Texas Top Aviation at the AOPA Fly-In

    Where were you on April 26th?

    AOPA Fly In LogoTexas Top Aviation was at the AOPA Regional Fly-In at the San Marcos Regional Airport (KHYI).  If you weren’t there, you certainly missed out spending time with 2,500 other airplane and flying enthusiasts!

    The day began somewhat gloomy and windy with the threat of rain.  Organizers feared that weather would keep a lot of people from coming.  Boy, were they wrong!

    There were many classic airplanes, many modern and pretty nicely equipped airplanes, and everything in between.  There were aviation celebrities, Rod Machado and the Kings of King Schools fame, to name a few.  Not to mention the fabulous BBQ!

    N132BBTexas Top Aviation had several drawings for free training and 3 lucky winners.  We also had a Lancair Super ES for sale, N132BB (which made the San Marcos Record newspaper!). It definitely stood out with it’s unique paint job.  The flames on the tail drew many oohs and aahs.

    Departing the San Marcos Airport after the fly in was like battling traffic in Austin at rush hour (though, Austin doesn’t have any air traffic controllers).  The San Marcos controllers probably hadn’t seen that much traffic since the airport was an Army Air Base back during WWII.  It was quite a sight to see all the exhibitor’s airplanes lined up ready to head skyward.

    Thanks to all of you who stopped by the Texas Top Aviation booth!  It was a pleasure meeting all of you and we look forward to working with you in the future!

    Texas Top Aviation
    Hank Gibson and Russell Moore of Texas Top Aviation


  • Flying the Hudson River Corridor

    Ever since I moved out to the Philadelphia area, the Hudson River corridor in New York City has become one my favorite places to fly. It’s hard to overstate the beauty of the city from low over the river. Every time I have a family member or friend come to visit, I try and take them over to see the city from the air.

    Each time I fly up the river I can’t believe that we are actually allowed to do so, flying below the tops of the buildings and close enough that you feel that you could reach and out touch them. The draw back to the Hudson River Corridor is that it can be busy, intimidating, and confusing. However, with some reading and preparation, the Skyline flight is easy to do and extremely rewarding.

    Having the right weather is an important first step. The second step is try to arrive during ideal lighting conditions. If possible, select a smooth, calm day to make it easier to maintain a track down the correct side of the river. I always try and target arrival at the city around sunset. The view is spectacular any time of day, but having the lights from the city while the sun is just setting gives the best viewing. I’ve also flown over and done the whole flight after dark, which is always spectacular.

    View of the World Trade Center

    The first method of flying the river is to utilize VFR flight following. If the controllers aren’t too busy, they will provide advisories to aircraft that request the Skyline. The nice thing about doing it this way is that the controller will clear you into the NY bravo airspace and keep you above the traffic flying the Skyline in the VFR corridor below. This is the method that I have always preferred as I enjoy the added benefit of the traffic advisories and it’s nice not to worry about position reporting on the radio.

    If you want to get flight following, head toward the corridor and request the Skyline route with NY Approach. (Remember to stay clear of the Bravo until you’re cleared in!) Once you’re cleared into the Bravo and approaching the corridor, they will hand you off to Newark/ LaGuardia Tower for traffic advisories over the river. I like to approach from the south and ask for a 180 over the George Washington Bridge. This allows me to fly past the city a second time before exiting the corridor over the VZ (Verrazano Bridge) and heading back toward home.

    In red is the path I typically fly. I descend to 1400’ and fly toward the APPLE intersection picking up the shoreline around Staten Island and hugging it until crossing the middle of the VZ. Newark normally clears me into the Bravo at 1400’ or 1500’ to fly up the corridor.

    Pros:

    • Better traffic Awareness
    • No position reports

    Cons:

    • Flying slightly higher reduces the view
    • If the controllers are busy, they may deny your request for advisories  
    • Can be intimidating to talk to NY Approach/ Newark/ LaGuardia 

    The other option is to fly in the VFR corridor. If you want to do it via this method there are just a few things you need to make sure you’re familiar with before you go. When in the VFR corridor you’ll need to make required position reports on a CTAF frequency. Make sure that you have the proper charts and have studied pictures of the landmarks so that you know what you’re looking for. I tend to plan on this as a backup in the event that the controllers won’t give me advisories.

    Pros:

    • Doesn’t require talking to controllers/ class B clearance
    • More freedom to select altitude and routing as desired

    Cons: 

    • Less traffic awareness
    • Required position reporting

    All the requirements and guidelines for flying the corridor can be found on the back of the NYC TAC chart. Any pilot flying the river is required to have one of these or a NYC helicopter route chart on board. If you’re using Foreflight, look in the Documents section under FAA Fly Charts and select the NYC TAC chart in order to read the back of page.

    Below you’ll find examples of the diagrams/ instructions printed on the back of the NYC TAC charts.

    You can see the traffic flow requires northbound airplanes to hug the east side of the river, while the southbound traffic stays on the west side. The VFR reporting positions (listed from North to South) are: Alpine Tower, George Washington Bridge, Intrepid aircraft carrier, Goldman Sachs (clock), Statue of Liberty, VZ (Verrazano Bridge). Each position report should include aircraft type, position, direction, and altitude.

    Other things to be aware of:
    NYC is always a hotspot for TFR’s. There are often TFR’s for baseball games or presidential movements so make sure to check before you head that way. Additionally, there is a speed restriction in place of 140 kts, though I’m not sure why anyone sightseeing would want to go that fast anyhow.

    I realize that all of the procedures and restrictions can be overwhelming, but with the proper preparation, the Hudson Skyline is one of the most incredible places in the world to operate an airplane. There are a lot of things that are easy to get excited about that don’t live up to expectation, but this isn’t one of them. I’ve never taken anyone to the river that wasn’t impressed by what they saw and that’s why I plan to keep going back.

    About to cross the VZ looking north toward the city

Leave a Reply

Your email address will not be published. Required fields are marked *