So the Word became human and made his home among us. He was full of unfailing love and faithfulness. And we have seen his glory, the glory of the Father’s one and only Son (John 1:14).
From the Texas Top Aviation family (Hank, Kelsey, Everett, Cooper, and Cord) to your family, we wish you a Merry Christmas! We are thankful for how the Lord has blessed us this year. We pray for blessings on your family this coming year.
It’s winter time, so that means winter weather for the aviation community. For single engine piston pilots, that means dealing with icing conditions. For us Texan flyers, ice only presents an issue for maybe a week out of the year (the exception being for those Panhandle residents!), but it’s nice to have some protection.
Most single engine pistons do not come with ice protection from the factory and, of those that do, most are not Flight Into Known Icing (FIKI) approved. The systems are “get out of jail” systems that can reduce the amount of ice you pick up if you accidentally get into icing conditions and you are on your way out. The Cirrus SR22 line of aircraft has had the TKS system option since 2006, with the new FIKI system being available since 2010. The Cessna TTx has a FIKI option that was debuted in 2014.
The above mentioned airplanes use TKS systems. There are a handful of single engine pistons that use boots that are FIKI certified: the Piper PA46 line (Malibu, Mirage, and Matrix) and the Cessna P210 and T210 line (though not all are equipped with boots).
If you find yourself flying into wintry conditions often and want some protection for your clean wing airplane, there are some aftermarket options for a lot of airplanes now. Do note that all these systems do come with a pretty hefty price tag, but can be worth it if you fly into icing a good bit.
CAV Ice Protection TKS Systems
CAV Ice Protection is a TKS system outfitter. What is TKS fluid? According to Flying Magazine:
“TKS systems dispense an ethylene glycol-based fluid with a freezing point below minus 70 degrees F through porous titanium panels attached to the leading edge of the wing and empennage. The fluid is released through thousands of the panels’ laser-drilled holes, which are not much larger than the size of a human hair. As air flows over the wing and empennage, it disperses the fluid, coating the surfaces, and preventing the formation and adherence of ice.”
The advantages of a TKS system are the whole entire wing gets coated to get rid of any extra ice that adheres to the top or bottom of the wing surface. The disadvantage is there is only a finite amount of fluid, so when it runs out, you don’t have any more protection. The fluid also adds extra weight agains the useful load of the airplane.
CAV Offers a Basic TKS system for the following single engine piston aircraft:
Beech Bonanza
Cessna 182, 206, 210, 350, & 400
Columbia 350 & 400
Piper PA32
Mooney M20
CAV Offers a full FIKI System for the following single engine piston aircraft:
Ice Shield is another after market de-ice option. Ice Shield makes boots for wing leading edges. The advantage of boots is they activate instantaneously, getting rid of ice where it builds up first, on the wing leading edge. No running out of fluid and only the added weight of the system. Ice Shield also offers heated windscreens for several the Piper Saratoga line and the A36, B36, and G36 Bonanza line.
Ice Shield has boots for the following single engine piston aircraft:
One other company, Kelly Aerospace, makes an electric leading edge de-icer called the ThermaWing for the Cessna/Columbia 350/400 line. You can read a review of the ThermaWing here, or check out Kelly Aerospace’s website.
I’m a big fan of having my Foreflight map always match up exactly with the way I am flying. Having a Flight Stream in the airplane helps a lot with that as it always prompts me to load the new flight plan from the GPS into my Foreflight map. When I load an approach in the GPS flight plan, Foreflight will put it into my Foreflight flight plan via the Flight Stream.
The problem I run into on Foreflight is when there is a published hold at the Initial Approach Fix (IAF), but ATC has told me to fly the straight in approach and skip the hold. Up until recently, I didn’t think there was a way to set up a straight in approach on Foreflight, so I just settled for the hold staying on there.
Not anymore! There is a simple trick that I discovered that allows you to remove the hold from the Foreflight flight plan. Here’s how to do it.
Load the Approach
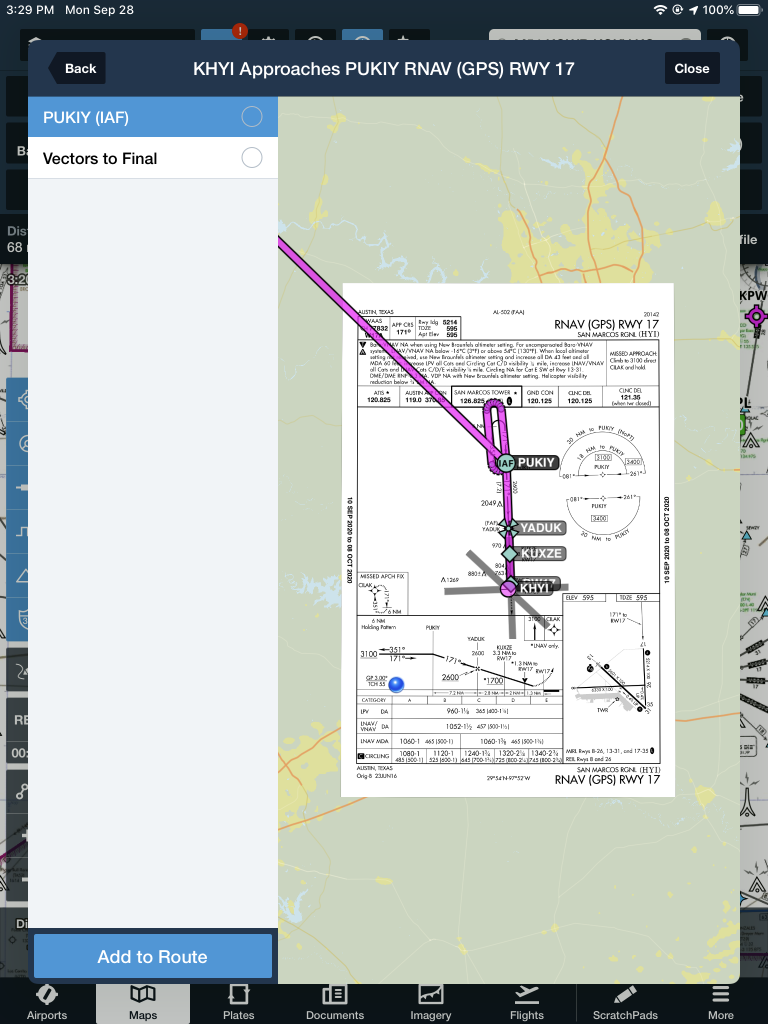
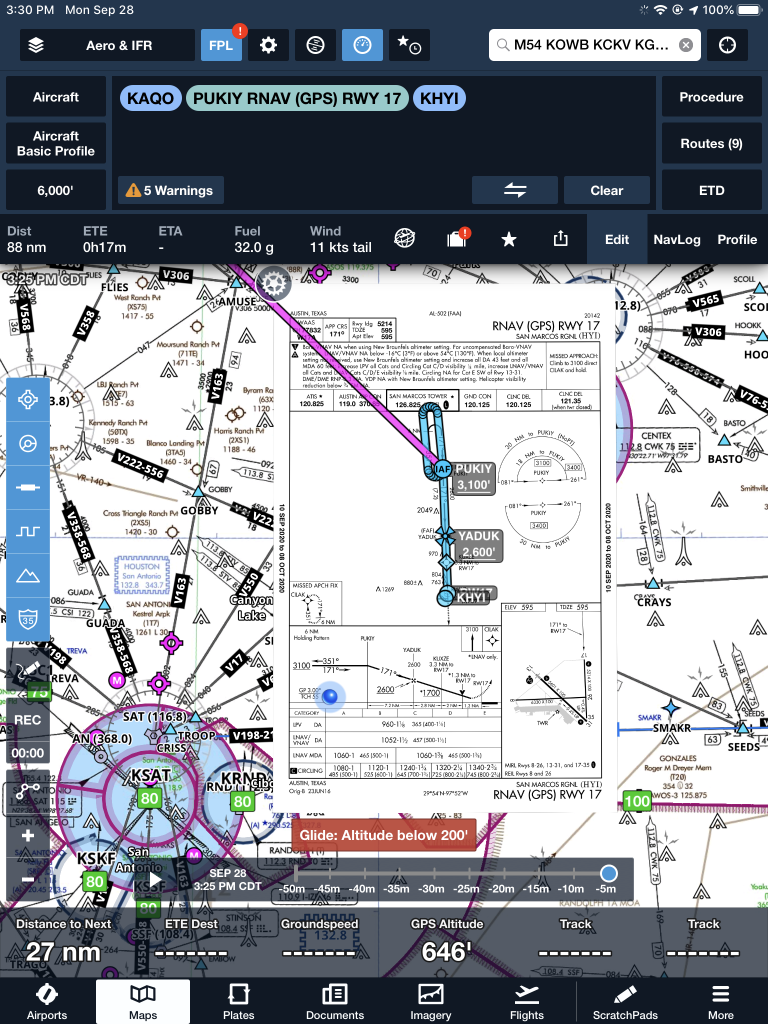
The first step is still to load the approach into your Foreflight flight plan on the Map page. In this scenario, we are flying from KAQO, the Llano Airport, to KHYI, the San Marcos Airport. Austin Approach has told us to expect the straight in RNAV 17 KHYI via PUKIY. So, on Foreflight, we have KAQO and KHYI in our flight plan. Then, I tap the Procedures button on the upper right hand corner of the screen. I then tap Approach, then RNAV 17 KHYI. Then I select my transition.
The options given are either PUKIY with the hold, seen below;
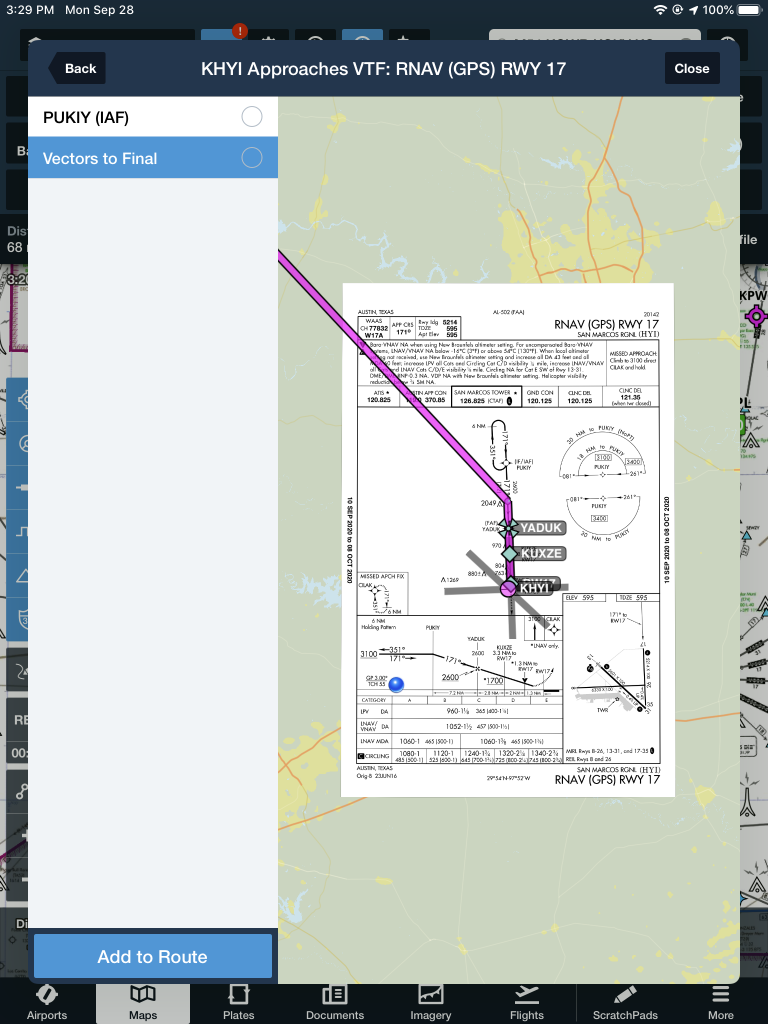
Or Vectors to Final, which lines me up inside of PUKIY. Neither of these are what I want.
But, to get this to work, I select PUKIY, then tap add to route. Now we have our approach loaded into our flight plan.
Removing the Hold
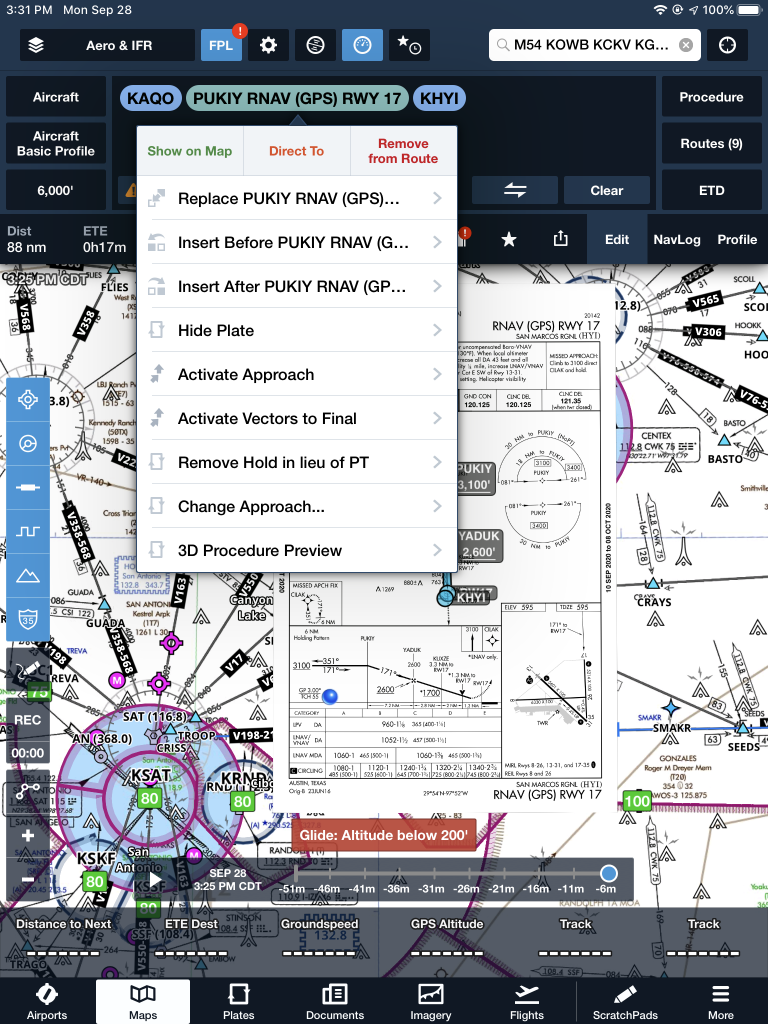
The RNAV 17 is now in the Foreflight flight plan, but the hold is displayed at PUKIY. To remove the hold, the first step is to tap the approach in green and a menu pops up.
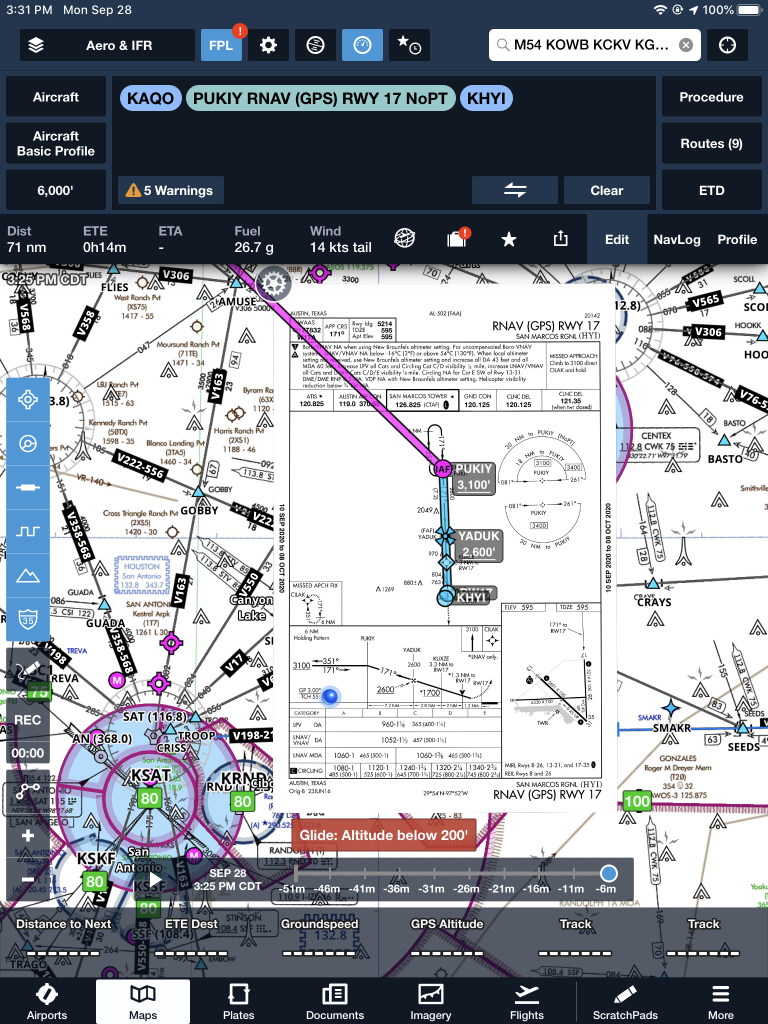
The 7th option down is “Remove Hold in lieu of PT.” Eureka! Tap that, then the approach is displayed without the hold. Houston, we have success! It even says “NoPT” in the flight plan.
You are hand-flying an in-the-weather descent, power back, heading for the FAF. You start a 30 degree banked turn at your lead point to cross the FAF, when your passenger behind you gasps. Looking over your shoulder, you see he has spilled his drink into his lap…too bad for him! However, when you turn your head back to your panel, your inner ear tumbles and you see 45 degrees of bank, 15 degrees nose low, airspeed increasing.
Congratulations! You have managed to get distracted and sucked into an unusual attitude recovery. By the book, you should roll wings level, pull to the horizon, and adjust power as necessary to keep the airspeed within limits. In this scenario, if you had not experienced vertigo, you might have been able to roll to less than 30 degrees of bank, recover your turn, pull the nose up to less than the original descent attitude, pulled a bit of power to slow back to your desired penetration speed and then resumed your desired ground track. However, this would only be appropriate if you had full situational awareness as to the deviations caused by the look over your shoulder, plus full confidence that the moderate corrective actions would put you back on your desired flight path.
As a military aviator, I learned unusual attitude recoveries based upon hard maneuvering at extreme pitch and bank angles. In the hard-maneuvering environment, an unusual attitude could be 90 degrees straight up, airspeed decreasing below 120 kts…or 80 degrees nose low, 135 degrees of bank, airspeed increasing through 500 kts… etc. In these cases, understanding angle of attack, or AOA, is critical to maintaining controlled flight and returning to a normal attitude.
In an extreme nose-high attitude, a military aviator is trained to roll the aircraft to 90 degrees of bank, ease off the back-stick pressure to reduce AOA, add power as required, and allow the nose to slice back towards level, rolling to wings level as the nose approaches the horizon. If nose low, the recovery procedure is to roll rapidly, within asymmetric g limits, until wings level, then to pull at optimum g loading to recover to level flight. For the nose-low recovery, power was normally reduced until airspeed could be assessed and brought under control. However, when doing the nose-low pullout at 7-9 gs, pulling the power for too long would leave you much to slow to resume combat.
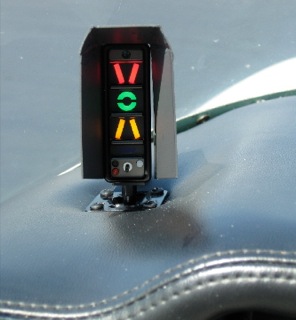
The AOA gauge on a fighter’s glare shield is a primary reference during hard maneuvering and for landing. The AOA for optimum maneuvering is 13 degrees, displayed as the green circle or “green donut” on the gauge. The red chevron on top represents a slow condition of 15 degrees or more and the yellow lower chevron represents 11 degrees or less.
For normal landing in the F-16C, the pilot slows to 220 kts and configures abeam the touchdown point while mentally computing the final approach airspeed of 136 kts plus 4 additional knots for each 1000 lbs of fuel. When rolling off the perch and flying the final turn, the pilot would usually only glance once at the airspeed once to ensure final turn airspeed of 180 kts while using the AOA sight gauge as the primary indicator of a best performance turn. As long as the AOA was green donut (13 degrees) or less, you would not stall. If on speed and 13 degrees wasn’t going to get you around the turn to line up with the runway, you knew you were going to overshoot. You never wanted to see the red chevron of 15 degrees or more as that meant you were too slow, pulling too hard, and in danger of building an un-recoverable sink rate!
Few GA aircraft are currently equipped with AOA indicators, though there are several after market devices available for retrofit. However, knowing the impact of AOA and how to manage it is vital to safe aviating, even without an AOA gauge. The bottom line is, as long as you don’t ask the wing to produce more angle of attack than it can handle, you won’t stall.
Practicing final turn stalls, to know what the wing feels like as you get too slow or pull too much on the controls, increasing AOA past the critical point, will keep you safe when you encounter that unexpected overshooting wind or you find yourself inadvertently on too tight of a downwind leg. Better to overshoot or take it around to try again, than to pull too hard and exceed critical AOA.
Mike Hostage is a retired USAF pilot with 37 years of experience, flying a wide variety of aircraft. An instructor pilot for more than half of his 4800 flight hours, Mike is currently qualified in a Cirrus SR-22T and regularly flies his two homebuilt sailplanes.
The massive storms that rolled through the Austin Bergstrom and San Antonio areas last Friday not only put a dent in the landscape, they put a dent in the skies too.
The Austin Bergstrom (KAUS) control tower suffered significant flood damage Friday. 6 inches of rainfall in an hour caused water to come pouring into the first floor of the tower, flooding the radar room and knocking out the power. This led to transmission outages for the tower, ground control, clearance delivery and the ATIS. Similar to the Chicago Center fire last year (though this was a much smaller section of airspace), the area normally controlled by Austin Approach was replaced by a big, gaping radar hole.
By 8:45am on Friday morning, the Austin Bergstrom airport actually closed. One runway eventually opened back up Friday afternoon, but massive delays and cancellations had already taken place. All the ILS approaches were down and Houston Center had taken over the airspace normally occupied by Austin Approach control.
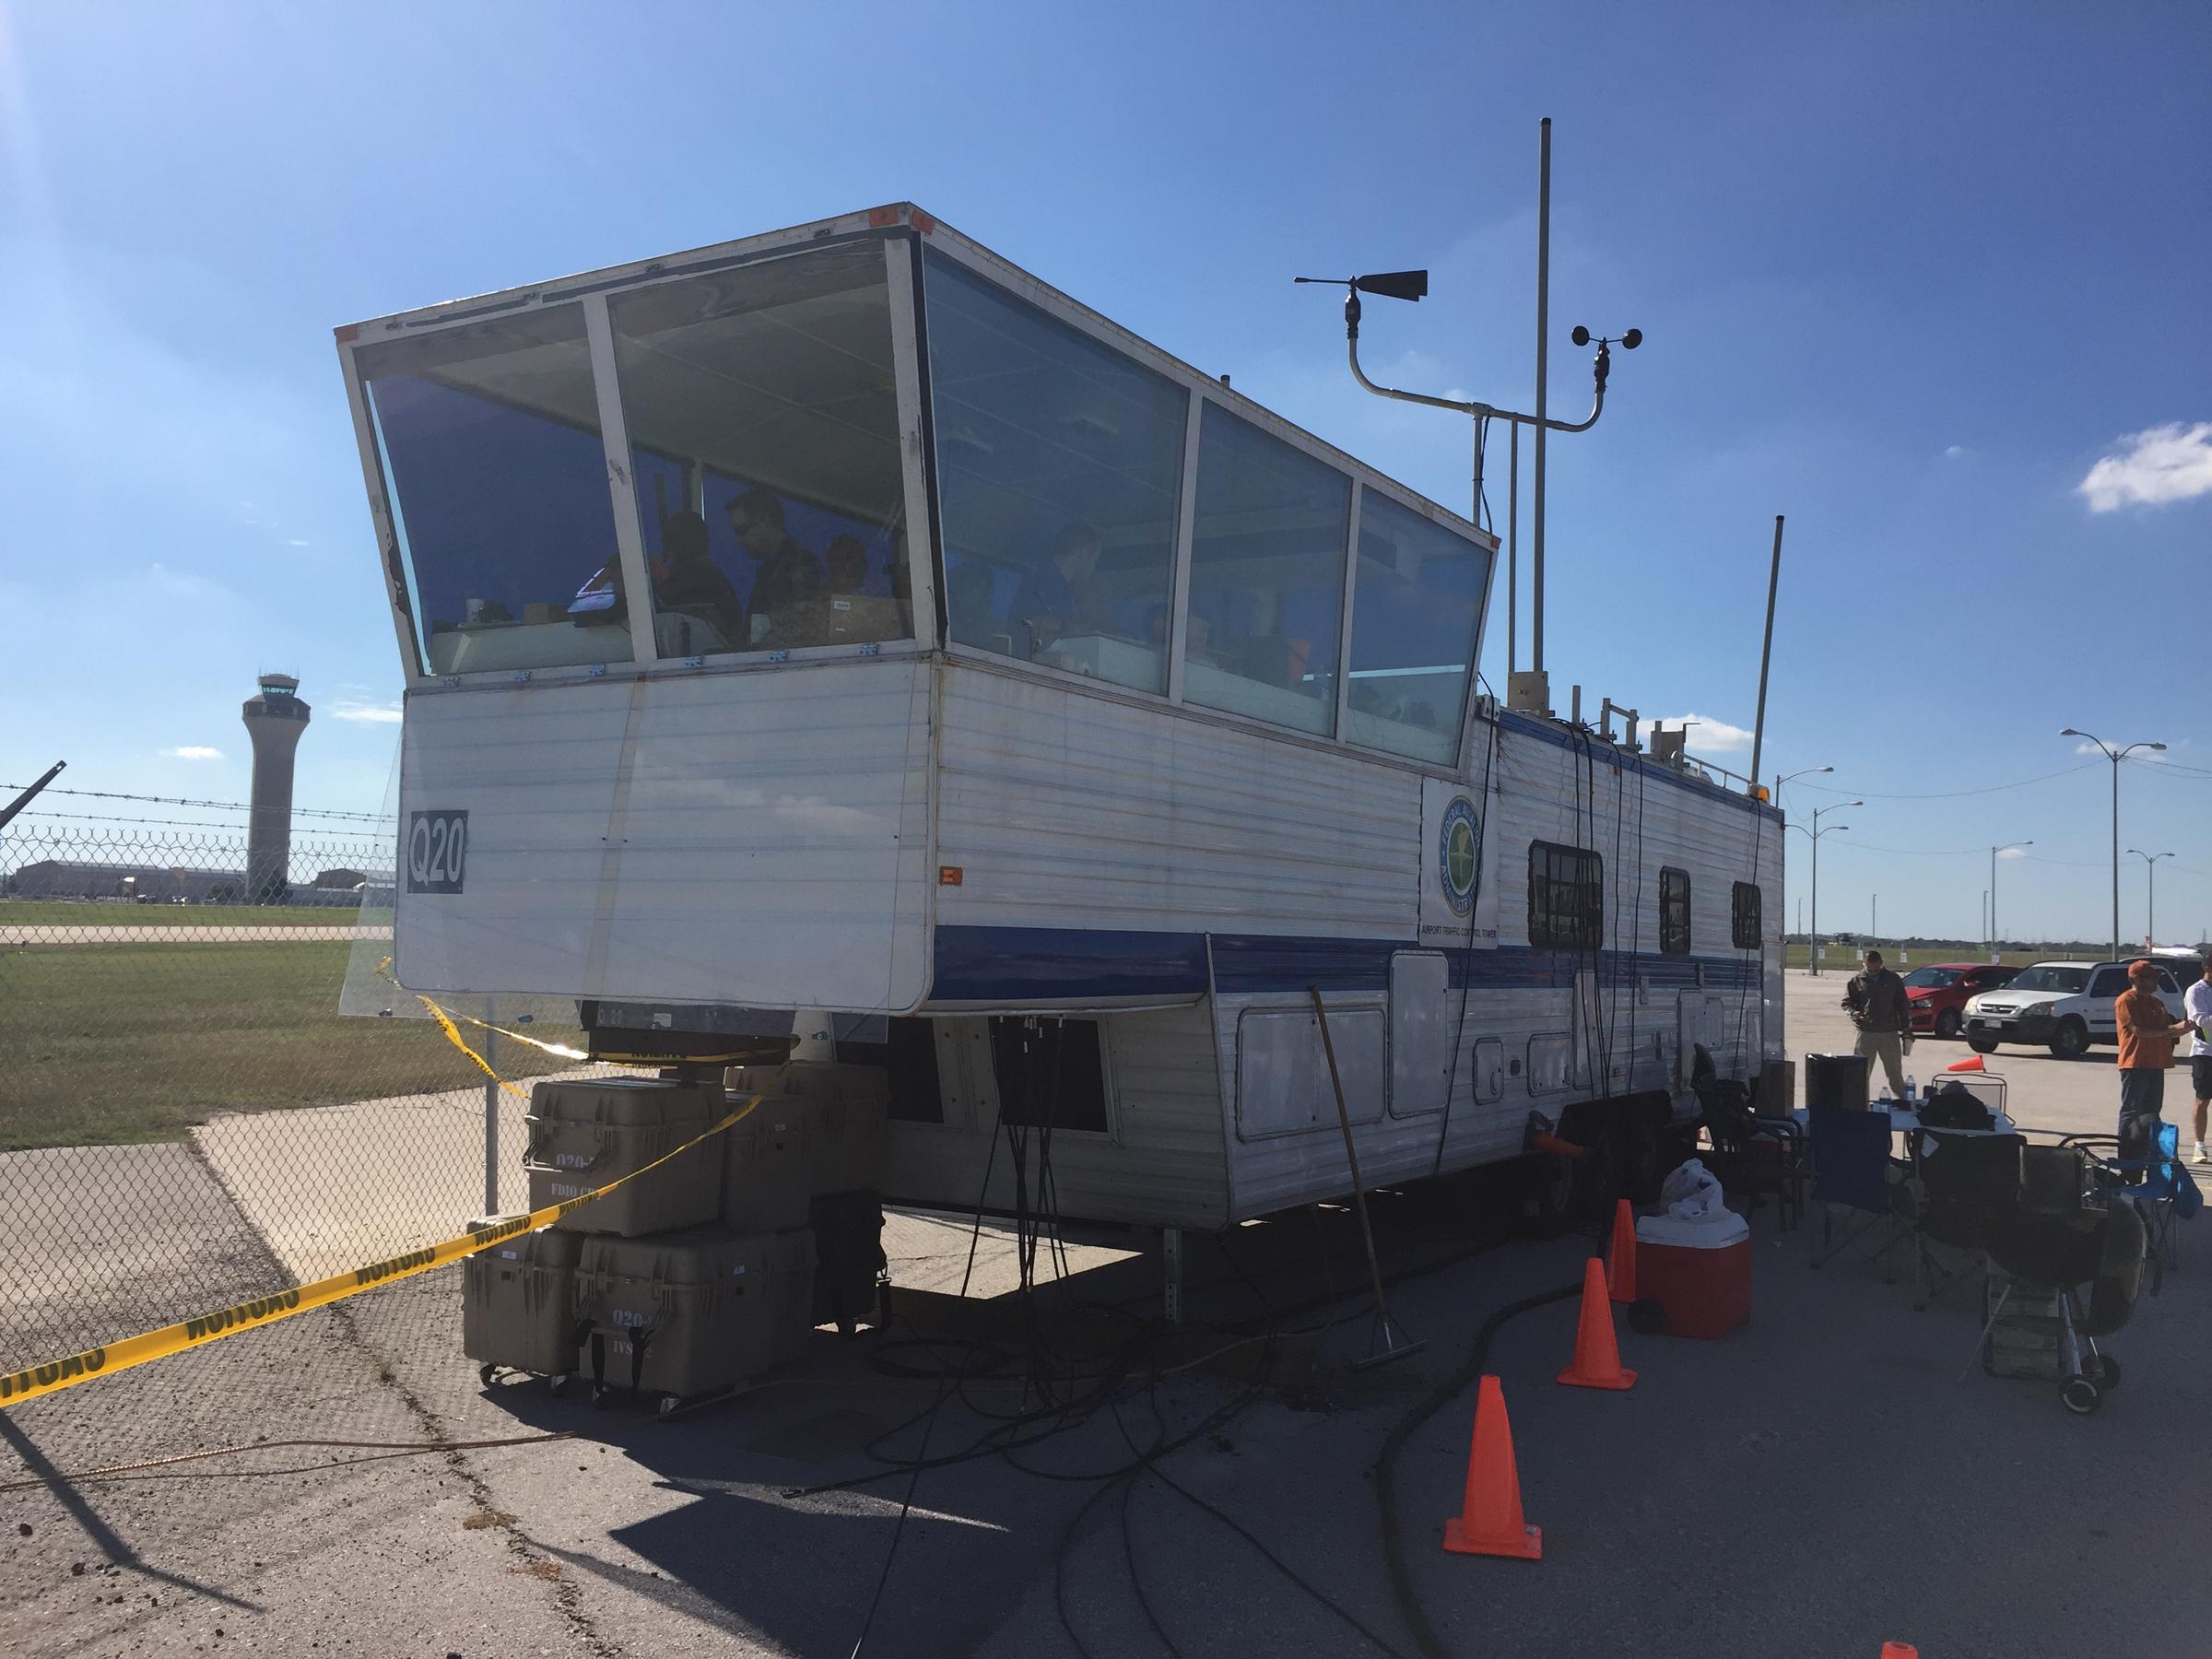
A temporary, emergency tower vehicle was brought in by the FAA (it’s essentially an RV with communications and a giant window) by the end of the weekend. All arrivals and departures were restricted to 17L and 35R.
Due to the radar outage, I heard there was as much as a 4 hour delay even for planes coming into Austin Bergstrom from Dallas, and that was in VMC conditions on Sunday and Monday. Tuesday and Wednesday brought IMC conditions which only enhanced the delays.
The latest news is that Austin Approach will be opening back up, but in a satellite base in San Antonio. The Austin controllers will be using the SAT radar room and will be receiving their radar picture via satellite. The approach frequencies should be up and running today or tomorrow. The Austin Bergstrom tower is up and running and most of the ILS approaches are operational at this point.
In the meantime, expect delays going in and out of Austin. If you don’t have to get to AUS, EDC, or GTU, you’re better off delaying a day or two until Austin Approach is back up and running.
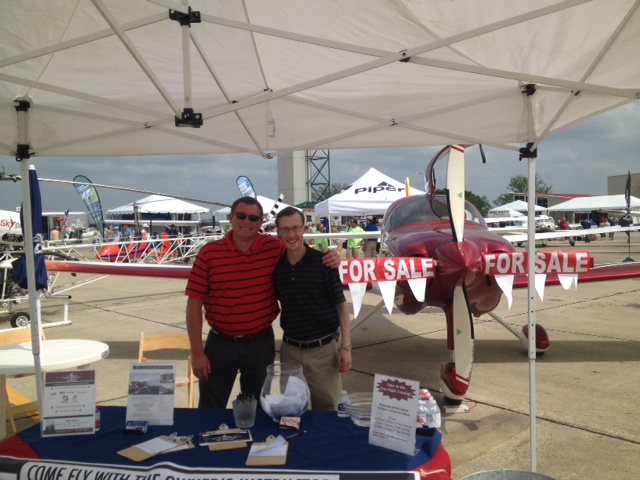
Texas Top Aviation was at the AOPA Regional Fly-In at the San Marcos Regional Airport (KHYI). If you weren’t there, you certainly missed out spending time with 2,500 other airplane and flying enthusiasts!
The day began somewhat gloomy and windy with the threat of rain. Organizers feared that weather would keep a lot of people from coming. Boy, were they wrong!
There were many classic airplanes, many modern and pretty nicely equipped airplanes, and everything in between. There were aviation celebrities, Rod Machado and the Kings of King Schools fame, to name a few. Not to mention the fabulous BBQ!
Texas Top Aviation had several drawings for free training and 3 lucky winners. We also had a Lancair Super ES for sale, N132BB (which made the San Marcos Record newspaper!). It definitely stood out with it’s unique paint job. The flames on the tail drew many oohs and aahs.
Departing the San Marcos Airport after the fly in was like battling traffic in Austin at rush hour (though, Austin doesn’t have any air traffic controllers). The San Marcos controllers probably hadn’t seen that much traffic since the airport was an Army Air Base back during WWII. It was quite a sight to see all the exhibitor’s airplanes lined up ready to head skyward.
Thanks to all of you who stopped by the Texas Top Aviation booth! It was a pleasure meeting all of you and we look forward to working with you in the future!
Hank Gibson and Russell Moore of Texas Top Aviation
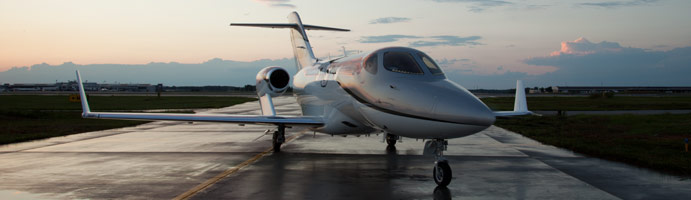
We have all been hearing about the HondaJet for quite a while now. It’s been in testing for a number of years, but it sounds like certification and deliveries will commence early in 2015. Honda says they expect FAA certification in the first part of 2015 and deliveries will commence soon thereafter.
For those of you in the San Antonio area, if you’d like to get a glimpse of the first production HondaJet, it will be at Landmark Aviation at KSAT on Wednesday, October 29th. Cutter Aviation is hosting the event, as they will handle the regional sales for Honda. No flights will be conducted, but folks are welcome to walk around the airplane, climb inside, and give it a good once over.
For those planning on attending, RSVP is required. Contact Lisa Harris at Cutter to RSVP either by phone (602-267-4054) or by email (lharris@cutteraviation.com). Drinks and snacks will be served. The event runs from 5:30pm-8:00pm.