The Go Around Button

Back in the old days, when flying an approach in an early Cirrus SR22 (circa 2004; yes, in airplane technology, those were the old days), performing a missed approach procedure was a lot of work.  You were low to the ground and weren’t able to see the runway.  Then, you had to start climbing so you don’t hit the ground, then push a lot of buttons in order to get the GPS and autopilot set fly the missed approach procedure.  It was very easy to get distracted with button pushing, then forget to fly the airplane, putting yourself and passengers in very unsafe circumstances.  The go around button has changed all that.

Going Missed the Old Fashioned Way

Let’s stick with our example of the 2004 Cirrus.  The SR22 in 2004 was equipped with the Avidyne Entegra system, complete with dual Garmin 430 GPS units, and an STEC 55x Autopilot.  A very capable IFR flying machine (we could use the same example of a 2004 or 2005 Lancair Columbia 350 or 400 that was equipped the same way, except the screens were vertical instead of horizontal).
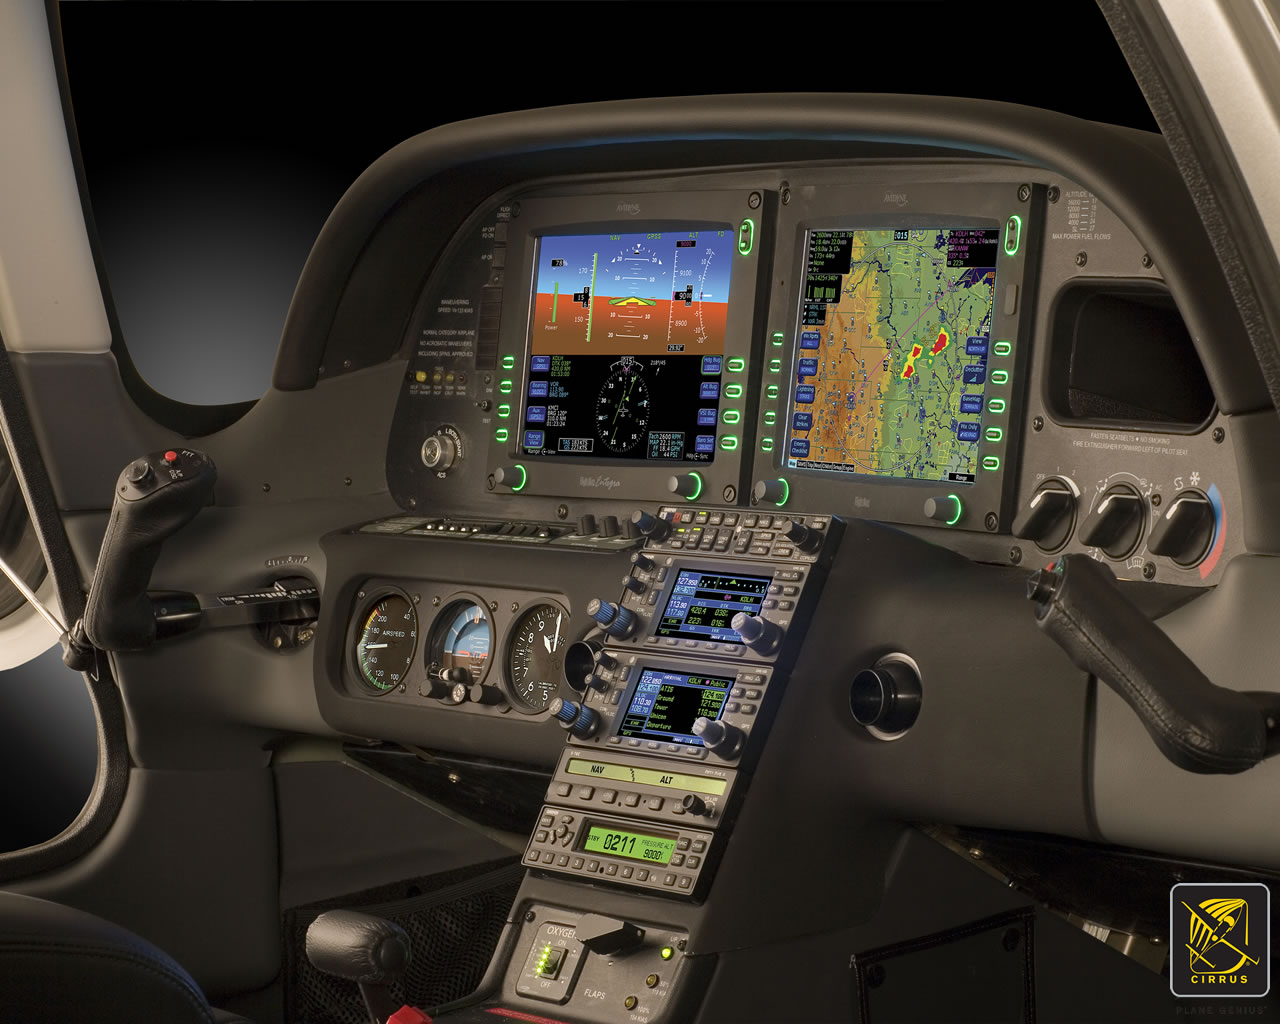
Avidyne Cirrus Go Around Button

We’ll use the ILS 15 at the Temple airport, KTPL, for our example.  You pass TPL, the outer marker at 1,683 with the glide slope already centered.  Everything is going well so far.  The number 1 Garmin 430 is set to VLOC and the autopilot is showing NAV and APR for the lateral guidance and GS on the vertical, tracking the glide slope.  The last weather report stated the clouds were Broken at 500 feet, so it appears like you’ll be able to get in on the approach.

As you get closer to the Decision Altitude, the clouds aren’t letting up at all.  You hit 1,000 feet on your altimeter, 120 feet above the minimums, and you still can’t see a thing.  Another 100 feet lower doesn’t change anything, so you elect to proceed with the missed approach.  This means things are about to get busy.

Here’s the process:

  • Fly the airplane first, meaning shut off the autopilot, pitch the nose up to about 7 degrees, TRIM, add full power, retract the flaps, and step on the right rudder
  • The Garmin 430 is now in SUSP mode, meaning the missed approach point is locked in as the active waypoint.  So, you have to press the OBS button to cause the GPS to cycle over to the missed approach procedure
  • You have to press the VLOC button on the Garmin 430 in order to change the CDI back to GPS
  • You have to re-engage the autopilot by pressing NAV twice (which engages GPS Steering mode)
  • You have to reset your altitude bug (if you hadn’t set it for the missed approach altitude previously)
  • You have to press VS and ALT on your autopilot to have the STEC continue the climb

That’s a lot of work, isn’t it?  Plus, that’s an extensive amount of head down time in the cockpit, with your eyes looking elsewhere other than the instruments while hand flying.  All very low to the ground, I might add.  Can you see how this can be dangerous?  (Note:  The Avidyne IFD 550 has made this a little easier with automatically switching from VLOC to GPS and automatically engaging the missed approach procedure in the flight plan)

The advent of the Go Around Button has streamlined the process, leading to safer operations where it matters most.  The functions of the Go Around Button vary based on the airplane, but here are three examples, the Garmin G1000 Cessna Corvalis TT, the Garmin G1000 Piper Mirage, and the Garmin Perspective Cirrus SR22.

Cessna Corvalis TT

We’ll take the above situation and swap out the airplanes.  Gone is the 2004 Cirrus SR22.  Insert a 2008 Cessna Corvalis TT, equipped with the Garmin G1000 suite and the GFC 700 autopilot.  The go around button is positioned directly above the twist in throttle.

Cessna Corvalis G1000 Go Around Button

When you push the Go Around Button, here’s what the system does:

  • Disconnects the Autopilot
  • Sets the Flight Director for 7.5 degrees pitch up (which is about your normal climb angle) and wings level
  • Switches the CDI back to GPS
  • Takes the GPS out of SUSP mode and cycles the flight plan to the first waypoint on the missed approach procedure

Here’s what you have to do:

  • Follow the flight director by pitching the nose up and TRIM
  • Add full mixture, prop and throttle (prop & throttle should be full already)
  • Retract the flaps
  • Step on the right rudder
  • Re-engage the autopilot, then press NAV and VS (or FLC) and set your altitude bug if it isn’t already set

Not too bad, eh?  Makes the whole situation streamlined and safer.

Piper PA46-350P Mirage

Same situation, different airplane.  You’ll notice the procedure for the Piper Mirage is almost exactly the same as the  Corvalis procedure.  The difference between the two airplanes is where the autopilot controller is.  In the Corvalis, the autopilot controller is positioned on the left side of the MFD, making it easy to scan back and forth while pushing buttons on the autopilot.

The Piper Mirage autopilot controller is positioned below both screens and in front of the power quadrant. With this positioning, the pilot’s eyes have to go a lot further to see which autopilot button he is pushing. In this case, it becomes very important to get the airplane climbing and trimmed before going down to engage the autopilot.

As in the Corvalis, here is what the Go Around button does:

  • Disconnects the Autopilot
  • Sets the Flight Director for 7.5 degrees pitch up (which is about your normal climb angle) and wings level
  • Switches the CDI back to GPS
  • Takes the GPS out of SUSP mode and cycles the flight plan to the first waypoint on the missed approach procedure

And here’s what you have to do:

  • Follow the flight director by pitching the nose up, then TRIM
  • Add full mixture, prop and throttle (prop & throttle should be full already)
  • Retract the flaps
  • Step on the right rudder
  • Re-engage the autopilot, then press NAV and VS (or FLC) and set your altitude bug if it isn’t already set

Cirrus SR22
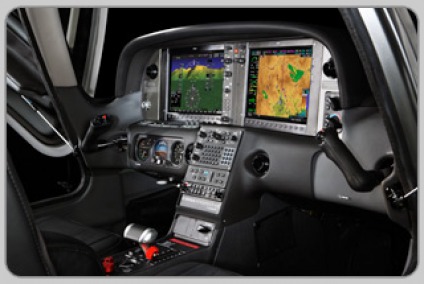
Cirrus Perspective Go Around Button

This time, we’ll use the 2010 Cirrus SR22T with the Garmin Perspective and GFC 700 Autopilot. One thing I really like about how Cirrus configured their system is where the Go Around button is.  It’s actually on the throttle itself, making it much more intuitive.  This way, you can press the Go Around button while adding full throttle.

There is one major difference between the Garmin Perspective in the Cirrus and the G1000 in the Corvalis. When you press the Go Around button in the Cirrus, the autopilot actually stays on.

Here’s what happens when you press the Go Around button in the Cirrus:

  • Flight Director pitches to 7.5 degrees pitch up and wings level
  • AP Mode switches to Go Around mode, following the flight director
  • GPS comes out of SUSP mode
  • CDI switches back to GPS

All the pilot really has to do is add power, take the flaps up, then press NAV on the GFC 700 to get the autopilot following the missed approach procedure.

If you aren’t familiar with the Go Around button or haven’t used the one in your plane lately, it’s good to go up with a knowledgeable instructor and fly a couple of approaches where you perform the published missed approach afterward.  That way, he or she can assist you through the first missed approach, then give you pointers until  you get comfortable with the Go Around button.

Similar Posts

  • Night Flying Techniques

    We’ve all been there. You’re flying into an unfamiliar airport at night, you’re having difficulty seeing the field, and trouble identifying the runway. Airports can be hard to identify for a variety of reasons, but approaching in darkness only makes it more difficult. Perhaps the airport is located in a densely populated area and the airport lights bleed into the city lights. Maybe the airport that you’re approaching is located amid terrain that obstructs your view.

    Situations like these are not uncommon for charter pilots. Just a few evenings ago I was descending IFR into Asheville, NC (KAVL) on a dark night with high overcast and scattered showers. Although the airport was VFR, the surrounding hills made me doubtful that I would be able to see the field in time to safely and comfortably descend for the visual approach that I was expecting.

    Fortunately, there are some things we can do to help find our destination and set us up for the approach. Here are a few tricks that I use regularly when I find myself in this position:

    • When flying into an untowered/closed tower airport: Make sure that you have the right lighting frequency. Some airports have pilot-controlled lighting that is operated on a different frequency than the CTAF. If the lights don’t seem to be working, consult your AFD. If the AFD advises that your frequency is correct, double check the NOTAMs to make sure that the lights haven’t been taken out of service.
      • For towered airports: Ask the tower controller to turn up the intensity of the runway lights. This has helped me find the runway countless times. This request can be especially useful at airports that are located in a highly lit area. Controllers are happy to honor this request and will often leave the lights at the bright setting until you advise them that you are ready for them to be turned back to normal intensity.
    • Load an approach: If you are an instrument rated pilot, loading an instrument approach is a great way to get oriented with a runway when you need a little help. You may need to coordinate with the tower or controlling agency if you want to fly the approach, but this has the added bonus of giving the pilot altitudes for terrain/obstacle clearance should there be any hazards present.
    • Use OBS mode: If you are flying an airplane that has equipment capable of doing so, you can use the Omni Bearing Selector (OBS) button to help align you with the runway. If using this strategy, just remember: THIS IS NOT AN INSTRUMENT APPROACH. It will not provide you with obstacle clearance, nor will it line you up directly with the runway.

    The pictures below should help clarify how to use the OBS to assist in airport orientation.

    Step 1- Have the destination set as the next way point in your flight plan. In the picture below, The GPS is set to navigate direct to KJGG. Press the OBS button (circled in red) to engage the OBS mode.

    OBS 1

    Step 2- Once OBS is selected, use either the window on the screen (which should come up automatically when you press the button in step 1) or the OBS selec tor on your navigation head to select the inbound radial. In this example, I have selected 310 degrees, the landing runway at KJGG.

    OBS 2

    Step 3- The GPS now shows an inbound course to the airport of 310 degrees. It appears as a magenta line. The line serves as an excellent aid in airport/ runway orientation. Remember that this will not line you up perfectly with the runway, but it can still be extremely useful in planning a pattern entry or for getting your bearings.

    OBS 3

    Note: As shown below, If you press the OBS button again, the GPS will return to the navigation as previously set.

    OBS 4
    1. Ask for vectors to the airport/ runway: If you have VFR flight following or are talking to a tower equipped to provide vectors, asking for them can be a good choice. Although the controllers may not always be able to accommodate your request due to workload or equipment limitations, most will be happy to comply if they are able. Some pilots may feel silly asking for help, but my policy has always been that I’d rather feel silly for asking than look silly for being lost.

    In the case of the Asheville flight mentioned in the opening of this article, my solution was to ask the controller fo r direct to the final approach fix of the assigned runway. Upon arriving there, I had no trouble seeing the VASI and was in good position to fly the visual approach. If I had wanted to be positioned a little further out, I could have asked to fly to a different fix or simply asked to be cleared for the approach in lieu of the visual. Just remember to keep your intentions clear when communicating them to the controller.

    The best way to approach an airport day or night, familiar or unfamiliar, is with careful preparation. Having lighted landmarks picked out as well as being acquainted with the airport layout will pay off when it comes time to plan your pattern entry or find the airport on a dark night. Use the resources available to you to get you safely to your destination.

    Andrew Robinson is a 135 Charter Pilot and flight instructor in Pennsylvania.  He flies Pilatus PC-12s and instructs in Beechcraft Bonanzas.

  • AOPA Rusty Pilot Seminar in San Marcos

    “AOPA Rusty Pilot presented by AOPA Ambassador Pat Brown at Tempus Training Solutions”
    Topic: A Rusty Pilots Seminar
    On Saturday, July 16, 2016 at 09:00 Central Daylight Time
    Location:
    Tempus Training Solutions
    2080 Airport Dr.

    San Marcos, TX 78666

    Select Number:
    EA2769634

    Description:

    Life may have gotten in the way, but the dream of flight can be yours again. Returning to the skies is not as difficult as most rusty pilot think. We’re inviting you back in the cockpit and will help you get there. Come and participate in a FREE Rusty Pilot program with fellow lapsed pilots. We will help you understand what’s changed in aviation since you’ve last took the controls and brush up on your aviation knowledge. The Rusty Pilot program is developed by AOPA in partnership with local flight training providers in order to create the best environment for getting you back in the air and a part of the general aviation community.

    It is easier than most people think:

    • No FAA checkride or test
    • Medical may not be required

    As a Bonus, by attending, you get two to three hours of free ground instruction towards your flight review!

    Register Now!

    https://ww2.eventrebels.com/er/Registration/StepRegInfo.jsp?ActivityID=16910&StepNumber=1

    To view further details and registration information for this seminar, click here.

  • Utilizing Personal Minimums

    The FAA defines personal minimums “as an individual pilot’s set of procedures, rules, criteria, and guidelines for deciding whether and under what conditions to operate (or continue operating) in the National Airspace System.” Have you actually given thought as to why we choose the personal minimums we do? From the beginning of initial pilot training, weather minimums were established for day-to-day training and during solo flight. I didn’t realize it at first, but I later learned these limits were not just an insurance mandate, but these minimums were set at the time to safely operate an aircraft based on my “then” current experience.

    So here’s the question: what are your personal minimums and WHY do YOU have them? Do you ever lower or raise your minimums? Are your minimums based solely on your overall experience level or do they take into account other variables such as advanced avionics? For pilots that fly multiple aircraft like I do, can and do your minimums change in regard to category or type of aircraft you are flying? It’s a judgment decision on how you chose your minimums. However, it’s important that time is taken before you strap into the cockpit for each flight to critically think about the different risk factors and variables which may affect your decision for the minimums you choose.

    To guide us, let’s try briefly apply the FAA’s Personal Minimums Checklist to see how risk factors might shape what personal minimums or decisions we make for the day. Remember, just because you have been flying with a certain set of minimums one day, doesn’t mean you can’t adjust your minimums to a higher value given an ever-changing situation.

    The acronym most pilots have heard is PAVE:

    Pilot– We all should be familiar with the acronym IMSAFE associated with this. It addresses variables such as Illness, Medication, Stress, Alcohol, Fatigue, and Emotion. But how do you adjust your personal minimums using this guideline? Have you ever thought about raising your minimums for a training flight if you only got 4-6 hours of sleep, instead of 8? Or if you anticipate a hard IFR flight with a long day, maybe taking a safety pilot to mitigate the chance of a mistake if you’re forecasting having to shoot an approach to your weather planning minimums.

    Aircraft– Personally, this is a really important factor for me when deciding what minimums to apply. I often spend a large majority of my time asking myself; is this aircraft properly equipped for the flight? This question goes beyond just looking at the logbook for a properly equipped and legal aircraft. A professional pilot should think further. Am I flying a traditional 6-pack “steam gauge” layout, non-slaved compass card, with a separate OBS gauge for course guidance? What if the aircraft doesn’t have an auto-pilot? What if I’m flying an aircraft equipped with a dual auto-pilot, dual GPS with an integrated glass cockpit? I can comfortably say my personal minimums change depending on the equipment I have available.

    A pilot should also look at his/her recency with the aircraft. For example, if you are qualified to fly both airplanes and helicopters, maybe you should choose to have higher personal minimums in one particular airframe or if you haven’t flown that airframe within 30, 60 or 90 days. This is a very important factor for the owner/pilot.

    EnVironment– Most of the time, when we think of environment, we ask ourselves, is the weather legal for me to take off and, more importantly, can I conduct this flight safely? Basic flight planning should have taught us to take into consideration crosswind limits, day versus night, and the type of airspace the flight is conducted in. Thought should also be given to how you set your personal minimums in regards to the particular type of environment you might rarely encounter. Flying an approach to your minimums in the flat plains of Texas during the day is one thing, but how would you adjust your weather minimums flying to a new airport, at night, with no moon illumination, in the mountains of Colorado? Could you reduce the risk and adjust your minimums in this scenario with two pilots?

    External Pressures – What external pressures are affecting your flight? Passengers, the owner, “get-there-it is”, the desire to impress someone? Although external pressures should never be a factor when conducting a flight, they almost always play a role in your decision whether to conduct the flight or not. For example, a professional pilot gets hired to do a flight and the weather is below their personal minimums. The pilot could be tempted to lower their minimums by 100 feet to take the flight for a paying customer. This scenario plays out every day across the country whether it’s a professional pilot or owner/pilot. It would be foolish not to consider this type of pressure. Always make sure you have a plan if and when you encounter this situation. Planning your flight and having a plan to deal with these potential scenarios ahead of time ensures you stick to your minimums. It can be as simple as telling your passengers, or the owner, well ahead of your flight what your personal minimums are to accept the flight, and to ensure they, or you, have a back-up plan!

    Most pilots will never break a hard limitation such as an airframe cross wind limitation, or engine limit, but the chances of breaking a personal minimum are realistic. Think about the last time you went on a diet and broke your plan because you were tempted by your friends or family during an outing. Self-imposed personal minimums can be hard to enforce and we need to acknowledge this as humans. Here are a few techniques that you can use to assist in making a decision using personal minimums and help reduce the influence of external pressures.

    Step 1: Sit down with your CFI/CFII and fill out a personal minimums worksheet. Filling one out by yourself is a good start but having an outside objective view will help in making sure your personal minimums are realistic. Remember, it is easy to convince ourselves that we can do something even though we have set personal minimums. Talk with other pilots to see if you have set realistic expectations.

    Step 2: Preflight planning must start a few days in advanced. It can be as easy as checking what the forecast might be and looking at the projected route, near-by alternate airports, and various approaches. This can be done quickly and will give you a heads up on whether the flight can be safely conducted or not. By alerting the passengers or owner early enough, alternate plans can be developed. An extra pilot can be added, the passengers can fly commercial, bring along a CFI, or cancel the trip altogether and seek alternate transportation. The main point is the decision was made well ahead of the flight when conditions didn’t look favorable. This helps in removing external pressures and ensures you don’t go below your personal minimums.

    Step 3: Never be afraid to ask for a second opinion. Part 135 operators have set procedures for conducting flights which assist the pilots in making decisions. These set procedures help remove external pressures by allowing the pilot to say, “The rules don’t allow for this, or this is how we will conduct the flight!” However, under Part 91, the pilot has to take ownership for all phases of the flight. This is where talking it out with another pilot helps with mitigating external factors and the environment. Ideally, this person should have more experience and be able to talk through the situation. For instance, if I’m flying to a new destination, I often seek the advice from another pilot who’s familiar with the area. They may have key insights into weather patterns, preferred approaches, or hazards to avoid. In certain situations, asking for another pilot’s opinion might be what influences your go/no-go decision! You’ll be amazed how much you can learn just from talking to other pilots.

    Step 4: Continue to build your experience and knowledge base. Building experience requires us to push our abilities, and sometimes this may be to the limit. However, this can be done in a controlled training environment or just going out and experiencing it. Get a new license, fly regularly with a CFI/CFII, and always try and take advantage of training opportunities. For example on your next flight from point A to point B, practice hand flying an approach, do a short field landing, a quick steep turn, etc. Quality flight time is always better than quantity. Continue to challenge yourself and try not to become complacent.

    Personal minimums are a tool to assist in every pilot’s aeronautical decision making process. Use your personal minimums to guide your final go/no-go decision and remember to stick to the plan. I encourage you to review the FAA’s Risk Management Handbook (FAA-H-8083-2). Appendix B has Sample Risk Management Scenarios and reviewing them will give a better understanding how to apply the techniques discussed to your everyday flying.


    Pedro Vargas-Lebron is a King Air 200 and uH-60 Blackhawk Instructor pilot with the Texas Army National Guard. Pedro is a CFI/CFII/MEI both in airplanes and helicopters with over 4000 hours of flight time, half as an instructor pilot.

  • Icon A5 Thought to Have Crashed in California


    Most pilots have seen the Icon A5 light sport amphibious aircraft.  It’s a neat design that can land on water or on a runway.  The high wing design with a pusher prop has foldable wings that allow it to be put on a trailer and towed behind a vehicle, allowing it to be offloaded at boat ramps (it also begs the question can you wakeboard behind it?).

    Apparently, not all non-pilots know about the Icon A5.  Last week, one landed in the water near a beach in Southern California, but most of the beach goers and local authorities believed it had crash landed in the water.  Emergency crews were dispatched, but everyone was surprised when the two occupants crawled out on the wings, had a cup of coffee, and took back off.

    You can read the full article on the Flying Magazine’s website.

  • Piper PA46 De-Ice Boots Care

    It’s winter time, which means it’s time to use those Piper PA46 de-ice boots a little more often. Most of us know the winter flying rules, don’t stay in ice, get rid of frost, etc. However, most of us aren’t as familiar with how to maintain those Piper PA46 de-ice boots. The do need some TLC every couple of months to keep them in tip top shape.

    Below is the recommendation from Goodrich (the maker of the boots) on what to use to clean and polish the boots and how often to do it.

    Steps 1-3 below are your twice a year items to make your Piper PA46 de-ice boots last through the lifetime of the aircraft.

    Step 1-ShineMaster Prep

    ShineMaster Prep strips all the dirt, grime, grease, oil, silicone products and old ShineMaster on the Piper PA46 de-ice boots to prep them for Step 2.

    ShineMaster Prep can be found on Goodrich’s website.

    Step 2-AgeMaster #1

    AgeMaster is your second step the in the Piper PA46 de-ice boot preservation and protectant process. AgeMaster is a rubber preservative that protects against weathering, ozone, and ultraviolet rays.

    Make the first application when your de-ice boots are 6 months old, then re-apply every 150 hours (or twice a year) after that.

    AgeMaster #1 can be purchased on Goodrich’s website.

    Step 3-ShineMaster

    Step 3 in the Piper PA46 de-ice boot care is ShineMaster. As the name implies, ShineMaster shine’s the boots up after getting rid of all the old gunk & grime with ShineMaster Prep and after AgeMaster is applied. 2-3 coats should be sufficient.

    ShineMaster can be purchased on Goodrich’s website.


    During icing season, Goodrich recommends ICEX II. ICEX II is an ice inhibitor that should be applied every 50 hours during ice season. This will help prevent ice from sticking to the Piper PA46 de-ice boots. ICEX II can be found here.

    Finally, for general cleaning of the boots after each flight, utilize Goodrich Aerospace Cleaner to debug, then follow up with Goodrich Aerospace Protectant. Goodrich claims their Protectant will resist dust, soiling, and staining. There may be less bugs to clean each time!


    With just a few hours a couple times a year spent working on the Piper PA46 de-ice boots, owners will never have to worry about the hefty price tag of boot replacement!

  • TBM Debuts the 960 at Sun N Fun

    This is a Press Release from Daher’s website, the maker of the TBM 960.

    Sun ‘n Fun Aerospace Expo, Lakeland, Florida, April 5, 2022 – Daher today unveiled the latest high-end version of its TBM pressurized single turboprop aircraft family – the TBM 960 – which incorporates Pratt & Whitney Canada’s advanced PT6E-66XT engine and a fully digital e-throttle, along with a digitally-controlled cabin that incorporates an all-new environmental control system, LED ambience lighting and electrically-dimmable windows.

    The TBM 960 was introduced at the Sun ‘n Fun Aerospace Expo in Lakeland, Florida, where Daher is exhibiting the first production airplane (exhibit stand #MD-22B).

    “The TBM 960 is the quintessential TBM, representing the fifth evolution of our very fast turboprop aircraft family since the TBM 900-series’ introduction in 2014,” commented Nicolas Chabbert, the Senior Vice President of Daher’s Aircraft Division. “It takes the maximum advantage of today’s turboprop technology to provide digital control of the engine and the propeller.”

    The TBM 960 retains the rapid speed of Daher’s TBM family while enabling lower fuel consumption. At Daher’s recommended cruise setting of 308 kts., the fuel consumption is only 57 U.S. gallons per hour, which is a 10% fuel economy compared to maximum cruise setting for more sustainability.

    At the heart of this latest TBM version is the intelligent PT6E-66XT powerplant and Hartzell Propeller’s five-blade RaptorTM composite propeller, both of which are linked to the dual-channel digital Engine and Propeller Electronic Control System (EPECS).

    With the EPECS, the PT6E-66XT’s startup is fully automated after a single-switch activation. The cockpit’s power lever is an e-throttle, using a single forward position from takeoff to landing – with the EPECS optimizing powerplant performance throughout the flight envelope while

    Daher unveils the TBM 960 at Sun ‘n Fun Aerospace Expo

    reducing pilot workload by integrating all functions and protecting the engine’s life. Analysis of engine parameters is driven by 100-plus smart data inputs.

    The RaptorTM propeller is fully integrated into the propulsion system. It is specifically designed to reduce overall weight and improve the TBM 960’s takeoff distance, climb and cruise speed. Turning at 1,925 rpm during maximum power output, the Raptor contributes to limiting noise and vibration. Its sound level during takeoff is just 76.4 decibels, meeting the most stringent international noise standards.

    With its G3000® integrated flight deck, the TBM 960 retains Daher’s e-copilot® concentration of technological innovation and safety systems in the TBM, which can be compared to an “electronic copilot.” This includes an icing protection system, flight envelope monitoring through the Electronic Stability and Protection (ESP) and the Under-speed Protection (USP) systems, the Emergency Descent Mode (EDM) function, as well as the game-changing HomeSafeTM emergency autoland system.

    New to the TBM 960 is the Garmin GWXTM 8000 doppler weather radar with advanced surveillance features such as lightning and hail prediction, turbulence detection, zero blind range for close-in returns, and ground clutter suppression. The TBM 960 also is the first application of Garmin’s GDL® 60 next-generation data transmitter for automatic database upload and interconnection with mobile devices.

    The TBM 960’s Prestige cabin extends Daher’s use of digital power inside the aircraft, featuring an all-new environmental control system, LED ambience strip lighting integrated into both sides of the overhead ceiling panel, and electronically-dimmable windows – all controlled by a PassengerComfortDisplay(PCD). Enhancementsinthecabin’sstyleandcomfortalsoinclude new ergonomically enhanced seats, USB-A and USB-C power plugs, individual cupholders and headset hangers for each occupant.

    For the TBM 960, a fifth TBM paint scheme – called Sirocco, based on the creativity of French designer Alexandre Echasseriau – has been added to the aircraft’s style customization possibilities.

    The TBM 960 has been certified by EASA (the European Union Aviation Safety Agency); with certification by the U.S. FAA (Federal Aviation Administration) currently underway. Deliveries will begin in the first half of 2022.

    With the new aircraft’s launch, Daher’s TBM family is now offered in two versions: the TBM 960 and TBM 910.

    About Daher – www.daher.com

Leave a Reply

Your email address will not be published. Required fields are marked *