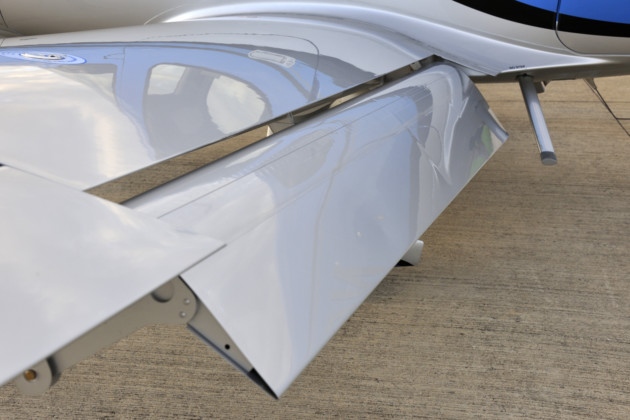
I get to fly a lot of different airplanes in my chosen career. There aren’t many airplanes that I take off in, then say “Wow,” and have a big smile on my face. The RDD LX7 was definitely one of those.
I wrote about the RDD LX7 in the past, bragging about everything I read about it. The blogs all advertised 250 KTAS and 17 GPH and FL250, all of which are eye popping numbers.
Lo and behold, those numbers are true.
I got to go up to RDD’s Redmond, Oregon facility in April 2021 to get my initial training in the RDD LX7 and I couldn’t wipe the smile off my face. The 3 screen G3X Touch layout is very impressive and not crowded like I thought it would be. Being familiar with the G500TXi, there are some G3X specifics that take a little getting used to, but overall, it’s a good system. The main GPS and number 1 radio is a GTN 750Xi.
We took off from RDM and proceeded to climb at 140 KIAS, which equated to 2,000 FPM. We only had half tanks (which is still 90 gallons of fuel!), but it climbed with no problem. It’s extremely responsive as I learned while doing the basic flight maneuvers. The stall speed of the airplane (the biggest problem with the Lancair 4P, the airframe that the RDD LX7 is derived from, was the terrible wing design and extremely high stall speed), was in the low 60s or high 50s, with the stall being extremely docile.
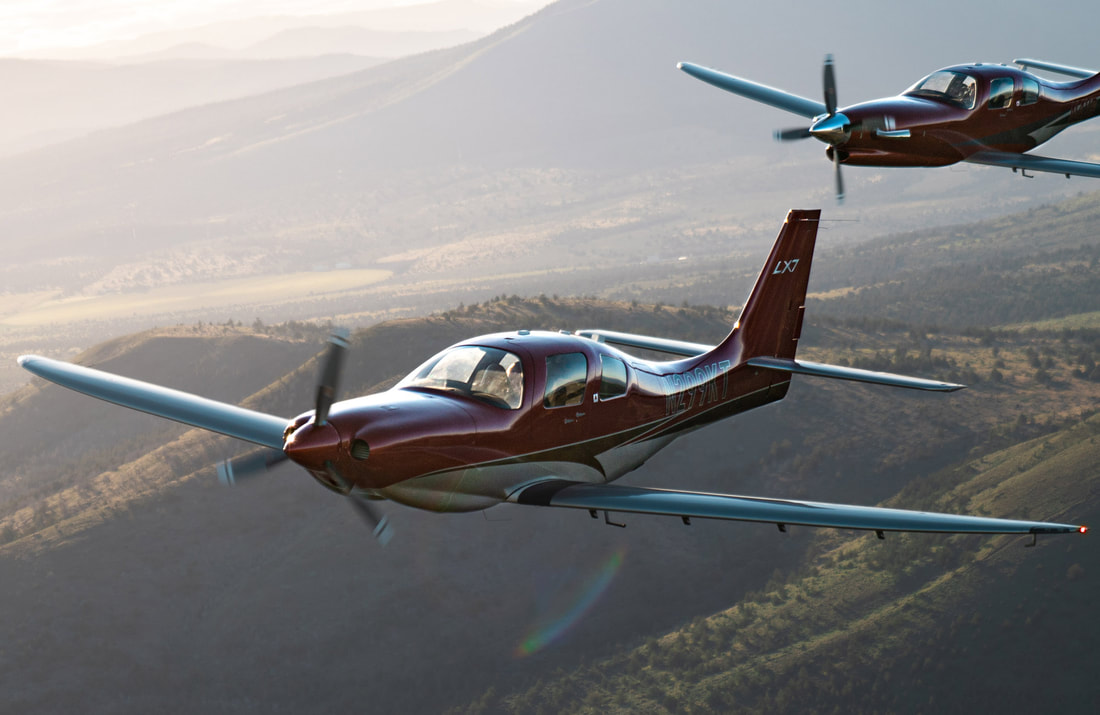
The airplane handled very similarly to a Columbia 400, but seemed even more responsive. The glide ratio isn’t as good as some, but it’s still better than a Cirrus (plus it still has a BRS system to boot).
The big test was the flight to San Antonio from Redmond to bring the plane home. The new owner and I departed RDM with the tanks full of Avgas (180 gallons), then got up to a cruise altitude of FL210. After setting power and leaning, the numbers came out true to spec: 252 KTAS, 17.5 GPH.
The greatest part? We stopped in Santa Fe to stretch our legs and we didn’t need fuel. We still had 100 gallons left! That left us plenty to get to San Antonio with 40-50 gallons left over. Another RDD LX7 owner flew his piston direct from Redmond, OR to Jacksonville, FL, non-stop. It was over 9 hours. That’s impressive.
You can’t beat the purchase price, either. A new Cirrus SR22T runs a little north of $1.2m. A piston engine LX7, that is pressurized, 70 KTAS faster with a much longer range, and still has a BRS, is between $850,000-$900,000. An LX7 starts to make a whole lot of sense when you weigh all that. There is also a PT6 option with several different sizes and horsepowers to choose from, which costs more, but you see 300 KTAS.
To learn more about the RDD LX7, check out the company’s website: RDD LX7.
Field Condition, or FICON, reports show up in NOTAMs both during the summer time and the winter time. In the southern states, FICON reports are seen more in the summertime during and after hard rains and thunderstorms (with the exception of winter 2021 & 2022, where Texans quickly got familiar with FICON reports after some very unusual winter weather). In cold winter climates, FICON reports are a staple during the winter season, showing up during and after snow & ice storms.
The question is, what do those codes mean in the FICON report? You could see 5/5/5, 3/3/3, 3/4/4 and any combination thereof. And why are there three numbers?
Let’s start with the second question first. The three different numbers in the FICON report indicate the 3 different sections of the runway: the touchdown third, midpoint third, and rollout third of the runway.
Now, what are those numbers describing? The three numbers are the indication of how slippery that portion of the runway is. This is referred to as a Runway Condition Code (or RCC). The lower the number, the more slippery the runway is. The higher the number, the dryer the runway. The scale is 0-6, with 6 being completely dry and zero being no traction at all.
Here is the FAA table for the RCCs.
Now, in order for those RCC codes to generate, at least 25% of the surface must be wet. If there are just spots of standing water, slush or snow, a FICON report will be issued to report the contaminants, but no codes will be generated.
The Runway Condition Codes are only part of a FICON report. In addition to the codes, a descriptor in the NOTAM will be published describing what percentage of the portion of the runway is affected and by what.
For example: RWY 28 FICON 3/3/3 100 PRCNT 2IN DRY SN OVER COMPACTED SN.
Deciphered, that is saying that all sections of Runway 28 have braking deceleration that is noticeably reduced or direction control is noticeably reduced and 100% of each section has 2 inches of dry snow over compacted snow. Sounds like a runway to avoid!
Braking action reports are separate from FICON reports, but also issued via NOTAM. Braking action reports are issued by the airport manager whereas the FICON reports are computer generated.
Recently, I was training a customer who had a brand new instrument panel installed in his TBM 700. The avionics shop that did the work (Abilene Aero, who I highly recommend for any panel installs, located at KABI) told us when we picked the plane up that the new Garmin GTN 750Xi had the most recent software update, which included the Garmin Smart Glide.
I had never used the Garmin Smart Glide before, so I was eager to check it out during our training. When we got to engine failures, we pushed the Emergency button on the Home page of the GTN 750Xi, and then the magic happened.
The plane was also equipped with a Garmin G600TXi PFD and the Garmin GFC 600 Autopilot. In order for Smart Glide to work, there has to be either a GTN 750Xi or GTN 650Xi installed, along with a G500TXi or G600TXi and a Garmin Autopilot. Garmin is working on getting the legacy G500 as well as the GI 275 and G5 to work with the above GPS units for Smart Glide as well.
Here’s what happens. The plane loses it’s engine. The pilot’s workload and stress level suddenly goes way up. Trim the airplane for best glide, find the nearest airport, attempt restart. Do it quickly so you have time to focus on the glide. Oh yeah, squawk 7700 and declare your emergency. All the while plummeting toward the ground in a somewhat controlled crash. Yikes.
Garmin Smart Glide takes over the flying part, allowing the pilot to handle the restart, while making it much easier to squawk, talk and plan the engine out landing. On the home page of the GTN 750Xi/650Xi, the pilot simply taps the Emergency icon on the bottom of the screen. The Autopilot comes on and goes into IAS mode and maintains best glide while descending. The GPS immediately analyzes the Glide Advisor, and turns to the nearest airport in the glide ring (if there is no airport within gliding distance, the GTN 750Xi advises the pilot). Then, the Autopilot flies directly to the Nearest airport, allowing the pilot the ability to take attempt a restart.
Once it is determined that the engine won’t start, the Garmin Smart Glide has excellent situation awareness tools. On all screens, the pilot is constantly being advised of how high AGL the plane is currently, while advising also of how high AGL the plane will be over the airport that the glide is set up for. There is also a short cut on the screen to tap to squawk 7700 as well as runway length information at the airport.
The Garmin Smart Glide Button wasn’t installed yet in the TBM, but that will make things even easier when it is (it will be certified in January). This is amazing technology that all Garmin GTN 750Xi pilots should have their software updated to. Remember, you have to have a Garmin Autopilot and a Garmin PFD for it all to work.
There are a number of airplanes out there equipped with the Avidyne Entegra PFD and MFD system, most notably the Cirrus SR20 and SR22 models from the early 2000s and the Columbia 350 and 400 from the same era. The Entegra is pretty simple and easy to learn, but doesn’t have the capability that it’s Garmin glass panel counterparts do (I have not, however, tried the R9, which could prove much more capable than it’s predecessor). I have found that pilots master the Entegra a lot quicker because of the reduced functionality.
One of the nice features of the Avidyne Entegra is the CMAX Chartview option. With a yearly subscription, you can get all the Jeppesen approach plates and airport diagrams for the entire US on your MFD. Just like your GPS, though, you have to update the charts monthly to keep them legal. After a period of time when you don’t keep up with the updates (I believe it is 90 days), then the charts disappear.
The update process is a little tricky if you don’t have someone to explain it to you. Once you go through it a few times, you’ll have it down pat. Here’s the process for the Avidyne Entegra Chart Updates.
Jeppesen Subscription
The first step in performing your Avidyne Entegra Chart Updates is to create an account with Jeppesen, who handles all the GPS NavData and MFD Chart updates for both Garmin and Avidyne. If you already have a Jeppesen subscription, you can skip down to the next section. To do that, simply go to jeppdirect.jeppesen.com, and then do the following:
Click on Avionics Data on the upper left hand side
Click “Purchase Avionics Subscription”
Then, click on “Create Account” in the new users section
Once you’ve created an account, login, then put in your aircraft information and select 1 update for the Avidyne Entegra EX500 EX 5000
Click Continue at the bottom and you can put in your payment information
Software Needed
There are two different programs depending on if you have a PC or a Mac. If you have a PC, you need the Jeppesen Services Update Manager (JSUM). If you have a Mac, you need the Jeppesen Distribution Manager (JDM). Download whichever one you need, then login, and your updates will show up.
Downloading the Avidyne Entegra Chart Updates
First, we’ll go through the process of performing the Avidyne Entegra Chart Updates process for a Windows computer, using JSUM. You’ll need two 2 GB USB drives formatted to FAT 16. Here’s how to format to FAT 16.
Go to My Computer after inserting the USB drive
Right click on the drive
Click on Format, then select FAT and press OK
Once the USB drive is formatted to FAT16, open up the JSUM program. Login and your updates will be displayed on the screen
You’ll need to set the Avidyne CMAX Key Code
Right click the Avidyne Electronic Charts Service and click Set Avidyne Key
To get the key code, visit MyAvidyne.com and create an account using your JeppView subscription number and your serial number for your Avidyne MFD (found on the AUX page) and your PFD serial number (displayed on startup when the PFD is warming up)
Once you get the Key Code, copy and paste it in the window and click OK
Click on the service and click Start
The program should automatically detect the drive (if it doesn’t, click browse and select the drive)
Click Continue and the charts will start downloading and automatically programmed to the USB drive
If you are updating NavData on the MFD as well, follow the same steps as listed above in order to update the NavData
Next, we’ll go through the Avidyne Entegra Chart Updates process on a Mac, using the JDM program. You’ll need two 2 GB USB flash drives formatted to FAT 16 (the easiest way to format to FAT 16 is on a Windows computer, using the process above).
Open the JDM program and login
Insert the first USB drive
You’ll need to set your Avidyne CMAX Key Code
Click Service Details under the Electronic Charts Service
Click Set Avidyne CMAX Key Code
Program automatically detects the USB drive
Click and drag the Electronic Charts service over to the USB and release
The service is downloaded and copied to the USB drive automatically
Eject the USB drive
Insert the second USB drive (or plug the USB drive in to your MFD, do the update, then reformat the drive) and follow the same steps for the NavData
Updated the MFD with the Avidyne Entegra Chart Updates
Once everything is programmed the your USB drives, the rest of the process is simple. Just go out to your airplane, plug in the first USB drive with the Electronic Charts on it, turn your battery on and the avionics master, and the system will upload the information automatically. Once it’s finished, turn everything off, pull the USB drive out, then insert the second USB drive and do the same thing.
Now, you’re all updated!
If you’d like to see a video on the process, Jeppesen has some very good videos on the updating procedure. The links are below. If you have questions, please contact Texas Top Aviation and an expert will help you through the process.
The FAA defines personal minimums “as an individual pilot’s set of procedures, rules, criteria, and guidelines for deciding whether and under what conditions to operate (or continue operating) in the National Airspace System.” Have you actually given thought as to why we choose the personal minimums we do? From the beginning of initial pilot training, weather minimums were established for day-to-day training and during solo flight. I didn’t realize it at first, but I later learned these limits were not just an insurance mandate, but these minimums were set at the time to safely operate an aircraft based on my “then” current experience.
So here’s the question: what are your personal minimums and WHY do YOU have them? Do you ever lower or raise your minimums? Are your minimums based solely on your overall experience level or do they take into account other variables such as advanced avionics? For pilots that fly multiple aircraft like I do, can and do your minimums change in regard to category or type of aircraft you are flying? It’s a judgment decision on how you chose your minimums. However, it’s important that time is taken before you strap into the cockpit for each flight to critically think about the different risk factors and variables which may affect your decision for the minimums you choose.
To guide us, let’s try briefly apply the FAA’s Personal Minimums Checklist to see how risk factors might shape what personal minimums or decisions we make for the day. Remember, just because you have been flying with a certain set of minimums one day, doesn’t mean you can’t adjust your minimums to a higher value given an ever-changing situation.
The acronym most pilots have heard is PAVE:
Pilot– We all should be familiar with the acronym IMSAFE associated with this. It addresses variables such as Illness, Medication, Stress, Alcohol, Fatigue, and Emotion. But how do you adjust your personal minimums using this guideline? Have you ever thought about raising your minimums for a training flight if you only got 4-6 hours of sleep, instead of 8? Or if you anticipate a hard IFR flight with a long day, maybe taking a safety pilot to mitigate the chance of a mistake if you’re forecasting having to shoot an approach to your weather planning minimums.
Aircraft– Personally, this is a really important factor for me when deciding what minimums to apply. I often spend a large majority of my time asking myself; is this aircraft properly equipped for the flight? This question goes beyond just looking at the logbook for a properly equipped and legal aircraft. A professional pilot should think further. Am I flying a traditional 6-pack “steam gauge” layout, non-slaved compass card, with a separate OBS gauge for course guidance? What if the aircraft doesn’t have an auto-pilot? What if I’m flying an aircraft equipped with a dual auto-pilot, dual GPS with an integrated glass cockpit? I can comfortably say my personal minimums change depending on the equipment I have available.
A pilot should also look at his/her recency with the aircraft. For example, if you are qualified to fly both airplanes and helicopters, maybe you should choose to have higher personal minimums in one particular airframe or if you haven’t flown that airframe within 30, 60 or 90 days. This is a very important factor for the owner/pilot.
EnVironment– Most of the time, when we think of environment, we ask ourselves, is the weather legal for me to take off and, more importantly, can I conduct this flight safely? Basic flight planning should have taught us to take into consideration crosswind limits, day versus night, and the type of airspace the flight is conducted in. Thought should also be given to how you set your personal minimums in regards to the particular type of environment you might rarely encounter. Flying an approach to your minimums in the flat plains of Texas during the day is one thing, but how would you adjust your weather minimums flying to a new airport, at night, with no moon illumination, in the mountains of Colorado? Could you reduce the risk and adjust your minimums in this scenario with two pilots?
External Pressures – What external pressures are affecting your flight? Passengers, the owner, “get-there-it is”, the desire to impress someone? Although external pressures should never be a factor when conducting a flight, they almost always play a role in your decision whether to conduct the flight or not. For example, a professional pilot gets hired to do a flight and the weather is below their personal minimums. The pilot could be tempted to lower their minimums by 100 feet to take the flight for a paying customer. This scenario plays out every day across the country whether it’s a professional pilot or owner/pilot. It would be foolish not to consider this type of pressure. Always make sure you have a plan if and when you encounter this situation. Planning your flight and having a plan to deal with these potential scenarios ahead of time ensures you stick to your minimums. It can be as simple as telling your passengers, or the owner, well ahead of your flight what your personal minimums are to accept the flight, and to ensure they, or you, have a back-up plan!
Most pilots will never break a hard limitation such as an airframe cross wind limitation, or engine limit, but the chances of breaking a personal minimum are realistic. Think about the last time you went on a diet and broke your plan because you were tempted by your friends or family during an outing. Self-imposed personal minimums can be hard to enforce and we need to acknowledge this as humans. Here are a few techniques that you can use to assist in making a decision using personal minimums and help reduce the influence of external pressures.
Step 1: Sit down with your CFI/CFII and fill out a personal minimums worksheet. Filling one out by yourself is a good start but having an outside objective view will help in making sure your personal minimums are realistic. Remember, it is easy to convince ourselves that we can do something even though we have set personal minimums. Talk with other pilots to see if you have set realistic expectations.
Step 2: Preflight planning must start a few days in advanced. It can be as easy as checking what the forecast might be and looking at the projected route, near-by alternate airports, and various approaches. This can be done quickly and will give you a heads up on whether the flight can be safely conducted or not. By alerting the passengers or owner early enough, alternate plans can be developed. An extra pilot can be added, the passengers can fly commercial, bring along a CFI, or cancel the trip altogether and seek alternate transportation. The main point is the decision was made well ahead of the flight when conditions didn’t look favorable. This helps in removing external pressures and ensures you don’t go below your personal minimums.
Step 3: Never be afraid to ask for a second opinion. Part 135 operators have set procedures for conducting flights which assist the pilots in making decisions. These set procedures help remove external pressures by allowing the pilot to say, “The rules don’t allow for this, or this is how we will conduct the flight!” However, under Part 91, the pilot has to take ownership for all phases of the flight. This is where talking it out with another pilot helps with mitigating external factors and the environment. Ideally, this person should have more experience and be able to talk through the situation. For instance, if I’m flying to a new destination, I often seek the advice from another pilot who’s familiar with the area. They may have key insights into weather patterns, preferred approaches, or hazards to avoid. In certain situations, asking for another pilot’s opinion might be what influences your go/no-go decision! You’ll be amazed how much you can learn just from talking to other pilots.
Step 4: Continue to build your experience and knowledge base. Building experience requires us to push our abilities, and sometimes this may be to the limit. However, this can be done in a controlled training environment or just going out and experiencing it. Get a new license, fly regularly with a CFI/CFII, and always try and take advantage of training opportunities. For example on your next flight from point A to point B, practice hand flying an approach, do a short field landing, a quick steep turn, etc. Quality flight time is always better than quantity. Continue to challenge yourself and try not to become complacent.
Personal minimums are a tool to assist in every pilot’s aeronautical decision making process. Use your personal minimums to guide your final go/no-go decision and remember to stick to the plan. I encourage you to review the FAA’s Risk Management Handbook (FAA-H-8083-2). Appendix B has Sample Risk Management Scenarios and reviewing them will give a better understanding how to apply the techniques discussed to your everyday flying.
Pedro Vargas-Lebron is a King Air 200 and uH-60 Blackhawk Instructor pilot with the Texas Army National Guard. Pedro is a CFI/CFII/MEI both in airplanes and helicopters with over 4000 hours of flight time, half as an instructor pilot.
11 years ago, in April of 2009, the Avidyne Corporation unveiled the much bally-hooed Release 9, or R9 as it is commonly known, as a hardware replacement for the Avidyne EX5000 Entegra system in Cirrus Aircraft. The Entegra system was way outdated by that point. Even though Avidyne was the first company to put together a glass PFD in a single engine piston airplane, the company had quickly fallen behind Garmin in keeping up with the ever changing technology landscape.
Rewind to 2008. Cirrus had been going strong with the Avidyne Entegra since the SR20 and SR22 went to full glass in 2003 (a PFD and an MFD; prior to that, Cirrus aircraft only had an MFD with steam gauges and a Sandel Electronic HSI). Cessna, on the other hand, vaulted past the Avidyne Entegra and went straight to the Garmin G1000 in it’s aircraft, starting in 2004 with the 182 G1000 and 2005 with the 172 G1000. Beechcraft and Columbia went to the G1000 (Columbia started with the Avidyne as well) in 2005.
Garmin’s technology in 2007 was so much better than Avidyne’s technology that Cirrus decided to switch. I’m sure there were many promises made by Avidyne to Cirrus about what Avidyne was working on (the R9), but the G1000 was out there, available, and being used in a lot of different airplanes with very good results.
So, in 2008, Cirrus made the switch from the Avidyne Entegra to the Garmin G1000, dubbing it the Cirrus Perspective by Garmin avionics package. Avidyne finally got the R9 to market in 2009, but by that time, Piper was the only airplane manufacturer left putting factory Avidyne panels in their airplanes, and they switched to G1000 later that year.
The R9 is a fabulous product. It’s fully integrated, has great graphics, has fully redundant displays, a QWERTY keypad (which, by the way, Garmin didn’t do for another 8 years), and a lot of other neat features. There’s a bit of a learning curve, but it’s a really good product for what it is.
Avidyne, though, was late to the game with their technology. By the time it debuted in 2009, all the GA aircraft manufacturers had long since switched to the Garmin G1000 and weren’t looking back. That left Avidyne with the retrofit market for the many different Avidyne Entegra Cirrus aircraft out there. The only problem was, the retrofit was $80,000 ($95,000 if you wanted to throw in the DFC 100 Autopilot, which is a must have) and not many owners were up for paying that much money, then or now.
To sum up our brief history lesson, Avidyne knew the Entegra needed to go, but couldn’t get the R9 out quickly enough to convince anyone to stick with Avidyne products. The retrofit market didn’t amount to many sales, so Avidyne doesn’t even make the R9 anymore.
As a side note, I really, really like the Avidyne R9 and am sad that it didn’t make it into more airplanes.
So, when the Avidyne Entegra starts to have issues, what’s an owner to do? Keep reading!
There is Hope
There are thousands of Cirrus aircraft out there flying with the Avidyne Entegra instrumentation, which is basically 20 year old technology (I’ve had a computer engineer tell me the programming in an Entegra is Windows 98 tech). These things are going to start having problems at some point (many already have), but what solution do owners have that is cost effective and get’s them new technology?
Remember that little company named Garmin? Well, they have come through again. Announced this summer, the Garmin G500 TXi is now certified as a replacement in the Cirrus Avidyne Entegra equipped aircraft. This means pulling out both the PFD and MFD and replacing them with the G500 TXi on both sides. Engine data is also displayed on the G500TXi MFD, including the percent power and TIT indications, if equipped.
Cirrus SR22 Equipped with Dual G500 TXi Screens and Dual Garmin GTN 650Xi GPS Units
The cost for the panel? Two 10.6″ G500 TXi’s run about $16,000 apiece for the units, not including labor. $32,000 for a brand new panel isn’t terrible. Plus, the G500 TXi’s work with the DFC90 autopilot if the Cirrus is already equipped with it. If not, the Garmin GFC 500 autopilot is now approved for the Cirrus at a relatively low price of $7,000, including the servos.
Still have the original Garmin 430s in your Cirrus? Upgraded to the Avidyne IFD 540/440 stack? Put in dual GTN 650Xi’s? Put in a GTN 750Xi? All are compatible with the G500 TXi panel.
Want to upgrade everything? It does get kind of pricey at that point, but for just equipment, the cost for a complete panel conversion is somewhere in the area of $65,000 plus labor, still below what the R9 cost, but not cheap either. That would include 2 G500 TXi’s, 2 GTN 650Xi’s, a GFC 500 Autopilot, and all the engine monitoring equipment that the G500 TXi would need.
Cirrus SR22 Equipped with Dual G500 TXi Screens, a GTN 750Xi, and a GTN 650Xi
Thankfully, some new technology has finally come to the Generation 1-3 Cirrus. Oh, and by the way, your steam gauge Cirrus is fully upgradable as well.
Looking for some good $100 Hamburger options in the state of Texas? Here are some other good fly-in eateries around Texas. These are ranked in no particular order because they are all just really good! Most of these are located on the airport property, but a few are in town and worth the drive!
Lockhart BBQ (50R): With 4 BBQ options in Lockhart (and City Market BBQ 10 minutes away in Luling), you can’t go wrong with a stop in Lockhart. Just grab the keys for the giant suburban, and away you go. Most folks who stop off in Lockhart will give it a legitimate claim over Hard 8 in Stephenville.
Angelina County Airport Restaurant (KLFK): This is pure East Texas eating here in Lufkin. With greasy, tasty burgers and sandwiches, breakfast, and ladies who call you “Sugar” when taking your order, this is down home if I ever tasted it. Lufkin and Brenham are currently neck and neck for the best Texas burger.
Black Walnut Cafe (KCXO): This airport diner, located at the Galaxy FBO in Conroe on the north side of Houston, is top notch. The food is excellent (I have eaten several different sandwiches and have not been disappointed) and you can’t beat the 3rd floor runway view from the patio. Not a bad place to spend the lunch hour, though make sure you get there before the lunch hour. It fills up quick.
Airport Diner (T82): Right next to the Hangar Hotel, the Airport Diner in Fredericksburg brings back memories of the old soda fountains of the ’40s and ’50s. With plates like the Warthog (their sausage sandwich with Fredericksburg made sausage) and the Whirly Bird (their chicken tenders wrap), the Airport Diner fully embraces the airport theme. Better to stop for lunch on a weekday rather than a weekend as their isn’t a whole ton of seating. Check your NOTAMs as the restaurant is closed on Mondays and Tuesdays.
Radial Engine Cafe (KGPM): A good little stop in the Dallas area for a simple burger, fries, and a Coke. Don’t get the smaller 17/35 runway at GPM confused with the much larger 16/34 runway at GKY just to the west. Approaching from the south, this can be easily done.
Clear Springs Restaurant (KBAZ): Come for the onion rings, stay for the fish. Clear Springs is just a 5 minute drive from the airport and there are always plenty of crew cars available. You could probably make a whole meal out of the onion rings themselves, but the fish is top notch too.
Gate 12 (KCLL): The College Station Airport now has the 12th Man! Aggie Fans will appreciate the Gate 12 experience with all the Texas A&M decorations scattered throughout the restaurant. Bring an appetite if you want to tackle the burgers. They are huge! Parking is only at the FBO. Only military planes get to park in front of the restaurant.
Cooper’s BBQ (KAQO): Llano, TX is known for BBQ. Just fly in to the airport, get a car, and after a 10 minute drive, you can take your pick of any kind of BBQ under the sun. Careful, as it’s easy to over order!
Hangar 6 Restaurant (KUVA): The newest restaurant on the list, located on the ramp at the Uvalde Airport, Hangar 6 tips it’s hat to the military history of the Uvalde airport while serving really good food. Taxi in and walk up to the quaint little joint. They even have a playground for the kids!
Sky Restaurant (KVCT): Not quite within walking distance, but just a short drive from the FBO, Sky Restaurant specializes on the seafood, but they also have good burgers and steaks. VCT is popular amongst the Air Force and Navy trainers in the area, especially around lunch!
Runway Cafe (KLBX): The best place I have found for seafood along the Texas Gulf Coast. With a huge runway to land on and a beautiful FBO next door, this is my go to for Fried Shrimp when I’m in the Houston area.
Delta Charlie’s (KRBD): With quite an extensive menu (and a full bar for those overnight trips), I will definitely make RBD one of my routine stops. Dallas Jet Center recently opened in the terminal, so fueling your stomach and your plane can all be done in one spot.
The Red Baron Restaurant (KDHT): The Panhandle of Texas hides many surprises and the Red Baron restaurant in Dalhart, TX is no exception. For those early morning flights, The Red Baron makes a solid breakfast and a mean cup of coffee. Lunch satisfies even the hungriest pilot. Dalhart has a very spiffy modern FBO to sleep away that burger and fries until your passengers show back up too.
Hogg’s BBQ (KDUX): I came hungry and I left very happy. Hogg’s makes some good West Texas BBQ. Huge helpings and an aviation themed dining room makes for a good choice. Restaurant is located just behind the terminal building. I was there for dinner and it wasn’t too crowded, but I bet lunch is hoppin’!
Aviator’s Grill (KDWH): Located in the Gill Aviation, FBO, Aviator’s Grill has a great selection of creative sandwiches. Hooks can be a little tricky to navigate while taxiing, but just tell ground you are going to Gill, and they will direct you to lunch.
Bill’s Burgers (KBMQ): A short drive from the airport in the Burnet FBO’s new courtesy van deposits you at Bill’s Burgers, the largest burger this side of the Mississippi. Always a popular lunch spot, especially on weekends, hitting lunch early or late is a good plan. Don’t get a full order of fries unless you want to share. It’s huge! Closed on Mondays.
In my book, these are the other great places to stop on a flight in Texas. Always make sure to come hungry! I probably missed a few along the way, so please feel free to add others to the list!
Note: Some of the above restaurants are either closed for COVID, or are only doing takeout. Make sure you call before hand. Google doesn’t always have updated information.
2 Comments
Hank thanks for review of the the LX7! How difficult (costly) is this airplane to insure? Also i am a 300 hour instrument rated PP with 200 of those hours in a G1000 Columbia 400. Would you go the PT-6 route or the Piston for me? The slow flight characteristics of this plane make it seem very reachable for me.
Thanks,
Charles.
Thanks!