MMOPA Operating Practices for the Piper PA46

I have the privilege of serving on the Malibu & M-Class Owners and Pilot’s Association Safety Committee.  Along with 6 other Piper PA46 instructors, we were tasked with two things last year leading up to the MMOPA Convention in Colorado Springs last October.  The first was to develop a Master Aviator Program (more on that in a later article).  The second was to develop Operating Practices for the Piper PA46 fleet that we as instructors could all get on board with to teach the same thing, allowing everyone in the fleet to fly approaches and patterns the same way.

When I started instructing in the piston Piper PA46 line (the Malibu, Mirage, and Matrix), I was surprised to find that there were no recommendations anywhere that I could find for approach and pattern power settings and airspeeds.  This led to some experimentation on my part trying to find out what works well for the airplane.  I had originally been given good training in a Malibu, but hadn’t flown one for several years, so my numbers were a bit rusty.

I have been in the Cirrus world for a very long time.  One thing I greatly appreciated from an instructing point of view about Cirrus was the abundance of guidance the factory gives instructors and pilots on how the airplane is supposed to be flown.  All CSIPs and all Cirrus pilots should (theoretically) be teaching and flying the exact same way.

I was quite surprised that Piper didn’t put out similar information.  I wasn’t as familiar with MMOPA at the time, but was surprised they didn’t have any information either.

I apparently wasn’t the only one with a desire to have a little bit more standardization.

So, without further ado, here are the MMOPA Operating Practices that the Safety Committee put together.  If you are a new Piper PA46 pilot, these numbers are what you will expect to use when you do your Initial training.  If you are a seasoned Piper PA46 pilot, you probably fly these numbers, or pretty close to them already.

These are tried and true power settings and speeds for the approach phase and landing phase.  They work. That was the goal of the Safety Committee:  put down in writing something repeatable to enhance safety.  I believe we have accomplished that.

Similar Posts

  • Pitch + Power = Performance

    My first chief flight instructor had an addage he would impart to his flight instructors when we began working at that flight school. “Pitch + Power = Performance” he would tell us. Then he’d glare at us and follow up with, “nobody teaches that right, so make sure your students know it.”

    Now, having been a CFI for seven years, I would tend to agree with him. I have moved on from doing mostly primary training to transition training. Transition training is taking someone who is already a pilot and teaching them how to fly a different type of airplane. In jets, you get a type rating. In piston engine airplanes, there is no FAA requirement to go through any type of extra training as long as you are rated in category and class (eg. single engine piston). But, insurance companies know that Mr. Fresh Private Pilot can’t just hop from a Cessna 172 into a Cirrus SR22 or a Bonanza, so they require transition training before insuring those pilots.

    What did my chief instructor mean when he imparted his wisdom? He was speaking about a particular phase of flight, the final approach phase, regardless of whether it’s a VFR approach or an IFR approach. The pitch of the airplane and the power setting of the airplane have to be utilized together to achieve the proper speed and descent rate (performance).

    VFR

    On the final approach leg of a VFR pattern, most piston engine aircraft are configured with landing gear down and flaps down in the landing position. This puts the airplane on the back side of the power curve in the region of reverse command. In the region of positive command, in cruise, for example, the more power you add, the faster you are going to go and, if you pitch up, you will go up and you pitch down, you will go down. But, they work together (if you point the nose down, you will accelerate unless you reduce the power); remember, Pitch + Power = Performance.

    diamond-landing

    In the region of reverse command, the pitch controls the airspeed and the power controls your rate of descent, but, again, they work together. Let’s say the airplane is 5 knots above it’s approach speed on final. Initially, the pilot will need to pitch up slightly to bleed off that airspeed. The airplane will want to climb, so as he is pitching up, he’ll need to make a slight power reduction to stay on glide slope.

    Alternatively, let’s say the airplane is high, but is on speed. The pilot will make a power reduction to descend to the glide path, but he’ll also need to pitch down to maintain the proper airspeed.

    What you don’t want to do is this: if the airplane is high on final, don’t push the nose down to try and get down. This does cause the airplane to lose altitude quickly, but the airspeed increases quickly. With a higher airspeed, the airplane has a lot more energy to dissipate when it gets to the runway, meaning you’ll float longer which can lead to forcing the airplane down or using up too much runway and not being able to get the airplane stopped in time.

    IFR

    On an instrument approach, you are on the front side of the power curve. When trying to stay on glide slope, the power is controlling the speed of the airplane and the pitch is keeping the airplane on glide slope. This can be a little bit confusing for VFR pilots transitioning to instrument approaches as they are not used to being on the front side of the power curve.

    Keeping in mind that Pitch + Power = Performance, let’s put the airplane above the glide slope on an ILS approach. In order to get down to the glide slope, the pitch needs to be lowered as much as needed (it’s always better to pick a pitch attitude to fly and see if it is working to bring the glide slope back to center. If it doesn’t work, pick a new one. Don’t just push the nose down until the glide slope moves) and the power needs to be reduced to maintain airspeed (again, pick a specific power setting). Once the glide slope centers, then the pitch will be raised slightly and the power will need to be increased to hold glide slope and speed respectively.

  • Flying to the Bahamas

    A couple weeks ago, my employer informed me that he wanted to take a group to Nassau, The Bahamas. I thought, no big deal, this should be an easy trip. The more I started to read, though, the more I realized it wasn’t going to be just a “normal” trip.

    If you aren’t a member of AOPA, I would highly recommend joining. AOPA’s website was where I started researching. They actually have a checklist to help you along the way.

    The first step is getting the paperwork started. All souls on board are going to need a valid passport. In our case, a couple of passengers need to get theirs. Since it was a little shorter notice, we had to go through the expedited process. It’s fairly simple. A quick internet search gave me a couple of people that helped the process along.

    Next was making sure the aircraft had all it’s paperwork. The airworthiness certificate was easy as it’s always in the plane (or should be).

    The registration certificate was next to check. We recently upgraded to the King Air 350 so we had to make sure we had the original issuance registration certificate. The Bahamas supposedly doesn’t allow Temporary Certificates and I really didn’t want to test that policy.  Thankfully after a couple of calls between owner and the FAA we got the original.

    The aircraft and pilot are both also required to have an FCC Radio License. This is only for international flying, but not an everyday thing pilots think about.

    After that was flight planning. I use FltPlan.com. The actual filing of the flight plan was very easy. I use the prescribed routes from the website. In the remarks section of the flight plan put ADCUS (Advise Customs). This advices ATC to let customs know of your arrival. It’s basically an added safety net in case you forget to call ahead or your flight times end up being way off.

    The other item when dealing with flight planning is dealing with eApis. There are numerous companies who will provide this service for you. I elected not to use one of those. If you go to the CBP website, you can set up an account and do all of it yourself. Take your time and really plan the flight out well to make sure your arrival times are as close to real time as possible. If you’re way off, this will make any customs agent very frustrated and that is not something you want to be dealing with.

    Approach charts and en route charts are another hurdle. Thankfully Foreflight has you covered. With my subscription, I already had en route charts. The approach charts were the real issue. In the Bahamas, the only places that have approved instrument approaches is Nassau and Freeport. Fortunately, we were going to Nassau. Foreflight does charge almost $400 for the Caribbean and Bahamas charts.  Emailing the FBO is a good option as they can usually supply approach plates for international flights.

    You’ll also need a CBP sticker. This goes on the outside of the aircraft showing customs you’re in the system. This can be found on the CBP website as well. It takes a little bit to get the
    sticker in the mail. However, once you pay for the sticker, the receipt can be used in place of the sticker.
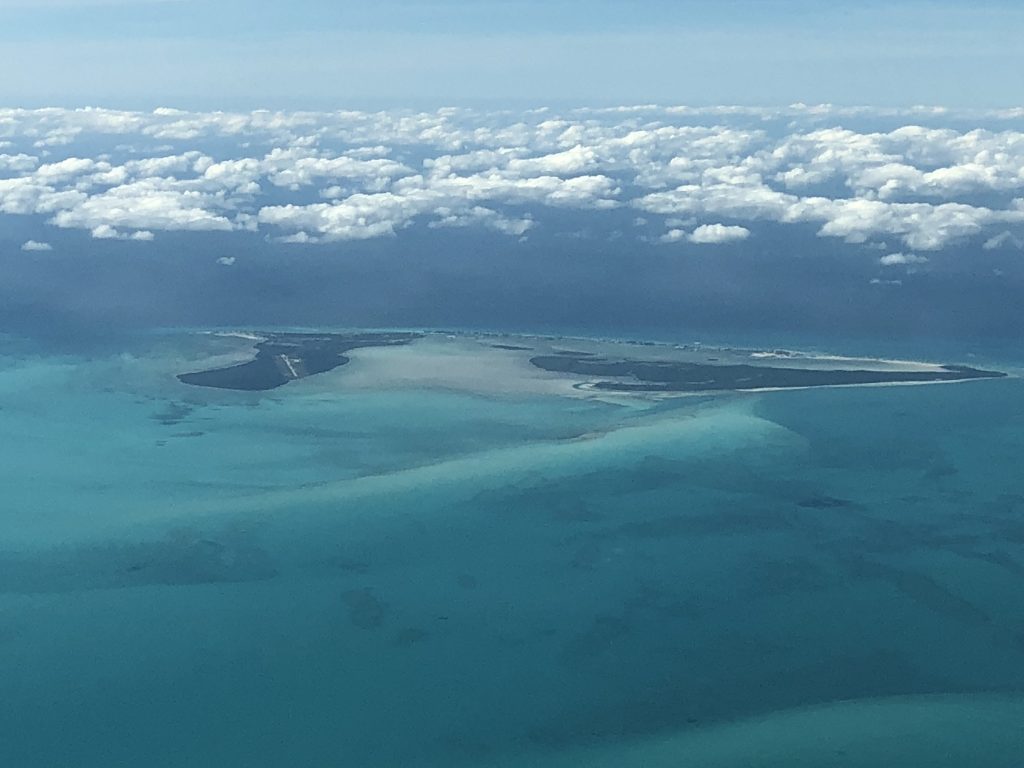
    The final thing I focused on was picking an FBO. I chose Jet Aviation. They had CAA which gave us a Jet fuel discount. Their facility was excellent and staff was very friendly. The thing that put it over the top for me was how they handled customs. I emailed Jet Aviation all the information for myself and passengers and they pre-filled all the customs forms for me. When we arrived, customs took all of five minutes and then my passengers were out the door.

    While in Nassau, I stayed at Breezes Resort. It’s all inclusive so that helps keep the costs down for your owners if you’re a corporate pilot. It’s next to some of the other bigger resorts so there were shuttles available to get to other amenities. The only complaint I might have was the power kept cycling on and off and the internet wasn’t reliable. This proved challenging when trying to plan for the return trip.

    The return trip required a lot of the same preparation. Again it was nice to have a good FBO to help prepare the paperwork required to clear customs. Jet Aviation handled the General Declarations for me and my passengers. All I was required to do was file the flight plan and file eApis, which was actually challenging while my internet at the resort was on the fritz.

    Don’t forget to call US Customs at your Port of Entry! As this was Ft. Lauderdale for us, I called them twenty four hours in advance as prescribed. The customs agent was friendly and helpful with any questions I had. I think the best advice I can give throughout this whole experience is call ahead and ask lots of questions! Did I say that already?

    The morning of the return trip went off with no hitches. Again, Jet Aviation had set up a driver to pick me up and he was on time. Jet Aviation had all the General Declarations paperwork pre-filled out for myself and passengers. Again, I use FltPlan.com to file my flight plans. Their service performed flawlessly even though I had heard rumors of flight plans not going through. To curb my bet, I talked with the staff at Jet Aviation and they made a call to tower for me to verify that the flight plan had gone through; of course, it had.

    The actual flight out of Nassau was pretty uneventful. The last real hurdle I had was dealing with customs in Ft. Lauderdale, and hurdle it was. When we landed at FLL, ground instructed me over to customs ramp. There was no one to tell us where to park on the ramp. This was extremely frustrating.

    A Learjet taxied in prior to us and had taken up most of the ramp but, we found a spot and shutdown. Once we shut down, no one came out to our aircraft. I walked in to talk to someone and was greeted by a Boarder agent who was less than helpful. Since the Learjet had parked first, they got to go through first. Evidently, we were not allowed in the building until they were done. This didn’t make my owner too happy!

    Be prepared, though, if another airplane is on the Customs ramp before you arrive.  You are not supposed to get out of the airplane until a Customs agent comes and meets you, even to go to the bathroom.  This can result in large fines.

    Once we were allowed in, the process went smoothly. We had to put all of our bags through the x-ray machine. Beyond the x-ray machine, CPB didn’t require any other security measures. On other crossings I’ve done, CPB had opened up bags and sifted through clothes, so just doing the conveyor belt was a surprise. The rest of the trip was fairly commonplace. We stopped in Destin FL for dinner before making our final leg into Dallas. All in all, it was an excellent trip and I’m excited to do another one.
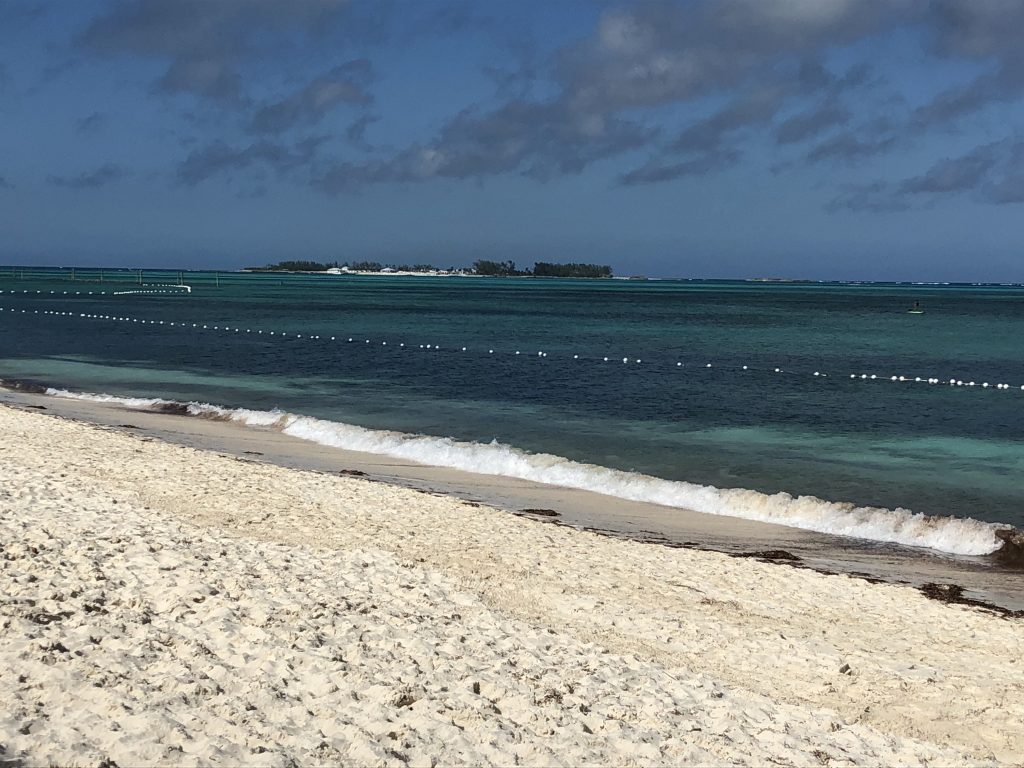
    Ryne Bergren works for a Part 91 operation in Dallas flying a King Air 350. Being a Part 91 outfit, he doesn’t get to rely on a “dispatch” or “company” to help with any international flight planning. This was a learning experience for him. Hopefully this will be a help to anyone for future trips.


  • Fly Away Destination: Sedona, AZ (KSEZ)

    Looking for somewhere to take a trip this fall?  Sedona, Arizona should warrant strong consideration.  Just shy of 100 miles north of Phoenix, Sedona is one of the most beautiful areas in the southwest United States.  From Texas, depending on how fast your airplane travels, you could make it to Sedona in a day, with a couple of stops in between.  You’d definitely want to spend a few days to enjoy the scenery and maybe jump over to the Grand Canyon while you’re in the area.

    The Airport

    As you approach the Sedona Airport (KSEZ), you become somewhat distracted by the scenery around you.  Don’t be too distracted as the approach is a little tricky.  If you are landing north, on Runway 3, the calm wind runway, don’t let the surroundings fool you.  Stay on that PAPI and don’t be short, as the runway is on a 500 foot mesa.  In instrument conditions, the MDA for the RNAV approach to Runway 3 dumps you out about 1,300 feet above the airport elevation, giving you plenty of time to set up to land.

    When using runway 21, don’t make your pattern too wide as there are some pretty tall rocks (around 7,000 feet) north of the field.  The Airport/Facilities Directory gives a warning to pilots in strong southwesterly wind conditions.  Be aware of strong downdrafts coming in on final for runway 21.

    The runway itself is in excellent condition, and plenty long at just over 5,000 feet.  The FBO is a little dated, but the folks there are great.  They were redoing the ramp this summer, so beware of that.  Airplane parking is no problem, but actually getting to the FBO is a little tricky.  The Mesa Grill is a very nice good restaurant just a short walk from the FBO.  When I was there, I chowed down on a buffalo burger.  It definitely hit the spot.

    What To Do

    Sedona is the outdoorsman’s paradise.  Starting off, to get a great overview of the area, hop on the Red Rock Scenic Byway (SR 179) about an hour before dusk.  You’ll get to see some spectacular views while it’s still light, then you can’t beat the sunsets in Sedona.

    For hiking, you have a myriad of options, from the Cathedral Rock, to the Oak Creek Canyon, to the Devil’s Bridge Trail, all are beautiful, though most are not for the faint of heart (especially the Devil’s Bridge).  Even though the fall is cooler, make sure you pack plenty of water for the hikes.

    Sedona

    Want something to do in the evening?  Go up to the Chapel of the Holy Cross to watch the sunset.  After the sun goes down, go do some stargazing.  You’ll get to take a tour of the stars at the Sedona Star Gazing location in Oak Creek.  You are shown all the constellations and stars by professional astronomers, and blankets and chairs are provided.

    Art connoisseur?  You’ll find plenty of art galleries around town with a ton of beautiful, original artwork.  There are also several theaters and golf courses around Sedona, giving everyone a little bit of everything.

    If you’re up for it, the Grand Canyon is about a 2 hour drive north of Sedona, or a quick flight up to the Grand Canyon Airport (KGCN).

    In search of a good getaway?  Try Sedona.  You’ll be sore from lots of hiking and sight seeing, but it will definitely have been worth it.

  • US Aircraft Expo Returns to Addison

    The 2022 Fly In Season kicks off March 4th-5th with the US Aircraft Expo at the Addison, TX Airport (KADS). Cutter Aviation at KADS will be the host for the event. All the major and minor aviation manufacturers will have static aircraft displays. Come see all the new Cirrus innovations, the Piper M600, and the Diamond DA62. All the latest and greatest technology will be available for your viewing enjoyment.

    If you are planning on flying in, the FBOs at ADS are Million Air and Atlantic.

    The event will run from 10am-3pm on both days, March 4th and March 5th.

    For more info, check out the US Aircraft Expo website.

    Don’t forget to check out other big fly in events in 2022: Sun N Fun, the Texas Top Aviation Fly In at Santa Fe, and Osh Kosh!

  • Simplified Instrument Approach Briefing

    In instrument flying, I am all about keeping things simple.  There is a ton of detail that an instrument pilot can get bogged down in.  When an instrument pilot gets bogged down, he gets distracted from flying the airplane.  When he gets distracted from flying the airplane, dangerous circumstances can happen.

    I like to keep things simple.  When I first started instructing, I developed a very simple instrument approach briefing that captures everything that is necessary on an approach plate, but prevents getting bogged down in the details.

    I call it the BBC instrument approach briefing.  Here it is:

    Brief

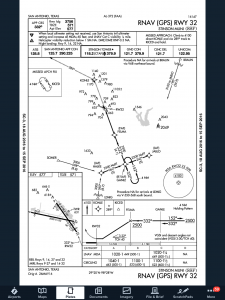
    rnav-32-kssfFirst things first.  The first step of an instrument approach briefing is to brief the approach plate.  There are a bunch of acronyms out there that instructors tell their students to memorize that only cause confusion instead of helping get the plate briefed.  To keep it simple, just work your way across the plate and you’ll get all the information you need.
    Start in the top left hand corner of the plate, with the approach course, then work your way right and down, as follows:

    • Approach Course (or Nav frequency if flying a VOR/ILS/LOC)
    • Runway information
    • Notes (these are good to brief the night before as a lot are irrelevant to GA pilots
    • Missed approach
    • Frequencies
    • Planview and MSA
    • Profile View and Minimums

    Simple enough, right?

    Build

    Now that you know what you are planning on doing, you can now take the second step in the instrument approach briefing and build the approach in your GPS.  You know your approach type, you know your transition, and you know what your minimums are.  Taking all that information, you can now build it in to your system.

    Checklists

    Once everything else is done, don’t forget the checklists.  The descent and before landing checklists still need to be done as part of an approach.  The best time to do these is before joining the approach so that you don’t have to worry about flying the approach and looking at a checklist at the same time.  Even better, memorize the checklist and you don’t have to look at anything!

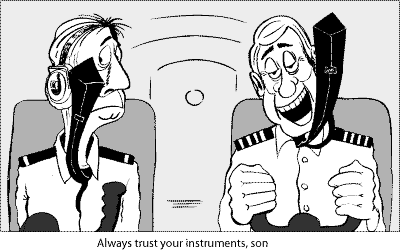
    Most importantly, you want to be configured properly for the approach by the final approach fix.  Gear, flaps set, power set, so all you have to worry about at that point is following the needles and trusting your instruments.

    ifr-cartoon

3 Comments

  1. I am new to PA-46P, I would like any proven tips on a hot start, it’s a
    1995 Mirage.
    Yesterday after re-fueling and both the engine and OAT were very hot
    it took several attempts before it started.

    Thanks, Brian

    1. Brian, since you have the Lycoming engine, the best way to hot start it is as follows:
      1. Leave the mixture idle cutoff and open the throttle a bit more then you would for a normal start.
      2. Do not prime (do not push the mixture rich at all before cranking)
      3. Engage the starter and as soon as the engine starts “coughing and wheezing”, go about 3/4 of the way forward on the mixture
      4. Once the engine gives you a good catch, go all the way rich
      5. Reduce the throttle for 1,000 RPM and continue with your normal checklist

  2. I appreciate that you explained if you are a rookie Piper PA46 pilot, you may anticipate utilizing these numbers throughout your initial training. My best friend is looking for some info, this should help him. I appreciate that you helped me learn more about PA46 Pilot Training.

Leave a Reply

Your email address will not be published. Required fields are marked *