Fly Away Destination: Lajitas Golf Resort

Talk about star treatment.  The Lajitas Golf Resort rolled out the red carpet for the 2019 Texas Top Aviation Lajitas Fly In.  I had been to Lajitas twice before; once in July when it was hot, miserable and bumpy.  The second time was the week before our Fly In.  Both times, everyone from the airport folks to the bus drivers to the front desk and restaurant staff were top notch.  It made for a very pleasurable experience.

If you haven’t been out to Lajitas (or don’t even know where it is) and you’re a pilot (you don’t even have to play golf), you have missed a sure gem.  Lajitas is positioned on the southern tip of the Big Bend area of Texas, right on the Rio Grande river.  Lajitas has great lodging with several different room options from big to small, an excellent restaurant for 3 square a day (and even a bakery for sweets, coffee, and breakfast tacos in the mornings), and a 5 star golf course in Black Jack Crossing.

Why is this all relevant to us aviators?  Lajitas has it’s own private airport, 89TE.  Complete with a 5,500 foot asphalt runway, VFR conditions most of the year, and reasonable fuel prices, Lajitas is the pilot’s gateway to the resort and the entire Big Bend area.  If you wait until the fall, a brand new, 7,000 foot concrete runway should be completed and an IFR approach should be available.  An AWOS is in the works too.

The resort and airport are so far south, radar and radio coverage with Albuquerque Center is pretty poor below about 15,000 feet, and non-existent below 10,000 feet.  This isn’t a big concern as any airplanes in the area should be on 122.9 and the airport manager will make contact with you, give you a weather report, and assign a runway.

Once you are on the ground, there will be a resort bus waiting to whisk you and all your friends to the resort for your getaway.

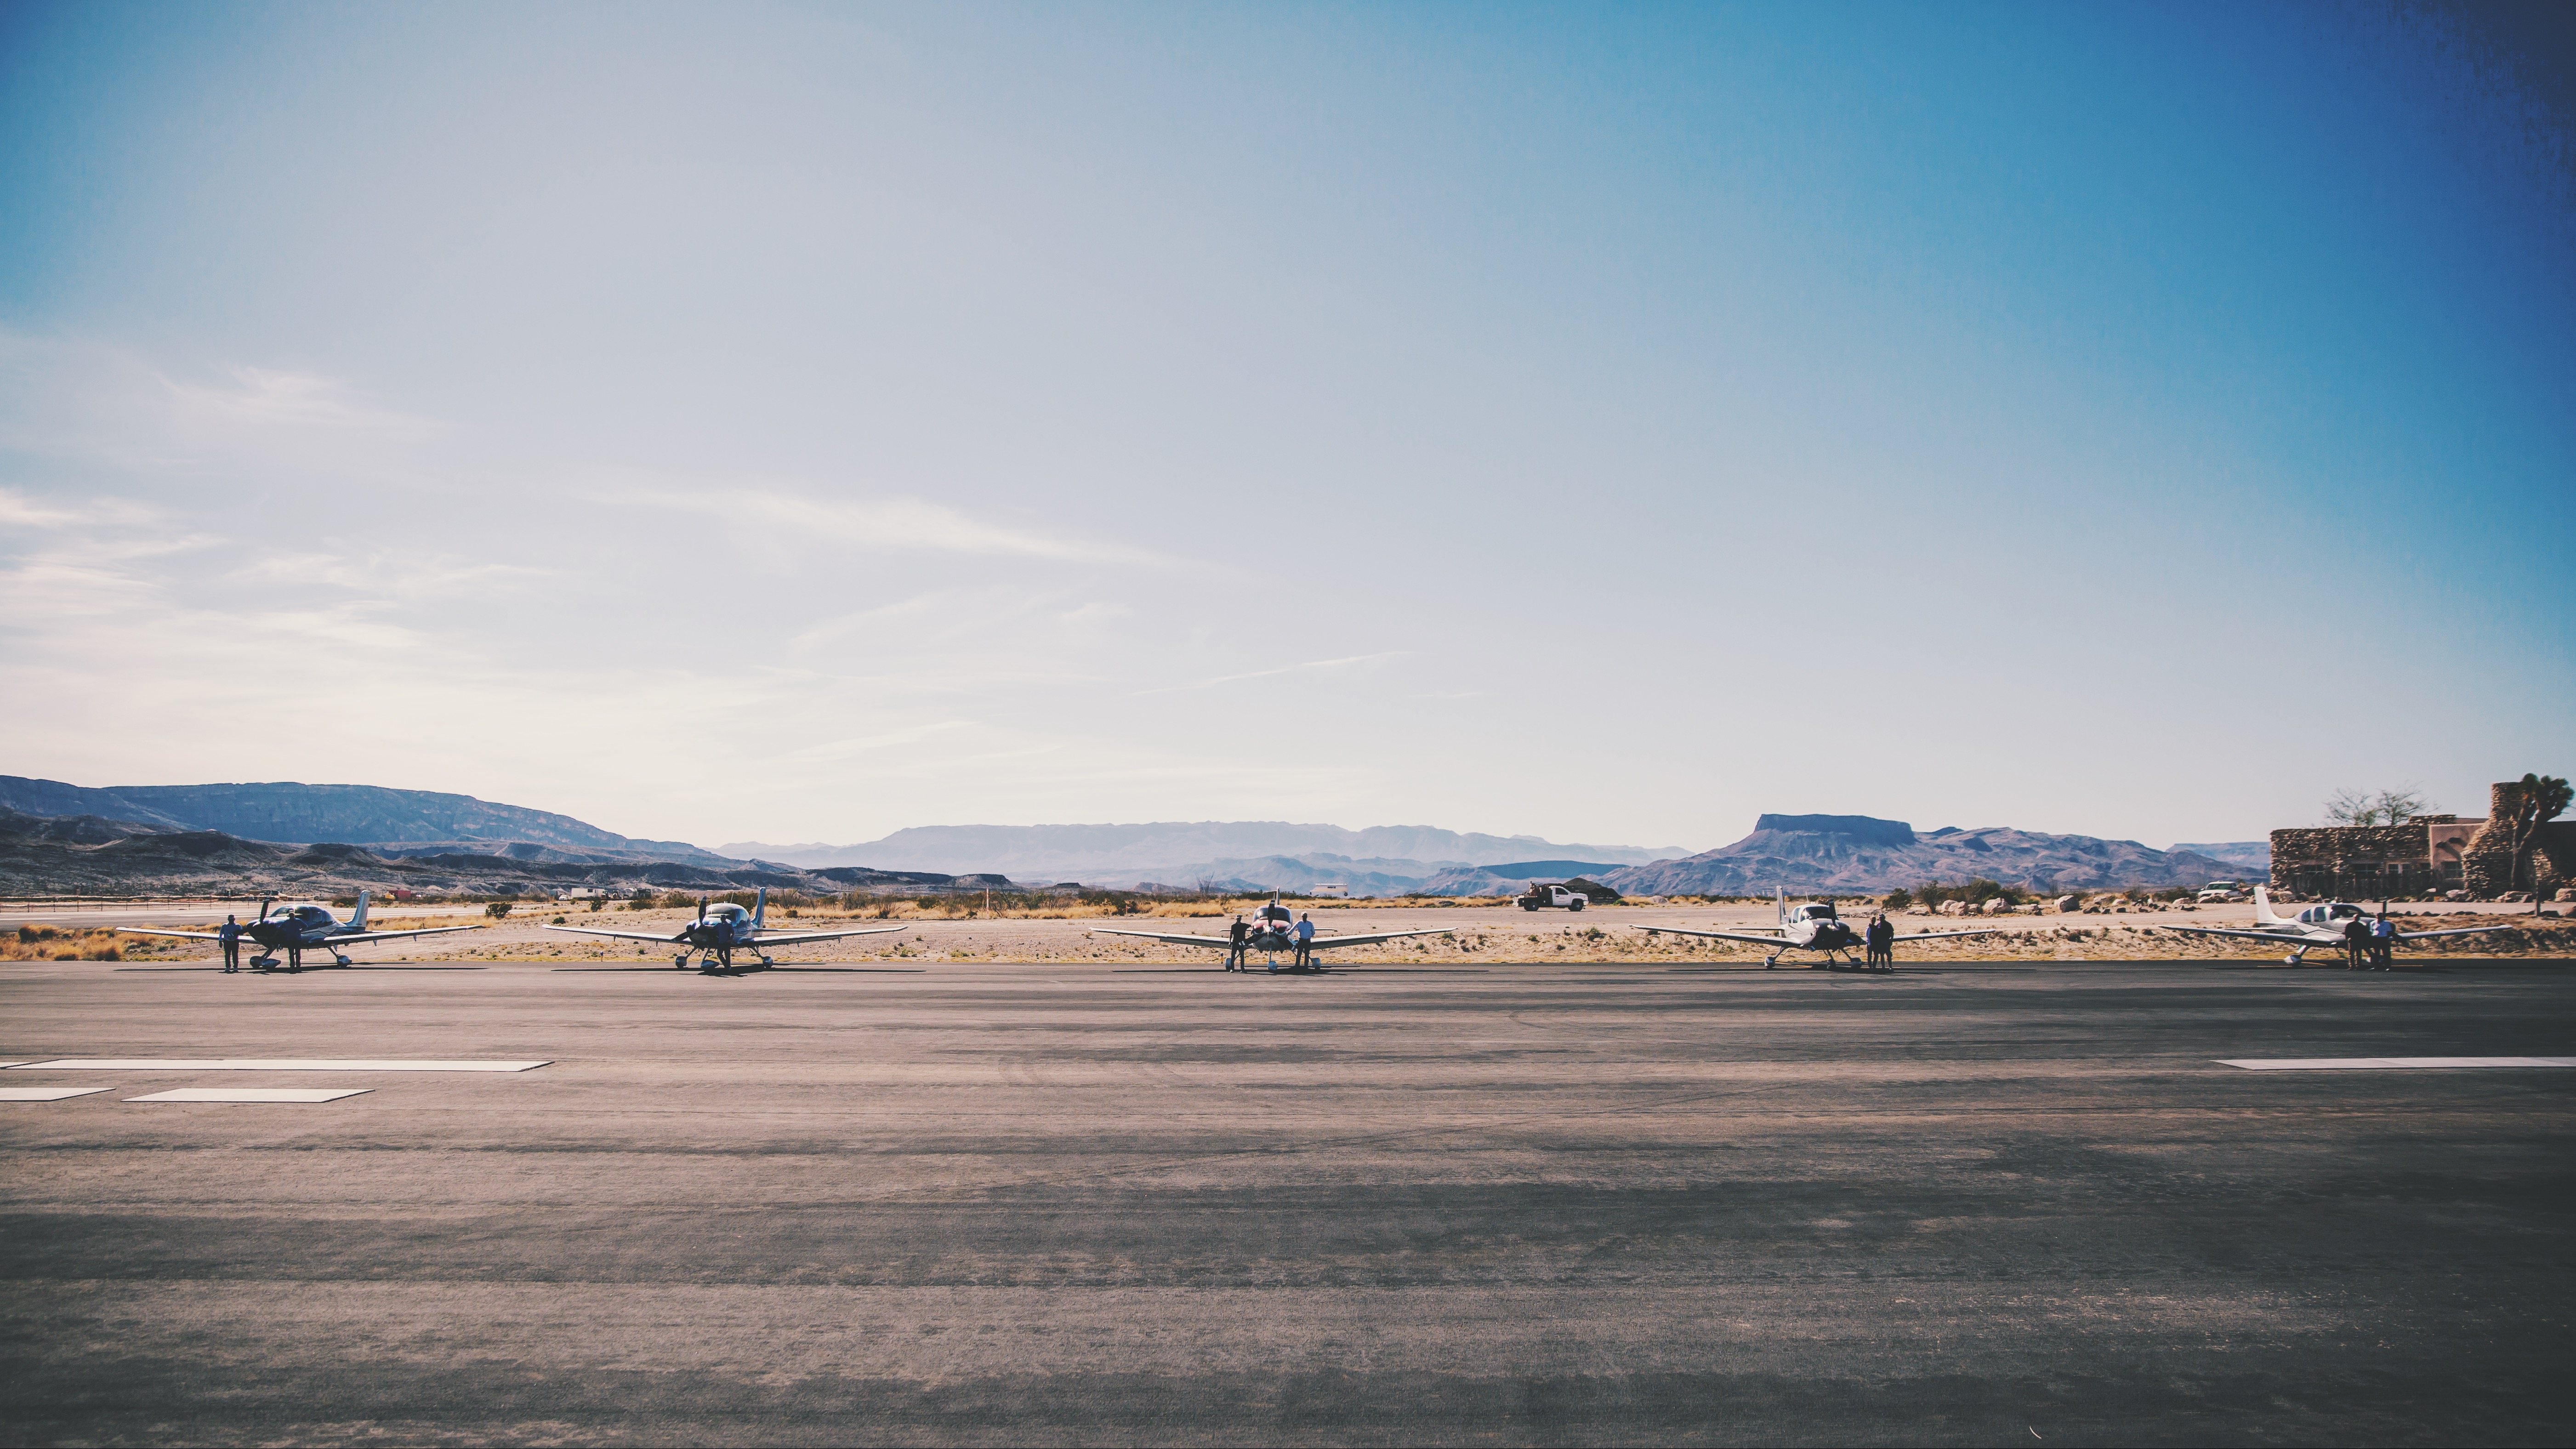
The 2019 Texas Top Aviation Lajitas Fly In was a big hit.  We had 7 airplanes total:  5 Cirrus SR22s, 1 Piper Matrix, and 1 Citation M2.  There were 15 attendees total, including 13 golfers.  Everyone raved about the resort and the golf course.  The only hiccup in the weekend was the cold front that blasted through on Friday afternoon, kicking up a lot of dust.  Golfing on Saturday was windy too, but Sunday morning was absolutely perfect.

Thanks again to the folks at Lajitas for the star treatment!

Interested in participating in the next Texas Top Aviation Fly In?  Contact Us or Sign Up for Our Newsletter and we will make sure you find out about the next one so you don’t miss out!

Similar Posts

  • The Anatomy of a Hot Start

    Are you one of those pilots who hates fuel stops simply for the fact that the engine doesn’t have time to cool off?  You pump gas into the plane, hit the bathroom, get in the plane and the oil temperature is still up at 160-170 degrees, leading you to have to figure out how to get the plane going again with a hot engine.  For those without proper training, this usually means a lot of jockeying around with the throttle, mixture, and fuel pump to try and get the thing started without flooding it.  After coughing and wheezing several times, the engine finally comes to life, leaving you to only guess what worked and without the knowledge of how to duplicate it.

    Hot Start 2

    Let’s take a step back for a minute to see what is actually happening with a hot engine.  Once the engine is shut off, the fuel in the lines leading from the tank to the engine is vaporized, meaning there is more air in the fuel lines than liquid fuel.  In the engine block itself, there is still liquid fuel in the injectors, but only enough for the engine to cough then quit if started.

    When a normal priming and starting procedure is performed, too much fuel is forced into the cylinders and the engine becomes flooded.  A flooded engine just means that the stoichiometric ratio is way too rich, meaning there is too much fuel and not enough air.  The prime does the trick of getting the fuel vapor out of the fuel lines, but it shoves too much fuel into the cylinders.  Once the engine is flooded, it’s a waiting game to allow air into the engine to get the mixture right.  All Lycoming powered high performance and turbo charged engines are notoriously easy to flood when hot.

    So, what’s the solution?  By taking a step back to see what is actually happening, you can attack the problem from the source, which is the fuel lines.  You need to get the vapor out of the fuel lines and get some liquid fuel in there.  The procedure for this varies based on the make and model of engine, but I’m going to use the example of the Continental IO-550-N that is in a Cirrus SR22.  I found this procedure in the Continental Engine Manual and it works every time.

    (Pilots of other airplanes, keep reading.  I have sections below for PA46s, Columbias, and Bonanzas as well )

    • Mixture:  Full Lean (this allows fuel in the fuel lines, but prevents it from going past the mixture control into the engine, sending all fuel back to the fuel tank; a small amount of fuel leaks past the mixture control providing prime for the engine)
    • Throttle:  Idle
    • Low Boost Pump:  Run for 30-60 seconds (see note below)  (15 seconds in the Turbo Cirrus)
    • Mixture:  Full Rich
    • Throttle:  Open about 1/4 travel (not 1/4″, that won’t be enough)
    • Boost Pump:  Off, but have your finger on Low Boost
    • Starter:  Crank (engine will turn over a few more times before firing, this is normal)
    • At the first indication of start, turn the Low Boost on, increase the throttle to ensure the engine catches,  then adjust the throttle for 1,000 RPM
      • The engine will fire right about the time you start thinking it isn’t going to work

    A few notes regarding engine temperatures:

    • If the oil temperature is above 150 degrees, a hot start will be required.  If oil temp is close to 200 degrees, run low boost for 60 seconds in a non-turbo.  If oil temp is 175, run low boost for 45 seconds in a non-turbo.  If oil temp is 150, run low boost for 30 seconds in a non-turbo.  Use 15 seconds for all temps above 150 in a Cirrus Turbo.
    • If the oil temperature is between 125-150, skip the hot start procedure, don’t prime the engine, leave the boost pump off, and crank the engine, then boost pump on when it starts and slightly increase throttle to make sure the engine catches
    • If the oil temperature is between 100-125, skip the hot start, don’t prime the engine, and perform a normal start with the boost pump on
    • If the oil temperature is below 100, perform a normal prime and start

    Piper Malibu (PA46-310P with Continental Engine)

    • Mixture:  Full Lean (this allows fuel in the fuel lines, but prevents it from going past the mixture control into the engine, sending all fuel back to the fuel tank; a small amount of fuel leaks past the mixture control providing prime for the engine)
    • Throttle:  Idle
    • Low Boost Pump:  Run for 15-30 seconds depending on oil temperature…
      • Greater than 150 degrees: 30 seconds
      • Less than 125-150 degrees:  15 seconds
      • Less than 100-125 degrees, no need to run the Low Boost
      • Perform normal cold start below 100 degrees
    • Mixture:  Full Rich
    • Throttle:  Open about 1/4 travel (not 1/4″, that won’t be enough)
    • Boost Pump:  Off, but have your finger on the Primer Button
    • Magnetos:  On
    • Starter:  Crank (engine will turn over a few more times before firing, this is normal)
    • Engine should fire with the Low Boost Pump off, but…
      • If the engine starts to die, simultaneously increase the throttle a little bit and hit the primer button.
      • Only tap the primer button, don’t hold it as you’ll flood the engine if you hold it At the first indication of start, turn the Low Boost on, increase the throttle to ensure the engine catches,  then adjust the throttle for 1,000 RPM

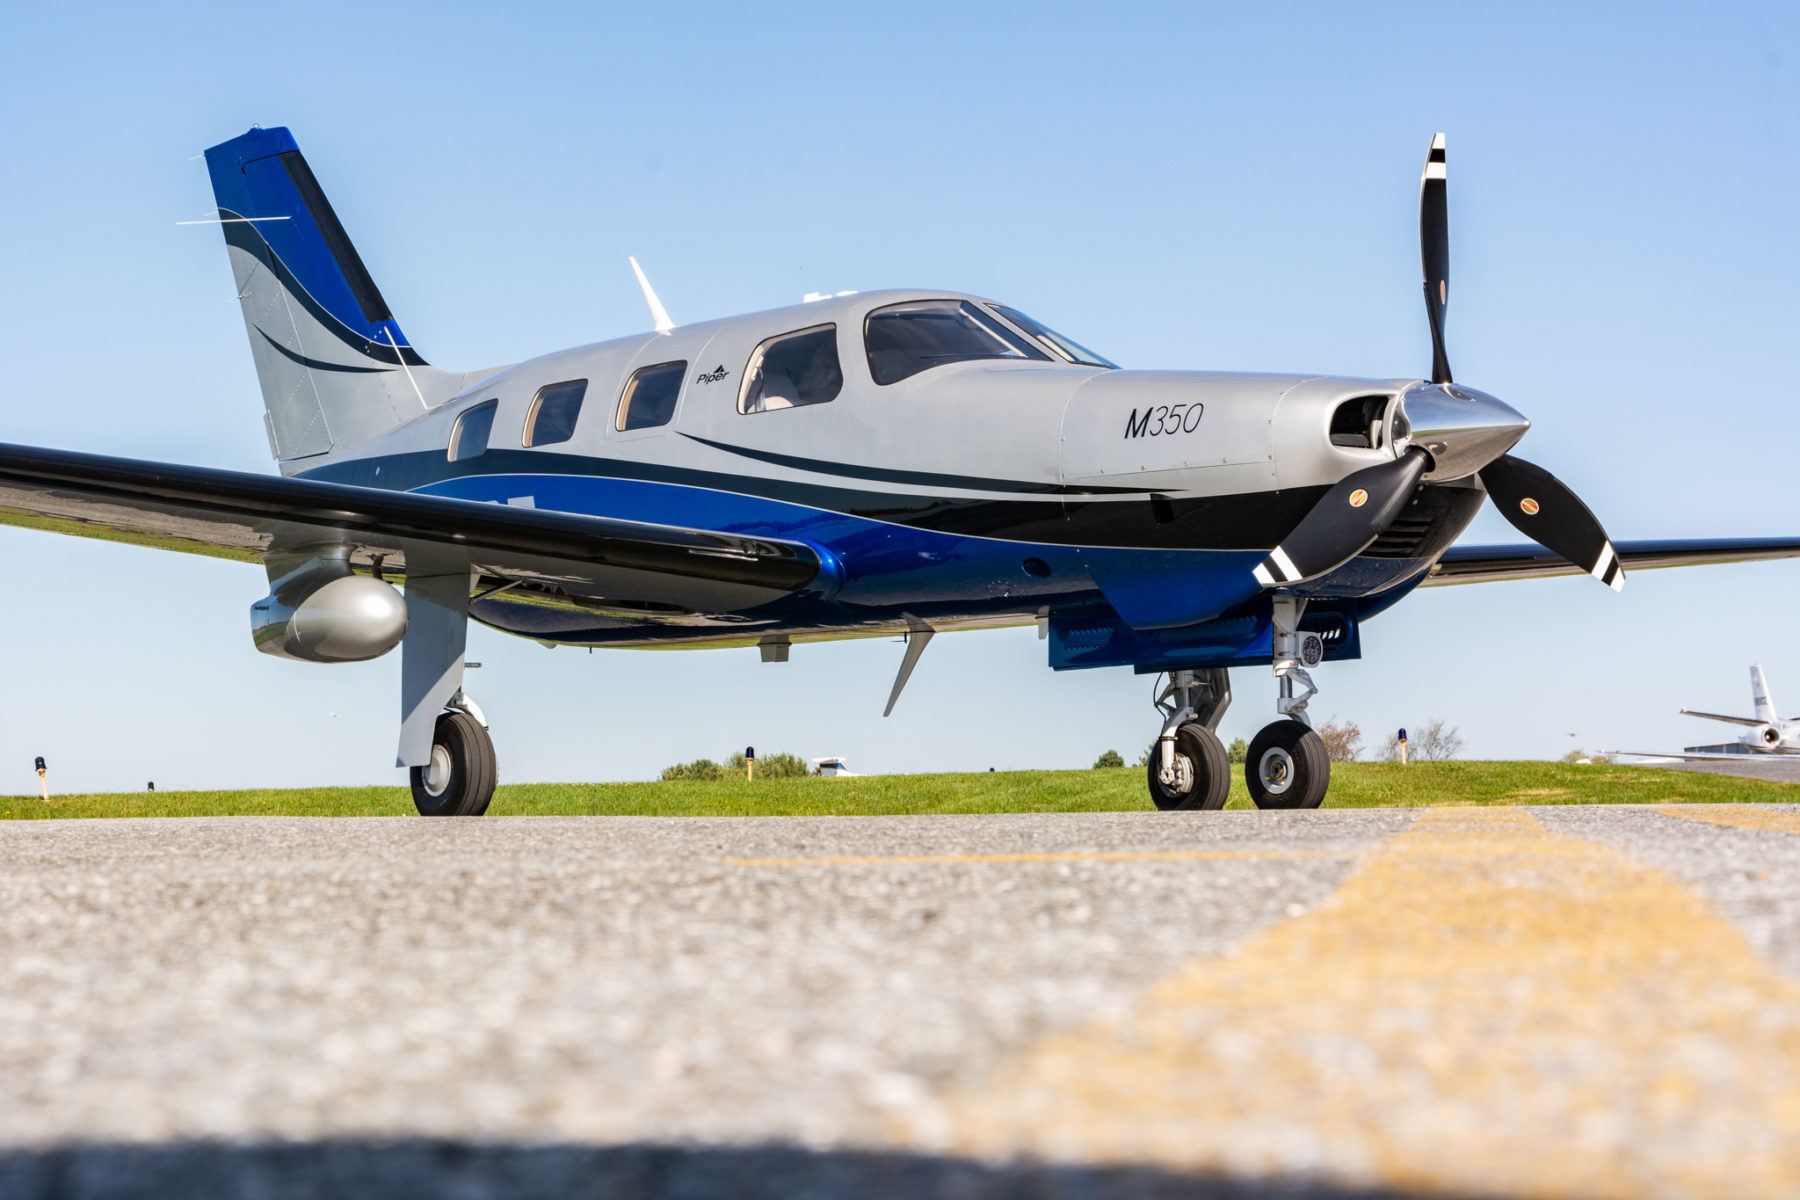
    Piper Mirage & Matrix (PA46-350P and PA46-350T with Lycoming Engine)

    • Leave throttle and mixture idle
      • Before you turn the battery on, ensure the mixture is idle cutoff
      • If the mixture is forward and the battery is on, the low boost pump in the fuel tank will start pumping fuel to the engine and quickly flood it
    • Ensure Magneto switches are on
    • Open throttle 1/4 travel (not 1/4″ as this won’t be enough)
    • Crank
    • As soon as the engine begins coughing and wheezing (and this is what it will sound like), push the mixture 3/4 of the way forward
    • Once the engine has a good solid fire, smoothly and swiftly push the mixture all the way forward
    • Reduce throttle
    • Note:  The Emergency Boost Pump can be used as part of the hot start technique, but I usually leave it off.
      • Pro to the Emergency Boost Pump is it can help suck more fuel in and purge vapor during the start
      • Con is that if the engine doesn’t start on the first try, you are flooding your motor

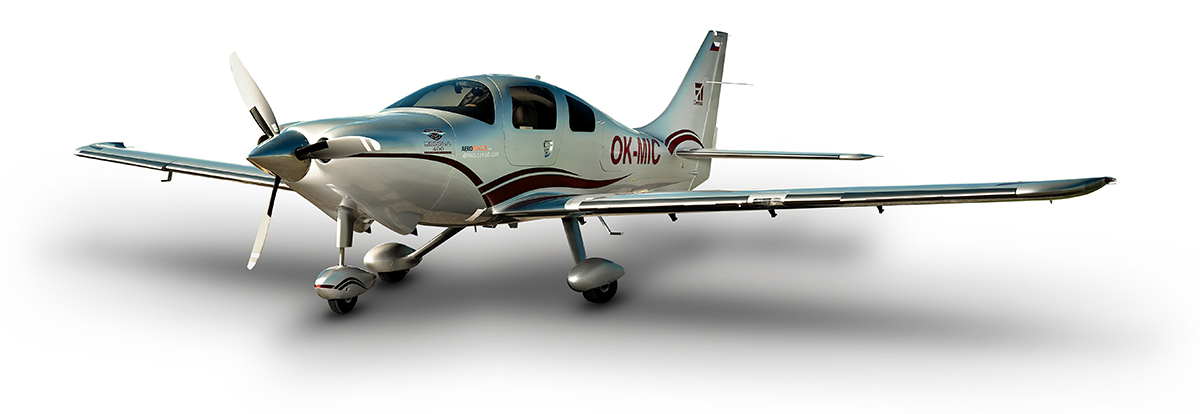
    Columbia 400

    • Throttle and Mixture Idle Cutoff
    • Vapor Suppression:  Run for 30-60 seconds.  Reference above temperatures on the non-turbo Cirrus for run times
    • Mixture full forward
    • Throttle 1″ in
    • Prime for 3 seconds, then off
    • Crank
    • Once engine fires, primer might need to be pushed momentarily to purge excess vapor
      • On Columbia 350s, the throttle should be twisted (or pushed depending on if it’s an Avidyne or Garmin Columbia) in while cranking
      • Be prepared to reduce power once engine fires

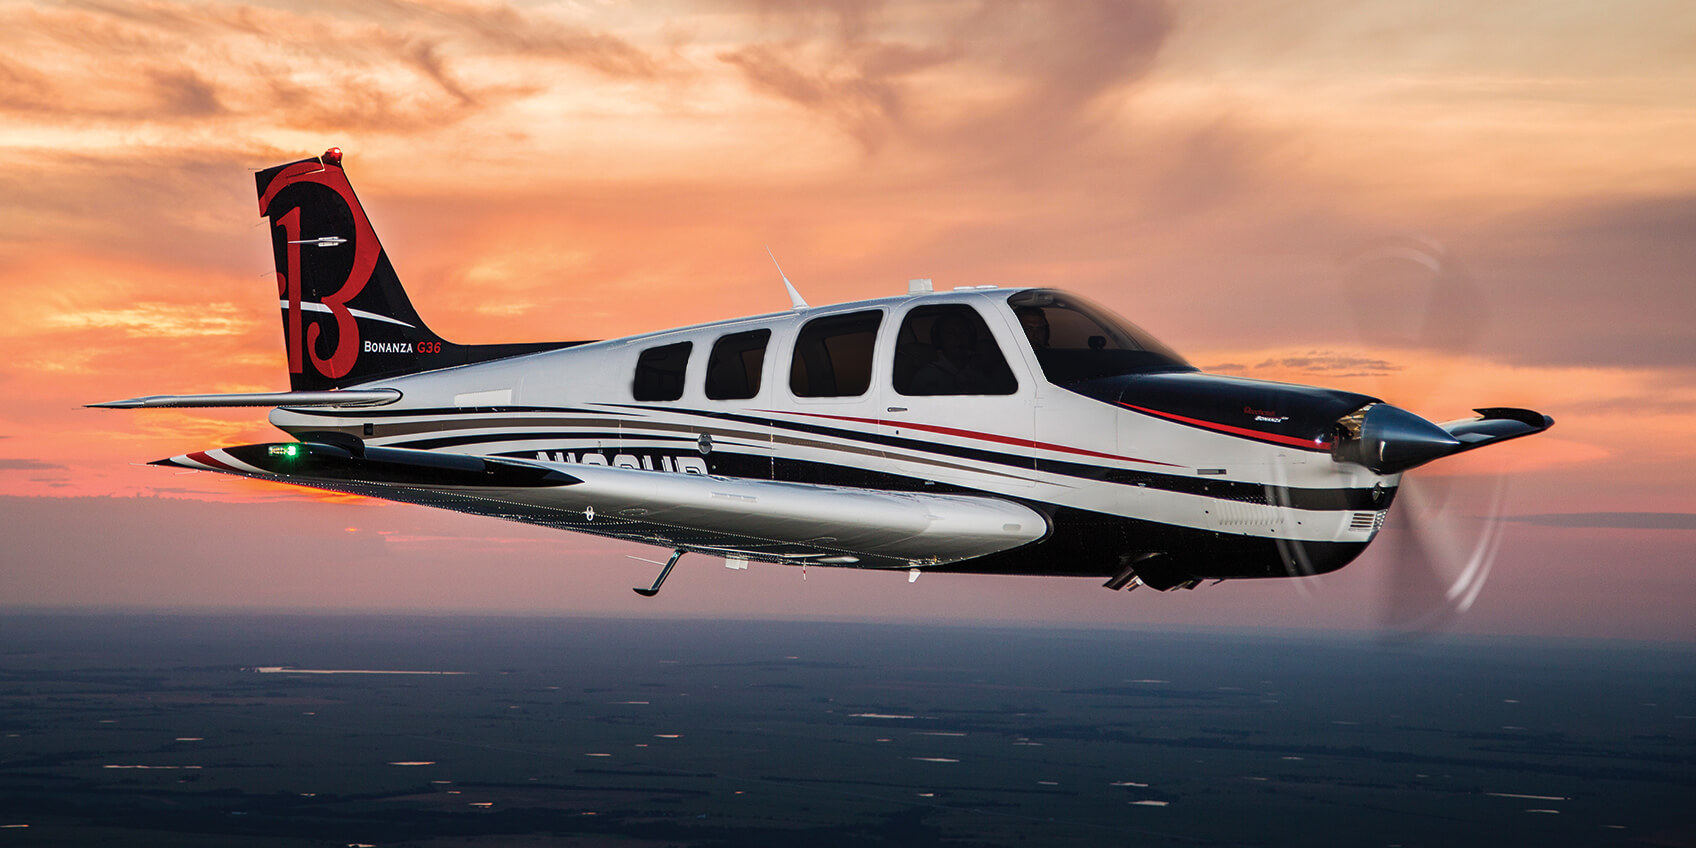
    Beechcraft 36 Bonanza

    • Throttle and Mixture Idle Cutoff
    • Low Boost:  Run for 30-60 seconds.  Reference above temperatures on the non-turbo Cirrus for run times
    • Mixture full forward
    • Throttle open 1″
    • High Boost until fuel flow peaks, then off
    • Crank
    • Once engine fires, Low Boost might need to be engaged momentarily to purge excess vapor

    There are other “procedures” for hot starting out there, but most of them involve starting with full throttle, which can lead to the airplane shooting ahead on a ramp or taxi way if the brakes aren’t properly set.  This can lead to high repair costs, so always be cautious.  Figuring out what is happening when the engine is hot will give you a better chance of getting it started right away.

    Are you one of those pilots who hates fuel stops simply for the fact that the engine doesn’t have time to cool off?  You pump gas into the plane, hit the bathroom, get in the plane and the oil temperature is still up at 160-170 degrees, leading you to have to figure out how to…

  • The Aunt Betty Directive: PFD Failures

    Glass panel displays, ballistic parachute aircraft recovery systems, portable tablet computers enabling paperless cockpits, and widely available three axis autopilot systems have changed the way we fly, the way we train, and the way we are expected to perform on check rides. Our training and testing paradigms have tried to stay in synch, yet always seem to be catching up to the latest levels of technology.

    This is very apparent when we instructors are preparing a student for an FAA practical test. When training aircraft had no autopilots, no GPS, and certainly no parachutes, the general philosophy was that during training, the student should have the lowest level of technology available. This was also the expectation on the check ride. This theory has changed over the years and now the Practical Test Standards require that an applicant integrate all available technology while demonstrating mastery of his or her aircraft. This raises numerous questions from instructors and students about what technology will be available for each task.

    One example of this dilemma is found when contemplating an instrument airplane practical test in a Cirrus SR20/SR22. The test requires the task “Instrument Approach without Primary Flight Display”, which has taken the place of what was the partial panel approach, accomplished without use of gyroscopic heading and attitude indicators. In the Cirrus, the standby attitude indicator, standby airspeed, and standby altimeter are available, as is the Multi-Function Display. Guidance from the FAA has us shooting a GPS approach using the moving map display on the MFD after disabling the PFD. Those of us who trained and tested in steam gauge aircraft think that this task should be fairly easy. With a fully functional Attitude Indicator and a nice big moving map display showing our course, a reasonably competent instrument pilot should have little trouble adapting to this setup and flying a good approach.

    But, in the Cirrus specifically, and perhaps in other aircraft as well, another question comes up. Can the applicant use the autopilot (which still works just fine after a display failure) during the approach without the PFD? A rather famous DPE who writes for a national magazine says “yes”, opining that not to allow its use would be introducing simultaneous multiple systems failures, which is strictly forbidden in the minds of some. If we follow this logic, we would not test simulated engine failure emergencies in these aircraft either, because to do so would imply failure of not only the engine, but the CAPS parachute system as well. In my former role as a pilot examiner, I always said no, that the approach should be hand flown. Here is my logic.

    I was amazed that flight instructors and examiners would accept the substitution of autopilot technology for the skill required to fly an approach without the PFD. I would argue that the intent and the well described emphasis of the PTS is that the applicant must demonstrate the ability to control the airplane after a loss of the primary flight display, not observe and monitor the autopilot controlling the airplane! This argument was generally unpersuasive, so I approached from a different point of view, that of a concerned family member.

    “Aunt Betty” represents a future passenger flying with the soon to be rated instrument pilot. Here is the question posed to Aunt Betty: “When we train and test pilots for instrument proficiency, we require them to demonstrate the ability to safely and skillfully fly the airplane without their primary instruments. Now, Betty, in this airplane, we can test this task in one of two ways. We would like your input on which way you would prefer, seeing as you will be a frequent passenger with your nephew. We can either have the pilot (might be your son, brother, husband, or nephew) demonstrate that he can fly the airplane by hand without the PFD, which does require a little more skill and a slightly different technique, or, we can require the pilot to perform this task using the autopilot so that the pilot basically monitors the airplane flying itself on the approach.

    “Now, Aunt Betty, a pilot allowed to use the autopilot system on this approach may not have the skill or technique to fly the approach by hand in the clouds should the autopilot shut down due to turbulence or mechanical failure. Should this happen to a pilot without the skill and practice normally required, the odds of a fatal accident occurring would be quite high.

    “So what do you think, Aunt Betty? Would you feel more comfortable flying with this fellow if he has demonstrated mastery of the aircraft (sans PFD) without the autopilot or only with its assistance?”

    This leads us to a larger discussion about the use of other technology, iPad, GPS moving map, and more. If technology is used as a replacement for pilot proficiency during training and testing, we end up with less skillful, less competent and ultimately less safe pilots. But, if we require that our students demonstrate mastery with the lowest available level of automation and technology (which, by the way, implies excellent fundamental aircraft control skills) then, when technology is added into the equation, we have a safer pilot.

    Technology can be a value added safety multiplier, or it can be a crutch needed to make up for lack of fundamental and advanced skills. Crutch or Safety Multiplier, which one will you choose? I know which one Aunt Betty prefers.

    Charles McDougal is a flight instructor, corporate pilot, and former DPE ‎who offers basic and advanced flight instruction in the San Antonio area.  To find out more information about Charles or to contact him, visit his website, www.flighttrainingcoalition.com.

    Glass panel displays, ballistic parachute aircraft recovery systems, portable tablet computers enabling paperless cockpits, and widely available three axis autopilot systems have changed the way we fly, the way we train, and the way we are expected to perform on check rides. Our training and testing paradigms have tried to stay in synch, yet always…

  • Night Flying

    Ah, fall is finally here.  In Texas, it arrived about a month late, but showed up with a vengeance.  A strong cold front caused a 40 degree temperature drop in 12 hours earlier this week, bringing rain, lower freezing levels, and lots of wind.

    Fall means cooler temps, but fall also means less light.  The sun begins to set sooner, plus the fall back time change in November cause darkness to spring upon an unaware pilot.

    Before getting in to too many night landings tips, just a friendly reminder, passengers can only be carried at night if the PIC has completed 3 takeoffs and landings to a full stop in the last 90 days during the time period of 1 hour after sunset to 1 hour before sunrise.

    Lots of us have been landing long before sunset for most of the past couple of months, so those night flying skills might be a little rusty.  The best way to remedy night flying rustiness?  Call an instructor and go get some practice.

    In the meantime, here are some tips as to what to expect for your next night flying experience.

    1. Your Eyes Are Very Important.  This may seem like an obvious statement, but night vision can be affected by many things.  Before you takeoff, you want to make sure you can see in the dark.  The FAA recommends no bright lights 30 minutes prior to takeoff.  They also recommend using oxygen at night as this greatly improves night vision, even at low altitudes.  Use off center viewing to help spot traffic or other objects in the air.  Finally, when preflighting, use a red flashlight as much as possible, but if you do have to use a white light, close one eye to keep one eye from being blinded.
    2. Utilize Approach Lights on Landing.  Night landings are very different then day landings.  It is very difficult to get the proper depth perception, not too mention see obstacles below you on your final approach to a runway.  PAPI’s, VASI’s, and instrument approach glide slope’s become very important.  If you are VFR only pilot, if your airport has a PAPI or a VASI, keep 2 white and 2 red (or 1 white and 1 red) lights.  If you see 3 red (or 2 red), climb.  If you see 4 red, definitely climb.  If you are an IFR pilot, I highly recommend always flying an approach at night.  What if your airport doesn’t have a PAPI, VASI, or approach with a glide slope?  You might not want to utilize it at night.  One side note on VFR flight: Clouds are nearly invisible at night.  If you do fly into a cloud (a clue is your strobe lights start reflecting back at you), don’t panic.  If you have an autopilot, turn it on and execute a 180 degree level turn.  If you don’t have an autopilot, start scanning your instruments, keep your attitude indicator blue side up, and make a shallow 180 degree while maintaining altitude.  Then call ATC, advise them what happened, and ask for help.  One more note:  I highly recommend that if a pilot finds that he/she will fly at night at lot, get an instrument rating and fly IFR at night.  It’s much safer.
    3. Practice Landings Before Carrying Passengers.  The tendency when landing at night is to level off too high before flaring, causing the airplane to bleed off speed and energy too high above the runway.  This can lead to a stall, a hard landing, and/or too high of a pitch attitude at touch down causing a tail strike. A good tip is start your level off when you can see the tire marks on the runway.  Make sure you practice night landings, preferably with an experienced instructor who is night current and proficient, before carrying any passengers on board, even if you are night current, but haven’t landed at night in a while.
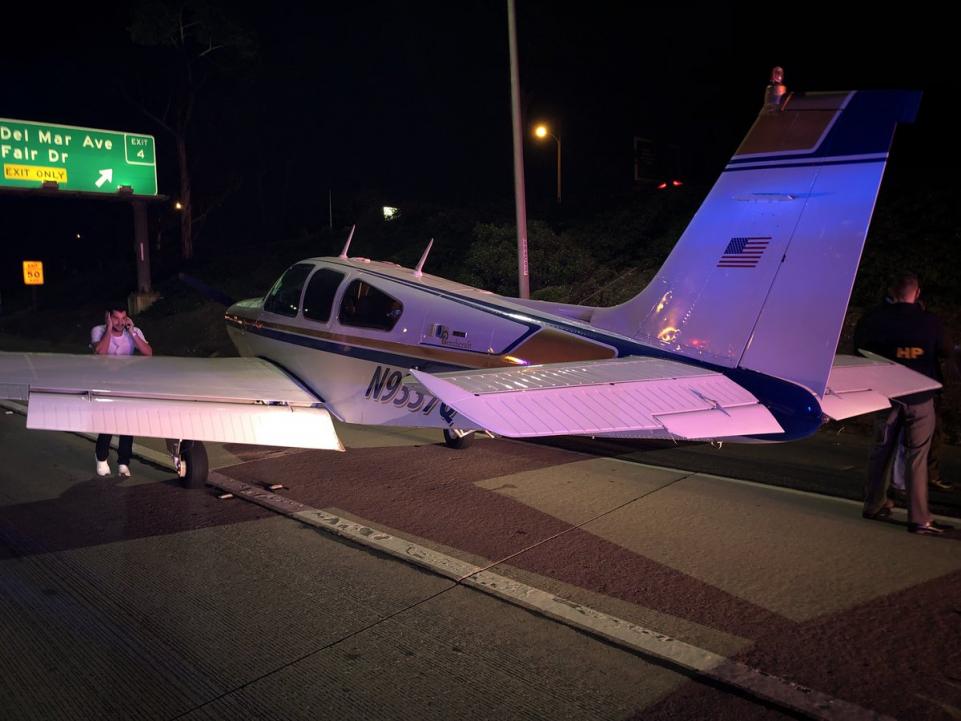
    4. Night Emergencies.  For engine failures at night, you are very limited on options.  Unless you have a Cirrus equipped with a CAPS parachute system, you really have two options if an airport isn’t within gliding distance.  Find a wide, lighted road that appears to be lightly trafficked.  A word of caution, though:  be careful of light poles, fences, concrete medians, cars, and buildings.  The LA freeway would not be a good option (though there are exceptions to this rule as is evidenced by the picture below).  The second option is find a dark spot and pray it’s a field (or the Hudson River).  As you get closer, you can turn your landing light on to see what the ground looks like.  If it looks good, keep the light on and continue.  If you don’t like what you see, turn your landing light off and continue….

    Flying at night can be the best time of day to fly.  It’s usually smoother, cooler, and you get to see all the city lights.  It is a very different environment, however, so make sure to get some training before darkness settles in on your next trip.

    Ah, fall is finally here.  In Texas, it arrived about a month late, but showed up with a vengeance.  A strong cold front caused a 40 degree temperature drop in 12 hours earlier this week, bringing rain, lower freezing levels, and lots of wind. Fall means cooler temps, but fall also means less light.  The…

  • Aircraft Purchase: The Logbook & Pre-Purchase Inspections

    Your about to make your dream aircraft purchase.  The plane has low time on the engine, is reasonably priced, and, according to the seller, has no damage history.  You are overjoyed!  Your dream of making an aircraft purchase is finally coming true.  You prepare your offer for the seller, set up the escrow account, and start all the paperwork.

    Two weeks later, the airplane is yours!  You start flying it, though, and the engine starts to have some strange vibrations.  After several flights, it starts to get worse.  You take it to your mechanic to get it looked at and you find out the airplane needs three new cylinders along with some other engine work that is going to total a lot of money.  Plus, your airplane is now going to be in the shop for several weeks.

    All that excitement you just had?  It just went out the window.

    Could this have been prevented?  Probably so, with a logbook inspection and a pre-purchase inspection.

    Aircraft Purchase:  Maintenance Logbooks

    Aircraft Purchase: Logbook Inspection

    Inspecting a logbook can be very daunting when making an aircraft purchase, especially for older airplanes.  This is, however, one of the most vital steps in making a new aircraft purchase.  You can find out many things from looking at the maintenance logs of an airplane.  First, you can check the compression levels of the engine.  Typically, you want compression levels in the 70’s, with it still being okay in the high 60’s.  Anything below 65 and there could be potential problems.

    Second, you can find out if there has been any odd maintenance done pointing to possible unreported damage history.  This is rare, as most aircraft owners are honest and up front when talking about damage history.  But, if there is an entry detailing a prop overhaul after only 50 hours on that prop, you may start to ask some questions.

    Third, you can find out how well the airplane has been maintained.  If a lot of maintenance was completed at each annual, even if it was a lot of small things, then the airplane has been maintained by a good mechanic who is very thorough.  This also involves a check of the ADs, Mandatory SBs, SBs, and SLs that have been issued for the airplane.  If all that has been kept up with, it’s a well maintained airplane.

    Finally, it gives you a good idea of how much the airplane has been flown.  Sure, the ad online will have the total time and time since overhaul, but you can look at the year by year breakdown of how much the airplane has been flown.  It may have been flown a lot earlier in it’s life, but not quite as much recently.  That’s not necessarily a bad thing, but airplanes like to be flown.

    Aircraft Purchase: Pre-Purchase Inspection

    Before making an aircraft purchase, it is extremely vital that whenever you are buying an airplane that you get a pre-purchase inspection done on the airplane.  Even better is getting one done by a mechanic who specializes in that type of airplane (eg. Piper Service Center for Pipers, Cirrus Service Centers for Cirrus, Kevin Mead for PA-46s).  A pre-purchase inspection can save you a lot of money in the end.

    There is always going to be some kind of maintenance issue with an airplane being purchased, whether it is big or small.  Once a pre-purchase inspection is completed, you can take the findings to the seller and negotiate for a lower price based on those findings, or just have the seller fix the items before the sale is completed.

    I would recommend having the seller fix the problems before the sale is completed.  Even though it may take a little longer for the sale to be completed this way, you’ll get to enjoy your airplane right away instead of it being in the shop the next several weeks after you complete the purchase.

    There is the circumstance where the  pre-purchase inspection reveals some serious airworthiness issues which would cause the deal to be voided.  Always put this clause in a purchase agreement, giving you, the buyer, an out if there are serious airworthiness issues.

    When it comes to making an aircraft purchase, it is not a process to be rushed.  Slow and steady usually gets the best airplane for the money, giving you years of enjoyment in the future.

    Looking to make an aircraft purchase?  Daunted by all the work that’s involved to find a good, quality airplane?  Let Texas Top Aviation do your aircraft search for you!  To learn more, visit Texas Top Aviation’s Aircraft Purchase Consultations page.

    Your about to make your dream aircraft purchase.  The plane has low time on the engine, is reasonably priced, and, according to the seller, has no damage history.  You are overjoyed!  Your dream of making an aircraft purchase is finally coming true.  You prepare your offer for the seller, set up the escrow account, and…

  • Wind the Clock

    There is truth in the old adage that 99% of flying is routine while the remaining 1% holds the potential for events that cause those who fly to hold themselves above mere ground-bound mortals. My 37 years of military flying might have distorted that ratio a fair bit given the complexity of high-energy fighter aircraft and the uncertainties of combat, but rest assured we all earn our right to be proud of our wings every time we fly.

    The requirement that a single-seat fighter pilot be able to handle rapidly evolving emergency situations and complex systems diagnosis sets a high bar for any who join that group. However, the lessons we learned and techniques we developed for making fighter aviation significantly safer than in yesteryear have direct applicability to general aviation.

    Prioritization and compartmentalization are two important skills that every pilot should have. These skills amount to the ability to look at a complex problem, quickly determine the most critical elements, and mentally set aside those things that can wait so as to deal with highest priorities first. While this does not sound like rocket science, the art is in the doing!

    The technique for dealing with the immediate onslaught of information, such as when that caution tone or caution light presents and different gauges or displays go haywire, provided the title for this piece.

    All flight training will, at some point, involve what is called situational emergency procedures training, know to military aviators as SEPT. We do this type of training in a simulated cockpit that has all the dials and switches for our particular aircraft. None of the switches and dials do anything, some are just decals on a wooden dashboard, but the presentation allows the SEPT victim to reach for the appropriate switch or lever, while telling the instructor what and why they are doing so.

    One of the most common mistakes new trainees make is that of trying to act too fast, before they have fully and correctly analyzed the situation at hand. Herein lies the titled technique. After blurting out a quick and incorrect answer, the instructor would admonish with: “rather than try to react instantly, maintain aircraft control, analyze the situation, then take appropriate action. The best thing you can do is to reach up and wind the clock. This will give your nervous energy some place to channel itself, while your brain takes in the full situation.”

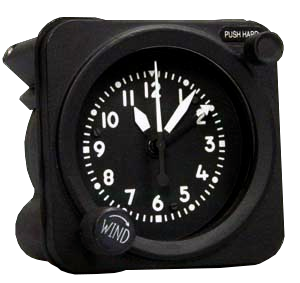
    Waltham clock

    Winding the clock might seem like an archaic notion, but, amazingly enough, even our most modern aircraft have the same clock we flew with as far back as the 1960s. The Waltham A-13A aircraft clock and timer is a wind-up device that only uses power to light up at night. Unless your emergency involved some type of catastrophic impact to the instrument panel, you could count on at least your clock to be functioning normally. Thus, reaching out and winding it was unlikely to cause any worsening of your evolving emergency and would distract your brain from the need to take some poorly-thought-out action, too quickly.

    Now, in most aircraft there are a few emergencies that will require immediate, reactive actions. In fighters, we call these Boldface Emergencies. For each type of fighter, we memorize, to the letter, the few key actions that have to be instinctive, to prevent disaster. For all other emergencies, there is time to reach out and wind the clock while assessing all instruments and lights to fully understand your situation.

    For your aircraft, know those Boldface or Critical Action Procedures, but for all other emergencies, take the time to maintain aircraft control, “wind the clock” while you analyze the situation, then take appropriate action.

    Mike Hostage is a retired USAF pilot with 37 years of experience, flying a wide variety of aircraft.  An instructor pilot for more than half of his 4800 flight hours, Mike is currently qualified in a Cirrus SR-22T and regularly flys his two homebuilt sailplanes.

    There is truth in the old adage that 99% of flying is routine while the remaining 1% holds the potential for events that cause those who fly to hold themselves above mere ground-bound mortals. My 37 years of military flying might have distorted that ratio a fair bit given the complexity of high-energy fighter aircraft…

  • An Innovative ADS-B Solution from uAvionix

    The closer we get to 2020, the more innovative companies are getting with ADS-B out solutions.  There are a myriad of transponders out there that have been released in to meet the ADS-B out requirement and to offer ADS-B in options.  L3 has the Lynx transponder line (and hardware to upgrade an already installed GTX 327 or GTX 330), Garmin has the GTX 345 and offers upgrades to the GTX 330, Appareo has it’s Stratus ESGi ADS-B out transponder, and Avidyne offers it’s AXP340 transponder, among others.

    Most of the ADS-B solutions require some kind of panel work, whether it’s pulling out the Garmin GTX 330 to send off, or making panel modifications to fit the L3 Lynx in.  Very few are actual slide in replacements, so there is some labor involved in swapping transponders.

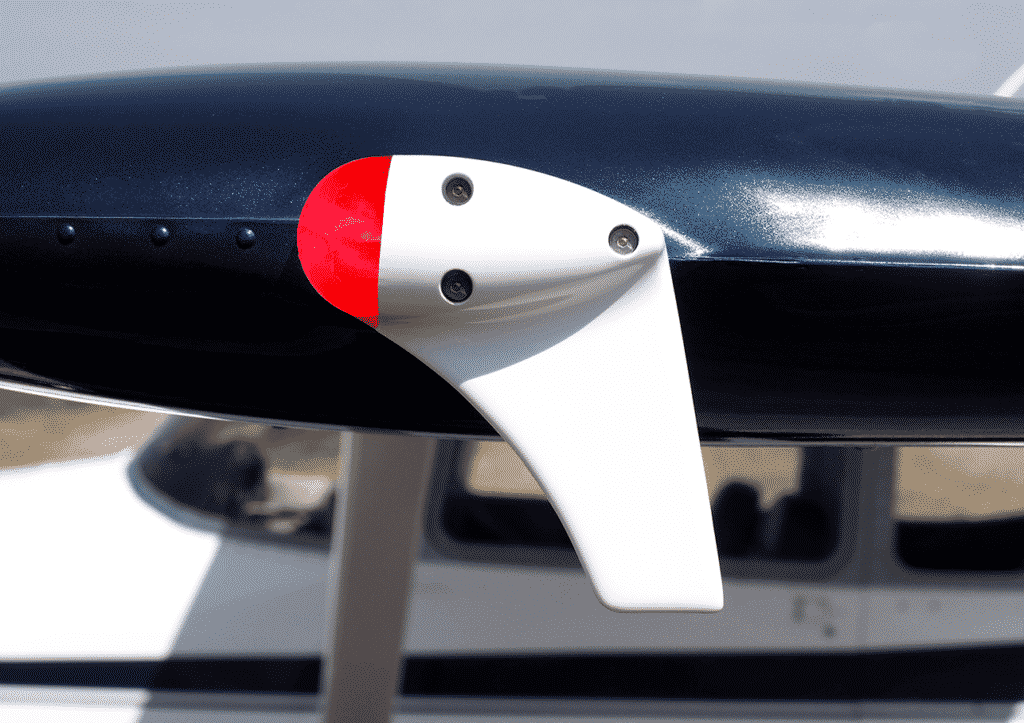
    Want a simpler and more innovative solution?  uAvionix, a Montana based company that makes the recently released Scout portable ADS-B In solution, has a product for you.  Meet the SkyBeacon.

    What is it?  The uAvionix SkyBeacon is simply a navigation light replacement that bolts on your wing with a fin that hangs down.  All the ADS-B out transmitting equipment is placed behind the nav light on the device.  It has an integrated WAAS GPS unit, can work with any Mode C or Mode S transponder wirelessly, and it mounts directly in to where the original nav light was, same screws and everything.  No additional hardware needed.  uAvionix claims installation should take 10 minutes.

    Configuration is super easy too, as it is all done on a smart phone on the uAvionix app.

    Right now, the uAvionix SkyBeacon is only approved for experimental aircraft, but, according to their website, uAvionix expects FAA certification in early spring.  With a price tag of only $1,500 and a strobe light to be added as well, this is your simplest and easiest ADS-B compliance solution.

    The closer we get to 2020, the more innovative companies are getting with ADS-B out solutions.  There are a myriad of transponders out there that have been released in to meet the ADS-B out requirement and to offer ADS-B in options.  L3 has the Lynx transponder line (and hardware to upgrade an already installed GTX…

Leave a Reply

Your email address will not be published. Required fields are marked *