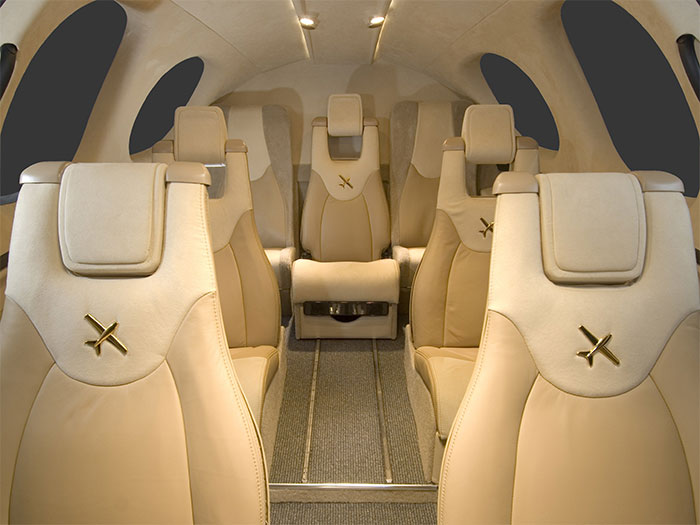
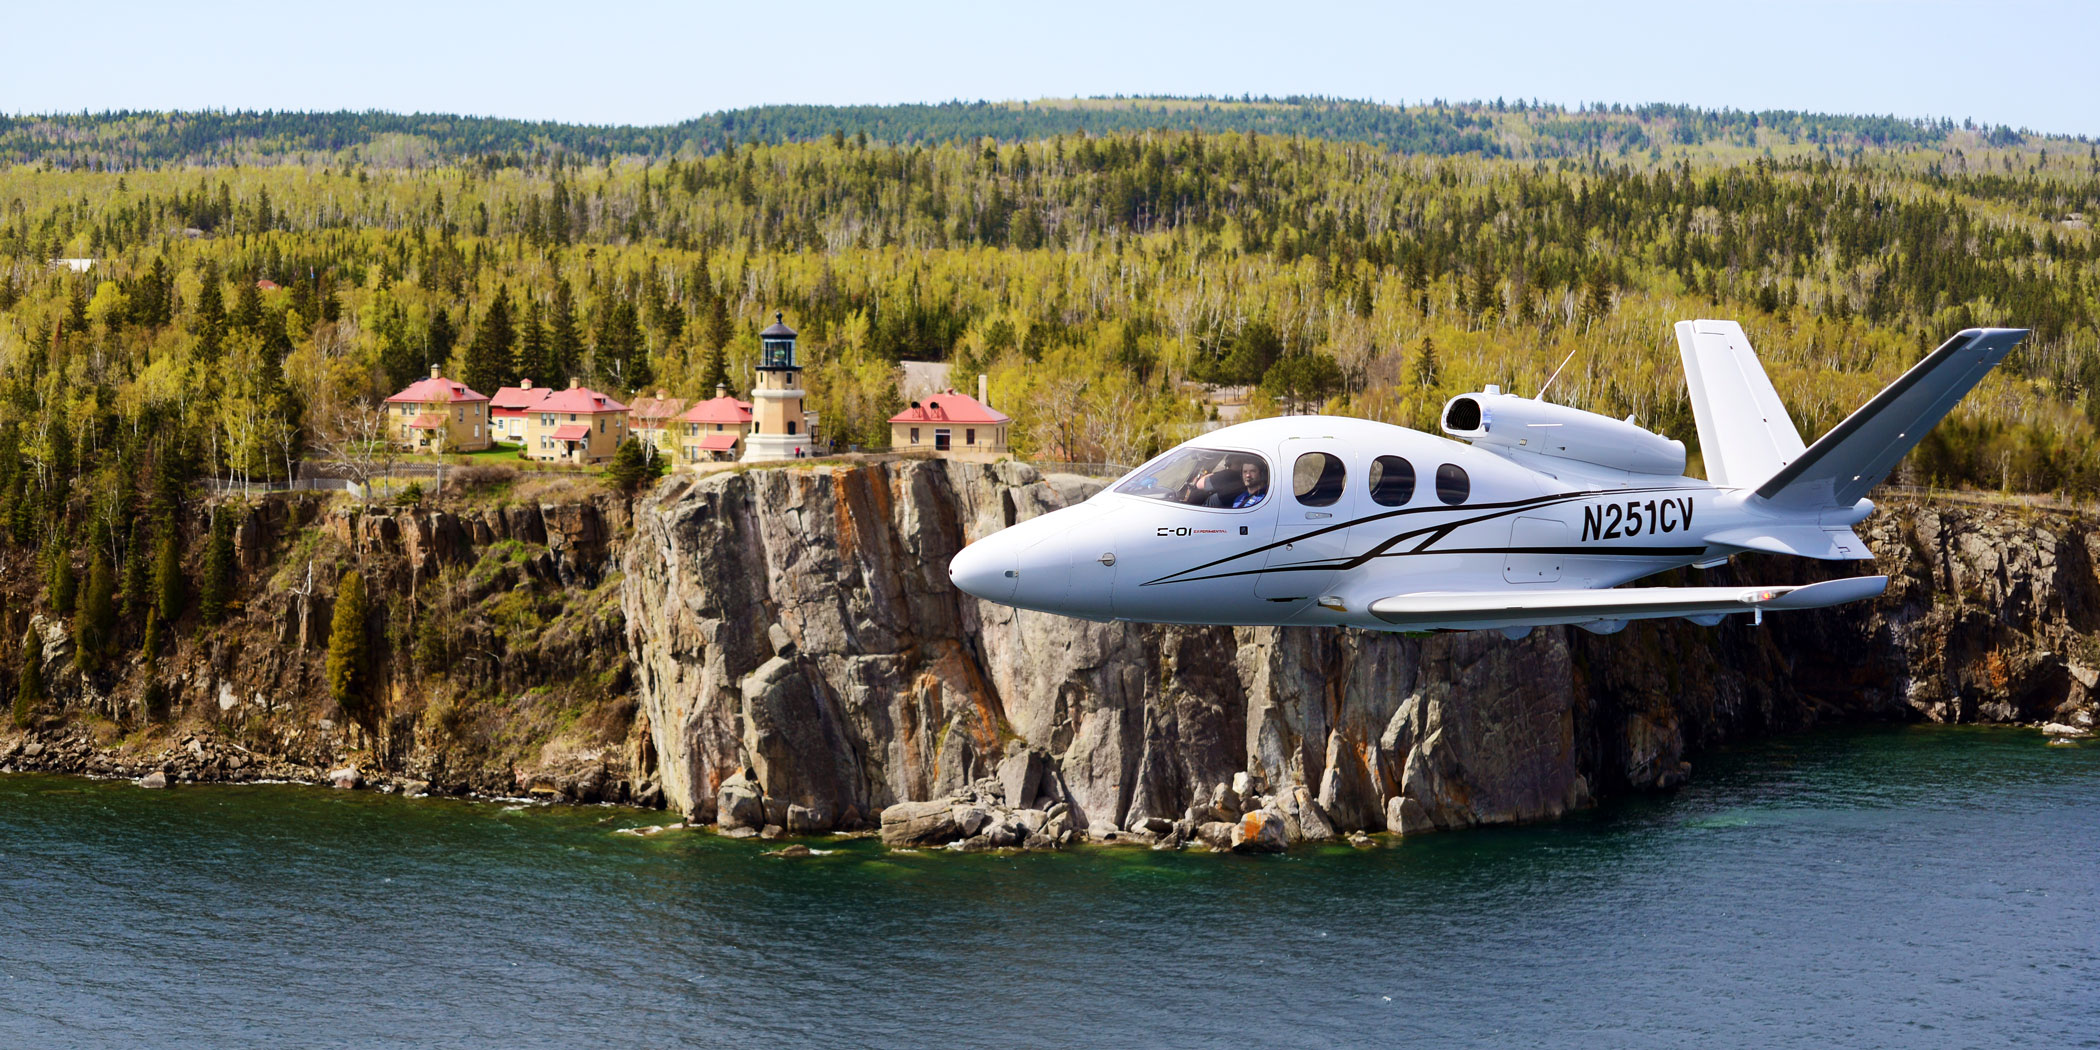
The long anticipated certification of the Cirrus Vision Jet finally happened. On October 30th, the FAA awarded certification to Cirrus’ single engine jet. Marketed as the world’s first single engine personal jet, the Cirrus Vision Jet will seat five adults, two children, and cruise around 300 knots.
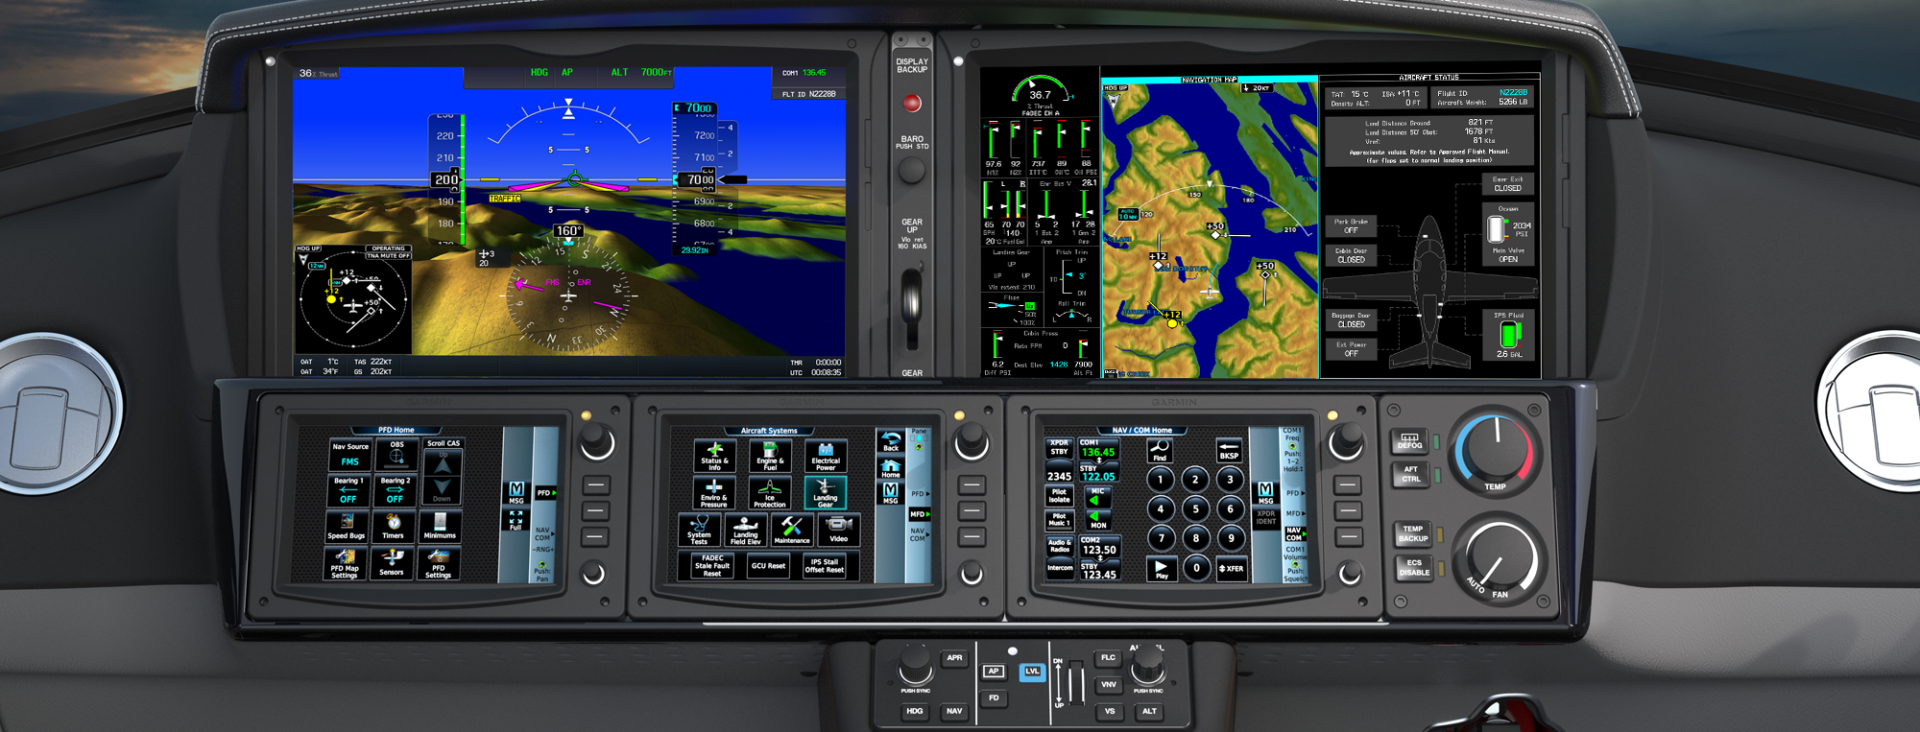
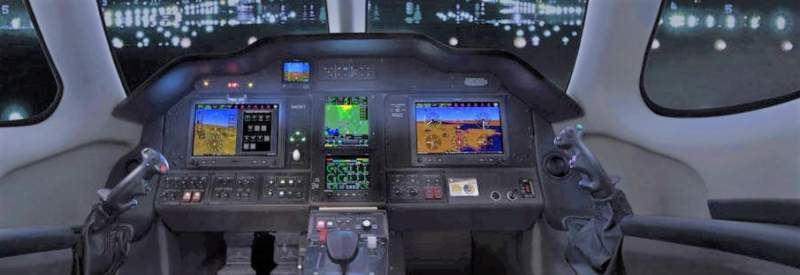
The Williams FJ33-5A Turbo Fan engine is operated by a FADEC, single handle throttle, similar to the throttle in the piston powered Cirrus family. In fact, the SR series was taken into consideration when designing the Cirrus Vision Jet in order to simplify the upgrade for pilots. Many of the buttons and knobs are in the same places in the Cirrus Vision Jet.
The Cirrus Vision Jet is equipped with the Cirrus Perspective Touch by Garmin that is very similar to the Cirrus Perspective by Garmin in the piston powered line. Equipped also with the Flight Into Known Icing system and the Cirrus Airframe Parachute System (CAPS), both of which are standard.
Unlike the piston powered Cirrus lines, the CAPS system on the Cirrus Vision Jet is actually mounted in the nose. Also, unlike the piston lines, the jet CAPS is integrated with the aircraft avionics to slow the airplane to between 67 and 160 knots when the system is activated. In the jet, the CAPS system was designed to withstand higher weights, higher speeds and higher altitudes.
Cirrus hopes to start deliveries of the Vision Jet by the end of the year, with many more rolling off the line in 2017. All Cirrus Vision Jet pilots will need to be type rated in order to fly the aircraft. Cirrus is doing all the type rating training in house at their new Vision Center in Knoxville, Tennessee.
Earlier this week, Mooney announced they would be following competitors Piper (with their Archer DX) and Redbird (with their retrofitted 172 known as the Redhawk) into the training market with the Mooney M10 T and Mooney M10 J. Mooney, which hasn’t manufactured a primary trainer since the Mooney M10 Cadet in 1970, is planning on putting Jet A burning Continental Engines in the new aircraft. The mockup was unveiled at Airshow China.
The Mooney M10 T is a 3 seat, fixed gear trainer sporting a Continental CD-135 engine. At 135 HP, the initial design data claims the Mooney M10 T will be able to cruise at 140 KTAS at 75% power, allowing the Jet A engine to burn between 4-5 gallons per hour while holding 42 gallons of fuel. As with other Jet A piston powered airplanes, the Mooney M10 T will have a Fully Automated Digital Engine Control (or FADEC) system. This leaves just a single power lever in the cockpit, allowing the pilot to set a percent power and the FADEC computer will set the manifold pressure, prop speed, and mixture.
The Mooney M10 J has a slightly bigger engine, the 155 HP Continental CD-155. It also is equipped with retractable gear. Initially, Mooney is predicting 160 KTAS at 75% power for the Mooney M10 J. The airplane will come as a two-seater, but will have a third seat as an option. Mooney says that the Mooney M10 J will allow pilots to make an easy transition to the bigger and faster M20J that has been popular for many years amongst “Mooniacs.”
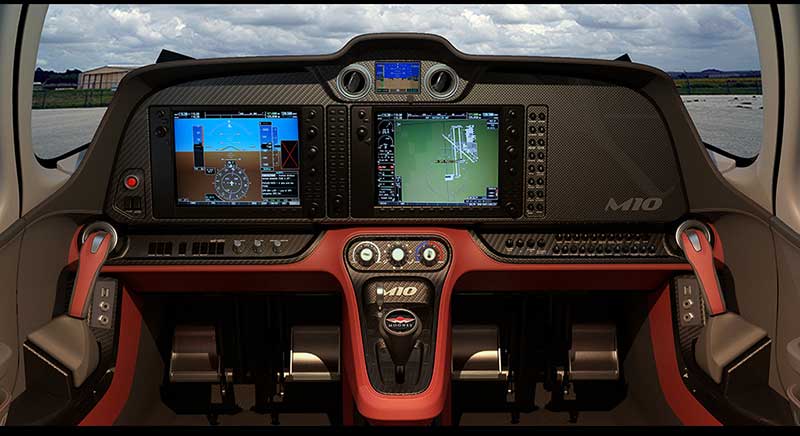
In a new direction for Mooney, the Mooney M10 T Mooney M10 J will both be composite airplanes with side sticks, instead of the traditional sheet metal exterior with a yoke as Mooney aircraft have been in the past. Also venturing from the more powerful Mooney aircraft is the fact that the Mooney M10 T and Mooney M10 J will have two doors. Remaining, though, is the swept tail that Mooney aircraft are known for. Both airplanes will be equipped with Garmin G1000 panels, while the Mooney M10 J will also have the GFC 700 autopilot, marketing more toward aircraft owners rather than students.
The only downside that I read about was the time between replacements for the engines. For the CD-135 engine in the Mooney M10 T, time between replacement is 1,500 hours, whereas the CD-155 only has a 1,200 hour replacement time.
Mooney expects certification and deliveries to begin for the Mooney M10 T and Mooney M10 J in 2017.
Information courtesy of AOPA and Mooney International. Images courtesy of Mooney International.
Earlier this week, Mooney announced they would be following competitors Piper (with their Archer DX) and Redbird (with their retrofitted 172 known as the Redhawk) into the training market with the Mooney M10 T and Mooney M10 J. Mooney, which hasn’t manufactured a primary trainer since the Mooney M10 Cadet in 1970, is planning on…
For those of you in the Hill Country looking to kick off the Christmas month right, head over to the Castroville Airport (KCVB) on Saturday, December 6th and get yourself a short stack of flapjacks. For just $5, you can get yourself a good hearty breakfast that includes coffee or juice and bacon or sausage. The eating starts at 0800 and goes until 1200, local time. Come with an empty belly and an empty gas tank as CVB currently has some of the lowest priced gas in South Texas, currently listed at $4.70/gallon.
There will be plenty of hangar flying, lots of airplanes to look at, and most importantly, lots of pancakes!
For those of you in the Hill Country looking to kick off the Christmas month right, head over to the Castroville Airport (KCVB) on Saturday, December 6th and get yourself a short stack of flapjacks. For just $5, you can get yourself a good hearty breakfast that includes coffee or juice and bacon or sausage….
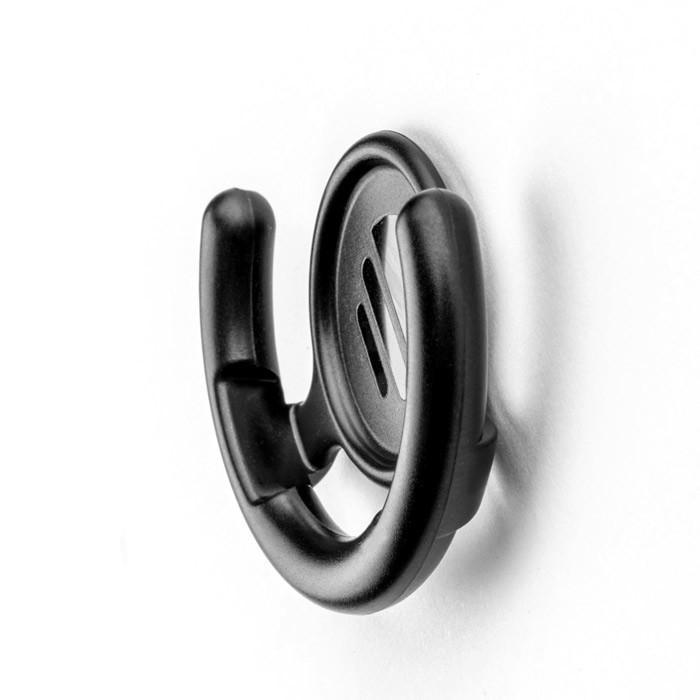
I was recently clued in to a really cool (and very cost efficient) iPad yoke mount.
It’s called a PopSocket and you won’t find it on any aviation website (I have to credit Joe Casey of Casey Aviation with this nifty find).
It’s very simple. You take the mount (see right) and stick it to your yoke. Then you pick one of a ton of designs from PopSocket and stick it to the back of your iPad (you can even create your own design! B2 Bomber anyone?).
It’s low profile, doesn’t get in the way of anything, and is easily removable. The PopSocket mounts are $10 apiece (depending on the size of your iPad, you may want to get 2). The PopSocket is $10, so at the most, you’ll be in $40 plus tax and shipping. Most mounts on Sporty’s are upwards of $50 and require a lot of installation, are big and bulky, and usually require lots of juggling to get the iPad in and out of the mount.
Give the PopSocket a try.
I was recently clued in to a really cool (and very cost efficient) iPad yoke mount. It’s called a PopSocket and you won’t find it on any aviation website (I have to credit Joe Casey of Casey Aviation with this nifty find). It’s very simple. You take the mount (see right) and stick it to…
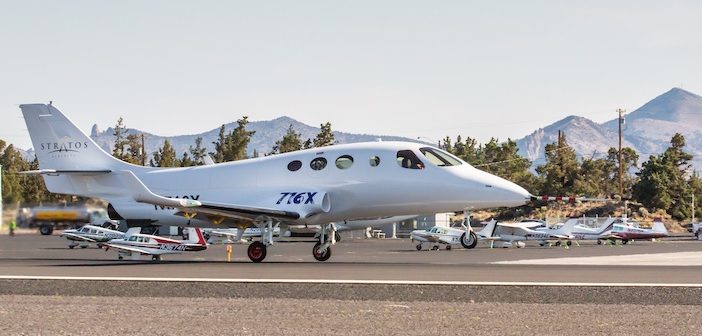
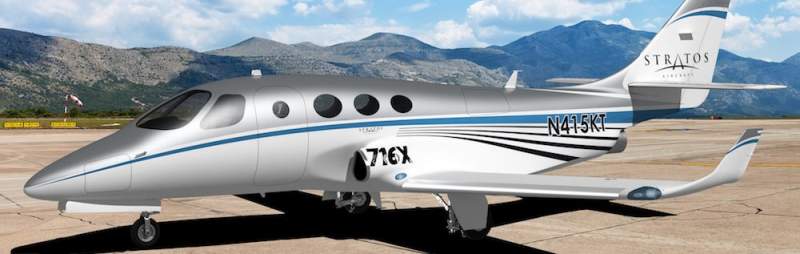
In July, Stratos Aircraft completed the first test flight of the single engine Stratos 716X personal jet. Stratos, based in Redmond, OR, is taking a page out of Epic Aircraft’s book in how the company is planning on bringing the Stratos 716X to market.
Epic Aircraft first released the Epic LT composite single engine turboprop in the early 2000s as an experimental. The first kit was completed and flying in 2005. Epic’s goal was to bring the airplane to market as a certified aircraft, a feat that took them almost 20 years to do, achieving full certification earlier this year.
Stratos Aircraft is hoping to learn a lot from their Bend, OR neighbors. The 716X is going to start off as a limited release experimental kit, while the company is working on achieving certification for the airplane. Once the plane is certified, it will be dubbed the Stratos 716. The 716X experimental kits will be assembled through a factory builder assist program (no garage built single engine jets here!). The kit will cost $2.5 million assembled, while the expected cost of the certified Stratos 716 will be $3.5 million.
Now, let’s talk about the airplane. 400 KTAS. One engine.
That’s right, you did hear correctly. The Stratos 716X is expected to cruise at 400 KTAS on only one engine. Compared to the Cirrus Vision Jet, that’s 100 knots faster. Think, “I’ll be relaxing at the hotel pool with a drink in hand when you are landing” type speeds. The fuel burn of the Pratt & Whitney JT15D-5 engine (3,000 lbs of thrust) is about 25 GPH more than the Vision Jet (the Stratos 716X will burn about 98 GPH of Jet A while the Vision Jet averages about 75 GPH of Jet A).
Comparing the two engines, the above numbers start to make sense. The Williams FJ33 engine on the Vision Jet only puts out 1,850 lbs of thrust, significantly less than the 3,000 lbs of thrust that the Stratos 716X Pratt & Whitney JT15D-5 puts out.
What does that mean to the pilot? In the Stratos 716X, it means less takeoff roll, better climb rate, faster cruise (as evidence by the 400 KTAS expected cruise speed), and a better payload. More power = more weight carrying capacity. And, the 716X is expected to have a service ceiling of 41,000 feet. I probably wouldn’t want to go that high single pilot with one engine, but I’d be very happy with that speed in the mid-30s.
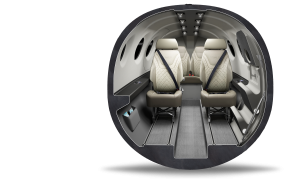
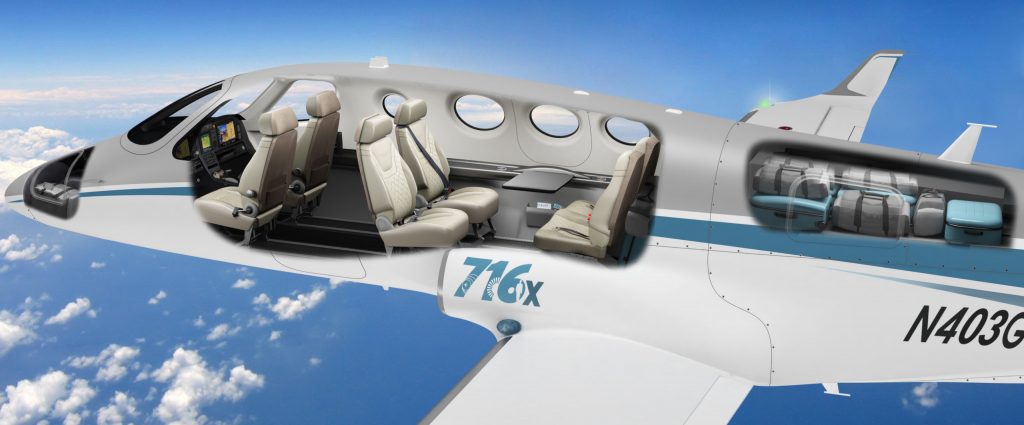
The cabin, based on the pictures I’ve seen, looks very comfortable. The Stratos 716X seats 6 and can be configured in several different ways. Baggage is no problem as Stratos Aircraft stretched the fuselage from their original 714 Proof of Concept aircraft, adding a very roomy baggage compartment above the engine compartment. The passenger compartment is as big as a Phenom 100, providing more leg and head room than the Vision Jet. The front seats have plenty of legroom too, as Stratos has opted for a side stick instead of a yoke.
The avionics for the Stratos 716X are expected to be the Garmin G3X Touch for the panel which will be driven by a Garmin GTN 750 GPS. Autopilot will be integrated within the G3X. I would imagine that once the plane is certified, the panel will be switched to a Garmin G1000 NXi and a GFC 700 will be installed.
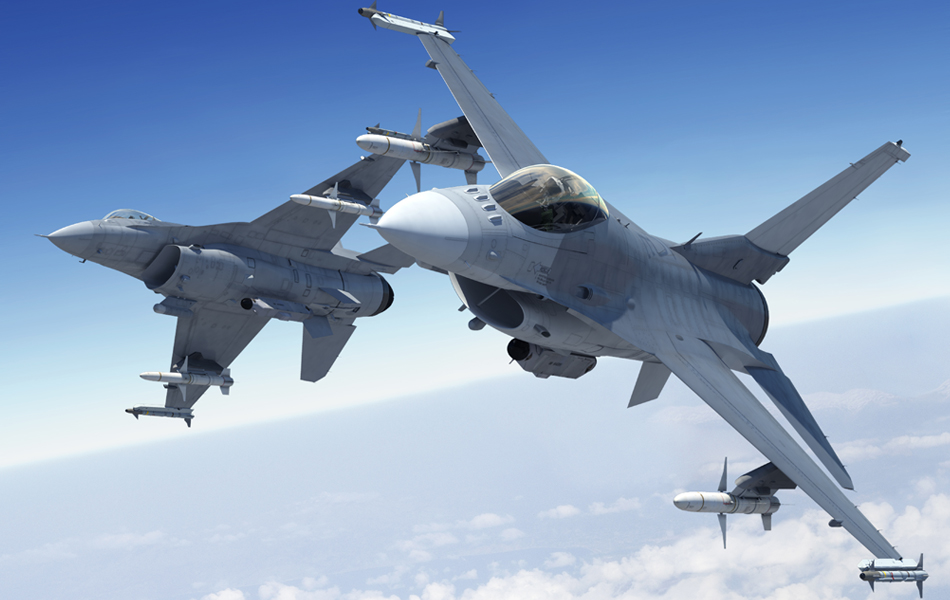
The genius of the design of the Stratos 716X is the aerodynamics of the engine placement. Instead of hanging the engine out in the slip stream and going with a drag inducing V-Tail like Cirrus did, Stratos took some notes from the myriad of single engine military fighter jets out there, placing the engine inside the fuselage. The fuselage is then built around the engine with two air scoops for intake directly in front of the wings. With two intakes instead of one, that leads to more air flow, which again, means more power. The Vision Jet has only one.
I’m going to keep tabs on the Stratos 716X (as I kept tabs on the Epic E1000). I’m hoping Stratos gets several flying soon (the company expects to do 3 kits a year till the airplane gets certified) and certification comes quickly after.
I got to stick my head in the mockup of the Stratos 716X when I went to Osh Kosh in 2018. I was very impressed and was excited to see the airplane was finally airborne this summer.
For more information about the Stratos 716X, check out the Stratos website.
Cirrus Vision Jet, meet your competition. In July, Stratos Aircraft completed the first test flight of the single engine Stratos 716X personal jet. Stratos, based in Redmond, OR, is taking a page out of Epic Aircraft’s book in how the company is planning on bringing the Stratos 716X to market. Epic Aircraft first released the…
From the time I started flying, I have always had the dream to learn how to fly a seaplane. As I learned in November, it’s actually learning to land a seaplane, and the veterans call them floatplanes.
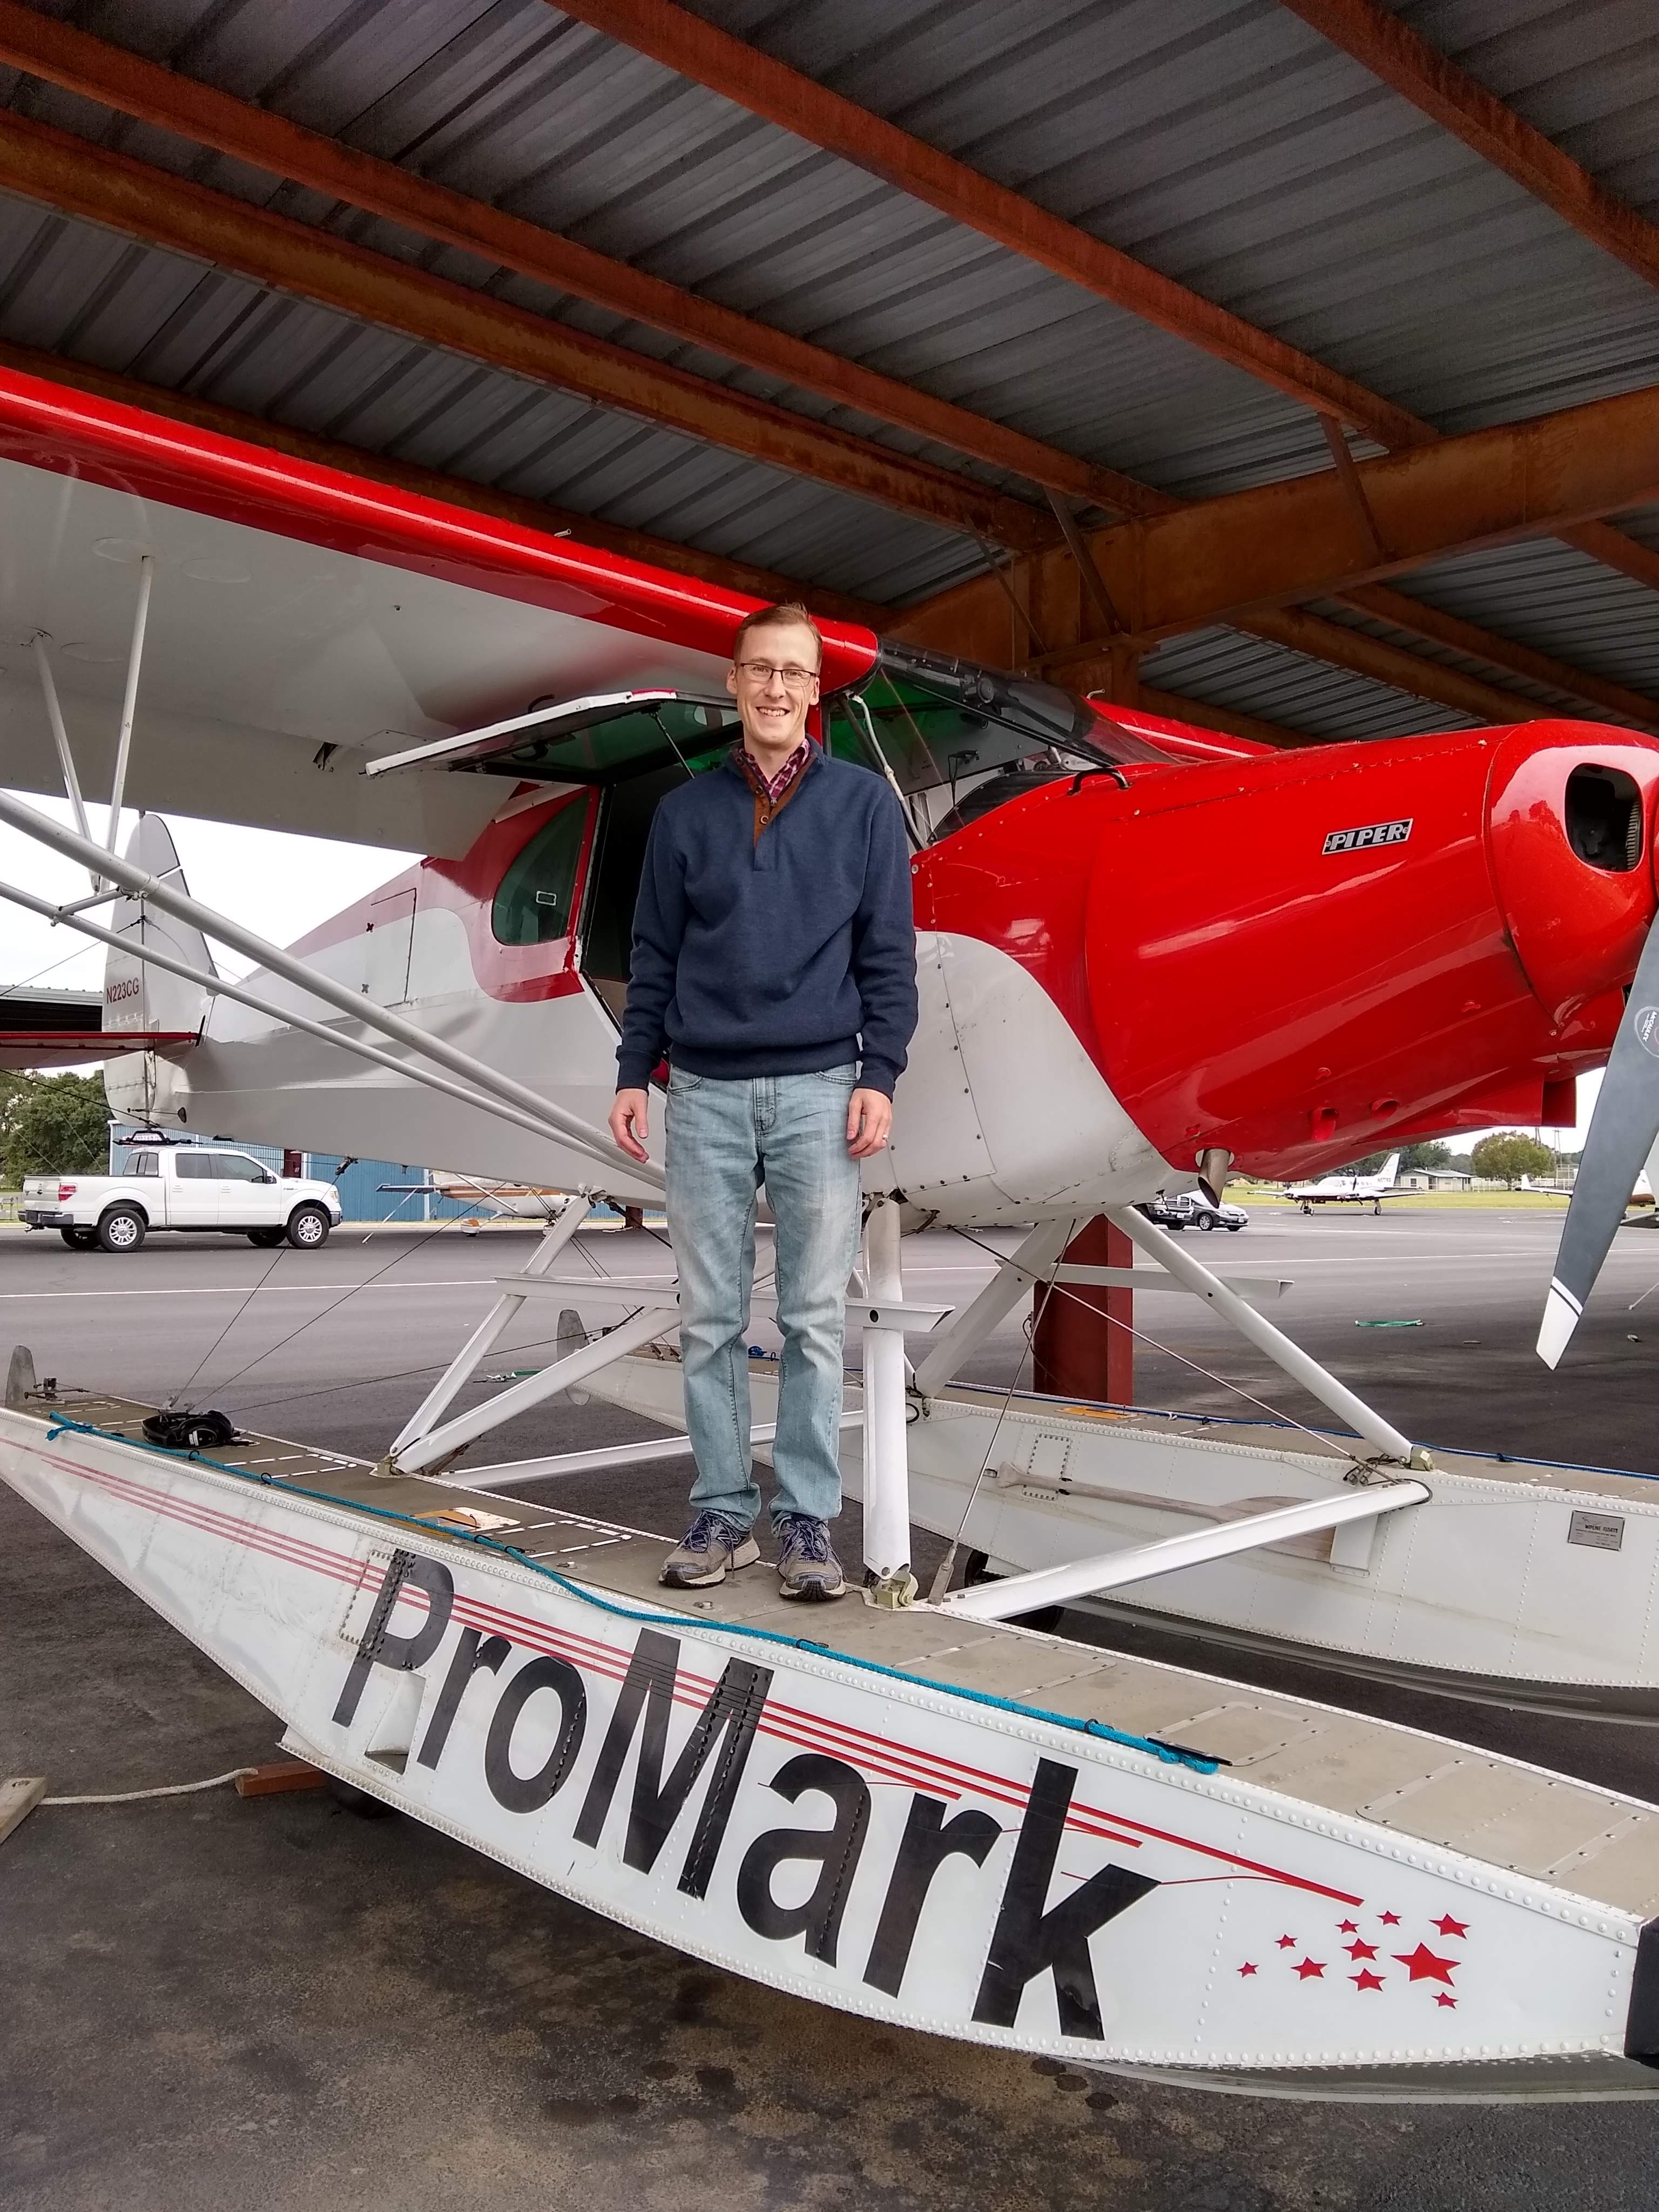
ProMark Aviation at the Burnet Airport (KBMQ) offers a weekend float plane course that is high on fun and low on stress. The school has a Piper PA12 Super Cruiser on amphibious floats (amphibs as I was corrected at one point. I mean, if you’re going to fly a seaplane, er, floatplane, you have to know the lingo) that will land and takeoff on water, but does little else with ease and grace. At 150 HP with those big floats and all the associated rigging hanging underneath the airplane, you are lucky to get to 500 feet before you get to your destination.
We weren’t working on setting any speed records. I was learning the lay of the water. I learned about the step, the keel, pumping the floats, how to read the water, currents, ducks (yes, ducks and birds are important to know about when you are flying low on the water), buoys, docking, and ditching. Step taxiing was fun as you are basically at 3/4 throttle screaming across the top of the water just below flying speed. It’s the best way to taxi a seaplane (truly, it is. You get more air in your engine, you can see better, and you are moving. Just don’t try and turn sharp).
Floatplanes also don’t have any shock absorbers, so the higher the wave, the more you get knocked around, so wind velocity and, in turn, wave height is very important.
A very important nuance of an amphibious floatplane compared to a straight floatplane (one that doesn’t have wheels that come out of the floats), is at one point, you want to make sure your gear is down for landing (runway landing) and at another, you want to make absolutely sure your gear is up for landing (water landing). If you land wheels down in the water, you will capsize, 100% of the time. Thankfully from my good instruction, I did not capsize.
Ken Wittekiend, my instructor, and I spent the majority of the weekend landing and taking off on Lake Buchanan (I was informed by locals it is pronounced “Buk-cannon”, not “Bue-cannon”), which is more open and therefore has more waves. We did one landing on Inks Lake so my kids could see me land, which they thought was the best thing since cheese sticks.
There is a check ride at the end of the training, but, as Ken reassured me, it’s the most fun check ride you’ll ever have. I still hate check rides, but that one I think I hated least of all.
I hope someday I can put my floatplane skills to practice, but for now, I can vouch that I now speak seaplane!
From the time I started flying, I have always had the dream to learn how to fly a seaplane. As I learned in November, it’s actually learning to land a seaplane, and the veterans call them floatplanes. ProMark Aviation at the Burnet Airport (KBMQ) offers a weekend float plane course that is high on fun…
I am an iPad user, but I have an Android phone. I had been using a junky aviation weather app that just gave meters and TAFs, but seemed to have been programmed in a foreign language (un-decoded TAFs notwithstanding). I wanted something more robust, but didn’t see the need to pay for a Garmin Pilot subscription since Foreflight on my iPad was my main EFB (Electronic Flight Bag) I use in the airplane.
When I upgraded my phone, I decided I had to find something better. I have a WIFI only iPad, so I utilize my phone to take quick glances at weather reports or when I want to see the radar without having to tether my iPad to my phone. The app I had wasn’t cutting it.
That’s when I found FltPlan Go. We are all familiar with FltPlan.com. It’s what a lot of corporate pilots use to file flight plans. I’ve used it some, but there is a large amount of data it needs to set up an airplane. Since I already have all the airplanes I need in Foreflight, I don’t use it that much since I didn’t want to do the setup. It is rather handy as it spits out flight logs and has a lot of pre-loaded performance numbers for different makes and models.
FltPlan Go is FltPlan.com‘s app. It is very user friendly, easy to use, and, most importantly, free! You can get METARs, TAFs, NOTAMs, Airport Diagrams, approach plates, full weather reports for airports including radar, maps, and a whole lot more. As far as I can tell, it is a full fledged EFB. I haven’t really scratched the surface on all the features in using mine, but it is quite robust from the little bit of poking around I’ve done.
I’m still a Foreflight guy, but if you want something else or you have an Android phone and don’t want to pay for Garmin Pilot or WingXPro, check out FltPlan Go. It’s a winner.
I am an iPad user, but I have an Android phone. I had been using a junky aviation weather app that just gave meters and TAFs, but seemed to have been programmed in a foreign language (un-decoded TAFs notwithstanding). I wanted something more robust, but didn’t see the need to pay for a Garmin Pilot…