|

The Importance of a Pre-Buy Inspection

There are multiple ways to save money during the aircraft buying process. To start, since you are buying an airplane, you have some means of positive income in order to afford an airplane. Airplanes come in all different shapes and sizes and usually, an airplane can be found to fit almost any budget, whether is a $20,000 Texas Taildragger all the way up to a multi-million dollar jet.

One way is to stay within your budget. There will always be a shinier, newer, lower time airplane that is just above where you set your budget at. Don’t reach for it! There is a reason you set your budget where you did.

Another way is to shop around and get multiple insurance quotes. Your agent is in charge of engaging underwriters who are going to evaluate you and your airplane as risks, then price a policy accordingly. With most airplanes, you should get multiple quotes to see what fits you best. Beware though, because sometimes, you can get a lower rate, but it will require more training, so you end up shelling out more money in the long run. If you find a policy you like, but the training seems skewed or the liability isn’t high enough, you can always have your agent ask the underwriter to modify the quote. You are still in charge.

Finally, if you evaluate your mission and see that your budget can’t afford an airplane that carries enough or goes fast enough, look into taking on a partner or two to help with costs. Be thorough in vetting your potential partners as a good partnership is worth it’s weight in gold, but a bad one is downright unpleasant and often times hard to get out of. Find pilots who have the same mindset & personality you do and treat their stuff the same way you do. Try to take a ride in their car or go to their house, then you’ll see what kind of shape they will keep the airplane in.

The best way to cost yourself more money in the aircraft buying process?

Don’t do a pre-buy inspection.
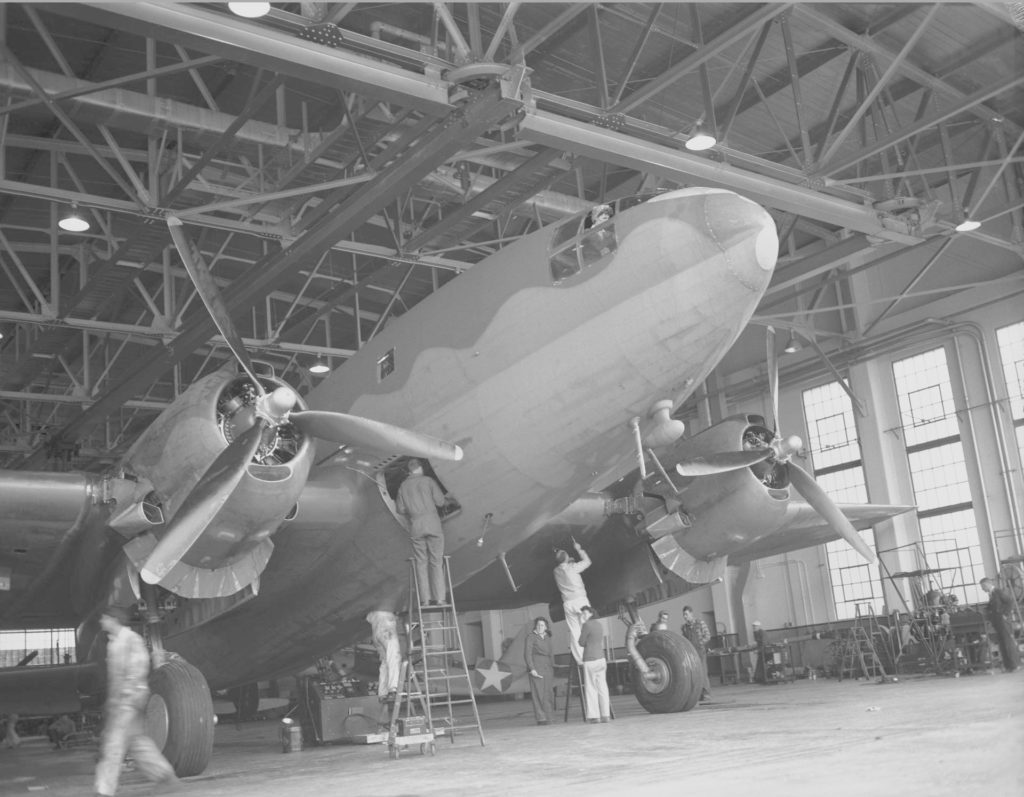
A pre-buy inspection takes place after negotiations and once a Purchase Agreement is in place. You are pretty much set on the airplane, you just want a third party mechanic who is knowledgeable on that make and model of airplane (and this is a very important point) to go over it and make sure that it is sound from a mechanical standpoint. The buyer, you, want someone who has never had an association with the seller since the mechanic will be your representative in the process and you want him answering to you.

If you have used a broker or a buyer’s agent, that person should have already gone through the logbooks for you, so you’ll have a basic idea of the history of the airplane. However, knowledgeable mechanics find things all the time that turn out to be the responsibility of the seller to repair since it happened on their watch. Without a pre-buy, you would end up having to pay for that in the not to distant future.

Here is an example of where not doing a pre-buy can cost a lot of money.

An owner bought a late ’70s model Citation ISP, one of the very first Citations ever made. It had been based in Florida (salt & humidity + aircraft don’t mix well) for a while. The buyer didn’t use a broker, but thankfully had someone look through the maintenance history of the airplane. Since it was so old, the logbook reviewer didn’t have time to do anything but a basic overview, but he gave the thumbs up to the buyer.

The buyer decided he just wanted a boroscope inspection and the seller’s mechanics to look over the airplane. Remember what I said before about a third party mechanic? Well, these mechanics didn’t do a very thorough job. When the buyer took delivery of the plane, after about 10 hours of flying, he already had an $18,000-$25,000 maintenance bill.

You may say, well that’s a jet. Jet’s have specialized maintenance and need a more extensive pre-buy inspection.
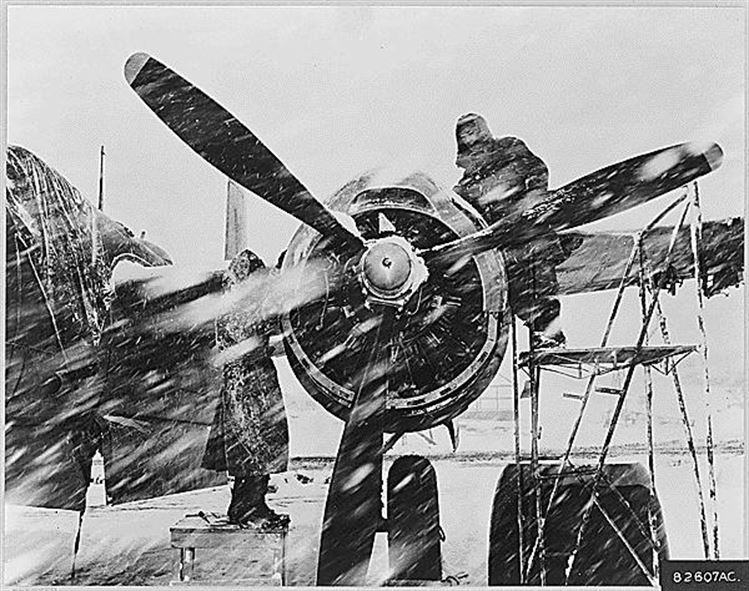
On the contrary, in my 8 years in the training business, I have seen Cirrus, Piper PA46s, Bonanzas and several other piston engine airplanes that either didn’t have a pre-buy done or the pre-buy was done by someone who didn’t know that airframe. Lo and behold, things started breaking and adding up very quickly that would have been discovered on a good pre-buy inspection.

Don’t skip on the pre-buy inspection. They usually run a few thousand dollars, but save tons of money in the long run.


Similar Posts

  • FltPlan Go

    I am an iPad user, but I have an Android phone.  I had been using a junky aviation weather app that just gave meters and TAFs, but seemed to have been programmed in a foreign language (un-decoded TAFs notwithstanding).  I wanted something more robust, but didn’t see the need to pay for a Garmin Pilot subscription since Foreflight on my iPad was my main EFB (Electronic Flight Bag) I use in the airplane.

    When I upgraded my phone, I decided I had to find something better.  I have a WIFI only iPad, so I utilize my phone to take quick glances at weather reports or when I want to see the radar without having to tether my iPad to my phone.  The app I had wasn’t cutting it.

    That’s when I found FltPlan Go.  We are all familiar with FltPlan.com.  It’s what a lot of corporate pilots use to file flight plans.  I’ve used it some, but there is a large amount of data it needs to set up an airplane. Since I already have all the airplanes I need in Foreflight, I don’t use it that much since I didn’t want to do the setup.  It is rather handy as it spits out flight logs and has a lot of pre-loaded performance numbers for different makes and models.

    FltPlan Go

    FltPlan Go is FltPlan.com‘s app.  It is very user friendly, easy to use, and, most importantly, free!  You can get METARs, TAFs, NOTAMs, Airport Diagrams, approach plates, full weather reports for airports including radar, maps, and a whole lot more.  As far as I can tell, it is a full fledged EFB.  I haven’t really scratched the surface on all the features in using mine, but it is quite robust from the little bit of poking around I’ve done.

    I’m still a Foreflight guy, but if you want something else or you have an Android phone and don’t want to pay for Garmin Pilot or WingXPro, check out FltPlan Go.  It’s a winner.

    I am an iPad user, but I have an Android phone.  I had been using a junky aviation weather app that just gave meters and TAFs, but seemed to have been programmed in a foreign language (un-decoded TAFs notwithstanding).  I wanted something more robust, but didn’t see the need to pay for a Garmin Pilot…

  • Night Flying Techniques

    We’ve all been there. You’re flying into an unfamiliar airport at night, you’re having difficulty seeing the field, and trouble identifying the runway. Airports can be hard to identify for a variety of reasons, but approaching in darkness only makes it more difficult. Perhaps the airport is located in a densely populated area and the airport lights bleed into the city lights. Maybe the airport that you’re approaching is located amid terrain that obstructs your view.

    Situations like these are not uncommon for charter pilots. Just a few evenings ago I was descending IFR into Asheville, NC (KAVL) on a dark night with high overcast and scattered showers. Although the airport was VFR, the surrounding hills made me doubtful that I would be able to see the field in time to safely and comfortably descend for the visual approach that I was expecting.

    Fortunately, there are some things we can do to help find our destination and set us up for the approach. Here are a few tricks that I use regularly when I find myself in this position:

    • When flying into an untowered/closed tower airport: Make sure that you have the right lighting frequency. Some airports have pilot-controlled lighting that is operated on a different frequency than the CTAF. If the lights don’t seem to be working, consult your AFD. If the AFD advises that your frequency is correct, double check the NOTAMs to make sure that the lights haven’t been taken out of service.
      • For towered airports: Ask the tower controller to turn up the intensity of the runway lights. This has helped me find the runway countless times. This request can be especially useful at airports that are located in a highly lit area. Controllers are happy to honor this request and will often leave the lights at the bright setting until you advise them that you are ready for them to be turned back to normal intensity.
    • Load an approach: If you are an instrument rated pilot, loading an instrument approach is a great way to get oriented with a runway when you need a little help. You may need to coordinate with the tower or controlling agency if you want to fly the approach, but this has the added bonus of giving the pilot altitudes for terrain/obstacle clearance should there be any hazards present.
    • Use OBS mode: If you are flying an airplane that has equipment capable of doing so, you can use the Omni Bearing Selector (OBS) button to help align you with the runway. If using this strategy, just remember: THIS IS NOT AN INSTRUMENT APPROACH. It will not provide you with obstacle clearance, nor will it line you up directly with the runway.

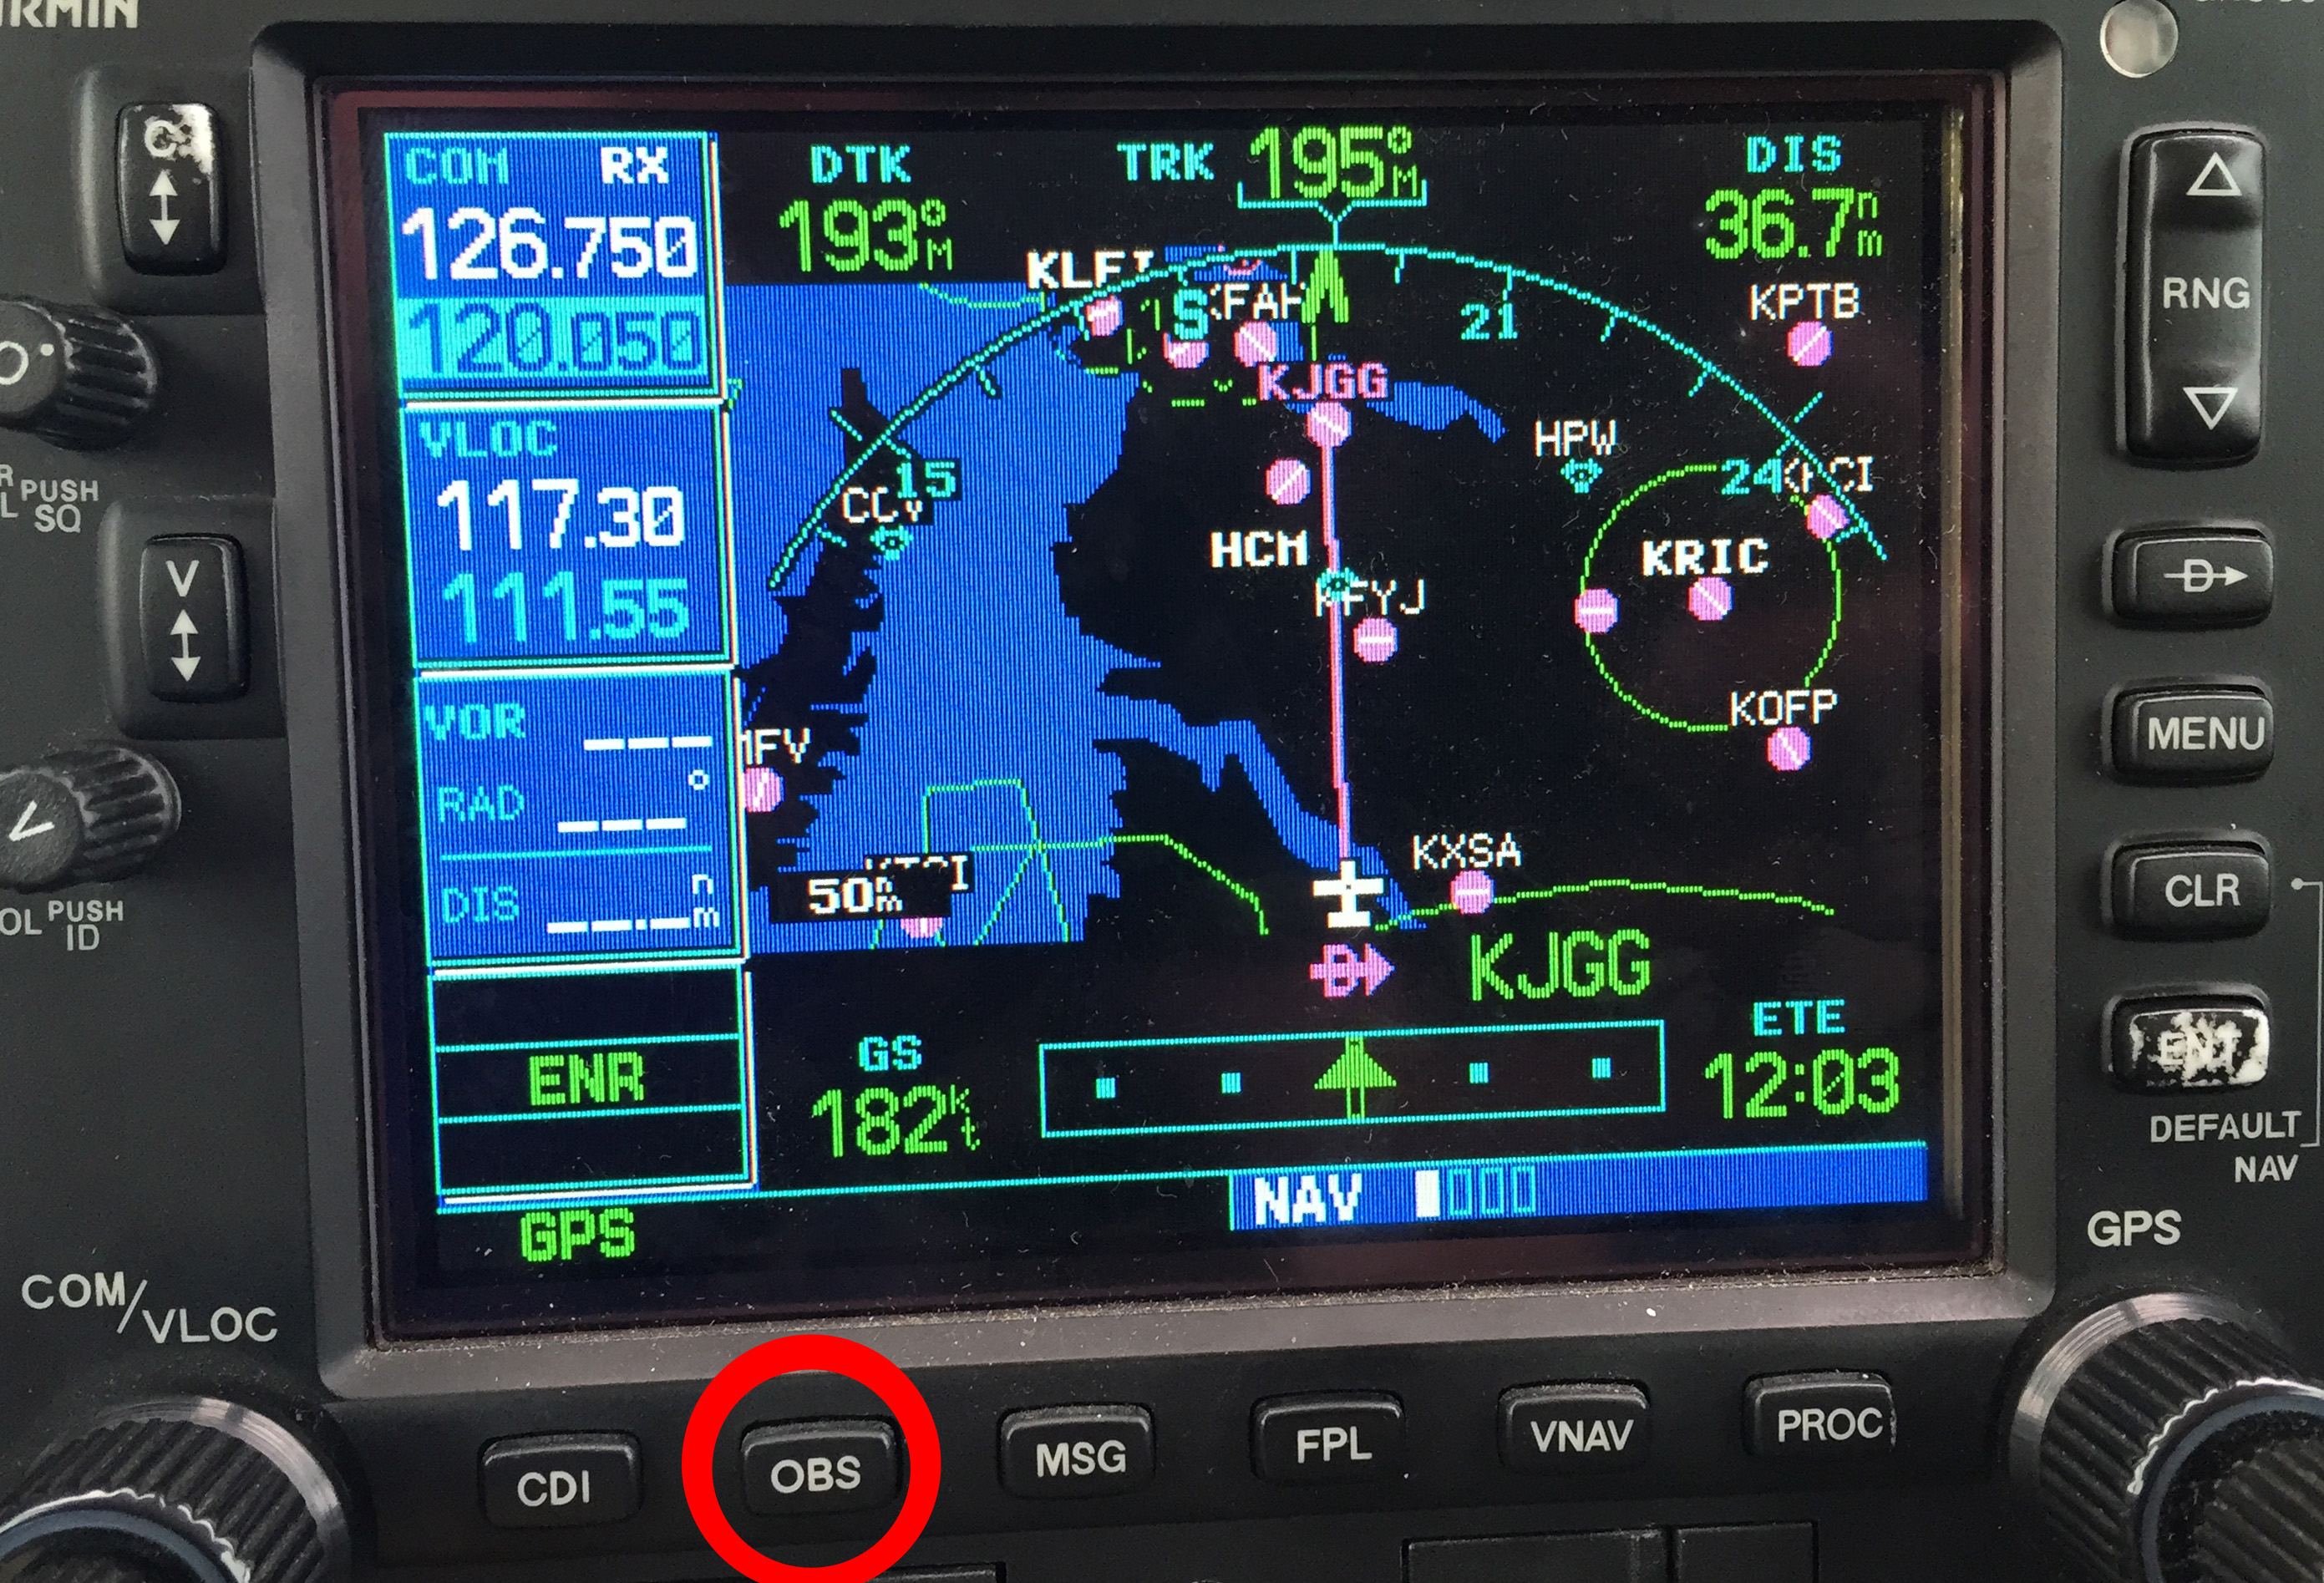
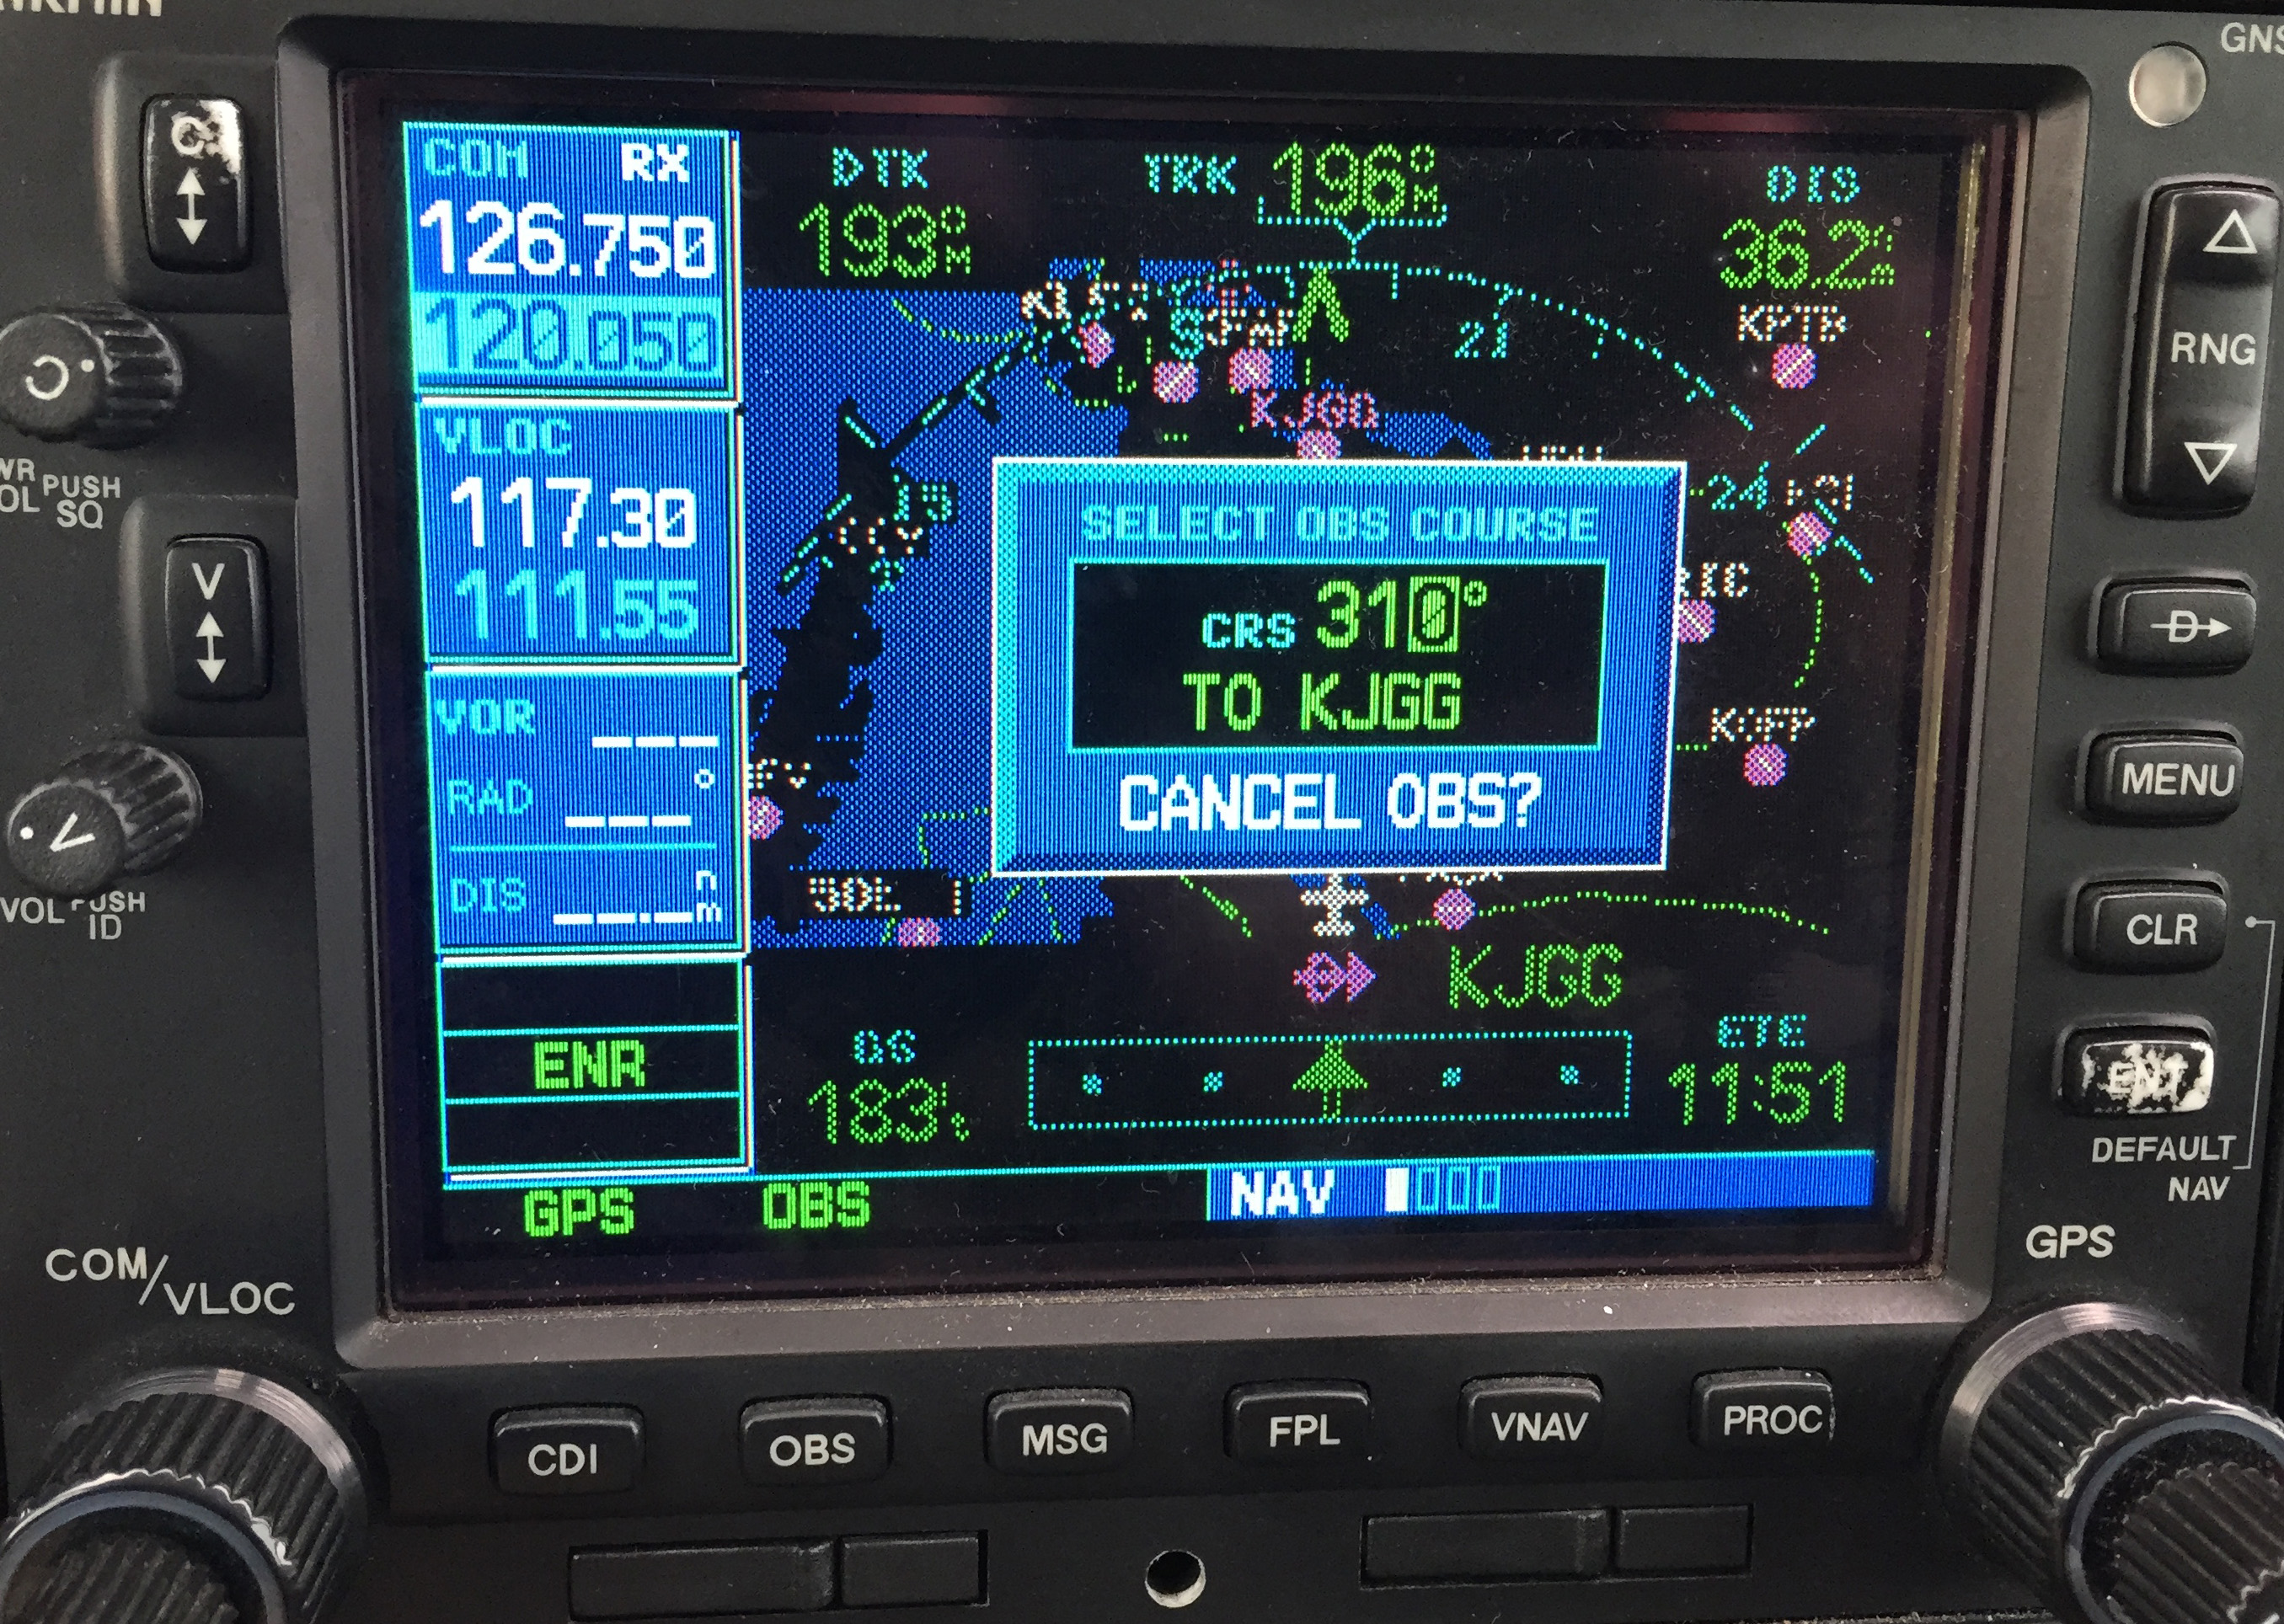
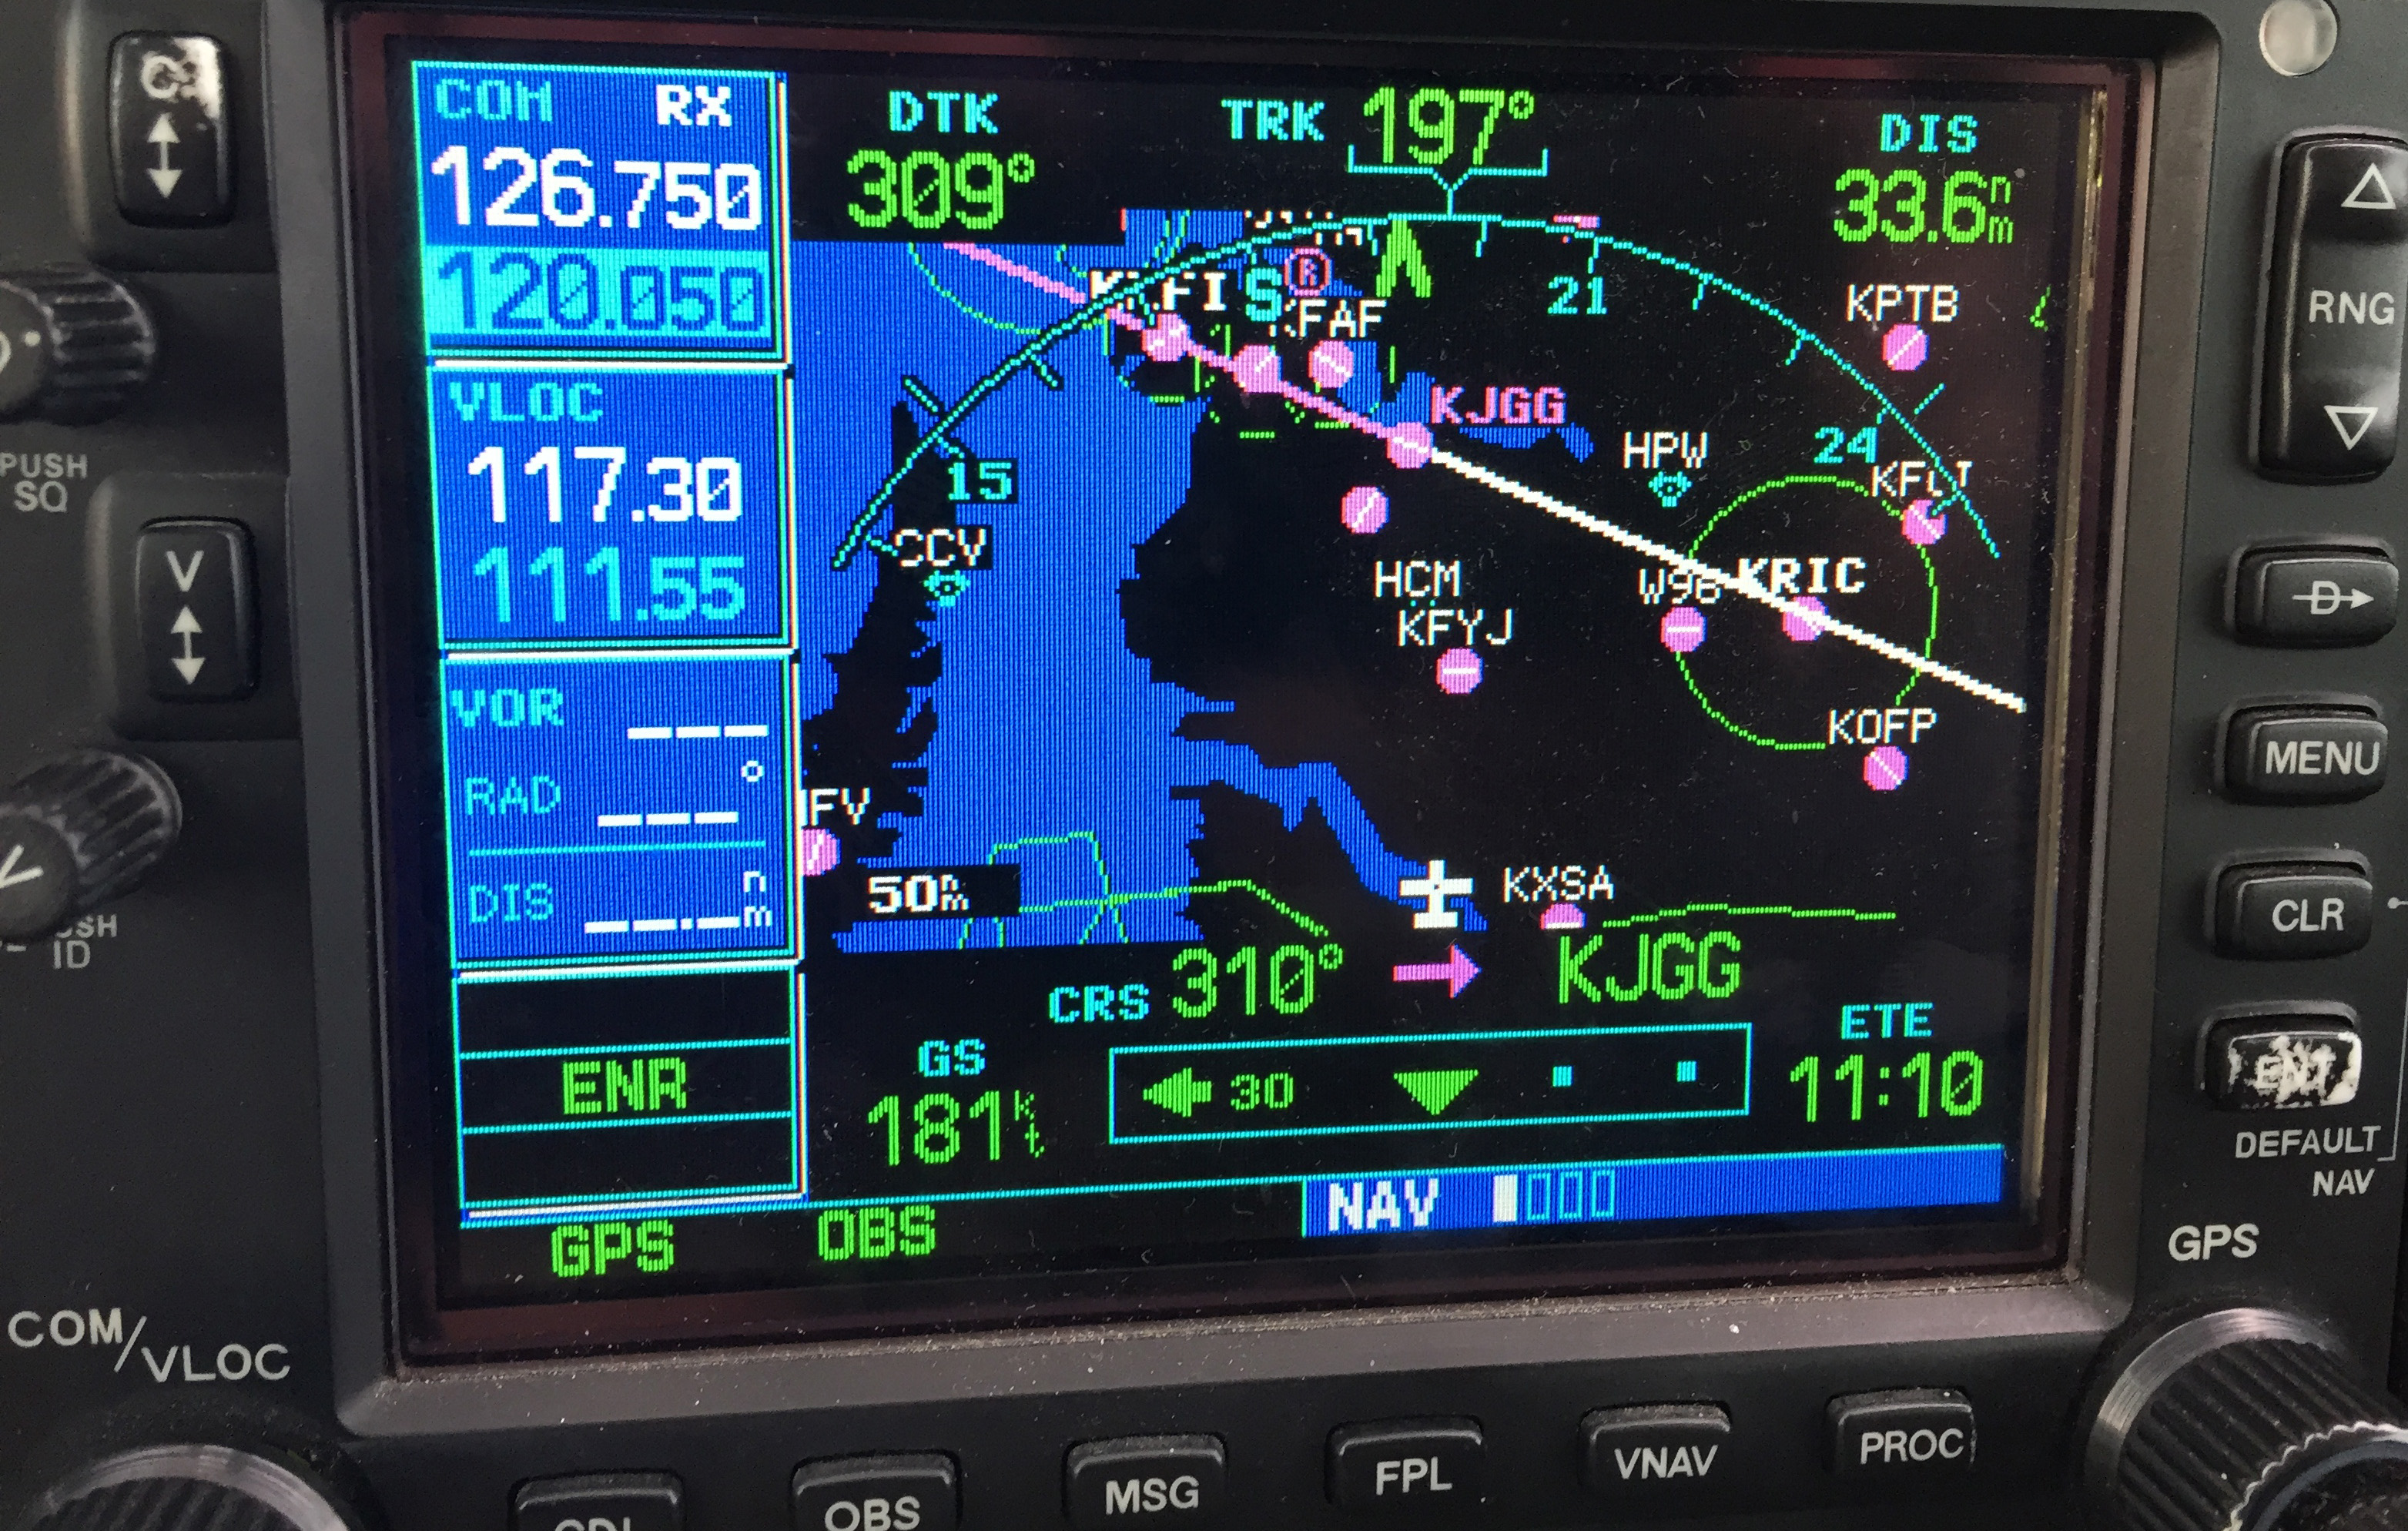
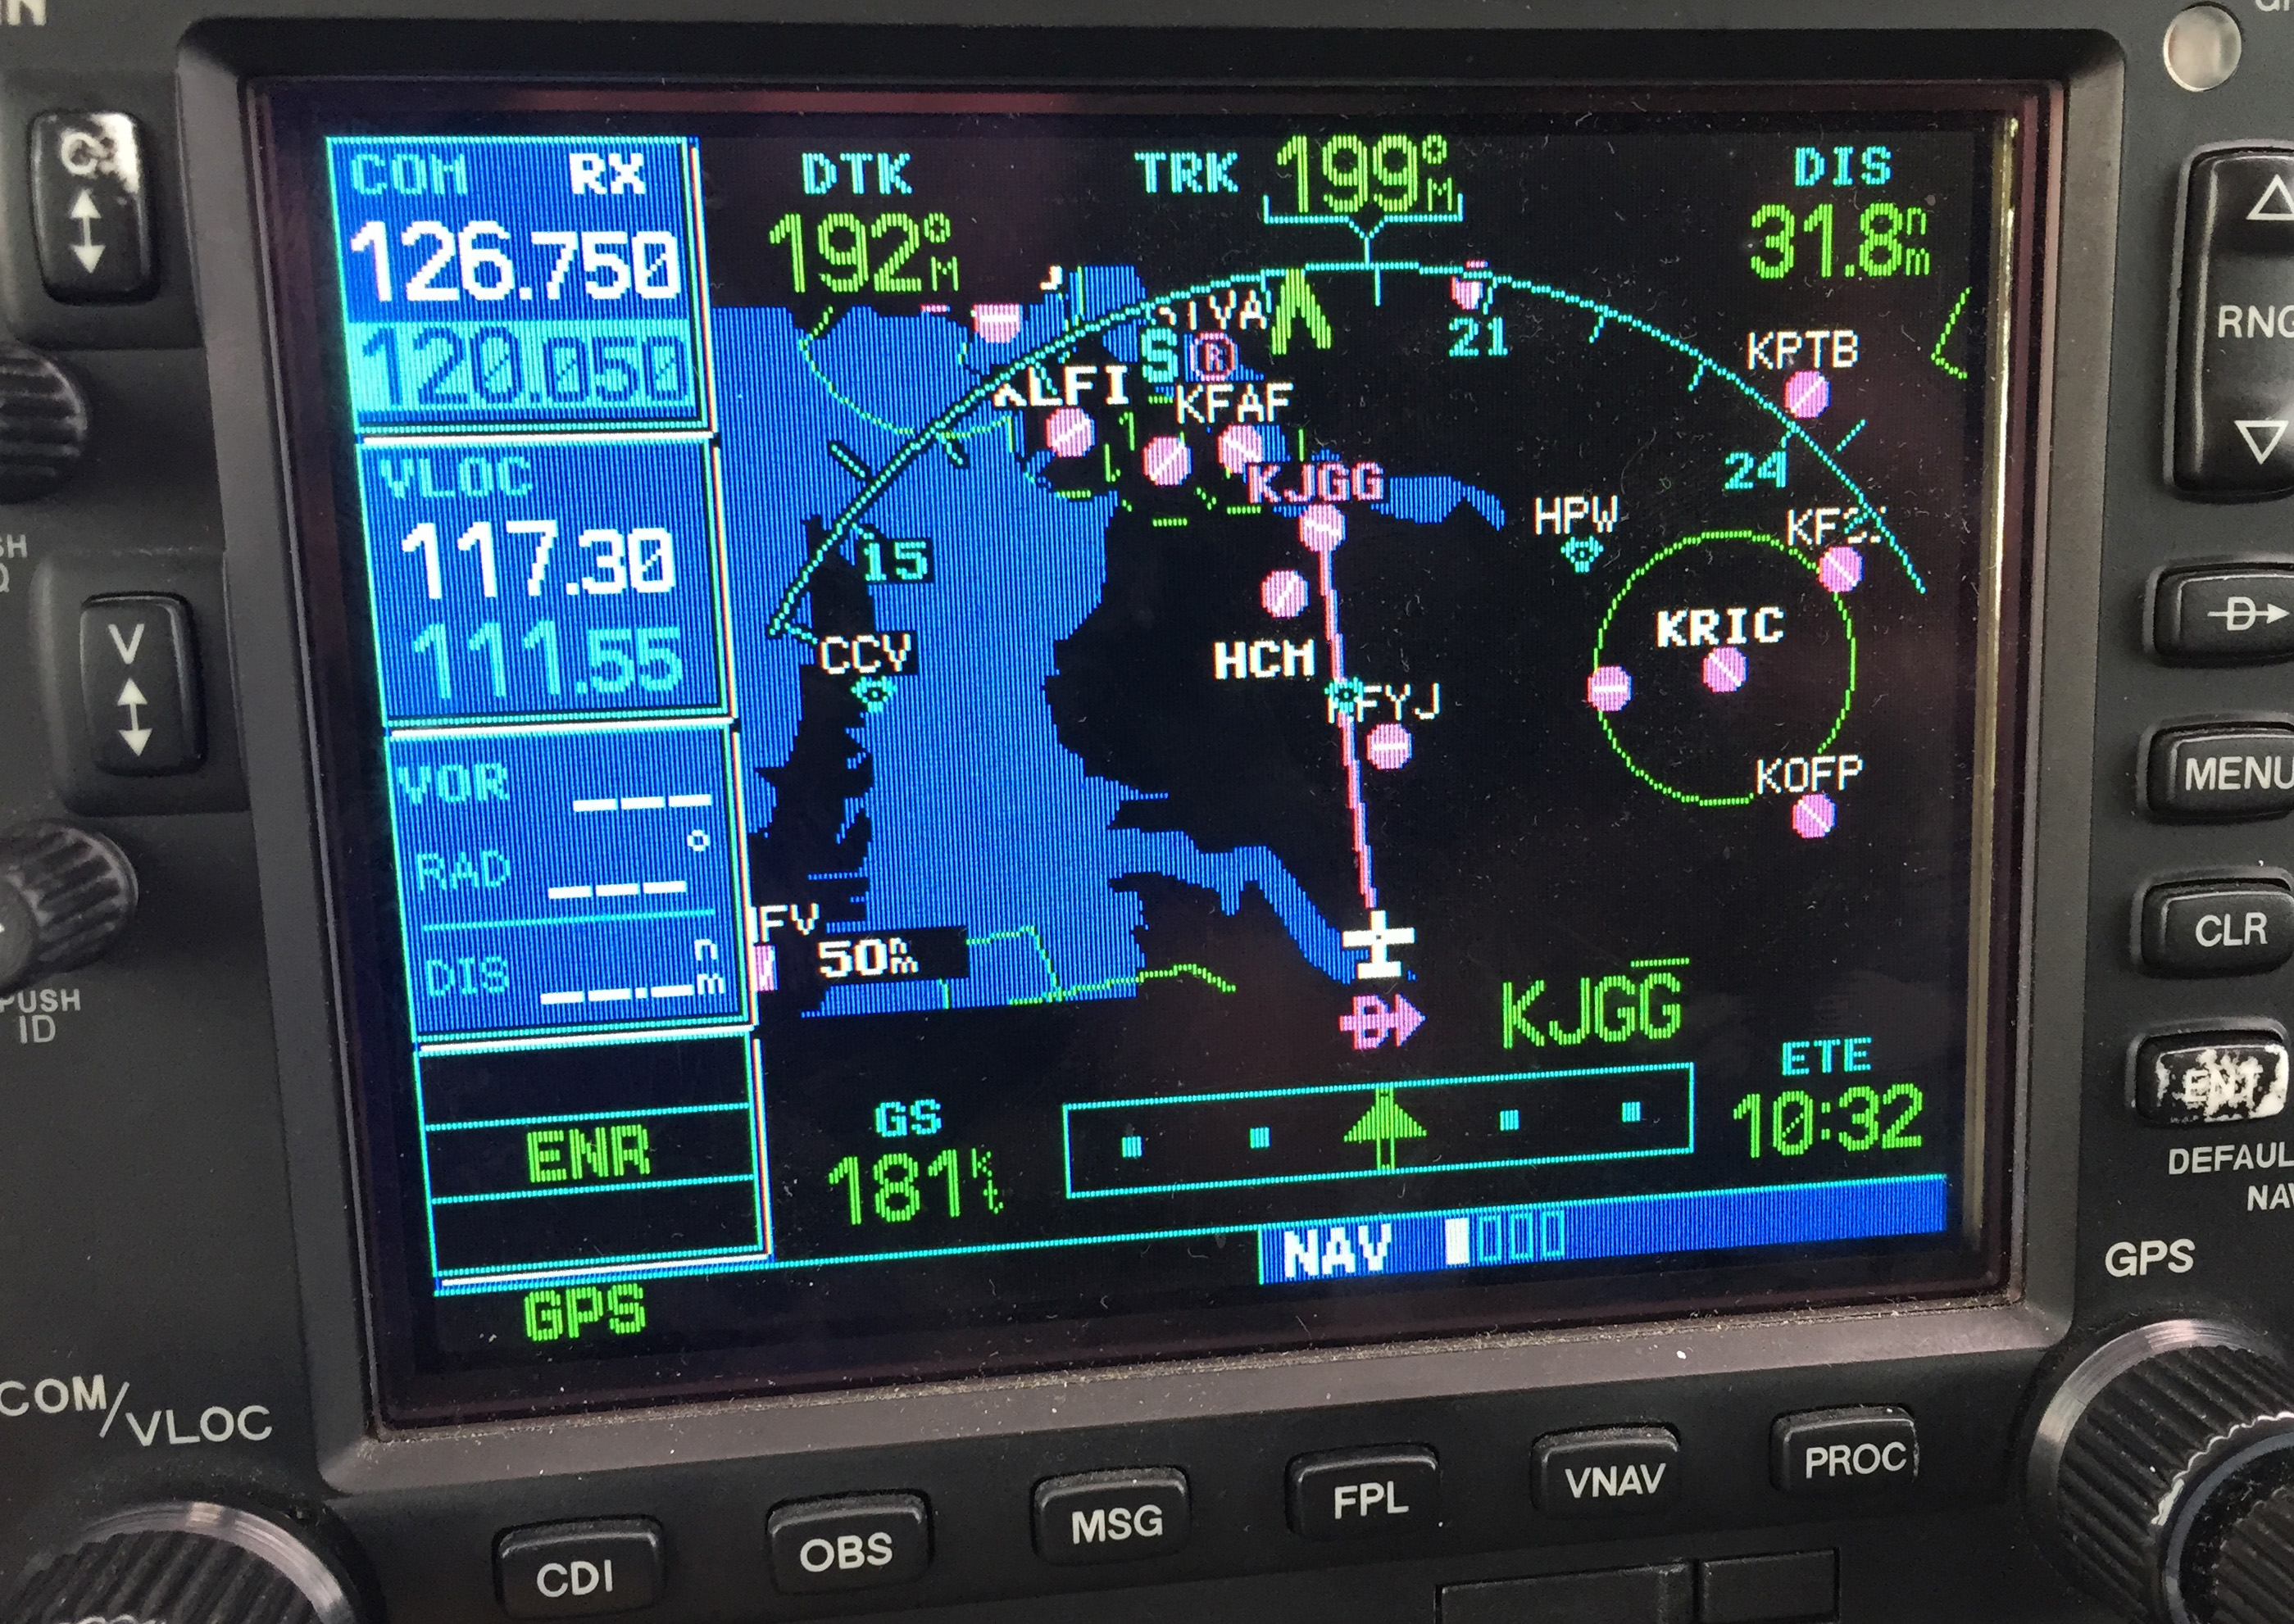
    The pictures below should help clarify how to use the OBS to assist in airport orientation.

    Step 1- Have the destination set as the next way point in your flight plan. In the picture below, The GPS is set to navigate direct to KJGG. Press the OBS button (circled in red) to engage the OBS mode.

    OBS 1

    Step 2- Once OBS is selected, use either the window on the screen (which should come up automatically when you press the button in step 1) or the OBS selec tor on your navigation head to select the inbound radial. In this example, I have selected 310 degrees, the landing runway at KJGG.

    OBS 2

    Step 3- The GPS now shows an inbound course to the airport of 310 degrees. It appears as a magenta line. The line serves as an excellent aid in airport/ runway orientation. Remember that this will not line you up perfectly with the runway, but it can still be extremely useful in planning a pattern entry or for getting your bearings.

    OBS 3

    Note: As shown below, If you press the OBS button again, the GPS will return to the navigation as previously set.

    OBS 4
    1. Ask for vectors to the airport/ runway: If you have VFR flight following or are talking to a tower equipped to provide vectors, asking for them can be a good choice. Although the controllers may not always be able to accommodate your request due to workload or equipment limitations, most will be happy to comply if they are able. Some pilots may feel silly asking for help, but my policy has always been that I’d rather feel silly for asking than look silly for being lost.

    In the case of the Asheville flight mentioned in the opening of this article, my solution was to ask the controller fo r direct to the final approach fix of the assigned runway. Upon arriving there, I had no trouble seeing the VASI and was in good position to fly the visual approach. If I had wanted to be positioned a little further out, I could have asked to fly to a different fix or simply asked to be cleared for the approach in lieu of the visual. Just remember to keep your intentions clear when communicating them to the controller.

    The best way to approach an airport day or night, familiar or unfamiliar, is with careful preparation. Having lighted landmarks picked out as well as being acquainted with the airport layout will pay off when it comes time to plan your pattern entry or find the airport on a dark night. Use the resources available to you to get you safely to your destination.

    Andrew Robinson is a 135 Charter Pilot and flight instructor in Pennsylvania.  He flies Pilatus PC-12s and instructs in Beechcraft Bonanzas.

    We’ve all been there. You’re flying into an unfamiliar airport at night, you’re having difficulty seeing the field, and trouble identifying the runway. Airports can be hard to identify for a variety of reasons, but approaching in darkness only makes it more difficult. Perhaps the airport is located in a densely populated area and the…

  • 3 Tips to Better Landings

    In my 3,000+ hours of flight training, I have developed some tips and tricks to help people fly better.  With teaching landings, I have 3 specific tips that will make smoother landings every time, guaranteed.

    A Good Pattern

    A wise flight instructor whom I would love to give credit to (but don’t know who it is!) once said that a good landing starts off with a good traffic pattern.  So true!  A good landing all begins with the setup.  This is true for a VFR rectangular traffic pattern or an IFR instrument approach.  Flying the proper speeds and being at the proper AGL altitudes helps immensely in making a good landing. Being at 600 feet AGL on a 1/2 mile final (or the alternative of 60 feet off the ground on a mile final!) makes it hard to make a good landing.

    Proper Use & Understanding of Pitch and Power

    Once flaps are used in the pattern, the plane is now on the back side of the power curve (or in the region of reverse command).  Power is now being used to control the plane’s rate of descent while pitch is being used to control airspeed.  The key is, both pitch and power work together, so if the pilot changes the power, he’ll also need to change the pitch and vice versa.

    The common mistake I see here is when the airplane gets low on final, the pilot tends to (quite naturally) pitch up.  All this does is bleed off airspeed and cause the airplane to sink faster.  The proper input would be to add power, then adjust the pitch for airspeed.

    Look Down the Runway

    Now that we have gotten to the point of the round-out and touchdown, it’s the most important part.  The best thing the pilot can do to make the best landing possible, is to look at the trees at the end of the runway.  When I worked with college students, I told them to find the owl in the trees at the end of the runway.

    The tendency is to stare at the pavement (or concrete) the whole way down to the landing.  When a pilot’s eyes are fixated on the ground, this destroys his depth perception and causes a level off too low to the runway, resulting in a 3 point landing and/or a bounce.

    By looking at the trees at the end of the runway, this gives the pilot much better depth perception and allows him to properly judge where to level off the airplane.

    The question now is when should the pilot start looking at the trees?  My recommendation is crossing the threshold of the runway.  For some, it works better to start looking at the trees when turning final.  Others, right before the level off.  Regardless, find that owl!

    In my 3,000+ hours of flight training, I have developed some tips and tricks to help people fly better.  With teaching landings, I have 3 specific tips that will make smoother landings every time, guaranteed. A Good Pattern A wise flight instructor whom I would love to give credit to (but don’t know who it…

  • Iridium Zoleo Allows In Flight Messaging

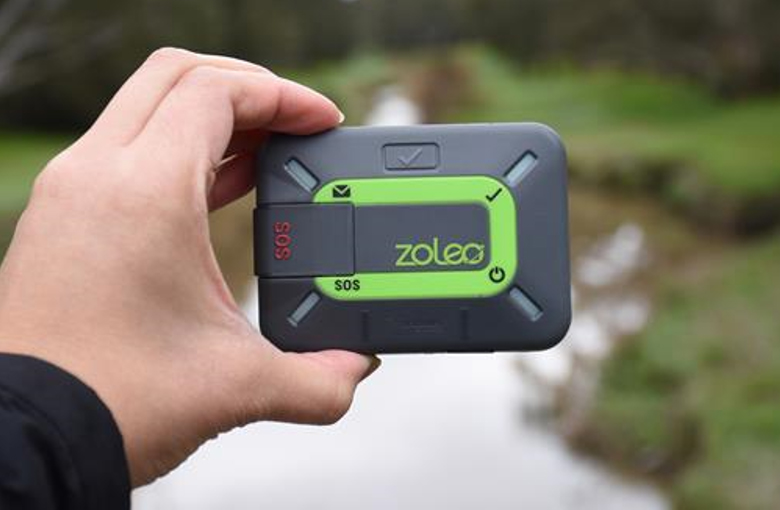
    Satellite communications company Iridium now has a really nifty little product called the Iridium Zoleo Satellite Communicator. Most pilots who fly newer Cirrus Aircraft will be familiar with the company name Iridium. Iridium manufactures the built in satellite phone that is an option in all Cirrus after 2012. The Iridium Zoleo brings messaging capability to any airplane in a cost effective and simple manner.

    The Iridium Zoleo is a device roughly the size of a walkie-talkie. It links up with the Iridium satellite network to send and receive messages and emails anywhere in the world (or air!). To make things easier, the Iridium Zoleo links with a phone via Bluetooth to a free app that allows the user to write a message directly from the phone and send through the device.

    The Iridium Zoleo is affordable at only $200. A plan has to be purchased in order to send messages, with 3 different levels of subscription offered: 25 messages a month for $20, 250 messages a month for $35, or unlimited messages per month for $50. Each plan offers a $6 upgrade to allow unlimited worldwide breadcrumbs and tracking.

    The Iridium Zoleo has a 200 hour battery life and is designed to be shock, dust, and water resistant. Plus, the device has a built in SOS that can be used anywhere in the world. So, you can take it rafting down the Grand Canyon, hiking in the Andes, flying over the Atlantic, or SOS if you are stranded in the middle of the Indian Ocean.

    Click here to read more about Zoleo and here to read more about the Zoleo plans.

    Satellite communications company Iridium now has a really nifty little product called the Iridium Zoleo Satellite Communicator. Most pilots who fly newer Cirrus Aircraft will be familiar with the company name Iridium. Iridium manufactures the built in satellite phone that is an option in all Cirrus after 2012. The Iridium Zoleo brings messaging capability to…

  • Mooney Enters the Training Market with the Mooney M10

    Earlier this week, Mooney announced they would be following competitors Piper (with their Archer DX) and Redbird (with their retrofitted 172 known as the Redhawk) into the training market with the Mooney M10 T and Mooney M10 J.  Mooney, which hasn’t manufactured a primary trainer since the Mooney M10 Cadet in 1970, is planning on putting Jet A burning Continental Engines in the new aircraft.  The mockup was unveiled at Airshow China.

    The Mooney M10 T is a 3 seat, fixed gear trainer sporting a Continental CD-135 engine.  At 135 HP, the initial design data claims the Mooney M10 T will be able to cruise at 140 KTAS at 75% power, allowing the Jet A engine to burn between 4-5 gallons per hour while holding 42 gallons of fuel.  As with other Jet A piston powered airplanes, the Mooney M10 T will have a Fully Automated Digital Engine Control (or FADEC) system.  This leaves just a single power lever in the cockpit, allowing the pilot to set a percent power and the FADEC computer will set the manifold pressure, prop speed, and mixture.

    The Mooney M10 J has a slightly bigger engine, the 155 HP Continental CD-155.  It also is equipped with retractable gear.  Initially, Mooney is predicting 160 KTAS at 75% power for the Mooney  M10 J.  The airplane will come as a two-seater, but will have a third seat as an option.  Mooney says that the Mooney M10 J will allow pilots to make an easy transition to the bigger and faster M20J that has been popular for many years amongst “Mooniacs.”

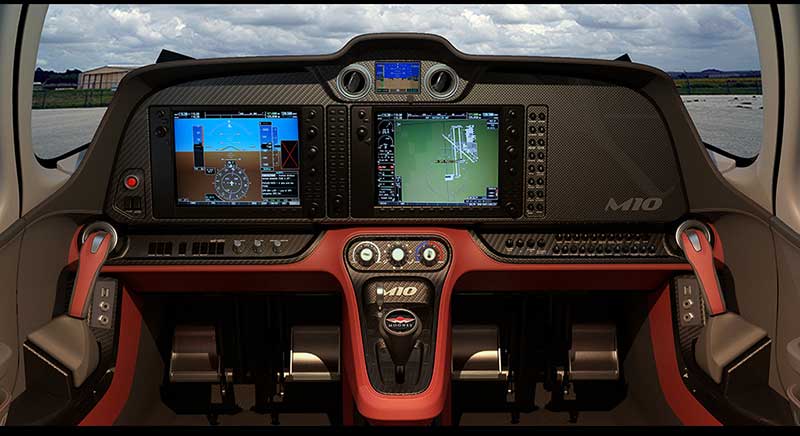
    Mooney M10 Interior

    In a new direction for Mooney, the Mooney M10 T Mooney M10 J will both be composite airplanes with side sticks, instead of the traditional sheet metal exterior with a yoke as Mooney aircraft have been in the past. Also venturing from the more powerful Mooney aircraft is the fact that the Mooney M10 T and Mooney M10 J will have two doors.  Remaining, though, is the swept tail that Mooney aircraft are known for.  Both airplanes will be equipped with Garmin G1000 panels, while the Mooney M10 J will also have the GFC 700 autopilot, marketing more toward aircraft owners rather than students.

    The only downside that I read about was the time between replacements for the engines.  For the CD-135 engine in the Mooney M10 T, time between replacement is 1,500 hours, whereas the CD-155 only has a 1,200 hour replacement time.

    Mooney expects certification and deliveries to begin for the Mooney M10 T and Mooney M10 J in 2017.

    Mooney M10T and M10J

    Information courtesy of AOPA and Mooney International.  Images courtesy of Mooney International.

    Earlier this week, Mooney announced they would be following competitors Piper (with their Archer DX) and Redbird (with their retrofitted 172 known as the Redhawk) into the training market with the Mooney M10 T and Mooney M10 J.  Mooney, which hasn’t manufactured a primary trainer since the Mooney M10 Cadet in 1970, is planning on…

  • Avidyne Vantage

    For years, Cirrus owners who have the Avidyne Entegra PFD and MFD have been clamoring for Avidyne to come up with some sort of upgrade. The Entegra, or EX 5000 system, is late ’90s technology and, though it still works, there will be a certain point in the future when it gives up the ghost. Avidyne still supports the Entegra system, but it’s hard for a Cirrus owner to see all this new technology coming on the market while not being able to upgrade the original Avidyne screens.

    Avidyne gave it a go in the late 2000s with a panel upgrade known as the R9. The R9 was a good system, but Avidyne was very slow on the release (rumors were the company wanted it to be absolutely perfect before releasing it, which frustrated Cirrus, who then switched to the Garmin Perspective panel, leaving Avidyne behind) which led to the R9 only being available as a very expensive retrofit to the Entegra system ($80,000-$90,000 for the system and install). Needless to say, there weren’t that many takers.

    Late in 2020, Garmin announced it had received certification to retrofit Avidyne Entegra equipped Cirrus Aircraft with the company’s G500 TXi displays, which gave new hope to G1, G2, and G3 Cirrus owners. The price tag wasn’t outrageous, coming in at $16,000 apiece for each display. The G500 TXi works with any possible GPS that can be installed in a Cirrus (GNS 430Ws, GTN 650s, GTN750, or the Avidyne IFD 540/440) and with the DFC 90 Autopilot (if the Cirrus is still equipped with an STEC 55x, the Autopilot would need to be changed to either a DFC 90 or a Garmin GFC 500).

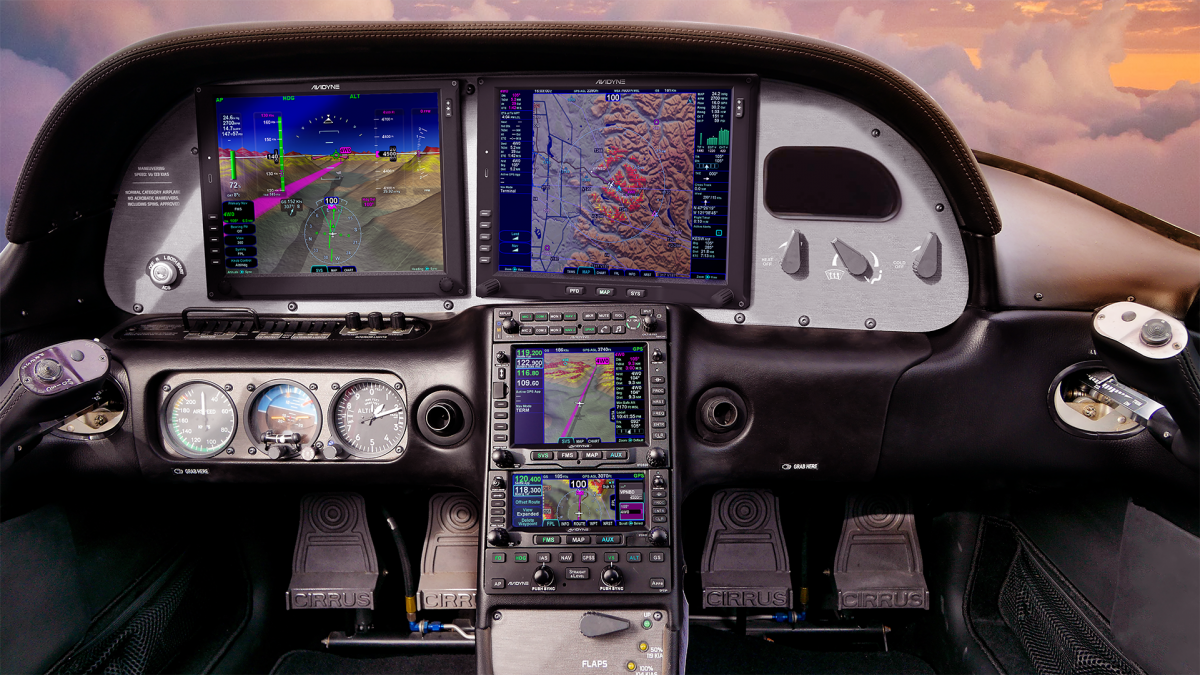
    Fast forward to June of 2021 and Avidyne re-enters the game with the Avidyne Vantage. After the R9 debacle, Avidyne has opted this time to go for a more simple approach. The Avidyne Vantage system changes out the Entegra PFD and MFD with bigger screens (12″; Garmin’s TXi units are only 10.6″) with high quality pixelation, synthetic vision, engine gauges, checklists, charts, a hybrid touch interface, and all the other information that was offered on the Entegra system, just all more modern and updated. The best news is that the system provides redundant reversionary mode, which was one of the biggest complaints about the Entegra system.

    The price tag comes in lower than Garmin, with each screen being priced at $12,500. The units will work seamlessly with the Avidyne IFD Series GPS units, though, as of this writing, it isn’t clear if the Avidyne Vantage will work with Garmin GTN 430Ws or the GTN 750/650. I would assume that the integration would be there, but I haven’t found any documentation stating that yet. DFC 90 Autopilot integration would be seamless, but not sure the integration with the STEC 55x or Garmin GFC 500.

    Avidyne says the Vantage will be fully certified in early 2022, but the company is taking orders now. Visit the Avidyne Website for more information.

    For years, Cirrus owners who have the Avidyne Entegra PFD and MFD have been clamoring for Avidyne to come up with some sort of upgrade. The Entegra, or EX 5000 system, is late ’90s technology and, though it still works, there will be a certain point in the future when it gives up the ghost….

Leave a Reply

Your email address will not be published. Required fields are marked *