Last fall, the Malibu & M-Class Owner’s and Pilot’s Association (MMOPA) announced a new program to encourage and enhance safety, the Master Aviator Program.
The MMOPA Master Aviator Program was designed as a system to recognize those in the Piper PA46 community who strive to become the best pilots they can be. Each year, those who have achieved each of the levels in the program will be honored at the MMOPA Convention (the 2020 MMOPA Convention will be in Tucson in the spring of 2020) by getting Wings pinned on.
What is the heart behind the MMOPA Master Aviator Program, you ask? Here’s a quote from the MMOPA Website:
This program is the result of MMOPA having identified areas of flight operation that need improvement to increase safety. It provides a path forward for training for the PA46 pilot, honors those pilots that elect to participate in the MMOPA Master Aviator Program, and rewards those pilots that progress upwards to ultimately reach the highest level (MMOPA Master Aviator).
The main focus areas of the MMOPA Master Aviator Program are pilot flight experience (flying more during a year increases skills), stall/spin awareness, and operations in the runway environment (improper aircraft handling during takeoff, landing, and go around, with a particular emphasis on rudder control).
The MMOPA Master Aviator Program tackles these three areas in each of the different levels of achievement: Aviator, Senior Aviator, and Master Aviator.
To achieve the Aviator Wings, a PA46 pilot must do the following:
Complete Initial Training with an Approved Training Provider
Fly 100 total hours in a PA46
Attend an Approved Mid-Year Training Event (M-Class, MMSTF, MMOPA Safety Standown, MMOPA Maintenance Standown, to name a few)
Attend the MMOPA Convention once in the last 3 years
No accidents/incidents in a PA46 in the last 3 years
To achieve the Senior Aviator Wings, a PA46 pilot must have received their Aviator Wings and do the following:
Completed at least one yearly Recurrent Training Event
Attend the MMOPA convention once in the last 3 years
No accidents/incidents in a PA46 in the last 3 years
To achieve the Master Aviator Wings, a PA46 pilot must have received their Senior Aviator Wings and do the following:
Completed at least two yearly Recurrent Training Events
Fly 300 total hours in a PA46
Receive a tailwheel endorsement
Attended the MMOPA convention once in the last 3 years
No accidents/incidents in a PA46 in the last 3 years
To incentive PA46 pilots, MMOPA offers a $400 voucher to program participants to accomplish the Aviator Mid Year Training, the Senior Aviator Upset/Recovery Training, and the Master Aviator Tailwheel Training. A PA46 pilot is only eligible for one voucher per year.
I received the Master Aviator Award at the MMOPA Convention this year. All told, there were close to 40 participants who received one of the three levels of achievement at the MMOPA Convention in Amelia Island, FL this year.
Interested in applying to be a part of the MMOPA Master Aviator Program? You can find out more information on MMOPA’s website.
Skyvector has changed it’s look. The aeronautical chart website is now offering flight plan filing capability. In order to gain the ability to file flight plans, the user has to form an account first.
Personally, I really liked how Skyvector had a simple interface before they changed. As an instructor, a lot of times, I go to multiple airports on one flight. It was really nice to just plug in airport IDs to check distances and heading information on Skyvector. The new format is a little clunky as the website has made it a little more difficult to do what it did best before.
Did the aviation community need another venue to file flight plans? Not with Foreflight, Garmin Pilot, and WingXPro leading the way in the app market. Skyvector was smart in not trying to develop another app to compete with the big boys.
Will the new Skyvector last? We’ll see. I’m hoping they’ll go back to the way they used to be, but we’ll see. I may use it enough to come around to liking it.
The Bluebonnet Fly-In at Redbird Skyport has been rescheduled due to weather and the recent flooding in San Marcos. The new date for the Bluebonnet Fly-In will be Saturday, June 6th from 10am-4pm.
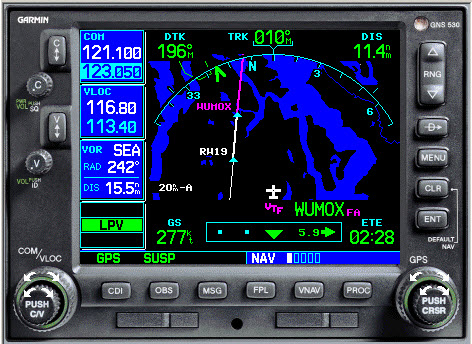
Hank Gibson of Texas Top Aviation will still be presenting on Garmin 430/530 Approaches this Saturday at 2pm in the large conference room at Redbird.
He’s very sneaky, creeping unexpectedly and attacking after the propeller begins to turn.
He’s very cunning, veiling his intentions until, BOOM, he attacks.
Beware of the Lunch Monster!
Whenever I am doing a full day of training (which is usually how transition training courses are planned out, in full day sessions), I always plan a lunch stop. My metabolism has the speed of a rocket ship, so I get hungry and need some sustenance in the middle of the day. I have a running list of airports to stop at that have good lunch spots at them or nearby, so my customers and I usually end up at one of those airports.
Almost without fail, if a customer is having an excellent flying morning, nailing all the procedures, picking up all the techniques, and overall, flying pretty well, then eats lunch, the afternoon doesn’t go quite as well. Doing some of the same things we did that morning, but the customer’s performance isn’t quite as good. Most of the time, it’s just a brain lockup or landings aren’t quite as squeaky as they were in the morning.
Part of it is fatigue after flying for 2-3 hours in the morning. The other part is what I call the Lunch Monster. Eating a big lunch can sap away brain power and cause a person to lose energy around 2-3pm, leading to an afternoon lull (or the Lunch Monster attacking!).
Diet contributes to energy levels too. “Eating a lunch that is too big is the most common reason for feeling sleepy in the afternoon,” says Rebecca Solomon a nutritionist at Mount Sinai Hospital in Manhattan. “All your energy goes into digesting the enormous meal.”
The goal is to keep the body’s Cortical and Cortisone levels even since they’re the hormones released by the body in reaction to stress–they produce the fight or flight response. Their levels are elevated when you have sugar, caffeine and processed food, so you feel awake and energetic. But a few hours later, when those levels drop, you’re sluggish.
Solomon recommends eating a meal that’s balanced with healthy fats (from olive oil or avocados, for instance) with protein and healthy carbohydrates (whole wheat bread or pasta). The portion will vary for people of different sizes, but a general rule is you should be hungry about four hours after the meal.
Another healthy eating habit: Consume small portions of foods throughout the day, including almonds, carrots and hummus and fruit. Enjoy lunch around 1:30 or 2 p.m., just before the time you normally feel fatigued.
Now, most of the stops on my list of restaurants don’t fit the bill of healthy fats and healthy carbohydrates (plenty of protein, though, especially the BBQ joints). For those days, bringing along a snack like almonds or dried fruit is a great idea to munch on mid-afternoon. Trimming down the amount eaten at lunch helps a lot too.
So, the next time you have a long day of flying or training, beware the lunch monster and prep some good snacks when your flight instructor says you’re stopping for BBQ!
Type Clubs Lead By Example with Standard Operating Practices
This article appeared in the May 2019 edition of EAA’s Sport Aviation Magazine. It is used with permission. For other articles by Charlie Precourt, please visit EAA.org and join for a full subscription.
Imagine a year when there are no fatal accidents in general aviation. Does that seem impossible? The airlines achieved that many years ago, and so can we if we focus on the right things in our safety pro- grams. In fact, the overall trend in GA accident rates over the last few years is very encouraging. AOPA’s Air Safety Institute published its annual GA Accident Scorecard recently (see www.EAA.org/ extras), revealing fatal accidents from 2008 to 2017 are down more than 30 percent. Nevertheless, there were 185 fatal accidents in 2017, so we still have a long way to go. But, there are many developments in safety programs across GA that can keep the trend going.
One such development that I’ve advocated through a couple of type clubs is establishing standard operating practices (SOP). When I flew for both the U.S. Air Force and NASA, we had what we called standard operating procedures. They were the law for our flying. That is, we had to follow them procedurally because the folks that paid our salaries said so. The objective was to ensure we all used the same playbook, minimizing the risk that one of us might develop a bad in-flight habit that increased risk to the organization.
One way to think about SOPs is to recognize the difference between procedure and technique. For example, you have to follow the manufacturer’s pilot’s operating handbook (procedure)where it says to lower the landing gear before landing. If you don’t, you are in for a bad day. However, it does not tell you exactly when to lower the gear; that’s left to technique.
In the middle, between procedure and technique, is a best practice. In this example, lowering the gear just before the final approach fix is a “standard practice.” It is the generally accepted “best” place to lower the gear. In GA, however, aircraft owners don’t generally answer to a boss, so I prefer the term practices instead of procedures.
However, whether or not someone is paying us to fly, following best practices just makes sense. If you have a good set of practices, they enable you to do things the same way every time, leaving lots of brain cells to manage the unusual, the things that might go wrong. The safest approach to accomplishing a flight task is one that leverages consistency. On the other hand, if you are inconsistent, doing flight tasks differently each time, you’ll always be struggling to keep up. So, in my involvement with the safety committees for both the Malibu Mirage Owners and Pilots Association and the Citation Jet Pilots Association, there has been broad acceptance of recently developed standard operating practices.
The good news in this development is that a culture of safety is growing broadly across most sectors of GA through these type club initiatives. Perhaps more importantly, there is much to learn from each other about the effectiveness of these various initiatives. EAA has seen a four-year drop of 47 percent in fatal accidents among homebuilts! So, there must be something right going on there — a major focus on appropriate transition training before flying a new homebuilt (as a standard operating practice) is paying off.
So, what is covered in the SOPs these type clubs have developed? The following outlines the kinds of standard practices other type clubs have set up and represent SOPs you could establish for yourself regardless of the type of aircraft you fly. You just have to fill in the blanks for your particular type and commit to sticking to them in your flying. These are notional and are practices (not mandatory procedures). They don’t tell you how to fly your aircraft; they give you things to think about when you do. If you take a bit of time to set your own SOPs and then stick with them, you’ll be a far safer pilot. Here are some ideas:
Duty Day
Set the maximum number of hours of flight time during a calendar day and rest hours off between flying days. One example is a maximum of eight hours in the air and a minimum of 10 hours off until flying again.
Cargo
Establish best practices for what you will carry as cargo. One example is no lithium batteries in the baggage compartment.
Flight Planning and Preparation
What are your limitations for the types of flight you’ll take on? Consider SOPs such as designating a suitable alternate airport for all flights. Another might be for first flights after significant maintenance, such as no flight at night or in IMC until a day-VMC functional check flight has been done.
Runway Field Length Guidelines
Establish an appropriate minimum field length for your aircraft and commit to not going into shorter fields. Consider sea level operations and high-altitude airports as well.
Surface Operations
What should be your maximum wind conditions for taxi, takeoff, or landing? Maximum acceptable crosswinds on landing? Set them in your SOP and stick to them.
En Route
Consider establishing practices like no non-operationally necessary conversation below 10,000 feet MSL, during any segment of an approach procedure, or during the last 1,000 feet before leveloff during climb or descent. Also consider declaring “minimum fuel” when the fuel state becomes less than fuel to destination plus 45 minutes at current burn, even if flying day VFR.
Approach and Landing
Consider establishing personal minimums in your SOPs for things like visual approaches. Perhaps use a 1,500-foot ceiling and 3 miles’ visibility for day and 5 miles for night, even though these exceed the FAA’s requirements.
Pilot Limitations, Training, & Currency
FAR Part 91 rules allow us to fly with pretty marginal levels of currency. Consider setting your own SOP to something more appropriate for the kind of aircraft you fly and the kind of flying you do in it. For example, consider these ideas as SOPs:
If you have less than 100 hours of time-in-type or have not flown at least 15 hours as pilot in command in the last 90 days, use a minimum planned fuel reserve of one hour.
Also, if flying IFR in this situation, use a minimum visibility for takeoff of 1 mile.
On instrument approaches, increase the published minimums by one- half mile visibility and add 200 feet to the decision altitude or minimum descent altitude.
Perform landings at a weight that allows a full stop in 60 percent of available runway length.
Consider an SOP that establishes you will fly with a CFI on a refresher flight before flying as pilot in command if you have not logged at least an hour of flight time and one takeoff and landing in an aircraft of the same type within the preceding 45 days.
Maneuver Standards
Wherever there are “techniques” associated with things like takeoffs and climbs, cruise, use of autopilot, power settings, and approaches and landings, you can write down your preferred technique as your own SOP. Describe each maneuver in enough detail (speeds, altitudes, power settings, configurations, etc.) to define a routine you will use each time. This ensures you fly consistently each flight and leverage the power of the standard operating practice, that is, to give you the bandwidth you need should you encounter an unexpected event or an emergency.
SOPs are among the exciting concepts underway to make safety programs work for us. Hats off to type clubs like MMOPA and CJP and many others that are taking the initiative. But even if you’re not in this kind of group, you can still set up your own SOPs. Let’s all look forward to our first year in GA without a fatal accident — and let’s make it soon! Fly safe!
Charlie Precourt is a former NASA chief astronaut, space shuttle commander, and Air Force test pilot. He built a VariEze, owns a Piper JetPROP, and is a member of the EAA board of directors.
This is Part 2 of the Proper Cross Country Flight Checklist article. To read Part 1, click here.
Airplane Covers
If you’re going to be leaving your airplane outside at your destination, make sure you have proper covers and plugs to protect it while you are gone. A friend of mine forgot to put his pitot cover on his airplane while it was parked outside and had his departure delayed because of a mud dauber which had moved in while the airplane sat on the ramp.
An example of a pitot tube blockage taken from www.student-pilots.com
Tie-Down Ropes
Depending on your destination airport/FBO, there may or may not be tie down ropes available on the ramp. It isn’t uncommon for there to be tie down loops, but no ropes. I generally try to carry a set of ropes in the airplane and even my own set of chocks. If you are going to a fly-in or landing at a private strip, steaks with tie down ropes can be very useful as well. Don’t forget to take your ropes and chocks with you when you leave, though. Ropes and chocks which are left unattended can cause problems for airport machinery (plows) and other airplanes.
Paper and a Pen
Back to basics! Don’t forget to bring a pen/ pencil and something to write on to keep track of clearances and frequencies.
EAPIS/ Boarder Crossing Procedures
If you are planning to fly across the U.S. Border, you will need to have filed the proper paperwork and make sure to bring along your passport/greencard. If you want to fly into Canada everyone on board the airplane is required to have a passport.
Basic Tools
You never know when you may need a screwdriver or some pliers. Having a small toolbox which you can throw in the airplane could be a life saver.
GPS
If you have a GPS, make sure that your data base is up to date.
Camera
Pretty self explanatory…but, don’t forget the camera charger!
Currency
Look through your pilot logbook and the airplane logbook and make sure that everything is up to date. If you need to get an IPC or a BFR done before you leave, give yourself some buffer time in case you have to reschedule.
Other Considerations
Sometimes it makes sense to go to a larger airport despite having to pay additional fees and higher gas prices. Often, if I am traveling at night or after regular business hours, it is worth the extra expense to know that there will be assistance available should I need it. It also isn’t always necessary to get a hotel…there are airports such as Noble County, Ohio (I10) that have beautiful campsites available on the airport. If you like camping, it can be a fun alternative to shelling out the cash for a hotel and rental car.
Camping out next to the airplane can be a fun way to spend the night.
Finally, I like to take the airplane out for a short flight and make sure that everything is working properly before I bring the family and get everything loaded up. (Plus, it’s a perfect excuse to go for a little joyride.) I’d much rather find out that the battery is dead or the plugs are fouled when I have time to fix the issues. If possible, do your test flight on a day when your maintenance shop is open so you can get any problems addressed immediately. If you haven’t done much cross country flying or if you are a little rusty, ask a flight instructor or another pilot to look over your planning. There is also nothing wrong with having an instructor or experienced friend come along on the first few trips until you become more comfortable doing it on your own.
An approach into Farmer’s Cay in the Bahamas.
In my opinion, cross country flying is one of the most rewarding things a pilot can do with their certificate. The view available from the window of a general aviation airplane is so different than the one you get out the window of a car or a commercial airliner. If you’re willing to invest the time and money, you’ll get a lot more out of your trip than a few hours in your logbook. So, what are you waiting for….haven’t you always wanted to go to Oshkosh?
Andrew Robinson is a 135 Charter Pilot and flight instructor who lives with his wife and 2 daughters in Pennsylvania. He flies Pilatus PC-12s and instructs in Beechcraft Bonanzas.
I have the blessing (same say it’s a curse) of being a tailwheel pilot. I did my tailwheel training in a Citabria and have gathered about 400 hours over the years in Citabrias, Super Cubs, and Maules (don’t judge all tailwheel airplanes by a Maule, by the way. The Maule is it’s own unique animal). The blessing of being a tailwheel pilot is that it greatly enhances my stick and rudder skills for all airplanes.
No matter what airplane you fly, basic stick and rudder skills are always important. At some point during a flight, the rudder will need to be used, even if you have an airplane that has a yaw damper. Rudder use is vitally important in the takeoff and landing phase, especially if you fly an airplane that generates a lot of torque on the takeoff roll. Rudder in that phase of flight is pretty evident, because if the rudder isn’t used, you’ll go off the left side of the runway.
Where I want to focus is rudder use in the landing phase. As an airplane comes down final, there are several forces that are be acting on the airplane. When it’s bumpy, updrafts and downdrafts are moving the plane up and down and all around. To correct for a bump that sends the airplane into a roll, aileron is added in the opposite direction of the roll. That aileron input also induces adverse yaw, pulling the nose of the airplane in the opposite direction that the pilot is moving the ailerons.
If a pilot isn’t using his feet correctly, then the nose of the airplane will wallow around through the air as aileron inputs are used. The tail is also moving around quite a bit, so the pilot might not “feel” the yawing moment, but the passengers in the back seat certainly will.
The other advantage that comes with proper rudder usage on short final is the airplane is more responsive to control inputs. When utilizing both the ailerons and the rudder, a pilot is able to fly the airplane much more precisely and control it much better.
This doesn’t mean you have to be staring at the turn coordinator the whole time down final. In fact, that’s exactly what you don’t want to do. Your eyes need to be outside the airplane. Just get in the habit of stepping on the rudder whenever you move the ailerons on final and eventually, you will feel what your airplane is doing. Don’t step on the rudder as hard as you can, but slight pedal pressure in the direction of aileron input will make a big difference.
Rudder is also vitally important for landing in a crosswind no matter that airplane. Crosswind landings are a learned skill that take a lot of practice to perfect. There is also a lot of confusion as to what control input does what during the landing.
Here is the simplest way to picture a crosswind landing and what the controls do:
Aileron-When performing a crosswind landing, the ailerons keep the airplane over the centerline. If the airplane is drifting to the right of the centerline, add left aileron to bring it back to centerline, then keep enough aileron control pressure in to keep the airplane over centerline. In a perfect crosswind landing, the main tire on the windward side will touch down first. Left crosswind means left tire touching first.
Rudder-When performing a crosswind landing, the job of the rudder is to straighten the nose to point down the runway. You will not be coordinated in a crosswind landing, you will be slipping, which is the goal. So, with a left crosswind, you will be inputting left aileron to remain over the centerline and you will also need right rudder to straighten the nose. This also prevents the airplane from actually rolling in the direction of the aileron input.
If you remember for a crosswind landing: “Aileron into the wind to stay over centerline, opposite rudder to straighten the nose.” Too much aileron and the plane will drift into the wind. Too much rudder and the nose will yaw in the opposite direction.
Rudder is very important, even in our day and age where a lot of general aviation airplanes have yaw dampers. Our feet only have a job for a short period of time, but that is the most critical time. An excellent way to get more proficient in rudder use is to go get a tailwheel endorsement. If you are in the central Texas area, check out TacAreo in Fredericksburg, T82.