Flying To Mexico

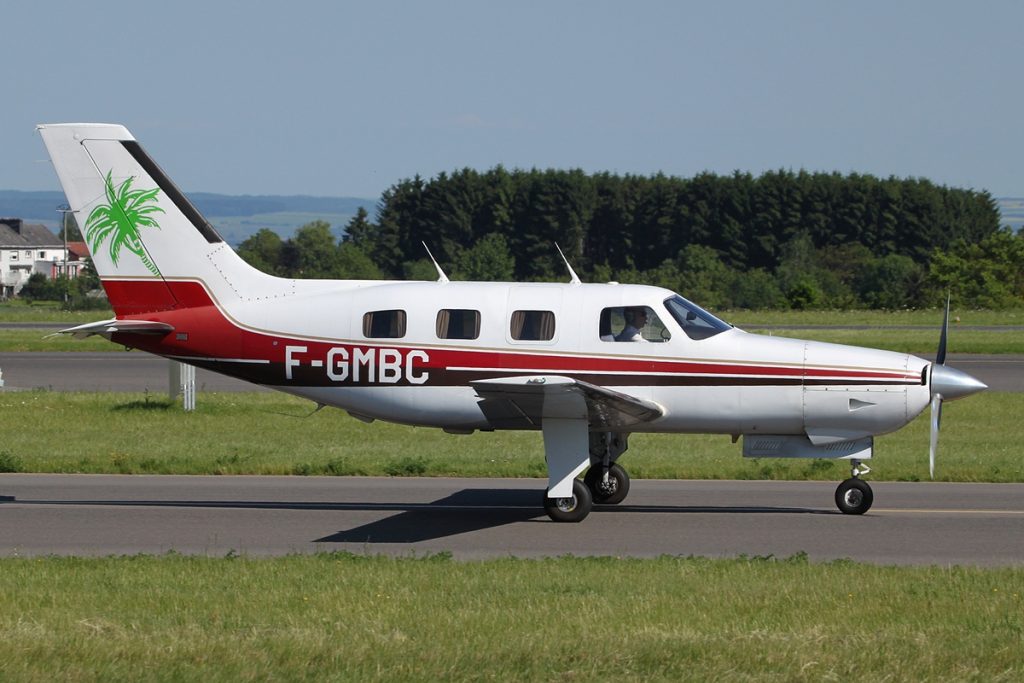
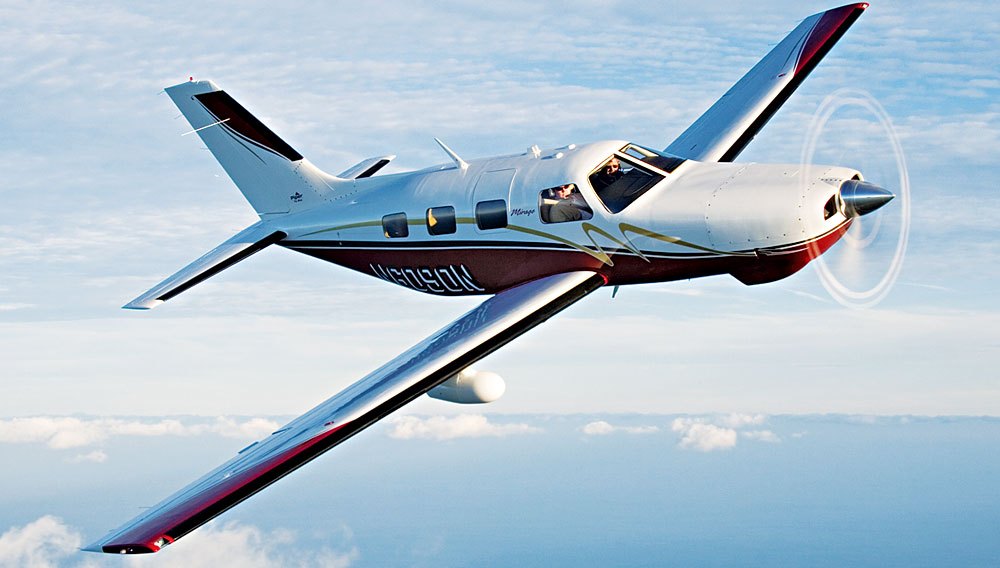
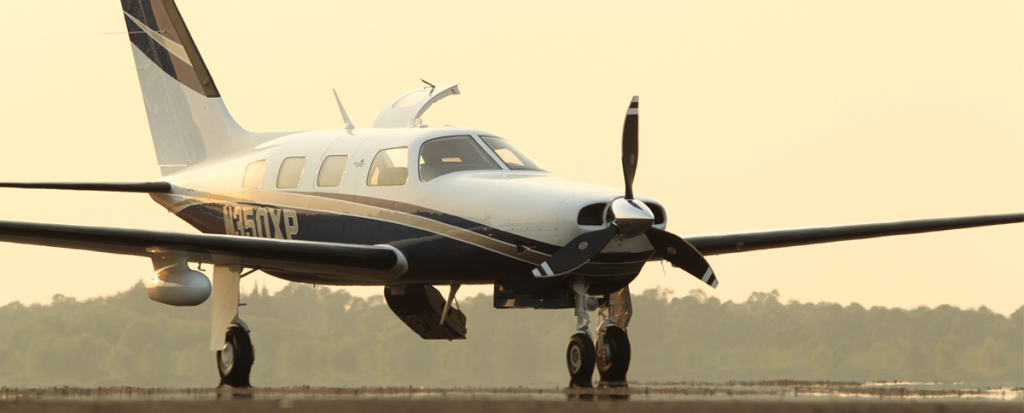
I took a Piper Malibu to Cabo San Lucas a few weeks back.  This was my second trip flying to Mexico, but the first where I arranged everything.  Cabo is a beautiful place and the MMSL airport is a fabulous facility. For those who haven’t been fying to Mexico before, MMSL is the place to go.  The folks there are extremely helpful and do most of the paperwork for you.  You just have to pass along your information to them.

Mexico Flying

Flying to Mexico and back out is different than flying in the US.  First of all, don’t forget your passport. The authorities on both sides frown upon that.  You’ll probably get sent back to the US (or sent back to Mexico if you are on your return trip).  Your aircraft also needs, Mexican insurance (talk to your US insurance agent) a radio license, and a customs decal.

Second, you’ll have to file an ICAO specific flight plan for flying to Mexico.  This is available on Foreflight now, but I really like Fltplan.com’s way of doing it.  I don’t fly internationally enough to remember what everything means, but Fltplan.com does a great job of walking pilots through the the different classifications.  It’s almost impossible to get confused.

Third, you have to fill out an eAPIS form.  This has to be done at least 24 hours prior to departure from the US, but it can be done as far in advance as you’d like.  If your departure time changes or your passengers change, you can edit the eAPIS form to bring it current.

Flying to Mexico IFR is a lot simpler than flying VFR.  I have only flown IFR and it is very easy.  I’m already on a flight plan, already squawking a discreet code, and already on radar, so there really isn’t any way I can mess up the ADIZ penetration.  I really recommend going in and out of Mexico IFR instead of VFR.

Once you land in Mexico, you have to close your IFR flight plan.  The tower doesn’t do this for you.  After clearing customs, you’ll have to pay a landing fee and sign your flight plan confirming you have arrived and closing it out.

When departing, you have to file another eAPIS 24 hours in advance.  Wherever you plan on clearing Customs in the US, you’ll need to call the Customs office no less than 1 hour, but not more than 23 hours before arrival.  It’s called an Advanced Notice of Arrival.

You’ll need to fill out a paper flight plan before departing, clear customs again to leave, then away you go.

There are a lot of really fun getaways in Mexico and flying there doesn’t have to be difficult.  When you have the right information, flying to Mexico can be a breeze!

Similar Posts

  • Cessna TTx Production Ceases

    Sadly, in January, a pretty great airplane was put out to pasture.  Textron (the conglomerate that now owns Cessna, Beechcraft, Hawker, and Lycoming) announced it was ceasing production of the Cessna TTx.  With the end of the Cessna TTx production, an airplane that was the main “competitor” to Cirrus (if you can call it competition; Cirrus consistently outsold the Cessna TTx by a wide margin each year), it leaves the SR series to stand alone atop the High Performance piston single market.

    I got to go through Cessna’s FITS Accepted Instructor (CFAI) course back in 2012 and have flown in the Cessna 350 and 400 (which is what they were known as at the time; the Cessna TTx name came around in 2011) for about 120 hours.  I really like the airplanes.  I’m partial to the Cirrus, but the Cessna 350 & 400 are fast airplanes and great for 1-2 people.  I flew a 350 (the non-turbo charged version) from New York to San Antonio last fall and routinely saw 170 knots at 12 GPH.

    Columbia started out making the 350 & 400 (the turbo-charged version) in the early 2000s, but went bankrupt in 2007.  Lancair started Columbia to make a certified version of their popular kit planes.  If you see a Lancair ES floating around, you would swear it’s a Columbia with only 1 door.  Cessna bought the design from Columbia in 2007 to begin manufacturing the airplanes themselves.

    Cessna then made a huge mistake as they moved the production facility from Bend, Oregon to Mexico. Production completely halted in 2009 as the planes coming out of Mexico were found to have defective composite work.  The sales never really recovered, even though Cessna put the Garmin G2000 panel in the Cessna TTx, complete with a touchscreen key pad.  A FIKI system was added as an option in 2012.

    A prospective buyer can still get a great value on a used 350, 400, or TTx, as they are valued a little lower than a Cirrus.  The 350, 400 or TTx all make excellent single pilot or two person speedsters with very comfortable amenities.

    Information for this article was taken from Flying Magazine’s website.

  • Flying the Hudson River Corridor

    Ever since I moved out to the Philadelphia area, the Hudson River corridor in New York City has become one my favorite places to fly. It’s hard to overstate the beauty of the city from low over the river. Every time I have a family member or friend come to visit, I try and take them over to see the city from the air.

    Each time I fly up the river I can’t believe that we are actually allowed to do so, flying below the tops of the buildings and close enough that you feel that you could reach and out touch them. The draw back to the Hudson River Corridor is that it can be busy, intimidating, and confusing. However, with some reading and preparation, the Skyline flight is easy to do and extremely rewarding.

    Having the right weather is an important first step. The second step is try to arrive during ideal lighting conditions. If possible, select a smooth, calm day to make it easier to maintain a track down the correct side of the river. I always try and target arrival at the city around sunset. The view is spectacular any time of day, but having the lights from the city while the sun is just setting gives the best viewing. I’ve also flown over and done the whole flight after dark, which is always spectacular.

    View of the World Trade Center

    The first method of flying the river is to utilize VFR flight following. If the controllers aren’t too busy, they will provide advisories to aircraft that request the Skyline. The nice thing about doing it this way is that the controller will clear you into the NY bravo airspace and keep you above the traffic flying the Skyline in the VFR corridor below. This is the method that I have always preferred as I enjoy the added benefit of the traffic advisories and it’s nice not to worry about position reporting on the radio.

    If you want to get flight following, head toward the corridor and request the Skyline route with NY Approach. (Remember to stay clear of the Bravo until you’re cleared in!) Once you’re cleared into the Bravo and approaching the corridor, they will hand you off to Newark/ LaGuardia Tower for traffic advisories over the river. I like to approach from the south and ask for a 180 over the George Washington Bridge. This allows me to fly past the city a second time before exiting the corridor over the VZ (Verrazano Bridge) and heading back toward home.

    In red is the path I typically fly. I descend to 1400’ and fly toward the APPLE intersection picking up the shoreline around Staten Island and hugging it until crossing the middle of the VZ. Newark normally clears me into the Bravo at 1400’ or 1500’ to fly up the corridor.

    Pros:

    • Better traffic Awareness
    • No position reports

    Cons:

    • Flying slightly higher reduces the view
    • If the controllers are busy, they may deny your request for advisories  
    • Can be intimidating to talk to NY Approach/ Newark/ LaGuardia 

    The other option is to fly in the VFR corridor. If you want to do it via this method there are just a few things you need to make sure you’re familiar with before you go. When in the VFR corridor you’ll need to make required position reports on a CTAF frequency. Make sure that you have the proper charts and have studied pictures of the landmarks so that you know what you’re looking for. I tend to plan on this as a backup in the event that the controllers won’t give me advisories.

    Pros:

    • Doesn’t require talking to controllers/ class B clearance
    • More freedom to select altitude and routing as desired

    Cons: 

    • Less traffic awareness
    • Required position reporting

    All the requirements and guidelines for flying the corridor can be found on the back of the NYC TAC chart. Any pilot flying the river is required to have one of these or a NYC helicopter route chart on board. If you’re using Foreflight, look in the Documents section under FAA Fly Charts and select the NYC TAC chart in order to read the back of page.

    Below you’ll find examples of the diagrams/ instructions printed on the back of the NYC TAC charts.

    You can see the traffic flow requires northbound airplanes to hug the east side of the river, while the southbound traffic stays on the west side. The VFR reporting positions (listed from North to South) are: Alpine Tower, George Washington Bridge, Intrepid aircraft carrier, Goldman Sachs (clock), Statue of Liberty, VZ (Verrazano Bridge). Each position report should include aircraft type, position, direction, and altitude.

    Other things to be aware of:
    NYC is always a hotspot for TFR’s. There are often TFR’s for baseball games or presidential movements so make sure to check before you head that way. Additionally, there is a speed restriction in place of 140 kts, though I’m not sure why anyone sightseeing would want to go that fast anyhow.

    I realize that all of the procedures and restrictions can be overwhelming, but with the proper preparation, the Hudson Skyline is one of the most incredible places in the world to operate an airplane. There are a lot of things that are easy to get excited about that don’t live up to expectation, but this isn’t one of them. I’ve never taken anyone to the river that wasn’t impressed by what they saw and that’s why I plan to keep going back.

    About to cross the VZ looking north toward the city

  • Will Fly To Food: Texas Airport Diners

    Looking for some good $100 Hamburger options in the state of Texas?  Here are some other good fly-in eateries around Texas.  These are ranked in no particular order because they are all just really good!  Most of these are located on the airport property, but a few are in town and worth the drive!

    • Lockhart BBQ (50R):  With 4 BBQ options in Lockhart (and City Market BBQ 10 minutes away in Luling), you can’t go wrong with a stop in Lockhart.  Just grab the keys for the giant suburban, and away you go. Most folks who stop off in Lockhart will give it a legitimate claim over Hard 8 in Stephenville.
    • Angelina County Airport Restaurant (KLFK):  This is pure East Texas eating here in Lufkin.  With greasy, tasty burgers and sandwiches, breakfast, and ladies who call you “Sugar” when taking your order, this is down home if I ever tasted it.  Lufkin and Brenham are currently neck and neck for the best Texas burger.
    • Black Walnut Cafe (KCXO):  This airport diner, located at the Galaxy FBO in Conroe on the north side of Houston, is top notch.  The food is excellent (I have eaten several different sandwiches and have not been disappointed) and you can’t beat the 3rd floor runway view from the patio.  Not a bad place to spend the lunch hour, though make sure you get there before the lunch hour.  It fills up quick.

    Black Walnut Cafe

    • Airport Diner (T82):  Right next to the Hangar Hotel, the Airport Diner in Fredericksburg brings back memories of the old soda fountains of the ’40s and ’50s.  With plates like the Warthog (their sausage sandwich with Fredericksburg made sausage) and the Whirly Bird (their chicken tenders wrap), the Airport Diner fully embraces the airport theme.  Better to stop for lunch on a weekday rather than a weekend as their isn’t a whole ton of seating.  Check your NOTAMs as the restaurant is closed on Mondays and Tuesdays.
    • Radial Engine Cafe (KGPM):  A good little stop in the Dallas area for a simple burger, fries, and a Coke. Don’t get the smaller 17/35 runway at GPM confused with the much larger 16/34 runway at GKY just to the west.  Approaching from the south, this can be easily done.
    • Clear Springs Restaurant (KBAZ):  Come for the onion rings, stay for the fish.  Clear Springs is just a 5 minute drive from the airport and there are always plenty of crew cars available.  You could probably make a whole meal out of the onion rings themselves, but the fish is top notch too.
    • Gate 12 (KCLL):  The College Station Airport now has the 12th Man!  Aggie Fans will appreciate the Gate 12 experience with all the Texas A&M decorations scattered throughout the restaurant.  Bring an appetite if you want to tackle the burgers.  They are huge!  Parking is only at the FBO.  Only military planes get to park in front of the restaurant.
    • Cooper’s BBQ (KAQO):  Llano, TX is known for BBQ.  Just fly in to the airport, get a car, and after a 10 minute drive, you can take your pick of any kind of BBQ under the sun.  Careful, as it’s easy to over order!
    • Hangar 6 Restaurant (KUVA):  The newest restaurant on the list, located on the ramp at the Uvalde Airport, Hangar 6 tips it’s hat to the military history of the Uvalde airport while serving really good food.  Taxi in and walk up to the quaint little joint.  They even have a playground for the kids!
    • Sky Restaurant (KVCT):  Not quite within walking distance, but just a short drive from the FBO, Sky Restaurant specializes on the seafood, but they also have good burgers and steaks.  VCT is popular amongst the Air Force and Navy trainers in the area, especially around lunch!
    • Runway Cafe (KLBX):  The best place I have found for seafood along the Texas Gulf Coast.  With a huge runway to land on and a beautiful FBO next door, this is my go to for Fried Shrimp when I’m in the Houston area.
    • Delta Charlie’s (KRBD):  With quite an extensive menu (and a full bar for those overnight trips), I will definitely make RBD one of my routine stops. Dallas Jet Center recently opened in the terminal, so fueling your stomach and your plane can all be done in one spot.
    • The Red Baron Restaurant (KDHT):  The Panhandle of Texas hides many surprises and the Red Baron restaurant in Dalhart, TX is no exception.  For those early morning flights, The Red Baron makes a solid breakfast and a mean cup of coffee.  Lunch satisfies even the hungriest pilot.  Dalhart has a very spiffy modern FBO to sleep away that burger and fries until your passengers show back up too.
    • Hogg’s BBQ (KDUX):  I came hungry and I left very happy.  Hogg’s makes some good West Texas BBQ.  Huge helpings and an aviation themed dining room makes for a good choice.  Restaurant is located just behind the terminal building.  I was there for dinner and it wasn’t too crowded, but I bet lunch is hoppin’!
    • Aviator’s Grill (KDWH):  Located in the Gill Aviation, FBO, Aviator’s Grill has a great selection of creative sandwiches.  Hooks can be a little tricky to navigate while taxiing, but just tell ground you are going to Gill, and they will direct you to lunch.
    • Bill’s Burgers (KBMQ):  A short drive from the airport in the Burnet FBO’s new courtesy van deposits you at Bill’s Burgers, the largest burger this side of the Mississippi.  Always a popular lunch spot, especially on weekends, hitting lunch early or late is a good plan.  Don’t get a full order of fries unless you want to share.  It’s huge!  Closed on Mondays.

    In my book, these are the other great places to stop on a flight in Texas.  Always make sure to come hungry! I probably missed a few along the way, so please feel free to add others to the list!

    Note:  Some of the above restaurants are either closed for COVID, or are only doing takeout.  Make sure you call before hand.  Google doesn’t always have updated information.

  • Avidyne IFD 440 Receives Certification

    Avidyne’s plug and play replacement for the Garmin 430, the Avidyne IFD 440, finally received certification from the FAA last week.  The touch screen GPS unit is being marketed as a simple swap out for the Garmin 430.  This release follows up Avidyne’s release last year of the IFD 540, also a plug and play replacement, but for the Garmin 530.

    The features and touch screen of the GPS units sound quite nifty, but it will be hard for Avidyne to compete with the GTN 750 and 650 from Garmin.  The unit prices for the IFD 540 and 440 will be less (and installation is simpler), but we will see how the company does.

    Avidyne IFD 440

    The STC allows for installation in 1,000 makes and models of aircraft, according to the company, so there are a lot of possibilities for installs.

    In conjunction, Avidyne also released a new version of it’s software for both GPS units.  According to Avidyne, this will unlock multiple features that enhances the capabilities of both units.

    To read more on the IFD 440 and it’s bigger brother, the IFD 540, check out Avidyne’s website.

  • Upgrading Avionics

    There are many different ways to upgrade an instrument panel.  Putting in a 696 here, a JPI engine monitoring system there, even an Electronic HSI.  But, if you want to swing for the fences and get a serious upgrade, you have to go for a complete glass instrument panel.  For good measure, you might as well throw in a touch screen GPS while you are at it.

    Which panel to go with?  There are two mainstream options (Garmin and Aspen) and a handful of other companies that make glass panel replacements (Avidyne being one, King for a short period of time at the end of the last decade being another with the KFD 840).  Around 2010, there were a lot of companies trying to get into the glass panel retrofit game, but many of the products didn’t gain a whole lot of popularity, leaving Garmin and Aspen at the top of the heap.

    What about the touch screen GPS market?  Garmin has this pretty much cornered as well, with Avidyne and King just getting into the game.  The gap between Garmin’s GTN series and Avidyne and King is pretty wide.

    Garmin GTN Series

    The answer is pretty easy when it comes to the GPS (go with Garmin!), but not so easy when it comes to the panel.  The G500 and the Aspen Evolution series are both excellent interfaces with strong reliability, so which one do you go with?  Feature-wise, both have a lot of the same features: traffic, weather, terrain, synthetic vision, to name a few.  The presentation for each feature is a little different between the two interfaces.  It just depends on what you like better.

    The nice thing about the Aspen system is you can go glass, but you have options on how much glass you want:  1 screen, 2 screens, or 3 screens?  With the single screen PFD, you have all your instrumentation, traffic, weather, and optional synthetic vision.  You don’t need the synthetic vision for the traffic and weather, as it shows up behind your HSI.  It is an honest to goodness glass panel retrofit.

    When you decide to upgrade to 2 screens, this is where Aspen has a leg up.  The second screen is a completely redundant PFD and, if you get the 2 hour emergency backup battery installed, acts as the backup instrumentation to the main PFD.  This means you can take out the old steam gauge standby instruments.  This helps clean the panel up.

    I personally don’t see the need for 3 screens, but maybe there is someone out there who needs it.

    One selling point that Aspen has over Garmin is the wide variety of autopilots and GPS units that Aspen units are compatible with.  The G500 is only compatible with King autopilots, it’s own GFC 700 autopilot (which would be a retrofit), some Collins autopilots, and the Century 21, 31, 41, and 2000.  This does cover a wide array of autopilots, but it keeps some on the outside.  Aspen, on the other hand, is compatible with most autopilots on the market.

    Finally, let’s talk price.  Going with an Aspen EFD 1000 PFD (this is the single screen Aspen) will run you somewhere in the area of $12,000.  The price will vary based on the shop and the airplane.  When you want to add a screen, it’s an additional $6,000.  This is for the base, so if you want to add weather or synthetic vision, it’ll run you a little more.

    The Garmin G500 comes in around $20,000, again depending on the shop and the airplane.  The screens are bigger on the G500, which is kind of nice, and you are buying a Garmin product, which has a fabulous track record in the aviation industry.

    Decisions, decisions.  There really is no wrong answer here.  Both are excellent products with very good track records.  Both have really nice features and don’t hardly fail.  Really, the choice comes down to what you want.

    Need training on your upgraded GPS or glass panel retrofit?  Contact Texas Top Aviation for thorough training on your new avionics today.

  • Garmin GTN 750 Tips & Tricks

    The Garmin GTN 750 is an awesome piece of equipment.  Garmin tried to make the user interface with the touch screen as simple as possible (though there still is a bit of a learning curve when moving up from a Garmin 530W).  Garmin also integrated several key features that the 530W did not have that makes flying with a Garmin GTN 750 in IFR all that much better.

    The two features of the Garmin GTN 750 I want to focus on today are the “Load Airway” feature and the “Hold at Waypoint” feature.  If a pilot isn’t looking for these specifically, they can actually be a bit hard to find.  The “Load Airway” feature is especially handy when flying IFR long distances with several airways as part of the clearance.  Here’s how to utilize both.

    Load Airway

    1. On your flight plan page, insert the waypoint that you will be joining the airway, or, if your clearance was radar vectors to join an airway, then insert the waypoint on the airway that begins the leg you will be joining on.
    2. Tap the waypoint you just inserted.
    3. A menu will pop up.  Tap Load Airway.
    4. Select the Airway you want from the next menu that pops up.
    5. Then, a list of waypoints will display to exit the airway.  Select the waypoint where you will be exiting the airway.
      1. Note:  Garmin defaults to listing these waypoints alphabetically.  If you unselect the “Sort Alpha” option, it will sort the waypoints by direction and distance from the entry waypoint.  This is a little more practical, easier to work with, and how I recommend doing it.  This way you can either scroll up or down depending on the direction of travel on the airway and find your exit waypoint.
    6. Tap Load.
    7. The Airway and all the waypoints in between your entry and exit waypoints appear in your flight plan.
    8. If you are getting vectors to join the airway, you’ll need to use the Activate Leg function to activate the leg you will be joining the airway on.
      1. On the Flight Plan page, tap the waypoint that ends the leg you want to activate.
      2. On the menu that pops up, tap Activate Leg.

    Hold At Waypoint

    The Garmin GTN 750 allows pilots to place a holding pattern at any waypoint that is in the Nav Database (or any user created waypoint).  Here’s how to do it.

    1. On the Flight Plan page, tap the Waypoint that you want to hold at.
    2. On the menu that pops up, tap Hold At Waypoint
    3. On the next menu that pops up, input either the inbound or outbound course, right or left turns, leg time or distance, and the EFC time, then tap Load.
    4. You will see the hold now as a Waypoint in your flight plan.


    Once the hold is entered, the GPS will go into Suspend mode, suspending the Flight Plan Waypoint Sequencing.  Once you are ready to depart the hold, you will have to tap Unsuspend before crossing the holding point on the inbound leg, then the GPS will resume normal waypoint sequencing.

    These are 2 of the really cool, gee-wiz features of the Garmin GTN 750.  Following the above steps will make IFR flying much easier for the pilot, as well as much more enjoyable!

Leave a Reply

Your email address will not be published. Required fields are marked *