Coflyt Ownership App

Coflyt Ownership App

0 Comments

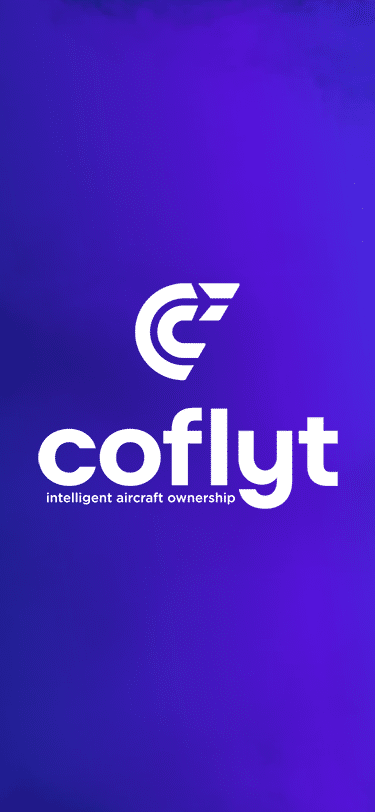
A new app came out last year that fits a need for many owners. Coflyt, available on the Apple App Store for $14/month for up to two airplanes, helps immensely with staying organized. Those questions of, “When is my oil change due?” or “Has the plane had it’s IFR inspections?” are easily answered by checking the app instead of having to dig through maintenance logs.

Not only does Coflyt help keep track of maintenance, but it also houses squawk lists that owner’s can send to maintenance shops as well as keeping track of Airworthiness Directives. If the pilot remembers at the end of flights to put the amount in, it even shows how much fuel is remaining in the airplane.

For flying clubs and partnerships, it provides easy scheduling without having to share calendars. Payments can also be taken and flights tracked. No more paper flight sheets after flights to track down.

As a pilot, it helps immensely to be organized. For $14 a month ($36/month for partnerships or flying clubs), that’s a small price to pay.

The Anatomy of a Hot Start

2 Comments

Are you one of those pilots who hates fuel stops simply for the fact that the engine doesn’t have time to cool off?  You pump gas into the plane, hit the bathroom, get in the plane and the oil temperature is still up at 160-170 degrees, leading you to have to figure out how to get the plane going again with a hot engine.  For those without proper training, this usually means a lot of jockeying around with the throttle, mixture, and fuel pump to try and get the thing started without flooding it.  After coughing and wheezing several times, the engine finally comes to life, leaving you to only guess what worked and without the knowledge of how to duplicate it.

Hot Start 2

Let’s take a step back for a minute to see what is actually happening with a hot engine.  Once the engine is shut off, the fuel in the lines leading from the tank to the engine is vaporized, meaning there is more air in the fuel lines than liquid fuel.  In the engine block itself, there is still liquid fuel in the injectors, but only enough for the engine to cough then quit if started.

When a normal priming and starting procedure is performed, too much fuel is forced into the cylinders and the engine becomes flooded.  A flooded engine just means that the stoichiometric ratio is way too rich, meaning there is too much fuel and not enough air.  The prime does the trick of getting the fuel vapor out of the fuel lines, but it shoves too much fuel into the cylinders.  Once the engine is flooded, it’s a waiting game to allow air into the engine to get the mixture right.  All Lycoming powered high performance and turbo charged engines are notoriously easy to flood when hot.

So, what’s the solution?  By taking a step back to see what is actually happening, you can attack the problem from the source, which is the fuel lines.  You need to get the vapor out of the fuel lines and get some liquid fuel in there.  The procedure for this varies based on the make and model of engine, but I’m going to use the example of the Continental IO-550-N that is in a Cirrus SR22.  I found this procedure in the Continental Engine Manual and it works every time.

(Pilots of other airplanes, keep reading.  I have sections below for PA46s, Columbias, and Bonanzas as well )

  • Mixture:  Full Lean (this allows fuel in the fuel lines, but prevents it from going past the mixture control into the engine, sending all fuel back to the fuel tank; a small amount of fuel leaks past the mixture control providing prime for the engine)
  • Throttle:  Idle
  • Low Boost Pump:  Run for 30-60 seconds (see note below)  (15 seconds in the Turbo Cirrus)
  • Mixture:  Full Rich
  • Throttle:  Open about 1/4 travel (not 1/4″, that won’t be enough)
  • Boost Pump:  Off, but have your finger on Low Boost
  • Starter:  Crank (engine will turn over a few more times before firing, this is normal)
  • At the first indication of start, turn the Low Boost on, increase the throttle to ensure the engine catches,  then adjust the throttle for 1,000 RPM
    • The engine will fire right about the time you start thinking it isn’t going to work

A few notes regarding engine temperatures:

  • If the oil temperature is above 150 degrees, a hot start will be required.  If oil temp is close to 200 degrees, run low boost for 60 seconds in a non-turbo.  If oil temp is 175, run low boost for 45 seconds in a non-turbo.  If oil temp is 150, run low boost for 30 seconds in a non-turbo.  Use 15 seconds for all temps above 150 in a Cirrus Turbo.
  • If the oil temperature is between 125-150, skip the hot start procedure, don’t prime the engine, leave the boost pump off, and crank the engine, then boost pump on when it starts and slightly increase throttle to make sure the engine catches
  • If the oil temperature is between 100-125, skip the hot start, don’t prime the engine, and perform a normal start with the boost pump on
  • If the oil temperature is below 100, perform a normal prime and start

Piper Malibu (PA46-310P with Continental Engine)

  • Mixture:  Full Lean (this allows fuel in the fuel lines, but prevents it from going past the mixture control into the engine, sending all fuel back to the fuel tank; a small amount of fuel leaks past the mixture control providing prime for the engine)
  • Throttle:  Idle
  • Low Boost Pump:  Run for 15-30 seconds depending on oil temperature…
    • Greater than 150 degrees: 30 seconds
    • Less than 125-150 degrees:  15 seconds
    • Less than 100-125 degrees, no need to run the Low Boost
    • Perform normal cold start below 100 degrees
  • Mixture:  Full Rich
  • Throttle:  Open about 1/4 travel (not 1/4″, that won’t be enough)
  • Boost Pump:  Off, but have your finger on the Primer Button
  • Magnetos:  On
  • Starter:  Crank (engine will turn over a few more times before firing, this is normal)
  • Engine should fire with the Low Boost Pump off, but…
    • If the engine starts to die, simultaneously increase the throttle a little bit and hit the primer button.
    • Only tap the primer button, don’t hold it as you’ll flood the engine if you hold it At the first indication of start, turn the Low Boost on, increase the throttle to ensure the engine catches,  then adjust the throttle for 1,000 RPM

Piper Mirage & Matrix (PA46-350P and PA46-350T with Lycoming Engine)

  • Leave throttle and mixture idle
    • Before you turn the battery on, ensure the mixture is idle cutoff
    • If the mixture is forward and the battery is on, the low boost pump in the fuel tank will start pumping fuel to the engine and quickly flood it
  • Ensure Magneto switches are on
  • Open throttle 1/4 travel (not 1/4″ as this won’t be enough)
  • Crank
  • As soon as the engine begins coughing and wheezing (and this is what it will sound like), push the mixture 3/4 of the way forward
  • Once the engine has a good solid fire, smoothly and swiftly push the mixture all the way forward
  • Reduce throttle
  • Note:  The Emergency Boost Pump can be used as part of the hot start technique, but I usually leave it off.
    • Pro to the Emergency Boost Pump is it can help suck more fuel in and purge vapor during the start
    • Con is that if the engine doesn’t start on the first try, you are flooding your motor

Columbia 400

  • Throttle and Mixture Idle Cutoff
  • Vapor Suppression:  Run for 30-60 seconds.  Reference above temperatures on the non-turbo Cirrus for run times
  • Mixture full forward
  • Throttle 1″ in
  • Prime for 3 seconds, then off
  • Crank
  • Once engine fires, primer might need to be pushed momentarily to purge excess vapor
    • On Columbia 350s, the throttle should be twisted (or pushed depending on if it’s an Avidyne or Garmin Columbia) in while cranking
    • Be prepared to reduce power once engine fires

Beechcraft 36 Bonanza

  • Throttle and Mixture Idle Cutoff
  • Low Boost:  Run for 30-60 seconds.  Reference above temperatures on the non-turbo Cirrus for run times
  • Mixture full forward
  • Throttle open 1″
  • High Boost until fuel flow peaks, then off
  • Crank
  • Once engine fires, Low Boost might need to be engaged momentarily to purge excess vapor

There are other “procedures” for hot starting out there, but most of them involve starting with full throttle, which can lead to the airplane shooting ahead on a ramp or taxi way if the brakes aren’t properly set.  This can lead to high repair costs, so always be cautious.  Figuring out what is happening when the engine is hot will give you a better chance of getting it started right away.

Using the ICARUS Device to Simulate IFR Conditions

0 Comments

Most of us who have been through instrument training are familiar with the traditional view limiting devices. There is the original hood, which does a decent job of blocking a pilot’s view of outside, but there are still gaps that allow “peeking”, though that peeking doesn’t really help a pilot fly an approach. It does help them figure out which way is up, so it’s not a true simulation.

The other problem with a hood is the process of putting it on to begin simulating IFR conditions, then taking it off when it’s time to land. This process takes time and the instructor has to take the controls (or the autopilot flies), losing some of the realism of the simulation.

Overall, an IFR hood is relatively comfortable. The elastic band sits under your headset, doesn’t squeeze your heard, and doesn’t press underneath your ear cups of the headset, giving you a headache. Hoods are large and somewhat unwieldy.

Foggles are another way to simulate IFR conditions for training. Most of the time, these are safety glasses that have most of the lens blacked out or fogged out, leaving little slits at the bottom for the pilot’s eyes to see the instruments.

Foggles aren’t quite as good as an IFR hood at blocking the outside. Due to their shape, there are often cracks that allow more “peeking” then a hood. The process of beginning to simulate IFR conditions and ending the simulated IFR conditions is easier though, since all the pilot has to do is put the foggles on or slip them off, which can often be done one handed (putting them on can be more difficult one handed since they have to fit underneath your headset). Wearing them for a long period of time can get painful as your headset is probably going to start crushing them against the side of your head.

The best comfort and view limiting combination I have found, so far, is called the ViBAN. It’s very comfortable and does a really good job of simulating IFR by blocking a view of the outside.

What’s the whole goal behind a view limiting device? When a pilot starts instrument training, ideally, all the training would take place in the clouds, since that is why someone get’s an instrument rating. As we all know, this isn’t possible, hence the need to simulate IFR conditions. The problem with simulating IFR is, it’s not true IFR. True IFR conditions are different then what a hood or a set of foggles can simulate. This can lead to spatial disorientation if a fresh instrument pilot enters the clouds for the first time, having done all his training in simulated conditions.

I’ve even heard a story of a pilot who did all his IFR training with a hood, passed his check ride, went into the clouds the first time, and put the hood on because he was getting disoriented since he hadn’t ever experienced true IFR.

What about full motion simulators? How I wish every airport had a full motion simulator for instrument training. Full motion sims are truly the best way to simulate IFR conditions. A pilot can easily get spatially disoriented in a sim if he or she isn’t careful. It’s a great way to simulate IFR conditions, but, alas, this just isn’t possible.

Are we doomed to just do an okay job of training instrument pilots in simulated IFR conditions with a hood or foggles?

Nope, at least not anymore.

Enter the ICARUS Device. The ICARUS Device, which stands for Instrument Conditions Awareness Recognition and Understanding System, is an amazing piece of equipment which truly simulates IFR conditions in the training environment. The ICARUS is a plastic shield that uses a Polymer Dispersed Liquid Crystal film that allows the degradation of a pilot’s visibility. It clips on to a baseball cap and is attached to a battery. That battery is then bluetoothed to an iPad or iPhone App that allows the instructor to put the pilot into and take him out of simulated IFR conditions.

Originally designed for helicopter training, it’s an excellent tool for fixed wing IFR training too. I’ve been using it for the last month and a half and I am hooked. The customer’s that I have used it with truly say that they cannot see a thing outside. Because the plastic shield turns white, it really does give the view that the pilot is in the clouds. The inner ear certainly believes it. The curve of it fits the glare shield in most planes nicely (there is some custom cutting that would have to take place for specifically rounded glare shields, but it fits Cirrus and Piper Saratogas nicely, the two planes I have used it in), and it sits away from the pilot’s face, blocking out all windows, which is what clouds do.

The greatest thing from an instructor’s standpoint is the ICARUS Device app. The pilot puts the device on before taxi and I set the app to VMC. This completely clears the ICARUS Device so the pilot can see just fine for taxi and takeoff. Then, at about 400 AGL, I tap the <1/2 VIS button on the app, and boom, the pilot is in the clouds. I even have a time delay to slowly make the ICARUS Device opaque to simulate slowly entering the clouds. I do the same thing on an approach, except in the reverse order, simulating we are slowly exiting the clouds.

The ICARUS Device is a game changer for IFR training. It’s comfortable, easy to use, the battery lasts for a long time (though bring a standard USB charging cord with you in the plane because the battery failure mode makes the ICARUS Device opaque instead of transparent. You don’t want that to happen at 200 AGL!), and, most important, it truly simulates IFR conditions.

After using it, I believe all flight schools and CFII should get one of these, both in the fixed wing and helicopter world. It’s the best option for simulating IFR conditions.

Checkout the ICARUS Device website for more information and to hear the story of the company.


Texas Top Aviation, LLC was given an ICARUS Device by the ICARUS Device company to test. Texas Top Aviation, LLC was not paid for our above opinion on the ICARUS Device (trust me, if it was terrible, I would have told you!).

Epic E1000 Gets the GFC 700

1 Comment

When the Epic E1000 was finally certified in the spring of 2020, there was much celebrating across the aviation world. Epic Aircraft expended a lot of time and energy getting the E1000 certified and into production (more information on that journey here and in Flying Magazine here).

The airplane is amazing. In the single engine, 6 seat turboprop market, it easily blows away the competition. With it’s 1,200 SHP PT6-67A, it has double the horsepower of the M600 (600 SHP), and 350 more horsepower than the TBM 940 (850 SHP). It’s 60 KTAS faster than the M600 and, even though the TBM can keep up (both airplanes have equal top cruise speeds of 330 KTAS), the Epic E1000 can carry a payload of 1,024 pounds with full fuel, while the 940 can only carry 584 pounds with full fuel. The TBM carries about 15 minutes more of fuel, but to me, that’s pretty negligible.

Did I mention climb rates? The E1000 climbs at an average of 1500 FPM at Vy (it’s capable of 4,000 FPM), making it to 25,000 feet in 10 minutes. The TBM climbs at 1000 FPM, taking 13 minutes to climb to the same altitude, while the M600 settles in at about 800 FPM, reaching FL250 in 21 minutes.

If you expand the comparison to include the Pilatus PC-12, the two airplanes have 1,200 SHP, but the Epic is 50 KTAS faster and they both have about the same weight carrying ability.

In the most important arena, price, the E1000 is around a million dollars cheaper than the TBM 940.

The one drawback to the Epic E1000 that immediately was noticeable was the autopilot. Epic originally installed the STEC 2100 autopilot to pair with the G1000 (and later the G1000 NXi). Epic decided to stick with the STEC 2100 through certification for the plane since that autopilot was on all of the E1000s paperwork going through all the levels of FAA approval. To change to the GFC 700 during the certification process would have been a massive undertaking that probably would have delayed certification.

The STEC 2100 is a good autopilot, but, as any G1000 pilot can tell you, the lack of integration between any STEC autopilot and Garmin panel leaves some to be desired. Not all the bugs talk, which often requires dual data entry, which can lead to forgetting to do both the bug and the autopilot when things get busy. Hello, altitude deviation.

The goal for Epic was never to leave the STEC autopilot in the airplane. The first E1000s were rolled off the line with the STEC, but Epic didn’t take long to change the autopilot to the much more integrated Garmin GFC 700. That took place this winter (2020), and the E1000 received it’s first upgrade, with Epic dubbing the airplane the Epic E1000 GX.

I expect the innovators in Bend, OR, where Epic is based and where tons of innovation in aviation happens (Lancair/Columbia started in Bend while RDD is based there as well), to quickly come out with more avionics upgrades for the airplane. I wouldn’t be surprised to see a G3000 version at some point, complete with auto throttles and the new Garmin Autoland. Epic would be smart to follow in the steps of Daher and offer two models, one with the G1000 and one with the G3000 (the TBM 910 has the G1000 NXi while the TBM 940 has the G3000).

I have yet to fly in an Epic E1000, but I would certainly jump at the chance to do so. Someone asked me yesterday what airplane I would buy if I had a blank check. With the GFC 700 now in the Epic, it would absolutely be the E1000 GX.

The Avidyne Equipped Cirrus Upgrade

1 Comment

A History Lesson

11 years ago, in April of 2009, the Avidyne Corporation unveiled the much bally-hooed Release 9, or R9 as it is commonly known, as a hardware replacement for the Avidyne EX5000 Entegra system in Cirrus Aircraft. The Entegra system was way outdated by that point. Even though Avidyne was the first company to put together a glass PFD in a single engine piston airplane, the company had quickly fallen behind Garmin in keeping up with the ever changing technology landscape.

Rewind to 2008. Cirrus had been going strong with the Avidyne Entegra since the SR20 and SR22 went to full glass in 2003 (a PFD and an MFD; prior to that, Cirrus aircraft only had an MFD with steam gauges and a Sandel Electronic HSI). Cessna, on the other hand, vaulted past the Avidyne Entegra and went straight to the Garmin G1000 in it’s aircraft, starting in 2004 with the 182 G1000 and 2005 with the 172 G1000. Beechcraft and Columbia went to the G1000 (Columbia started with the Avidyne as well) in 2005.

Garmin’s technology in 2007 was so much better than Avidyne’s technology that Cirrus decided to switch. I’m sure there were many promises made by Avidyne to Cirrus about what Avidyne was working on (the R9), but the G1000 was out there, available, and being used in a lot of different airplanes with very good results.

So, in 2008, Cirrus made the switch from the Avidyne Entegra to the Garmin G1000, dubbing it the Cirrus Perspective by Garmin avionics package. Avidyne finally got the R9 to market in 2009, but by that time, Piper was the only airplane manufacturer left putting factory Avidyne panels in their airplanes, and they switched to G1000 later that year.

The R9 is a fabulous product. It’s fully integrated, has great graphics, has fully redundant displays, a QWERTY keypad (which, by the way, Garmin didn’t do for another 8 years), and a lot of other neat features. There’s a bit of a learning curve, but it’s a really good product for what it is.

Avidyne, though, was late to the game with their technology. By the time it debuted in 2009, all the GA aircraft manufacturers had long since switched to the Garmin G1000 and weren’t looking back. That left Avidyne with the retrofit market for the many different Avidyne Entegra Cirrus aircraft out there. The only problem was, the retrofit was $80,000 ($95,000 if you wanted to throw in the DFC 100 Autopilot, which is a must have) and not many owners were up for paying that much money, then or now.

To sum up our brief history lesson, Avidyne knew the Entegra needed to go, but couldn’t get the R9 out quickly enough to convince anyone to stick with Avidyne products. The retrofit market didn’t amount to many sales, so Avidyne doesn’t even make the R9 anymore.

As a side note, I really, really like the Avidyne R9 and am sad that it didn’t make it into more airplanes.

So, when the Avidyne Entegra starts to have issues, what’s an owner to do? Keep reading!

There is Hope

There are thousands of Cirrus aircraft out there flying with the Avidyne Entegra instrumentation, which is basically 20 year old technology (I’ve had a computer engineer tell me the programming in an Entegra is Windows 98 tech). These things are going to start having problems at some point (many already have), but what solution do owners have that is cost effective and get’s them new technology?

Remember that little company named Garmin? Well, they have come through again. Announced this summer, the Garmin G500 TXi is now certified as a replacement in the Cirrus Avidyne Entegra equipped aircraft. This means pulling out both the PFD and MFD and replacing them with the G500 TXi on both sides. Engine data is also displayed on the G500TXi MFD, including the percent power and TIT indications, if equipped.

Cirrus SR22 Equipped with Dual G500 TXi Screens and Dual Garmin GTN 650Xi GPS Units

The cost for the panel? Two 10.6″ G500 TXi’s run about $16,000 apiece for the units, not including labor. $32,000 for a brand new panel isn’t terrible. Plus, the G500 TXi’s work with the DFC90 autopilot if the Cirrus is already equipped with it. If not, the Garmin GFC 500 autopilot is now approved for the Cirrus at a relatively low price of $7,000, including the servos.

Still have the original Garmin 430s in your Cirrus? Upgraded to the Avidyne IFD 540/440 stack? Put in dual GTN 650Xi’s? Put in a GTN 750Xi? All are compatible with the G500 TXi panel.

Want to upgrade everything? It does get kind of pricey at that point, but for just equipment, the cost for a complete panel conversion is somewhere in the area of $65,000 plus labor, still below what the R9 cost, but not cheap either. That would include 2 G500 TXi’s, 2 GTN 650Xi’s, a GFC 500 Autopilot, and all the engine monitoring equipment that the G500 TXi would need.

Cirrus SR22 Equipped with Dual G500 TXi Screens, a GTN 750Xi, and a GTN 650Xi

Thankfully, some new technology has finally come to the Generation 1-3 Cirrus. Oh, and by the way, your steam gauge Cirrus is fully upgradable as well.

Want to read more? Check out Garmin’s website.