The Angelina County Airport in Lufkin, TX (KLFK) will be hosting the Angelina County Airfest on Saturday, October 10th. The airport will open up at 9am.
Prepare for a day of food, fun, and some great performances. There will be warbirds and many other classic airplanes on display, not too mention a number of aerobatic performances as the day goes on.
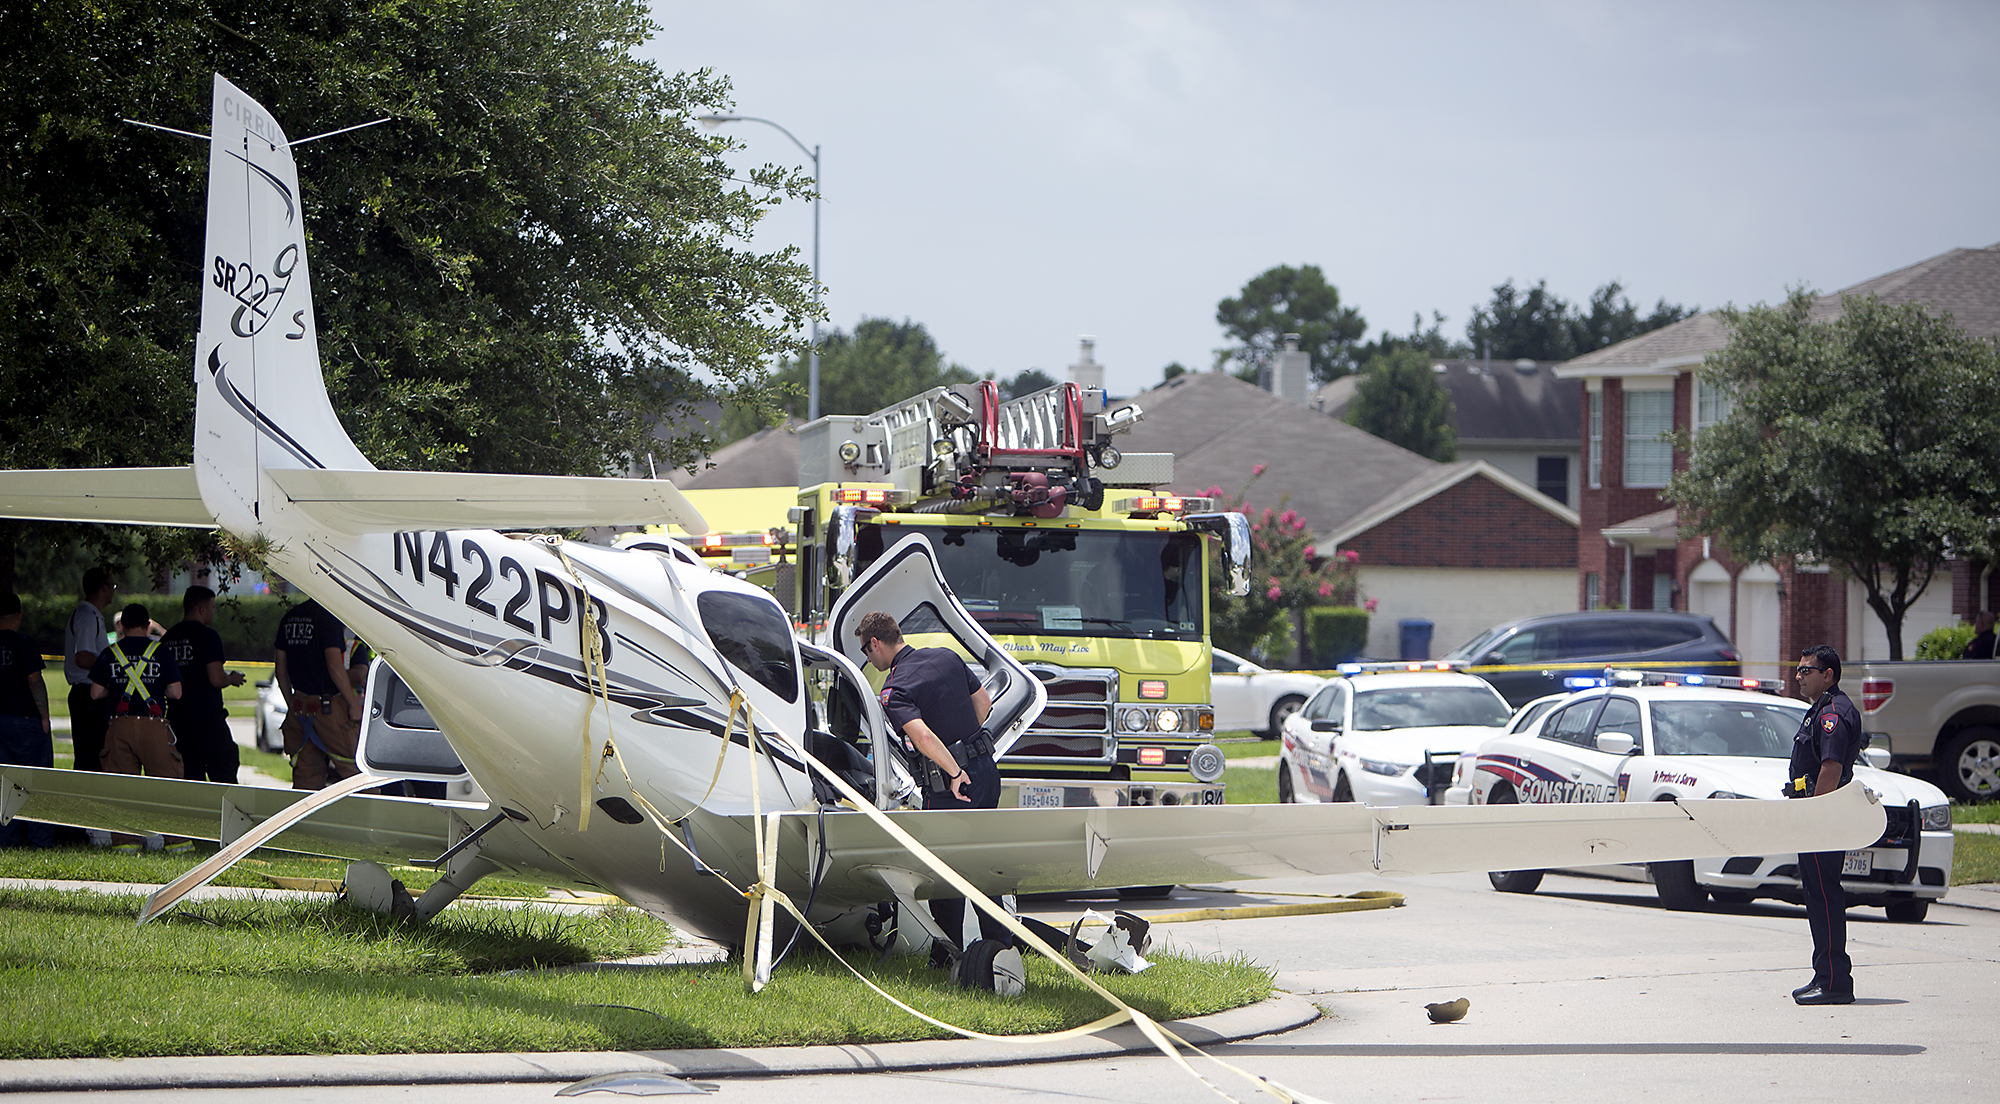
In July, a Cirrus SR22 suffered an engine failure in Houston after departing KIAH. The CAPS system was deployed and the airplane came to rest in a neighborhood on the north side of Houston. This makes CAPS save number 53 for Cirrus and no fatalities. The initial NTSB report is below.
14 CFR Part 91: General Aviation
Accident occurred Tuesday, July 07, 2015 in Houston, TX
Aircraft: CIRRUS DESIGN CORP SR22, registration: N422PB
Injuries: 2 Minor.
This is preliminary information, subject to change, and may contain errors. Any errors in this report will be corrected when the final report has been completed. NTSB investigators may not have traveled in support of this investigation and used data provided by various sources to prepare this aircraft accident report.
On July 7, 2015, about 1137 central daylight time, a Cirrus SR-22 single-engine airplane, N422PB, descended under the canopy of the cirrus airframe parachute system (CAPS) and landed in a residential neighborhood at Houston, Texas. The pilot and passenger sustained minor injuries, and the airplane was substantially damaged. The airplane was registered to and operated by AIRCCS, LLC; Humble, Texas, as a 14 Code of Federal Regulations Part 91 business flight. Day visual meteorological conditions (VMC) prevailed and a flight plan had not been filed. The airplane departed George Bush Intercontinental/Houston Airport (IAH), Houston, Texas, at 1133 and was destined for Austin Bergstrom International Airport (AUS), Austin, Texas.
The pilot reported that during initial climb, he noticed the engine temperatures began increasing and he reduced power in an attempt to lower the engine temperatures. When the airplane was about 900 feet above ground level (agl) the engine began detonating, and soon after there was a complete loss of engine power. With no suitable forced landing areas the pilot deployed the CAPS ballistic parachute system and the airplane impacted terrain and came to rest upright next to a residence.
An initial on-scene wreckage examination showed there was adequate fuel on-board. At the facility where the airplane had most recently been refueled, refueling unit records and a review of security camera video showed that the airplane had been refueled with aviation gasoline and not with jet fuel. Postaccident fuel quality checks of that fuel facility were satisfactory.
The wreckage was moved to a different location and will be further examined. Several avionics components containing non-volatile memory (NVM), including engine performance data, will then be removed from the wreckage for examination and an extraction of useful data is expected.
At 1053 the Automated Surface Observation System at IAH reported wind from 160 degrees at 15 knots gusting to 20 knots, visibility 10 miles, scattered clouds at 3,000 feet agl, broken clouds at 25,000 feet agl, temperature 31 degrees Celsius (C), dew point 24 degrees C, and an altimeter setting of 30.03 inches of Mercury.
There has always been something that felt wrong to me about how the walkway on many models of Beechcraft extends onto the right hand flap. I have never felt right about stepping onto the flap as I make my way into and out of my dad’s E33A Bonanza and therefore I generally try to step over top of it and place my foot on the wing instead. But does this effort actually make any difference, or am I just making my self look silly for no reason?
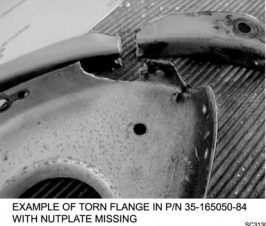
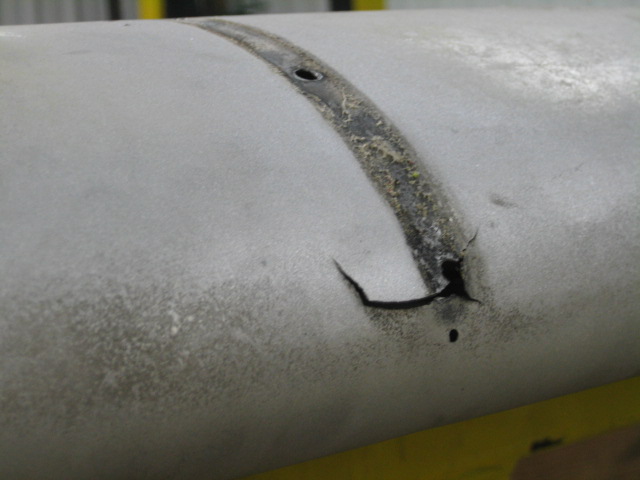
Well, as it turns out, it wasn’t such a bad idea. In 2007, a pilot flying a Beech reported a split flap condition. Upon inspection, it was found that there was damage to the actuation rod attachment as well as the nose rib and nut plates. Six other aircraft were checked and found to have similar damage. These findings were submitted to Hawker Beechcraft and in 2008 and they issued a maintenance alert regarding the issue. In 2011 the FAA issued SAIB CE-11-21 (Special Airworthiness Information Bulletin) to alert owners, operators, and maintenance personnel about the problem; specifically warning of the potential for cracking in the nose flap rib (part number 35-165050-84). And while its true that this type of damage is not limited to the right hand flap, it is known to be much more common on that side. Stepping over the flap instead of on it is recommended by both the FAA and Beechcraft as a solution.
Unfortunately, the flap cracking is known to span a wide variety of aircraft types. A 2011 “Safety Communique” issued by Hawker Beechcraft lists the affected models as:
-Bonanza 33, 35, and 36
-Baron 55, 56, 58, and 95
-Duke 60
Damage at the flap actuator point (Photo Courtesy of AOPA)
According the the FAA, the cracking can been found most commonly on airframes which are between 4,000 and 6,500 hours, but has also been found on aircraft with as few as 2,000.
So, what do we do about it?
First off, although much of the damage is difficult to detect without dis-assembly, the paperwork from both the FAA and Beechcraft recommend taking a look at the flap yourself to see if there are any obvious signs of problems. They also suggest taking special care looking in this area during your preflight inspections.
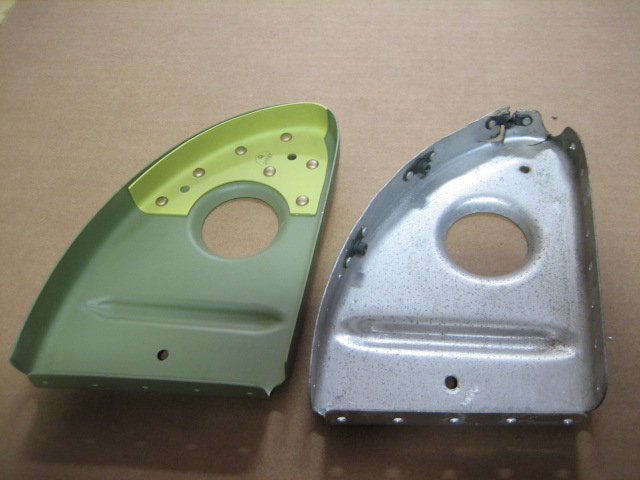
Next, if you have an airplane which may be susceptible to cracking, talk to who ever is doing your maintenance work and have them look carefully during your annual inspections. I talked to one of the IA’s at our shop who has dealt with this issue before and he told me that most shops will remove the flap and send it away to a repair station to have it fixed. It’s possible that if you purchased your airplane used it may have already had this issue taken care of; a quick look through the maintenance logbooks should clear up any questions.
Repaired rib next to a damaged rib (Courtesty: AOPA)
Regardless of whether your airplane is known to suffer from this problem or not, do your best to avoid stepping on the flap when getting in and out of the cockpit. It is also a good idea to ask your passengers to do the same as this simple act could end up saving you big headaches and big money someday down the road.
For more information regarding the flap issues discussed above, talk to your maintenance provider and visit these links:
Brazilian manufacturer Embraer recently received FAA certification for it’s “mid-light” Legacy 450. Capable of Mach .83 and a 2,500 mile range, this is one sweet airplane. Embraer designers gave passengers headroom as the cabin stretches up to 6 feet in height down the center. Complete with fly by wire controls and a full glass cockpit configuration, Embraer did a wonderful job with this airplane. The club seats even fold down to a bed!
The airplane’s list price is $16.5 million. To learn more about the Legacy 450, visit Embraer’s website.
The FAA has decided to discontinue the dedicated En Route Flight Advisory (EFAS or Flight Watch) frequency 122.0. The effective date will be September 24th, but Flight Service will continue to monitor the frequency for an additional six months to direct pilots to Flight Service Station frequencies.
EFAS services will still be provided by Flight Service, though, on the published Flight Service Station frequencies (and 122.2).
To me, this makes some sense. In the past, if I accidentally contacted Flight Service on one of their frequencies to issue a pilot report or get a weather update, they would send me over to Flight Watch on 122.0. More than likely, the Flight Watch operator was sitting right next to the Flight Service operator, but I had to flip frequencies. This will help alleviate some confusion for pilots.
The deactivation of Flight Watch had been coming for years since the advent of Foreflight and other iPad and tablet apps giving pilots much easier access to weather, both in flight and on the ground. With Nexrad and Stratus, there isn’t much need for Flight Watch anymore (though you still can’t file a PIREP over the XM Weather!).