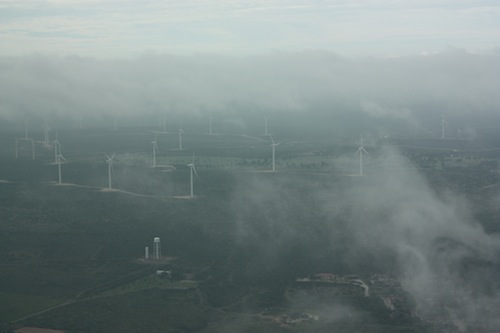
I was speaking with a pilot a few months back who was not instrument rated. He was telling me of his flying experience while continually speaking fondly of scud running. He told me several stories, most of the time with a smile on his face, about scud running to his destination while staying clear of clouds. While he was talking, my mind was cycling through the numerous accident reports I’ve seen where a scud running VFR pilot has crashed into terrain or an obstacle. Needless to say, scud running is not a very good idea.
This pilot’s stories got me to thinking, how common is the practice of scud running amongst VFR only pilots? As an instructor, I always teach my private students about personal minimums and making that no-go decision when clouds are below those personal minimums. The act of scud running falls under several of those dangerous pilot mindsets, get-there-itis, invincibility, and macho-ism, to name a few.
To bring everyone on the same page, let’s define scud running. Wikipedia has a very good definition:
Scud running is a practice in which pilots lower their altitude to avoid clouds or instrument meteorological conditions (IMC). The goal of scud running is to stay clear of weather to continue flying with visual, rather than instrument, references. This practice is widely accepted to be dangerous, and has led to death in many cases from pilots flying into radio towers and high tension wires; however, even instrument-rated pilots sometimes elect to take the risk to avoid icing or embedded thunderstorms in cloud, or in situations where the minimum instrument altitudes are too high for their aircraft.
To put some numbers with that definition, a scud running VFR pilot would takeoff with a 1200-1500 foot ceiling and stay 700-1000 feet above the ground, right in the area where towers, hills, and rapidly rising terrain reside.
How do we change this mindset? Well, if someone has been scud running for years without incident, the practice becomes normal, like the pilot I mentioned above. The mindset of invincibility sets in and the practice continues. This particular pilot can also lead other pilots to adopt the same practice, encouraging them that nothing will happen to them, since we all know that our pilot peers know better than our flight instructors (insert heavy sarcasm here).
In order to change this mindset, instructors need to emphasize personal minimums from day one. This includes ceilings, visibility, and winds. For a seasoned pilot, a review of accident statistics might help the process.
Scud running is not a safe practice. If you’re a scud runner, you need to rethink your attitude. Is getting there really worth it?
When is the last time you talked to the Flight Service Station?
Believe it or not, FSS is still in existence. Over the past 10 years, they went from FAA run, the being bought by Lockheed Martin, to now being privately run by a company called Leidos. 1-800-WX Brief will get you connected with a weather briefer, but you’ll hear “Leidos Flight Service Station” now when the briefer picks up.
Since the advent of Foreflight, most pilots these days get their weather briefings digitally on the iPad. Foreflight has come a long way since it’s inception. The briefing part of their Flights page is quite comprehensive, with lots of information, and counts as a legal weather briefing (which pilots are still required to get before a flight).
Why does a pilot even need to call Flight Service? Well, when’s the last time you tried to interpret everything the Briefing on Foreflight told you? As I said before, it’s a lot of information and a lot of it can be confusing. Pilots are not fully trained on interpreting Prog Charts and getting an overall weather picture for a flight. A weather briefer is.
I have over 5,000 hours and I still call a weather briefer before almost every flight. On the way to the airport is a great opportunity to get a weather briefing. I get a great picture of what’s going on in my area or over my route, frontal movement, bad weather areas, and whether or not it’s a good idea to even take off. Calling in the car alleviates the main complaint I hear about calling the Flight Service Station, which is it’s inconvenient and causes a delay since you have to call them on the phone.
I don’t do much private pilot training anymore, but when I do, I always teach my students how to get a weather briefing from the Flight Service Station. I’ll show them how to get the briefing on Foreflight too, but usually their eyes bug out of their heads when they start trying to read everything. A breathe of relief is released when I tell them there is a trained professional just a phone call away who can clear everything up.
The other thing that the Flight Service Station provides that is important to a lot of folks are PIREPs. It’s vital in sketchy weather areas for the FSS to get a report of what’s actually going on in the air. This helps other pilots out greatly as they are getting information about icing, cloud bases and tops, turbulence and a myriad of other things from airplanes who are actually in the conditions.
Finally, the most used portion of the Flight Service Station is the Clearance Delivery line (888-766-8267). At airports without a tower or a clearance delivery frequency, with IFR conditions present, the only way to get your IFR clearance is to call Clearance Delivery. Yes, it can take a little time sometimes, but you will get a clearance every time, unlike taking off and trying to dodge the clouds without hitting anything, while trying to call Center on the radio (which isn’t safe or legal).
Been a while since you’ve talked to the Flight Service Station? Give them a call, either on the phone or on the radio. Odds are, they are bored and just wanting someone to talk to, just like you are on that long cross country flight!
Checkout 1800WXBrief.com to see all the cool stuff the Flight Service Station does.
There are a multitude of weather products out there today to assist pilots in preparing for a flight. Aviationweather.gov is the best source for getting all the information a pilot needs for planning a flight. Aviationweather.gov is the National Weather Service’s source for all aviation related weather products. When I teach about weather and weather briefings, I recommend to my students to utilize Aviationweather.gov in the planning stages, but still call the Flight Service Station to get a full fledged weather briefing before takeoff.
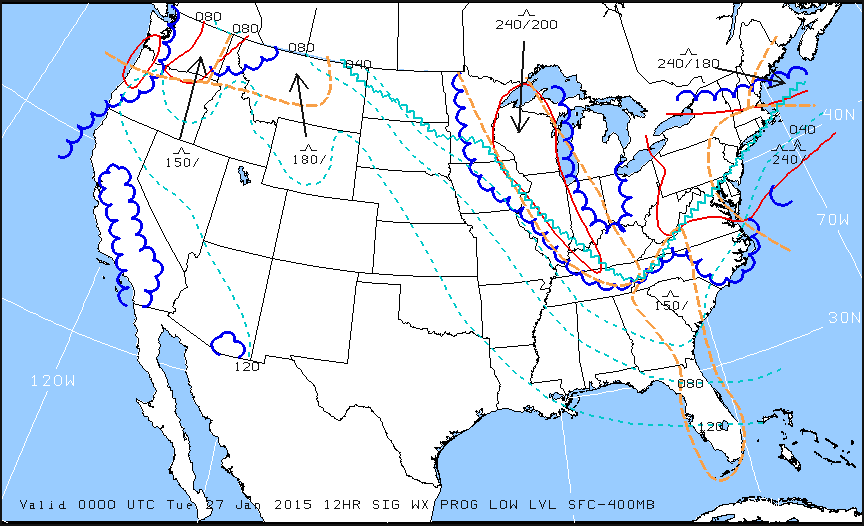
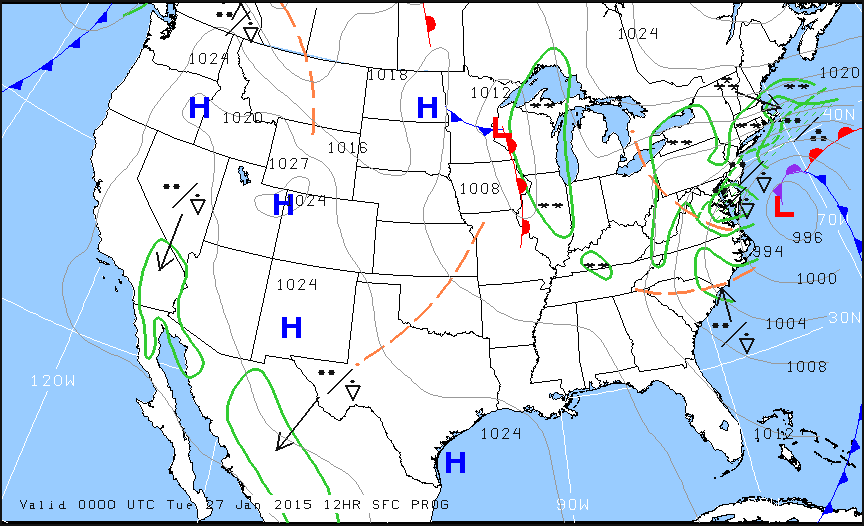
When preflight weather planning, one of the best ways to get a picture of what is happening over a broad area is utilizing the Low Level Significant Weather Prog charts. The Prog chart gives a forecasted 12 and 24 hour picture of what type of weather to expect over the US. The Prog chart gives the expected flight rules, areas of turbulence, and where the freezing level is located. If you’re looking at the 4 panel view, the Surface Prog chart shows fronts, pressure areas, and areas of expected precipitation. That covers just about everything, doesn’t it?
I believe the Prog charts are underutilized in planning. Foreflight and Garmin Pilot have given easy access to radar pictures, satellite pictures, METARs, TAFs, and several other sources of weather information. But, a lot of the easy access data you can get from those apps is current data (with the exception of the TAF) while a lot of the forecast data takes some hunting around. So, products like Prog charts aren’t often utilized.
The other problem arises when pilots know about Prog charts, but don’t know how to read them, then don’t know how to find the legend to decipher the chart, the chart is often set aside and quickly forgotten about just because of a lack of knowledge. Have no fear, though, as now we will use an example 4 panel Prog chart to decipher the lines and colorations.
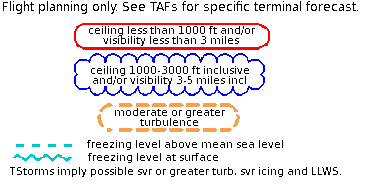
Just looking at the Low Level Significant Weather Prog Chart above, it can be a little confusing. That’s why they make a legend!
Coupling the legend with the chart above, we can determine some things. First, California, parts of the Pacific Northwest, a small part of southern Arizona, and a good portion of the Midwest and East coast are going to have marginal VFR conditions in the next 12 hours. Wisconsin, Illinois, a good portion of the Northeast, and a small portion of the Pacific Northwest will suffer IFR from IFR conditions. There are going to be a good amount of low level turbulence in the northern and eastern parts of the country. Finally, the freezing level starts at the surface running in a jagged line across the midwest states and curling up into the Northeast.
That’s a good bit of information, isn’t it? If a pilot is planning a VFR flight into the Northeast tonight, it would probably be best to wait for another day, according to this chart.
Now, to see what is causing the conditions above, we need to look at the Surface Prog Chart.
The green circular areas above show that some form of precipitation is in that area. The circular dots with the triangle located in Mexico and Baja California are depicting moderate rain showers. If the triangle was gone, it would just be moderate rain. In the northeast, all those symbols are showing moderate to heavy snow showers. Across the plains, we see a lot of high pressure, meaning visibility and nice flying weather.
These charts are invaluable when it comes to flight planning, especially over long distances when the weather could be changing a lot over the period of your flight. Put them to use the next time you are planning a trip and you’ll learn you have a much better picture of what the weather is doing.
It’s winter time, so that means winter weather for the aviation community. For single engine piston pilots, that means dealing with icing conditions. For us Texan flyers, ice only presents an issue for maybe a week out of the year (the exception being for those Panhandle residents!), but it’s nice to have some protection.
Most single engine pistons do not come with ice protection from the factory and, of those that do, most are not Flight Into Known Icing (FIKI) approved. The systems are “get out of jail” systems that can reduce the amount of ice you pick up if you accidentally get into icing conditions and you are on your way out. The Cirrus SR22 line of aircraft has had the TKS system option since 2006, with the new FIKI system being available since 2010. The Cessna TTx has a FIKI option that was debuted in 2014.
The above mentioned airplanes use TKS systems. There are a handful of single engine pistons that use boots that are FIKI certified: the Piper PA46 line (Malibu, Mirage, and Matrix) and the Cessna P210 and T210 line (though not all are equipped with boots).
If you find yourself flying into wintry conditions often and want some protection for your clean wing airplane, there are some aftermarket options for a lot of airplanes now. Do note that all these systems do come with a pretty hefty price tag, but can be worth it if you fly into icing a good bit.
CAV Ice Protection TKS Systems
CAV Ice Protection is a TKS system outfitter. What is TKS fluid? According to Flying Magazine:
“TKS systems dispense an ethylene glycol-based fluid with a freezing point below minus 70 degrees F through porous titanium panels attached to the leading edge of the wing and empennage. The fluid is released through thousands of the panels’ laser-drilled holes, which are not much larger than the size of a human hair. As air flows over the wing and empennage, it disperses the fluid, coating the surfaces, and preventing the formation and adherence of ice.”
The advantages of a TKS system are the whole entire wing gets coated to get rid of any extra ice that adheres to the top or bottom of the wing surface. The disadvantage is there is only a finite amount of fluid, so when it runs out, you don’t have any more protection. The fluid also adds extra weight agains the useful load of the airplane.
CAV Offers a Basic TKS system for the following single engine piston aircraft:
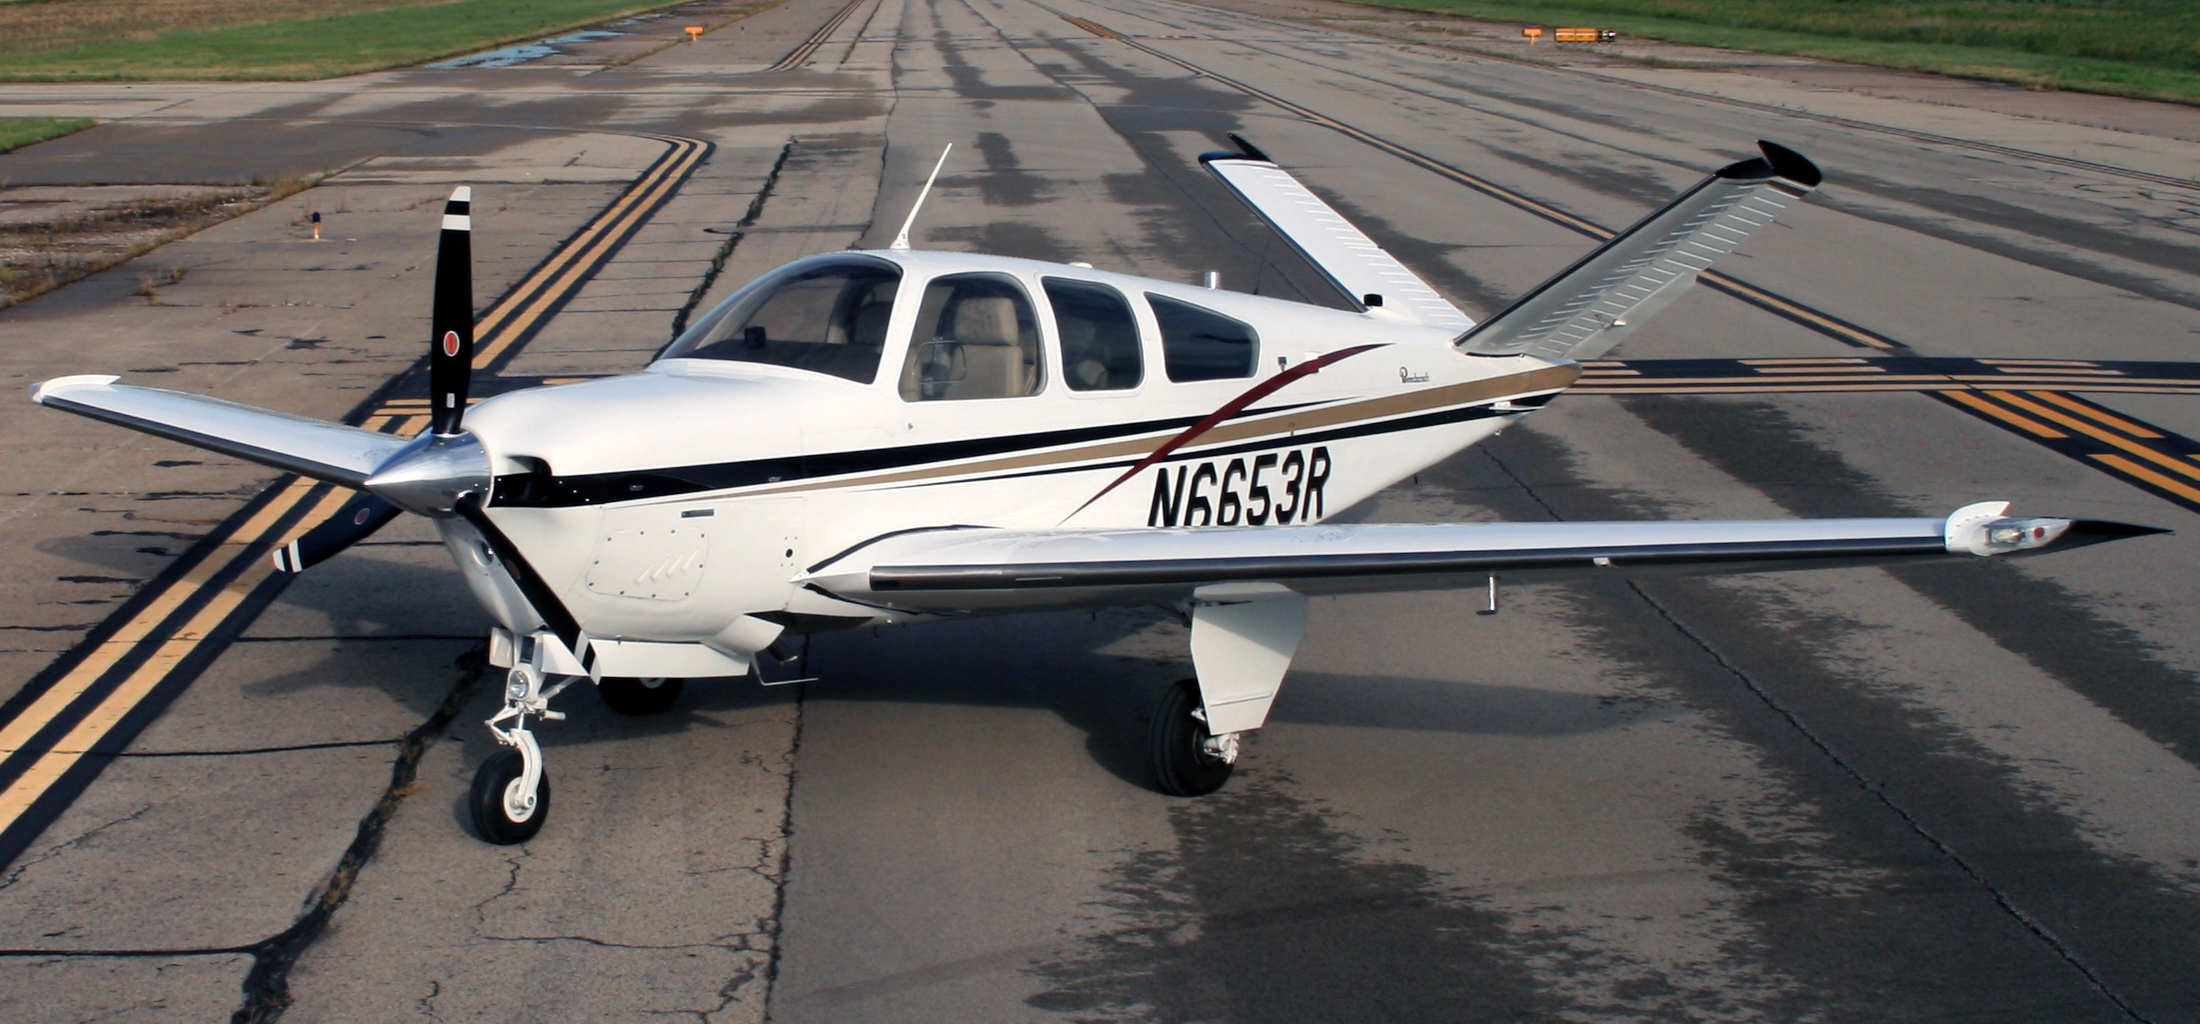
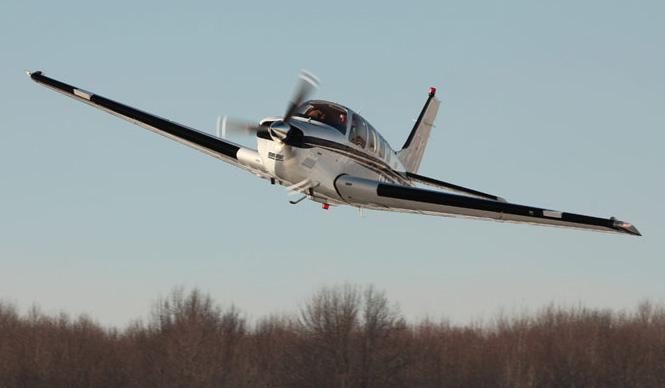
Beech Bonanza
Cessna 182, 206, 210, 350, & 400
Columbia 350 & 400
Piper PA32
Mooney M20
CAV Offers a full FIKI System for the following single engine piston aircraft:
Ice Shield is another after market de-ice option. Ice Shield makes boots for wing leading edges. The advantage of boots is they activate instantaneously, getting rid of ice where it builds up first, on the wing leading edge. No running out of fluid and only the added weight of the system. Ice Shield also offers heated windscreens for several the Piper Saratoga line and the A36, B36, and G36 Bonanza line.
Ice Shield has boots for the following single engine piston aircraft:
One other company, Kelly Aerospace, makes an electric leading edge de-icer called the ThermaWing for the Cessna/Columbia 350/400 line. You can read a review of the ThermaWing here, or check out Kelly Aerospace’s website.
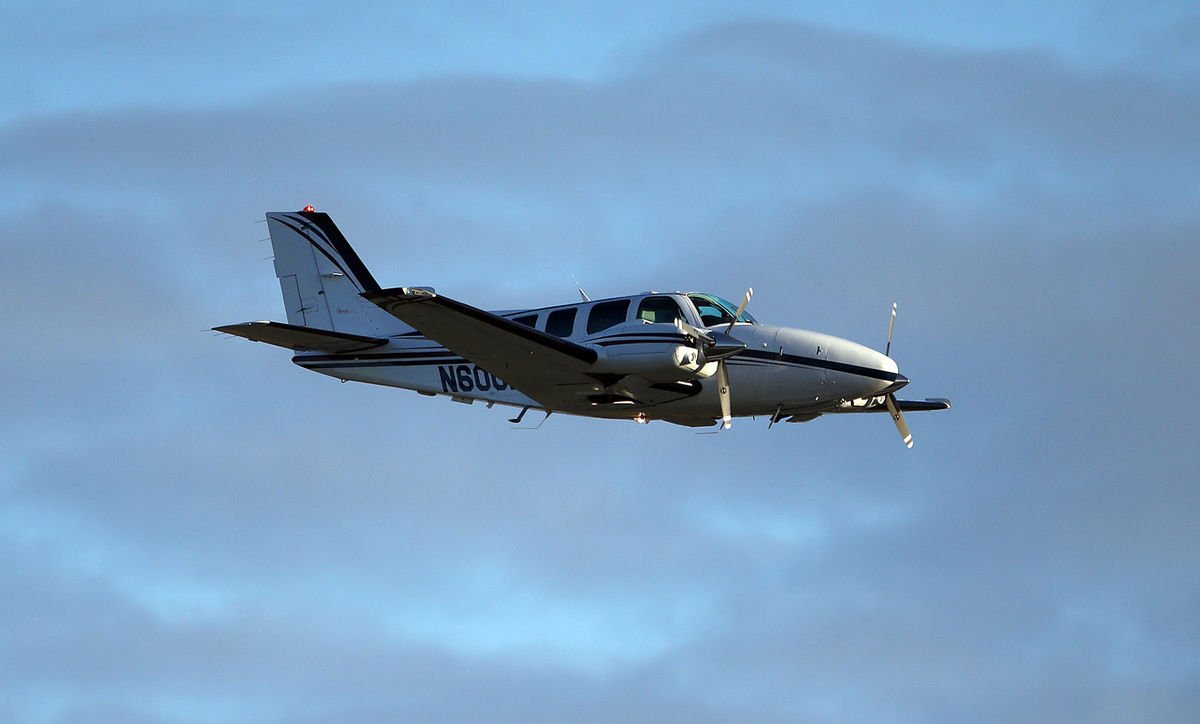
Only now did I begin to realize the severity of the situation. The deer had completely broken the left main gear off of the airplane. Obviously, landing in this condition would not be ideal. Landing without a nose wheel is one thing, but landing without one of the mains would be a very dangerous and undesirable proposition.
The company’s maintenance guys arrived on the scene while I executed a few more low passes so that they could take a look. We all came to the same conclusion that the best situation for landing would be to retract the other two wheels so I could land on the belly. Unfortunately, the landing gear wouldn’t retract. Cranking the emergency gear handle didn’t work either as it is not designed to bring the wheels up, only to put them down.
I flew circles around the airport for a while as different options were all discussed. I owe a lot to the guys on the ground who were digging through the manuals coming up with solutions. Eventually, it was decided that I would try cranking the gear up by hand, even though the checklist in the airplane said that it could only be used to lower the gear. Even if we damaged the hand cranking mechanism, it would be worthwhile…plus, I’d already torn off the left main entirely, surely a little damage to the retraction mechanism wouldn’t be the end of the world!
Following the checklist, I pulled the CB for the gear motor and started cranking. To my great relief, the “in transit” light illuminated and the three green indication went away. It was difficult work to crank the gear up manually. The handle is in a very poor location in Barons and Bonanzas, plus I was working against gravity. It is also possible that there was some debris from the missing wheel causing friction or binding. While I was cranking, the rescue crews were being coordinated while extra vehicles and people had been called in from the city for support.
After some time had passed, enough to get a slightly sore arm from cranking, the lights indicated that the gear was up and locked. I lined up for one more pass hoping to verify that the landing gear was up and the landing gear doors were closed. After the final go ahead from everyone on the ground, all that was left was the landing.
I had been doing my best to keep the passengers informed of what was happening throughout the whole flight, but I felt bad for them as the news changed from the beginning of the flight: “precautionary landing” was quite different than the briefing I ended up giving them before we landed. I informed them that I was going to be “… killing the engines and landing with the gear up….” They did an impressive job of staying calm and being responsive. Before we landed, I made sure that they were all briefed on what to expect, how to unbuckle, and how to evacuate from the airplane. It is difficult to convince someone that everything is going to be fine when there are hordes of emergency vehicles (including ambulances) waiting next to the runway in anticipation of your landing.
Shortly before landing, I went through my flows and callouts, then verified by use of the checklist to ensure I hadn’t missed anything. I distinctly remember sitting in the airplane preparing for the landing, all the while being in complete disbelief that this was a real situation. I never imagined that I could be flying an airplane that was missing a wheel strut. Previously, my assumption had been that if there was an event serious enough to shear off one of my mains, the airplane wouldn’t continue flying. It all seemed like a bad dream.
I elected to use runway 26 since it was the longest. I wanted to be able to carry extra speed in order to give myself extra time between pulling the mixtures and landing so that I could feather the props and turn the fuel shut off valves to the off position (never thought I’d have to do that!) without being rushed. As I made my final approach with the engines shut off, I went through my final memory items and couldn’t help but laugh about just how backwards everything was from normal arrival procedure. GUMPS: Gas- Off (normally on the fullest tank), Under carriage- Up (Definitely not normal), Mixtures- Idle cut off (I normally save this for when I’m parked on the ramp), Props- Feathered (Again, never thought I’d have to do that in real life), Seatbelts- On (the only one that stayed the same!).
On final approach for runway 26 with the gear up and the props feathered. Photo Credit: www.lancasteronline.com
I’ve had several remarks about how quiet the airplane must have been during the final un-powered glide to the runway, and while that is absolutely true, I must confess that I never noticed. I was so focused on the task at hand that the silence in the airplane simply wasn’t something that stuck out to me. What did make an impression on me, however, was the acceleration the airplane experienced when the props were feathered. I’ve heard it preached many times the importance of feathering the propeller on a dead engine, but never truly appreciated the importance of it until I did it myself. I remember the airplane accelerating noticeably as though I had hit a boost button which was hidden somewhere in the cockpit for just such an occasion.
Although I didn’t notice the lack of noise upon killing the engines, the sickening, deafening noise which was produced during the touchdown and deceleration is something which I will never forget. Another thing that surprised me was the smoke which filled the cockpit and cabin as we slowed down. This was produced by the friction between the belly and the runway, although nothing was burning.
I don’t know how long the airplane actually slid for after touching down, but it felt like an eternity. However, when the noise subsided and the motion stopped everything returned to real time. I unfastened my seat belt, opened the door and climbed out onto the wing. I helped the passengers evacuate and we retreated to a safe distance on the side of the runway while the firefighters rushed in to do their job.
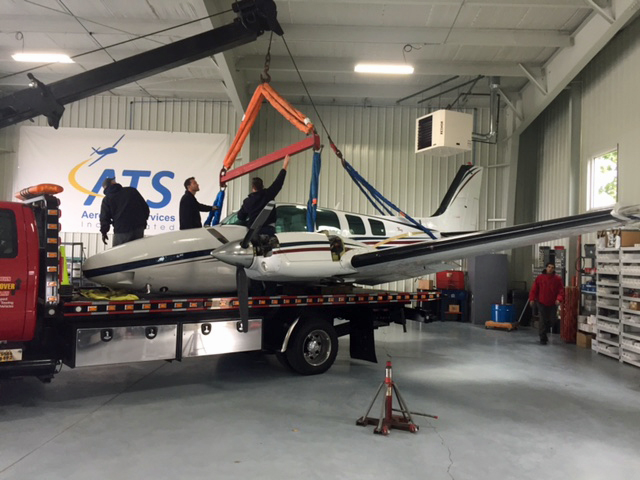
Tow Truck Unloading the Baron in the Maintenance Hangar
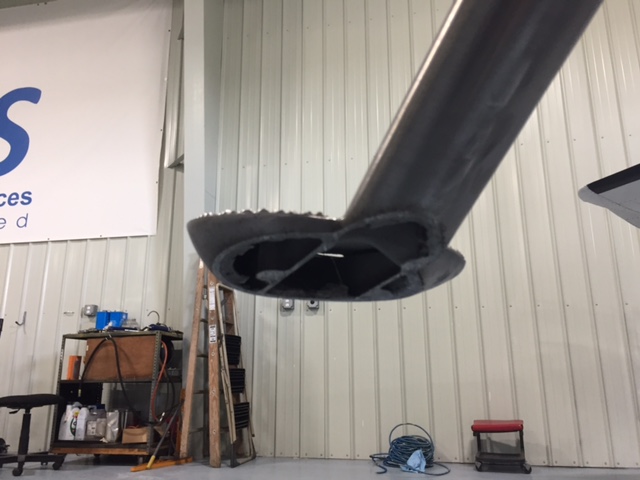
The step took the brunt of the runway damage and actually saved the right hand flap from contacting the runway at all
It was 8:35 am. So, from the time we took off to the time we landed was almost exactly an hour and a half. Not surprisingly, the passengers elected not to continue on to Pittsburgh and instead accepted a ride home in a car. The rest of my day was a blur of paperwork, reports, and phone calls.
Andrew Robinson is an airline pilot for Piedmont Airlines. He is a former 135 Charter Pilot and flight instructor who lives with his wife and 2 daughters in Pennsylvania. He instructs in Beechcraft Bonanzas.
Are you thinking of buying an iPad and going to a paperless cockpit? Have you just recently purchased an iPad and are unsure of how to use Foreflight to it’s fullest extent? Check out this free webinar on Monday, January 19th. Gary Reeves, a Master CFI from California, will be hosting the 90 minute seminar, which begins at 1800 Z. He will be able to point you in the right direction for what type of iPad to purchase, how to set up your Foreflight account, and the basics of using the App.
You can finally get rid of those paper charts, saving clutter in the cockpit. Just make sure you bring along a charger for those extended flight in case your battery dips low!
To sign up for this webinar, click here. There is no cost associated with the webinar.
The Piper PA-46 series, which includes models like the piston engine Piper Malibu and Piper Mirage, and the turboprops Piper Meridian, M500, and M600, is a popular choice for private pilots and business aviation. Known for its impressive speed, range, and pressurization, the PA-46 is a very capable single pilot aircraft. However, like all high-performance aircraft, it presents its own set of challenges and risks, especially when pilot error or adverse conditions come into play.
The 2024 PMOPA (Piper M-Class Owner’s and Pilot’s Association) Convention was the first weekend in November and one of the sessions every year is the PA-46 Safety Review. Sadly, in 2024, the accidents involving various PA-46 models pointed out several areas related to decision making that all pilots need to put be aware of. These accidents highlight critical issues in weather awareness, pilot training, and decision-making, and they provide valuable lessons for other pilots in any type of aircraft.
Overview of the 2024 Piper PA-46 Accidents
The Piper PA-46 is generally regarded as a reliable and capable aircraft, but the safe outcome of a flight often times depends on the pilot’s decision making. There always can be mechanical malfunctions, but those still require good pilot decision making to be able to walk away from the accident.
In 2024, multiple accidents occurred involving different variants of the PA-46, with many of the accidents occurring during critical phases of flight like takeoff or landing. Some of the key factors contributing to these accidents included:
Weather Challenges: In several cases, adverse weather conditions, such as low visibility, thunderstorms, or high winds, contributed to accidents. Despite most PA-46’s being equipped with NexRad and weather radar, pilots sometimes underestimated or misjudged the weather risks.
Pilot Decision-Making: A recurring theme in these accidents was pilot error—specifically, poor decision-making when faced with challenging conditions. In some cases, pilots continued flights despite deteriorating weather or failed to react appropriately to emergency situations.
Mechanical Failures: As with every airplane, systems fail on a Piper PA-46. Several accidents were due to engine power loss. Proper training teaches pilots how to have the right mindset and skills to handle those engine power loss situations, taking a bad situation and having the best possible outcome due to good decision making and gliding skills.
Three Key Lessons for Pilots
The Piper PA-46 accidents of 2024 serve as valuable reminders about the importance of pilot preparation, decision-making, and risk management. Here are three critical lessons pilots can take away from these accidents:
1. Prioritize Pre-Flight Weather Planning
Poor weather conditions were a significant factor in some of the crashes in 2024. Pilots of high-performance aircraft must place a strong emphasis on weather pre-flight planning, especially when flying into regions prone to rapidly changing weather or severe conditions and across frontal systems. Pilots should:
Stay up-to-date with weather briefings before and during the flight, including calls to Flight Service Station if there is serious weather along the route.
Be proactive in altering flight plans or delaying departures when weather conditions become unfavorable.
Utilize onboard weather radar and other tools to monitor changing conditions in real time and avoid nasty looking weather systems. ADS-B and XM Weather are delayed information. They are not meant to be used to find holes through storm systems.
Finally, don’t try to shoot through holes! They are called sucker holes for a reason.
2. Master Emergency Procedures
Pilots of all aircraft, not just PA-46 models, need to practice engine-out procedures multiple times a year with an instructor, not just at recurrent training. The goal is to make emergency procedures second nature which creates the right mindset to handle the emergency, creating a much better outcome. Training should focus on:
Engine-out procedures immediately after takeoff, climbing out at low altitude, and at cruise.
Performance with the propeller feathered and unfeathered, recognizing how the feathered prop increases glide range.
Practicing forced landings and other emergency scenarios regularly to build confidence and competence.
3. Always Plan for an Emergency Landing
It is very important to know your options in the event of an emergency. When flying over mountainous or remote areas, pilots should always have a contingency plan for where to land if something goes wrong. An emergency engine out brief should be a part of every pre-takeoff briefing to put the pilot in the right mindset. Pilots should:
Brief an engine failure on the runway, low altitude, and at an altitude that allows for a safe return to the airport in the event of an engine failure as part of every pre-takeoff briefing.
Study the flight route in detail and identify suitable emergency landing sites along the way, especially when flying in areas with limited options.
Consider the terrain, weather conditions, and available options in the event of an engine failure or other emergency.
Use terrain awareness and other onboard tools to help identify suitable landing areas in real-time, including the ForeFlight Glide Advisor.
Conclusion
The Piper PA-46 series, while a capable and reliable aircraft, demands a high level of skill and preparation from its pilots. The accidents in 2024 serve as a sobering reminder of the critical importance of weather awareness, emergency training, and proper flight planning. By learning from these accidents, pilots can make better decisions, have the right mindset, and reduce the risk of similar accidents in the future.
By prioritizing weather awareness, mastering emergency procedures, and always having a contingency plan for forced landings, pilots of the Piper PA-46 can improve their ability to handle the challenges posed by these high-performance aircraft. These lessons are not just for PA-46 pilots, but for all pilots striving to fly safely and confidently.