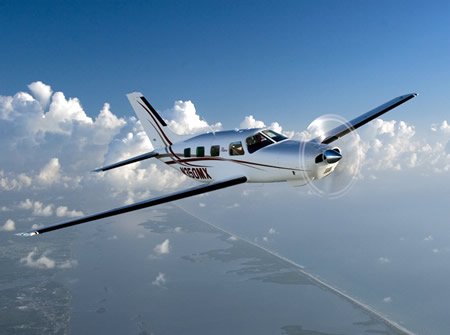
Yes, you heard correctly. Last fall, Cirrus released a program called Cirrus Embark. The Cirrus Embark program offers 3 Free Days of Training to new purchasers of used Cirrus aircraft. The 3 Days is equivalent to the Cirrus VFR Transition Training Course.
Previously, Cirrus offered free factory training to anyone who purchased a new Cirrus from the Cirrus factory. Now, anyone buying a used Cirrus gets the same offer through Cirrus Embark at their home airport with a local CSIP training provider.
IFR pilot? No problem. The Cirrus IFR Advanced Transition Training Course is 5 days in length, but the Cirrus Embark program covers the first 3, reducing the out of pocket pay to only 2 days.
Most of us who have been through instrument training are familiar with the traditional view limiting devices. There is the original hood, which does a decent job of blocking a pilot’s view of outside, but there are still gaps that allow “peeking”, though that peeking doesn’t really help a pilot fly an approach. It does help them figure out which way is up, so it’s not a true simulation.
The other problem with a hood is the process of putting it on to begin simulating IFR conditions, then taking it off when it’s time to land. This process takes time and the instructor has to take the controls (or the autopilot flies), losing some of the realism of the simulation.
Overall, an IFR hood is relatively comfortable. The elastic band sits under your headset, doesn’t squeeze your heard, and doesn’t press underneath your ear cups of the headset, giving you a headache. Hoods are large and somewhat unwieldy.
Foggles are another way to simulate IFR conditions for training. Most of the time, these are safety glasses that have most of the lens blacked out or fogged out, leaving little slits at the bottom for the pilot’s eyes to see the instruments.
Foggles aren’t quite as good as an IFR hood at blocking the outside. Due to their shape, there are often cracks that allow more “peeking” then a hood. The process of beginning to simulate IFR conditions and ending the simulated IFR conditions is easier though, since all the pilot has to do is put the foggles on or slip them off, which can often be done one handed (putting them on can be more difficult one handed since they have to fit underneath your headset). Wearing them for a long period of time can get painful as your headset is probably going to start crushing them against the side of your head.
The best comfort and view limiting combination I have found, so far, is called the ViBAN. It’s very comfortable and does a really good job of simulating IFR by blocking a view of the outside.
What’s the whole goal behind a view limiting device? When a pilot starts instrument training, ideally, all the training would take place in the clouds, since that is why someone get’s an instrument rating. As we all know, this isn’t possible, hence the need to simulate IFR conditions. The problem with simulating IFR is, it’s not true IFR. True IFR conditions are different then what a hood or a set of foggles can simulate. This can lead to spatial disorientation if a fresh instrument pilot enters the clouds for the first time, having done all his training in simulated conditions.
I’ve even heard a story of a pilot who did all his IFR training with a hood, passed his check ride, went into the clouds the first time, and put the hood on because he was getting disoriented since he hadn’t ever experienced true IFR.
What about full motion simulators? How I wish every airport had a full motion simulator for instrument training. Full motion sims are truly the best way to simulate IFR conditions. A pilot can easily get spatially disoriented in a sim if he or she isn’t careful. It’s a great way to simulate IFR conditions, but, alas, this just isn’t possible.
Are we doomed to just do an okay job of training instrument pilots in simulated IFR conditions with a hood or foggles?
Nope, at least not anymore.
Enter the ICARUS Device. The ICARUS Device, which stands for Instrument Conditions Awareness Recognition and Understanding System, is an amazing piece of equipment which truly simulates IFR conditions in the training environment. The ICARUS is a plastic shield that uses a Polymer Dispersed Liquid Crystal film that allows the degradation of a pilot’s visibility. It clips on to a baseball cap and is attached to a battery. That battery is then bluetoothed to an iPad or iPhone App that allows the instructor to put the pilot into and take him out of simulated IFR conditions.
Originally designed for helicopter training, it’s an excellent tool for fixed wing IFR training too. I’ve been using it for the last month and a half and I am hooked. The customer’s that I have used it with truly say that they cannot see a thing outside. Because the plastic shield turns white, it really does give the view that the pilot is in the clouds. The inner ear certainly believes it. The curve of it fits the glare shield in most planes nicely (there is some custom cutting that would have to take place for specifically rounded glare shields, but it fits Cirrus and Piper Saratogas nicely, the two planes I have used it in), and it sits away from the pilot’s face, blocking out all windows, which is what clouds do.
The greatest thing from an instructor’s standpoint is the ICARUS Device app. The pilot puts the device on before taxi and I set the app to VMC. This completely clears the ICARUS Device so the pilot can see just fine for taxi and takeoff. Then, at about 400 AGL, I tap the <1/2 VIS button on the app, and boom, the pilot is in the clouds. I even have a time delay to slowly make the ICARUS Device opaque to simulate slowly entering the clouds. I do the same thing on an approach, except in the reverse order, simulating we are slowly exiting the clouds.
The ICARUS Device is a game changer for IFR training. It’s comfortable, easy to use, the battery lasts for a long time (though bring a standard USB charging cord with you in the plane because the battery failure mode makes the ICARUS Device opaque instead of transparent. You don’t want that to happen at 200 AGL!), and, most important, it truly simulates IFR conditions.
After using it, I believe all flight schools and CFII should get one of these, both in the fixed wing and helicopter world. It’s the best option for simulating IFR conditions.
Texas Top Aviation, LLC was given an ICARUS Device by the ICARUS Device company to test. Texas Top Aviation, LLC was not paid for our above opinion on the ICARUS Device (trust me, if it was terrible, I would have told you!).
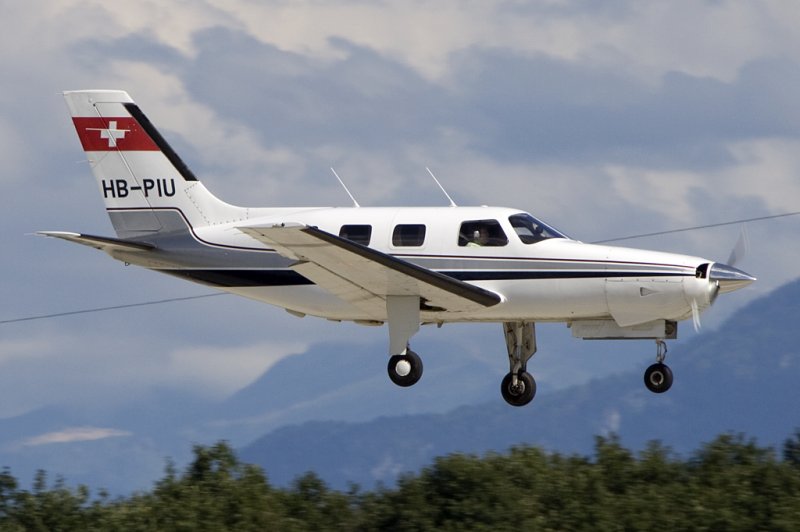
The Malibu & M-Class Owner’s and Pilot’s Association recently released their MMOPA Vision Video. It is a great video detailing the history of the Piper PA46 & the history of MMOPA. The PA46 would have ceased to exist without the founding of the original Malibu Coalition.
Checkout the video above (and Texas Top Aviation’s Hank Gibson even gets a cameo!).
When filing an IFR flight plan, part of the process is determining whether or not an alternate airport is required. An alternate airport is required when the following conditions exist(as is outlined by the FAA in 91.169 (b)):
The weather conditions at the destination airport
From 1 hour before your arrival time to 1 hour after your estimated time of arrival, the weather conditions are forecast to be below
2,000 Feet AGL and/or
3 statute miles visibility
Let’s paint a scenario. You are traveling from KSAT (San Antonio International Airport) to KHBV (Jim Hogg County Airport in Hebbronville, TX). You start to file your flight plan and get down to the space where you put your alternate in. Since Laredo (KLRD) is the closest airport with a TAF, you check Laredo’s TAF and see that the forecast conditions there at your ETA are ceilings 1,500 and visibility of 2sm.
Based on this information, you need an alternate airport. Now, the process of finding one. In Part 91.169 (c), the forecast conditions at the alternate airport must be at or above:
600 Feet AGL and 2sm visibility for a precision approach, or
800 Feet AGL and 2sm visibility for a non-precision approach
Alright, now we have some guidance. Laredo is the nearest airport to KHBV, and we know the forecast from the above TAF showing the conditions are forecast to be above the alternate minimums outlined in Part 91, so let’s pick Laredo. All done?
Not quite. A lot of airports have Non-Standard Alternate Minimums. How do you figure out if they do? The easiest way is to look at any approach plate for the airport. In the notes section of the government plates, there will be a black triangle with an A in it. That means there are non-standard alternate minimums published for that airport (in layman’s terms, different than the ones stated above in Part 91).
Now the question is, where do you find those non-standard alternate minimums? On Foreflight:
Go to the Airports page
Tap the Procedures button
Tap the Arrival button
Tap the Alternate Minimums option
This brings up the IFR Alternate Minimums document for all the airports with non-standard alternate minimums in that area. Scroll through to find Laredo.
As you can see, there are several notes there concerning the different approaches into Laredo. For our example, we’ll say the winds are out of the south and we are planning on flying the ILS 17R if we cannot get into KHBV and have to come to Laredo. The note there is that the Alternate Minimums for the ILS 17R are actually 700 AGL ceilings and 2sm instead of the above state 600 AGL ceilings and 2sm, the procedure is NA if the tower is closed, and NA if the local weather isn’t received.
What does this tell us? If the forecasted ceilings at Laredo were below 600 AGL instead of 700 AGL, we would not be able to use LRD as an alternate airport if we were planning on flying the ILS 17R. The RNAV approaches are all fair game, so a GPS equipped aircraft would have no problem.
On top of that, some approaches at a certain airport are not authorized to be used in the case of the airport being used as an alternate. At the Galveston airport (KGLS), the ILS 14 is NA as an alternate procedure, but all the RNAV approaches are available.
Picking an alternate seems simple at first, but there are actually a lot of things to consider in the process.
Need help remember all this stuff? AOPA has put out a kneeboard sheet that helps all IFR pilots remember those important things when it comes to IFR flying. Check it out here.
MMOPA will be hosting it’s second Safety Standdown event at many locations across the country for Piper PA46 owners and pilots. The first iteration of MMOPA Safety Standdown in the fall of 2019 was a big hit. Each event was very well attended by MMOPA members.
What is Safety Standdown you ask? Safety Standdown was put together as a mid-year training event as part of the MMOPA Master Aviator program. It’s goal is to allow PA46 owners and pilots to fly in to a location at a reasonable time (the event starts at 10am local time), received some good quality ground training over relevant safety topics by highly experienced PA46 instructors, have a free lunch, then depart mid-afternoon to arrive back home before dark.
The event is free to all attendees. Lunch will be provided at each location. This event is not exclusive to MMOPA members, either. Any PA46 owner or pilot, or just anyone interested in the PA46 world, are invited to attend.
Texas Top Aviation is hosting the South Central Region Spring Safety Standdown at the Henrickson Jet Center at the Austin Executive Airport (KEDC). Hank Gibson and Pedro Vargas-Lebron will be presenting on the following topics:
MMOPA Operational Practices review and importance of stabilized approaches
Crosswind Takeoffs and Landings
High Density Altitude Operations
A discussion of thunderstorms, resources in the cockpit for weather avoidance, and accidents that have occurred involving thunderstorms
The MMOPA Spring Safety Standdown will take place on Saturday, April 18th, 2020. Registration is required for the event. The link for registration can be found here.
Come on out for some high quality training and free BBQ with 50 of your closest PA46 buddies!
Glass panel displays, ballistic parachute aircraft recovery systems, portable tablet computers enabling paperless cockpits, and widely available three axis autopilot systems have changed the way we fly, the way we train, and the way we are expected to perform on check rides. Our training and testing paradigms have tried to stay in synch, yet always seem to be catching up to the latest levels of technology.
This is very apparent when we instructors are preparing a student for an FAA practical test. When training aircraft had no autopilots, no GPS, and certainly no parachutes, the general philosophy was that during training, the student should have the lowest level of technology available. This was also the expectation on the check ride. This theory has changed over the years and now the Practical Test Standards require that an applicant integrate all available technology while demonstrating mastery of his or her aircraft. This raises numerous questions from instructors and students about what technology will be available for each task.
One example of this dilemma is found when contemplating an instrument airplane practical test in a Cirrus SR20/SR22. The test requires the task “Instrument Approach without Primary Flight Display”, which has taken the place of what was the partial panel approach, accomplished without use of gyroscopic heading and attitude indicators. In the Cirrus, the standby attitude indicator, standby airspeed, and standby altimeter are available, as is the Multi-Function Display. Guidance from the FAA has us shooting a GPS approach using the moving map display on the MFD after disabling the PFD. Those of us who trained and tested in steam gauge aircraft think that this task should be fairly easy. With a fully functional Attitude Indicator and a nice big moving map display showing our course, a reasonably competent instrument pilot should have little trouble adapting to this setup and flying a good approach.
But, in the Cirrus specifically, and perhaps in other aircraft as well, another question comes up. Can the applicant use the autopilot (which still works just fine after a display failure) during the approach without the PFD? A rather famous DPE who writes for a national magazine says “yes”, opining that not to allow its use would be introducing simultaneous multiple systems failures, which is strictly forbidden in the minds of some. If we follow this logic, we would not test simulated engine failure emergencies in these aircraft either, because to do so would imply failure of not only the engine, but the CAPS parachute system as well. In my former role as a pilot examiner, I always said no, that the approach should be hand flown. Here is my logic.
I was amazed that flight instructors and examiners would accept the substitution of autopilot technology for the skill required to fly an approach without the PFD. I would argue that the intent and the well described emphasis of the PTS is that the applicant must demonstrate the ability to control the airplane after a loss of the primary flight display, not observe and monitor the autopilot controlling the airplane! This argument was generally unpersuasive, so I approached from a different point of view, that of a concerned family member.
“Aunt Betty” represents a future passenger flying with the soon to be rated instrument pilot. Here is the question posed to Aunt Betty: “When we train and test pilots for instrument proficiency, we require them to demonstrate the ability to safely and skillfully fly the airplane without their primary instruments. Now, Betty, in this airplane, we can test this task in one of two ways. We would like your input on which way you would prefer, seeing as you will be a frequent passenger with your nephew. We can either have the pilot (might be your son, brother, husband, or nephew) demonstrate that he can fly the airplane by hand without the PFD, which does require a little more skill and a slightly different technique, or, we can require the pilot to perform this task using the autopilot so that the pilot basically monitors the airplane flying itself on the approach.
“Now, Aunt Betty, a pilot allowed to use the autopilot system on this approach may not have the skill or technique to fly the approach by hand in the clouds should the autopilot shut down due to turbulence or mechanical failure. Should this happen to a pilot without the skill and practice normally required, the odds of a fatal accident occurring would be quite high.
“So what do you think, Aunt Betty? Would you feel more comfortable flying with this fellow if he has demonstrated mastery of the aircraft (sans PFD) without the autopilot or only with its assistance?”
This leads us to a larger discussion about the use of other technology, iPad, GPS moving map, and more. If technology is used as a replacement for pilot proficiency during training and testing, we end up with less skillful, less competent and ultimately less safe pilots. But, if we require that our students demonstrate mastery with the lowest available level of automation and technology (which, by the way, implies excellent fundamental aircraft control skills) then, when technology is added into the equation, we have a safer pilot.
Technology can be a value added safety multiplier, or it can be a crutch needed to make up for lack of fundamental and advanced skills. Crutch or Safety Multiplier, which one will you choose? I know which one Aunt Betty prefers.
Charles McDougal is a flight instructor, corporate pilot, and former DPE who offers basic and advanced flight instruction in the San Antonio area. To find out more information about Charles or to contact him, visit his website, www.flighttrainingcoalition.com.
I was flying in the Rio Grande Valley in south Texas a few weeks ago and heard an IFR clearance given to a King Air that pricked my ears up. It was a clearance from CRP to LRD, but the routing was one you don’t hear too often anymore. Because of active military airspace, the routing was via a radial and DME off the CRP VOR (so a point defined by the radial and DME) to another radial and DME point off the LRD VOR.
It took me a second to think about how to do this the easiest (without setting up the VOR and watching the DME). After a moment’s thought, it’s actually a snap with the G1000. You create 2 user waypoints, one for each Radial/DME spot, then put those 2 user waypoints in your Flight Plan.
Here’s how.
Step 1
Using the big knob, go to the Waypoint chapter. Once there, scroll down to the User Waypoint page using the small knob.
Step 2
Press the New soft key. If you want to name the waypoint something specific, you can do that at the top of the page. If not, it will default to something like VOR 1 or VOR 2.
Step 3
Under Waypoint Type, use the small knob to select RAD/DIS (stands for Radial/Distance).
Step 4
Under Reference Waypoints, again using the small knob (or your keypad), type or dial in the VOR identifier, the radial from that VOR, and the DME distance. Press enter and you are done.
Once you have both User Waypoints created, then just put them in your flight plan (if you forget what you named them, you can just go back to the User Waypoint page), and off you go.
One Comment