News

Dry Motoring a PT6

0 Comments

When it comes to turboprop engines, a hot start is a really bad thing. For you piston drivers out there thinking, “What’s the big deal, you are just starting a hot engine,” then here’s a little education for you.

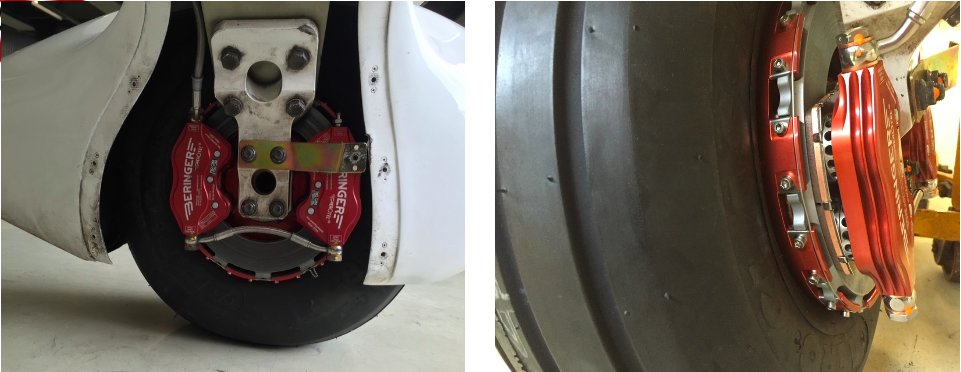
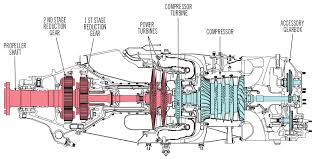
In a PT6 turboprop engine, there is a very important temperature gauge that a pilot monitors very closely during each and every start. It is called the Inter-Turbine Temperature gauge, or ITT. This temperature is a measurement of the exhaust gases between the compressor turbine and the power turbine (s). In the picture below, the probe is located where the blue and red colors meet.

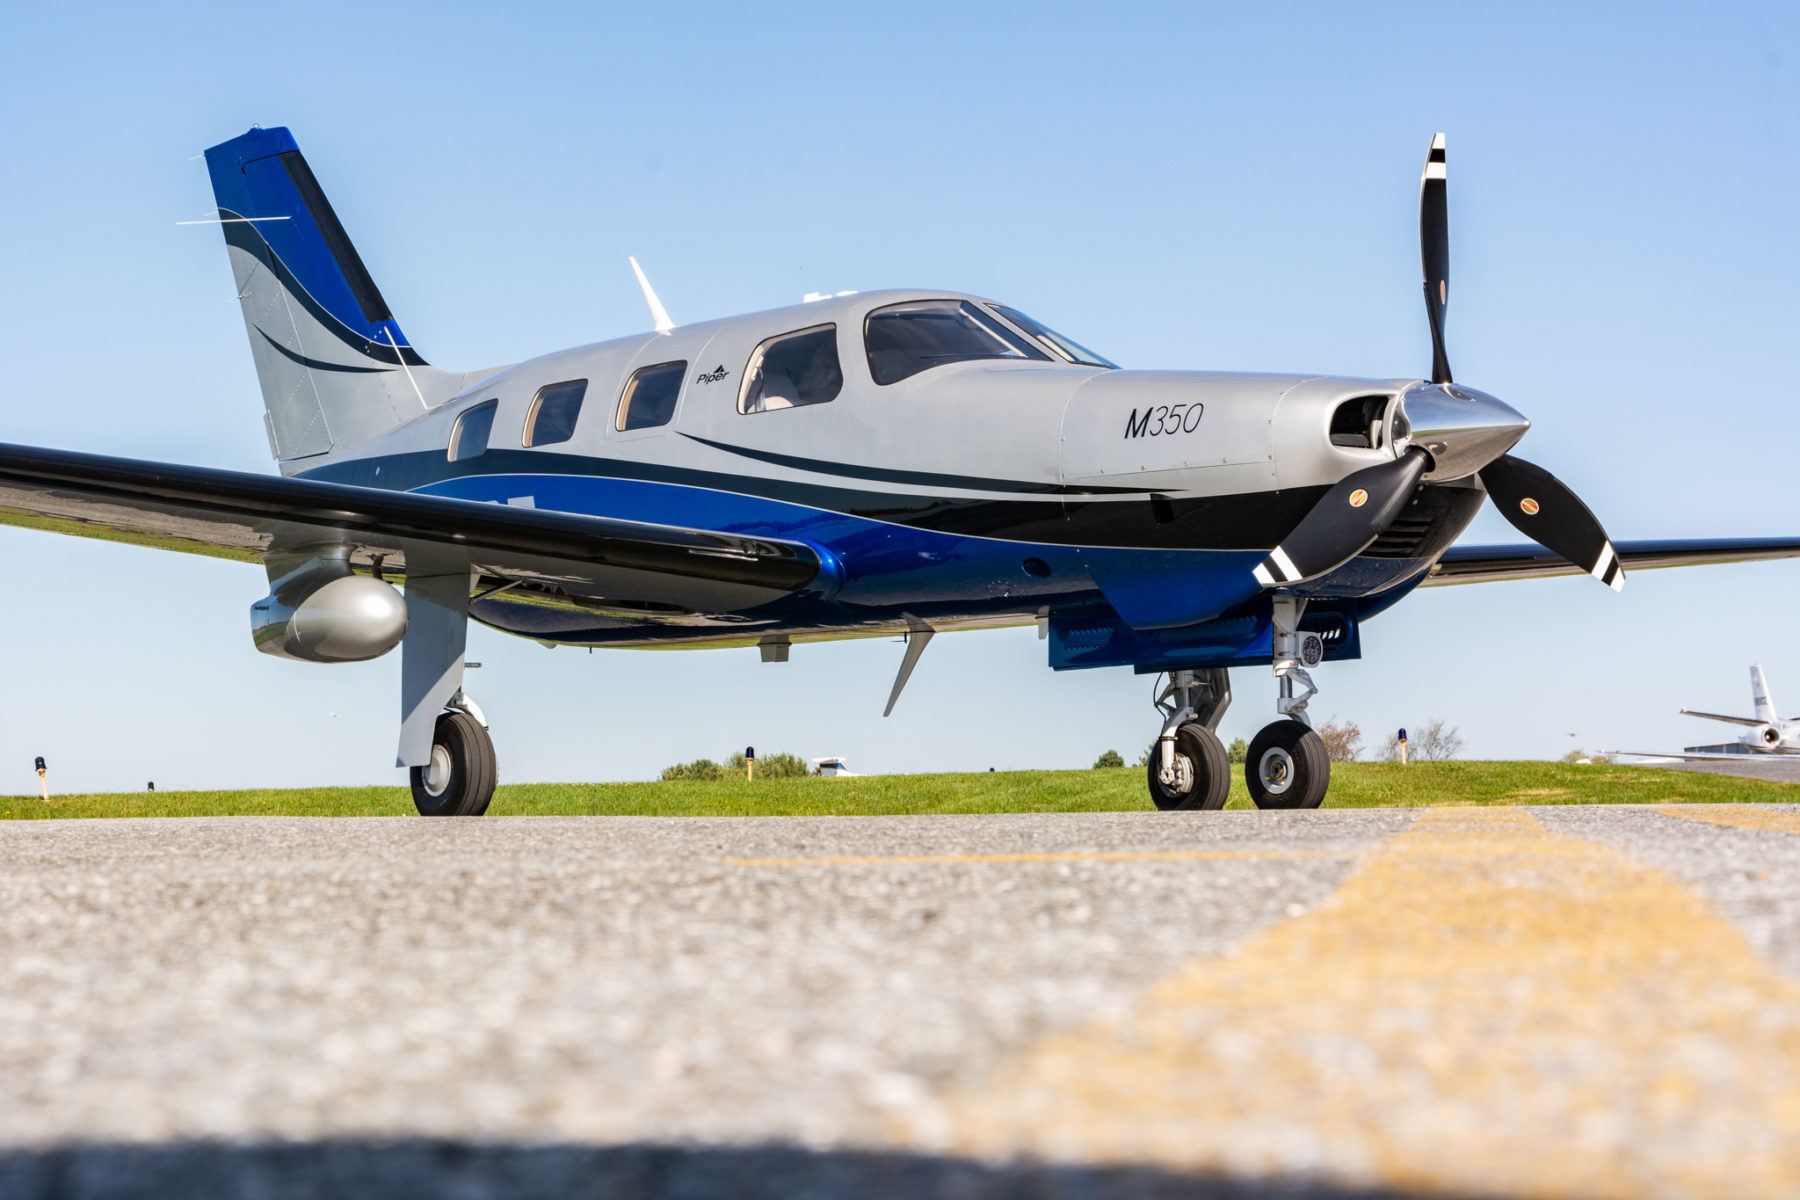
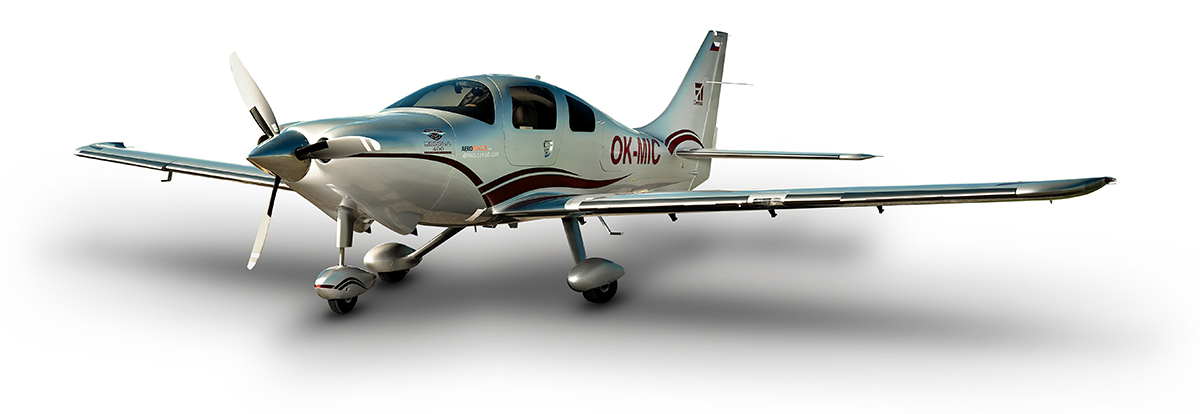
In a turboprop engine, specifically the Pratt & Whitney PT-6 in all it’s different sizes and variations, there will always be a specific temperature that the pilot will want to keep the ITT below. This article will deal specifically with a Piper Meridian.

A Piper Meridian starts hotter than almost any other PT6 engine because of the way it’s air intake is designed. Unlike other turboprops, the Meridian has a permanently open inertial separator. This means that not all the intake air makes it to the engine during start because some of it goes out the inertial separator opening. So, coming to a Meridian from operating other turboprop engines can lead to a little bit of a surprise on the ITT temperature being higher than what a pilot is used to when starting.

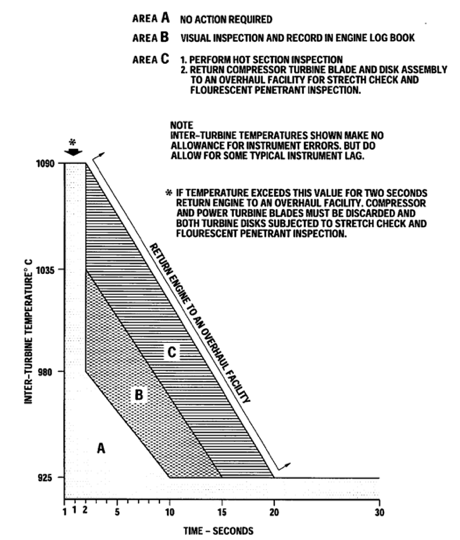
As a rule of thumb, when starting a Meridian, never let a start continue when the ITT hits 875 degrees. Based on the chart below, you are still in the safe zone at 875 and have about a 50 degree buffer before you have to start getting worried.

On cold starts with a good battery or a GPU, 875 is typically not an issue. Most starts when cold are going to be in the high 700s or low 800s. On a cold start, if you are seeing starts in the mid to upper 800s, try starting with a GPU and see if that lowers the start temperature. If it does, then that means your battery is weak and needs to be replaced. Another tell-tale sign of a weak batter is the Ng doesn’t spool up properly (meaning it settles around 12-13%) or takes a really long time to spool up. Also, never start on the battery with less than 24 volts.

When there are multiple flights in one day, the pilot has to take into consideration the warm engine prior to starting. If the ITT, prior to the start sequence, is above 150 degrees, it is time to do some motoring of the engine.

What is motoring? It is simply using the starter to turn the engine, which leads to air being sucked into the engine allowing the engine to cool off prior to start. The theory is, the cooler your engine prior to start, the cooler the ITT peaks at during start.

Here’s the steps on how to dry motor a Piper Meridian:

  • Battery on
  • Strobes on
  • Fuel Pumps and Ignition off
  • Throttle idle
  • Condition Lever feather/cutoff
  • Push the start button
  • Monitor the ITT temperature
  • Reaching 150 degrees, if less than 30 seconds have elapsed:
    • Fuel Pumps on
    • Ignition On
    • Condition Lever run
  • Reaching 150 degrees, if 30 seconds have elapsed:
    • Push Manual/Stop button to stop the start
    • Let starter rest for 30 seconds

The starter has a 30 second limit on the Meridian, followed by a 30 second rest period. You can do the sequence twice, then, after the 3rd start, there is a 30 minute rest period. Typically, if the ITT won’t cool down to 150 after the 3rd time, there is probably something wrong.

The most important thing a pilot can remember is never, ever push the condition lever forward if the ITT is above 150 degrees. You’ll be well on your way to avoiding hot starts that way.

Cirrus Braking Systems: A Hot Topic

0 Comments

You just bought your Cirrus SR22. You do some flying, and soon find yourself with a brake temp sticker that isn’t white anymore. You remember from your transition training that any color other than white is a no go. You now ponder…. I don’t remember getting on the brakes hard, or riding the brakes while taxiing, but sure enough they aren’t white anymore. You now start thinking that all the horrible rumors of Cirrus brakes are true. They overheat so fast!

I would like to share some little-known facts about the Cirrus factory equipped braking system. Following the procedures below can help make the brakes last a little longer. There is also a very popular STC that allows upgraded brakes to be installed on all SR series aircraft. More to come on that.

Notice the Top Yellow sticker is far darker than the Bottom. The Yellow temperature indicator turns at 300 Degrees, while the bottom Blue indicator turns at 330 Degrees. This is an indication to the pilot that if the bottom sticker has turned colors, that the braking system has exceeded 330 degrees and is in need of servicing.

Above is a photograph of an SR22 G1 braking system with turned brake temp stickers. The first things you may notice is that there are in fact two brake temperature stickers. We can only see the bottom blue sticker from the inspection port on the wheel pants. The other is higher on the caliper; in order to see it, the wheel pant must be removed. This isn’t common knowledge because there is no mention of this additional indicator in the POH.

Now you may be asking yourself, what can I do to extend the service life of my factory equipped Cirrus brakes? Here are some tips. First, always taxi at 1000 RPM and use the rudder as much as you can while only tapping the brakes. This is not fool proof, since sometimes, depending on the grade, you will have no choice but to utilize brake tapping to keep the aircraft going straight. Taxiing is not typically where the brakes get overheated, though, but this is still a good practice to follow.

What we tend to see is that the Cleveland brakes are generally overheated on landing. We always recommend to make sure your final approach speed is not excessive, land in the first 1/3 of the runway, and let the aircraft rollout to a smooth stop. What tends to happen is that the aircraft is too fast, and the pilot tries to exit at a certain taxi way, or brakes hard and continues to ride the brakes after landing during taxi. If you do your best to avoid these habits, it will serve you well.

This braking system remained unchanged all the way until the 2016 G5 Cirrus SR series. Starting in 2016, the factory equipped G5 and G6 Cirrus SR series all now come standard with a single piston hydraulic braking system from Beringer. The Cirrus Beringer brakes far exceed the braking power and durability of the old system. The new system is more robust, withstands heat better, and is is very well built. There is also an option for an upgraded dual caliper system to increase durability and stopping power. A braking system STC for the older Cirrus G1 through early G5 models was created to upgrade those airplanes to the better stopping power and cooling of the Cirrus Beringer brakes.

Seen above is a page from a Beringer catalog highlighting the Cirrus SR series STC kits. Your local Cirrus service center will be able to quote prices for the kits. We have over 1000Hrs spent behind Beringer equipped Cirrus aircraft and the difference is quite apparent. The pilot has better control of the aircraft, no spongy pedal, and the confidence to get the plane stopped without possibly overheating the braking system. This, in our opinion, is one of the best upgrades you can do to your Cirrus.
Above is what an STC upgraded braking kit from Beringer looks like, as well as the new temperature indicator for the pre/post flight inspection. Notice the black spot on the left hand picture. These brakes have been overheated.

One other difference for a pilot to note is that once upgraded to the Cirrus Beringer brakes, there is only one temperature indicator and it changes color at a whopping 450 Degrees Fahrenheit! Needless to say, it can handle some heat! The new temperature indicator is now Orange in color and turns grey/black when overheated.

On the left are the original Cirrus factory brakes. On the right is the caliper to the new Beringer brakes for a Cirrus.
Dual Caliper Cirrus Beringer Brakes

The Cirrus Beringer brakes upgrade is quite a step up in the world of slowing down. However, this doesn’t mean that they are completely issue free. There is one little-known problem with Beringer brakes that is not that big of a deal and can be fixed with relative ease.

The rotor on the Beringer braking systems is “free floating,” meaning it is not necessarily “fixed” in position when secured down to the spindle. It is “keyed” into the wheel rim with the male and female side interlocking.

The brakes occasionally will get noisy, causing a “knocking” noise when brakes are applied. This noise is caused by the small metal tabs that tighten up the space between the wheel and the brake rotor. This is so the small tabs wear with use instead of the aluminum rim that they are fixed to. So, if your Beringers are making a knocking noise when brakes applied, this is most likely your culprit.

These gaps above are the “keyed” position where the rotor finds home in the rim. Without these tabs that wear with use, we would be replacing the rim more often than the much cheaper replaceable tabs.

It is highly recommended to upgrade your original Cirrus factory brakes to the new Beringer braking system. You will deal with less maintenance, less chance of a brake overheat, and less confusion on whether or not your brakes are airworthy. For more info, you can check out the Cirrus website for the single or dual caliper Beringer brakes.


Zach Anderson is a Cirrus Standardized Instructor Pilot (CSIP) for Texas Top Aviation. Zach comes from a auto mechanic background and is very familiar with the ins and outs of maintenance. He started working for Texas Top Aviation in December 2020.

Coflyt Ownership App

0 Comments

A new app came out last year that fits a need for many owners. Coflyt, available on the Apple App Store for $14/month for up to two airplanes, helps immensely with staying organized. Those questions of, “When is my oil change due?” or “Has the plane had it’s IFR inspections?” are easily answered by checking the app instead of having to dig through maintenance logs.

Not only does Coflyt help keep track of maintenance, but it also houses squawk lists that owner’s can send to maintenance shops as well as keeping track of Airworthiness Directives. If the pilot remembers at the end of flights to put the amount in, it even shows how much fuel is remaining in the airplane.

For flying clubs and partnerships, it provides easy scheduling without having to share calendars. Payments can also be taken and flights tracked. No more paper flight sheets after flights to track down.

As a pilot, it helps immensely to be organized. For $14 a month ($36/month for partnerships or flying clubs), that’s a small price to pay.

The Anatomy of a Hot Start

2 Comments

Are you one of those pilots who hates fuel stops simply for the fact that the engine doesn’t have time to cool off?  You pump gas into the plane, hit the bathroom, get in the plane and the oil temperature is still up at 160-170 degrees, leading you to have to figure out how to get the plane going again with a hot engine.  For those without proper training, this usually means a lot of jockeying around with the throttle, mixture, and fuel pump to try and get the thing started without flooding it.  After coughing and wheezing several times, the engine finally comes to life, leaving you to only guess what worked and without the knowledge of how to duplicate it.

Hot Start 2

Let’s take a step back for a minute to see what is actually happening with a hot engine.  Once the engine is shut off, the fuel in the lines leading from the tank to the engine is vaporized, meaning there is more air in the fuel lines than liquid fuel.  In the engine block itself, there is still liquid fuel in the injectors, but only enough for the engine to cough then quit if started.

When a normal priming and starting procedure is performed, too much fuel is forced into the cylinders and the engine becomes flooded.  A flooded engine just means that the stoichiometric ratio is way too rich, meaning there is too much fuel and not enough air.  The prime does the trick of getting the fuel vapor out of the fuel lines, but it shoves too much fuel into the cylinders.  Once the engine is flooded, it’s a waiting game to allow air into the engine to get the mixture right.  All Lycoming powered high performance and turbo charged engines are notoriously easy to flood when hot.

So, what’s the solution?  By taking a step back to see what is actually happening, you can attack the problem from the source, which is the fuel lines.  You need to get the vapor out of the fuel lines and get some liquid fuel in there.  The procedure for this varies based on the make and model of engine, but I’m going to use the example of the Continental IO-550-N that is in a Cirrus SR22.  I found this procedure in the Continental Engine Manual and it works every time.

(Pilots of other airplanes, keep reading.  I have sections below for PA46s, Columbias, and Bonanzas as well )

  • Mixture:  Full Lean (this allows fuel in the fuel lines, but prevents it from going past the mixture control into the engine, sending all fuel back to the fuel tank; a small amount of fuel leaks past the mixture control providing prime for the engine)
  • Throttle:  Idle
  • Low Boost Pump:  Run for 30-60 seconds (see note below)  (15 seconds in the Turbo Cirrus)
  • Mixture:  Full Rich
  • Throttle:  Open about 1/4 travel (not 1/4″, that won’t be enough)
  • Boost Pump:  Off, but have your finger on Low Boost
  • Starter:  Crank (engine will turn over a few more times before firing, this is normal)
  • At the first indication of start, turn the Low Boost on, increase the throttle to ensure the engine catches,  then adjust the throttle for 1,000 RPM
    • The engine will fire right about the time you start thinking it isn’t going to work

A few notes regarding engine temperatures:

  • If the oil temperature is above 150 degrees, a hot start will be required.  If oil temp is close to 200 degrees, run low boost for 60 seconds in a non-turbo.  If oil temp is 175, run low boost for 45 seconds in a non-turbo.  If oil temp is 150, run low boost for 30 seconds in a non-turbo.  Use 15 seconds for all temps above 150 in a Cirrus Turbo.
  • If the oil temperature is between 125-150, skip the hot start procedure, don’t prime the engine, leave the boost pump off, and crank the engine, then boost pump on when it starts and slightly increase throttle to make sure the engine catches
  • If the oil temperature is between 100-125, skip the hot start, don’t prime the engine, and perform a normal start with the boost pump on
  • If the oil temperature is below 100, perform a normal prime and start

Piper Malibu (PA46-310P with Continental Engine)

  • Mixture:  Full Lean (this allows fuel in the fuel lines, but prevents it from going past the mixture control into the engine, sending all fuel back to the fuel tank; a small amount of fuel leaks past the mixture control providing prime for the engine)
  • Throttle:  Idle
  • Low Boost Pump:  Run for 15-30 seconds depending on oil temperature…
    • Greater than 150 degrees: 30 seconds
    • Less than 125-150 degrees:  15 seconds
    • Less than 100-125 degrees, no need to run the Low Boost
    • Perform normal cold start below 100 degrees
  • Mixture:  Full Rich
  • Throttle:  Open about 1/4 travel (not 1/4″, that won’t be enough)
  • Boost Pump:  Off, but have your finger on the Primer Button
  • Magnetos:  On
  • Starter:  Crank (engine will turn over a few more times before firing, this is normal)
  • Engine should fire with the Low Boost Pump off, but…
    • If the engine starts to die, simultaneously increase the throttle a little bit and hit the primer button.
    • Only tap the primer button, don’t hold it as you’ll flood the engine if you hold it At the first indication of start, turn the Low Boost on, increase the throttle to ensure the engine catches,  then adjust the throttle for 1,000 RPM

Piper Mirage & Matrix (PA46-350P and PA46-350T with Lycoming Engine)

  • Leave throttle and mixture idle
    • Before you turn the battery on, ensure the mixture is idle cutoff
    • If the mixture is forward and the battery is on, the low boost pump in the fuel tank will start pumping fuel to the engine and quickly flood it
  • Ensure Magneto switches are on
  • Open throttle 1/4 travel (not 1/4″ as this won’t be enough)
  • Crank
  • As soon as the engine begins coughing and wheezing (and this is what it will sound like), push the mixture 3/4 of the way forward
  • Once the engine has a good solid fire, smoothly and swiftly push the mixture all the way forward
  • Reduce throttle
  • Note:  The Emergency Boost Pump can be used as part of the hot start technique, but I usually leave it off.
    • Pro to the Emergency Boost Pump is it can help suck more fuel in and purge vapor during the start
    • Con is that if the engine doesn’t start on the first try, you are flooding your motor

Columbia 400

  • Throttle and Mixture Idle Cutoff
  • Vapor Suppression:  Run for 30-60 seconds.  Reference above temperatures on the non-turbo Cirrus for run times
  • Mixture full forward
  • Throttle 1″ in
  • Prime for 3 seconds, then off
  • Crank
  • Once engine fires, primer might need to be pushed momentarily to purge excess vapor
    • On Columbia 350s, the throttle should be twisted (or pushed depending on if it’s an Avidyne or Garmin Columbia) in while cranking
    • Be prepared to reduce power once engine fires

Beechcraft 36 Bonanza

  • Throttle and Mixture Idle Cutoff
  • Low Boost:  Run for 30-60 seconds.  Reference above temperatures on the non-turbo Cirrus for run times
  • Mixture full forward
  • Throttle open 1″
  • High Boost until fuel flow peaks, then off
  • Crank
  • Once engine fires, Low Boost might need to be engaged momentarily to purge excess vapor

There are other “procedures” for hot starting out there, but most of them involve starting with full throttle, which can lead to the airplane shooting ahead on a ramp or taxi way if the brakes aren’t properly set.  This can lead to high repair costs, so always be cautious.  Figuring out what is happening when the engine is hot will give you a better chance of getting it started right away.

Using the ICARUS Device to Simulate IFR Conditions

0 Comments

Most of us who have been through instrument training are familiar with the traditional view limiting devices. There is the original hood, which does a decent job of blocking a pilot’s view of outside, but there are still gaps that allow “peeking”, though that peeking doesn’t really help a pilot fly an approach. It does help them figure out which way is up, so it’s not a true simulation.

The other problem with a hood is the process of putting it on to begin simulating IFR conditions, then taking it off when it’s time to land. This process takes time and the instructor has to take the controls (or the autopilot flies), losing some of the realism of the simulation.

Overall, an IFR hood is relatively comfortable. The elastic band sits under your headset, doesn’t squeeze your heard, and doesn’t press underneath your ear cups of the headset, giving you a headache. Hoods are large and somewhat unwieldy.

Foggles are another way to simulate IFR conditions for training. Most of the time, these are safety glasses that have most of the lens blacked out or fogged out, leaving little slits at the bottom for the pilot’s eyes to see the instruments.

Foggles aren’t quite as good as an IFR hood at blocking the outside. Due to their shape, there are often cracks that allow more “peeking” then a hood. The process of beginning to simulate IFR conditions and ending the simulated IFR conditions is easier though, since all the pilot has to do is put the foggles on or slip them off, which can often be done one handed (putting them on can be more difficult one handed since they have to fit underneath your headset). Wearing them for a long period of time can get painful as your headset is probably going to start crushing them against the side of your head.

The best comfort and view limiting combination I have found, so far, is called the ViBAN. It’s very comfortable and does a really good job of simulating IFR by blocking a view of the outside.

What’s the whole goal behind a view limiting device? When a pilot starts instrument training, ideally, all the training would take place in the clouds, since that is why someone get’s an instrument rating. As we all know, this isn’t possible, hence the need to simulate IFR conditions. The problem with simulating IFR is, it’s not true IFR. True IFR conditions are different then what a hood or a set of foggles can simulate. This can lead to spatial disorientation if a fresh instrument pilot enters the clouds for the first time, having done all his training in simulated conditions.

I’ve even heard a story of a pilot who did all his IFR training with a hood, passed his check ride, went into the clouds the first time, and put the hood on because he was getting disoriented since he hadn’t ever experienced true IFR.

What about full motion simulators? How I wish every airport had a full motion simulator for instrument training. Full motion sims are truly the best way to simulate IFR conditions. A pilot can easily get spatially disoriented in a sim if he or she isn’t careful. It’s a great way to simulate IFR conditions, but, alas, this just isn’t possible.

Are we doomed to just do an okay job of training instrument pilots in simulated IFR conditions with a hood or foggles?

Nope, at least not anymore.

Enter the ICARUS Device. The ICARUS Device, which stands for Instrument Conditions Awareness Recognition and Understanding System, is an amazing piece of equipment which truly simulates IFR conditions in the training environment. The ICARUS is a plastic shield that uses a Polymer Dispersed Liquid Crystal film that allows the degradation of a pilot’s visibility. It clips on to a baseball cap and is attached to a battery. That battery is then bluetoothed to an iPad or iPhone App that allows the instructor to put the pilot into and take him out of simulated IFR conditions.

Originally designed for helicopter training, it’s an excellent tool for fixed wing IFR training too. I’ve been using it for the last month and a half and I am hooked. The customer’s that I have used it with truly say that they cannot see a thing outside. Because the plastic shield turns white, it really does give the view that the pilot is in the clouds. The inner ear certainly believes it. The curve of it fits the glare shield in most planes nicely (there is some custom cutting that would have to take place for specifically rounded glare shields, but it fits Cirrus and Piper Saratogas nicely, the two planes I have used it in), and it sits away from the pilot’s face, blocking out all windows, which is what clouds do.

The greatest thing from an instructor’s standpoint is the ICARUS Device app. The pilot puts the device on before taxi and I set the app to VMC. This completely clears the ICARUS Device so the pilot can see just fine for taxi and takeoff. Then, at about 400 AGL, I tap the <1/2 VIS button on the app, and boom, the pilot is in the clouds. I even have a time delay to slowly make the ICARUS Device opaque to simulate slowly entering the clouds. I do the same thing on an approach, except in the reverse order, simulating we are slowly exiting the clouds.

The ICARUS Device is a game changer for IFR training. It’s comfortable, easy to use, the battery lasts for a long time (though bring a standard USB charging cord with you in the plane because the battery failure mode makes the ICARUS Device opaque instead of transparent. You don’t want that to happen at 200 AGL!), and, most important, it truly simulates IFR conditions.

After using it, I believe all flight schools and CFII should get one of these, both in the fixed wing and helicopter world. It’s the best option for simulating IFR conditions.

Checkout the ICARUS Device website for more information and to hear the story of the company.


Texas Top Aviation, LLC was given an ICARUS Device by the ICARUS Device company to test. Texas Top Aviation, LLC was not paid for our above opinion on the ICARUS Device (trust me, if it was terrible, I would have told you!).