MMOPA will be hosting it’s second Safety Standdown event at many locations across the country for Piper PA46 owners and pilots. The first iteration of MMOPA Safety Standdown in the fall of 2019 was a big hit. Each event was very well attended by MMOPA members.
What is Safety Standdown you ask? Safety Standdown was put together as a mid-year training event as part of the MMOPA Master Aviator program. It’s goal is to allow PA46 owners and pilots to fly in to a location at a reasonable time (the event starts at 10am local time), received some good quality ground training over relevant safety topics by highly experienced PA46 instructors, have a free lunch, then depart mid-afternoon to arrive back home before dark.
The event is free to all attendees. Lunch will be provided at each location. This event is not exclusive to MMOPA members, either. Any PA46 owner or pilot, or just anyone interested in the PA46 world, are invited to attend.
Texas Top Aviation is hosting the South Central Region Spring Safety Standdown at the Henrickson Jet Center at the Austin Executive Airport (KEDC). Hank Gibson and Pedro Vargas-Lebron will be presenting on the following topics:
MMOPA Operational Practices review and importance of stabilized approaches
Crosswind Takeoffs and Landings
High Density Altitude Operations
A discussion of thunderstorms, resources in the cockpit for weather avoidance, and accidents that have occurred involving thunderstorms
The MMOPA Spring Safety Standdown will take place on Saturday, April 18th, 2020. Registration is required for the event. The link for registration can be found here.
Come on out for some high quality training and free BBQ with 50 of your closest PA46 buddies!
Ever wanted to be a Cirrus owner, but the economics of being a single owner just don’t make sense for you? If you’re in the Houston area, you now have a chance to join a Cirrus SR22 partnership at the West Houston Airport, KIWS.
The group, CirrusShare, is a 4 member group, but one of the members is looking to sell his share. The airplane is a 2007 G3 SR22. It is in excellent condition, with dual WAAS 430s and air conditioning.
Ever wanted to be a Cirrus owner, but the economics of being a single owner just don’t make sense for you? If you’re in the Houston area, you now have a chance to join a Cirrus SR22 partnership at the West Houston Airport, KIWS. The group, CirrusShare, is a 4 member group, but one of the members…
Skyvector has changed it’s look. The aeronautical chart website is now offering flight plan filing capability. In order to gain the ability to file flight plans, the user has to form an account first.
Personally, I really liked how Skyvector had a simple interface before they changed. As an instructor, a lot of times, I go to multiple airports on one flight. It was really nice to just plug in airport IDs to check distances and heading information on Skyvector. The new format is a little clunky as the website has made it a little more difficult to do what it did best before.
Did the aviation community need another venue to file flight plans? Not with Foreflight, Garmin Pilot, and WingXPro leading the way in the app market. Skyvector was smart in not trying to develop another app to compete with the big boys.
Will the new Skyvector last? We’ll see. I’m hoping they’ll go back to the way they used to be, but we’ll see. I may use it enough to come around to liking it.
Skyvector has changed it’s look. The aeronautical chart website is now offering flight plan filing capability. In order to gain the ability to file flight plans, the user has to form an account first. Personally, I really liked how Skyvector had a simple interface before they changed. As an instructor, a lot of times, I go…
For years, there has been clamoring for airplanes to get rid of lead in piston engine Avgas. In the early 2000s, Thielert created a Jet A burning piston engine for Diamond Aircraft that gained some traction, but Thielert had internal issues and ended up declaring bankruptcy. Several other Jet A piston engines have come down the line since then to some success (Diamond is currently using 2 Austro manufactured Jet A piston engines on it’s DA62 and a Continental manufactured Jet piston on the new DA50).
The problem with a Jet A burning piston engine, though, is that those engines would be very expensive to put on existing airplanes, not to mention the cost of the STC alone.
Insert GAMI (General Aviation Modifications, Inc.), the famed Ada, Oklahoma company that championed turbo normalization, balanced injectors, and lean of peak operations. For those that have been to GAMI’s engine class, you know that these guys are at the very top of their game in engine knowledge.
In 2010, GAMI started the process of creating an Unleaded form of Avgas, terming it G100UL (the irony of traditional Avgas, 100LL, is the LL starts for low lead, but the lead levels in 100LL are actually quite high. UL stands for UnLeaded). Just before Osh Kosh in 2021, GAMI revealed that it’s work has come to fruition, gaining an STC for G100UL for Lycoming powered Cessna 172s.
The amazing thing about GAMI’s product is that it is able to mix with 100LL and not cause any issues. This means fuel trucks, fuel lines, fuel pumps, and aircraft fuel tanks don’t have to have any modifications to them to use G100UL. Plus, pilots will see longer engine life using G100UL because of the simple elimination of the lead. In tests, combustion chambers in cylinders burned cleaner, so theoretically, cylinders and engines will last a lot longer.
According to the company, GAMI has a few more tests to run and, assuming those go well, G100UL will be available for a whole lot more airplanes. An STC will still be required for the use of G100UL in a specific airplane, but the hope is, eventually, 100LL will be completely replaced by G100UL. The only downside is that G100UL is expected to cost about $1/gallon more than 100LL.
GAMI has partnered with Avfuel, so expect to see 100UL showing up at all Avfuel FBOs in the next year or two.
To read more, check out the press release on AOPA’s website.
For years, there has been clamoring for airplanes to get rid of lead in piston engine Avgas. In the early 2000s, Thielert created a Jet A burning piston engine for Diamond Aircraft that gained some traction, but Thielert had internal issues and ended up declaring bankruptcy. Several other Jet A piston engines have come down…
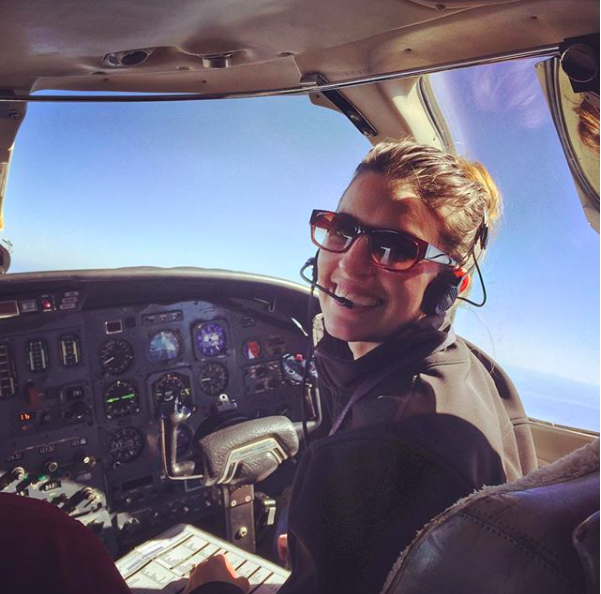
Texas Top Aviation has added a new member to our instructing team. Stephanie Mertz was hired in March 2019 and will be specializing in G1000 & Instrument instruction.
Stephanie graduated from LeTourneau University in Longview, Texas with a degree in Aeronautical Science, earning her commercial single and multi ratings while there. She began her aviation career in Ontario, California flying a Pilatus PC-12 for charter and medical trips. While operating the PC-12, she gained valuable experience flying all over the US and Mexico.
In 2013, Stephanie moved back to East Texas with her husband where she worked as a contract pilot flying a variety of Citations as well as a Falcon 10. A few years later, she became involved in her local Ninety-Nines chapter and joined their mentorship program.
After earning her CFI, CFII, and MEI, Stephanie returned to her alma mater to pass on her flying passions to college students through flight instructing. After a year of teaching at LeTourneau, she and her husband, with their first baby in tow, moved to the Austin area. Now she is instructing with Texas Top Aviation while acting as a mentor for other women working on achieving their flying dreams.
Texas Top Aviation has added a new member to our instructing team. Stephanie Mertz was hired in March 2019 and will be specializing in G1000 & Instrument instruction. Stephanie graduated from LeTourneau University in Longview, Texas with a degree in Aeronautical Science, earning her commercial single and multi ratings while there. She began her aviation…
I love Lightspeed headsets. They are very comfortable, durable, and reasonably priced. Plus, when you call Customer Service, you are actually talking to someone who works for the company and knows what they are talking about.
One thing to watch out for with Lightspeed headsets is the Mono vs. Stereo option. On the Zulu 3, there is a very small control panel underneath the battery compartment to change from Mono to Stereo. If you have any kind of modern audio panel, you will definitely want to do this. Here’s why.
I was flying in a Cirrus SR22 G5 last fall with a Garmin 350 Audio Panel. Everything worked fine talking to the ground and tower controllers. Once I took off and was switched to approach, everything went quiet. I could hear the approach controller, but couldn’t transmit. I thought my headset had bit the dust. There was another set in the plane that I switched to, but I thought the transmit function of mine was out.
I sent the headset back to Lightspeed for repair. The headset was still under their 5 year warranty, which is really nice! I got it back a few days later, plugged it in to another Cirrus, and still had nothing. I was getting frustrated, but then a light went on. One of my colleagues had mentioned something about mono and stereo in the Lightspeed. I popped the batteries out, flipped the switch over to stereo, and wa-la! Everything was fully operational.
If you get Lightspeed headsets, you’ll want to make sure it is set on Stereo, as they all come from the factory on Mono. If you get a PFX, there is an easy access button on the side of the battery unit to switch from Mono to Stereo.
I love Lightspeed headsets. They are very comfortable, durable, and reasonably priced. Plus, when you call Customer Service, you are actually talking to someone who works for the company and knows what they are talking about. One thing to watch out for with Lightspeed headsets is the Mono vs. Stereo option. On the Zulu 3,…
You are hand-flying an in-the-weather descent, power back, heading for the FAF. You start a 30 degree banked turn at your lead point to cross the FAF, when your passenger behind you gasps. Looking over your shoulder, you see he has spilled his drink into his lap…too bad for him! However, when you turn your head back to your panel, your inner ear tumbles and you see 45 degrees of bank, 15 degrees nose low, airspeed increasing.
Congratulations! You have managed to get distracted and sucked into an unusual attitude recovery. By the book, you should roll wings level, pull to the horizon, and adjust power as necessary to keep the airspeed within limits. In this scenario, if you had not experienced vertigo, you might have been able to roll to less than 30 degrees of bank, recover your turn, pull the nose up to less than the original descent attitude, pulled a bit of power to slow back to your desired penetration speed and then resumed your desired ground track. However, this would only be appropriate if you had full situational awareness as to the deviations caused by the look over your shoulder, plus full confidence that the moderate corrective actions would put you back on your desired flight path.
As a military aviator, I learned unusual attitude recoveries based upon hard maneuvering at extreme pitch and bank angles. In the hard-maneuvering environment, an unusual attitude could be 90 degrees straight up, airspeed decreasing below 120 kts…or 80 degrees nose low, 135 degrees of bank, airspeed increasing through 500 kts… etc. In these cases, understanding angle of attack, or AOA, is critical to maintaining controlled flight and returning to a normal attitude.
In an extreme nose-high attitude, a military aviator is trained to roll the aircraft to 90 degrees of bank, ease off the back-stick pressure to reduce AOA, add power as required, and allow the nose to slice back towards level, rolling to wings level as the nose approaches the horizon. If nose low, the recovery procedure is to roll rapidly, within asymmetric g limits, until wings level, then to pull at optimum g loading to recover to level flight. For the nose-low recovery, power was normally reduced until airspeed could be assessed and brought under control. However, when doing the nose-low pullout at 7-9 gs, pulling the power for too long would leave you much to slow to resume combat.
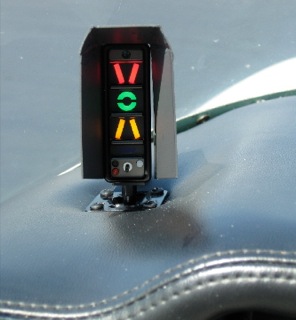
The AOA gauge on a fighter’s glare shield is a primary reference during hard maneuvering and for landing. The AOA for optimum maneuvering is 13 degrees, displayed as the green circle or “green donut” on the gauge. The red chevron on top represents a slow condition of 15 degrees or more and the yellow lower chevron represents 11 degrees or less.
For normal landing in the F-16C, the pilot slows to 220 kts and configures abeam the touchdown point while mentally computing the final approach airspeed of 136 kts plus 4 additional knots for each 1000 lbs of fuel. When rolling off the perch and flying the final turn, the pilot would usually only glance once at the airspeed once to ensure final turn airspeed of 180 kts while using the AOA sight gauge as the primary indicator of a best performance turn. As long as the AOA was green donut (13 degrees) or less, you would not stall. If on speed and 13 degrees wasn’t going to get you around the turn to line up with the runway, you knew you were going to overshoot. You never wanted to see the red chevron of 15 degrees or more as that meant you were too slow, pulling too hard, and in danger of building an un-recoverable sink rate!
Few GA aircraft are currently equipped with AOA indicators, though there are several after market devices available for retrofit. However, knowing the impact of AOA and how to manage it is vital to safe aviating, even without an AOA gauge. The bottom line is, as long as you don’t ask the wing to produce more angle of attack than it can handle, you won’t stall.
Practicing final turn stalls, to know what the wing feels like as you get too slow or pull too much on the controls, increasing AOA past the critical point, will keep you safe when you encounter that unexpected overshooting wind or you find yourself inadvertently on too tight of a downwind leg. Better to overshoot or take it around to try again, than to pull too hard and exceed critical AOA.
Mike Hostage is a retired USAF pilot with 37 years of experience, flying a wide variety of aircraft. An instructor pilot for more than half of his 4800 flight hours, Mike is currently qualified in a Cirrus SR-22T and regularly flies his two homebuilt sailplanes.
You are hand-flying an in-the-weather descent, power back, heading for the FAF. You start a 30 degree banked turn at your lead point to cross the FAF, when your passenger behind you gasps. Looking over your shoulder, you see he has spilled his drink into his lap…too bad for him! However, when you turn your…