Redbird Skyport at the San Marcos Regional Airport will be hosting it’s 6th Annual Redbird Migration Flight Training Conference. The event is focused on flight training and flight training providers. Past speakers have included the president of Hartnell Propellers, the CEO of Big Red, and various Redbird Executives.
The list of speakers for this year’s Migration has yet to be released, but it promises to be a good lineup. Attendees every year always compliment Redbird on the event and the speakers they bring in.
If you are a CFI or flight school owner interested in attending, check out Redbird’s event page to request an invitation.
The Cirrus Pilot Proficiency Program (CPPP) will be coming to the Galaxy FBO at the Lone Star Executive Airport in Conroe, TX again this year. The dates of the event will be October 14th-16th.
Wondering what the CPPP program is?
“CPPP offers a weekend event for Cirrus owners and their partners that focuses on Cirrus-specific knowledge and flying proficiency. We bring some of the most experienced flight instructors who regularly teach in all kinds of Cirrus airplanes flown for all kinds of missions. We have prepared an extensive syllabus of ground courses that complement the transition training and delve into areas of greatest need for Cirrus pilots.” (from CirrusPilots.org)
The weekend starts off with a group dinner on Friday night. The Saturday morning ground session focuses on General Aviation Safety with special focus on the Cirrus accident statistics. Normal and emergency procedures are also reviewed.
In the afternoon on Saturday, the attendees are split into two groups. The first group has a myriad of options for ground sessions covering all topics related to Cirrus aircraft and operations. The second group flies, then they switch for the second 3 hour session. Sunday brings the same split, with more courses offered and more flying.
While the Cirrus pilots are flying and learning more about their airplanes, CPPP offers a Partner in Command course for flying partners on Saturday. This allows flying partners to be more comfortable in the airplane and teaches them what to do if something were to happen to the pilot.
All in all, attending a CPPP will improve both Cirrus knowledge and Cirrus flying skills. It’s highly recommended for all Cirrus pilots.
To register for the CPPP event in Conroe, check out the CPPP website.
The Cirrus Pilot Proficiency Program (CPPP) will be coming to the Galaxy FBO at the Lone Star Executive Airport in Conroe, TX again this year. The dates of the event will be October 14th-16th. Wondering what the CPPP program is? “CPPP offers a weekend event for Cirrus owners and their partners that focuses on Cirrus-specific…
MMOPA will be hosting it’s second Safety Standdown event at many locations across the country for Piper PA46 owners and pilots. The first iteration of MMOPA Safety Standdown in the fall of 2019 was a big hit. Each event was very well attended by MMOPA members.
What is Safety Standdown you ask? Safety Standdown was put together as a mid-year training event as part of the MMOPA Master Aviator program. It’s goal is to allow PA46 owners and pilots to fly in to a location at a reasonable time (the event starts at 10am local time), received some good quality ground training over relevant safety topics by highly experienced PA46 instructors, have a free lunch, then depart mid-afternoon to arrive back home before dark.
The event is free to all attendees. Lunch will be provided at each location. This event is not exclusive to MMOPA members, either. Any PA46 owner or pilot, or just anyone interested in the PA46 world, are invited to attend.
Texas Top Aviation is hosting the South Central Region Spring Safety Standdown at the Henrickson Jet Center at the Austin Executive Airport (KEDC). Hank Gibson and Pedro Vargas-Lebron will be presenting on the following topics:
MMOPA Operational Practices review and importance of stabilized approaches
Crosswind Takeoffs and Landings
High Density Altitude Operations
A discussion of thunderstorms, resources in the cockpit for weather avoidance, and accidents that have occurred involving thunderstorms
The MMOPA Spring Safety Standdown will take place on Saturday, April 18th, 2020. Registration is required for the event. The link for registration can be found here.
Come on out for some high quality training and free BBQ with 50 of your closest PA46 buddies!
MMOPA will be hosting it’s second Safety Standdown event at many locations across the country for Piper PA46 owners and pilots. The first iteration of MMOPA Safety Standdown in the fall of 2019 was a big hit. Each event was very well attended by MMOPA members. What is Safety Standdown you ask? Safety Standdown was…
For years, Cirrus owners who have the Avidyne Entegra PFD and MFD have been clamoring for Avidyne to come up with some sort of upgrade. The Entegra, or EX 5000 system, is late ’90s technology and, though it still works, there will be a certain point in the future when it gives up the ghost. Avidyne still supports the Entegra system, but it’s hard for a Cirrus owner to see all this new technology coming on the market while not being able to upgrade the original Avidyne screens.
Avidyne gave it a go in the late 2000s with a panel upgrade known as the R9. The R9 was a good system, but Avidyne was very slow on the release (rumors were the company wanted it to be absolutely perfect before releasing it, which frustrated Cirrus, who then switched to the Garmin Perspective panel, leaving Avidyne behind) which led to the R9 only being available as a very expensive retrofit to the Entegra system ($80,000-$90,000 for the system and install). Needless to say, there weren’t that many takers.
Late in 2020, Garmin announced it had received certification to retrofit Avidyne Entegra equipped Cirrus Aircraft with the company’s G500 TXi displays, which gave new hope to G1, G2, and G3 Cirrus owners. The price tag wasn’t outrageous, coming in at $16,000 apiece for each display. The G500 TXi works with any possible GPS that can be installed in a Cirrus (GNS 430Ws, GTN 650s, GTN750, or the Avidyne IFD 540/440) and with the DFC 90 Autopilot (if the Cirrus is still equipped with an STEC 55x, the Autopilot would need to be changed to either a DFC 90 or a Garmin GFC 500).
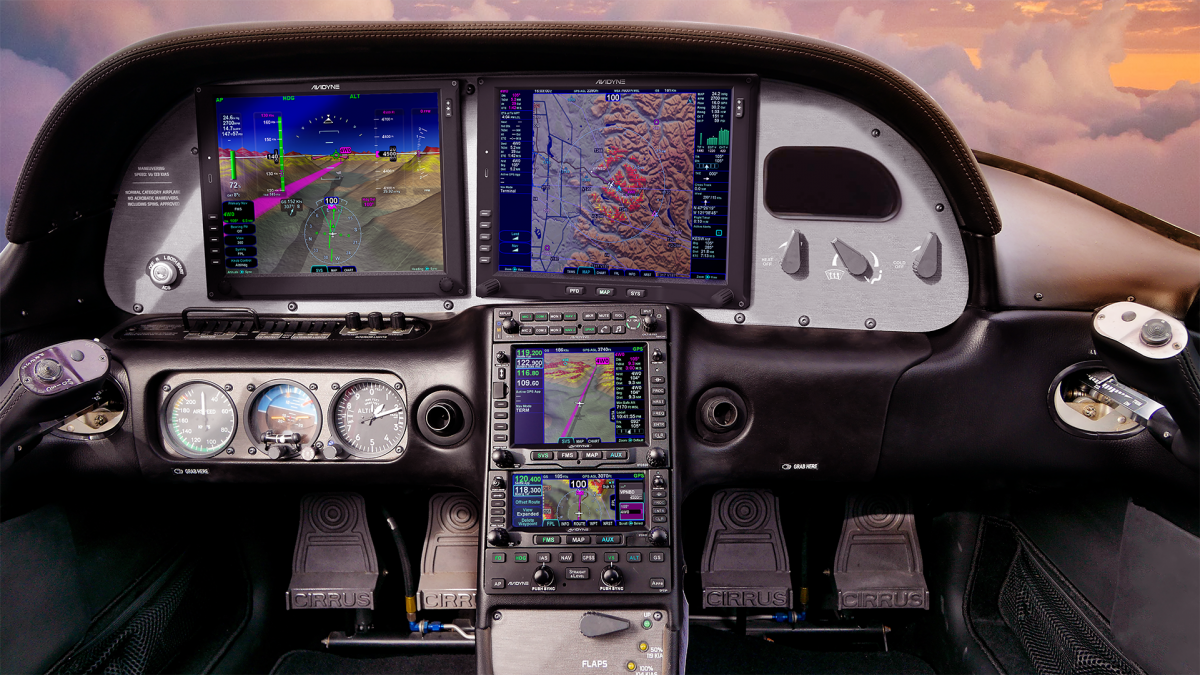
Fast forward to June of 2021 and Avidyne re-enters the game with the Avidyne Vantage. After the R9 debacle, Avidyne has opted this time to go for a more simple approach. The Avidyne Vantage system changes out the Entegra PFD and MFD with bigger screens (12″; Garmin’s TXi units are only 10.6″) with high quality pixelation, synthetic vision, engine gauges, checklists, charts, a hybrid touch interface, and all the other information that was offered on the Entegra system, just all more modern and updated. The best news is that the system provides redundant reversionary mode, which was one of the biggest complaints about the Entegra system.
The price tag comes in lower than Garmin, with each screen being priced at $12,500. The units will work seamlessly with the Avidyne IFD Series GPS units, though, as of this writing, it isn’t clear if the Avidyne Vantage will work with Garmin GTN 430Ws or the GTN 750/650. I would assume that the integration would be there, but I haven’t found any documentation stating that yet. DFC 90 Autopilot integration would be seamless, but not sure the integration with the STEC 55x or Garmin GFC 500.
Avidyne says the Vantage will be fully certified in early 2022, but the company is taking orders now. Visit the Avidyne Website for more information.
For years, Cirrus owners who have the Avidyne Entegra PFD and MFD have been clamoring for Avidyne to come up with some sort of upgrade. The Entegra, or EX 5000 system, is late ’90s technology and, though it still works, there will be a certain point in the future when it gives up the ghost….
I love cross country flights. Airplanes are designed to travel. When I was instructing private students, my favorite lessons were always the first cross country flights. I looked forward to getting my students out of the pattern, away from the practice area, and showing them what they could really look forward to as a private pilot.
When I was in college, my friend and I borrowed his dad’s Cessna 150, did a cross country flight in it from Indianapolis to Kitty Hawk, then down the coast to Florida. We camped in the grass next to the airplane wherever the airport managers would let us and had our own aviation adventure complete with mechanical problems, unexpected weather, and interesting people along the way. These types of trips have produced some of the best memories and experiences that I’ve acquired during my aviation career so far.
Unfortunately, I know many people whose only cross country flight experience is what was necessary to satisfy their Private and Instrument training requirements. Some of them are nervous about the idea of venturing away from the familiarity of their home airport, while others are relatively new pilots who simply don’t know where to start planning a long cross country flight.
I’ve taken some notes on my preparations for an upcoming cross country flight that I’ll be flying in my dad’s Bonanza. I’m hoping this checklist might help others feel a little more confident that they have everything they need to get going.
Oil
Its always a good idea to bring a few extra quarts of oil. If you stop somewhere and find you need some, its nice to have the right kind on hand. Never assume that the airport you’ll be landing at next will have oil available.
I like to keep a few extra quarts of 15W50 in the back of the Bonanza, just in case (photo from oil-store.com)
Fuel Stops
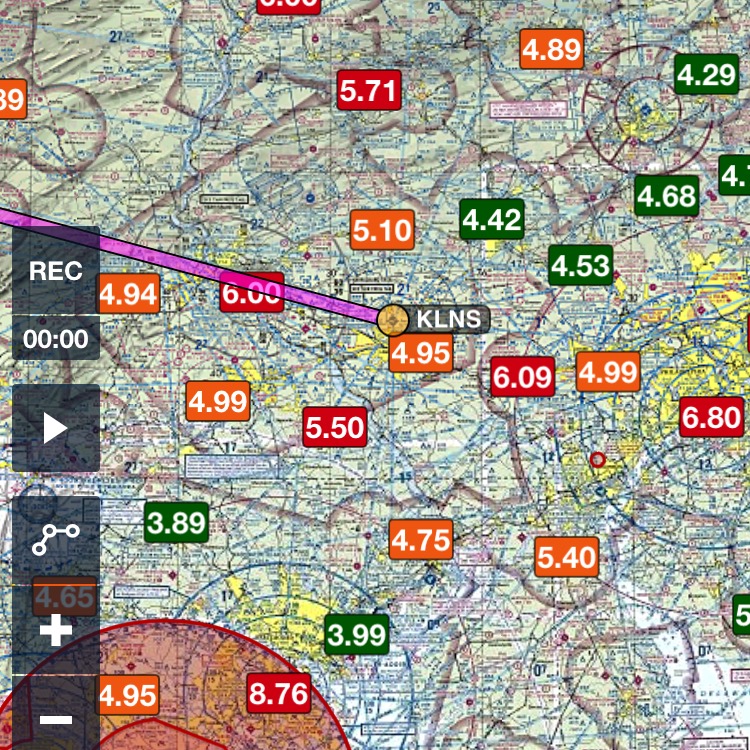
Here is an example of the 100LL price tool as seen on the Foreflight maps page
I’ve learned the hard way that calling ahead to verify fuel availability can be extremely important. I landed at an airport in Ohio one beautiful Sunday morning to find that the FBO wouldn’t be open until much later in the day. Naturally, there was no other fuel available on the field. I hadn’t called ahead to verify the hours of fuel availability (I assumed they had Self Serve) and had only 2 options: wait a while for the FBO to open, or try and find somewhere else nearby that had gas. As far as price, www.100LL.com is a valuable tool for finding cheap fuel. Foreflight also has posted prices for 100LL and Jet A, but it’s still a good idea to call ahead and verify price and availability.
Batteries for electronics
It’s miserable to run out of batteries for a noise canceling headset with hours remaining in your flight. Bring spares, not only for your headset, but for your flashlight and other gadgets as well. Make sure your hand held GPS, iPad, and Stratus are charged (if you have them). I like to carry a charge cable and adapter as a backup so that I can plug things into the cigarette lighter.
Jumper Cables
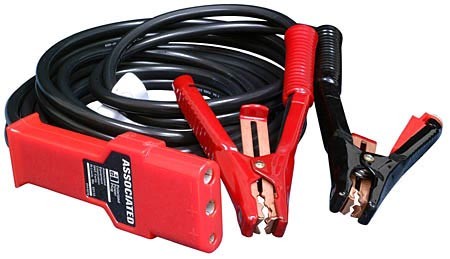
We always carry the ground power cable in the back of the Bonanza just in case we ever need a jump. Last month, when I was flying down to Texas, I was glad I had them; we had a dead battery after our fuel stop and had to borrow some power from an FBO worker’s pick up truck. Don’t assume that wherever you are stopping will have the correct cable to jump your airplane, especially if it requires a specific plug.
These are the cables we keep in the back of the Bonanza (photo from airchief.com)
Parking Fees
Every airport is different. I like to call ahead and find out how much the FBO is going to make me pay in landing/overnight fees. When I flew up to Buffalo last summer, I paid 25 dollars for parking at Niagara International (IAG). Had I parked at Buffalo (BUF), they would have charged me over $200.
Approach plates and charts
Make sure you have current approach plates and charts either physically available or downloaded before you blast off. Having a copy of an AFD is a good idea as well, be it digital or paper.
Rental cars
If you arrange it beforehand, many FBO’s will have the car ready for you upon arrival. You may also be able to drop the car off at the FBO when are finished, instead of taking it back to the rental agency. It sure is nice to have the car pulled up next to the airplane when it’s time to unload.
Hotels
Bigger FBO’s may have discounted rates with local hotels. If you call the desk and explain your needs they may offer to book it for you, or at least point you in the right direction. It may be worth picking an airport with more expensive fuel if it puts you closer to the hotels or restaurants you want to go to.
Come back next month for Part 2!
Andrew Robinson is a 135 Charter Pilot and flight instructor who lives with his wife and 2 daughters in Pennsylvania. He flies Pilatus PC-12s and instructs in Beechcraft Bonanzas.
I love cross country flights. Airplanes are designed to travel. When I was instructing private students, my favorite lessons were always the first cross country flights. I looked forward to getting my students out of the pattern, away from the practice area, and showing them what they could really look forward to as a private…
It’s winter time, which means it’s time to use those Piper PA46 de-ice boots a little more often. Most of us know the winter flying rules, don’t stay in ice, get rid of frost, etc. However, most of us aren’t as familiar with how to maintain those Piper PA46 de-ice boots. The do need some TLC every couple of months to keep them in tip top shape.
Below is the recommendation from Goodrich (the maker of the boots) on what to use to clean and polish the boots and how often to do it.
Steps 1-3 below are your twice a year items to make your Piper PA46 de-ice boots last through the lifetime of the aircraft.
Step 1-ShineMaster Prep
ShineMaster Prep strips all the dirt, grime, grease, oil, silicone products and old ShineMaster on the Piper PA46 de-ice boots to prep them for Step 2.
AgeMaster is your second step the in the Piper PA46 de-ice boot preservation and protectant process. AgeMaster is a rubber preservative that protects against weathering, ozone, and ultraviolet rays.
Make the first application when your de-ice boots are 6 months old, then re-apply every 150 hours (or twice a year) after that.
Step 3 in the Piper PA46 de-ice boot care is ShineMaster. As the name implies, ShineMaster shine’s the boots up after getting rid of all the old gunk & grime with ShineMaster Prep and after AgeMaster is applied. 2-3 coats should be sufficient.
During icing season, Goodrich recommends ICEX II. ICEX II is an ice inhibitor that should be applied every 50 hours during ice season. This will help prevent ice from sticking to the Piper PA46 de-ice boots. ICEX II can be found here.
Finally, for general cleaning of the boots after each flight, utilize Goodrich Aerospace Cleaner to debug, then follow up with Goodrich Aerospace Protectant. Goodrich claims their Protectant will resist dust, soiling, and staining. There may be less bugs to clean each time!
With just a few hours a couple times a year spent working on the Piper PA46 de-ice boots, owners will never have to worry about the hefty price tag of boot replacement!
It’s winter time, which means it’s time to use those Piper PA46 de-ice boots a little more often. Most of us know the winter flying rules, don’t stay in ice, get rid of frost, etc. However, most of us aren’t as familiar with how to maintain those Piper PA46 de-ice boots. The do need some…
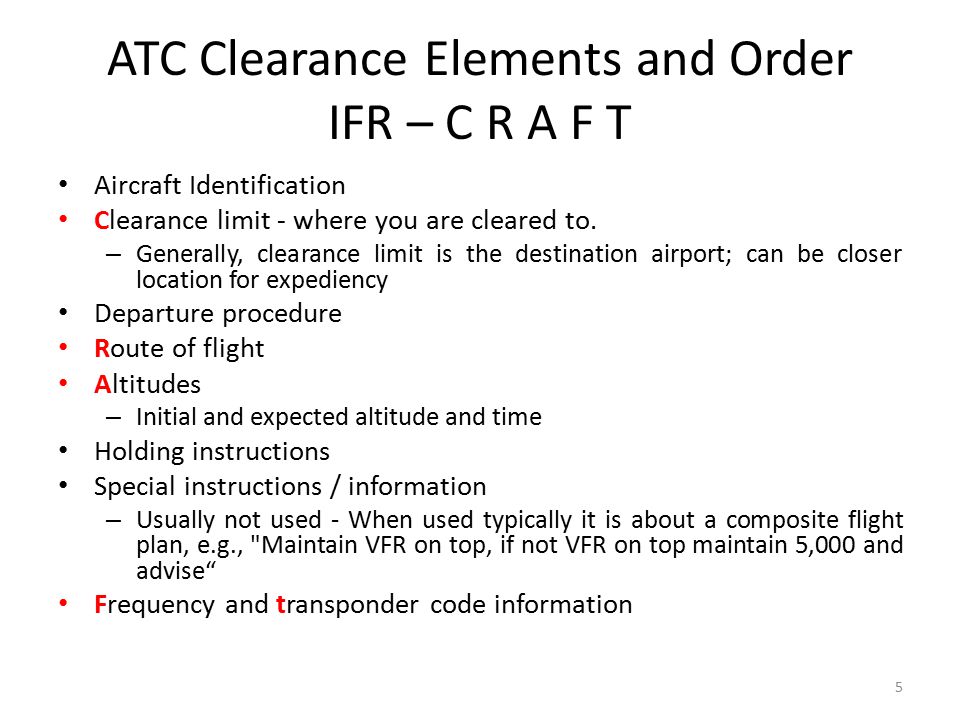
Picking up an IFR clearance at first can seem very simple. But, when taking off from an untowered field, especially if a pilot is based at a towered airport, it can be a little more complex. Based at an untowered field? The towered procedures are a little more streamlined, but still different.
Towered Airports
Class B or Class C
At Class B or Class C airports, there is a dedicated frequency to get an IFR clearance and VFR departure instructions called Clearance Delivery. It is published in the airport facilities directory as well as most approach plates. Before you call Clearance Delivery, get the ATIS and tell the controller you have it as well as where you are located on the airport.
Class D
Some Class D airports have a Clearance Delivery frequency (see KADS, Addison, TX), but for the most part, you’ll get your IFR clearance on the Ground frequency. If there is a dedicated Clearance Delivery frequency, the ATIS will specify whether or not to get your clearance on it or on ground control.
Class D towers are only part time towers, usually closing between 7pm and 10pm local time, depending on how busy the airspace is. These airports usually have published Clearance Delivery frequencies to contact either the local approach control or center to pick up an IFR clearance on the ground. They will be published on approach plates and in the A/FD.
Untowered Airports
Class E
There are a number of Class E airports that are Class E all the way down to the surface (see KLFK, Angelina County). At these airports, there will either be a Clearance Delivery frequency or you call on the Center or Approach frequency to get your clearance (at KLFK, you call Center as there is no Clearance Delivery frequency. At Temple, KTPL, there is a published Clearance Delivery frequency which you would be talking to Grey Approach).
Class G
There are two ways to pick up an IFR clearance at a Class G airport, one typically a little safer than the other.
The first option is to take off and maintain VFR while calling Center or Approach control. They will give you your clearance making you IFR and allowing you to enter the clouds. This option can be unsafe depending on the terrain surrounding the airport and how low the ceiling is. If the ceiling is overcast at 1,000, you can legally remain VFR in Class G airspace at 500 AGL, but that isn’t the safest option and you might not be able to raise ATC at that altitude.
The second, and safer option, is to call on the phone. Flight Service has a nationwide Clearance Delivery phone number that every pilot should have saved in their contacts (888-766-8267). Typically, you want to wait to call them until after you are done with your runup because they only give you a five or ten minute window to get off the ground. With bluetooth equipped headsets, this usually isn’t a problem.
Be prepared when calling Clearance Delivery on the phone to wait a few minutes. Us pilots aren’t good at being patient sometimes, but the FSS has to call Center on the phone to get your clearance and release and this can take a few minutes. Be prepared for that going in and just be patient. Remember, this is the safer option!
There are a handful of Class G airports around the US that have a GCO, a Ground Communications Outlet. With a GCO, you tune up the frequency, then click the mic 4 times to talk to ATC or 6 times to talk to FSS. Each mic click must be at least one second, so if you click the mic too quickly, it won’t work.
At certain airports that are underlying an approach control’s airspace, you can actually call the TRACON directly and get your clearance from them (5C1, the Boerne Stage Airport, for example. San Antonio approach is the controlling agency and you can call them directly to pick up your clearance). It’s a good practice to get the TRACON phone number and save that in your contacts as well.
Picking up an IFR clearance at first can seem very simple. But, when taking off from an untowered field, especially if a pilot is based at a towered airport, it can be a little more complex. Based at an untowered field? The towered procedures are a little more streamlined, but still different. Towered Airports Class…