Merry Christmas 2018

Merry Christmas 2018

0 Comments

So the Word became human and made his home among us. He was full of unfailing love and faithfulness. And we have seen his glory, the glory of the Father’s one and only Son (John 1:14).

From the Texas Top Aviation family (Hank, Kelsey, Everett, Cooper, and Cord) to your family, we wish you a Merry Christmas!  We are thankful for how the Lord has blessed us this year.  We pray for blessings on your family this coming year.

Keep the wheel side down and the sunny side up!

Merry Christmas!

The Go Around Button

0 Comments

Back in the old days, when flying an approach in an early Cirrus SR22 (circa 2004; yes, in airplane technology, those were the old days), performing a missed approach procedure was a lot of work.  You were low to the ground and weren’t able to see the runway.  Then, you had to start climbing so you don’t hit the ground, then push a lot of buttons in order to get the GPS and autopilot set fly the missed approach procedure.  It was very easy to get distracted with button pushing, then forget to fly the airplane, putting yourself and passengers in very unsafe circumstances.  The go around button has changed all that.

Going Missed the Old Fashioned Way

Let’s stick with our example of the 2004 Cirrus.  The SR22 in 2004 was equipped with the Avidyne Entegra system, complete with dual Garmin 430 GPS units, and an STEC 55x Autopilot.  A very capable IFR flying machine (we could use the same example of a 2004 or 2005 Lancair Columbia 350 or 400 that was equipped the same way, except the screens were vertical instead of horizontal).

Avidyne Cirrus Go Around Button

We’ll use the ILS 15 at the Temple airport, KTPL, for our example.  You pass TPL, the outer marker at 1,683 with the glide slope already centered.  Everything is going well so far.  The number 1 Garmin 430 is set to VLOC and the autopilot is showing NAV and APR for the lateral guidance and GS on the vertical, tracking the glide slope.  The last weather report stated the clouds were Broken at 500 feet, so it appears like you’ll be able to get in on the approach.

As you get closer to the Decision Altitude, the clouds aren’t letting up at all.  You hit 1,000 feet on your altimeter, 120 feet above the minimums, and you still can’t see a thing.  Another 100 feet lower doesn’t change anything, so you elect to proceed with the missed approach.  This means things are about to get busy.

Here’s the process:

  • Fly the airplane first, meaning shut off the autopilot, pitch the nose up to about 7 degrees, TRIM, add full power, retract the flaps, and step on the right rudder
  • The Garmin 430 is now in SUSP mode, meaning the missed approach point is locked in as the active waypoint.  So, you have to press the OBS button to cause the GPS to cycle over to the missed approach procedure
  • You have to press the VLOC button on the Garmin 430 in order to change the CDI back to GPS
  • You have to re-engage the autopilot by pressing NAV twice (which engages GPS Steering mode)
  • You have to reset your altitude bug (if you hadn’t set it for the missed approach altitude previously)
  • You have to press VS and ALT on your autopilot to have the STEC continue the climb

That’s a lot of work, isn’t it?  Plus, that’s an extensive amount of head down time in the cockpit, with your eyes looking elsewhere other than the instruments while hand flying.  All very low to the ground, I might add.  Can you see how this can be dangerous?  (Note:  The Avidyne IFD 550 has made this a little easier with automatically switching from VLOC to GPS and automatically engaging the missed approach procedure in the flight plan)

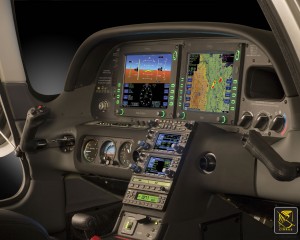
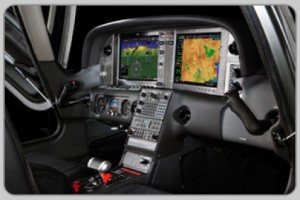
The advent of the Go Around Button has streamlined the process, leading to safer operations where it matters most.  The functions of the Go Around Button vary based on the airplane, but here are three examples, the Garmin G1000 Cessna Corvalis TT, the Garmin G1000 Piper Mirage, and the Garmin Perspective Cirrus SR22.

Cessna Corvalis TT

We’ll take the above situation and swap out the airplanes.  Gone is the 2004 Cirrus SR22.  Insert a 2008 Cessna Corvalis TT, equipped with the Garmin G1000 suite and the GFC 700 autopilot.  The go around button is positioned directly above the twist in throttle.

Cessna Corvalis G1000 Go Around Button

When you push the Go Around Button, here’s what the system does:

  • Disconnects the Autopilot
  • Sets the Flight Director for 7.5 degrees pitch up (which is about your normal climb angle) and wings level
  • Switches the CDI back to GPS
  • Takes the GPS out of SUSP mode and cycles the flight plan to the first waypoint on the missed approach procedure

Here’s what you have to do:

  • Follow the flight director by pitching the nose up and TRIM
  • Add full mixture, prop and throttle (prop & throttle should be full already)
  • Retract the flaps
  • Step on the right rudder
  • Re-engage the autopilot, then press NAV and VS (or FLC) and set your altitude bug if it isn’t already set

Not too bad, eh?  Makes the whole situation streamlined and safer.

Piper PA46-350P Mirage

Same situation, different airplane.  You’ll notice the procedure for the Piper Mirage is almost exactly the same as the  Corvalis procedure.  The difference between the two airplanes is where the autopilot controller is.  In the Corvalis, the autopilot controller is positioned on the left side of the MFD, making it easy to scan back and forth while pushing buttons on the autopilot.

The Piper Mirage autopilot controller is positioned below both screens and in front of the power quadrant. With this positioning, the pilot’s eyes have to go a lot further to see which autopilot button he is pushing. In this case, it becomes very important to get the airplane climbing and trimmed before going down to engage the autopilot.

As in the Corvalis, here is what the Go Around button does:

  • Disconnects the Autopilot
  • Sets the Flight Director for 7.5 degrees pitch up (which is about your normal climb angle) and wings level
  • Switches the CDI back to GPS
  • Takes the GPS out of SUSP mode and cycles the flight plan to the first waypoint on the missed approach procedure

And here’s what you have to do:

  • Follow the flight director by pitching the nose up, then TRIM
  • Add full mixture, prop and throttle (prop & throttle should be full already)
  • Retract the flaps
  • Step on the right rudder
  • Re-engage the autopilot, then press NAV and VS (or FLC) and set your altitude bug if it isn’t already set

Cirrus SR22

Cirrus Perspective Go Around Button

This time, we’ll use the 2010 Cirrus SR22T with the Garmin Perspective and GFC 700 Autopilot. One thing I really like about how Cirrus configured their system is where the Go Around button is.  It’s actually on the throttle itself, making it much more intuitive.  This way, you can press the Go Around button while adding full throttle.

There is one major difference between the Garmin Perspective in the Cirrus and the G1000 in the Corvalis. When you press the Go Around button in the Cirrus, the autopilot actually stays on.

Here’s what happens when you press the Go Around button in the Cirrus:

  • Flight Director pitches to 7.5 degrees pitch up and wings level
  • AP Mode switches to Go Around mode, following the flight director
  • GPS comes out of SUSP mode
  • CDI switches back to GPS

All the pilot really has to do is add power, take the flaps up, then press NAV on the GFC 700 to get the autopilot following the missed approach procedure.

If you aren’t familiar with the Go Around button or haven’t used the one in your plane lately, it’s good to go up with a knowledgeable instructor and fly a couple of approaches where you perform the published missed approach afterward.  That way, he or she can assist you through the first missed approach, then give you pointers until  you get comfortable with the Go Around button.

Garmin GFC 700 Autopilot

0 Comments

The Garmin GFC 700 Autopilot is an amazing machine.  Fully digital and fully integrated with the Garmin G1000 glass panel, it makes a pilot’s workload a lot easier, especially in busy airspace.

I train a lot of pilots in airplanes that have the Garmin GFC 700 autopilot.  The Cirrus SR22, the Columbia 350 & 400, the G36 Bonanza, and the Piper Mirage and M350 to name a few.  The most common problem I see for pilots transitioning into the Garmin GFC 700 equipped aircraft is that it doesn’t act like other autopilots.

STECs and DFC 90 Autopilots function like this:  you push the button for the mode you want on the autopilot controller and that turns the autopilot on.

Not so on the Garmin GFC 700.  If you push the button for the mode on the GFC 700, then the flight director engages, but not the autopilot.  This confuses folks a lot who move up from different autopilots because their autopilot primacy side of their brain is telling them the autopilot is on whenever they push one of the buttons on the GFC 700 controller.

Here’s an example:  A pilot has just departed and is ready to turn on course.  In his old airplane with an STEC 55x autopilot, the pilot pushes the direct to key to go to his first waypoint, then pushes NAV on the autopilot controller and the STEC 55x comes on and starts flying on course.  Then he presses VS and ALT to initiate a climb.

With the same scenario and a Garmin GFC 700 autopilot, the same pilot (who is used to a 55x), pushes the direct to key, then pushes NAV on the autopilot controller and pushes IAS or FLC to initiate the climb.  He lets go of the flight controls thinking the autopilot is engaged.  The airplane starts nosing over and he starts panicking.

Why did this happen?  The pilot in the second scenario never pushed the AP button on the Garmin GFC 700 so the autopilot never engaged.  All he did by pressing the NAV button and IAS button was to turn the flight director on.

How to remedy this?  Get in the habit of checking your scoreboard.  On the top of the G1000 or Garmin Perspective PFD, there is an autopilot annunciation strip (or scoreboard as I like to call it).  In the very middle of the scoreboard is an area to show if the autopilot or flight director is engaged.  AP means the autopilot is on; FD means the flight director is engaged but the autopilot is not.

I teach pilots to be in the habit of checking your scoreboard each time you get done pressing buttons on the autopilot controller to ensure the Garmin GFC 700 is in the proper mode.  This saves some of those panic moments when it is supposed the AP is engaged, but it’s only the FD.

Night Flying

0 Comments

Ah, fall is finally here.  In Texas, it arrived about a month late, but showed up with a vengeance.  A strong cold front caused a 40 degree temperature drop in 12 hours earlier this week, bringing rain, lower freezing levels, and lots of wind.

Fall means cooler temps, but fall also means less light.  The sun begins to set sooner, plus the fall back time change in November cause darkness to spring upon an unaware pilot.

Before getting in to too many night landings tips, just a friendly reminder, passengers can only be carried at night if the PIC has completed 3 takeoffs and landings to a full stop in the last 90 days during the time period of 1 hour after sunset to 1 hour before sunrise.

Lots of us have been landing long before sunset for most of the past couple of months, so those night flying skills might be a little rusty.  The best way to remedy night flying rustiness?  Call an instructor and go get some practice.

In the meantime, here are some tips as to what to expect for your next night flying experience.

  1. Your Eyes Are Very Important.  This may seem like an obvious statement, but night vision can be affected by many things.  Before you takeoff, you want to make sure you can see in the dark.  The FAA recommends no bright lights 30 minutes prior to takeoff.  They also recommend using oxygen at night as this greatly improves night vision, even at low altitudes.  Use off center viewing to help spot traffic or other objects in the air.  Finally, when preflighting, use a red flashlight as much as possible, but if you do have to use a white light, close one eye to keep one eye from being blinded.
  2. Utilize Approach Lights on Landing.  Night landings are very different then day landings.  It is very difficult to get the proper depth perception, not too mention see obstacles below you on your final approach to a runway.  PAPI’s, VASI’s, and instrument approach glide slope’s become very important.  If you are VFR only pilot, if your airport has a PAPI or a VASI, keep 2 white and 2 red (or 1 white and 1 red) lights.  If you see 3 red (or 2 red), climb.  If you see 4 red, definitely climb.  If you are an IFR pilot, I highly recommend always flying an approach at night.  What if your airport doesn’t have a PAPI, VASI, or approach with a glide slope?  You might not want to utilize it at night.  One side note on VFR flight: Clouds are nearly invisible at night.  If you do fly into a cloud (a clue is your strobe lights start reflecting back at you), don’t panic.  If you have an autopilot, turn it on and execute a 180 degree level turn.  If you don’t have an autopilot, start scanning your instruments, keep your attitude indicator blue side up, and make a shallow 180 degree while maintaining altitude.  Then call ATC, advise them what happened, and ask for help.  One more note:  I highly recommend that if a pilot finds that he/she will fly at night at lot, get an instrument rating and fly IFR at night.  It’s much safer.
  3. Practice Landings Before Carrying Passengers.  The tendency when landing at night is to level off too high before flaring, causing the airplane to bleed off speed and energy too high above the runway.  This can lead to a stall, a hard landing, and/or too high of a pitch attitude at touch down causing a tail strike. A good tip is start your level off when you can see the tire marks on the runway.  Make sure you practice night landings, preferably with an experienced instructor who is night current and proficient, before carrying any passengers on board, even if you are night current, but haven’t landed at night in a while.
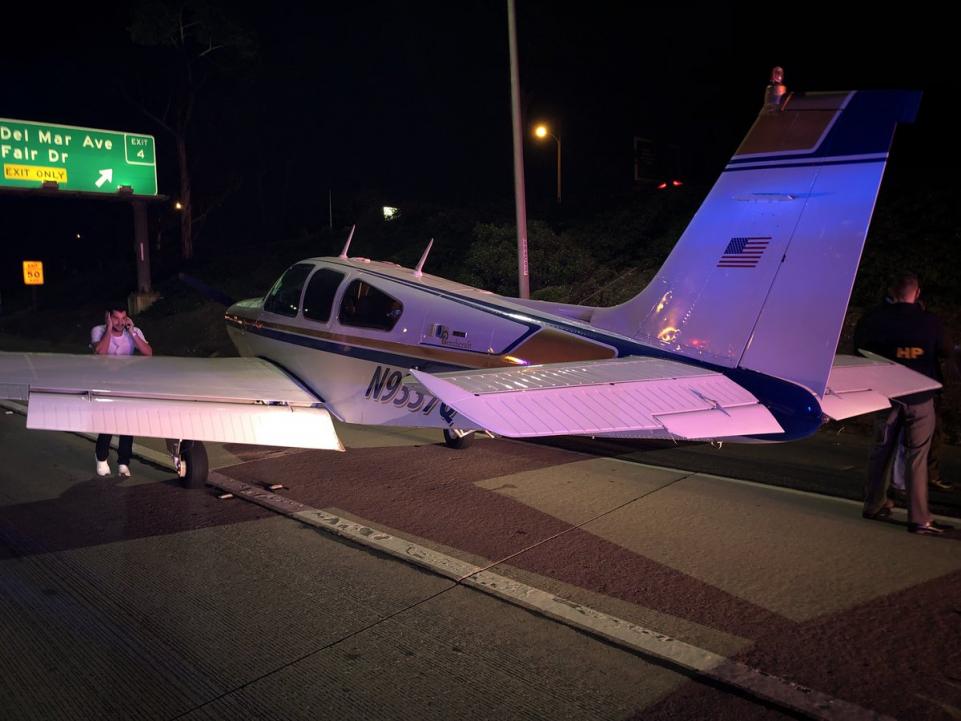
  4. Night Emergencies.  For engine failures at night, you are very limited on options.  Unless you have a Cirrus equipped with a CAPS parachute system, you really have two options if an airport isn’t within gliding distance.  Find a wide, lighted road that appears to be lightly trafficked.  A word of caution, though:  be careful of light poles, fences, concrete medians, cars, and buildings.  The LA freeway would not be a good option (though there are exceptions to this rule as is evidenced by the picture below).  The second option is find a dark spot and pray it’s a field (or the Hudson River).  As you get closer, you can turn your landing light on to see what the ground looks like.  If it looks good, keep the light on and continue.  If you don’t like what you see, turn your landing light off and continue….

Flying at night can be the best time of day to fly.  It’s usually smoother, cooler, and you get to see all the city lights.  It is a very different environment, however, so make sure to get some training before darkness settles in on your next trip.

2018 Houston, TX CPPP

0 Comments

The Cirrus Pilot Proficiency Program is once again returning to Houston, TX the first weekend in November. Henrickson Jet Center at the Houston Executive Airport (KTME) will be the host FBO this year.  If you are a Cirrus owner in the South Central US, the Houston CPPP weekend is definitely worth your while.

What is it?  The Houston CPPP is a combination ground and flight training weekend.  With ground classes ranging from engine management, to loss of control prevention, to avionics best practices, an attendee will not lack a better Cirrus education by the time he or she leaves.

The flight training side of the weekend gives an attendee several options.  A Houston CPPP attendee can do 1 or 2 flights with a highly qualified Cirrus Standardized Instructor Pilot (CSIP), one on Saturday and one on Sunday (if the 2 flight option is selected).  The Cirrus Owner’s and Pilot’s Association (COPA) brings in exceptional instructors for each of the CPPP events, so the training is top notch.  Folks who want to take in more ground school, but still want to fly a little bit have the option of just doing 1 flight, either Saturday or Sunday, in order to increase their Cirrus knowledge.

The Houston CPPP event will be November 2nd, 2018-November 4th, 2018, a Friday through a Sunday.  The weekend kicks off with a welcome dinner Friday night, then ground sessions and flying on Saturday and Sunday, plus a dinner on Saturday night.

For those who want to challenge themselves, there are simulator sessions available with a challenging instrument approach that doesn’t quite meet up with the normal, ho-hum type of approach.

The Houston CPPP also provides a Partner in Command course for those right seaters out there wanting to learn more about what to do in an emergency situation.

Hank Gibson of Texas Top Aviation will be at the Houston CPPP as a flight instructor.  For more information and to sign up, please click here.

Hope to see you there!