Looking for a fly in this fall? Check out the Texas STOL Roundup at the end of September in Hondo, KHDO. Interested in entering? All are welcome! There are several different categories including LSA, Experimental, and others. Come in for a fun weekend and see how short an airplane can be landed!
There will be bands, a STOL seminar, and even a hangar dance.
Fly in or drive in. Camping will be available on the airport.
Figuring out the pattern altitude at an airport should be pretty simple, right? But, in this day of helpful technology, most pilots actually get it wrong. How can you always get it right? Well, it just takes about an extra 15 seconds. Here’s how.
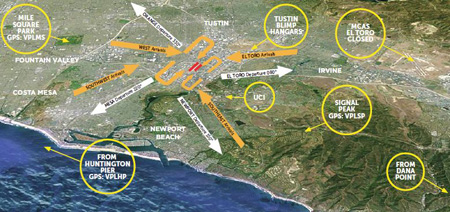
John Wayne Airport Traffic Patterns
As outlined in the Aeronautical Information Manual, section 4-3-3, “traffic pattern altitudes for propeller-driven aircraft generally extend from 600 feet to as high as 1,500 feet above the ground.” Further, in the Pilot’s Handbook of Aeronautical Knowledge on page 13-10, it states: “1,000 AGL is recommended pattern altitude unless established otherwise.”
Okay, so for piston driver’s, we’ve got it narrowed down to 1,000 AGL (Above Ground Level for those who don’t like acronyms). But wait! There’s that very important phrase at the end of the last quote: “unless established otherwise.” That means not all airports have traffic pattern altitudes of 1,000 AGL, or else they wouldn’t put that line in there!
How do you find out what the TPA (Traffic Pattern Altitude) is for a certain airport if it’s not 1,000 AGL? Great question! Your first guess is probably to look on Foreflight. Though this is a good start, it is not the full answer.
Let’s use an example. Look up KAQO, the Llano Airport on Foreflight. At the top of the page, the airport elevation is stated as 1,101′ MSL and the pattern altitude is stated as 1,902′ MSL. From what we just learned, 1,902′ MSL is not 1,000 AGL, so is 1,902′ MSL otherwise established?
On the Airports page with KAQO pulled up, tap the A/FD tab, second to last on the left. Scroll down to Llano Muni. Read the whole entry. Does it state in the entry that pattern altitude is different than 1,000 AGL? It sure doesn’t. So, because it is not otherwise established, pattern altitude at KAQO is 2,102′ MSL not 1,902′ MSL.
Where did Foreflight get that? I have no idea. Too often, though, pilots look at the Foreflight pattern altitude and don’t actually check the Airport Facilities Directory (A/FD). Then, they get the pattern altitude wrong.
What does it look like when pattern altitude is otherwise established? Look up KSGR, Sugar Land Regional, on your Foreflight app. Foreflight states the elevation as 82′ MSL and the Pattern Altitude as 1,000′ MSL. Is this correct? Well, tap that A/FD button again and let’s find out.
On the second line of the A/FD entry, it says TPA-See Remarks. Down in the remarks section, we find the following:
TPA-1000 (918) single engine piston acft, TPA-1500 (1418) for twin and turbojet acft, TPA-500 (418) for helicopters within 2NM.
Foreflight got it right this time for single engine pistons, but if you are in a twin, the pattern altitude is different. What’s the lesson here? Always check the A/FD and don’t always go by what Foreflight says. The A/FD is always right and usually has a little more detail to help set you straight.
One last thing. Both the AIM and the Pilot’s Handbook of Aeronautical Knowledge, when talking about pattern altitude, state, “When operating at an airport, traffic pattern altitudes should be maintained unless otherwise required by the applicable distance from cloud criteria in…section 91.155.” 91.155 defines basic VFR weather minimums. So, to fully interpret what the AIM is saying, we have to take into account the type of airspace we are in to determine if we can safely and legally operate at pattern altitude at a particular airport.
For example, let’s say we are at KCVB, the Castroville Airport. Pattern altitude there is 1,602 feet, which is 829 AGL. CVB is Class G airspace up to 700 AGL, then Class E above that. Let’s say there is a 700 AGL broken cloud layer. Pattern altitude is 829 AGL, so you won’t be able to get up that high with a broken ceiling. What altitude can you do pattern work at to stay legal?
Class G VFR weather minimums during the day below 1,200 AGL is 1 SM visibility and clear of clouds. So, legally, you could fly at 699 AGL (which at CVB would be 1,472 MSL) while in the pattern and be legal. Safe? Maybe, but probably not if you are skimming the base of the clouds. Is 1300 MSL a safer pattern altitude in this example? Well, that is 527 AGL, so probably not, since towers tend to stick up that high sometimes.
Let’s go back to KSGR and put a 1,000 AGL overcast ceiling there. SGR is Class D airspace and we already determined pattern altitude there was 1,000 MSL for piston singles. VFR visibility and cloud clearance requirements in Class D airspace are 1,000 feet above clouds, 500 feet below clouds, and 2,000 feet horizontally from the clouds with 3 SM visibility. In order to stay 500 feet below the clouds, you would be flying a 582 MSL pattern. Safe? Probably not, though it is legal.
To summarize, don’t take Foreflight’s word for pattern altitude. Cross reference the A/FD (it only takes 15 seconds at the most) to verify. If it’s cloudy, it’s really best to stay on the ground, but if you want to find out your legal pattern altitude with a cloud deck, cross reference 91.155. I don’t recommend flying below pattern altitude because it is there for a reason.
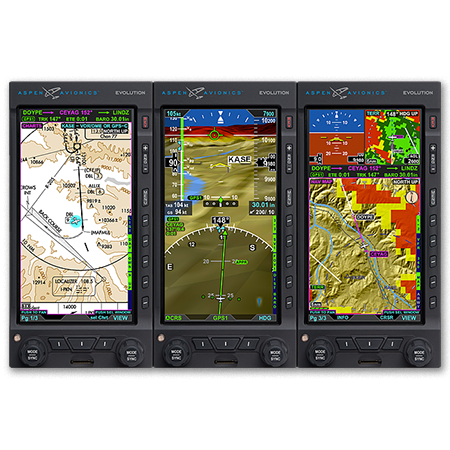
Have you looked longingly at the Aspen PFD or Garmin G500, imagining those beautiful glass panels set in your airplane? Think it’s too advanced for your flying skills? Well, think again! Hank Gibson of Texas Top Aviation will be hosting a seminar at the Redbird Skyport FBO at the San Marcos Airport (KHYI) on Thursday, September 25th at 7pm to enlighten everyone on all the different glass panel and modern GPS options out there.
No panel is too complex! No GPS is too complicated! Come hear about how you can upgrade your steam gauge airplane to a modern, glass panel cockpit that will be the envy of all your pilot buddies.
The seminar begins at 7pm in the large conference room at the Redbird Skyport. Come see this beautiful facility which hosted the AOPA Fly In this past April. There will be two drawings for free flight training in your airplane, so make sure you get your entry in once you arrive. WINGS credit will also be given.
Redbird welcomes pilots flying in for the event. If you are flying in, please show your support for Redbird by purchasing fuel!
Signup is required for the event. To sign up, please click here.
My first chief flight instructor had an addage he would impart to his flight instructors when we began working at that flight school. “Pitch + Power = Performance” he would tell us. Then he’d glare at us and follow up with, “nobody teaches that right, so make sure your students know it.”
Now, having been a CFI for seven years, I would tend to agree with him. I have moved on from doing mostly primary training to transition training. Transition training is taking someone who is already a pilot and teaching them how to fly a different type of airplane. In jets, you get a type rating. In piston engine airplanes, there is no FAA requirement to go through any type of extra training as long as you are rated in category and class (eg. single engine piston). But, insurance companies know that Mr. Fresh Private Pilot can’t just hop from a Cessna 172 into a Cirrus SR22 or a Bonanza, so they require transition training before insuring those pilots.
What did my chief instructor mean when he imparted his wisdom? He was speaking about a particular phase of flight, the final approach phase, regardless of whether it’s a VFR approach or an IFR approach. The pitch of the airplane and the power setting of the airplane have to be utilized together to achieve the proper speed and descent rate (performance).
VFR
On the final approach leg of a VFR pattern, most piston engine aircraft are configured with landing gear down and flaps down in the landing position. This puts the airplane on the back side of the power curve in the region of reverse command. In the region of positive command, in cruise, for example, the more power you add, the faster you are going to go and, if you pitch up, you will go up and you pitch down, you will go down. But, they work together (if you point the nose down, you will accelerate unless you reduce the power); remember, Pitch + Power = Performance.
In the region of reverse command, the pitch controls the airspeed and the power controls your rate of descent, but, again, they work together. Let’s say the airplane is 5 knots above it’s approach speed on final. Initially, the pilot will need to pitch up slightly to bleed off that airspeed. The airplane will want to climb, so as he is pitching up, he’ll need to make a slight power reduction to stay on glide slope.
Alternatively, let’s say the airplane is high, but is on speed. The pilot will make a power reduction to descend to the glide path, but he’ll also need to pitch down to maintain the proper airspeed.
What you don’t want to do is this: if the airplane is high on final, don’t push the nose down to try and get down. This does cause the airplane to lose altitude quickly, but the airspeed increases quickly. With a higher airspeed, the airplane has a lot more energy to dissipate when it gets to the runway, meaning you’ll float longer which can lead to forcing the airplane down or using up too much runway and not being able to get the airplane stopped in time.
IFR
On an instrument approach, you are on the front side of the power curve. When trying to stay on glide slope, the power is controlling the speed of the airplane and the pitch is keeping the airplane on glide slope. This can be a little bit confusing for VFR pilots transitioning to instrument approaches as they are not used to being on the front side of the power curve.
Keeping in mind that Pitch + Power = Performance, let’s put the airplane above the glide slope on an ILS approach. In order to get down to the glide slope, the pitch needs to be lowered as much as needed (it’s always better to pick a pitch attitude to fly and see if it is working to bring the glide slope back to center. If it doesn’t work, pick a new one. Don’t just push the nose down until the glide slope moves) and the power needs to be reduced to maintain airspeed (again, pick a specific power setting). Once the glide slope centers, then the pitch will be raised slightly and the power will need to be increased to hold glide slope and speed respectively.
In my 3,000+ hours of flight training, I have developed some tips and tricks to help people fly better. With teaching landings, I have 3 specific tips that will make smoother landings every time, guaranteed.
A Good Pattern
A wise flight instructor whom I would love to give credit to (but don’t know who it is!) once said that a good landing starts off with a good traffic pattern. So true! A good landing all begins with the setup. This is true for a VFR rectangular traffic pattern or an IFR instrument approach. Flying the proper speeds and being at the proper AGL altitudes helps immensely in making a good landing. Being at 600 feet AGL on a 1/2 mile final (or the alternative of 60 feet off the ground on a mile final!) makes it hard to make a good landing.
Proper Use & Understanding of Pitch and Power
Once flaps are used in the pattern, the plane is now on the back side of the power curve (or in the region of reverse command). Power is now being used to control the plane’s rate of descent while pitch is being used to control airspeed. The key is, both pitch and power work together, so if the pilot changes the power, he’ll also need to change the pitch and vice versa.
The common mistake I see here is when the airplane gets low on final, the pilot tends to (quite naturally) pitch up. All this does is bleed off airspeed and cause the airplane to sink faster. The proper input would be to add power, then adjust the pitch for airspeed.
Look Down the Runway
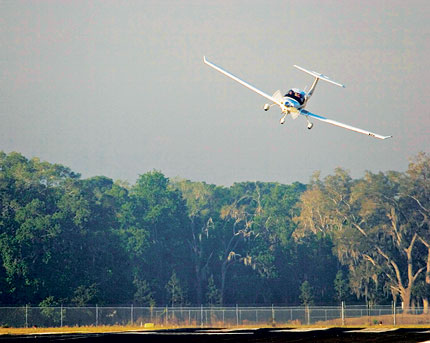
Now that we have gotten to the point of the round-out and touchdown, it’s the most important part. The best thing the pilot can do to make the best landing possible, is to look at the trees at the end of the runway. When I worked with college students, I told them to find the owl in the trees at the end of the runway.
The tendency is to stare at the pavement (or concrete) the whole way down to the landing. When a pilot’s eyes are fixated on the ground, this destroys his depth perception and causes a level off too low to the runway, resulting in a 3 point landing and/or a bounce.
By looking at the trees at the end of the runway, this gives the pilot much better depth perception and allows him to properly judge where to level off the airplane.
The question now is when should the pilot start looking at the trees? My recommendation is crossing the threshold of the runway. For some, it works better to start looking at the trees when turning final. Others, right before the level off. Regardless, find that owl!
I have the blessing (same say it’s a curse) of being a tailwheel pilot. I did my tailwheel training in a Citabria and have gathered about 400 hours over the years in Citabrias, Super Cubs, and Maules (don’t judge all tailwheel airplanes by a Maule, by the way. The Maule is it’s own unique animal). The blessing of being a tailwheel pilot is that it greatly enhances my stick and rudder skills for all airplanes.
No matter what airplane you fly, basic stick and rudder skills are always important. At some point during a flight, the rudder will need to be used, even if you have an airplane that has a yaw damper. Rudder use is vitally important in the takeoff and landing phase, especially if you fly an airplane that generates a lot of torque on the takeoff roll. Rudder in that phase of flight is pretty evident, because if the rudder isn’t used, you’ll go off the left side of the runway.
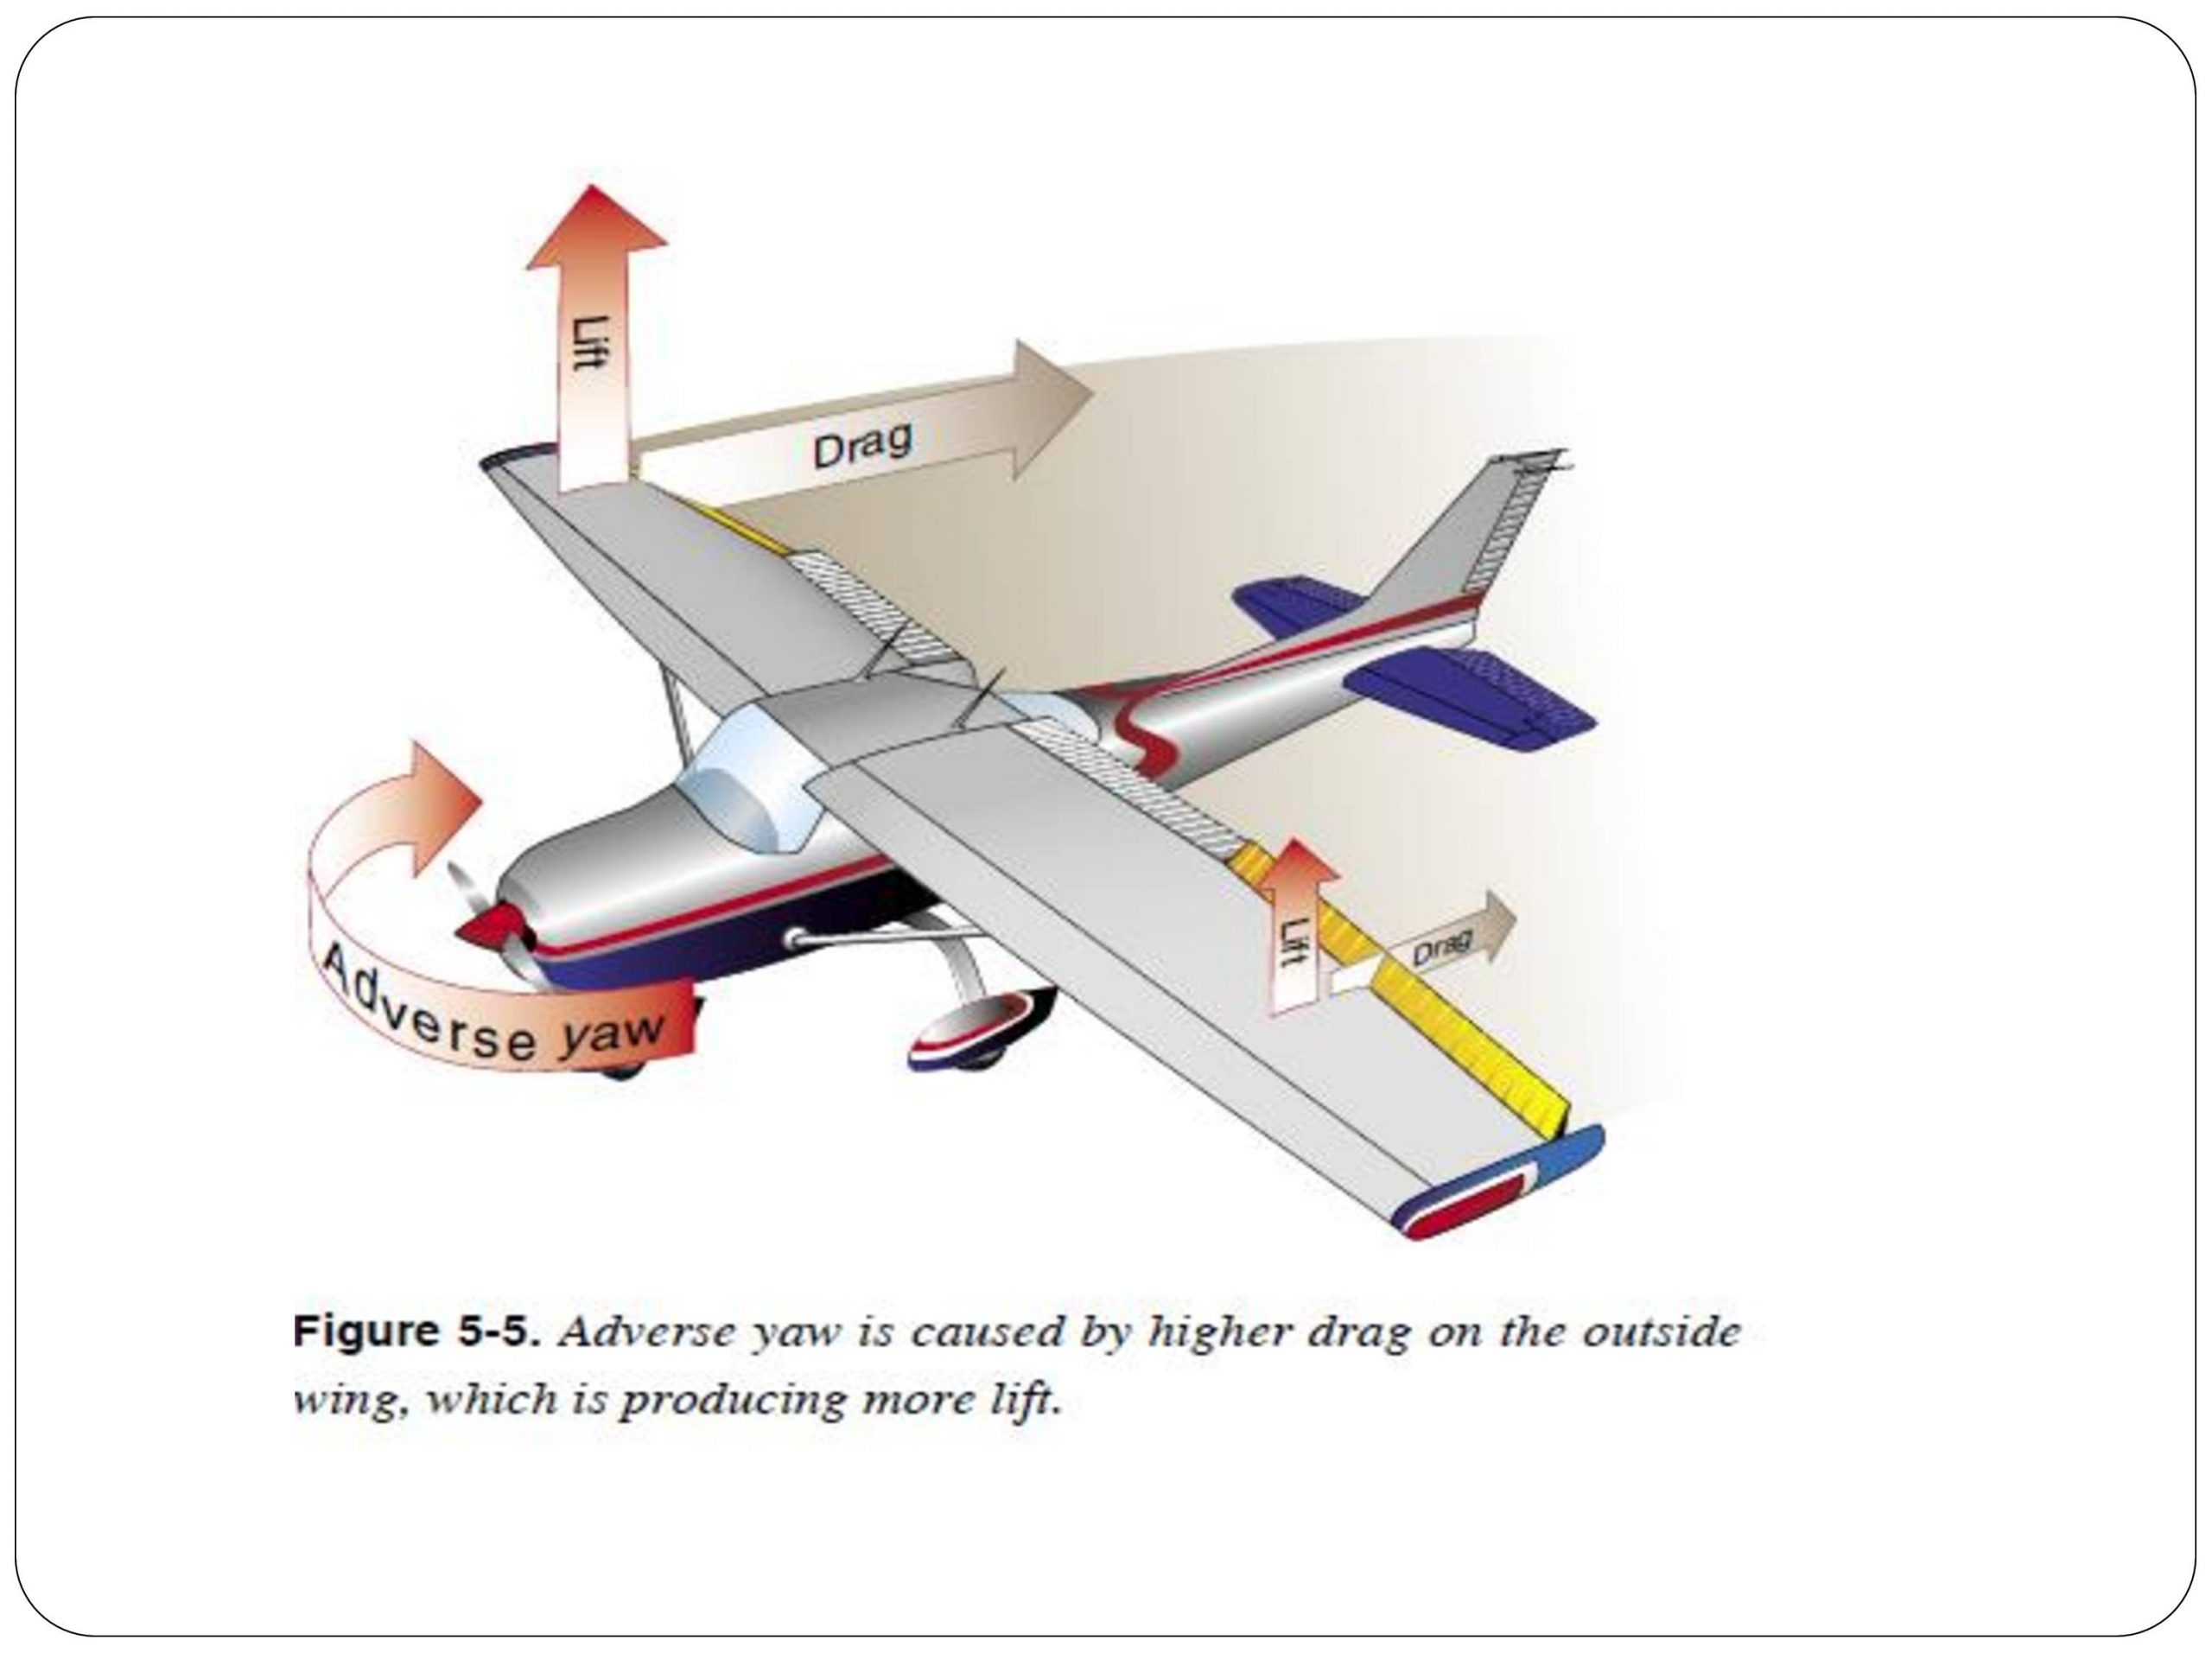
Where I want to focus is rudder use in the landing phase. As an airplane comes down final, there are several forces that are be acting on the airplane. When it’s bumpy, updrafts and downdrafts are moving the plane up and down and all around. To correct for a bump that sends the airplane into a roll, aileron is added in the opposite direction of the roll. That aileron input also induces adverse yaw, pulling the nose of the airplane in the opposite direction that the pilot is moving the ailerons.
If a pilot isn’t using his feet correctly, then the nose of the airplane will wallow around through the air as aileron inputs are used. The tail is also moving around quite a bit, so the pilot might not “feel” the yawing moment, but the passengers in the back seat certainly will.
The other advantage that comes with proper rudder usage on short final is the airplane is more responsive to control inputs. When utilizing both the ailerons and the rudder, a pilot is able to fly the airplane much more precisely and control it much better.
This doesn’t mean you have to be staring at the turn coordinator the whole time down final. In fact, that’s exactly what you don’t want to do. Your eyes need to be outside the airplane. Just get in the habit of stepping on the rudder whenever you move the ailerons on final and eventually, you will feel what your airplane is doing. Don’t step on the rudder as hard as you can, but slight pedal pressure in the direction of aileron input will make a big difference.
Rudder is also vitally important for landing in a crosswind no matter that airplane. Crosswind landings are a learned skill that take a lot of practice to perfect. There is also a lot of confusion as to what control input does what during the landing.
Here is the simplest way to picture a crosswind landing and what the controls do:
Aileron-When performing a crosswind landing, the ailerons keep the airplane over the centerline. If the airplane is drifting to the right of the centerline, add left aileron to bring it back to centerline, then keep enough aileron control pressure in to keep the airplane over centerline. In a perfect crosswind landing, the main tire on the windward side will touch down first. Left crosswind means left tire touching first.
Rudder-When performing a crosswind landing, the job of the rudder is to straighten the nose to point down the runway. You will not be coordinated in a crosswind landing, you will be slipping, which is the goal. So, with a left crosswind, you will be inputting left aileron to remain over the centerline and you will also need right rudder to straighten the nose. This also prevents the airplane from actually rolling in the direction of the aileron input.
If you remember for a crosswind landing: “Aileron into the wind to stay over centerline, opposite rudder to straighten the nose.” Too much aileron and the plane will drift into the wind. Too much rudder and the nose will yaw in the opposite direction.
Rudder is very important, even in our day and age where a lot of general aviation airplanes have yaw dampers. Our feet only have a job for a short period of time, but that is the most critical time. An excellent way to get more proficient in rudder use is to go get a tailwheel endorsement. If you are in the central Texas area, check out TacAreo in Fredericksburg, T82.
Sometimes, it’s hard to find a good shop that does quality work and communicates well without charging a fortune. Luckily for the PA46 owner, there are lots of good options. Here are the Texas Top Aviation recommended Piper PA46 maintenance shops.
Lubbock Aero (KLBB)/Abilene Aero (KABI)-Texas
Lubbock Aero and Abilene Aero are owned by the same company. Both are Piper service centers. I have had some Piper PA46 maintenance interactions with Chad at Lubbock Aero over the last year and have been impressed.
The folks at Lubbock Aero are friendly, knowledgeable, and keep the customer abreast of what’s going on with their airplane. I haven’t been to Abilene Aero, but I suspect that the same quality of service exists there as well.
Chuck’s Aircraft (KEDC)-Austin, TX
Chuck’s Aircraft has been a Cirrus Service Center for a number of years. Recently, Chuck’s put several mechanics through Kevin Mead’s M-Class which educates mechanics on the ins and outs of Piper PA46 maintenance. Chuck’s is a great, convenient spot to get your PA46 worked on.
First Line Aero (KJSO)-Jacksonville, TX
Located on the same airport as Casey Aviation, First Line Aero specializes in Piper PA46 maintenance. Walking up to their hangar, it’s loaded with Malibus, Mirages, JetProps, and Meridians. Charles Crossman, the owner, has been turning wrenches for a lot of years. Anyone recommended by Joe Casey has a stamp of approval in my book.
Midwest Malibu (KHUT)-Hutchinson, KS
One of 2 nationally renowned PA46 shops, owners bring their PA46s from all over the country to Midwest Malibu. Owner Tony Beauchamp has personally assisted multiple of my customers when they have gotten in AOG situations with their PA46s.
Des Moines Flying Service (KDSM)-Des Moines, IA
I have not had any direct interaction with Des Moines Flying Service, but I have several customers who have. The reviews have all indicated knowledgeable mechanics, good work, and good communication.
Malibu Aerospace (KANE)-Blaine, MN
Malibu Aerospace (the second nationally renowned Piper PA46 maintenance shop) has done many great things for the PA46 line of aircraft. From the M1 Cooling Mod that alters the lower cowl and add baffles for cooling air getting to where it needs to go, to the M5 TSIO 550C upgrade for the original PA46-310P, the Malibu Aerospace guys know what they are doing with the PA46.
Hetrick Aviation (KTOP)-Topeka, KS
I recently learned about Hetrick Aviation in Topeka. I met a customer there to pick up his plane where it was having a pre-buy and annual done. Keith Hetrick, the owner, has worked on a lot of PA46 airplanes and was very knowledgeable in my discussions with him. He is also a pilot, so he flies each airplane after maintenance is done to make sure no bugs are present when an owner picks it up.
Those are the Texas Top Aviation recommended PA46 shops. Have another one to add? Post in the comments below and we’ll get it added to the list.