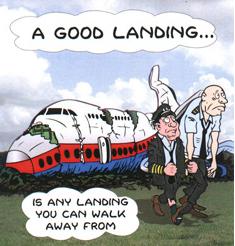
In my 3,000+ hours of flight training, I have developed some tips and tricks to help people fly better. With teaching landings, I have 3 specific tips that will make smoother landings every time, guaranteed.
A Good Pattern
A wise flight instructor whom I would love to give credit to (but don’t know who it is!) once said that a good landing starts off with a good traffic pattern. So true! A good landing all begins with the setup. This is true for a VFR rectangular traffic pattern or an IFR instrument approach. Flying the proper speeds and being at the proper AGL altitudes helps immensely in making a good landing. Being at 600 feet AGL on a 1/2 mile final (or the alternative of 60 feet off the ground on a mile final!) makes it hard to make a good landing.
Proper Use & Understanding of Pitch and Power
Once flaps are used in the pattern, the plane is now on the back side of the power curve (or in the region of reverse command). Power is now being used to control the plane’s rate of descent while pitch is being used to control airspeed. The key is, both pitch and power work together, so if the pilot changes the power, he’ll also need to change the pitch and vice versa.
The common mistake I see here is when the airplane gets low on final, the pilot tends to (quite naturally) pitch up. All this does is bleed off airspeed and cause the airplane to sink faster. The proper input would be to add power, then adjust the pitch for airspeed.
Look Down the Runway
Now that we have gotten to the point of the round-out and touchdown, it’s the most important part. The best thing the pilot can do to make the best landing possible, is to look at the trees at the end of the runway. When I worked with college students, I told them to find the owl in the trees at the end of the runway.
The tendency is to stare at the pavement (or concrete) the whole way down to the landing. When a pilot’s eyes are fixated on the ground, this destroys his depth perception and causes a level off too low to the runway, resulting in a 3 point landing and/or a bounce.
By looking at the trees at the end of the runway, this gives the pilot much better depth perception and allows him to properly judge where to level off the airplane.
The question now is when should the pilot start looking at the trees? My recommendation is crossing the threshold of the runway. For some, it works better to start looking at the trees when turning final. Others, right before the level off. Regardless, find that owl!
The first task I give my new instrument students before we start training is to find a view limiting device that they like. There’s the hood that everyone hates (which has been used since the beginning of instrument training,though it isn’t that uncomfortable) or foggles, which usually end up becoming very uncomfortable very quickly. The headset ends up pressing the sides of the foggles into the side of your head, leaving lumps and scars that hurt for days.
Well, there is finally another solution that combines the hood and foggles. Meet the ViBAN.
ViBAN brags that it is the most comfortable IFR view limiting device out there. I have a customer who has one and he loves it. It’s easy to put reading glasses on underneath while still blocking the view of the exterior of the plane. It doesn’t leave bruises against the side of your head, either.
If you’re looking for something different for your IFR training, give ViBAN a try.
The first task I give my new instrument students before we start training is to find a view limiting device that they like. There’s the hood that everyone hates (which has been used since the beginning of instrument training,though it isn’t that uncomfortable) or foggles, which usually end up becoming very uncomfortable very quickly. The…
The Garmin Perspective and Perspective + are awesome pieces of equipment. There is so much a pilot can do with this system that it can sometimes get overwhelming. There are two very important features of the Garmin Perspective that all IFR pilots need to know, but are tricky to do if the correct buttons aren’t pushed.
The two features of the Garmin Perspective I want to focus on today are the “Load Airway” feature and the “Hold at Waypoint” feature. The “Load Airway” feature is especially handy when flying IFR long distances with several airways as part of the clearance. Here’s how to utilize both on the Garmin Perspective.
Load Airway
On your flight plan page, insert the waypoint where you will be joining the airway, or, if your clearance was radar vectors to join an airway, then insert the waypoint on the airway that begins the leg you will be joining on
Press the Menu key on the keypad
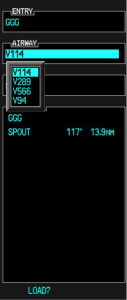
A menu will pop up. Scroll down to highlight Load Airway
Highlight the Airway you want from the next menu that pops up then press Enter
Then, a list of waypoints will display to exit the airway. Highlight the waypoint where you will be exiting the airway and Press Enter
The cursor will then move down to Load at the bottom of the menu. Press Enter to load the airway
The Airway and all the waypoints in between your entry and exit waypoints appear in your flight plan
If you are getting vectors to join the airway, you’ll need to use the Activate Leg function to activate the leg you will be joining the airway on
On the Flight Plan page, highlight the waypoint that ends the leg you want to activate
Look for the ACT LEG soft key on the lower right hand side of the MFD and press
This Activates the leg on the airway. Then, just simply fly the heading assigned by ATC until the CDI needle centers showing you are on the airway
Hold At Waypoint
The Garmin Perspective allows pilots to place a holding pattern at any waypoint that is in the Nav Database (or any user created waypoint). Here’s how to do it.
On the Flight Plan page, highlight the Waypoint that you want to hold over and press Menu on the keypad
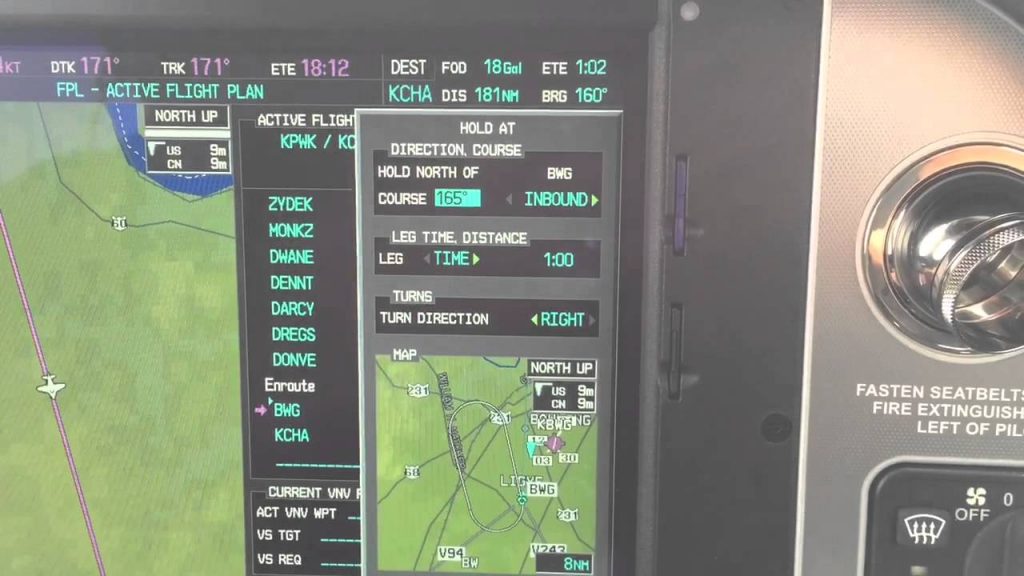
On the menu that pops up, highlight Hold At Waypoint and press Enter
On the next menu that pops up, input either the inbound or outbound course, right or left turns, leg time or distance, and the EFC time, then highlight Load and press Enter
You will see the hold now as a Waypoint in your flight plan
The Garmin Perspective and Perspective + are awesome pieces of equipment. There is so much a pilot can do with this system that it can sometimes get overwhelming. There are two very important features of the Garmin Perspective that all IFR pilots need to know, but are tricky to do if the correct buttons aren’t…
The massive storms that rolled through the Austin Bergstrom and San Antonio areas last Friday not only put a dent in the landscape, they put a dent in the skies too.
The Austin Bergstrom (KAUS) control tower suffered significant flood damage Friday. 6 inches of rainfall in an hour caused water to come pouring into the first floor of the tower, flooding the radar room and knocking out the power. This led to transmission outages for the tower, ground control, clearance delivery and the ATIS. Similar to the Chicago Center fire last year (though this was a much smaller section of airspace), the area normally controlled by Austin Approach was replaced by a big, gaping radar hole.
By 8:45am on Friday morning, the Austin Bergstrom airport actually closed. One runway eventually opened back up Friday afternoon, but massive delays and cancellations had already taken place. All the ILS approaches were down and Houston Center had taken over the airspace normally occupied by Austin Approach control.
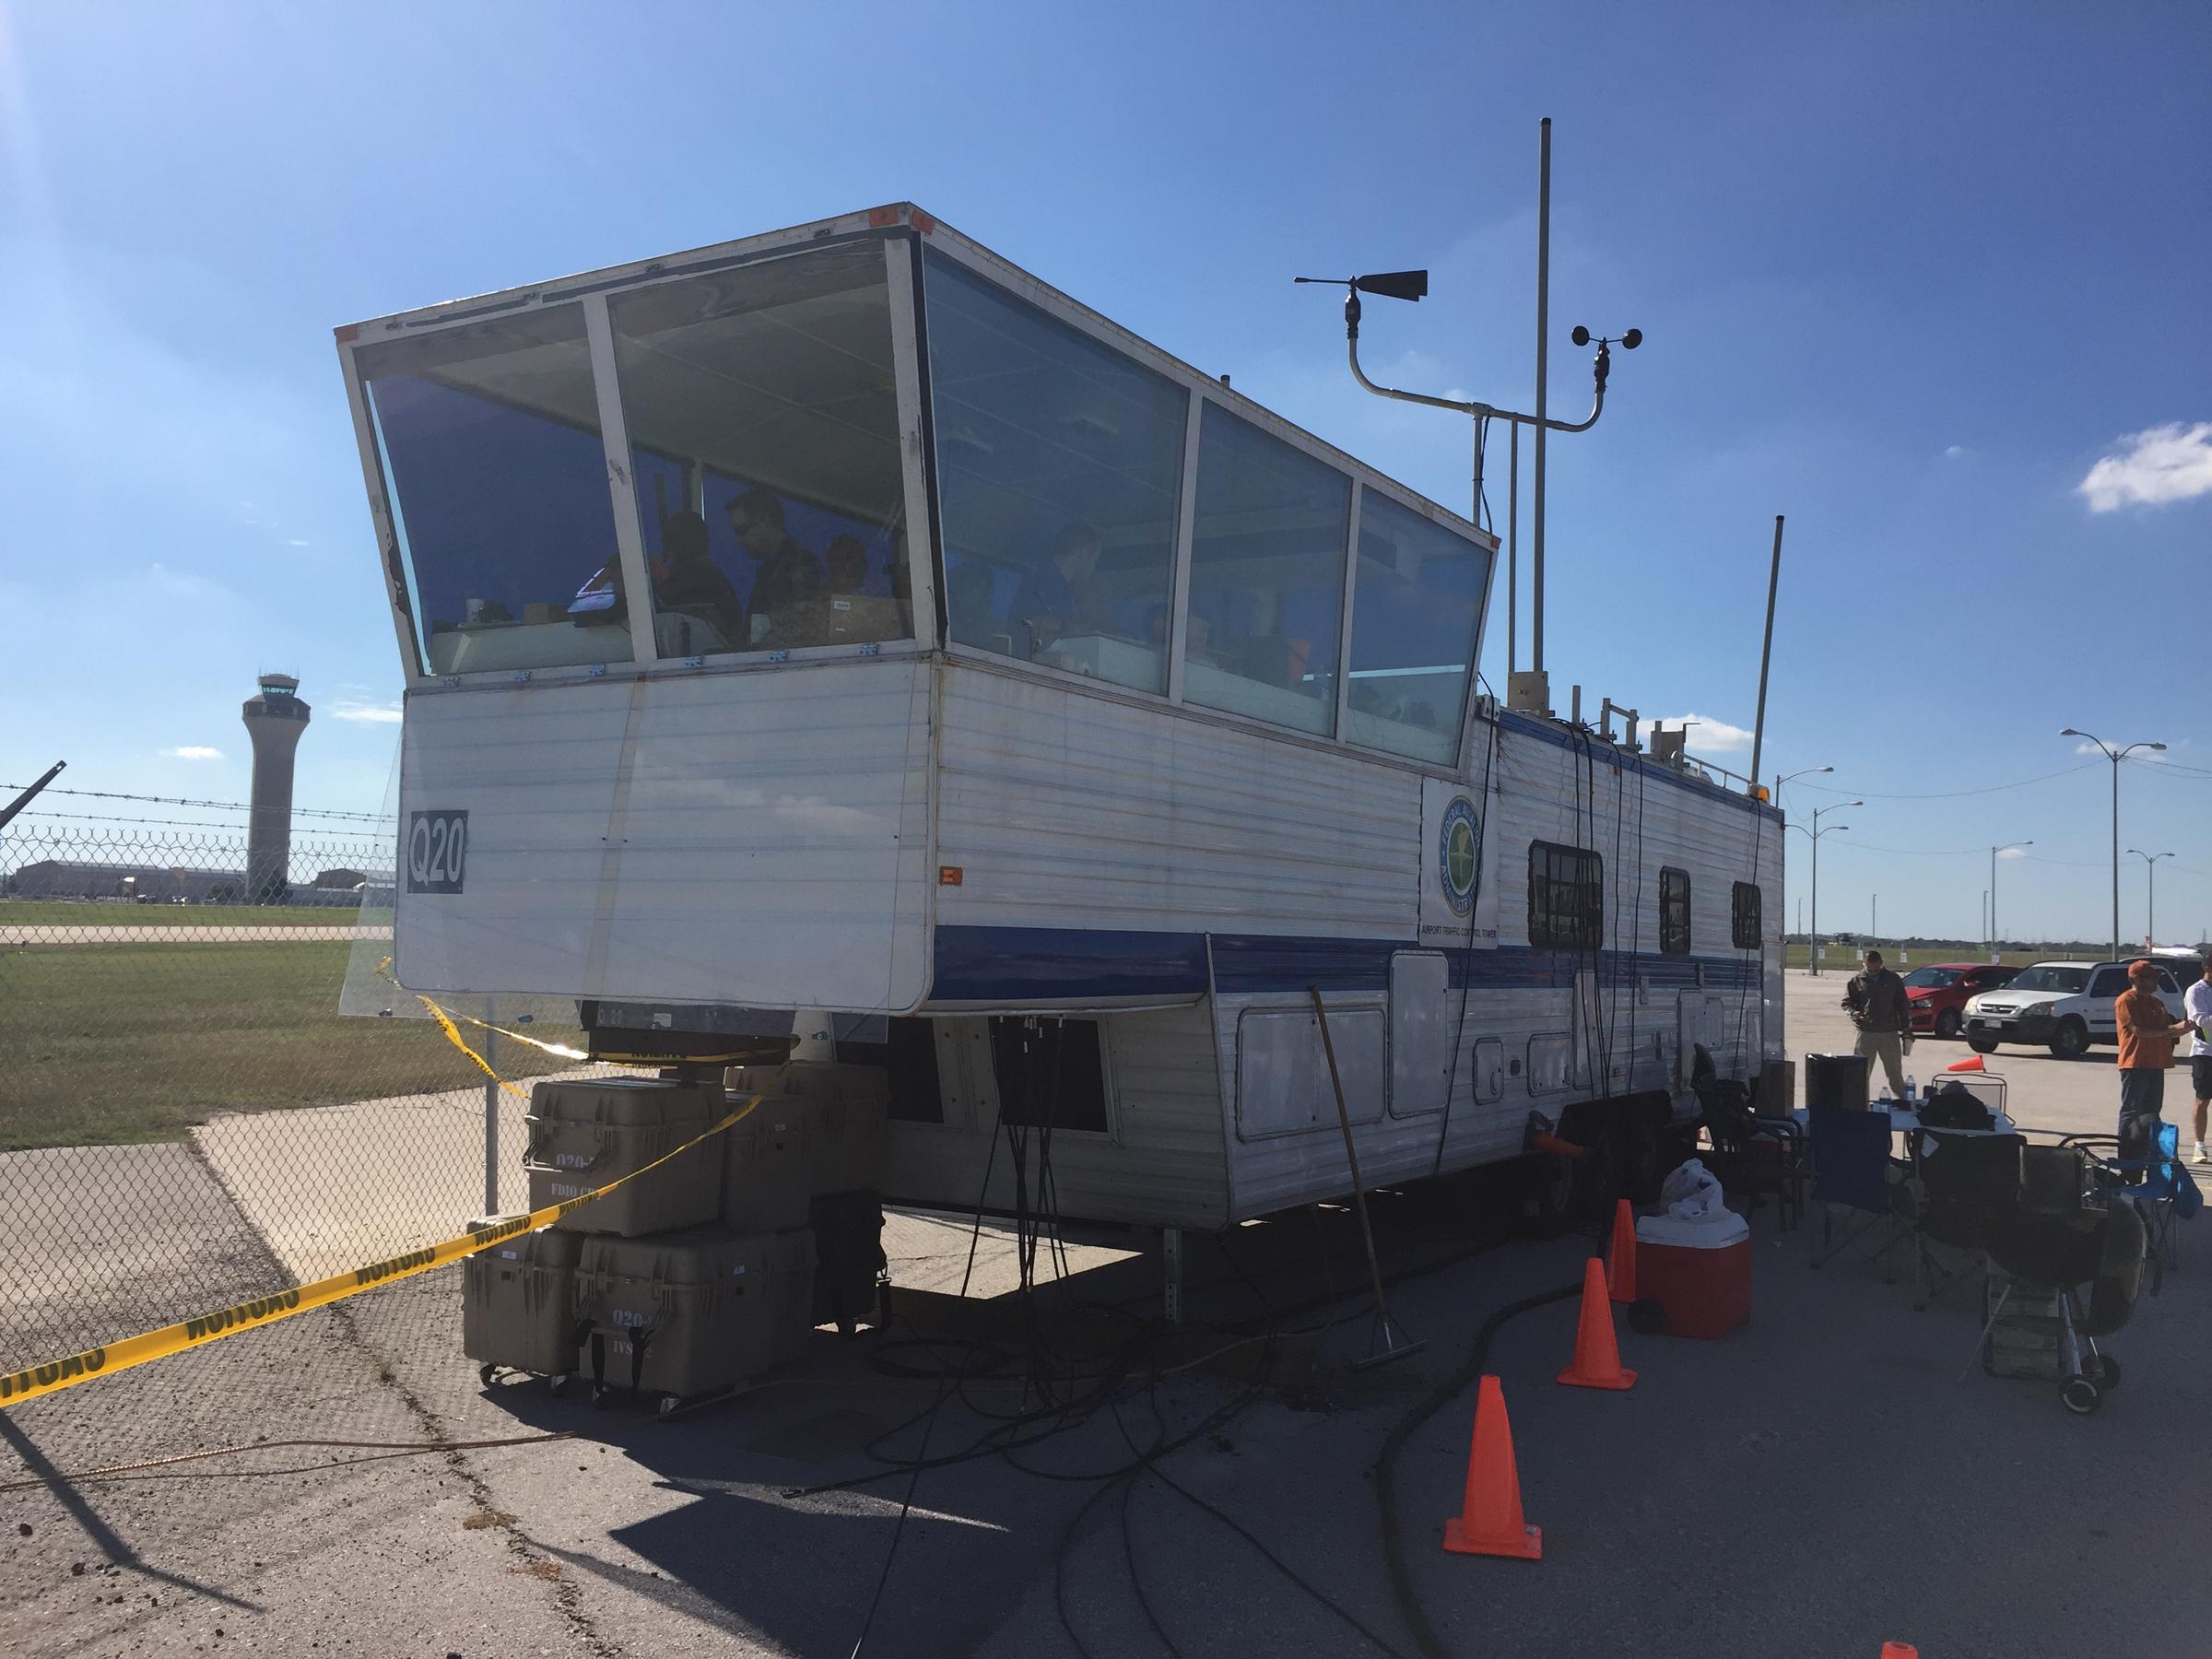
A temporary, emergency tower vehicle was brought in by the FAA (it’s essentially an RV with communications and a giant window) by the end of the weekend. All arrivals and departures were restricted to 17L and 35R.
Due to the radar outage, I heard there was as much as a 4 hour delay even for planes coming into Austin Bergstrom from Dallas, and that was in VMC conditions on Sunday and Monday. Tuesday and Wednesday brought IMC conditions which only enhanced the delays.
The latest news is that Austin Approach will be opening back up, but in a satellite base in San Antonio. The Austin controllers will be using the SAT radar room and will be receiving their radar picture via satellite. The approach frequencies should be up and running today or tomorrow. The Austin Bergstrom tower is up and running and most of the ILS approaches are operational at this point.
In the meantime, expect delays going in and out of Austin. If you don’t have to get to AUS, EDC, or GTU, you’re better off delaying a day or two until Austin Approach is back up and running.
The massive storms that rolled through the Austin Bergstrom and San Antonio areas last Friday not only put a dent in the landscape, they put a dent in the skies too. The Austin Bergstrom (KAUS) control tower suffered significant flood damage Friday. 6 inches of rainfall in an hour caused water to come pouring into…
The FAA defines personal minimums “as an individual pilot’s set of procedures, rules, criteria, and guidelines for deciding whether and under what conditions to operate (or continue operating) in the National Airspace System.” Have you actually given thought as to why we choose the personal minimums we do? From the beginning of initial pilot training, weather minimums were established for day-to-day training and during solo flight. I didn’t realize it at first, but I later learned these limits were not just an insurance mandate, but these minimums were set at the time to safely operate an aircraft based on my “then” current experience.
So here’s the question: what are your personal minimums and WHY do YOU have them? Do you ever lower or raise your minimums? Are your minimums based solely on your overall experience level or do they take into account other variables such as advanced avionics? For pilots that fly multiple aircraft like I do, can and do your minimums change in regard to category or type of aircraft you are flying? It’s a judgment decision on how you chose your minimums. However, it’s important that time is taken before you strap into the cockpit for each flight to critically think about the different risk factors and variables which may affect your decision for the minimums you choose.
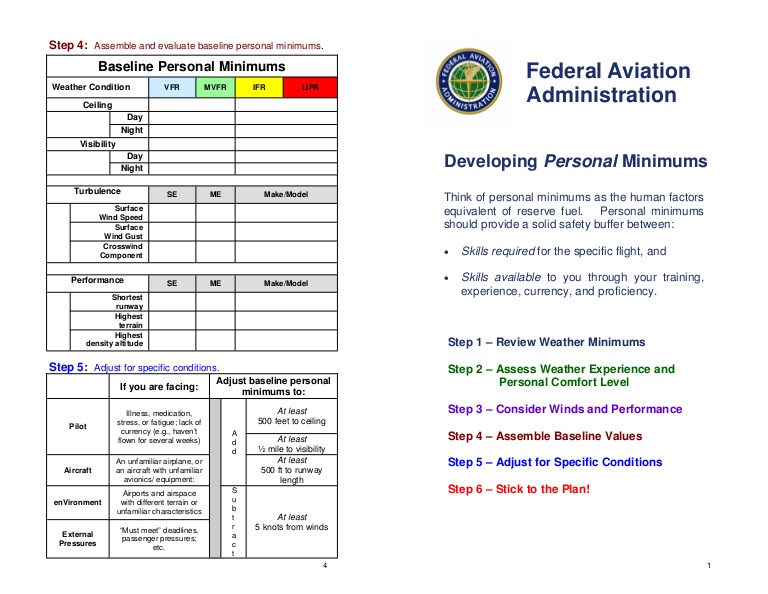
To guide us, let’s try briefly apply the FAA’s Personal Minimums Checklist to see how risk factors might shape what personal minimums or decisions we make for the day. Remember, just because you have been flying with a certain set of minimums one day, doesn’t mean you can’t adjust your minimums to a higher value given an ever-changing situation.
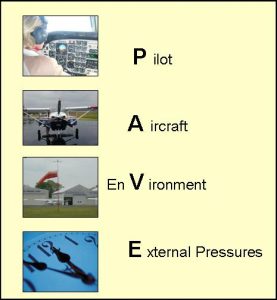
The acronym most pilots have heard is PAVE:
Pilot– We all should be familiar with the acronym IMSAFE associated with this. It addresses variables such as Illness, Medication, Stress, Alcohol, Fatigue, and Emotion. But how do you adjust your personal minimums using this guideline? Have you ever thought about raising your minimums for a training flight if you only got 4-6 hours of sleep, instead of 8? Or if you anticipate a hard IFR flight with a long day, maybe taking a safety pilot to mitigate the chance of a mistake if you’re forecasting having to shoot an approach to your weather planning minimums.
Aircraft– Personally, this is a really important factor for me when deciding what minimums to apply. I often spend a large majority of my time asking myself; is this aircraft properly equipped for the flight? This question goes beyond just looking at the logbook for a properly equipped and legal aircraft. A professional pilot should think further. Am I flying a traditional 6-pack “steam gauge” layout, non-slaved compass card, with a separate OBS gauge for course guidance? What if the aircraft doesn’t have an auto-pilot? What if I’m flying an aircraft equipped with a dual auto-pilot, dual GPS with an integrated glass cockpit? I can comfortably say my personal minimums change depending on the equipment I have available.
A pilot should also look at his/her recency with the aircraft. For example, if you are qualified to fly both airplanes and helicopters, maybe you should choose to have higher personal minimums in one particular airframe or if you haven’t flown that airframe within 30, 60 or 90 days. This is a very important factor for the owner/pilot.
EnVironment– Most of the time, when we think of environment, we ask ourselves, is the weather legal for me to take off and, more importantly, can I conduct this flight safely? Basic flight planning should have taught us to take into consideration crosswind limits, day versus night, and the type of airspace the flight is conducted in. Thought should also be given to how you set your personal minimums in regards to the particular type of environment you might rarely encounter. Flying an approach to your minimums in the flat plains of Texas during the day is one thing, but how would you adjust your weather minimums flying to a new airport, at night, with no moon illumination, in the mountains of Colorado? Could you reduce the risk and adjust your minimums in this scenario with two pilots?
External Pressures – What external pressures are affecting your flight? Passengers, the owner, “get-there-it is”, the desire to impress someone? Although external pressures should never be a factor when conducting a flight, they almost always play a role in your decision whether to conduct the flight or not. For example, a professional pilot gets hired to do a flight and the weather is below their personal minimums. The pilot could be tempted to lower their minimums by 100 feet to take the flight for a paying customer. This scenario plays out every day across the country whether it’s a professional pilot or owner/pilot. It would be foolish not to consider this type of pressure. Always make sure you have a plan if and when you encounter this situation. Planning your flight and having a plan to deal with these potential scenarios ahead of time ensures you stick to your minimums. It can be as simple as telling your passengers, or the owner, well ahead of your flight what your personal minimums are to accept the flight, and to ensure they, or you, have a back-up plan!
Most pilots will never break a hard limitation such as an airframe cross wind limitation, or engine limit, but the chances of breaking a personal minimum are realistic. Think about the last time you went on a diet and broke your plan because you were tempted by your friends or family during an outing. Self-imposed personal minimums can be hard to enforce and we need to acknowledge this as humans. Here are a few techniques that you can use to assist in making a decision using personal minimums and help reduce the influence of external pressures.
Step 1: Sit down with your CFI/CFII and fill out a personal minimums worksheet. Filling one out by yourself is a good start but having an outside objective view will help in making sure your personal minimums are realistic. Remember, it is easy to convince ourselves that we can do something even though we have set personal minimums. Talk with other pilots to see if you have set realistic expectations.
Step 2: Preflight planning must start a few days in advanced. It can be as easy as checking what the forecast might be and looking at the projected route, near-by alternate airports, and various approaches. This can be done quickly and will give you a heads up on whether the flight can be safely conducted or not. By alerting the passengers or owner early enough, alternate plans can be developed. An extra pilot can be added, the passengers can fly commercial, bring along a CFI, or cancel the trip altogether and seek alternate transportation. The main point is the decision was made well ahead of the flight when conditions didn’t look favorable. This helps in removing external pressures and ensures you don’t go below your personal minimums.
Step 3: Never be afraid to ask for a second opinion. Part 135 operators have set procedures for conducting flights which assist the pilots in making decisions. These set procedures help remove external pressures by allowing the pilot to say, “The rules don’t allow for this, or this is how we will conduct the flight!” However, under Part 91, the pilot has to take ownership for all phases of the flight. This is where talking it out with another pilot helps with mitigating external factors and the environment. Ideally, this person should have more experience and be able to talk through the situation. For instance, if I’m flying to a new destination, I often seek the advice from another pilot who’s familiar with the area. They may have key insights into weather patterns, preferred approaches, or hazards to avoid. In certain situations, asking for another pilot’s opinion might be what influences your go/no-go decision! You’ll be amazed how much you can learn just from talking to other pilots.
Step 4: Continue to build your experience and knowledge base. Building experience requires us to push our abilities, and sometimes this may be to the limit. However, this can be done in a controlled training environment or just going out and experiencing it. Get a new license, fly regularly with a CFI/CFII, and always try and take advantage of training opportunities. For example on your next flight from point A to point B, practice hand flying an approach, do a short field landing, a quick steep turn, etc. Quality flight time is always better than quantity. Continue to challenge yourself and try not to become complacent.
Personal minimums are a tool to assist in every pilot’s aeronautical decision making process. Use your personal minimums to guide your final go/no-go decision and remember to stick to the plan. I encourage you to review the FAA’s Risk Management Handbook (FAA-H-8083-2). Appendix B has Sample Risk Management Scenarios and reviewing them will give a better understanding how to apply the techniques discussed to your everyday flying.
Pedro Vargas-Lebron is a King Air 200 and uH-60 Blackhawk Instructor pilot with the Texas Army National Guard. Pedro is a CFI/CFII/MEI both in airplanes and helicopters with over 4000 hours of flight time, half as an instructor pilot.
The FAA defines personal minimums “as an individual pilot’s set of procedures, rules, criteria, and guidelines for deciding whether and under what conditions to operate (or continue operating) in the National Airspace System.” Have you actually given thought as to why we choose the personal minimums we do? From the beginning of initial pilot training,…
Texas Top Aviation is proud to announce that Hank Gibson has completed the training to become an American Bonanza Society Instructor, or ABS Instructor. He is now qualified to give instruction in Beech Aircraft.
As an ABS Instructor, Hank brings over 2800 hours of flying experience in a variety of aircraft to the cockpit of Beechcraft. Along with his ABS Instructor Designation, Hank is also a Cirrus Standardized Instructor Pilot (CSIP) and a Cessna FITS Accepted Instructor in both Cessna high and low wing piston aircraft (CFAI+). Hank is proud to add the ABS Instructor designation to his list of qualifications.
The process of becoming an ABS Instructor is quite comprehensive. The coursework consists of 20 powerpoint lessons covering anything and everything related to flying Debonairs, Bonanzas, Travel Airs, and Barons. The ABS Instructor course is quite in depth and detailed, giving the graduate a full understanding of the Beechcraft piston line of aircraft. To find out more about ABS Instructors, see the ABS website.
Hank is now giving initial and recurrent training in Beech Debonairs and Bonanzas. Please visit the Texas Top Aviation Bonanza Training page for more information on Bonanza and Debonair initial and recurrent training. Interested in Bonanza or Debonair training with a qualified ABS Instructor? Contact Texas Top Aviation today!
Texas Top Aviation is proud to announce that Hank Gibson has completed the training to become an American Bonanza Society Instructor, or ABS Instructor. He is now qualified to give instruction in Beech Aircraft. As an ABS Instructor, Hank brings over 2800 hours of flying experience in a variety of aircraft to the cockpit of…
6th Annual Armed Forces Weekend Celebration & Fly-In, May 20-21, in Brady, TX and Curtis Field (KBBD)!
Friday Night on the Square – FREE
Fly-In Saturday, 9-4 – FREE
A Night in London with Sentimental Journey Orchestra
Saturday night 7-11 PM
Tickets for Dinner & Dance, $30 available at www.morganmilitaryaviationmuseum.com.
6th Annual Armed Forces Weekend Celebration & Fly-In, May 20-21, in Brady, TX and Curtis Field (KBBD)! Friday Night on the Square – FREE Fly-In Saturday, 9-4 – FREE A Night in London with Sentimental Journey Orchestra Saturday night 7-11 PM Tickets for Dinner & Dance, $30 available at www.morganmilitaryaviationmuseum.com. Some fuel is available for…






Good stuff. Merry Christmas Brother!