Flying to the Bahamas

A couple weeks ago, my employer informed me that he wanted to take a group to Nassau, The Bahamas. I thought, no big deal, this should be an easy trip. The more I started to read, though, the more I realized it wasn’t going to be just a “normal” trip.

If you aren’t a member of AOPA, I would highly recommend joining. AOPA’s website was where I started researching. They actually have a checklist to help you along the way.

The first step is getting the paperwork started. All souls on board are going to need a valid passport. In our case, a couple of passengers need to get theirs. Since it was a little shorter notice, we had to go through the expedited process. It’s fairly simple. A quick internet search gave me a couple of people that helped the process along.

Next was making sure the aircraft had all it’s paperwork. The airworthiness certificate was easy as it’s always in the plane (or should be).

The registration certificate was next to check. We recently upgraded to the King Air 350 so we had to make sure we had the original issuance registration certificate. The Bahamas supposedly doesn’t allow Temporary Certificates and I really didn’t want to test that policy.  Thankfully after a couple of calls between owner and the FAA we got the original.

The aircraft and pilot are both also required to have an FCC Radio License. This is only for international flying, but not an everyday thing pilots think about.

After that was flight planning. I use FltPlan.com. The actual filing of the flight plan was very easy. I use the prescribed routes from the website. In the remarks section of the flight plan put ADCUS (Advise Customs). This advices ATC to let customs know of your arrival. It’s basically an added safety net in case you forget to call ahead or your flight times end up being way off.

The other item when dealing with flight planning is dealing with eApis. There are numerous companies who will provide this service for you. I elected not to use one of those. If you go to the CBP website, you can set up an account and do all of it yourself. Take your time and really plan the flight out well to make sure your arrival times are as close to real time as possible. If you’re way off, this will make any customs agent very frustrated and that is not something you want to be dealing with.

Approach charts and en route charts are another hurdle. Thankfully Foreflight has you covered. With my subscription, I already had en route charts. The approach charts were the real issue. In the Bahamas, the only places that have approved instrument approaches is Nassau and Freeport. Fortunately, we were going to Nassau. Foreflight does charge almost $400 for the Caribbean and Bahamas charts.  Emailing the FBO is a good option as they can usually supply approach plates for international flights.

You’ll also need a CBP sticker. This goes on the outside of the aircraft showing customs you’re in the system. This can be found on the CBP website as well. It takes a little bit to get the
sticker in the mail. However, once you pay for the sticker, the receipt can be used in place of the sticker.

The final thing I focused on was picking an FBO. I chose Jet Aviation. They had CAA which gave us a Jet fuel discount. Their facility was excellent and staff was very friendly. The thing that put it over the top for me was how they handled customs. I emailed Jet Aviation all the information for myself and passengers and they pre-filled all the customs forms for me. When we arrived, customs took all of five minutes and then my passengers were out the door.

While in Nassau, I stayed at Breezes Resort. It’s all inclusive so that helps keep the costs down for your owners if you’re a corporate pilot. It’s next to some of the other bigger resorts so there were shuttles available to get to other amenities. The only complaint I might have was the power kept cycling on and off and the internet wasn’t reliable. This proved challenging when trying to plan for the return trip.

The return trip required a lot of the same preparation. Again it was nice to have a good FBO to help prepare the paperwork required to clear customs. Jet Aviation handled the General Declarations for me and my passengers. All I was required to do was file the flight plan and file eApis, which was actually challenging while my internet at the resort was on the fritz.

Don’t forget to call US Customs at your Port of Entry! As this was Ft. Lauderdale for us, I called them twenty four hours in advance as prescribed. The customs agent was friendly and helpful with any questions I had. I think the best advice I can give throughout this whole experience is call ahead and ask lots of questions! Did I say that already?

The morning of the return trip went off with no hitches. Again, Jet Aviation had set up a driver to pick me up and he was on time. Jet Aviation had all the General Declarations paperwork pre-filled out for myself and passengers. Again, I use FltPlan.com to file my flight plans. Their service performed flawlessly even though I had heard rumors of flight plans not going through. To curb my bet, I talked with the staff at Jet Aviation and they made a call to tower for me to verify that the flight plan had gone through; of course, it had.

The actual flight out of Nassau was pretty uneventful. The last real hurdle I had was dealing with customs in Ft. Lauderdale, and hurdle it was. When we landed at FLL, ground instructed me over to customs ramp. There was no one to tell us where to park on the ramp. This was extremely frustrating.

A Learjet taxied in prior to us and had taken up most of the ramp but, we found a spot and shutdown. Once we shut down, no one came out to our aircraft. I walked in to talk to someone and was greeted by a Boarder agent who was less than helpful. Since the Learjet had parked first, they got to go through first. Evidently, we were not allowed in the building until they were done. This didn’t make my owner too happy!

Be prepared, though, if another airplane is on the Customs ramp before you arrive.  You are not supposed to get out of the airplane until a Customs agent comes and meets you, even to go to the bathroom.  This can result in large fines.

Once we were allowed in, the process went smoothly. We had to put all of our bags through the x-ray machine. Beyond the x-ray machine, CPB didn’t require any other security measures. On other crossings I’ve done, CPB had opened up bags and sifted through clothes, so just doing the conveyor belt was a surprise. The rest of the trip was fairly commonplace. We stopped in Destin FL for dinner before making our final leg into Dallas. All in all, it was an excellent trip and I’m excited to do another one.

Ryne Bergren works for a Part 91 operation in Dallas flying a King Air 350. Being a Part 91 outfit, he doesn’t get to rely on a “dispatch” or “company” to help with any international flight planning. This was a learning experience for him. Hopefully this will be a help to anyone for future trips.


Similar Posts

  • Cirrus SR20 vs. Diamond DA40

    Note:  For this article I am comparing a 2008 Cirrus SR20 G3 and a 2008 Diamond DA40 XLS.

    Aircraft shopping can be a tedious process.  First, a buyer needs to know what the mission is.  How far will flights typically be, how many people will be on board, and how fast does the airplane need to be.  Then, the buyer has to figure out what the budget is.  Finally, a prospective owner needs to figure out how much airplane he or she can handle.

    Two very good airplanes for newer pilots transitioning from a flight school 172 who need a faster airplane to build experience in, but also want to experience a glass panel, are the Cirrus SR20 G3 and the Diamond DA40 XLS.

    Cirrus SR20 G3

    The 2008 Cirrus SR20 G3 is a good airplane.  The G3 is equipped with the 6 cylinder, Continental IO-360-ES, 200 HP engine.  Performance-wise, an owner can expect 135-140 knots true at 9 GPH (Lean of Peak) or 145-150 knots true at 11.5-12 GPH (Rich of Peak).  The 3 blade propeller equipped models have better takeoff and climb performance than the 2 blade propeller equipped planes, especially in high density altitude conditions.

    Cirrus SR20 Comparison

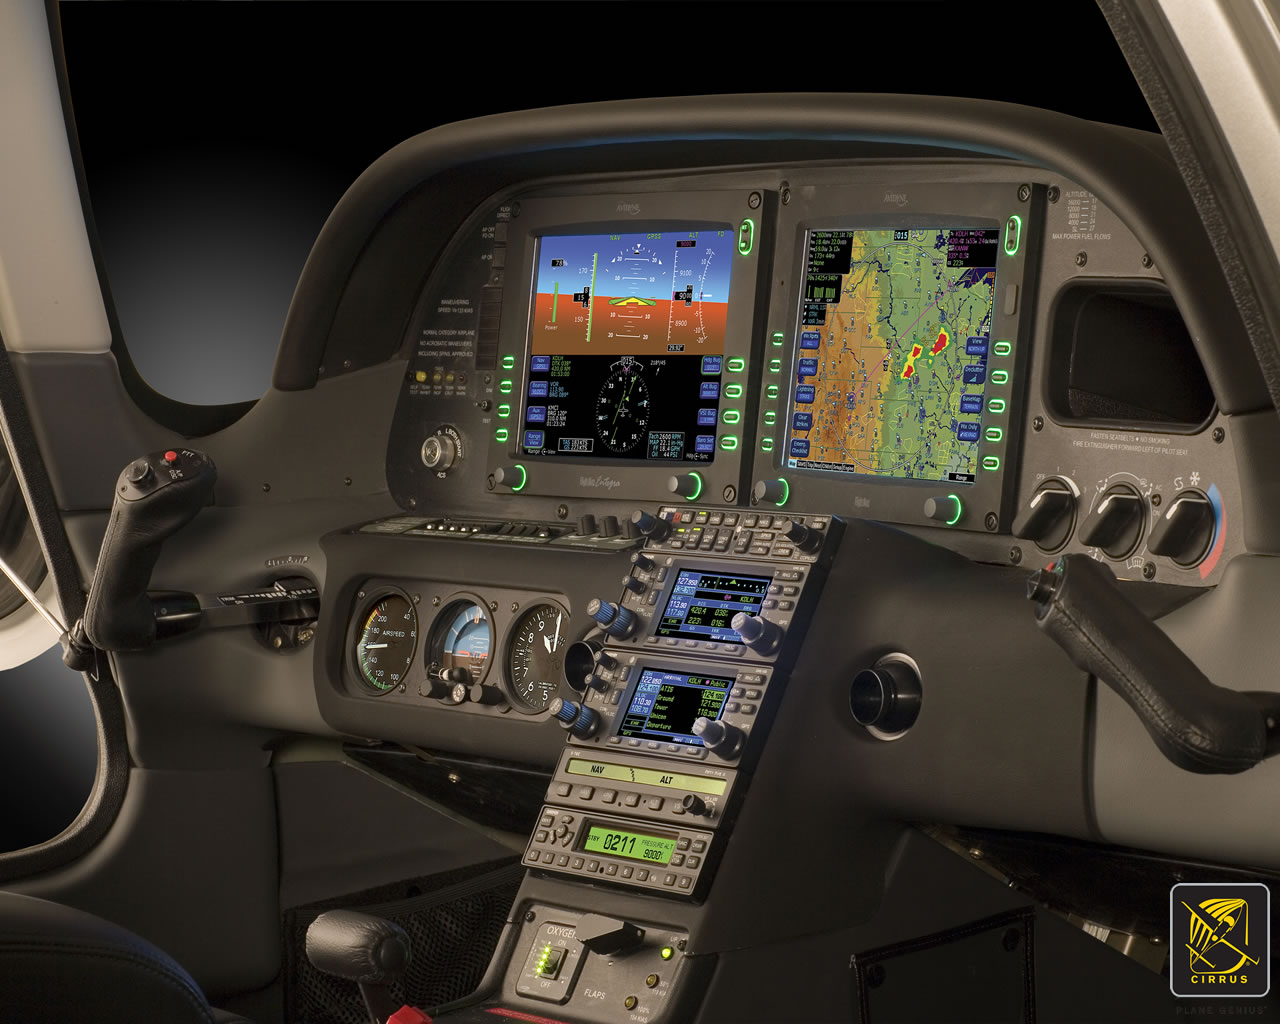
    The airplane is equipped with the Avidyne Entegra EX 5000 glass panel system.  Most models out there will have Avidyne’s CMAX (Chart View) and all will have the Avidyne EMAX (Engine Monitoring).  All came from the factory with the STEC 55x autopilot (though a handful will have the STEC 55 SR, which doesn’t have glideslope functionality).  They also came from the factory with dual Garmin 430s. Most units have been upgraded to WAAS.

    Some owners have upgraded the autopilot to the Avidyne DFC 90, which is a nice upgrade.  The STEC 55x is a rate based autopilot which takes it’s commands from a hidden turn coordinator that is behind the instrument panel in front of the co-pilot’s seat.  The STEC has some crosswind limitations on approaches where the pilot can actually fly better than the autopilot.

    The DFC 90, however, is an attitude based autopilot that  takes it’s commands from the attitude indicator on the Primary Flight Display (PFD).  It also adds a Straight and Level button as well as an Indicated Airspeed hold button, adding safety and functionality.  It does much better in crosswinds on an instrument approach then the STEC.

    A select few SR20s have been upgraded to a single (or dual) Garmin GTN 650 touch screen GPS unit.  The GTN 650 is a very nice upgrade.  The Garmin 430 is a great unit, but the learning curve with the GTN 650 is much less.  The touch screen setup makes a little more sense to the new user.

    Values on the 2008 SR20 G3 with 1,000 hours or less run somewhere between $220,000-$260,000, depending on total time and equipment.

    Diamond DA40 XLS

    A handful of 2007 XLS DA40s were made, but not many.  Most XLS models you will see are 2008 and later. These are equipped with the Lycoming IO-360, 4 cylinder, 180 HP engine with the Powerflow Exhaust STC. Due to the Powerflow Exhaust, the performance is equal to the SR20.  At 6,000-8,000 feet, you will routinely see 140 knots true at 10-10.5 GPH.  Higher altitudes will give slightly better performance and lower fuel burn.  Like the SR20, the Diamond DA40 XLS comes with either a 2 blade or 3 blade prop.  Go with the 3 blade as the takeoff and climb performance is much better.

    Diamond DA40 Comparison

    Where the DA40 XLS has a leg up on the 2008 SR20 G3 Avidyne is in the avionics.  Diamond got on the Garmin G1000 train a little sooner than Cirrus did and the XLS is equipped with the G1000 and GFC 700 autopilot.  The Garmin GFC 700 autopilot is the best GA autopilot I have flown with.  It is an amazing piece of equipment.

    Most, if not all, DA40 XLS models will have both WAAS and Synthetic Vision.  Cirrus didn’t get Synthetic Vision till they put the Cirrus Perspective by Garmin in their aircraft in the middle of 2008.

    The DA40 has great visibility due to the massive amount of glass surrounding the pilot.  The big glider wings give it excellent pop off the runway, but quite a different climb pitch attitude than most other piston single engine airplanes.  The airplane does like to float on landing if the pilot doesn’t get the speed right.

    Values on the 2008 Diamond DA40 XLS equipped with the Garmin G1000 are around the low-mid $200,000 range.

    Comparison

    Performance wise, the airplanes are about equal.  Rich of peak, the Cirrus out performs the Diamond, but uses more fuel.  Both have about 5 hour ranges (though the Cirrus has bigger fuel tanks, 56 gallons usable compared to the Diamond long range tanks of 50 gallons usable).  Useful load is slightly better in the Diamond due to the fact that the Lycoming engine has 2 fewer cylinders than the Cirrus.  The Cirrus does have a roomier back seat, a larger baggage area, and a side stick instead of a center stick, but the DA40 has a back door.  The Cirrus also has the CAPS system, though an owner has to do a $15,000 repack every ten years.  Airplane values are about the same.

    I give a slight edge to the Diamond, though, and here’s why.  For about the same price, a purchaser can get the Garmin G1000 system complete with the GFC 700 autopilot in the DA40 XLS.  The Avidyne and STEC system is great, but the Garmin system is definitely above and beyond.  To get the Garmin G1000 in an SR20, you’d have to look at the Cirrus Perspective by Garmin, which came out in late 2008, and you’d be paying $300,000 or more for a single engine piston with 200 HP (though you do get Air Conditioning!).

    So for my money, I would go for the Diamond DA40 XLS.  I believe you get a little bit more bang for your buck and you don’t lose anything with the DA40 XLS.  Don’t get me wrong, I love the Cirrus, but comparing the two, I think the Diamond DA40 XLS rates a little higher.

  • The Anatomy of a Hot Start

    Are you one of those pilots who hates fuel stops simply for the fact that the engine doesn’t have time to cool off?  You pump gas into the plane, hit the bathroom, get in the plane and the oil temperature is still up at 160-170 degrees, leading you to have to figure out how to get the plane going again with a hot engine.  For those without proper training, this usually means a lot of jockeying around with the throttle, mixture, and fuel pump to try and get the thing started without flooding it.  After coughing and wheezing several times, the engine finally comes to life, leaving you to only guess what worked and without the knowledge of how to duplicate it.

    Hot Start 2

    Let’s take a step back for a minute to see what is actually happening with a hot engine.  Once the engine is shut off, the fuel in the lines leading from the tank to the engine is vaporized, meaning there is more air in the fuel lines than liquid fuel.  In the engine block itself, there is still liquid fuel in the injectors, but only enough for the engine to cough then quit if started.

    When a normal priming and starting procedure is performed, too much fuel is forced into the cylinders and the engine becomes flooded.  A flooded engine just means that the stoichiometric ratio is way too rich, meaning there is too much fuel and not enough air.  The prime does the trick of getting the fuel vapor out of the fuel lines, but it shoves too much fuel into the cylinders.  Once the engine is flooded, it’s a waiting game to allow air into the engine to get the mixture right.  All Lycoming powered high performance and turbo charged engines are notoriously easy to flood when hot.

    So, what’s the solution?  By taking a step back to see what is actually happening, you can attack the problem from the source, which is the fuel lines.  You need to get the vapor out of the fuel lines and get some liquid fuel in there.  The procedure for this varies based on the make and model of engine, but I’m going to use the example of the Continental IO-550-N that is in a Cirrus SR22.  I found this procedure in the Continental Engine Manual and it works every time.

    (Pilots of other airplanes, keep reading.  I have sections below for PA46s, Columbias, and Bonanzas as well )

    • Mixture:  Full Lean (this allows fuel in the fuel lines, but prevents it from going past the mixture control into the engine, sending all fuel back to the fuel tank; a small amount of fuel leaks past the mixture control providing prime for the engine)
    • Throttle:  Idle
    • Low Boost Pump:  Run for 30-60 seconds (see note below)  (15 seconds in the Turbo Cirrus)
    • Mixture:  Full Rich
    • Throttle:  Open about 1/4 travel (not 1/4″, that won’t be enough)
    • Boost Pump:  Off, but have your finger on Low Boost
    • Starter:  Crank (engine will turn over a few more times before firing, this is normal)
    • At the first indication of start, turn the Low Boost on, increase the throttle to ensure the engine catches,  then adjust the throttle for 1,000 RPM
      • The engine will fire right about the time you start thinking it isn’t going to work

    A few notes regarding engine temperatures:

    • If the oil temperature is above 150 degrees, a hot start will be required.  If oil temp is close to 200 degrees, run low boost for 60 seconds in a non-turbo.  If oil temp is 175, run low boost for 45 seconds in a non-turbo.  If oil temp is 150, run low boost for 30 seconds in a non-turbo.  Use 15 seconds for all temps above 150 in a Cirrus Turbo.
    • If the oil temperature is between 125-150, skip the hot start procedure, don’t prime the engine, leave the boost pump off, and crank the engine, then boost pump on when it starts and slightly increase throttle to make sure the engine catches
    • If the oil temperature is between 100-125, skip the hot start, don’t prime the engine, and perform a normal start with the boost pump on
    • If the oil temperature is below 100, perform a normal prime and start

    Piper Malibu (PA46-310P with Continental Engine)

    • Mixture:  Full Lean (this allows fuel in the fuel lines, but prevents it from going past the mixture control into the engine, sending all fuel back to the fuel tank; a small amount of fuel leaks past the mixture control providing prime for the engine)
    • Throttle:  Idle
    • Low Boost Pump:  Run for 15-30 seconds depending on oil temperature…
      • Greater than 150 degrees: 30 seconds
      • Less than 125-150 degrees:  15 seconds
      • Less than 100-125 degrees, no need to run the Low Boost
      • Perform normal cold start below 100 degrees
    • Mixture:  Full Rich
    • Throttle:  Open about 1/4 travel (not 1/4″, that won’t be enough)
    • Boost Pump:  Off, but have your finger on the Primer Button
    • Magnetos:  On
    • Starter:  Crank (engine will turn over a few more times before firing, this is normal)
    • Engine should fire with the Low Boost Pump off, but…
      • If the engine starts to die, simultaneously increase the throttle a little bit and hit the primer button.
      • Only tap the primer button, don’t hold it as you’ll flood the engine if you hold it At the first indication of start, turn the Low Boost on, increase the throttle to ensure the engine catches,  then adjust the throttle for 1,000 RPM

    Piper Mirage & Matrix (PA46-350P and PA46-350T with Lycoming Engine)

    • Leave throttle and mixture idle
      • Before you turn the battery on, ensure the mixture is idle cutoff
      • If the mixture is forward and the battery is on, the low boost pump in the fuel tank will start pumping fuel to the engine and quickly flood it
    • Ensure Magneto switches are on
    • Open throttle 1/4 travel (not 1/4″ as this won’t be enough)
    • Crank
    • As soon as the engine begins coughing and wheezing (and this is what it will sound like), push the mixture 3/4 of the way forward
    • Once the engine has a good solid fire, smoothly and swiftly push the mixture all the way forward
    • Reduce throttle
    • Note:  The Emergency Boost Pump can be used as part of the hot start technique, but I usually leave it off.
      • Pro to the Emergency Boost Pump is it can help suck more fuel in and purge vapor during the start
      • Con is that if the engine doesn’t start on the first try, you are flooding your motor

    Columbia 400

    • Throttle and Mixture Idle Cutoff
    • Vapor Suppression:  Run for 30-60 seconds.  Reference above temperatures on the non-turbo Cirrus for run times
    • Mixture full forward
    • Throttle 1″ in
    • Prime for 3 seconds, then off
    • Crank
    • Once engine fires, primer might need to be pushed momentarily to purge excess vapor
      • On Columbia 350s, the throttle should be twisted (or pushed depending on if it’s an Avidyne or Garmin Columbia) in while cranking
      • Be prepared to reduce power once engine fires

    Beechcraft 36 Bonanza

    • Throttle and Mixture Idle Cutoff
    • Low Boost:  Run for 30-60 seconds.  Reference above temperatures on the non-turbo Cirrus for run times
    • Mixture full forward
    • Throttle open 1″
    • High Boost until fuel flow peaks, then off
    • Crank
    • Once engine fires, Low Boost might need to be engaged momentarily to purge excess vapor

    There are other “procedures” for hot starting out there, but most of them involve starting with full throttle, which can lead to the airplane shooting ahead on a ramp or taxi way if the brakes aren’t properly set.  This can lead to high repair costs, so always be cautious.  Figuring out what is happening when the engine is hot will give you a better chance of getting it started right away.

  • The Importance of a Pre-Buy Inspection

    There are multiple ways to save money during the aircraft buying process. To start, since you are buying an airplane, you have some means of positive income in order to afford an airplane. Airplanes come in all different shapes and sizes and usually, an airplane can be found to fit almost any budget, whether is a $20,000 Texas Taildragger all the way up to a multi-million dollar jet.

    One way is to stay within your budget. There will always be a shinier, newer, lower time airplane that is just above where you set your budget at. Don’t reach for it! There is a reason you set your budget where you did.

    Another way is to shop around and get multiple insurance quotes. Your agent is in charge of engaging underwriters who are going to evaluate you and your airplane as risks, then price a policy accordingly. With most airplanes, you should get multiple quotes to see what fits you best. Beware though, because sometimes, you can get a lower rate, but it will require more training, so you end up shelling out more money in the long run. If you find a policy you like, but the training seems skewed or the liability isn’t high enough, you can always have your agent ask the underwriter to modify the quote. You are still in charge.

    Finally, if you evaluate your mission and see that your budget can’t afford an airplane that carries enough or goes fast enough, look into taking on a partner or two to help with costs. Be thorough in vetting your potential partners as a good partnership is worth it’s weight in gold, but a bad one is downright unpleasant and often times hard to get out of. Find pilots who have the same mindset & personality you do and treat their stuff the same way you do. Try to take a ride in their car or go to their house, then you’ll see what kind of shape they will keep the airplane in.

    The best way to cost yourself more money in the aircraft buying process?

    Don’t do a pre-buy inspection.

    A pre-buy inspection takes place after negotiations and once a Purchase Agreement is in place. You are pretty much set on the airplane, you just want a third party mechanic who is knowledgeable on that make and model of airplane (and this is a very important point) to go over it and make sure that it is sound from a mechanical standpoint. The buyer, you, want someone who has never had an association with the seller since the mechanic will be your representative in the process and you want him answering to you.

    If you have used a broker or a buyer’s agent, that person should have already gone through the logbooks for you, so you’ll have a basic idea of the history of the airplane. However, knowledgeable mechanics find things all the time that turn out to be the responsibility of the seller to repair since it happened on their watch. Without a pre-buy, you would end up having to pay for that in the not to distant future.

    Here is an example of where not doing a pre-buy can cost a lot of money.

    An owner bought a late ’70s model Citation ISP, one of the very first Citations ever made. It had been based in Florida (salt & humidity + aircraft don’t mix well) for a while. The buyer didn’t use a broker, but thankfully had someone look through the maintenance history of the airplane. Since it was so old, the logbook reviewer didn’t have time to do anything but a basic overview, but he gave the thumbs up to the buyer.

    The buyer decided he just wanted a boroscope inspection and the seller’s mechanics to look over the airplane. Remember what I said before about a third party mechanic? Well, these mechanics didn’t do a very thorough job. When the buyer took delivery of the plane, after about 10 hours of flying, he already had an $18,000-$25,000 maintenance bill.

    You may say, well that’s a jet. Jet’s have specialized maintenance and need a more extensive pre-buy inspection.

    On the contrary, in my 8 years in the training business, I have seen Cirrus, Piper PA46s, Bonanzas and several other piston engine airplanes that either didn’t have a pre-buy done or the pre-buy was done by someone who didn’t know that airframe. Lo and behold, things started breaking and adding up very quickly that would have been discovered on a good pre-buy inspection.

    Don’t skip on the pre-buy inspection. They usually run a few thousand dollars, but save tons of money in the long run.

  • Jet A Fueling Mismanagement

    I’m sure at this point, most pilots in Texas have heard about the Cessna 421 that went down two weeks ago in Lufkin.  The Golden Eagle suffered a dual engine failure (the pilot lost the first at 2300 feet, then the second at 1700 feet) in IMC on climb out.  He broke out at 1,000 AGL miraculously lined up with US 59, south of the Lufkin airport.  The pilot had to dodge a car as he was attempting his landing, stalled the airplane, sheared off the landing gear, then slid into the median.  No one died, but lots of bumps and bruises.  All were airlifted to Houston.

    Jet A Lufkin Plane Crash

    The cause was a lineman at LFK put Jet A in the 421, which is a piston airplane and takes 100LL Avgas.  The story that I saw said the pilot and two passengers were returning to Houston from Kansas City and diverted to LFK due to weather.  They landed in driving rain and spent the night.  I have not seen any reports saying whether the pilot sumped the tanks or not the following morning.

    There were several factors that led to this accident.  If you take one factor out, the accident probably wouldn’t have happened.  Let’s take a look at the sequence of events.

    The 421 arrived in a driving rain storm, so the pilot and passengers probably disembarked quickly to get out of the weather.  Factor number 1 presents itself here.  We don’t know whether or not the pilot told the lineman to put Avgas in it or not (he may have just said fill it up), so we’ll leave that aside.

    Understandably, the pilot dashed inside to get out of the rain, but they neglected to monitor the fueling.  Whether or not the fueling took place that night or the next morning, we can’t say.  I have started to greatly encourage my customers to monitor the fueling of their airplanes, especially when it’s a fuselage that can either have Avgas piston engines or Jet A turboprops, as is the case with the Cessna 421.

    Factor number 2, we already know about.  The lineman messed up and put the wrong fuel in.  If their was uncertainty about what type of fuel, he would have been prudent to await the return of the pilot to ask, even if that meant delaying the pilot’s departure.

    Factor number 3 is the matter of sumping the fuel.  We don’t know if the pilot sumped the fuel or not. The tricky thing about sumping is Jet A doesn’t settle out of Avgas like water does unless it sits for a long, long time.  The two ways to determine if you have Jet A in your Avgas airplane are to smell it, as Jet A has a very strong diesel smell, or do the paper towel test.  The paper towel test consists of dumping a fuel sample onto a paper towel, then let the Avgas evaporate.  If you are left with a nasty, oily residue, you’ve got Jet A in your tanks (not to mention it will smell like diesel).

    To prevent misfueling of your airplane, take the following steps:

    • Be specific in telling the lineman what type of fuel you want, not just “fill ‘er up”
    • Monitor the fueling and watch which truck pulls up to your airplane
      • This is especially important with fuselages that can have either Pistons or Turbo-Prop engines, like the PA-46 line or the Twin Cessna line
    • Always sump your fuel, definitely smell it, and if there are any doubts, try a paper towel test
  • Winter Ops

    It’s summertime and the weather is hot! Over this dry, sunny season, winter flying is probably the last thing on your mind. However, now is the perfect time to start getting things in place for winter and that includes having a plan for taking care of your airplane.

    Why are preparations for winter ops needed in the first place? Cold weather, especially during the engine start and warm up period, can be very damaging to your engine if precautions aren’t taken to ensure that safe temperatures exist inside the engine before you turn the key. I always thought that the biggest problem associated with cold weather was engine oil. The logic is since cold oil is thicker and less viscous as the temperature drops, it is not able to circulate quickly throughout the engine to provide proper lubrication upon starting.

    While cold oil may be a factor, the introduction of multi­viscocity oils has greatly reduced that issue. The real problem is created by the different ways that various parts of the engine respond to heat. Because aluminum expands more quickly when heated than steel does, the pistons (made of aluminum) expand more quickly than the cylinders (made of steel). This can lead to scuffing on the sides of the cylinder barrel. In the same way, differential heating can reduce clearances which are designed to provide cooling oil to bearings and other vital engine parts, thereby causing damage which greatly reduces the life of the engine.

    So how cold is TOO cold? Unfortunately, that is a difficult question to answer. Because there is so much variation between engines, airplanes, and environments, there really isn’t any one specific answer. An older, more worn out engine may actually be less susceptible to cold weather damage than a newer, tighter engine because its internal clearances are probably not as tight as they were a few thousand hours ago. I have heard of some people who preheat their airplanes anytime the temperature falls below about 40 degrees. For us northerners, this seems excessive. On our E33A Bonanza which has a Continental IO­520, we generally preheat the airplane when it is cold soaked in temperatures below freezing (32° F).

    Here are a few of the best ways to get your machine ready for a cold weather flight:

    • Heated Hangar:­ Nothing beats a heated hangar for warming up an airplane. The warm air is evenly distributed around the engine and in the cockpit (your avionics and gyros will thank you!). The airplane will need to be in the hangar for a while in order to warm up the guts of the engine. Often, the easiest way is to have the airplane pulled in the evening before the planned departure and left overnight. Many FBOs will hangar airplanes overnight for a small fee and it is well worth the price. We almost always have our charter airplanes put into hangars overnight when on a winter trip to ensure that we don’t have any trouble when we depart the next day. This practice has the added benefit of keeping the airframe clear of any ice and snow that may accumulate before you are scheduled to leave.
    • Electric Engine Heaters­: Multi­point electronic heaters use heating pads that are placed around the engine in order to heat up the various components such as cylinders, the oil pan and crankcase. Most of these systems are designed to be activated by being plugged into a wall outlet with an extension cord. Preheating for a winter flight is as simple as going to the airport the night before and plugging it in. Two well ­known manufacturers of multi­point engine heaters are Reiff and Tanis. These systems are relatively inexpensive and can be a life saver if you regularly travel in colder climates. If an engine heater is the right choice for you, it is recommended to avoid less ­expensive models that heat only the oil pan.


    Reiff system
    Pictured above is the Reiff system. The heated bands go around the cylinder bases and the pad at the bottom of the picture heats the oil pan. Picture Courtesy of www.reiffpreheat.com


    • Covers and Blankets­: If it is especially cold or you have to preheat outside, having something to insulate the cowling and keep the wind out can be very useful. Regular blankets will work long as you can secure them in place. If you have an ongoing need for additional insulation, there are companies that make custom blankets and propeller covers to fit your airplane. If you are landing and then taking off again relatively quickly, using a few blankets and cowl plugs will work nicely to keep the engine warm while it is sitting outside. In a pinch, placing a couple of powered light bulbs in the cowling overnight with insulation on top can result in sufficient temperatures for starting the engine.


    Bonanza Cover
    Even with the multi­point electric heater, we still use a blanket while preheating to help keep everything toasty.


    • Forced Air:­ This method is used widely by FBO’s and flight schools. Hot air is produced in a portable heater and is then pumped into the engine compartment via the openings at the front or bottom of the cowling. This method has the benefit of not requiring any additional equipment to be installed on the aircraft beforehand and can be very effective provided there is adequate time for the engine to heat completely before removal.


    Forced Heat
    Pictured above is a Red Dragon engine preheater. Photo courtesy of Red Dragon’s website: www.flameengineering.com


    • Winter Baffles:­ When the air temperature starts to drop into the teens and lower, you may find it difficult to keep your engine temperatures warm enough in cruise flight. The problem is that the air entering the cowling inlets is so cold that it overcools the engine. The solution is to install additional baffling in the engine inlets to reduce the amount of airflow into the cowling. These additional baffles are usually just sheets of aluminum that are cut to the correct size and are bolted in and removed quickly and easily as needed. Some pilots swear by them while others complain that they can cause uneven cooling. If you have questions about winter baffling, I’d suggest talking to your mechanic about your specific airplane.

    Winter flying can be extremely rewarding. After their hands thaw from pre­flight, a pilot is often rewarded with smooth air, improved performance and outstanding views. Just don’t forget to prepare the airplane for the cold. The preparation is often as simple as plugging in an extension cord or making a phone call to the FBO. So whether you live in the north or the south, take good care of your engine so that it can keep taking good care of you.

  • Calm Wind Landings

    Some of a pilot’s favorite words are heard on the ATIS:  “Winds, Calm.”  These words set off all sorts of happy bells and hallelujah choruses.  Most pilots spend their lives fighting the winds.  On those rare days when the winds are calm, great happiness ensues.

    Limp Wind Sock

    But, are calm wind landings more complicated then everyone thinks?  Well, they can be if the proper planning doesn’t go into them.

    Let’s think about wind.  We have surface wind and we have winds aloft. Sometimes the surface winds are calm.  When this happens, certain airports have preferred calm wind runways which are supposed to be used in these conditions.  Winds aloft are almost never calm.  95% of the time, there is some kind of wind even 100-200 feet above the surface.

    Here is the question pilot’s face when coming into an airport with calm winds: which runway do I use?  Do I use the calm wind runway?  Do I use the runway that is easiest to enter the pattern for?  Do I use the one with the shortest taxi?

    A lot of technologically advanced aircraft have a wind indicator on the PFD. This tool is often forgotten in calm surface wind conditions.  On the contrary, this is probably the most important tool a pilot can have when figuring out which runway to use when the winds are reported calm.

    Here’s why.  That wind indicator is showing the pilot what the winds aloft are. The winds aloft should determine what runway is going to be used.  If the wind indicator is depicting a south wind, then a south runway should be used.  Even if it is a 5 knot wind at pattern altitude, it’ll still be a headwind coming in on final approach.  If the north facing runway is used, that same 5 knot headwind can blow an airplane halfway down the runway before the ground speed drops off enough for it to land.

    So, the next time you are coming into an airport and the winds are reported calm, take a look at your wind indicator on your PFD when deciding which runway to use.  It’ll probably save a few go arounds!

Leave a Reply

Your email address will not be published. Required fields are marked *