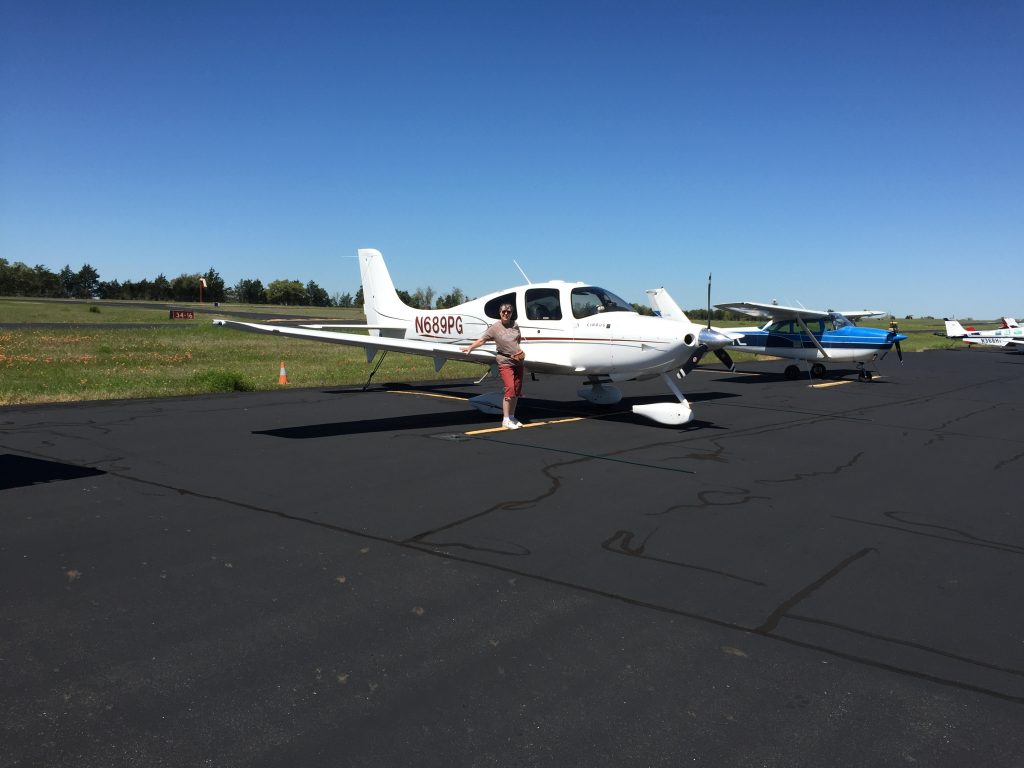
Brady Texas Fly In (KBBD)

6th Annual Armed Forces Weekend Celebration & Fly-In, May 20-21, in Brady, TX and Curtis Field (KBBD)!

Friday Night on the Square – FREE

Fly-In Saturday, 9-4 – FREE

A Night in London with Sentimental Journey Orchestra
Saturday night 7-11 PM
Tickets for Dinner & Dance, $30 available at www.morganmilitaryaviationmuseum.com.

Some fuel is available for warbirds! Please contact the airport if you would like to bring one!

Warbirds

Similar Posts

  • BendixKing Throws It’s Hat in the Glass Panel Ring

    Two pilots walk into an FBO.  “Nice airplane,” Pilot 1 says to Pilot 2.  “What kind of panel do you have in it?”

    “I just went all glass,” Pilot 2 says.  “Put in the Garmin G500 TXi, a GTN 750, and upgraded to the GFC 600 Autopilot.  Even put in the Mid-Continent standby instruments.  It’s a pretty sweet set up.  What about you?”

    “Wow, sounds like it!” Pilot 1 responds.  “I went a different route.  I liked all my old BendixKing instruments, so I stuck with the company.  I put in a BendixKing AeroVue Touch panel, a BendixKing KSN 770 touch screen GPS, kept my KFC 225 autopilot, got the ADS-B out compliant BendixKing KT 74 transponder, and finished it off with a King AeroFlight KI 300 Digital Backup instrument.”

    Wait, what?  BendixKing?

    Yes, my friends, BendixKing is still around.

    We are all used to the latest and greatest Garmin products these days.  Don’t get me wrong, Garmin and Aspen make great retro-fit products for your instrument panel, while Garmin and Avidyne are at the top of the touch-screen GPS market, but don’t forget about BendixKing.  They are staying in the game too.

    BendixKing announced in April the xVue Touch for experimental aircraft, with the STC for the AeroVue Touch for certified aircraft coming later this summer.  The xVue and AeroVue touch are pretty nifty units, comparable in features to what Garmin is doing with the G500 TXi and G600 TXi.  It will be difficult to claw back into a competitive market share with Garmin, but BendixKing might find a niche market of followers.

    Let’s take a look at the unit.

    BendixKing AeroVue Touch

    Now, I have not used the BendixKing AeroVue Touch or the xVue Touch, only read about them.  But, what I’ve read sounds pretty cool.  The display has really good resolution (BendixKing brags it is the highest screen resolution available), synthetic vision that comes standard (Garmin & Aspen charge extra for synthetic vision), plus VFR Sectional Charts & IFR High and Low Enroute charts, making paper charts even more obsolete.

    The display is 10.1 inches and can be easily swapped between a full screen instrument mode or a split screen setup as seen above.  Apparently, BendixKing has 3-D moving maps available on the AeroVue Touch too, which is standard.

    The one thing Garmin has on the BendixKing AeroVue Touch right now is engine information.  The G500TXi has a full complement of engine gauges available; the AeroVue Touch doesn’t, yet.  BendixKing says it’s in the works, as well as radio information and autopilot control.  I’m assuming the future autopilot control software would mean you could remotely mount an autopilot controller and input all functions from the AeroVue Touch display.  The nice thing about these future upgrades is all the software updates are free through BendixKing.

    The sticker price for the forthcoming unit is going to be about $12,600.  Garmin’s 10.5 inch G500 TXi is $16,000, while Aspen doesn’t offer anything quite that big.

    BendixKing KSN 770

    I’ve been keeping my eye on the BendixKing KSN 770 Touchscreen WAAS GPS for a few years now.  It never really has caught on quite like the Garmin GTN 750 or the Avidyne IFD 540.  BendixKing took the same route that Avidyne did in creating a hybrid touch GPS (or mini-MFD if you want to look at it that way) where a pilot can perform functions either using the touch screen or utilizing soft keys on the edges.  I like the hybrid touch approach as I have been bounced around in turbulence while trying to tap something into a Garmin GTN 750 and it can prove difficult.

    Similar to the AeroVue Touch, BendixKing utilized split screen technology in the KSN 770.  It’s a full WAAS unit that is already certified.  It’s sticker price is $14,200, compared to the Garmin GTN 750 at $17,200 and the Avidyne IFD 540 at $15,000.

    Other BendixKing Gadgets

    Here are some other BendixKing Gadgets both available now and in the works:

  • Cirrus Braking Systems: A Hot Topic

    You just bought your Cirrus SR22. You do some flying, and soon find yourself with a brake temp sticker that isn’t white anymore. You remember from your transition training that any color other than white is a no go. You now ponder…. I don’t remember getting on the brakes hard, or riding the brakes while taxiing, but sure enough they aren’t white anymore. You now start thinking that all the horrible rumors of Cirrus brakes are true. They overheat so fast!

    I would like to share some little-known facts about the Cirrus factory equipped braking system. Following the procedures below can help make the brakes last a little longer. There is also a very popular STC that allows upgraded brakes to be installed on all SR series aircraft. More to come on that.

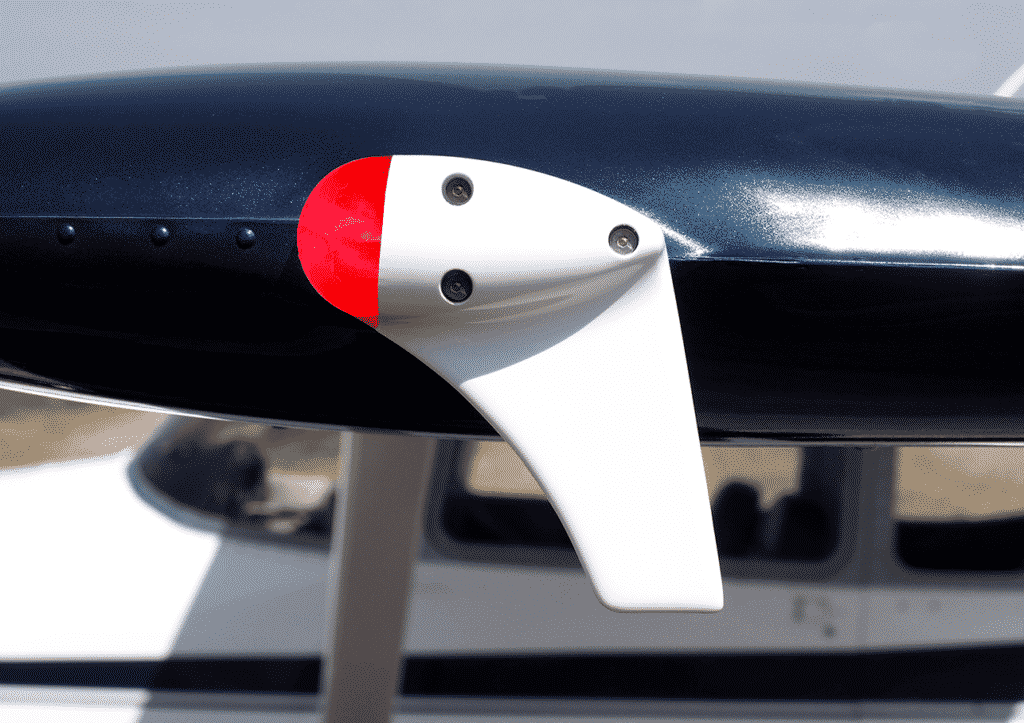
    Notice the Top Yellow sticker is far darker than the Bottom. The Yellow temperature indicator turns at 300 Degrees, while the bottom Blue indicator turns at 330 Degrees. This is an indication to the pilot that if the bottom sticker has turned colors, that the braking system has exceeded 330 degrees and is in need of servicing.

    Above is a photograph of an SR22 G1 braking system with turned brake temp stickers. The first things you may notice is that there are in fact two brake temperature stickers. We can only see the bottom blue sticker from the inspection port on the wheel pants. The other is higher on the caliper; in order to see it, the wheel pant must be removed. This isn’t common knowledge because there is no mention of this additional indicator in the POH.

    Now you may be asking yourself, what can I do to extend the service life of my factory equipped Cirrus brakes? Here are some tips. First, always taxi at 1000 RPM and use the rudder as much as you can while only tapping the brakes. This is not fool proof, since sometimes, depending on the grade, you will have no choice but to utilize brake tapping to keep the aircraft going straight. Taxiing is not typically where the brakes get overheated, though, but this is still a good practice to follow.

    What we tend to see is that the Cleveland brakes are generally overheated on landing. We always recommend to make sure your final approach speed is not excessive, land in the first 1/3 of the runway, and let the aircraft rollout to a smooth stop. What tends to happen is that the aircraft is too fast, and the pilot tries to exit at a certain taxi way, or brakes hard and continues to ride the brakes after landing during taxi. If you do your best to avoid these habits, it will serve you well.

    This braking system remained unchanged all the way until the 2016 G5 Cirrus SR series. Starting in 2016, the factory equipped G5 and G6 Cirrus SR series all now come standard with a single piston hydraulic braking system from Beringer. The Cirrus Beringer brakes far exceed the braking power and durability of the old system. The new system is more robust, withstands heat better, and is is very well built. There is also an option for an upgraded dual caliper system to increase durability and stopping power. A braking system STC for the older Cirrus G1 through early G5 models was created to upgrade those airplanes to the better stopping power and cooling of the Cirrus Beringer brakes.

    Seen above is a page from a Beringer catalog highlighting the Cirrus SR series STC kits. Your local Cirrus service center will be able to quote prices for the kits. We have over 1000Hrs spent behind Beringer equipped Cirrus aircraft and the difference is quite apparent. The pilot has better control of the aircraft, no spongy pedal, and the confidence to get the plane stopped without possibly overheating the braking system. This, in our opinion, is one of the best upgrades you can do to your Cirrus.
    Above is what an STC upgraded braking kit from Beringer looks like, as well as the new temperature indicator for the pre/post flight inspection. Notice the black spot on the left hand picture. These brakes have been overheated.

    One other difference for a pilot to note is that once upgraded to the Cirrus Beringer brakes, there is only one temperature indicator and it changes color at a whopping 450 Degrees Fahrenheit! Needless to say, it can handle some heat! The new temperature indicator is now Orange in color and turns grey/black when overheated.

    On the left are the original Cirrus factory brakes. On the right is the caliper to the new Beringer brakes for a Cirrus.
    Dual Caliper Cirrus Beringer Brakes

    The Cirrus Beringer brakes upgrade is quite a step up in the world of slowing down. However, this doesn’t mean that they are completely issue free. There is one little-known problem with Beringer brakes that is not that big of a deal and can be fixed with relative ease.

    The rotor on the Beringer braking systems is “free floating,” meaning it is not necessarily “fixed” in position when secured down to the spindle. It is “keyed” into the wheel rim with the male and female side interlocking.

    The brakes occasionally will get noisy, causing a “knocking” noise when brakes are applied. This noise is caused by the small metal tabs that tighten up the space between the wheel and the brake rotor. This is so the small tabs wear with use instead of the aluminum rim that they are fixed to. So, if your Beringers are making a knocking noise when brakes applied, this is most likely your culprit.

    These gaps above are the “keyed” position where the rotor finds home in the rim. Without these tabs that wear with use, we would be replacing the rim more often than the much cheaper replaceable tabs.

    It is highly recommended to upgrade your original Cirrus factory brakes to the new Beringer braking system. You will deal with less maintenance, less chance of a brake overheat, and less confusion on whether or not your brakes are airworthy. For more info, you can check out the Cirrus website for the single or dual caliper Beringer brakes.


    Zach Anderson is a Cirrus Standardized Instructor Pilot (CSIP) for Texas Top Aviation. Zach comes from a auto mechanic background and is very familiar with the ins and outs of maintenance. He started working for Texas Top Aviation in December 2020.

  • Pilatus Jet Nears Certification

    The Pilatus Jet, the PC-24 Super Versatile Jet, is nearing certification.  Pilatus expects the Pilatus Jet to receive European and US certification by December.  The first delivery may even take place before the end of the year.

    In developing the PC-24 Pilatus Jet, Pilatus, based in Switzerland, has taken the same approach as they did with the PC-12, their insanely successful single engine turboprop.  Versatility is the key, with their mindset being to make the PC-24 Pilatus Jet the first flying Suburban jet.  Pilatus emphasized STOL  and unimproved strip operation in their design.

    The huge cargo door so familiar on the PC-12 has been crafted into the PC-24 Pilatus Jet giving access to a massive cargo area.  According to Pilatus’ website, the jet has a takeoff distance of only 2,690 feet, which is unheard of for a a business jet.  There is seating for 11 + a pilot (yep, it’s a single pilot airplane!), so the whole family can come along.  With a max cruise of 425 knots and a range of almost 2,000 miles, it’s a get somewhere airplane.

    The price tag for a new PC-24 Pilatus Jet will be $8.9 million, which is just under what a new Phenom 300 costs.  There is a 90 order wait list, so if you get on it now, you can get one faster than a Cirrus Vision Jet!

  • Circle to Land Approaches

    When I was doing my instrument and multi-engine training, we did a lot of circle to land approaches.  As a student, I could never figure out why these types of approaches would ever be practical when you could an approach straight in to another runway.  But, as a good student, I never asked my instructors the purpose of them, I just did them to the best of my ability.

    Now, having been flying in the IFR system for almost a decade, I’m finally beginning to fully understand the practical purpose of a circle to land approach.  I have actually elected to do an approach where I had to circle to land on several occasions in actual IMC conditions.

    One important note to remember on circle to land approaches is that the minimum descent altitude (MDA) is always higher than on a straight in approach.  The reason for this is that you are basically joining the pattern for a different runway and you have to be able to visually keep yourself clear of towers and other obstacles.  So, you need a higher visibility and a higher ceiling than if you were just lining up to come straight in.

    Here are a couple of practical circumstances where it would make sense to do a circle to land approach.

    Airports with only 1 straight in approach

    This one is easy.  There are a number of airports scattered around the US that have only 1 straight in instrument approach published for it.  Around my part of Texas, the first one that pops into my mind is the RNAV 31 at T85 in Yoakum, TX.  Most of the year, the prevailing wind is out of the south, so 13 is the favored runway at T85.  During the winter is when most of the IMC weather happens in South Texas, so that is why the approach is for 31.

    Of course, especially this year during the summer, there are some IMC days where an approach to T85 would be necessary.  When there is a strong wind out of the south, landing on 31 is impractical, so a pilot would fly the approach to 31, then circle to land on 13.

    Approaching from the opposite direction

    Take a look at the RNAV 19 at KBMQ, Burnet, TX.  The two initial approach fixes (IAF) are IXANY and JIBAJ.  If a flight is approaching BMQ from the west or north, this is an easy approach to join.  If a flight is coming from Austin (directly the the east and a little south) or San Antonio (almost directly south), it would be a bit of extra flying to get configured properly for the approach.  Especially coming from Austin, because the degree of turn to join at JIBAJ wouldn’t make the approach practical.

    Well, how about vectors?  Unfortunately, Houston Center doesn’t have this approach depicted so vectors aren’t a possibility.  Center can give you vectors north to make the angle a little easier to join at JIBAJ, but they can’t vector you onto the approach.

    Direct DLORA to join is another option, but again, if you are approaching from the southeast, the angle is wrong.

    Insert the RNAV 01 approach with a circle to land.  AMUSE is right on V163, so it’s really easy to join the approach there coming from the south.  Coming from Austin, joining the approach at SUBIE works out great. Fly down to the MDA, join the left downwind for 19, and everyone is happy.

    VOR Circle to Land Approaches

    Every instrument pilot has had an instructor “force” them to do a VOR A or VOR B approach and no one enjoys them.  I personally think they are good practice.  With the number of RNAV systems and RNAV approaches out there, though, VOR approaches are becoming a bit archaic.

    They do have a place in this discussion, though.  A VOR approach is given an A or B designation when the angle of the final approach course is greater than 30 degrees to the runway (VOR A KLZZ), or the final approach course is lined up with the runway, but the MDA is too high to practically descend and land (VOR A KGRK or the VOR/DME C KASE).

    So, there are practical uses for a Circle to Land approach.  The next time you do some IMC work with an instructor, ask him/her if you can include one.

  • MMOPA Operating Practices for the Piper PA46

    I have the privilege of serving on the Malibu & M-Class Owners and Pilot’s Association Safety Committee.  Along with 6 other Piper PA46 instructors, we were tasked with two things last year leading up to the MMOPA Convention in Colorado Springs last October.  The first was to develop a Master Aviator Program (more on that in a later article).  The second was to develop Operating Practices for the Piper PA46 fleet that we as instructors could all get on board with to teach the same thing, allowing everyone in the fleet to fly approaches and patterns the same way.

    When I started instructing in the piston Piper PA46 line (the Malibu, Mirage, and Matrix), I was surprised to find that there were no recommendations anywhere that I could find for approach and pattern power settings and airspeeds.  This led to some experimentation on my part trying to find out what works well for the airplane.  I had originally been given good training in a Malibu, but hadn’t flown one for several years, so my numbers were a bit rusty.

    I have been in the Cirrus world for a very long time.  One thing I greatly appreciated from an instructing point of view about Cirrus was the abundance of guidance the factory gives instructors and pilots on how the airplane is supposed to be flown.  All CSIPs and all Cirrus pilots should (theoretically) be teaching and flying the exact same way.

    I was quite surprised that Piper didn’t put out similar information.  I wasn’t as familiar with MMOPA at the time, but was surprised they didn’t have any information either.

    I apparently wasn’t the only one with a desire to have a little bit more standardization.

    So, without further ado, here are the MMOPA Operating Practices that the Safety Committee put together.  If you are a new Piper PA46 pilot, these numbers are what you will expect to use when you do your Initial training.  If you are a seasoned Piper PA46 pilot, you probably fly these numbers, or pretty close to them already.

    These are tried and true power settings and speeds for the approach phase and landing phase.  They work. That was the goal of the Safety Committee:  put down in writing something repeatable to enhance safety.  I believe we have accomplished that.

  • Cirrus Electrical System Health

    As all Cirrus pilots know, SR20s and SR22s have 2 batteries in the Cirrus electrical system (technically, they have 3, as Battery 2 is made up of 2 12 volt batteries in series with each other).  Battery 1 provides power to the starter and is a backup for the entire Cirrus electrical system, while Battery 2 provides backup for the Essential Bus items.

    Cirrus Engine Page

    If you look on the engine page of either an Avidyne or a Garmin Cirrus, there is a section showing the Cirrus electrical system health.  With the engine running, you have voltmeters showing the voltage from Alternator 1 and Alternator 2, ammeters showing the amperage output from Alt 1 and Alt 2, and an ammeter showing the charging rate of Battery 1.  There is no indication for Battery 2.

    This brings up a question.  How does the pilot know that Battery 2 has any kind of a charge?  What happens if the whole Cirrus electrical system goes caput and all that’s left is Battery 2?  Will Battery 2 have juice then?

    The answer is actually rather simple.  As part of the pre-flight inspection, the first step in the cabin inspection is to turn the Battery 2 switch on, then check the Essential bus volt meter.  The checklist says the voltmeter should be reading between 23-25 volts.  This tells you how much voltage Battery 2 currently has. The next step (after ensuring the flap lights are out) is the turn Battery 1 on.  Battery 1 then powers the Main Bus and Essential Bus.  The voltage showing on the Main Bus shows how much voltage Battery 1 currently has.

    Easy enough right?  Now you can impress friends and family alike with your Cirrus electrical knowledge!

Leave a Reply

Your email address will not be published. Required fields are marked *