Cirrus Partner Wanted in San Antonio

Raise your hand if, after you have officially become a pilot by passing your private pilot check ride, you consistently file VFR flight plans with Flight Service.
Anybody?
Okay, let’s revise the question. Raise your hand if you have filed VFR flight plans at least 5 times in the last year.
Okay, one or two hands go up.
That’s it?
To be perfectly honest, I have filed VFR Flight Plans twice (I think) in the last year. The only reason I did was because I was flying in an area that had poor radar/radio communications and I wanted someone to know where I was (I was ferrying an airplane through southern Oregon and northern Nevada which is mountainous and is hard to get coverage into at lower altitudes). I was so unaccustomed to doing it that I nearly forgot to call and close my flight plan.
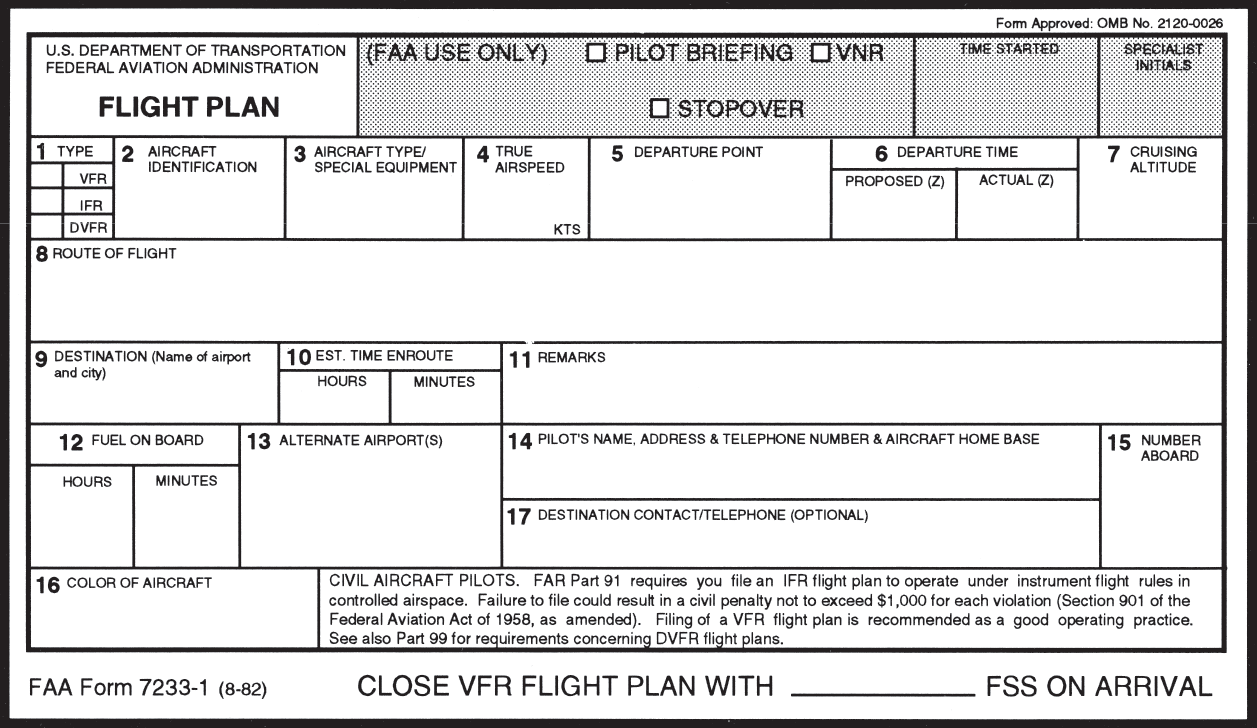
This is a common complaint amongst pilots concerning VFR flight plans. It’s extremely easy to get to your destination, hop in the car and completely forget to close your VFR flight plans. Thankfully, now a days, the Flight Service Station will typically call the number you put in your VFR flight plans (your cell phone number most of the time) to make sure you are on the ground before initiating search and rescue services.
Another complaint is that it is cumbersome to call the Flight Service Station after departing to open the VFR flight plans. This is especially true in a busy airspace area or if the pilot is getting a VFR Flight Following and talking to ATC on a different frequency.
I still think it is a great idea to file and utilize VFR flight plans. If you don’t show up at your destination, someone will come looking for you which could mean the difference between getting stranded after an off airport landing and getting a warm cup of coffee at the end of the day. Even if the you get flight following from ATC, it’s still good to file a flight plan.
Lockheed Martin, who runs all the Flight Service Stations across the US, heard these complaints from pilots and decided to come into the modern age and make it easier to open and close flight plans. They developed EasyActivate and EasyClose.
These services are very simple. Just go to Lockheed Martin’s Flight Service Station website, set up a new account, then file VFR flight plans to see the services in action.
File your VFR flight plans first, through calling the FSS or on your favorite iPad app. Then, for EasyActivate, you’ll receive an email 30 minutes prior to your ETD with a link in it. Simply click/tap on the link and your flight plan is activated. No having to call FSS in the air, no having to try to get them on the ground. Just tap the link and you’re good to go.
For EasyClose, you’ll receive an email 30 minutes prior to your ETA at your destination. When you get on the ground, you’ll see the email in your phone or iPad and you just tap the link and your flight plan is closed. Since we all have our phones and iPads with us constantly, there will be no more forgetting to close the flight plan and getting that angry call from the FSS.
Sign up is quick and easy. All Lockheed Martin needs is your email address, last name and phone number. They’ll send you the password to set up your account. Log in (they will have you change your password immediately), then just click on EasyActivate/EasyClose up at the top. You have to register the email address you want (you can also put in a phone number to receive a text message, and you can put multiple email addresses and phone numbers if you’d like), then you are all set to go.
For a long time, I was happy if an FBO had a radio where I could tune the ATIS or automated weather before getting into the plane. This would allow me to skip listening to the weather in the airplane with the engine running, giving me a quicker exit from the ramp while burning a little less fuel. I would also be able to brief my taxi route from the ramp since I would know which runway was in use before getting in the plane.
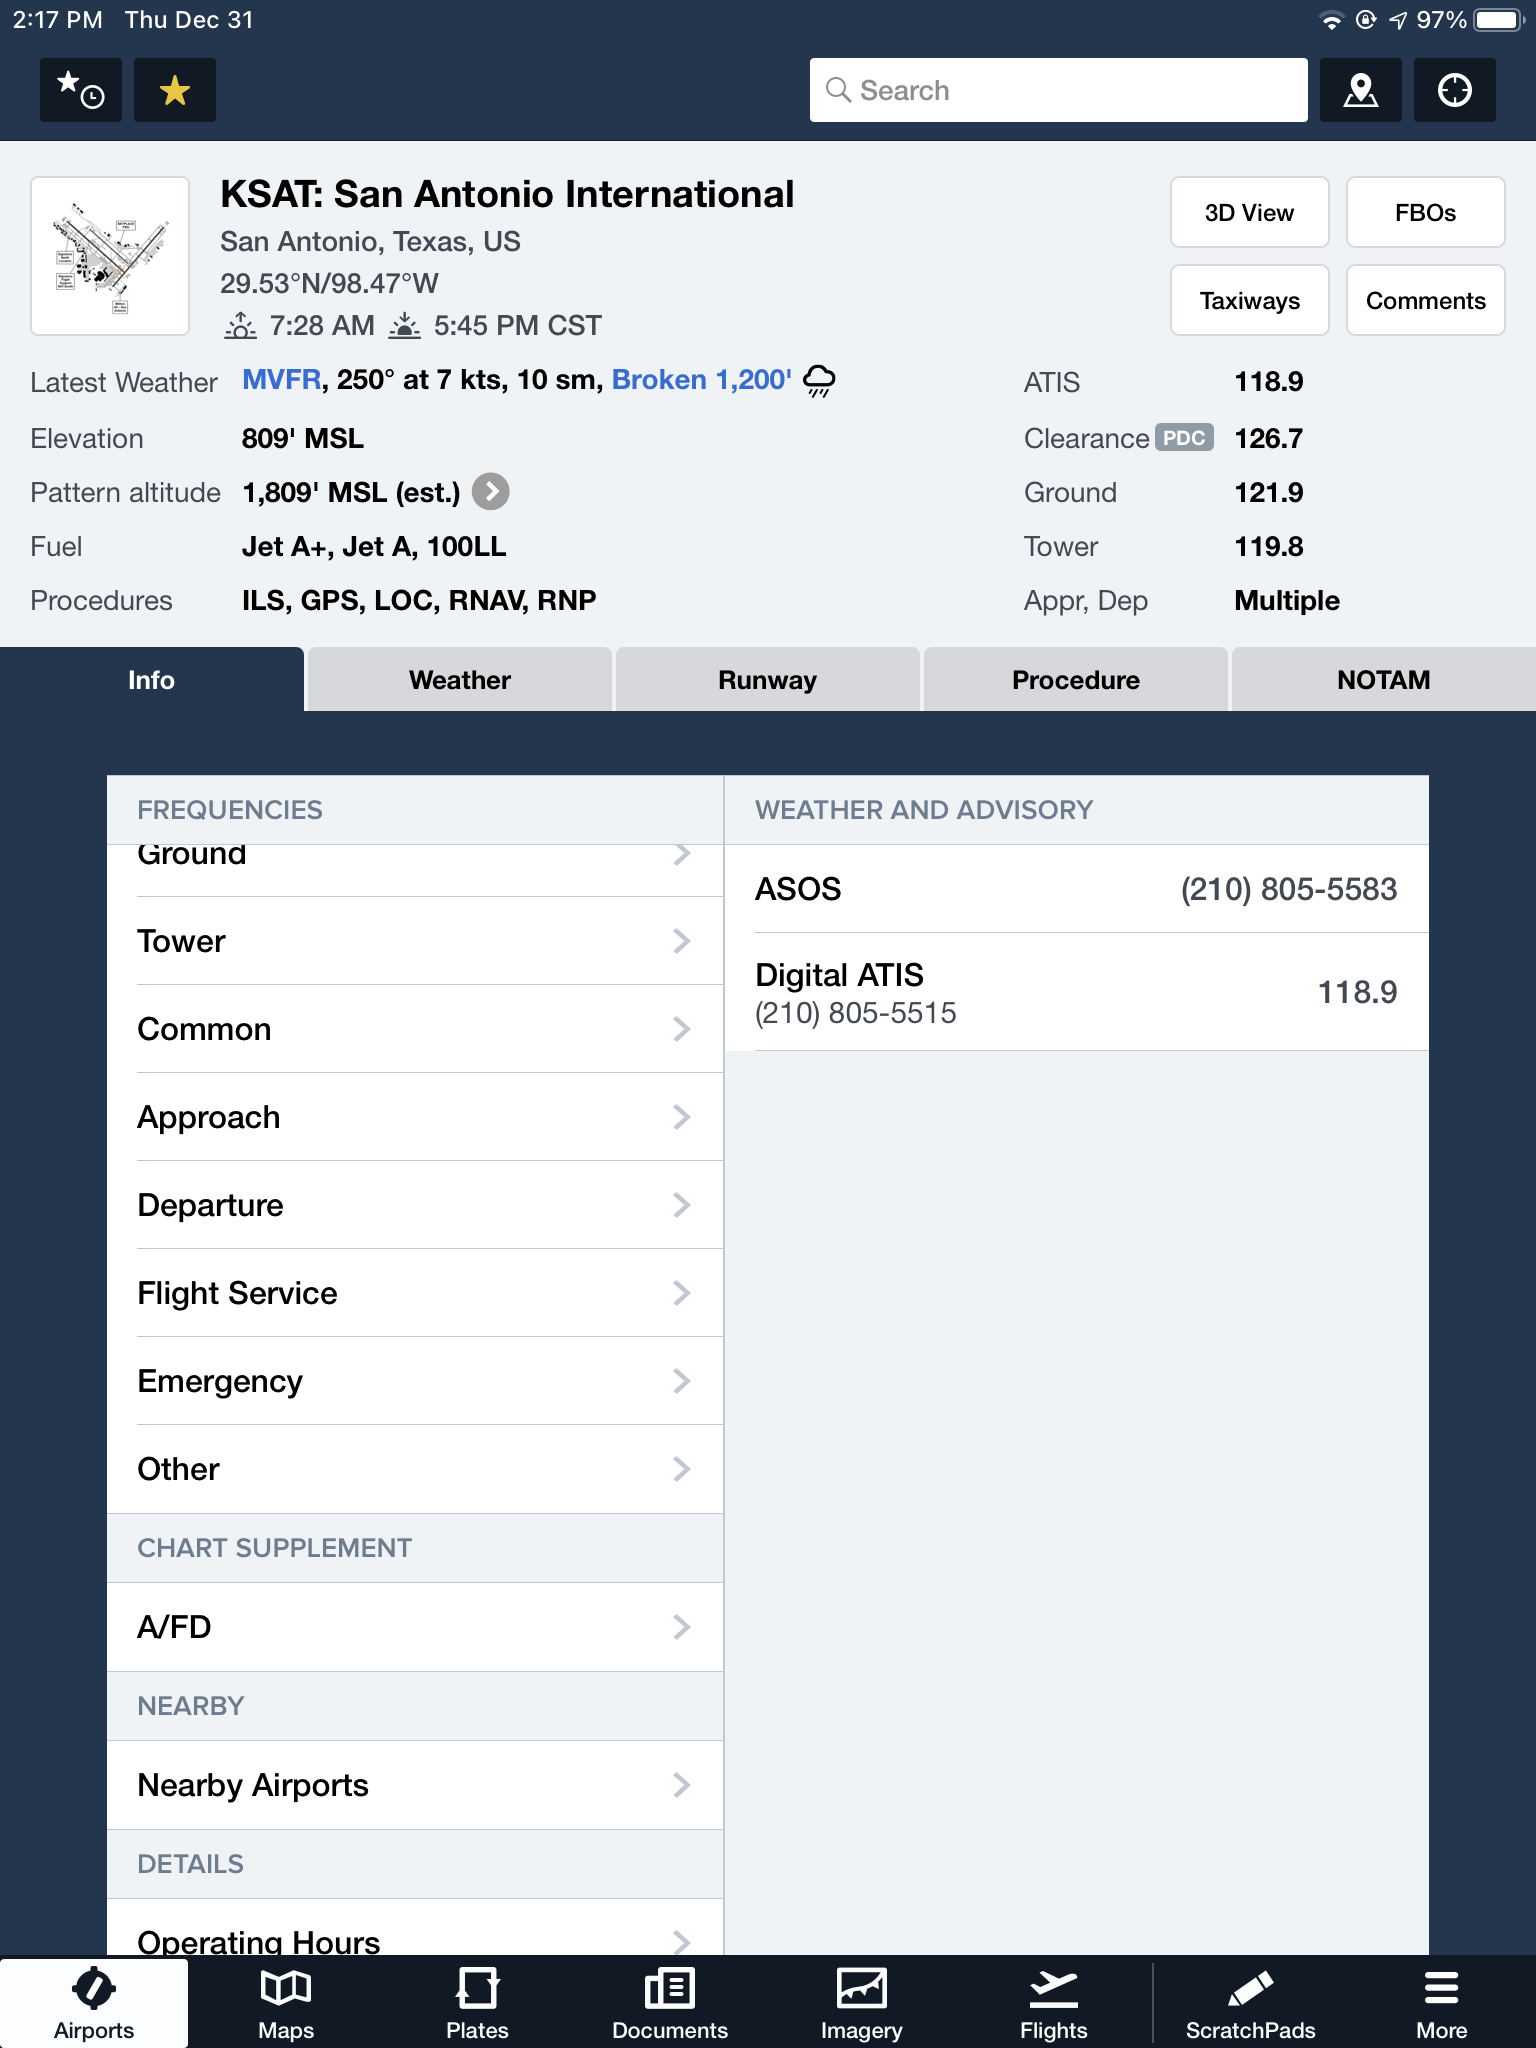
As we progress forward in technology, I’m constantly amazed at how much more planning I can do from the palm of my hand. Now, I can call a phone number and get the ATIS, AWOS, or ASOS, depending on the size of the airport; if you prefer reading a text version…well, there’s an app for that.
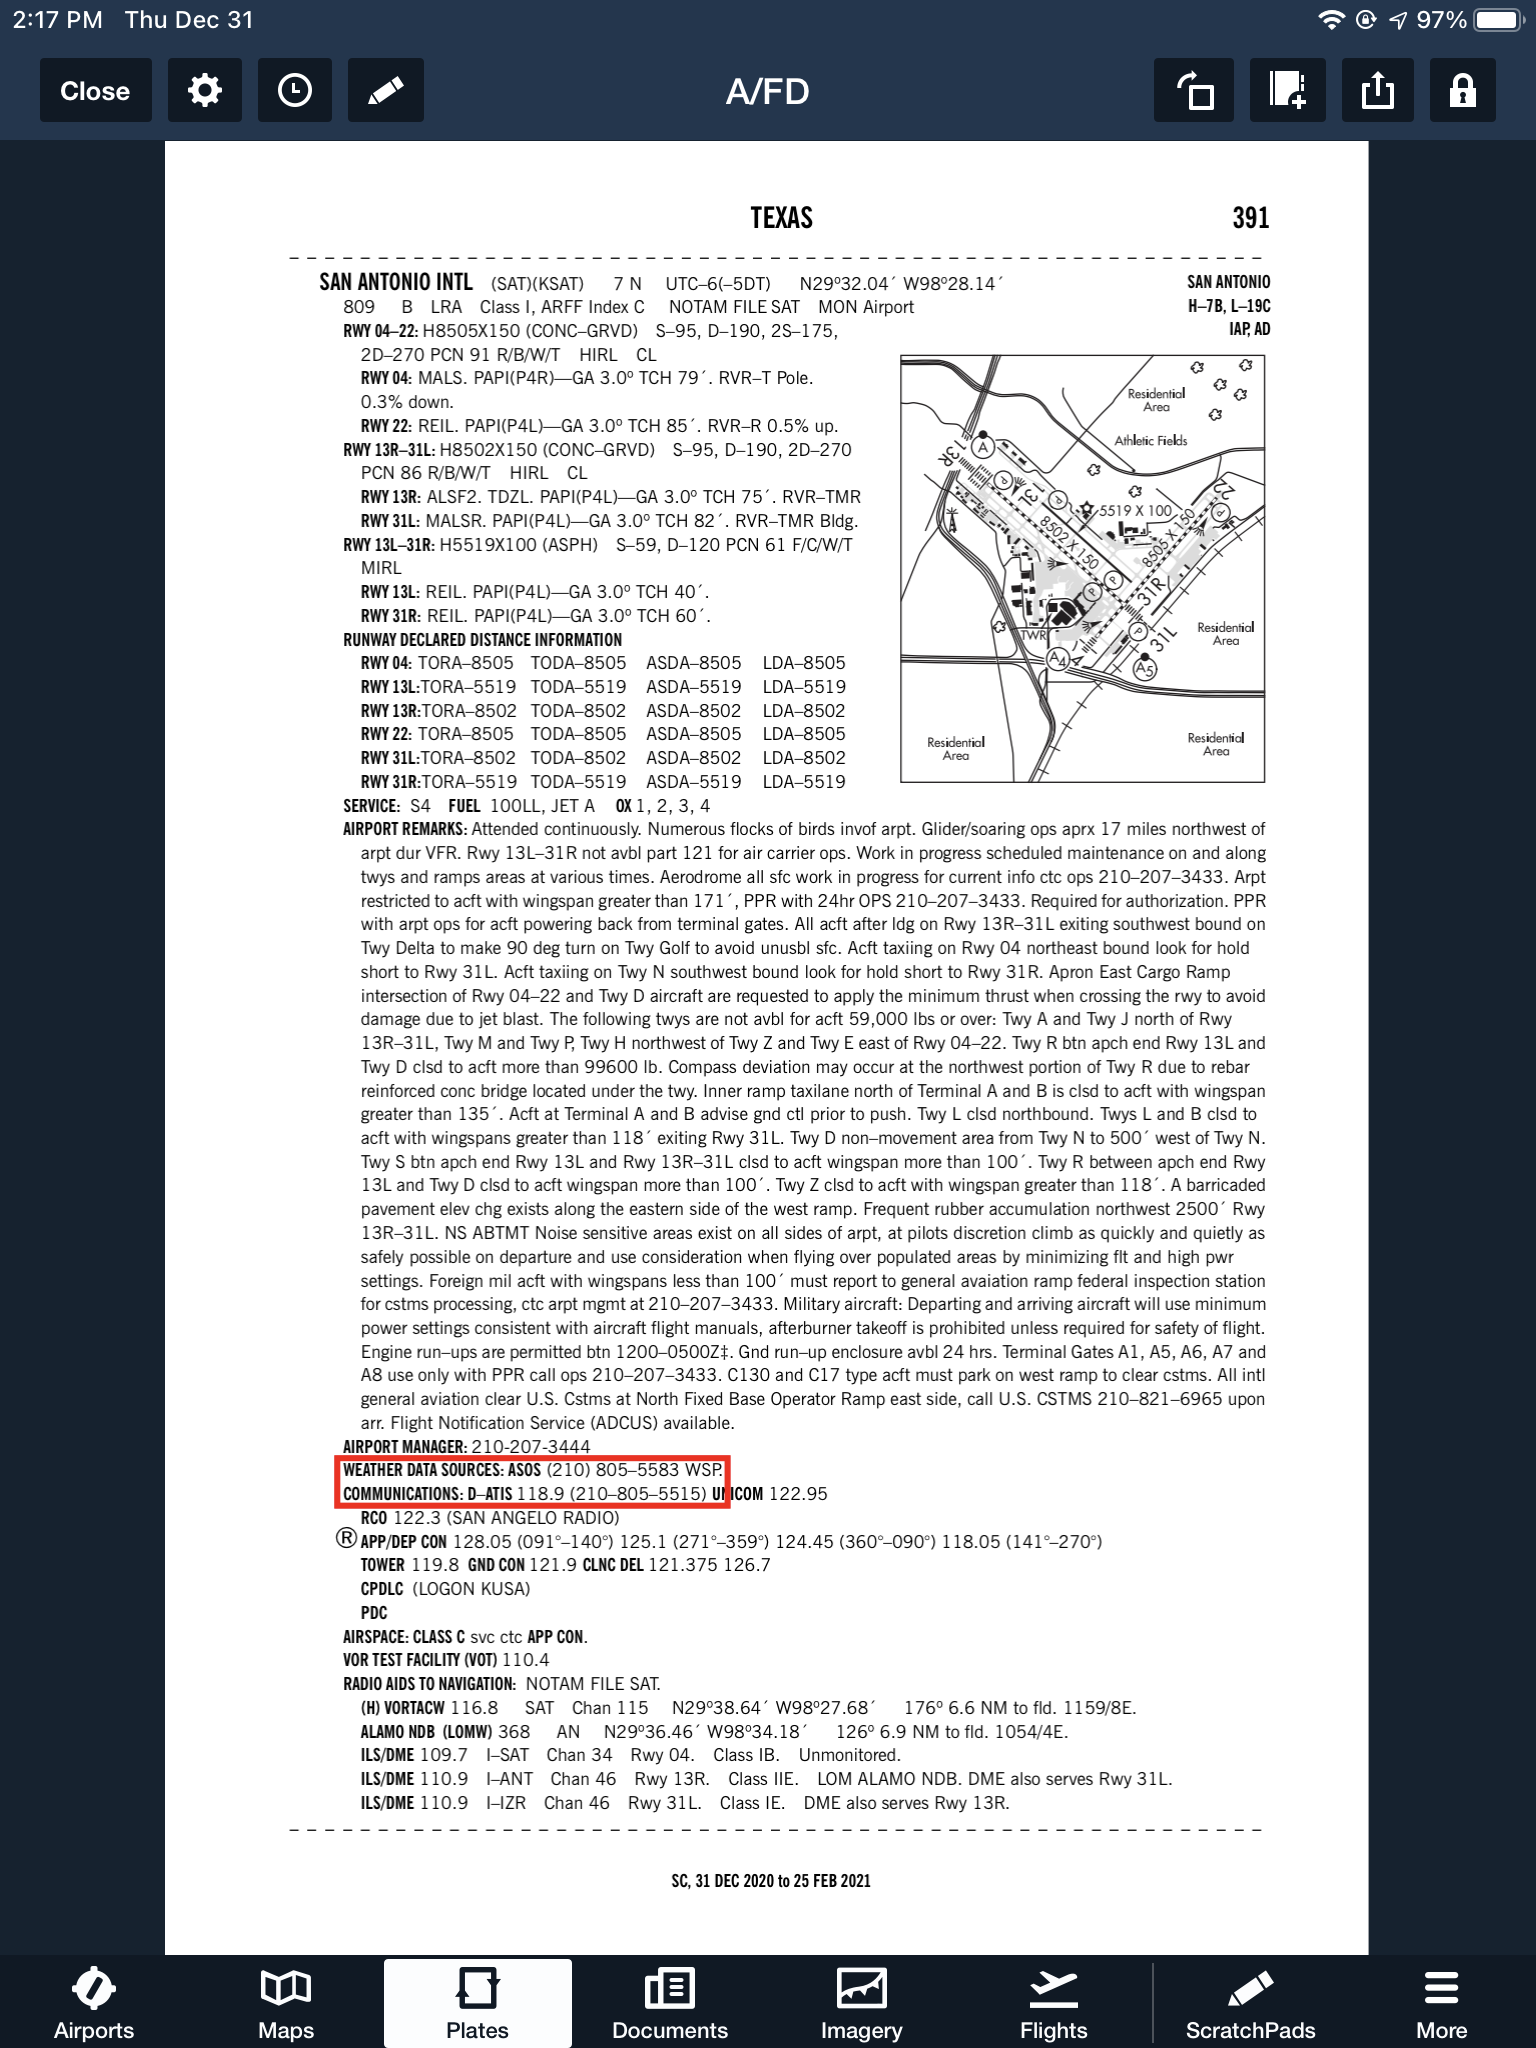
With this technology, it’s very important for pilots to be aware of what service they are utilizing when calling these numbers. Usually only a Class B or larger Class C airport will have a phone number specifically for ATIS as well as one for AWOS/ASOS. These are listed in the Airport/Facility Directory (AFD), as well as all flight planning apps (Foreflight, Garmin Pilot, Stratus Insight). More then one pilot has called the AWOS/ASOS number for an airport thinking they would receive the ATIS (because towered airports that have ATIS phone numbers often also have AWOS/ASOS phone numbers that are different). Since the pilot didn’t hear a code on the phone, that led to the false thinking that either the tower was closed or the pilot did not have the code (ie. Information Bravo) to give to ground control when calling for taxi instructions. The minute weather can be very useful for flight planning, but the ATIS must be received before contacting ATC at a towered airport.
Sometimes, you may get a busy tone if someone else is on the line. Usually, waiting a few minutes and trying again will lead to success. Just like old school phone lines, only one call can go through at at time! If it’s a particularly stormy day, you may be fighting a number of pilots to get on the line. In this case, an app where you can read the ATIS may be particularly helpful (Yes, there actually is a dedicated ATIS App!).
The ATIS app allows us lowly pilots without an Aircraft Communicating and Reporting System (ACARS) to access the Digital ATIS (D-ATIS ) at airports where ATIS is available. Only 76 airports in the US have D-ATIS, most of which are either Class B or busier Class C airports. Foreflight also provides D-ATIS textually at the same 76 airports, though it is only accessible depending on which subscription level you have with Foreflight (since I’m not a Garmin Pilot or Stratus Insight user, I’m not sure if either of them give D-ATIS reports).

With Foreflight’s D-ATIS, it does not get updated over ADS-B, only when your iPad or phone have an internet signal. When inbound to an airport with D-ATIS, the pilot has to listen to the radio frequency to get the current ATIS. Foreflight will display the last D-ATIS it received, but typically, it’s old. Check the time in the upper right hand corner.
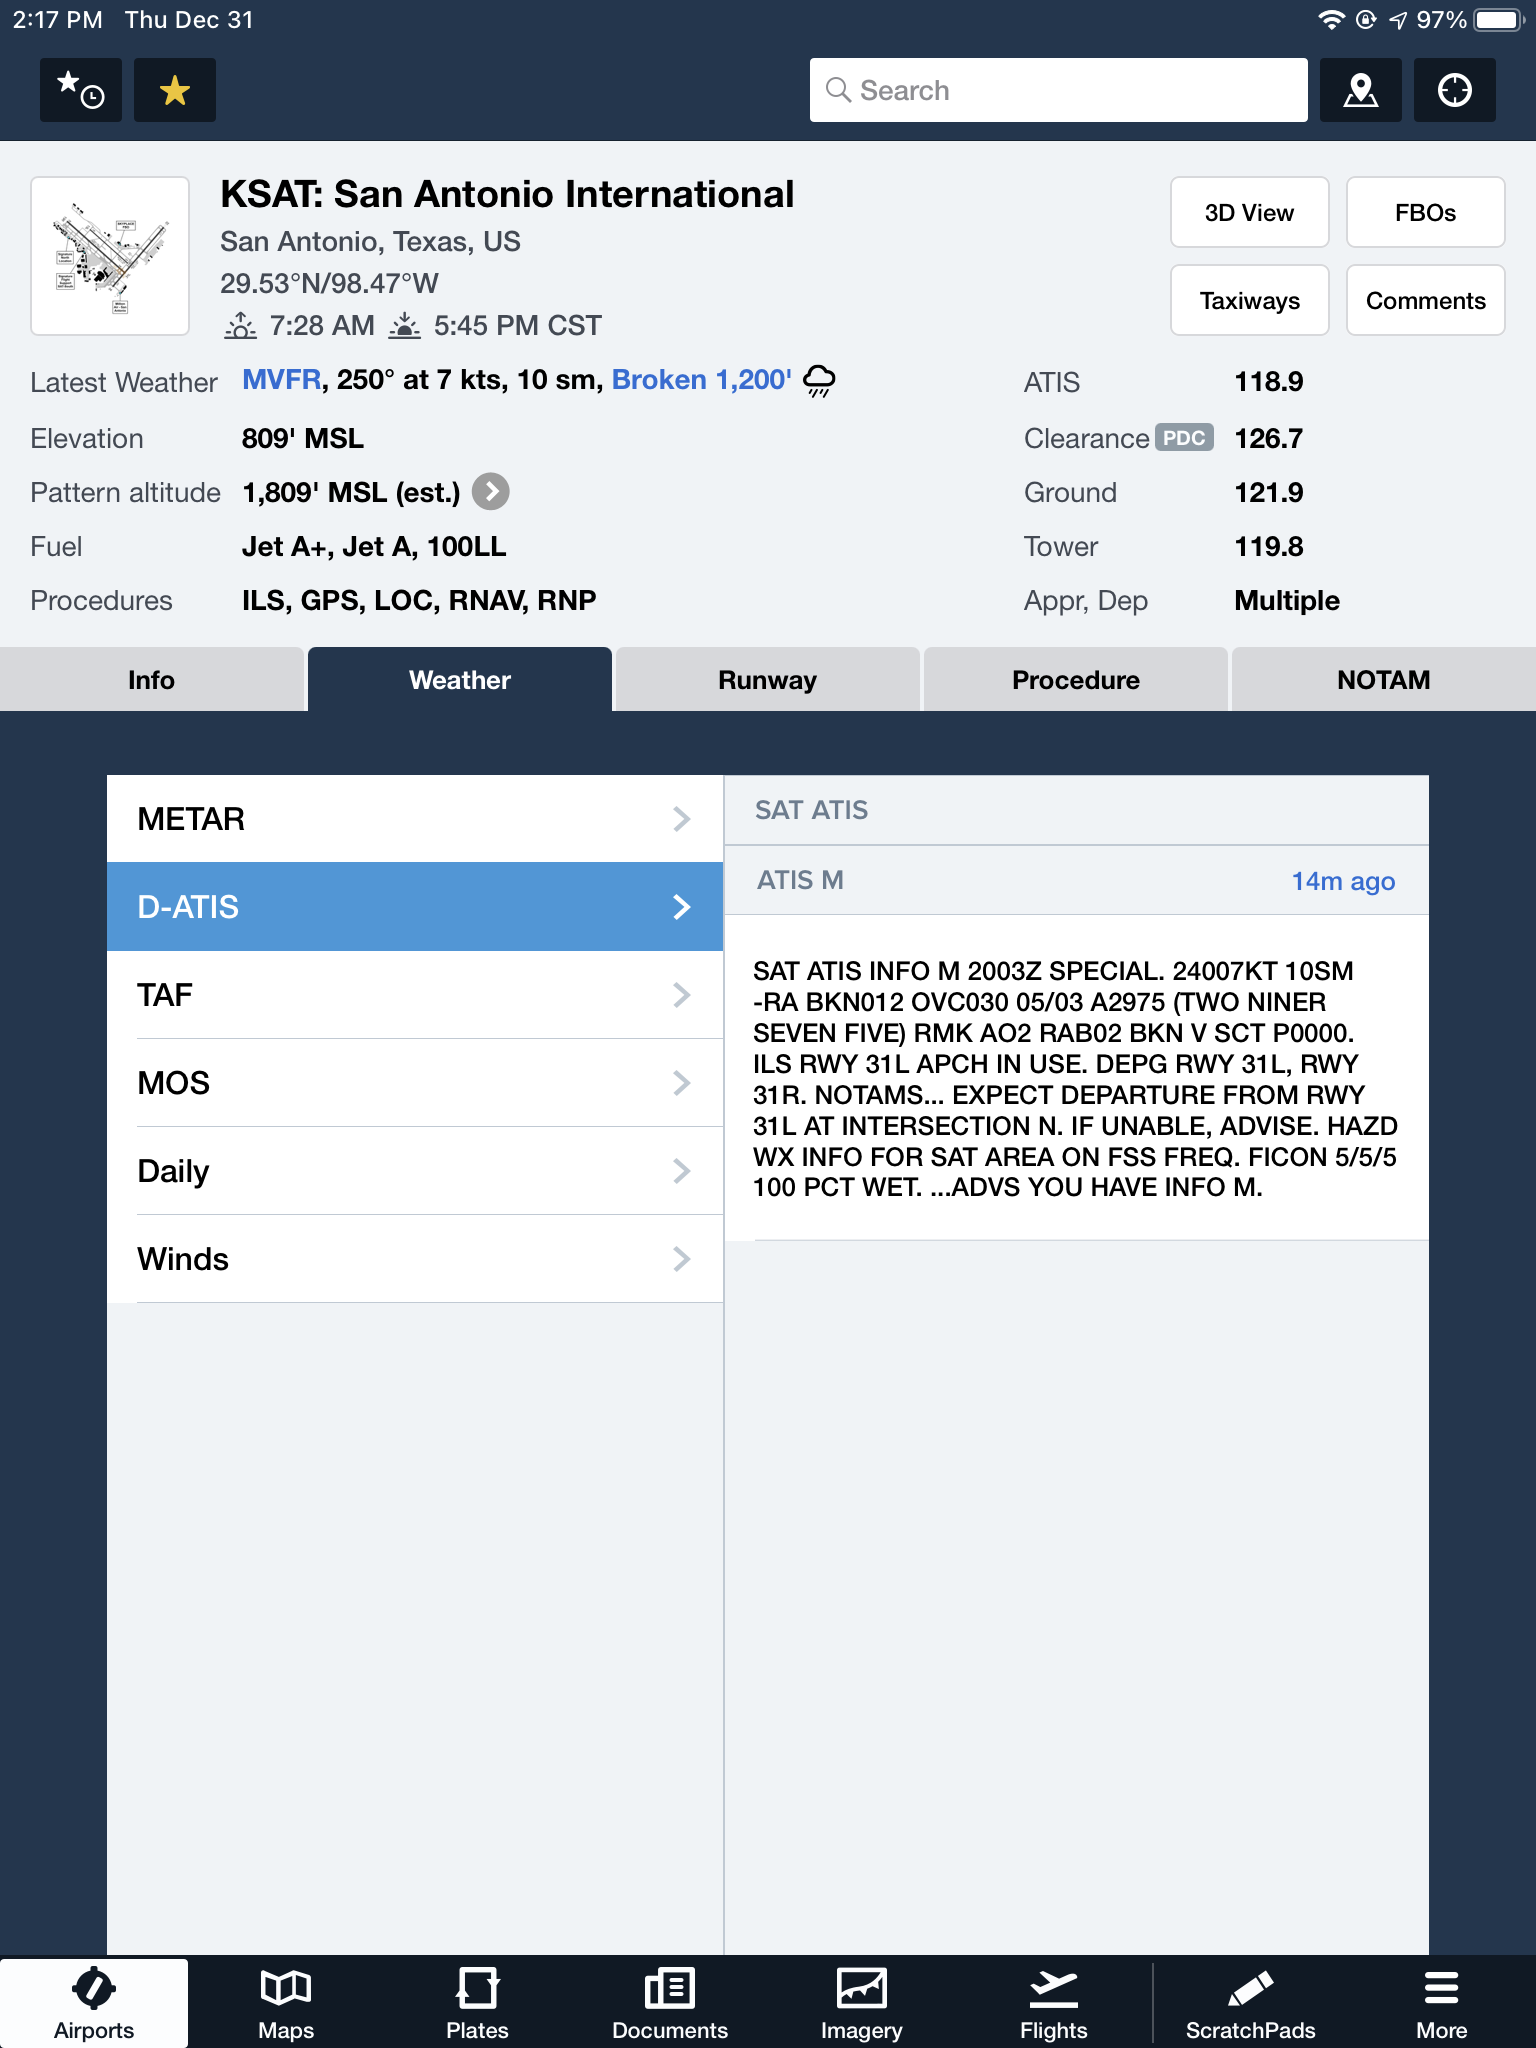
Foreflight now offers Pre-Departure Clearance (PDC) at those same 76 airports. With either a pre-registered tail number or a Foreflight call sign (starting in FFL), once a pilot files an IFR flight plan, the D-ATIS and the IFR clearance in it’s entirety are texted to the phone number the pilot filed with. All that is left to do is call ground, state “I have information Romeo and my clearance, ready to taxi,” then away you go. Skipping listening to the ATIS and talking to Clearance Delivery saves a good 5-10 minutes at times, depending on how busy the airport is.
These days, there are many different avenues to get the current weather (and IFR clearances!). When calling on the phone, the key is to be aware, know which number you are calling and, if you are expecting to hear an ATIS message but instead hear the AWOS/ASOS, verify the Chart Supplement Guide and Notices to Airmen (NOTAMS) to check tower hours of operation before flying into the airspace.
For a VFR or an IFR pilot, an unusual attitude can be one of the most dangerous situations to get into. That is one reason so many new autopilots are being developed with a level button. The concept behind the level button is if the pilot gets into a disorienting situation, press the level button and the autopilot comes on, holding the airplane in a straight and level pitch attitude.
What about all those planes without autopilots that have a level button? That’s who this article is for.

First off, what is an unusual attitude? The Airplane Flying Handbook on page 4-17 gives the following definition: “An unusual attitude is commonly referenced as an unintended or unexpected attitude in instrument flight.” The AFH also goes on to say that an unusual attitude in training has no defined bank and pitch parameters, but “for training purposes an instructor could place the airplane in a 30 degree bank with a nose up pitch attitude of 15 degrees and ask the student to recover and that would be considered an unusual attitude….”
We now have a basis from the FAA. VFR Pilots are now saying, “Oh, instrument flight, that doesn’t apply to us.” Not so fast. The Private Pilot ACS (and before it, the PTS) has a requirement for Basic Attitude Instrument Flying, including unusual attitude recoveries. Why? Because VFR pilots still inadvertently fly into IMC conditions and can get into an unusual attitude. Plus, a private, non-instrument rated pilot has a higher chance of not recovering from an unusual attitude since he isn’t used to relying on his instruments.
At each training event I do, whether it be private pilot training, a flight review, IFR training, transition training, or pretty much any kind of recurrent training, I like to do unusual attitude recoveries with my customers. It’s one of those things that the recovery procedure wanes over time since it isn’t routinely practiced solo (for good reason!).
I see people have the most trouble with the nose high unusual attitude recoveries. Let’s start with the recovery procedure, then I’ll discuss the common errors (notice that the nose high unusual attitude recovery procedure mirrors a stall recovery). Remember, this is in IFR conditions:
The order is important, especially the breathing part. What happens if a pilot goes straight into a recovery and doesn’t pause for a second or two to absorb what’s going on is the recovery isn’t executed properly.
Our brains see the wings banked and set off all kinds of alarms to roll the wings level first before doing anything else. Adding any kind of aileron input with the nose close to the critical angle of attack is a bad idea. You are adding adverse yaw (since you probably won’t be coordinated) and load factor which increases the stall speed. Then we all know that Stall + Yaw = Spin. That’s something that is best avoided in IMC.
We have to teach our brains to ignore the bank angle until the pitch and power come in. Once the airplane is far away from the critical angle of attack, then the bank can be rolled to neutral.
Let’s look at the nose low unusual attitude recovery. The order is still important on this one too:
The theory with the nose low unusual attitude is your speed is accelerating. By reducing the power first, that helps reduce the load factor experienced when the pitch is increased. Same with rolling the wings level. Neutral bank is a lower load factor than some kind of a bank angle. We are trying to prevent overspeeding the airplane. The lower the load factor, the less of a chance we have to rip the wings off.
The most important step in either recovery procedure is to breathe first, allowing the brain to process exactly what is happening. That way, the proper recovery can be executed.
Just south of the equator in the mountains of Papua, Indonesia on the island of New Guinea, pilots spend their days carrying food, building supplies, doctors, pigs, and passengers into some of the most remote and extreme airstrips on the planet. That’s where I fly.
Each morning I load my Cessna Grand Caravan with 2,600 lbs of (insert strange cargo here) and depart my home base of Wamena just after the sun sends its first rays of light across the waking skies above. I spend my day winding through narrow valleys and crossing high altitude mountain passes with building clouds and poor communication, only to land on short, narrow airstrips with steep slopes and little room for error. Most of these one-way in, one-way out runways require me to commit to landing well before touchdown due to terrain that is too close to allow for a safe go-around. Everything better be right when I cross that decision point or I could be in for some excitement.

The need to keep wide margins of safety might seem obvious in environments like mine, but that doesn’t make them any less important where you fly. You may be a new pilot or an old timer, but keeping your margin should always be on the top of your priority list.
Let’s unpack this further. Margin is not just maintaining the regulatory requirements for cloud clearances or minimum altitudes. It’s more than planning for an alternate airport or carrying the required fuel reserve. Margin is breathing room. It is that extra maneuvering room, the Plan C, the well thought out options that provide you multiple “outs” in any given situation. Margin is what gets you home when things take a turn for the worse.
Margin comes in all shapes and sizes. For myself it includes maintaining double my required turn radius in narrow valleys or choosing not to land when my groundspeed is just 1 knot too high at a short and slippery airstrip. For you, it could be determining a ceiling or visibility minimum requirement that is more conservative than the legal ones or setting a wind limitation that you know is reasonable. When it comes down to it, keeping your margin means you don’t push to the ragged edge of your skill or the aircraft’s capability.
Margin can also refer to your mental or emotional capacity. Are you mentally prepared to divert and miss that important event because the weather is getting bad? Are you ready to handle the disappointment of passengers when you arrive over your airstrip and choose not to land due to approaching rain or a factor that is difficult for a non-pilot to understand? Are you willing to cancel a flight on an important client because you are coming down with a cold or didn’t get adequate sleep? As the PIC of your flying machine, you alone are responsible for the safety of the aircraft and the people on board and those are the tough calls that only you can make.
Fatigue, overconfidence, and complacency are the biggest obstacles to keeping your margin. They are all very subtle dangers and you may be experiencing them without even recognizing it. Fatigue can slow down your thought process leaving you behind the plane and backed into a corner before you know it. Overconfidence might cause you to push weather or commit to a course of action that has no favorable alternatives. Complacency will lead you to believe that, because you have 2000 hours in a particular make and model, you don’t need to do a thorough preflight or complete the pre-landing checklist.
Regardless of experience level, operating environment, fancy avionics, and level of proficiency, margin is something that we all need plenty of. So as you go about your upcoming flights, be asking yourself what you can do to build in more margin. It just might be what gets you home.
Pete Greenwald is a transplant to Atlanta, Georgia who has fallen in love with all things Southern, including his wife, Ashley. As a pilot and A&P with Mission Aviation Fellowship, he flies the Cessna Grand Caravan in Papua, Indonesia serving people who live in isolation. In his spare time he is on the hunt for the best burger around.
Chuck’s Aircraft, the Austin Cirrus Service Center located at the Austin Executive Airport (KEDC), is celebrating it’s 10 year anniversary this month. What better what to celebrate than to fly in for Texas BBQ? That’s what they thought too!
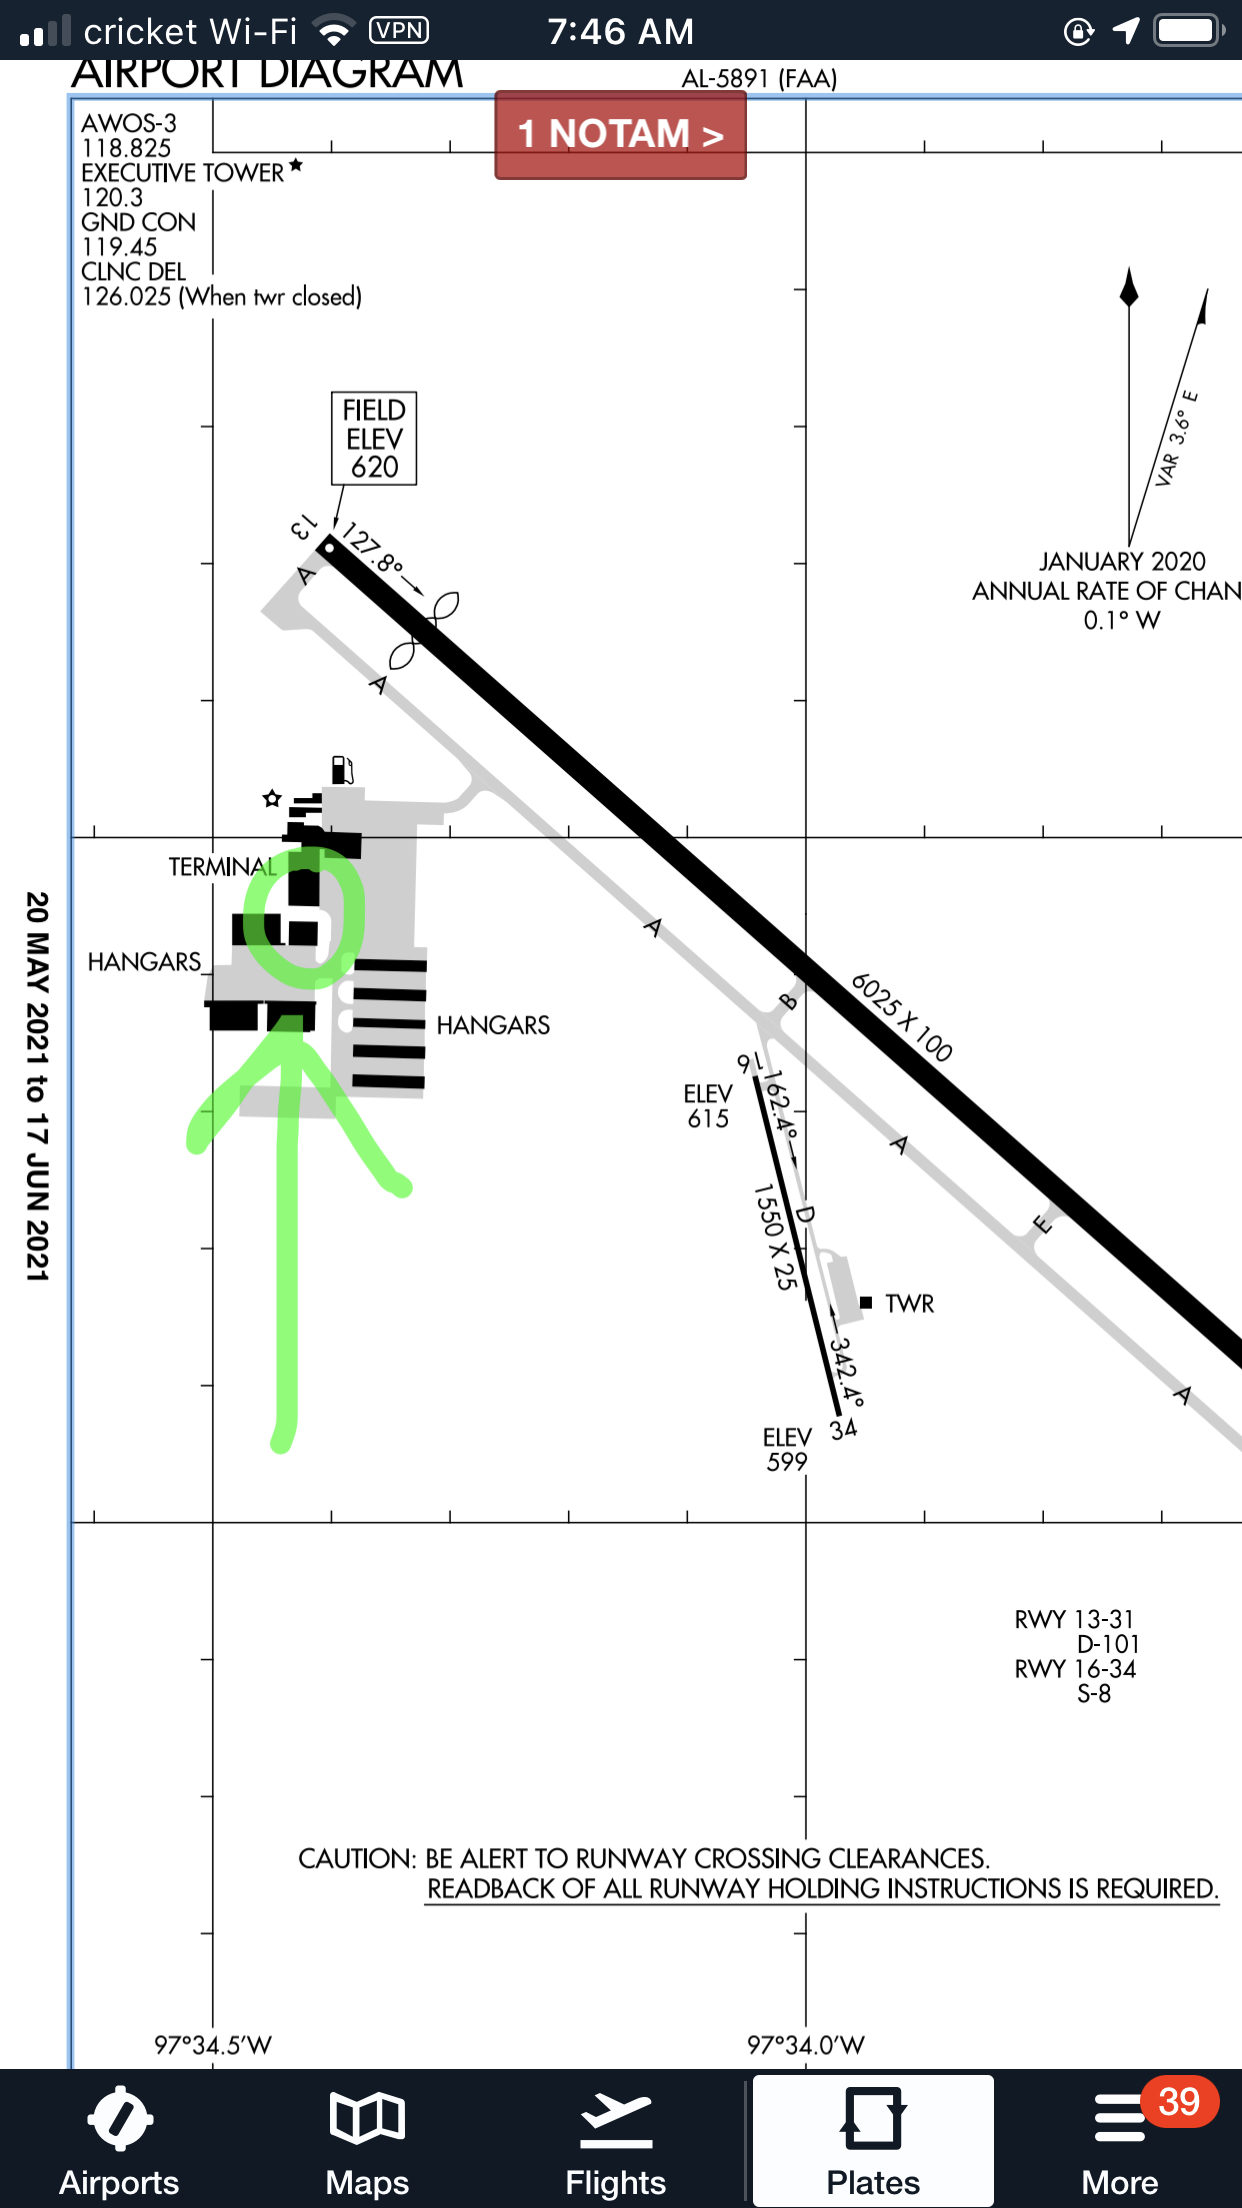
Chuck’s Aircraft will be hosting its 10 Year Anniversary Fly In on Friday, June 25th from 1pm to 5pm on their ramp at EDC (see airport diagram below). Chuck’s Aircraft always provides quality maintenance for Cirrus and other aircraft, so come show your appreciation for them.
Please RSVP to erin@chucksaircraftllc.com. Hope to see you there!!!
In my 3,000+ hours of flight training, I have developed some tips and tricks to help people fly better. With teaching landings, I have 3 specific tips that will make smoother landings every time, guaranteed.
A wise flight instructor whom I would love to give credit to (but don’t know who it is!) once said that a good landing starts off with a good traffic pattern. So true! A good landing all begins with the setup. This is true for a VFR rectangular traffic pattern or an IFR instrument approach. Flying the proper speeds and being at the proper AGL altitudes helps immensely in making a good landing. Being at 600 feet AGL on a 1/2 mile final (or the alternative of 60 feet off the ground on a mile final!) makes it hard to make a good landing.
Once flaps are used in the pattern, the plane is now on the back side of the power curve (or in the region of reverse command). Power is now being used to control the plane’s rate of descent while pitch is being used to control airspeed. The key is, both pitch and power work together, so if the pilot changes the power, he’ll also need to change the pitch and vice versa.
The common mistake I see here is when the airplane gets low on final, the pilot tends to (quite naturally) pitch up. All this does is bleed off airspeed and cause the airplane to sink faster. The proper input would be to add power, then adjust the pitch for airspeed.
Now that we have gotten to the point of the round-out and touchdown, it’s the most important part. The best thing the pilot can do to make the best landing possible, is to look at the trees at the end of the runway. When I worked with college students, I told them to find the owl in the trees at the end of the runway.
The tendency is to stare at the pavement (or concrete) the whole way down to the landing. When a pilot’s eyes are fixated on the ground, this destroys his depth perception and causes a level off too low to the runway, resulting in a 3 point landing and/or a bounce.
By looking at the trees at the end of the runway, this gives the pilot much better depth perception and allows him to properly judge where to level off the airplane.
The question now is when should the pilot start looking at the trees? My recommendation is crossing the threshold of the runway. For some, it works better to start looking at the trees when turning final. Others, right before the level off. Regardless, find that owl!


