2008 Cessna 400 Corvalis TT N422TJ on the ramp — a faster, better-value alternative to a Cirrus SR22T
| |

As Fast as a Cirrus — Better Tech, and Less?
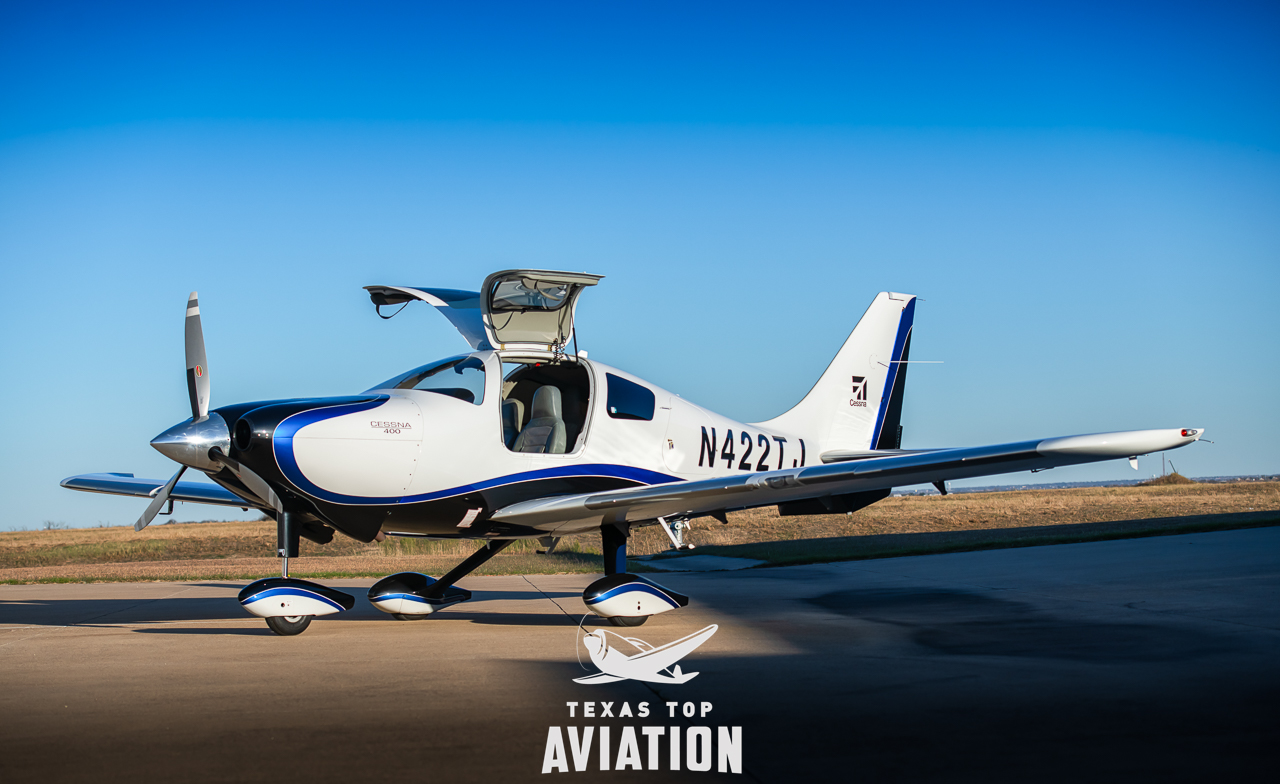
2008 Cessna 400 Corvalis TT N422TJ on the ramp — a faster, better-value alternative to a Cirrus SR22T
2008 Cessna 400 Corvalis TT (N422TJ) — 235 KTAS and Garmin G1000 glass, priced under a comparable Cirrus.

If you’re weighing a Cessna 400 vs Cirrus, start here. The 2008 Cessna 400 Corvalis TT cruises at 235 knots true — the fastest fixed-gear piston single ever certified. It’s faster than a turbocharged Cirrus on the same fuel and the same class of engine, and it costs less than a comparable SR22T. If you’re shopping a high-performance single for speed and value, N422TJ deserves a hard look.

The Airplane Cirrus Shoppers Overlook

The Cessna 400 is a Lancair design — a clean-sheet, all-composite airframe built to go fast. Cessna certified and refined it, and built N422TJ in 2008. It seats four, carries a real load, and handles weather. Most buyers shopping a high-performance single default to Cirrus, so airplanes like this one get overlooked. That’s where the value is.

Faster on the Same Fuel

The 400’s 235 KTAS is a true max cruise at 25,000 feet on oxygen. A 2011–2012 Cirrus SR22T (Gen 3) trues about 211 KTAS. Both burn 100LL and run turbocharged Continental engines in the same ~310-horsepower class.

That’s about 24 knots up high — roughly 45 minutes off a 1,000-nautical-mile leg — with no bigger engine and no more fuel. And it isn’t only a flight-levels number: at 10,000 feet the 400 still trues about 180 KTAS, roughly 10 knots faster than an SR22T at the same altitude.
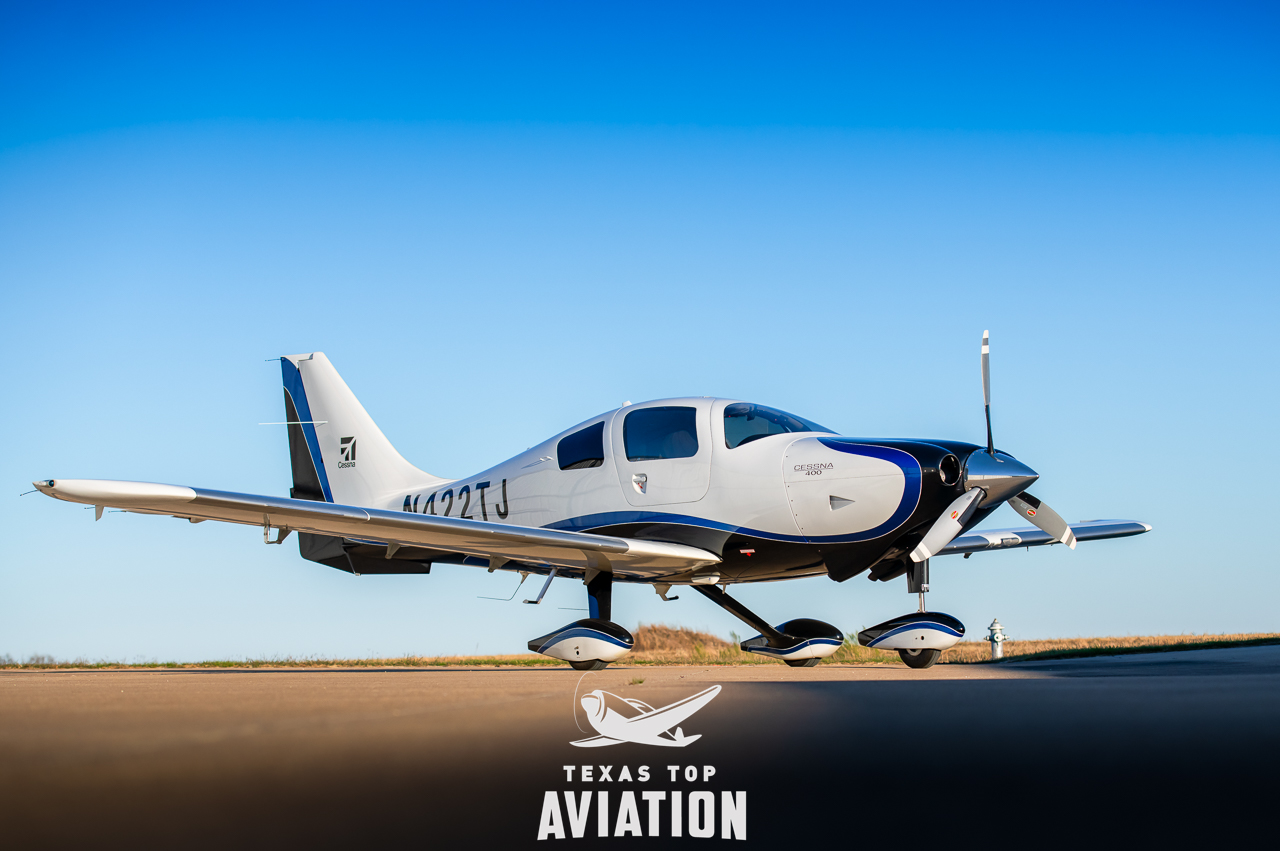
Side profile of the all-composite, fixed-gear airframe
Lancair-designed, all-composite, fixed-gear — the airframe that makes 235 knots possible.

The Value Gap

N422TJ is priced at $350,000. A comparable Gen 3 SR22T typically trades between $450,000 and $550,000 used. (A new SR22T is a $1M-plus airplane — not the comparison.) Against the newer turbo Cirrus, that’s roughly $100,000 to $175,000 less for a faster airplane.
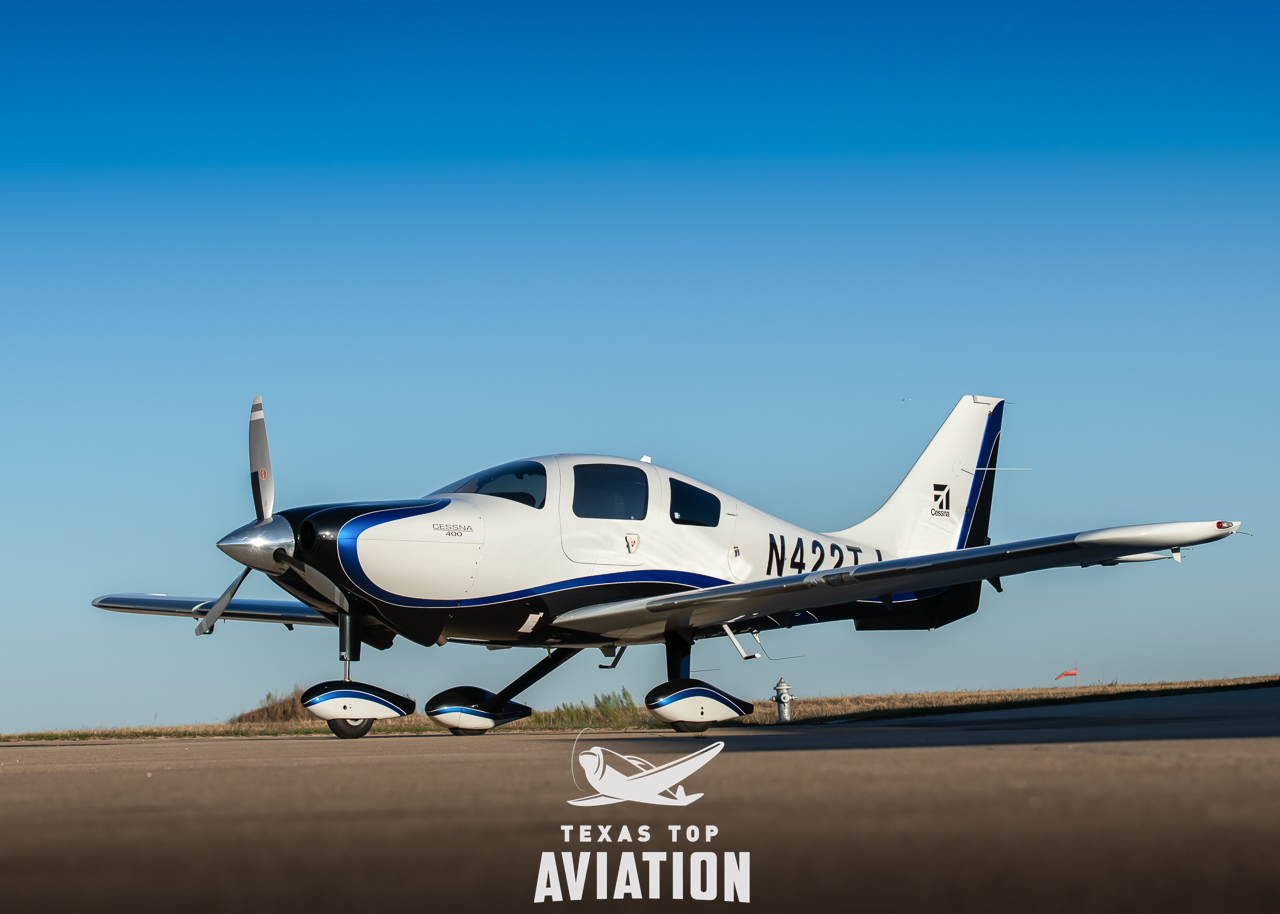
Cessna 400 Corvalis TT N422TJ on the ramp, front three-quarter view
N422TJ — no damage history, complete logs since new, Van Bortel-maintained.

Cross-Shopping a Turbonormalized Cirrus SR22

A lot of buyers looking at N422TJ also weigh a Cirrus SR22 with the Tornado Alley turbonormalized engine. It’s a fair comparison — the same ~310-horsepower-class Continental, the same all-composite fixed-gear layout, the same 100LL — so here’s the honest math.

Speed and engine: the turbonormalized SR22 trues around 211 KTAS; the 400 does 235. The 400 also runs a true twin-turbocharged TSIO-550-C, not a turbonormalized system — a true turbo makes boosted power up high, which is a big part of that speed edge.

Avionics and price — 2006–2008: those Cirrus came with the Avidyne Entegra panel. N422TJ’s Garmin G1000 with WAAS and Synthetic Vision is a clear step up — better glass for comparable or less money.

Avionics and price — 2009 and later: Cirrus moved to Garmin Perspective (G1000-class) glass, but the price moved with it. A 2009 SR22 turbonormalized with Perspective typically runs around $400,000 or more — one representative listing is $429,900. N422TJ is $350,000: less money, comparable glass, and 24 knots faster.

The SR22 still brings the CAPS parachute and the Cirrus owner community. But on speed, engine, and price, the Cessna 400 stays ahead.

MetricCessna 400 Corvalis TT (N422TJ)Cirrus SR22T — Gen 3 (2011–2012)Cirrus SR22 Turbonormalized (2006–2009)
Max cruise (25,000 ft)235 KTAS~211 KTAS~211 KTAS
Cruise at 10,000 ft~180 KTAS~170 KTAS~170 KTAS
EngineTwin-turbocharged Continental TSIO-550-C (true turbo, ~310 hp class)Turbocharged Continental (~310 hp class)Turbonormalized Continental IO-550-N (~310 hp class)
Glass panelGarmin G1000 — WAAS + Synthetic VisionCirrus Perspective (Garmin)Avidyne Entegra (2006–08) / Garmin Perspective (2009+)
Fuel100LL100LL100LL
Airframe / gearAll-composite, fixed gearAll-composite, fixed gearAll-composite, fixed gear
Useful loadComparable (often equal or a touch better)ComparableComparable
Whole-airframe parachuteNoYes (CAPS)Yes (CAPS)
Typical used price$350,000~$450,000–$550,000~$300,000–$450,000 (est.; 2009 Perspective ~$400K+)
Cessna 400 Corvalis TT vs. Cirrus SR22T (Gen 3) and the turbonormalized SR22. Speeds and prices are typical estimates; verify against the aircraft records and current market.

The fastest fixed-gear piston single ever certified — and it out-runs a turbo Cirrus on the same fuel.

The Avionics You Can’t Buy Anymore
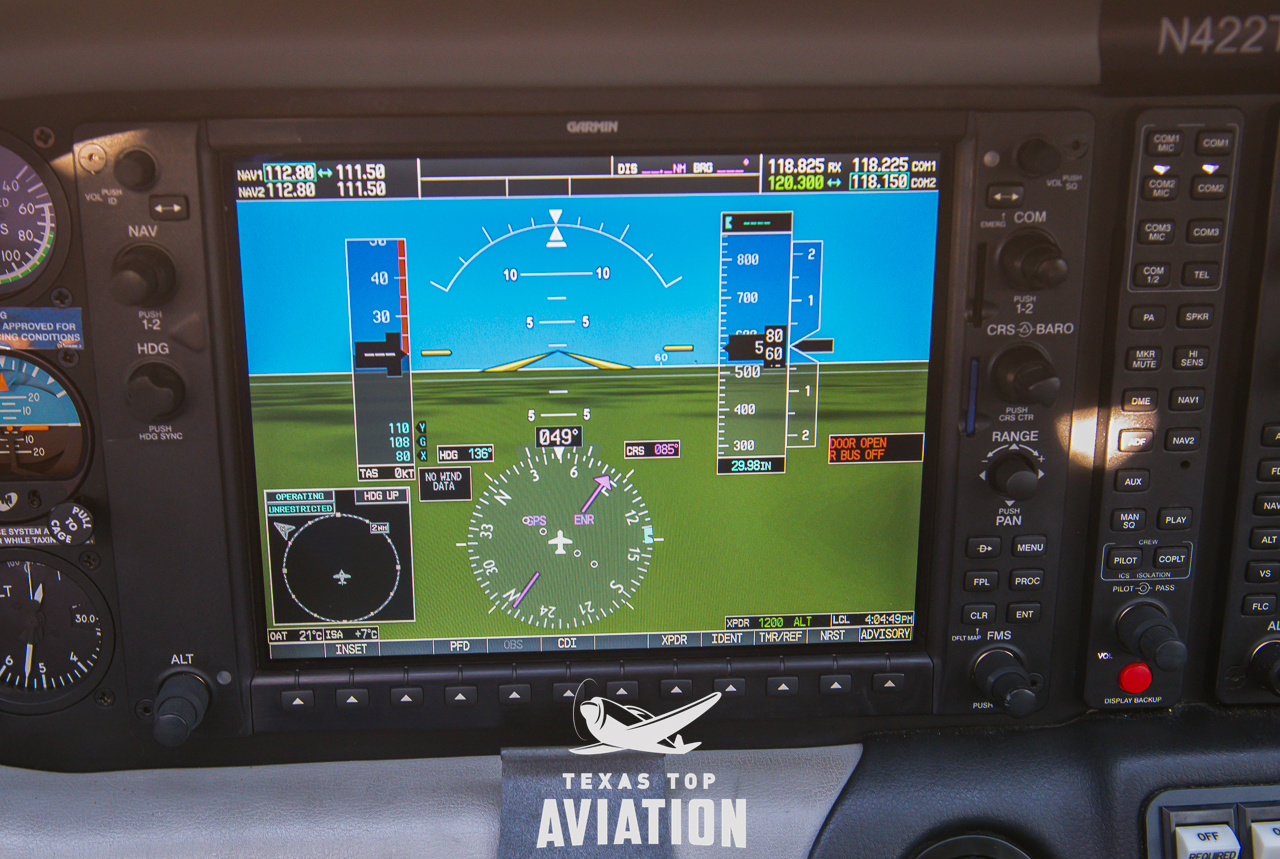
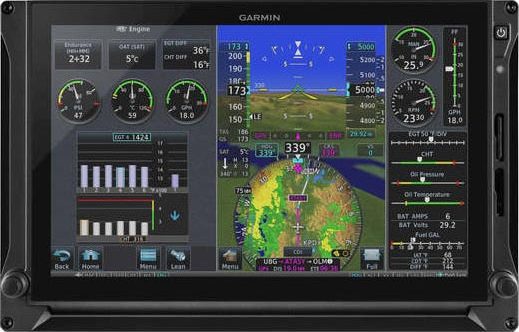
Garmin G1000 glass panel with WAAS and Synthetic Vision (SVT)
Garmin G1000 with WAAS and Synthetic Vision (SVT) and the GFC-700 autopilot.

N422TJ has a Garmin G1000 with WAAS and Synthetic Vision (SVT) and the GFC-700 autopilot. WAAS gives you LPV approaches — near-ILS precision at runways nationwide.

This matters because the WAAS upgrade path for the G1000 in these airframes is closed. A Cessna 400 that left the factory without WAAS can’t be upgraded — it will never fly an LPV approach. So a WAAS-plus-SVT 400 like this one is a scarce find. You either buy one that has it, or you don’t get it.

Glass cockpit with dual Garmin G1000 displays and leather interior
Both G1000 displays with synthetic vision — a modern, integrated flight deck.

Built to Actually Go

This airplane is equipped to be flown hard and often:

  • Thermawing electric de-ice with a backup alternator — a de-ice system (not certified known-ice)
  • Factory air conditioning
  • Speed brakes
  • Hot prop, built-in oxygen, and ADS-B Out
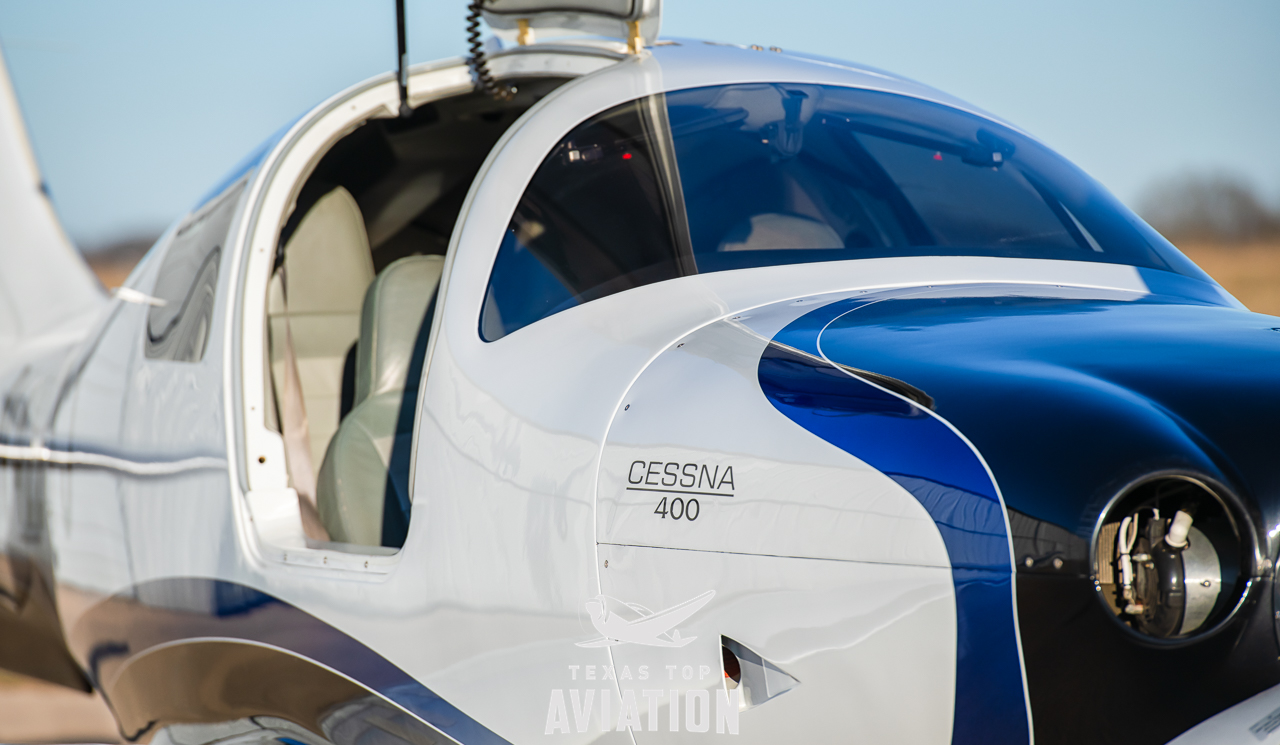
Cabin door open showing cabin access and seating
A comfortable four-seat cabin built for real trips.

The engine is a twin-turbocharged Continental TSIO-550-C with about 1,503 hours total time — the original engine, 1,503 since new. No damage history, complete logs since new, maintained by Van Bortel.
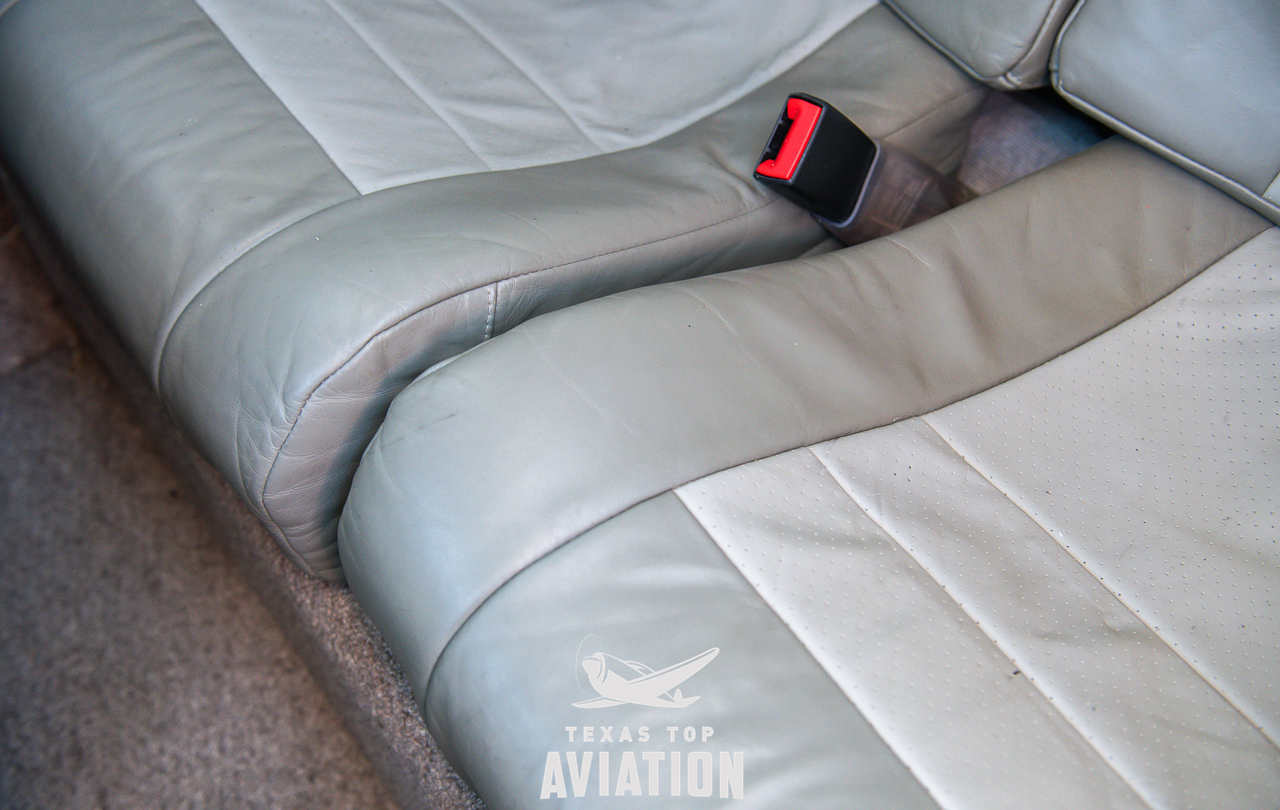
Leather interior seating
Leather interior, comfortable for four.

An Honest Word: What the Cirrus Does Better

One thing every Cirrus has that the 400 doesn’t: the CAPS whole-airframe parachute. Pull the handle and the airplane comes down under canopy. For a lot of buyers that’s the deciding factor, and it’s a fair reason to choose a Cirrus. Cirrus also has a large owner community and a strong support network.

Useful load is comparable across all three airplanes — the 400 is often equal or a little better. If the parachute and the community are your priorities, a Cirrus may be the right airplane, and we can help you find one. If your priorities are speed, avionics, and value, the 400 is hard to beat at this price.

Cessna 400 vs Cirrus: Quick Answers for Shoppers

Is the Cessna 400 faster than a Cirrus SR22T?

Yes. The Cessna 400 Corvalis TT trues up to 235 KTAS at 25,000 feet versus about 211 KTAS for a Gen 3 Cirrus SR22T — about 24 knots faster on the same 100LL and the same ~310-horsepower class of turbocharged Continental engine, or roughly 45 minutes saved on a 1,000-nautical-mile leg. At 10,000 feet the 400 still trues about 180 KTAS, roughly 10 knots faster than an SR22T at that altitude.

How does the Cessna 400 compare to a turbonormalized Cirrus SR22?

The Cessna 400 trues 235 KTAS versus about 211 KTAS for a turbonormalized SR22, and it uses a true twin-turbocharged Continental TSIO-550-C rather than a turbonormalized system. A 2006-2008 SR22 turbo has the older Avidyne Entegra panel, while the 400 has a Garmin G1000 with WAAS and Synthetic Vision. A 2009-and-later SR22 turbo with Garmin Perspective glass typically costs around $400,000 or more, versus $350,000 for N422TJ. The SR22 still offers its CAPS whole-airframe parachute.

Does the 2006-2008 Cirrus SR22 have a Garmin G1000?

No. Cirrus SR22s from 2006-2008 typically came with the Avidyne Entegra glass panel; Garmin-based Perspective glass arrived in 2009. The 2008 Cessna 400 came with the Garmin G1000, and N422TJ has the WAAS and Synthetic Vision version.

How much less is a Cessna 400 than a comparable Cirrus SR22T?

N422TJ is priced at $350,000, while a comparable 2011-2012 Cirrus SR22T (Gen 3) typically sells for about $450,000 to $550,000 used — roughly $100,000 to $175,000 less for a faster airplane.

What is the fastest fixed-gear single-engine airplane?

The Cessna 400 Corvalis TT, at 235 KTAS maximum cruise, is the fastest fixed-gear piston single-engine airplane ever certified.

Does the Cessna 400 have a parachute like the Cirrus?

No. A whole-airframe CAPS parachute is the one meaningful capability the Cirrus offers that the Cessna 400 does not. On speed, avionics, and useful load, the 400 matches or beats a comparable SR22 or SR22T.

Can the Cessna 400’s Garmin G1000 be upgraded to WAAS?

No. The WAAS upgrade path for the G1000 in these airframes is closed, so a non-WAAS Cessna 400 can never gain LPV approach capability. N422TJ already has WAAS plus Synthetic Vision, which makes it a scarce find.

Does the Cessna 400 carry less than a Cirrus SR22?

No. Useful load is comparable — the Cessna 400 is often equal to or a little better than a comparable SR22 or SR22T.

Contact Texas Top Aviation

✈️ See the full N422TJ listing, specs & photos →

Call to see N422TJ or to talk through the Cessna 400 vs Cirrus decision: (512) 270-1298 · txtopaviation.com. Austin & San Antonio, TX.


Similar Posts

  • The Importance of a Pre-Buy Inspection

    There are multiple ways to save money during the aircraft buying process. To start, since you are buying an airplane, you have some means of positive income in order to afford an airplane. Airplanes come in all different shapes and sizes and usually, an airplane can be found to fit almost any budget, whether is a $20,000 Texas Taildragger all the way up to a multi-million dollar jet.

    One way is to stay within your budget. There will always be a shinier, newer, lower time airplane that is just above where you set your budget at. Don’t reach for it! There is a reason you set your budget where you did.

    Another way is to shop around and get multiple insurance quotes. Your agent is in charge of engaging underwriters who are going to evaluate you and your airplane as risks, then price a policy accordingly. With most airplanes, you should get multiple quotes to see what fits you best. Beware though, because sometimes, you can get a lower rate, but it will require more training, so you end up shelling out more money in the long run. If you find a policy you like, but the training seems skewed or the liability isn’t high enough, you can always have your agent ask the underwriter to modify the quote. You are still in charge.

    Finally, if you evaluate your mission and see that your budget can’t afford an airplane that carries enough or goes fast enough, look into taking on a partner or two to help with costs. Be thorough in vetting your potential partners as a good partnership is worth it’s weight in gold, but a bad one is downright unpleasant and often times hard to get out of. Find pilots who have the same mindset & personality you do and treat their stuff the same way you do. Try to take a ride in their car or go to their house, then you’ll see what kind of shape they will keep the airplane in.

    The best way to cost yourself more money in the aircraft buying process?

    Don’t do a pre-buy inspection.

    A pre-buy inspection takes place after negotiations and once a Purchase Agreement is in place. You are pretty much set on the airplane, you just want a third party mechanic who is knowledgeable on that make and model of airplane (and this is a very important point) to go over it and make sure that it is sound from a mechanical standpoint. The buyer, you, want someone who has never had an association with the seller since the mechanic will be your representative in the process and you want him answering to you.

    If you have used a broker or a buyer’s agent, that person should have already gone through the logbooks for you, so you’ll have a basic idea of the history of the airplane. However, knowledgeable mechanics find things all the time that turn out to be the responsibility of the seller to repair since it happened on their watch. Without a pre-buy, you would end up having to pay for that in the not to distant future.

    Here is an example of where not doing a pre-buy can cost a lot of money.

    An owner bought a late ’70s model Citation ISP, one of the very first Citations ever made. It had been based in Florida (salt & humidity + aircraft don’t mix well) for a while. The buyer didn’t use a broker, but thankfully had someone look through the maintenance history of the airplane. Since it was so old, the logbook reviewer didn’t have time to do anything but a basic overview, but he gave the thumbs up to the buyer.

    The buyer decided he just wanted a boroscope inspection and the seller’s mechanics to look over the airplane. Remember what I said before about a third party mechanic? Well, these mechanics didn’t do a very thorough job. When the buyer took delivery of the plane, after about 10 hours of flying, he already had an $18,000-$25,000 maintenance bill.

    You may say, well that’s a jet. Jet’s have specialized maintenance and need a more extensive pre-buy inspection.

    On the contrary, in my 8 years in the training business, I have seen Cirrus, Piper PA46s, Bonanzas and several other piston engine airplanes that either didn’t have a pre-buy done or the pre-buy was done by someone who didn’t know that airframe. Lo and behold, things started breaking and adding up very quickly that would have been discovered on a good pre-buy inspection.

    Don’t skip on the pre-buy inspection. They usually run a few thousand dollars, but save tons of money in the long run.

  • Introducing…The Aviator’s Academy

    Imagine this …

    You have plans to fly to an airport 218 miles north for a business meeting. Your window is tight; you have an early morning meeting at your office you can’t miss prior to leaving for the airport. The colleagues you are flying to meet must catch another flight within two hours of your target arrival time. 

    You’re comfortable flying in the current weather conditions, but a small southward-moving storm north of your destination might threaten your approach. Additionally, given the time of day, you can expect ATC delays due to vectors and know you’ll have to adjust on the fly.

    Are you confident you can make the meeting in time?

    If the answer isn’t immediately clear, you’re not alone. Good aeronautical decision making is of utmost importance in the air. External pressures, unexpected challenges, and your level of instrument proficiency are among the many factors to consider when considering an IFR flight. 

    While we can’t remove the external pressures or control the weather, we CAN help with instrument proficiency!

    Introducing … The Aviator’s Academy – advanced online pilot training. 

    During my time training hundreds of capable and competent pilots at Texas Top Aviation, my most common observation with seasoned and rookie pilots alike is that the pilot is often aware of knowledge gaps with the airplane’s avionics after initial flight training or after upgrading to a more advanced airplane, but aren’t sure where to get answers.  Simply put – expert glass panel flight training is hard to find.

    They know enough to have earned their license, but still feel uneasy anticipating unexpected challenges. This leaves them feeling at best, uncomfortable, or worse, on edge and unsafe. When you’re not as proficient as you could be, an easy flight can become stressful quickly in unexpected scenarios, and things spiral from there. It doesn’t have to be this way.

    That’s why The Aviator’s Academy offers online courses with real-life scenarios using glass panel avionics. You’ll gain more confidence in the air and be equipped with better aeronautical decision-making skills after learning from the best in the business.

    We understand the pressures you face in the air. We get it because we have been providing expert, personalized, owner/pilot instruction since 2014 at Texas Top Aviation. With over 8000 hours of instruction given in Technically Advanced Aircraft and over 13,000 hours in total flight time, The Aviator’s Academy instructors are qualified to fly and instruct most single-engine aircraft to a level that far exceeds what a flight school can provide. Nowhere else can you get expert glass panel online instruction for Technically Advanced Aircraft.

    If you’re in need of an instrument proficiency check and fly a technically advanced aircraft with glass panel instruments, this is the place to get your ground school training. Conveniently online. Expertly taught. 

    Mastering your glass panel avionics isn’t impossible. You just need a guide. Enroll in the course you need to take your skill to the next level. You’ll receive expert, specialized online training. Then you’ll fly with confidence.

    LAUNCHING AT OSHKOSH! Visit www.aviatorsacademy.com and leave us your email to be notified when our first course drops. Come visit us at booth 3004 at Osh Kosh, July 25th-July 31st, 2022.

  • Cirrus Approach

    Earlier this year, Cirrus debuted it’s new Learning Management System (LMS), Cirrus Approach. For several years, Cirrus has led the way in online systems training while using several different platforms for it’s LMS. Cirrus Approach is the culmination of lots of sampling and tinkering, and boy, did Cirrus knock it out of the park.

    For those of you unfamiliar with the Cirrus training program, here is the quick rundown. When a pilot who has no Cirrus time buys a Cirrus aircraft, initial transition training is required to familiarize the pilot with the aircraft systems, speeds to fly, power settings, etc. The Cirrus Transition Course is a 3 day that gets a VFR pilot up to speed in the airplane. Under the Cirrus Embark program, those 3 days of training are covered by Cirrus and free to the new owner.

    If the pilot is an IFR pilot, then the 5 day Cirrus Advanced Transition Training Course is required. If the pilot has Cirrus experience, but with a different engine or avionics configuration, there are courses for that too. The Cirrus Embark program covers 3 days of training for most courses for a new Cirrus owner.

    As part of the aforementioned courses, there are systems to learn about and procedures to understand. This is where the Cirrus Approach LMS excels. Cirrus has done a great job of putting together lots of good videos (that are actually interesting but not annoying) on the airplane, systems, how to fly it, etc. for each course. It cuts down greatly on the time that the training instructor has to spend on the ground with the pilot since the pilot has already compiled knowledge through Cirrus Approach.

    Cirrus Approach is accessible online at learning.cirrusapproach.com. To get access to the courses, create an account, then select the Learning Catalog. The courses are categorized based on the type of training (Transition, Advanced Transition, Avionics Differences, Airframe & Powerplant Differences, Recurrent, and Specialty), then further broken down into the type of airplane, engine and avionics (eg. SR22T G6 Perspective+). Make sure the correct engine and avionics configuration is selected! Notice, there is a difference between the SR22T and SR22 (Turbo & Non-Turbo).

    Anyone can do the specialty courses. I would highly recommend for everyone to take the Engine Management course as well as the Icing Awareness Course for you TKS and FIKI operators. The Takeoff & Landing course is a good refresher course for a pilot who hasn’t done any training in a while.

    The Recurrent Training courses are encouraged for all Cirrus pilots. There is an IFR Refresher, a VFR Refresher, and a Skills Refresher. These are recommended to rotate through with a CSIP (Cirrus Standardized Instructor Pilot) on a yearly basis. With a little extra ground, a Flight Review and an IPC can be accomplished yearly using these courses.


    Interested in Initial or Recurrent training in your Cirrus using Cirrus Approach? Contact Texas Top Aviation today!

  • Cirrus Braking Systems: A Hot Topic

    You just bought your Cirrus SR22. You do some flying, and soon find yourself with a brake temp sticker that isn’t white anymore. You remember from your transition training that any color other than white is a no go. You now ponder…. I don’t remember getting on the brakes hard, or riding the brakes while taxiing, but sure enough they aren’t white anymore. You now start thinking that all the horrible rumors of Cirrus brakes are true. They overheat so fast!

    I would like to share some little-known facts about the Cirrus factory equipped braking system. Following the procedures below can help make the brakes last a little longer. There is also a very popular STC that allows upgraded brakes to be installed on all SR series aircraft. More to come on that.

    Notice the Top Yellow sticker is far darker than the Bottom. The Yellow temperature indicator turns at 300 Degrees, while the bottom Blue indicator turns at 330 Degrees. This is an indication to the pilot that if the bottom sticker has turned colors, that the braking system has exceeded 330 degrees and is in need of servicing.

    Above is a photograph of an SR22 G1 braking system with turned brake temp stickers. The first things you may notice is that there are in fact two brake temperature stickers. We can only see the bottom blue sticker from the inspection port on the wheel pants. The other is higher on the caliper; in order to see it, the wheel pant must be removed. This isn’t common knowledge because there is no mention of this additional indicator in the POH.

    Now you may be asking yourself, what can I do to extend the service life of my factory equipped Cirrus brakes? Here are some tips. First, always taxi at 1000 RPM and use the rudder as much as you can while only tapping the brakes. This is not fool proof, since sometimes, depending on the grade, you will have no choice but to utilize brake tapping to keep the aircraft going straight. Taxiing is not typically where the brakes get overheated, though, but this is still a good practice to follow.

    What we tend to see is that the Cleveland brakes are generally overheated on landing. We always recommend to make sure your final approach speed is not excessive, land in the first 1/3 of the runway, and let the aircraft rollout to a smooth stop. What tends to happen is that the aircraft is too fast, and the pilot tries to exit at a certain taxi way, or brakes hard and continues to ride the brakes after landing during taxi. If you do your best to avoid these habits, it will serve you well.

    This braking system remained unchanged all the way until the 2016 G5 Cirrus SR series. Starting in 2016, the factory equipped G5 and G6 Cirrus SR series all now come standard with a single piston hydraulic braking system from Beringer. The Cirrus Beringer brakes far exceed the braking power and durability of the old system. The new system is more robust, withstands heat better, and is is very well built. There is also an option for an upgraded dual caliper system to increase durability and stopping power. A braking system STC for the older Cirrus G1 through early G5 models was created to upgrade those airplanes to the better stopping power and cooling of the Cirrus Beringer brakes.

    Seen above is a page from a Beringer catalog highlighting the Cirrus SR series STC kits. Your local Cirrus service center will be able to quote prices for the kits. We have over 1000Hrs spent behind Beringer equipped Cirrus aircraft and the difference is quite apparent. The pilot has better control of the aircraft, no spongy pedal, and the confidence to get the plane stopped without possibly overheating the braking system. This, in our opinion, is one of the best upgrades you can do to your Cirrus.
    Above is what an STC upgraded braking kit from Beringer looks like, as well as the new temperature indicator for the pre/post flight inspection. Notice the black spot on the left hand picture. These brakes have been overheated.

    One other difference for a pilot to note is that once upgraded to the Cirrus Beringer brakes, there is only one temperature indicator and it changes color at a whopping 450 Degrees Fahrenheit! Needless to say, it can handle some heat! The new temperature indicator is now Orange in color and turns grey/black when overheated.

    On the left are the original Cirrus factory brakes. On the right is the caliper to the new Beringer brakes for a Cirrus.
    Dual Caliper Cirrus Beringer Brakes

    The Cirrus Beringer brakes upgrade is quite a step up in the world of slowing down. However, this doesn’t mean that they are completely issue free. There is one little-known problem with Beringer brakes that is not that big of a deal and can be fixed with relative ease.

    The rotor on the Beringer braking systems is “free floating,” meaning it is not necessarily “fixed” in position when secured down to the spindle. It is “keyed” into the wheel rim with the male and female side interlocking.

    The brakes occasionally will get noisy, causing a “knocking” noise when brakes are applied. This noise is caused by the small metal tabs that tighten up the space between the wheel and the brake rotor. This is so the small tabs wear with use instead of the aluminum rim that they are fixed to. So, if your Beringers are making a knocking noise when brakes applied, this is most likely your culprit.

    These gaps above are the “keyed” position where the rotor finds home in the rim. Without these tabs that wear with use, we would be replacing the rim more often than the much cheaper replaceable tabs.

    It is highly recommended to upgrade your original Cirrus factory brakes to the new Beringer braking system. You will deal with less maintenance, less chance of a brake overheat, and less confusion on whether or not your brakes are airworthy. For more info, you can check out the Cirrus website for the single or dual caliper Beringer brakes.


    Zach Anderson is a Cirrus Standardized Instructor Pilot (CSIP) for Texas Top Aviation. Zach comes from a auto mechanic background and is very familiar with the ins and outs of maintenance. He started working for Texas Top Aviation in December 2020.

  • Flying WAAS GPS Approaches

    When flying a WAAS GPS approach, there are several different levels of WAAS signal that a GPS receiver can get. The most precise is an LPV signal. LPV stands for Localizer Performance with Vertical guidance. An LPV approach has the lowest minimums of all the WAAS GPS approaches, typically in the range of 200-300 feet AGL. A GPS glide path (GP) is guaranteed with an LPV approach and the minimum altitude is a decision altitude (DA).

    Just like a localizer, an LPV course width get’s tighter and the CDI becomes more sensitive the closer the plane get’s to the runway. Even though the LPV approach minimums are so low and the approach is down to a DA, they still aren’t considered precision approaches by the FAA (which leads to some extra planning when selecting an airport as an alternate that only has GPS approaches, since the AIM specifies only the LNAV minimum are to be considered if an alternate airport only has GPS approaches, bringing the 800 foot ceiling requirement to bear)

    An LNAV/VNAV approach is still a WAAS approach that has a GPS glidepath, but is slightly different than an LPV approach. An LNAV/VNAV final approach course does not get more sensitive the closer the plane gets to the runway. The smallest course width on an LNAV/VNAV approach is 0.3 miles either side of center. LNAV/VNAV approaches will, most of the time, have higher minimums than LPV approaches and can have minimums no lower than 250′ AGL.

    The third type of WAAS approach is strictly a non-precision approach with a Minimum Descent Altitude (MDA). These are designated LP approaches, which stands for Localizer Performance. These are like old school Localizer only approaches that, similar to the lateral portion of an LPV approach, the course width tightens the closer to the runway that a pilot is. There is no glide path by definition of an LP approach, though there is a caveat.

    Now, by looking at an approach plate that is a WAAS approach, but only has LP minimums listed, a pilot would assume there would be no glide path. Depending on what type of GPS unit the airplane has, that pilot could be wrong. Garmin Perspective units (Cirrus G1000), all GTN 750s and GTN 650s, All G1000 NXi units, most Garmin 430W and 530W, and all Avidyne IFD 550/540 and 440 units will display an advisory glide path on an LP approach, designated LP+V.

    What does LP+V indicate? An advisory glide path is just advisory, but it is totally legal to follow down on a non-precision LP approach. The kicker is obstacle clearance is not guaranteed and the pilot needs to keep an eye on minimum altitudes at the different waypoints on the approach. The big thing I tell people is, when you arrive at the MDA and the runway is in sight, following the advisory glide path below the MDA could get you in trouble with obstacles. Don’t just hone in on your instruments when you break out of the clouds. Look out the windscreen and make sure you won’t hit anything.

    If you arrive at the MDA on the advisory glide path and the runway isn’t in sight, DON’T GO BELOW THE MDA! Most autopilots won’t level off at the MDA, even if that altitude is set in the altitude pre-select, so this will involve turning off the autopilot before the MDA and manually leveling off, or engaging the altitude mode of your autopilot at the MDA.

    One other type of GPS approach that you will encounter is an LNAV approach. This is a non-WAAS approach down to an MDA, but your GPS unit may still give you a +V. Most modern ones will.

  • Garmin Smart Glide

    Recently, I was training a customer who had a brand new instrument panel installed in his TBM 700. The avionics shop that did the work (Abilene Aero, who I highly recommend for any panel installs, located at KABI) told us when we picked the plane up that the new Garmin GTN 750Xi had the most recent software update, which included the Garmin Smart Glide.

    I had never used the Garmin Smart Glide before, so I was eager to check it out during our training. When we got to engine failures, we pushed the Emergency button on the Home page of the GTN 750Xi, and then the magic happened.

    The plane was also equipped with a Garmin G600TXi PFD and the Garmin GFC 600 Autopilot. In order for Smart Glide to work, there has to be either a GTN 750Xi or GTN 650Xi installed, along with a G500TXi or G600TXi and a Garmin Autopilot. Garmin is working on getting the legacy G500 as well as the GI 275 and G5 to work with the above GPS units for Smart Glide as well.

    Here’s what happens. The plane loses it’s engine. The pilot’s workload and stress level suddenly goes way up. Trim the airplane for best glide, find the nearest airport, attempt restart. Do it quickly so you have time to focus on the glide. Oh yeah, squawk 7700 and declare your emergency. All the while plummeting toward the ground in a somewhat controlled crash. Yikes.

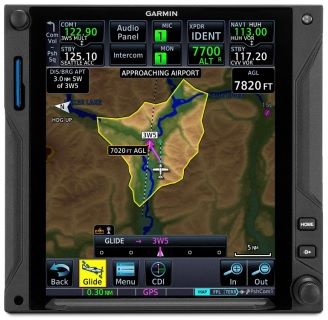
    Garmin Smart Glide takes over the flying part, allowing the pilot to handle the restart, while making it much easier to squawk, talk and plan the engine out landing. On the home page of the GTN 750Xi/650Xi, the pilot simply taps the Emergency icon on the bottom of the screen. The Autopilot comes on and goes into IAS mode and maintains best glide while descending. The GPS immediately analyzes the Glide Advisor, and turns to the nearest airport in the glide ring (if there is no airport within gliding distance, the GTN 750Xi advises the pilot). Then, the Autopilot flies directly to the Nearest airport, allowing the pilot the ability to take attempt a restart.

    Once it is determined that the engine won’t start, the Garmin Smart Glide has excellent situation awareness tools. On all screens, the pilot is constantly being advised of how high AGL the plane is currently, while advising also of how high AGL the plane will be over the airport that the glide is set up for. There is also a short cut on the screen to tap to squawk 7700 as well as runway length information at the airport.

    The Garmin Smart Glide Button wasn’t installed yet in the TBM, but that will make things even easier when it is (it will be certified in January). This is amazing technology that all Garmin GTN 750Xi pilots should have their software updated to. Remember, you have to have a Garmin Autopilot and a Garmin PFD for it all to work.

Leave a Reply

Your email address will not be published. Required fields are marked *