Avidyne Entegra Chart Updates

Columbia 400 Avidyne Entegra

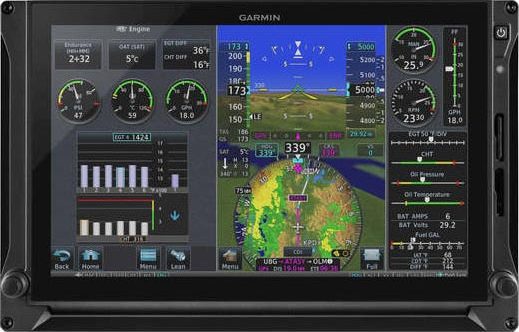
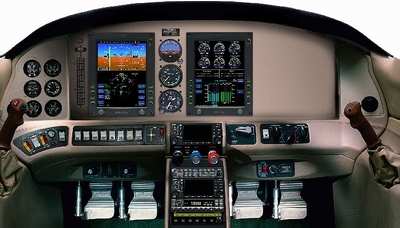
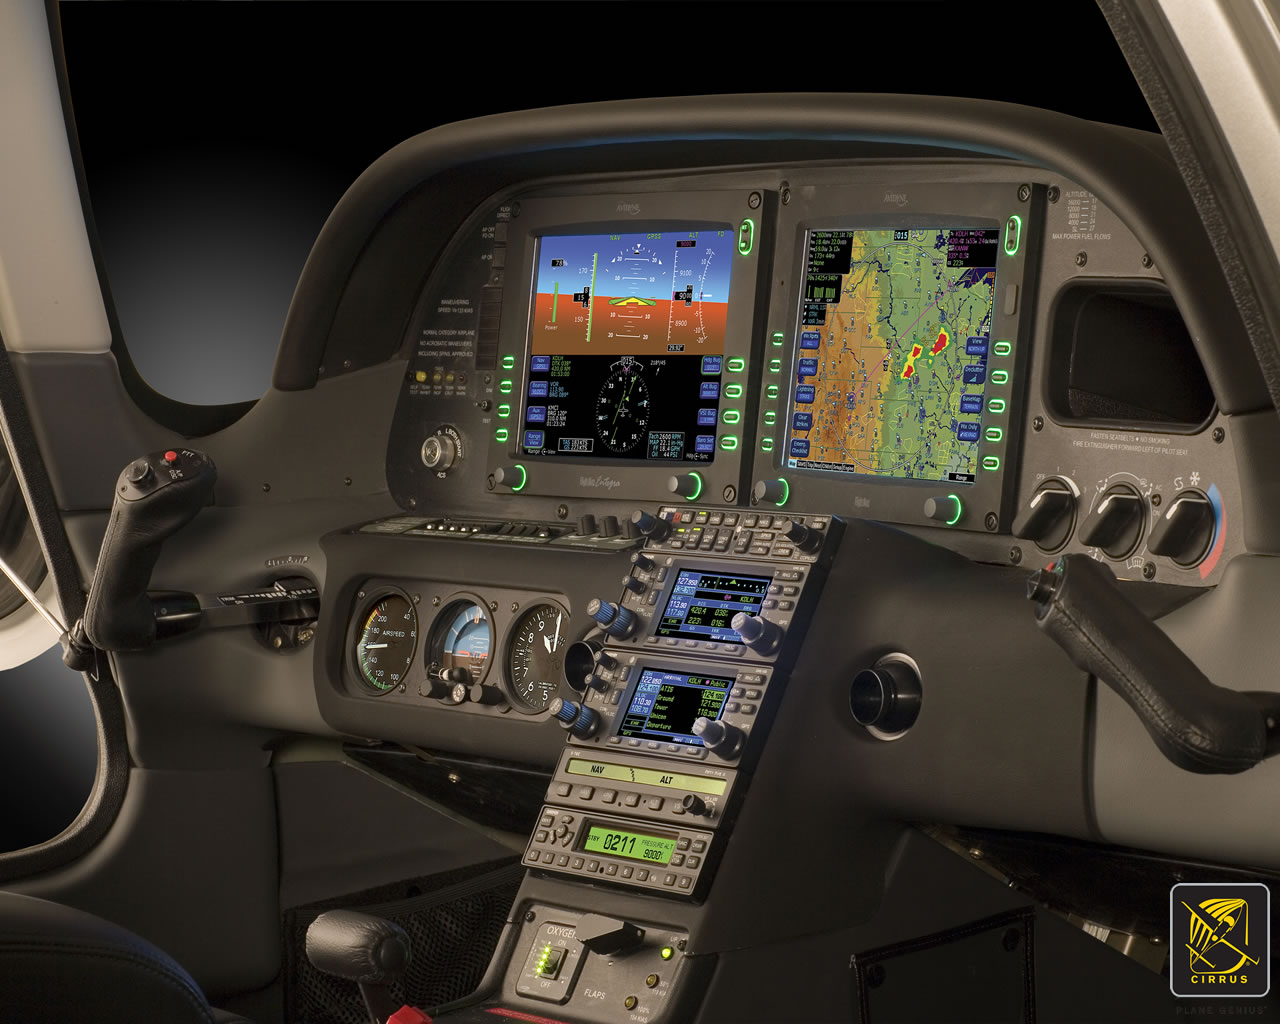
There are a number of airplanes out there equipped with the Avidyne Entegra PFD and MFD system, most notably the Cirrus SR20 and SR22 models from the early 2000s and the Columbia 350 and 400 from the same era.  The Entegra is pretty simple and easy to learn, but doesn’t have the capability that it’s Garmin glass panel counterparts do (I have not, however, tried the R9, which could prove much more capable than it’s predecessor).  I have found that pilots master the Entegra a lot quicker because of the reduced functionality.

One of the nice features of the Avidyne Entegra is the CMAX Chartview option.  With a yearly subscription, you can get all the Jeppesen approach plates and airport diagrams for the entire US on your MFD.  Just like your GPS, though, you have to update the charts monthly to keep them legal.  After a period of time when you don’t keep up with the updates (I believe it is 90 days), then the charts disappear.

The update process is a little tricky if you don’t have someone to explain it to you.  Once you go through it a few times, you’ll have it down pat.  Here’s the process for the Avidyne Entegra Chart Updates.

Jeppesen Subscription

The first step in performing your Avidyne Entegra Chart Updates is to create an account with Jeppesen, who handles all the GPS NavData and MFD Chart updates for both Garmin and Avidyne.  If you already have a Jeppesen subscription, you can skip down to the next section.  To do that, simply go to jeppdirect.jeppesen.com, and then do the following:
  • Click on Avionics Data on the upper left hand side
  • Click “Purchase Avionics Subscription”
  • Then, click on “Create Account” in the new users section
  • Once you’ve created an account, login, then put in your aircraft information and select 1 update for the Avidyne Entegra EX500 EX 5000
  • Click Continue at the bottom and you can put in your payment information

Software Needed

There are two different programs depending on if you have a PC or a Mac.  If you have a PC, you need the Jeppesen Services Update Manager (JSUM).  If you have a Mac, you need the Jeppesen Distribution Manager (JDM).  Download whichever one you need, then login, and your updates will show up.

Downloading the Avidyne Entegra Chart Updates

First, we’ll go through the process of performing the Avidyne Entegra Chart Updates process for a Windows computer, using JSUM.    You’ll need two 2 GB USB drives formatted to FAT 16.  Here’s how to format to FAT 16.

  • Go to My Computer after inserting the USB drive
  • Right click on the drive
  • Click on Format, then select FAT and press OK

Once the USB drive is formatted to FAT16, open up the JSUM program.  Login and your updates will be displayed on the screen

  • You’ll need to set the Avidyne CMAX Key Code
    • Right click the Avidyne Electronic Charts Service and click Set Avidyne Key
    • To get the key code, visit MyAvidyne.com and create an account using your JeppView subscription number and your serial number for your Avidyne MFD (found on the AUX page) and your PFD serial number (displayed on startup when the PFD is warming up)
    • Once you get the Key Code, copy and paste it in the window and click OK
  • Click on the service and click Start
  • The program should automatically detect the drive (if it doesn’t, click browse and select the drive)
  • Click Continue and the charts will start downloading and automatically programmed to the USB drive
  • If you are updating NavData on the MFD as well, follow the same steps as listed above in order to update the NavData

Next, we’ll go through the Avidyne Entegra Chart Updates process on a Mac, using the JDM program.  You’ll need two 2 GB USB flash drives formatted to FAT 16 (the easiest way to format to FAT 16 is on a Windows computer, using the process above).

  • Open the JDM program and login
  • Insert the first USB drive
  • You’ll need to set your Avidyne CMAX Key Code
    • Click Service Details under the Electronic Charts Service
    • Click Set Avidyne CMAX Key Code
    • Program automatically detects the USB drive
  • Click and drag the Electronic Charts service over to the USB and release
  • The service is downloaded and copied to the USB drive automatically
  • Eject the USB drive
  • Insert the second USB drive (or plug the USB drive in to your MFD, do the update, then reformat the drive) and follow the same steps for the NavData

Updated the MFD with the Avidyne Entegra Chart Updates
Avidyne Cirrus

Once everything is programmed the your USB drives, the rest of the process is simple.  Just go out to your airplane, plug in the first USB drive with the Electronic Charts on it, turn your battery on and the avionics master, and the system will upload the information automatically.  Once it’s finished, turn everything off, pull the USB drive out, then insert the second USB drive and do the same thing.

Now, you’re all updated!

If you’d like to see a video on the process, Jeppesen has some very good videos on the updating procedure.  The links are below.  If you have questions, please contact Texas Top Aviation and an expert will help you through the process.

JSUM USB Programming Procedure

JDM USB Programming Procedure

Avidyne Entegra Chart Updates Upload

Similar Posts

  • 2018 Houston, TX CPPP

    The Cirrus Pilot Proficiency Program is once again returning to Houston, TX the first weekend in November. Henrickson Jet Center at the Houston Executive Airport (KTME) will be the host FBO this year.  If you are a Cirrus owner in the South Central US, the Houston CPPP weekend is definitely worth your while.

    What is it?  The Houston CPPP is a combination ground and flight training weekend.  With ground classes ranging from engine management, to loss of control prevention, to avionics best practices, an attendee will not lack a better Cirrus education by the time he or she leaves.

    The flight training side of the weekend gives an attendee several options.  A Houston CPPP attendee can do 1 or 2 flights with a highly qualified Cirrus Standardized Instructor Pilot (CSIP), one on Saturday and one on Sunday (if the 2 flight option is selected).  The Cirrus Owner’s and Pilot’s Association (COPA) brings in exceptional instructors for each of the CPPP events, so the training is top notch.  Folks who want to take in more ground school, but still want to fly a little bit have the option of just doing 1 flight, either Saturday or Sunday, in order to increase their Cirrus knowledge.

    The Houston CPPP event will be November 2nd, 2018-November 4th, 2018, a Friday through a Sunday.  The weekend kicks off with a welcome dinner Friday night, then ground sessions and flying on Saturday and Sunday, plus a dinner on Saturday night.

    For those who want to challenge themselves, there are simulator sessions available with a challenging instrument approach that doesn’t quite meet up with the normal, ho-hum type of approach.

    The Houston CPPP also provides a Partner in Command course for those right seaters out there wanting to learn more about what to do in an emergency situation.

    Hank Gibson of Texas Top Aviation will be at the Houston CPPP as a flight instructor.  For more information and to sign up, please click here.

    Hope to see you there!

  • The Dual Garmin G5 Glass Panel Solution

    What’s the most cost effective glass panel retrofit?  There are several options out there (and it seems like more coming each Sun ‘N’ Fun or Osh Kosh event), but the consensus is the Aspen EFD 1000 or 1500, right?  At $12,000 installed, it’s about $8,000-$10,000 cheaper than the Garmin G500 (though you can make the argument that when you add a second screen and SVT to the Aspen, the price is about the same).

    I am here to blow your mind.  What if you could get a glass panel retrofit that is a complete AHRS system with airspeed and altitude, plus a slaved HSI that auto slews to your GPS and a 4 hour backup battery so you can throw your steam attitude indicator away, for only $4,600, plus installation?

    I am not crazy.

    The Garmin G5 debuted last year when the FAA relaxed it’s regulations to allow more experimental avionics into certified airplanes.  The single G5 was a big hit.  The 3.5 inch screen fit nicely into the hole that the traditional attitude indicator left, giving pilots a glass attitude, airspeed and altimeter options for less than $2,500.

    In March, Garmin brought out the HSI version of the G5.  Equipped with a low cost magnetometer, the DG/HSI version is a complete replacement for the traditional DG/HSI.  The unit also displays ground speed and distance (received from the GPS information), while auto-slewing to the GPS flight plan, so the CDI needle will move on it’s own, eliminating the annoying need for the pilot to set the course on the HSI (and ridding the GPS of the message that pops up reminding the pilot to set the course).

    The dual units provide a complete backup Attitude in the case of a display failure.  The reversionary mode you get with the Garmin G1000 and the Garmin G500 is also present in the dual G5s.  This eliminates the need for a backup steam gauge attitude indicator, freeing up panel space for an engine monitor or some other toy.  The G5 units can also be equipped with 4 hour backup batteries in case of electrical failure.

    The price for the dual G5 setup is very reasonable at just under $4,600 plus installation (which, according to Garmin, should be pretty simple as the units act as plug and play instruments).  The AHRS unit is available stand alone for under $2,200 while the DG/HSI unit standalone runs just under $2,600.

    For more information, check out Garmin’s website.

  • Skyvector Has a New Look

    Skyvector has changed it’s look.  The aeronautical chart website is now offering flight plan filing capability. In order to gain the ability to file flight plans, the user has to form an account first.

    Personally, I really liked how Skyvector had a simple interface before they changed.  As an instructor, a lot of times, I go to multiple airports on one flight.  It was really nice to just plug in airport IDs to check distances and heading information on Skyvector.  The new format is a little clunky as the website has made it a little more difficult to do what it did best before.

    Did the aviation community need another venue to file flight plans?  Not with Foreflight, Garmin Pilot, and WingXPro leading the way in the app market.  Skyvector was smart in not trying to develop another app to compete with the big boys.

    Will the new Skyvector last?  We’ll see.  I’m hoping they’ll go back to the way they used to be, but we’ll see. I may use it enough to come around to liking it.

  • TBM Debuts the 960 at Sun N Fun

    This is a Press Release from Daher’s website, the maker of the TBM 960.

    Sun ‘n Fun Aerospace Expo, Lakeland, Florida, April 5, 2022 – Daher today unveiled the latest high-end version of its TBM pressurized single turboprop aircraft family – the TBM 960 – which incorporates Pratt & Whitney Canada’s advanced PT6E-66XT engine and a fully digital e-throttle, along with a digitally-controlled cabin that incorporates an all-new environmental control system, LED ambience lighting and electrically-dimmable windows.

    The TBM 960 was introduced at the Sun ‘n Fun Aerospace Expo in Lakeland, Florida, where Daher is exhibiting the first production airplane (exhibit stand #MD-22B).

    “The TBM 960 is the quintessential TBM, representing the fifth evolution of our very fast turboprop aircraft family since the TBM 900-series’ introduction in 2014,” commented Nicolas Chabbert, the Senior Vice President of Daher’s Aircraft Division. “It takes the maximum advantage of today’s turboprop technology to provide digital control of the engine and the propeller.”

    The TBM 960 retains the rapid speed of Daher’s TBM family while enabling lower fuel consumption. At Daher’s recommended cruise setting of 308 kts., the fuel consumption is only 57 U.S. gallons per hour, which is a 10% fuel economy compared to maximum cruise setting for more sustainability.

    At the heart of this latest TBM version is the intelligent PT6E-66XT powerplant and Hartzell Propeller’s five-blade RaptorTM composite propeller, both of which are linked to the dual-channel digital Engine and Propeller Electronic Control System (EPECS).

    With the EPECS, the PT6E-66XT’s startup is fully automated after a single-switch activation. The cockpit’s power lever is an e-throttle, using a single forward position from takeoff to landing – with the EPECS optimizing powerplant performance throughout the flight envelope while

    Daher unveils the TBM 960 at Sun ‘n Fun Aerospace Expo

    reducing pilot workload by integrating all functions and protecting the engine’s life. Analysis of engine parameters is driven by 100-plus smart data inputs.

    The RaptorTM propeller is fully integrated into the propulsion system. It is specifically designed to reduce overall weight and improve the TBM 960’s takeoff distance, climb and cruise speed. Turning at 1,925 rpm during maximum power output, the Raptor contributes to limiting noise and vibration. Its sound level during takeoff is just 76.4 decibels, meeting the most stringent international noise standards.

    With its G3000® integrated flight deck, the TBM 960 retains Daher’s e-copilot® concentration of technological innovation and safety systems in the TBM, which can be compared to an “electronic copilot.” This includes an icing protection system, flight envelope monitoring through the Electronic Stability and Protection (ESP) and the Under-speed Protection (USP) systems, the Emergency Descent Mode (EDM) function, as well as the game-changing HomeSafeTM emergency autoland system.

    New to the TBM 960 is the Garmin GWXTM 8000 doppler weather radar with advanced surveillance features such as lightning and hail prediction, turbulence detection, zero blind range for close-in returns, and ground clutter suppression. The TBM 960 also is the first application of Garmin’s GDL® 60 next-generation data transmitter for automatic database upload and interconnection with mobile devices.

    The TBM 960’s Prestige cabin extends Daher’s use of digital power inside the aircraft, featuring an all-new environmental control system, LED ambience strip lighting integrated into both sides of the overhead ceiling panel, and electronically-dimmable windows – all controlled by a PassengerComfortDisplay(PCD). Enhancementsinthecabin’sstyleandcomfortalsoinclude new ergonomically enhanced seats, USB-A and USB-C power plugs, individual cupholders and headset hangers for each occupant.

    For the TBM 960, a fifth TBM paint scheme – called Sirocco, based on the creativity of French designer Alexandre Echasseriau – has been added to the aircraft’s style customization possibilities.

    The TBM 960 has been certified by EASA (the European Union Aviation Safety Agency); with certification by the U.S. FAA (Federal Aviation Administration) currently underway. Deliveries will begin in the first half of 2022.

    With the new aircraft’s launch, Daher’s TBM family is now offered in two versions: the TBM 960 and TBM 910.

    About Daher – www.daher.com

  • Cirrus Vision Jet Receives FAA Certification

    cirrus-vision-jet-interior

    The long anticipated certification of the Cirrus Vision Jet finally happened.  On October 30th, the FAA awarded certification to Cirrus’ single engine jet.  Marketed as the world’s first single engine personal jet, the Cirrus Vision Jet will seat five adults, two children, and cruise around 300 knots.

    The Williams FJ33-5A Turbo Fan engine is operated by a FADEC, single handle throttle, similar to the throttle in the piston powered Cirrus family.  In fact, the SR series was taken into consideration when designing the Cirrus Vision Jet in order to simplify the upgrade for pilots.  Many of the buttons and knobs are in the same places in the Cirrus Vision Jet.

    The Cirrus Vision Jet is equipped with the Cirrus Perspective Touch by Garmin that is very similar to the Cirrus Perspective by Garmin in the piston powered line.  Equipped also with the Flight Into Known Icing system and the Cirrus Airframe Parachute System (CAPS), both of which are standard.

    cirrus-perspective-touch

    Unlike the piston powered Cirrus lines, the CAPS system on the Cirrus Vision Jet is actually mounted in the nose.  Also, unlike the piston lines, the jet CAPS is integrated with the aircraft avionics to slow the airplane to between 67 and 160 knots when the system is activated.  In the jet, the CAPS system was designed to withstand higher weights, higher speeds and higher altitudes.

    Cirrus hopes to start deliveries of the Vision Jet by the end of the year, with many more rolling off the line in 2017.  All Cirrus Vision Jet pilots will need to be type rated in order to fly the aircraft.  Cirrus is doing all the type rating training in house at their new Vision Center in Knoxville, Tennessee.

    To read the full press release, click here.

    cirrus-vision-jet

  • Oh, Deer (Part 1)

    As far as I knew when I woke up, October 26, 2016 would be an ordinary day for me. It was a Wednesday, and I was scheduled to fly our Company’s BE58 Baron on a charter from Wings Field (KLOM), a non-towered airport just north of Philadelphia, to Pittsburgh International Airport (KPIT) and spend the day there waiting for my 3 passengers to finish up their meetings. The plan was to fly them back to Wings that evening and then make the short hop back to home base at Lancaster, PA. (KLNS).

    It was a flight that I had done countless times, and I was comfortable with the airports, the passengers, and the airplane. Everything went smoothly that morning and my short flight from Lancaster to Wings was uneventful. I even made it there in time to spill coffee all down the front of my pants before my passengers arrived. The weather was clear, calm and beautiful as we loaded into the Baron and the sun was just starting to come up as I taxied toward runway 24 for departure. I was departing VFR and had an IFR plan on file which I intended to pick up with Harrisburg Approach once we were airborne. According to my calculations, I was on schedule to be drinking my coffee at the Pittsburgh FBO right around 8:30.

    At 7:05, I advanced the throttles for departure. A few moments later, I received a very unpleasant surprise. I was quickly approaching rotation speed when 2 deer ran onto the runway directly in front of the aircraft. It was still dark enough that I was relying on my landing/ taxi lights to illuminate the runway for take-off.  As a result, I was unable to see the animals before it was too late. I don’t remember making a conscious decision to pull back on the yoke, but it was that or plow directly into them at about 85 knots. I pulled up as quickly as I could and the airplane rotated immediately.  A fraction of a second later I heard and felt a sickening THUD.

    There was no doubt that I had hit one of them, but, somewhat unbelievably, the airplane was climbing as though nothing had happened. I put the nose down to get the airspeed back up and began to try and piece together what damage the airplane had sustained. Based on the noise and the feeling of the impact, my suspicion was that I had hit the deer with the left main landing gear. A review of the instrumentation showed no abnormalities and the airplane was behaving normally, so I didn’t suspect any damage to the airframe/ flight controls. I couldn’t see anything out the windows that looked unusual, and somewhat unbelievably I still had 3 green lights.

    After gaining a safe amount of speed and altitude, I turned around and told the passengers that we had hit a deer. It was obvious that we had hit something and I was sure that they wanted to know what was going on. Then, I checked all my indications again and satisfied with what I was seeing, tried to bring up the landing gear. No dice. When I pulled the gear lever to the up position, the master “GEAR UP” warning light came on and I got a horn. There was never any change in the 3-green indication and the gear motor never came to life at all.

    At this point it was obvious that, minimally I was going to have to divert to Lancaster and have the maintenance guys look at the airplane to see if anything was broken. I figured that they would either give me the green light to continue or I would just jump into one of our PC12s and complete the trip while they worked on the Baron.

    The landing gear’s refusal to come up was my first indication that there was substantial damage. I set course for Lancaster and called our Chief Pilot. After explaining the situation to him, we agreed that KLNS was the best option and that he would let the maintenance guys know that I was coming.

    The logic was that proceeding to Lancaster would allow a visual check of the landing gear by maintenance people as well as the tower and result in the safest outcome if an emergency landing were required. Lancaster would likely have better services available in terms of emergency responders and, not to mention, I was fairly certain that there was a dead deer on the only runway at Wings that I didn’t feel like hitting for a second time. In addition, the relatively long runway at Lancaster combined with light traffic at that time of day made it the ideal option to divert to.

    I again turned around to brief the passengers. I told them that we were going to have to make precautionary landing before continuing to our intended destination and that I would be performing a few low passes for the tower.

    Due to the drag from the landing gear, the flight to Lancaster seemed to take forever. The long cruise home, however, gave me time to try and reach someone on the ground at Wings in hope of having the runway inspected and cleaned off before other traffic tried to use it. After several attempts to raise anyone on the Unicom/ CTAF frequency, I called Philadelphia Approach for help instead. Philly answered right away and I explained to them what had happened. I requested that they call over to Wings on the phone or send someone out to check the runway. They told me that they would get it done and asked if there was any other way that they could assist me. I told them I was headed to Lancaster and that I appreciated their offer, but didn’t require any further assistance. I then switched over to Lancaster Tower and let them know that I was about 15-20 minutes out, but I would need to perform a couple of passes to have them check my gear. The tower cleared me for a low approach over runway 26.

    I arrived at LNS at about 7:30. I performed my first low pass by the tower, not really expecting anything to appear out of place. I figured I had bent something or damaged the squat switch, but not much more. I climbed to pattern altitude and awaited the good word. Shortly after the fly-by, Tower reported that the left main gear didn’t appear to be down and locked. They suggested that I make another pass. The airport maintenance personnel chimed in, reporting the same. We had just started discussing whether cranking the gear a little by hand might help when Philly approach called the Lancaster tower on the phone.

    Philly informed Lancaster that someone had inspected the runway at Wings and found the left main strut and wheel in the grass. I quickly concluded that cranking the gear down probably wouldn’t help!

    This was found in the grass by the runway at Wings Field

    To Be Continued…

    (Read Part 2 Here)

    Andrew Robinson is an airline pilot for Piedmont Airlines.  He is a former 135 Charter Pilot and flight instructor who lives with his wife and 2 daughters in Pennsylvania.  He instructs in Beechcraft Bonanzas.

Leave a Reply

Your email address will not be published. Required fields are marked *